Use Actions to Validate and Store End-user Data Gathered By Signup Prompt Customizations
You can use Signup Prompt Customization along with the pre-user-registration
trigger to add end-user supplied data (like a user's phone number or location) from the signup prompt to user_metadata
. Optionally, you can validate this data and show a validation error in the prompt.
Prerequisites
Tenant has a Custom Domain verified
Tenant has a Page Template set
Add A Field To The Signup Prompt
Use the Management API to insert a custom field into a prompt using one of the Entry Points. This example adds the following content to the ulp-container-form-content-start
insertion point:
<div class="ulp-field">
<label for="first-name">First Name</label>
<input type="text" name="ulp-first-name" id="first-name">
</div>
Was this helpful?
The result is a First Name section in the signup prompt:
![](http://images.ctfassets.net/cdy7uua7fh8z/580LNGMxSkRlazJEdcVNpn/5fa98d4b414ac2133d1d6f4e327cea5a/Screenshot_2023-10-05_at_4.07.38_PM.png)
Create An Action In The Pre-User Registration Trigger
You can build a custom pre-user registration action by going to Actions > Library > Build Custom.
![](http://images.ctfassets.net/cdy7uua7fh8z/52VSznphe2TyoJQnAn4nQg/10a93faf1d5aa2bbf30a785fd032c128/2024-01-31_16-07-50.png)
Inside the code editor, update the 
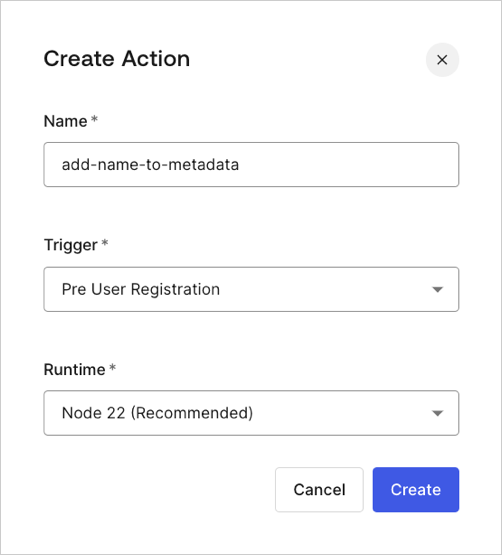
onExecutePreUserRegistration
handler:
exports.onExecutePreUserRegistration = async (event, api) => {
const firstName = event.request.body['ulp-first-name'];
api.user.setUserMetadata("firstName", firstName);
};
Was this helpful?
Optionally, you can validate the user input and send a validation error by calling the api.validation.error
method, then deploy the action:
exports.onExecutePreUserRegistration = async (event, api) => {
const firstName = event.request.body['ulp-first-name'];
if(!firstName) {
api.validation.error("invalid_payload", "Missing first name");
return;
}
api.user.setUserMetadata("firstName", firstName);
};
Was this helpful?
Add The Action To The Flow
Navigate to Actions > Flows > Pre User Registration > Add Action > Custom, then drag and drop your new action into the registration flow and select Apply.
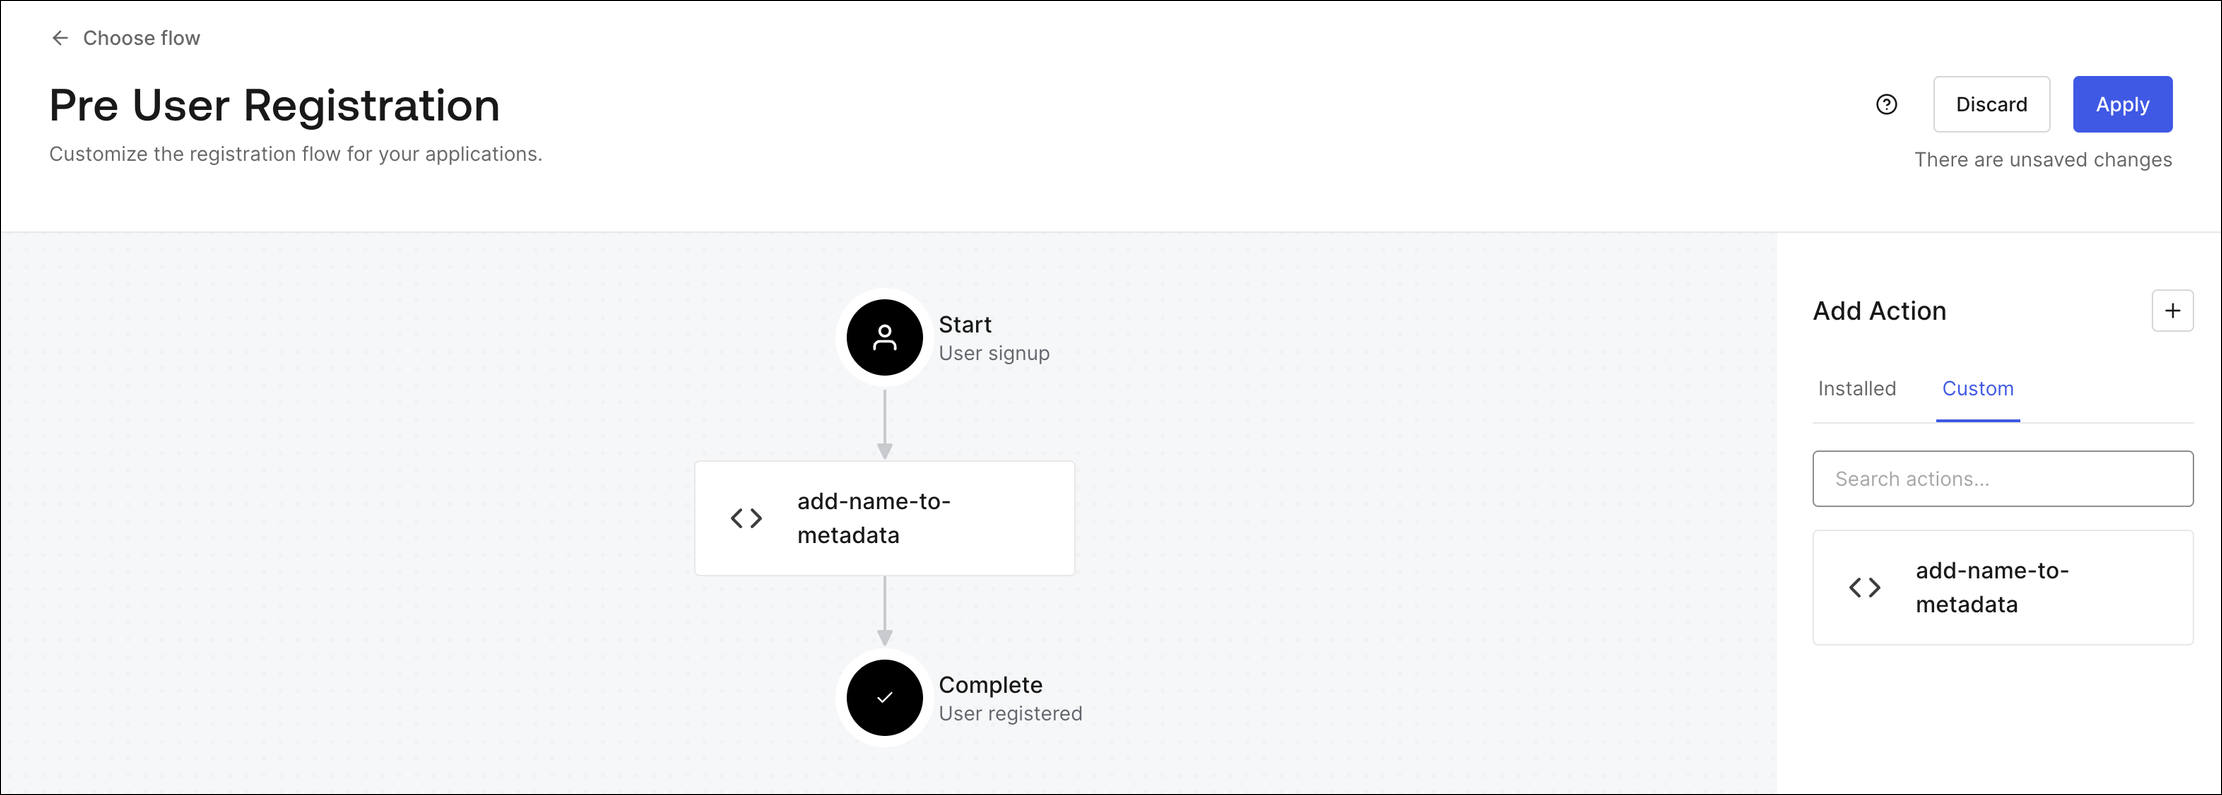
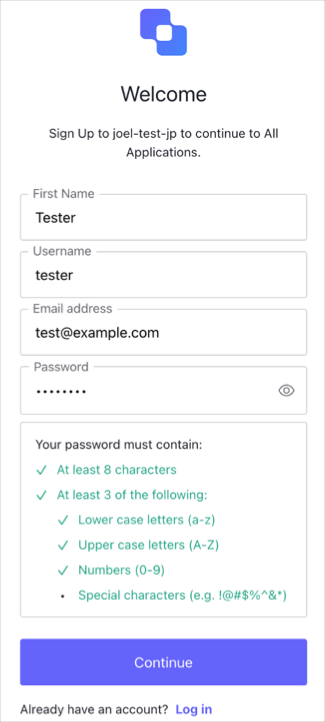
![](http://images.ctfassets.net/cdy7uua7fh8z/5JmjwcdZCX7pDukNa90cgD/dae853b10cf4c41d2d3543a8e167aae7/3333.png)
Test The Action
Sign up for an account in your test flow and leave the First Name field blank. You will see an error on submit:
![](http://images.ctfassets.net/cdy7uua7fh8z/7qIWCsP8doFWPJGvMTNXJY/1225f9b3ff7ac01a7e9b59f03ca5e139/2024-01-31_16-10-10.png)
After you enter a name in the First Name field, you are able to submit successfully:
![](http://images.ctfassets.net/cdy7uua7fh8z/6TaK1VQyKGELMGmhuRIbVA/b453fe2eb97c95d92e4fbd68ce3cbd6a/2024-01-31_16-12-01.png)
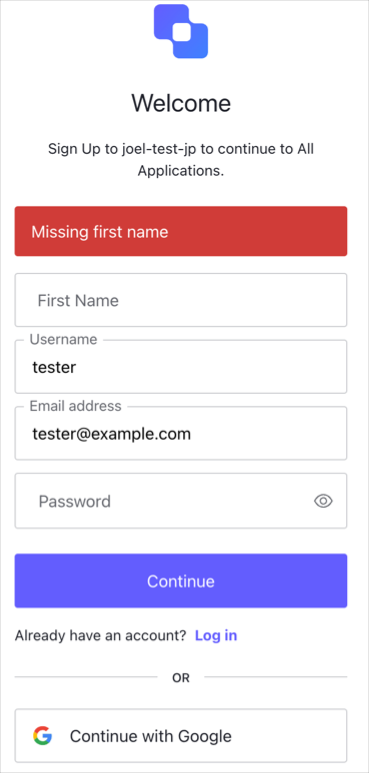
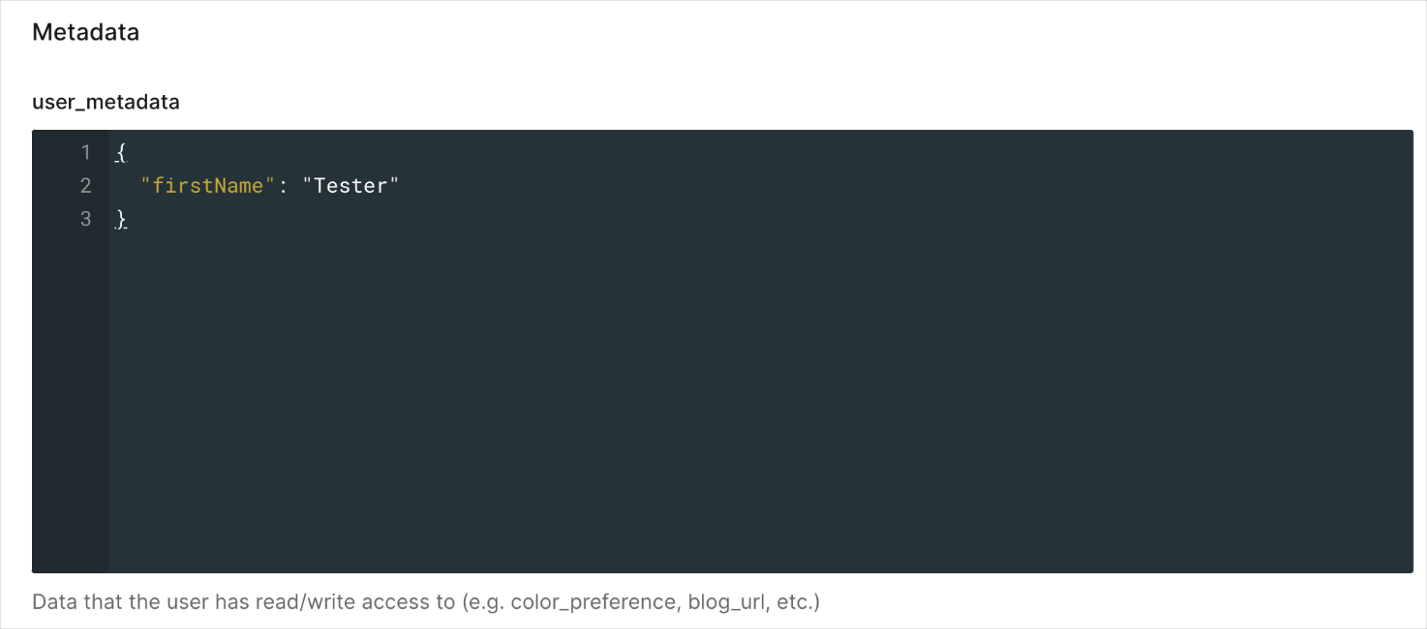
Verify That The Data Was Saved On user_metadata
Navigate to User Management > Users, then confirm the data has been saved by viewing the Details tab:
![](http://images.ctfassets.net/cdy7uua7fh8z/3x5lyrSJJgJQhbjsxoTmG6/033820476be7f67dc688da993fee7924/2024-01-31_16-13-35.png)