TL;DR: In this article, you’ll learn how to add an Auth0 login and logout experience to an Ionic Angular mobile app using Ionic’s Auth Connect plugin. To see a complete working example, take a look at this GitHub repo.
What is Ionic Framework?
Ionic Framework is an open-source UI toolkit for building performant, high-quality mobile and desktop apps using web technologies (HTML, CSS, and JavaScript). It’s focused on the frontend user experience, providing out-of-the-box UI interactions (controls, interactions, gestures, animations) so developers can focus on building the unique aspects of their apps. It’s easy to learn and integrates nicely with other frameworks, such as Angular, React, or Vue.
“Ionic Framework is an open-source UI toolkit for building performant, high-quality mobile and desktop apps using web technologies.”
Tweet This
What is Ionic Auth Connect?
Ionic Auth Connect makes it easy to add secure authentication to any Ionic app running on iOS, Android, or the web. Using a simple, powerful API, it handles user authentication and registration with an authentication provider (such as Auth0) using industry-standard OAuth or OpenID Connect.
Note: Auth Connect requires an Ionic Native key in order to install and use the Ionic Auth Connect plugin. Ionic Native includes a reliable set of Native APIs and functionality that you can use in your Ionic app, quality controlled and maintained by the Ionic Team. If you are interested in acquiring a key or learning more, please contact Ionic.
What Will You Build?
In this tutorial, you’ll use the Ionic Framework’s UI components to create a Login page and a Home page within an Ionic Angular app. With just a few lines of code, you’ll secure the Home page by adding Auth0 login/logout functionality using the Auth Connect native plugin. Here’s what the complete app looks like in action:
“Add an Auth0 login and logout experience to an Ionic Angular mobile app!”
Tweet This
Prerequisites
In order to follow this tutorial, the following tools are required:
- npm and Node: As Ionic projects are built using modern web technologies, download and install Node and npm, the popular JavaScript package manager.
- Xcode and/or Android Studio, along with a mobile device: You’ll be deploying the app to your mobile device of choice, so iOS and Android native tooling is required. Xcode is downloaded from the Mac App Store and Android Studio can be downloaded from the official Android Studio site.
- Code editor: Visual Studio Code is a great choice.
Configuring Auth0
Before creating the Ionic app, you’ll get Auth0 up and running. If you don’t have one already, create a free Auth0 account here then head over to the Applications page and click the “Create Application” button. Give your new app a name, then choose “Native” for the application type. You will then click on "Create".
Try out the most powerful authentication platform for free.
Get started →Note: The Domain and Client ID can be found under the "Settings" tab.
Next, choose your globally unique App Id, which is used both in Auth0 configuration as well as Cordova/Capacitor as well. Typically, this takes the form of “company-AppName” or reverse DNS style - “com.company.app.”
With that in hand, set the Allowed Callback URLs. After the app user signs into Auth0, this tells Auth Connect which page to redirect to in your app. Use the formula “uniqueId://page”, such as “company-AppName://callback.”
Similarly, set the Allowed Logout URLs, which tell Auth Connect where to redirect to after the user logs out of Auth0. Again, use the “uniqueId://page” format. Usually, the app would redirect the user to a login page, so consider using “company-AppName://login.”
Auth0 is now ready to use in your Ionic app.
Creating a New Ionic app
With an Auth0 application set up, it’s time to create an Ionic app using a terminal:
# Install the Ionic CLI
npm install -g ionic
# Create a new app named ‘ac-auth0’ using the ‘blank’ Ionic starter template
ionic start ac-auth0 blank
Next, change into the new project directory, then run ionic serve to spin up a local development server which launches in your browser. It makes app development easier, as it automatically reloads the app when changes to your source files are detected.
cd ac-auth0
ionic serve
The app loads in a web browser, automatically displaying the Home page.
Design the Login Page
Open your code editor then navigate to home.page.html under src/app/home. You’ll see something similar to the following:
<!-- src/app/home/home.page.html -->
<ion-header>
  <ion-toolbar>
    <ion-title>
      Ionic Blank
    </ion-title>
  </ion-toolbar>
</ion-header>

<ion-content>
  <div class="ion-padding">
    The world is your oyster.
    <p>If you get lost, the <a target="_blank" rel="noopener"
        href="https://ionicframework.com/docs/">docs</a> will be your guide.</p>
  </div>
</ion-content>
This is the main page you’ll protect behind an Auth0 login experience. You’ll update the design a bit later.
Next, create a Login page:
ionic generate page login
This creates a nearly-empty page that looks like:
<!-- src/app/login/login.page.html -->
<ion-header>
  <ion-toolbar>
    <ion-title>login</ion-title>
  </ion-toolbar>
</ion-header>

<ion-content>
</ion-content>
Next, prompt the user to sign in with some text as well as an <ion-button> button component. You’ll implement the click handler in a bit.
<!-- src/app/login/login.page.html -->
<ion-header>
  <ion-toolbar>
    <ion-title>Welcome!</ion-title>
  </ion-toolbar>
</ion-header>

<ion-content>
  <p style="text-align:center">Please sign into your account:</p>
  <ion-button expand="block" (click)="login()" padding size="large">
    Log In
  </ion-button>
</ion-content>
Installing Cordova/Capacitor and Auth Connect
Let’s take a brief pause from code to install the native portions of this project. The Auth Connect plugin works with both Cordova and Capacitor, two OSS native app runtimes. Before installing Auth Connect, add one of these to your project.
First, if you’ve picked Cordova and already have it installed, uninstall it then install the @ionic-enterprise version instead. The Ionic team needed to create it in order to work around a Cordova bug with scoped packages. It’s backward-compatible with the original project, too.
npm uninstall -g cordova
npm install -g @ionic-enterprise/cordova
Next, add your platform of choice:
# Add native platform (ios or android)
ionic cordova platform add [platform]
For Capacitor, run the following:
# Install Capacitor (local to this project)
ionic integrations enable capacitor
# Initialize the app, where appName is the name of your app
# and appId is the domain identifier of your app (ex: com.company.app)
ionic cap init [appName] [appId]
# Build the project once
ionic build
# Add a native platform (ios or android)
ionic cap add [platform]
Next, regardless of the native runtime you’ve chosen, run the following to install the Auth Connect plugin. For the AUTH_URL_SCHEME variable, use the globally unique App Id (ex: com.company.app) you decided on when configuring the Auth0 app above.
# Install the Auth Connect plugin
ionic cordova plugin add @ionic-enterprise/auth --variable AUTH_URL_SCHEME=com.company.app
Implementing Ionic Auth Connect
The basic login pieces are now in place - before continuing to build the app’s UI, you need to create an AuthenticationService class that encapsulates Auth0 and Ionic Auth Connect’s login functionality.
Generate this class using the ionic generate command once again:
ionic generate service services/authentication
Here’s the complete class implementation:
// src/app/services/authentication.service.ts
import { Injectable } from '@angular/core';
import { IonicAuth, IonicAuthOptions } from '@ionic-enterprise/auth';
import { Platform } from '@ionic/angular';
import { Router } from '@angular/router';
@Injectable({
  providedIn: 'root'
})
export class AuthenticationService extends IonicAuth {
  private router: Router;
  private loadingIndicator: HTMLIonLoadingElement;
  constructor(router: Router, plt: Platform) {
      const auth0Config : IonicAuthOptions = {
        // the auth provider
        authConfig: 'auth0',
        // The platform which the app is running on
        platform: 'cordova',
        // client or application id for provider
        clientID: 'FILL_IN',
        // the discovery url for the provider
        // OpenID configuration
        discoveryUrl: 'FILL_IN',
        // the URI to redirect to after log in
        redirectUri: 'FILL_IN',
        // requested scopes from provider
        scope: 'openid offline_access email picture profile',
        // the audience, if applicable
        audience: 'FILL_IN',
        // the URL to redirect to after log out
        logoutUrl: 'FILL_IN',
        // The type of iOS webview to use. 'shared' will use a webview that can
        // share session/cookies on iOS to provide SSO across multiple apps but
        // will cause a prompt for the user which asks them to confirm they want
        // to share site data with the app. 'private' uses a webview which will
        // not prompt the user but will not be able to share session/cookie data
        // either for true SSO across multiple apps.
        iosWebView: 'private',
        // required if running on the Web
        clientSecret: ''
      };
      super(auth0Config);
      this.router = router;
    }
     async login(loadingIndicator: any) {
       this.loadingIndicator = loadingIndicator;
       await super.login();
     }
    async onLoginSuccess(response: any) {
      await this.router.navigate(['home']);
      this.loadingIndicator.dismiss();
    }
    async onLogout() {
      this.router.navigate(['login']);
    }
    async logout() {
      super.logout();
    }
    async isAuthenticated() {
      return await super.isAuthenticated();
    }
    async getUserInfo() {
      return await super.getIdToken();
    }
}
Some of these IonicAuthOptions values are unique, and must be set based on your Auth0 app’s details:
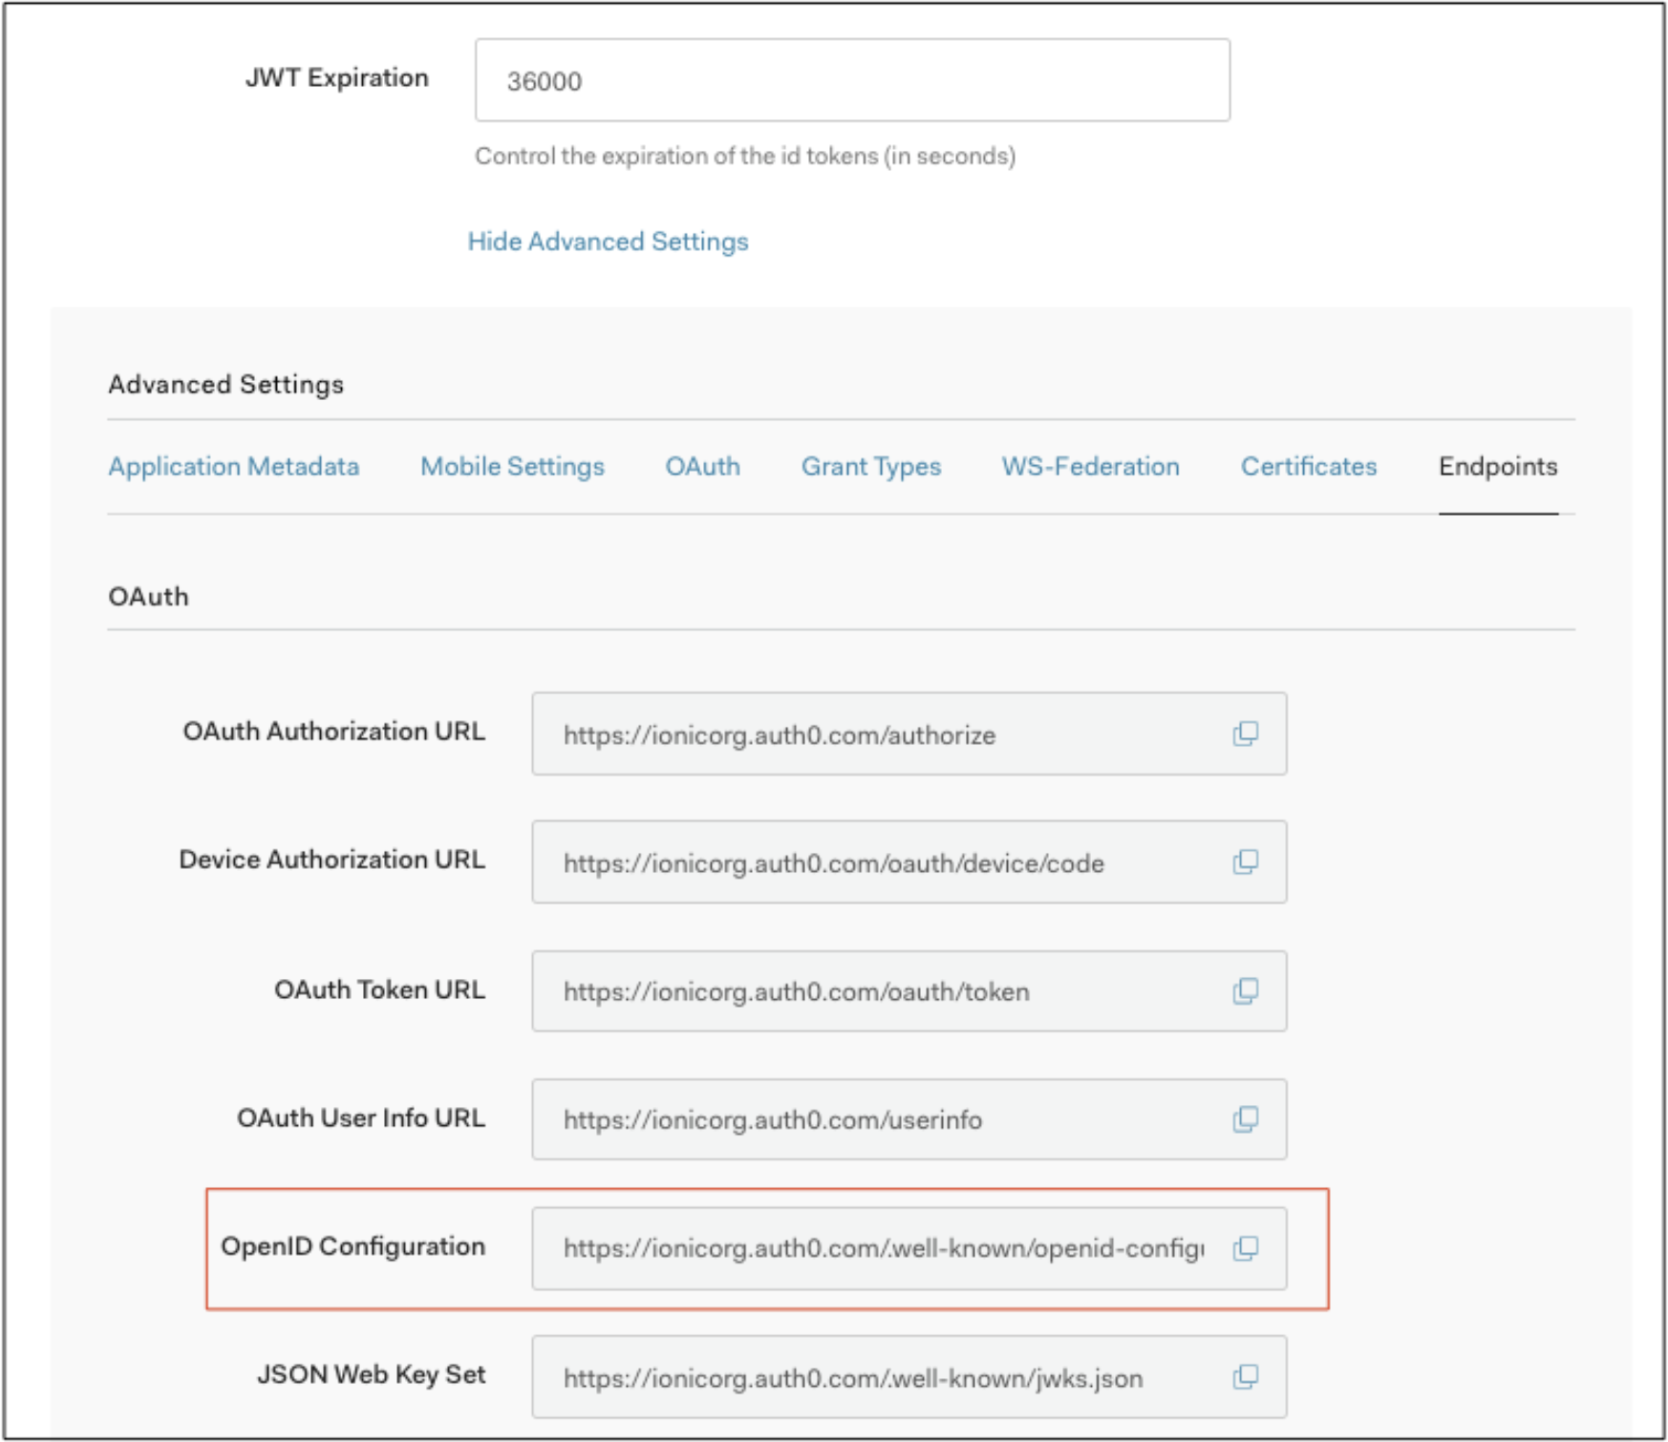
platform: Use “cordova” or “capacitor” accordingly.clientID: Your app’s Client ID.discoveryUrl: Consists of your Auth0 Domain plus “.well-known/openid-configuration”. Example: https://ionicorg.auth0.com/.well-known/openid-configurationredirectUri: The URI to redirect to after the user has logged in. Use the same AUTHURLSCHEME variable value (App Id) from when the Auth Connect plugin was installed. Example: com.company.app://callbacklogoutUrl: The URI to redirect to after the user has logged out. Example: com.company.app://login?logout=true
The Discovery URL can be found under Application Details -> Show Advanced Settings -> Endpoints tab:
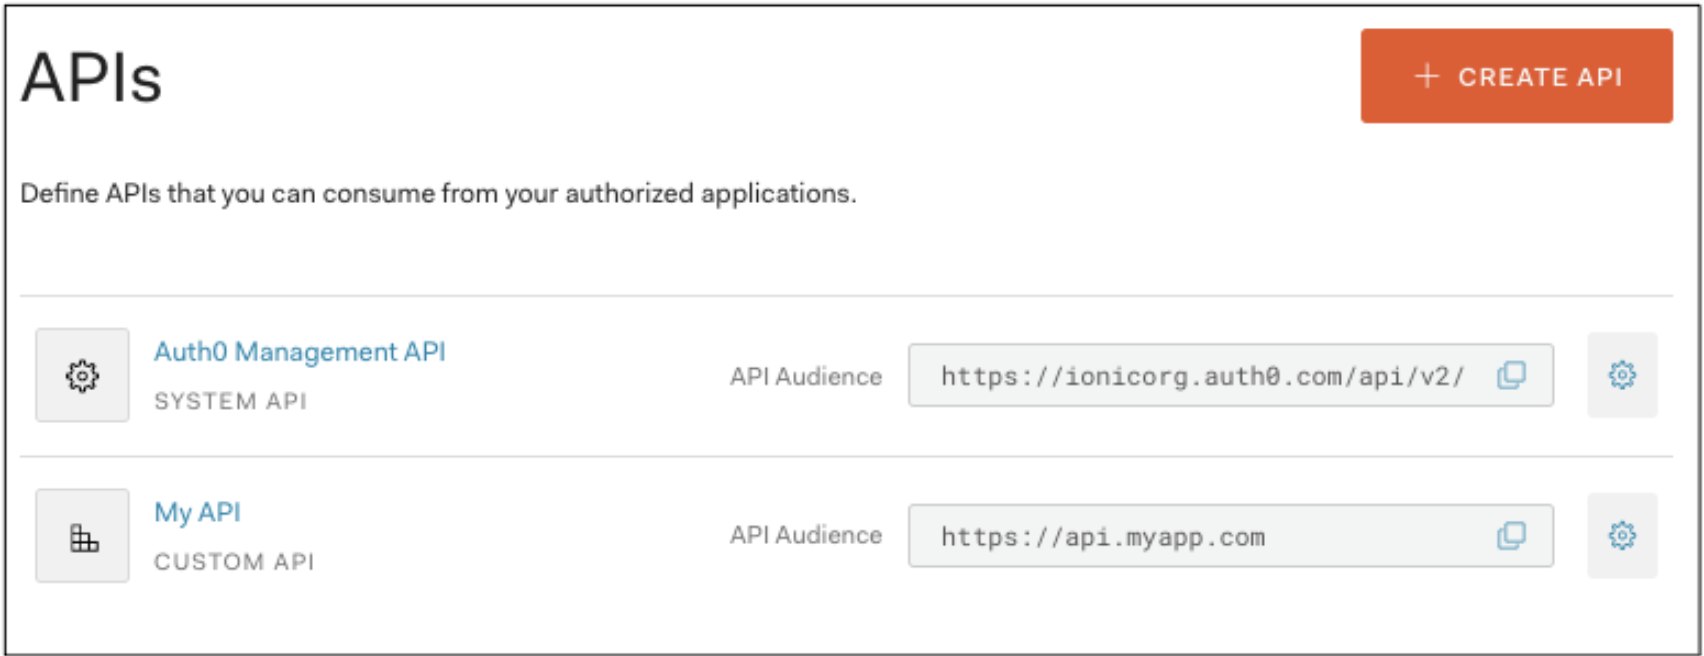
The audience field comes from your custom API of choice — the API Audience field:
Complete the Login Experience
Back in login.page.ts, import AuthenticationService and call its login function when the button is clicked. As a bonus user experience enhancement, display a progress indicator while the user is logging into Auth0 using the Ionic ion-loading loading indicator component.
// src/app/login/login.page.ts
async login() {
  // Display loading indicator while Auth Connect login window is open
  const loadingIndicator = await this.loadingController.create({
      message: 'Opening login window...'
    });
  await loadingIndicator.present();
  await this.authService.login(loadingIndicator);
}
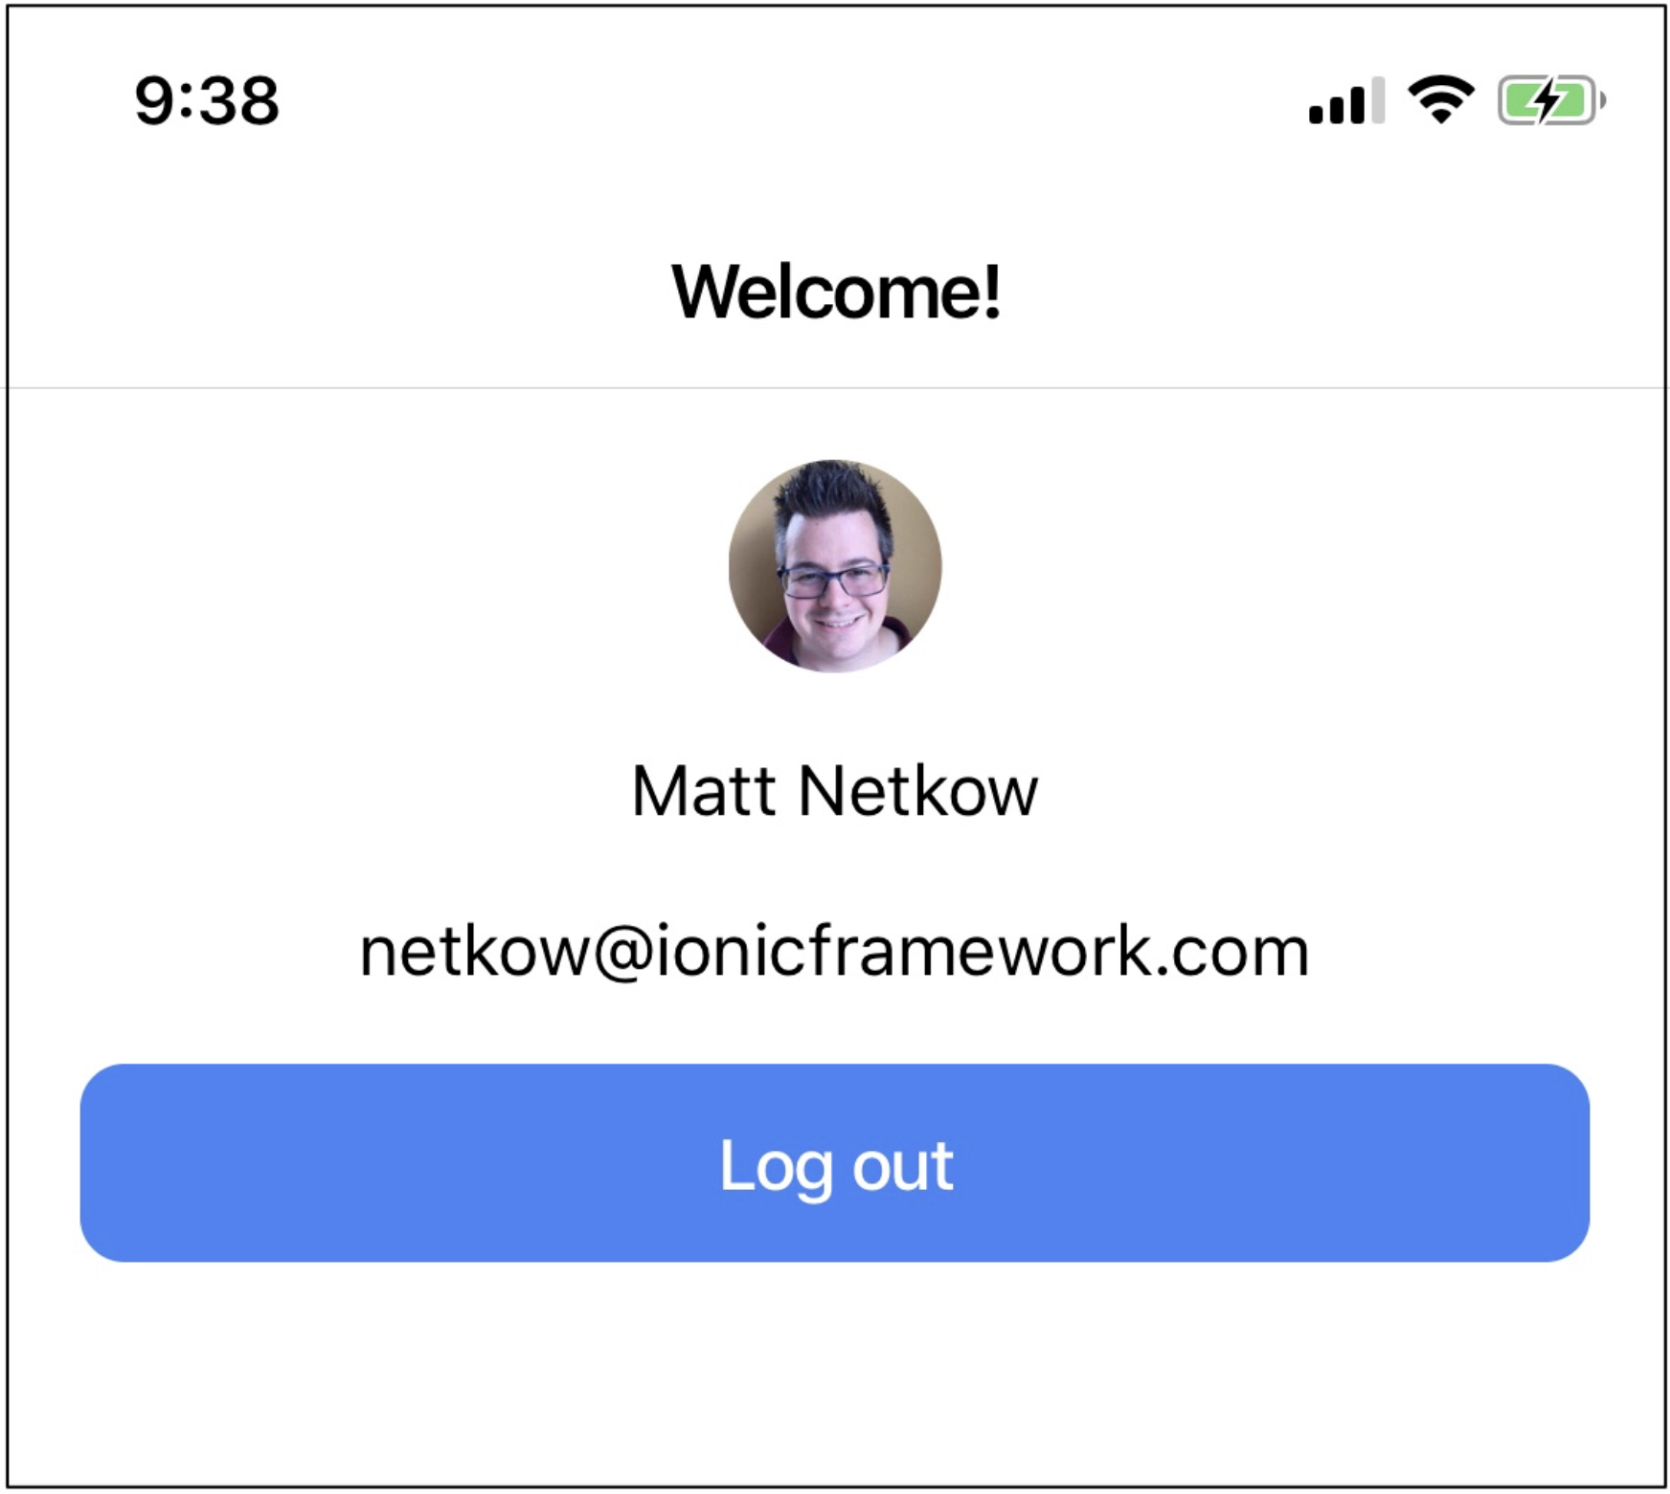
Next, revisit the Home page UI and welcome the app user who has just signed in. Display their name, email, and their Auth0 profile picture using an ion-avatar Ionic component.
<!-- src/app/home/home.page.html -->
<ion-header>
  <ion-toolbar>
    <ion-title>
      Welcome!
    </ion-title>
  </ion-toolbar>
</ion-header>

<ion-content>
  <div class="ion-padding">
    <div align="center" *ngIf="user">
      <ion-avatar>
        <img src="{{ user.picture }}"/>
      </ion-avatar>

      <p>{{ user.name}}</p>
      <p>{{ user.email }}</p>
    </div>

    <ion-button expand="block" (click)="logout();">Log out</ion-button>
  </div>
</ion-content>
Here’s an example of what this looks like:
Next, update the Home page’s logic in home.page.ts to retrieve the user’s info from Auth0 when the page loads, as well as wire up the Log Out button:
// src/app/home/home.page.ts
import { Component, OnInit } from '@angular/core';
import { AuthenticationService } from '../services/authentication.service';
import { Router } from '@angular/router';
@Component({
  selector: 'app-home',
  templateUrl: 'home.page.html',
  styleUrls: ['home.page.scss'],
})
export class HomePage implements OnInit {
  private router: Router;
  private user: any;
  constructor(private authService : AuthenticationService, router: Router) {
    this.router = router;
  }
  async ngOnInit() {
    this.user = await this.authService.getUserInfo();
  }
  async logout() {
    this.authService.logout();
  }
}
Secure the Home Page with an Angular Route Guard
Currently, when the app is opened, it displays the Home page. This should be secured behind the new Login page using an Angular route guard along with Auth Connect’s built-in authentication checks. Create an AuthGuard class under the services folder:
ionic generate guard services/auth
Next, implement the canActivate method. The logic is very straightforward since Auth Connect manages the user’s login state for us. If the user has signed in already, then let them through. If not, then redirect to the login page.
// src/app/services/auth.guard.ts
import { Injectable } from '@angular/core';
import { CanActivate } from '@angular/router';
import { AuthenticationService } from './authentication.service';
import { NavController } from '@ionic/angular';
@Injectable({
  providedIn: 'root'
})
export class AuthGuard implements CanActivate {
  constructor (
    private authentication: AuthenticationService,
    private navCtrl: NavController) { }
  async canActivate(): Promise<boolean> {
    const authed = await this.authentication.isAuthenticated();
    if (authed) {
      return true;
    } else {
      this.navCtrl.navigateRoot('/login');
      return false;
    }
  }
}
Finalize Securing the Home Page
With the route guard implemented, you can apply it to the Home page, ensuring it remains accessible only to users who have logged into Auth0. Here’s what it looks like currently:
// src/app/app-routing.module.ts
const routes: Routes = [
  { path: '', redirectTo: 'home', pathMatch: 'full' },
  { path: 'home', loadChildren: () => import('./home/home.module')
      .then( m => m.HomePageModule)},
  { path: 'login', loadChildren: './login/login.module#LoginPageModule' },
];
Import the AuthGuard and attach it to the Home page. Additionally, make the Login page the default navigation path:
// src/app/app-routing.module.ts
import { NgModule } from '@angular/core';
import { PreloadAllModules, RouterModule, Routes } from '@angular/router';
import { AuthGuard } from './services/auth.guard';
const routes: Routes = [
  { path: '', redirectTo: 'login', pathMatch: 'full' },
  { path: 'home', loadChildren: () => import('./home/home.module')
      .then( m => m.HomePageModule), canActivate: [AuthGuard]},
  { path: 'login', loadChildren: './login/login.module#LoginPageModule' },
];
With the login experience built, it’s time for the best part: testing on a mobile device.
Run the App on a Device
With Auth0 configured, an Ionic app created, and Auth Connect installed, you're now ready to test out the app on a device. First, connect an iOS or Android device to your computer.
If you’re using Cordova, run the following command in a terminal to build and deploy the app to your device:
ionic cordova run [platform]
If you’re using Capacitor, run the following command to open the native IDE of choice:
ionic cap open [platform]
From there, click the Run button to build and deploy the app onto your device.
You should see the Login page display within the app. Tap the login button to authenticate using Auth0, then get automatically redirected to the secure Home page. Here’s an example of what the complete experience looks like:
The complete working example is available on GitHub here.
What’s Next?
In this tutorial, you learned how to create an Ionic app that provides a simple login/logout experience using Auth0 and Ionic Auth Connect. From here, there are more paths you can take to build out the rest of your app. For example, you could design additional app features using a variety of the 100+ Ionic components available or add native device functionality using Ionic Native plugins. If you have questions on Auth Connect or anything else Ionic, feel free to reach out to me on Twitter. See you next time!
About Auth0
Auth0 by Okta takes a modern approach to customer identity and enables organizations to provide secure access to any application, for any user. Auth0 is a highly customizable platform that is as simple as development teams want, and as flexible as they need. Safeguarding billions of login transactions each month, Auth0 delivers convenience, privacy, and security so customers can focus on innovation. For more information, visit https://auth0.com.
About the author

Matt Netkow
Head of Developer Relations