TL;DR: As at the time of this writing, the Svelte frontend framework has overtaken Vue in popularity according to the State of JS 2019, disrupting the framework "Equilibrium" that frontend developers have enjoyed for a while with React, Vue, and Angular. Unlike other frameworks, Svelte does not do its DOM-updating work in the browser using the Virtual DOM but instead compiles efficient JavaScript code in its build step that updates your DOM when a state change occurs. This paradigm-changing strategy has led to the fast-rising popularity and adoption of Svelte.
In this post, you will learn how to implement authentication in Svelte applications using Auth0.
What You Are Going to Build
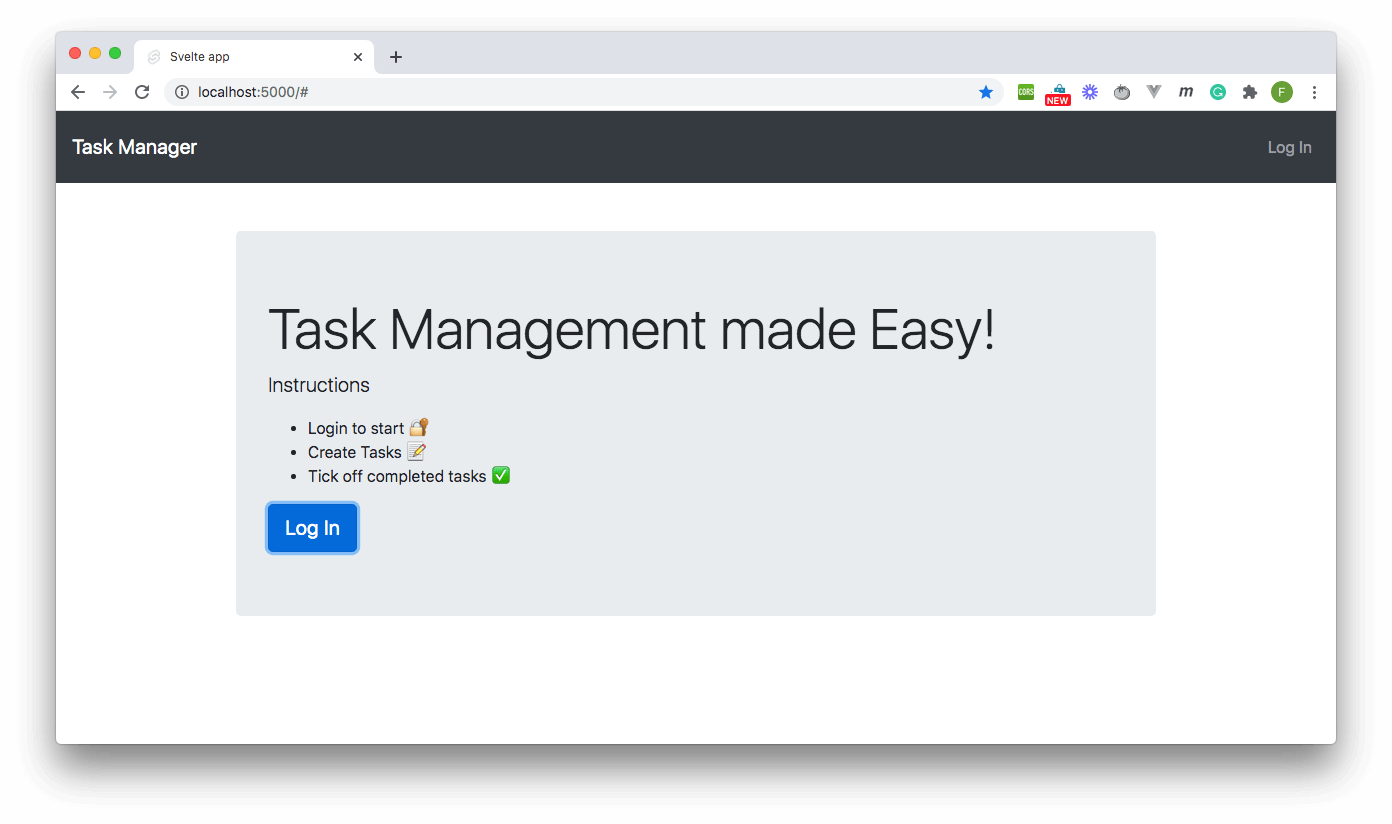
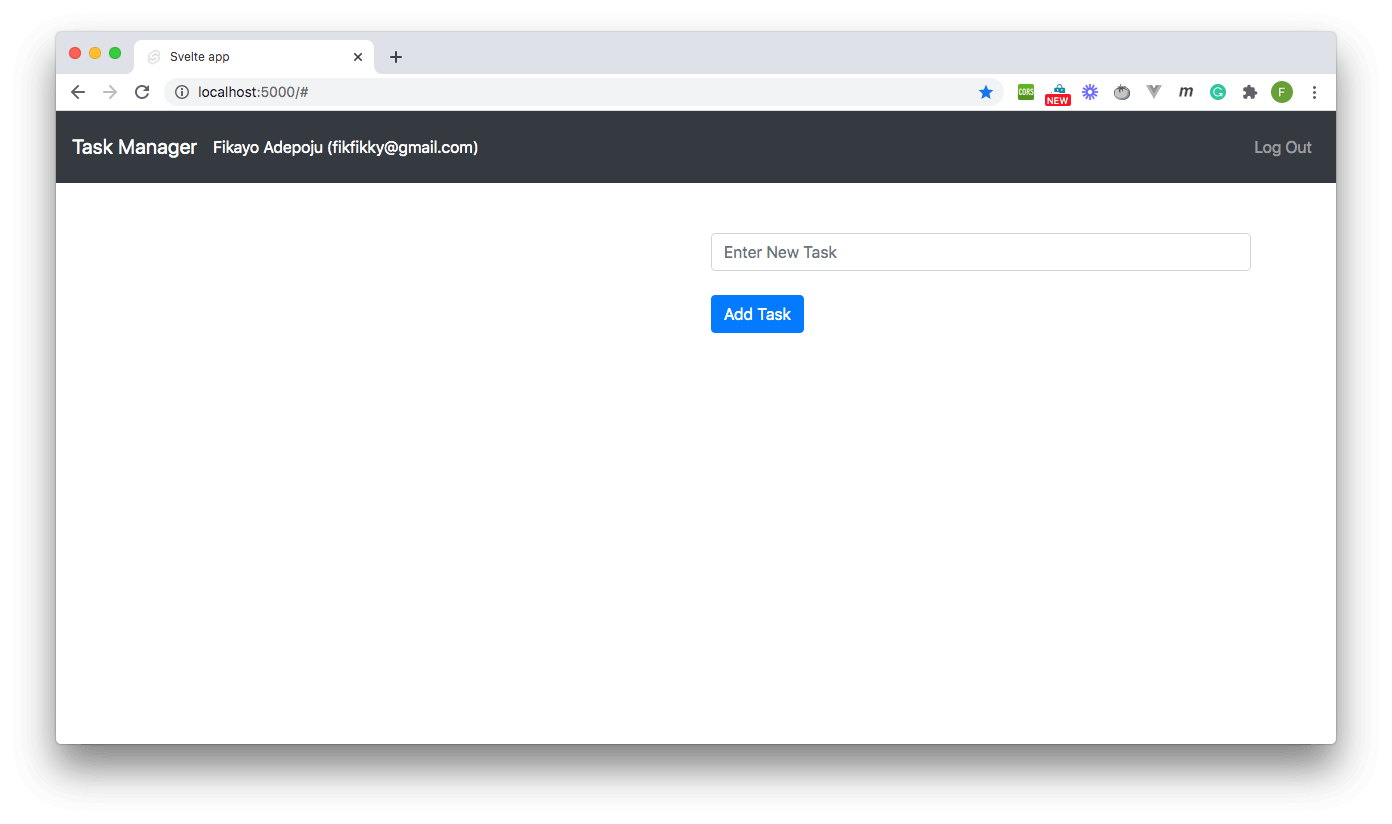
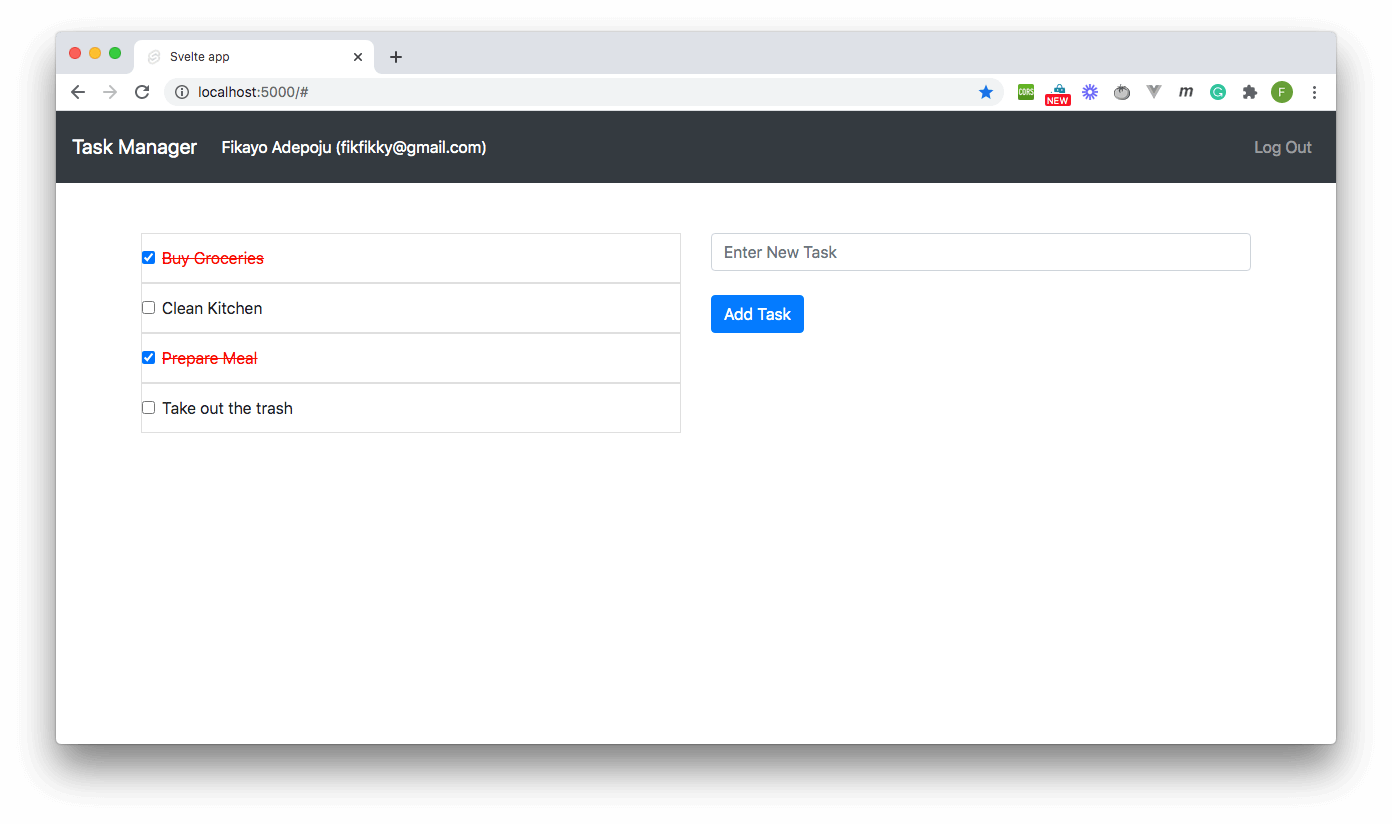
In this tutorial, you will build a simple task list manager using the Svelte framework. Users will be able to sign into this application to have authenticated access and create task items. When a user completes a task, the task can then be ticked off as "completed" on the list. By the end of this exercise, you will be fully armed with all you need to authenticate Svelte apps with Auth0. You can find the complete code for this tutorial at this Github repository. You can see a preview of what you are going to build below.
Prerequisites
To get started building this application, you will need to have a few things set up:
- Node.js installed on your system (
version >= 10is recommended) - A web browser
Surprised? Svelte is a very minimalistic framework. With these two, you are good to go.
Creating the Auth0 Application
Next up, you will set up your Auth0 application to handle authentication in your Svelte application. If you don't already have an Auth0 account, you can sign up for a free account here.
Try out the most powerful authentication platform for free.
Get started →Once logged in, click on Applications on the left-hand side menu. On the Applications page, click on the big orange CREATE APPLICATION button.
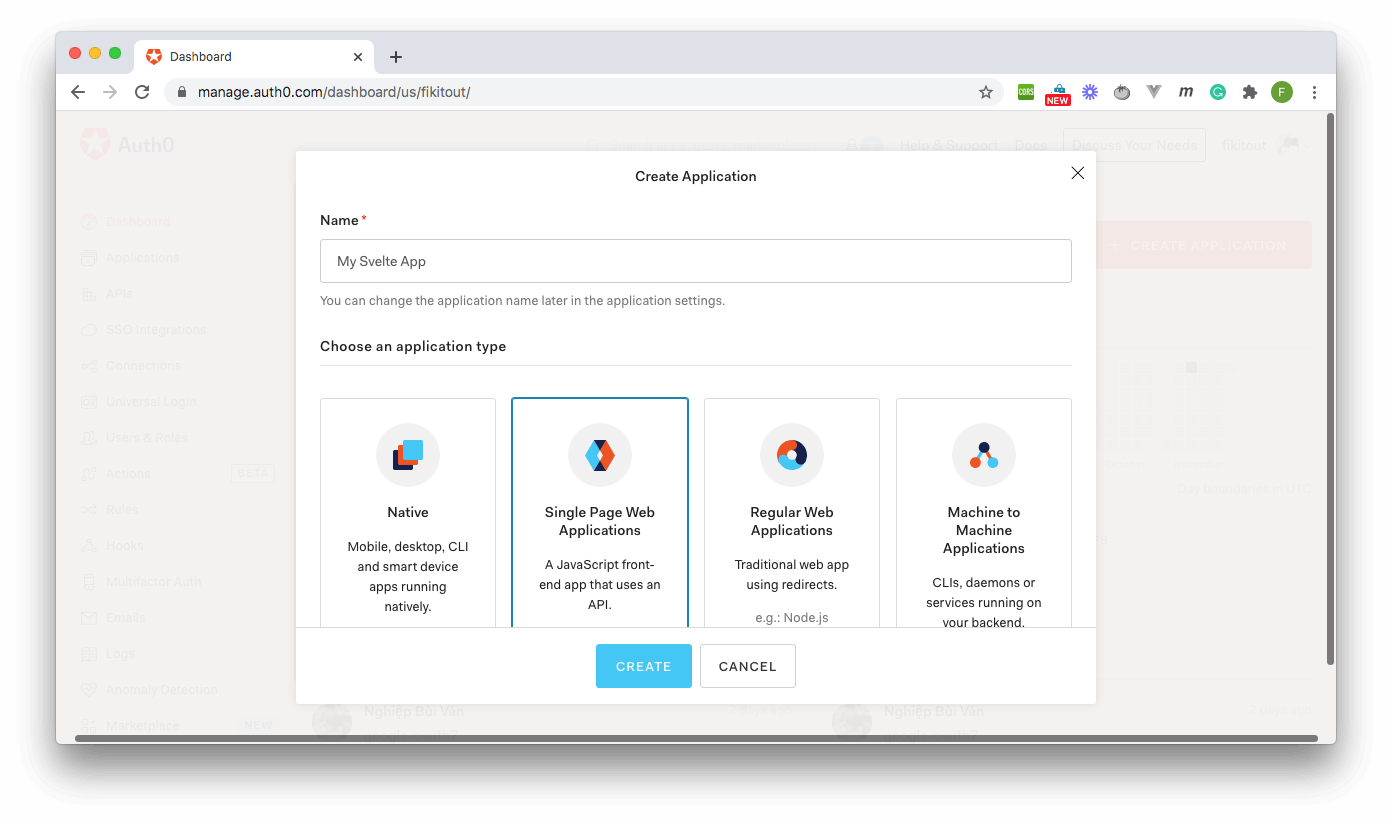
On the Create Application dialog that pops up, enter an appropriate name for your application and select Single Page Web Applications from the options below the application name field.
Now click the Create button to complete the process.
After the successful creation of the application, go to the Settings section of your newly created app. In the Allowed Callback URLs, Allowed Web Origins, Allowed Logout URLs, and Allowed Origins (CORS) fields, enter http://localhost:5000. This address is the default address of the Svelte application you will be creating later on. Make sure you update these settings once your application moves to production.
Once you're done entering these values, scroll down and hit the SAVE CHANGES button.
Scaffolding the Svelte Project
Your next task is to scaffold a new Svelte project. You can do this by cloning the standard Svelte project template using degit at any preferred location on your system as follows:
npx degit sveltejs/template svelte-task-list
In the command above, npx invokes degit to clone the standard template in your current working directory. svelte-task-list is the folder in which the project code will be cloned. Once this process is complete, go into the root of your project by running:
cd svelte-task-list
Next, you need to install the project dependencies with the following command:
npm install
When all dependencies have been installed, run the following command to boot up a development server to run your app in:
npm run dev
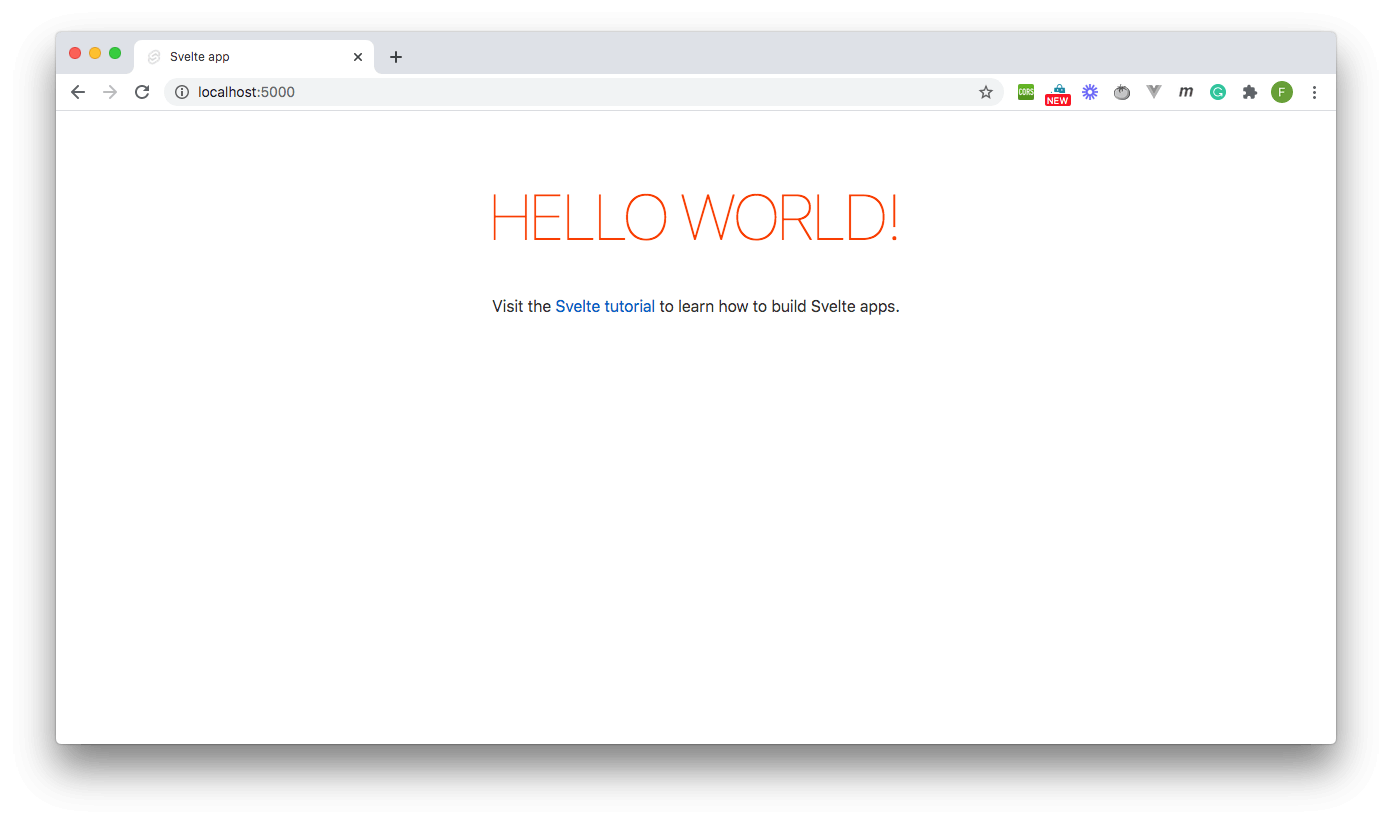
Once the above command is done, you will see the development URL of your application printed to the console, i.e. http://localhost:5000. Load this URL in your browser, you will see a page similar to the one below:
Setting up Authentication with Auth0
The next task is to set up all the application needs to authenticate users. To begin, you will need to install Auth0's SDK for authenticating Single Page Applications, the @auth0/auth0-spa-js package. Install this package by running the following command at the root of your project:
npm install @auth0/auth0-spa-js
Creating a Svelte store to hold authentication state
The next step is to create a Svelte store to hold the application state and, most importantly, the authentication state. Within the src folder, create a new file store.js and enter the following code:
// src/store.js

import { writable, derived } from "svelte/store";

export const isAuthenticated = writable(false);
export const user = writable({});
export const popupOpen = writable(false);
export const error = writable();

export const tasks = writable([]);

export const user_tasks = derived([tasks, user], ([$tasks, $user]) => {
  let logged_in_user_tasks = [];

  if ($user && $user.email) {
    logged_in_user_tasks = $tasks.filter((task) => task.user === $user.email);
  }

  return logged_in_user_tasks;
});
The above code consists of five writable and one derived state properties:
isAuthenticated: Defines the authenticated state of the user,truewhen a user is authenticated,falseby default.user: Holds the details of an authenticated user returned by Auth0 after successful authentication.popupOpen: The sign-in process will be initiated using Auth0's popup authentication modal. This is to monitor the visible state of the popup modal.error: Holds the error information if the authentication process fails.tasks: Holds all tasks created in the applicationuser_tasks: A derived state property that filters thetasksin the application to only return the ones created by the logged-in user.
Creating an authentication service
The next step is to create an authentication service to hold the authentication functions that the application will require. To begin, you first need to create a configuration file to hold your Auth0 application details. At the root of the project, create a new file, auth_config.js, and enter the following code:
// auth_config.js

const config = {
  domain: "YOUR_AUTH0_DOMAIN",
  clientId: "YOUR_APP_CLIENT_ID"
};

export default config;
Ensure you replace YOUR_AUTH0_DOMAIN with your own Auth0 domain and YOUR_APP_CLIENT_ID with the Client ID of your application.
To find these values, go back into the Applications page of your Auth0 dashboard. Find the application you created at the beginning of the tutorial, and click on "Settings". You'll find Domain and Client ID listed there.
Make sure you also add this file to your .gitignore file so that you don't mistakenly push your details to a public repository.
With this file in place, you can now create the authentication service. Create the file authService.js inside the src folder and place the following code in it:
// src/authService.js

import createAuth0Client from "@auth0/auth0-spa-js";
import { user, isAuthenticated, popupOpen } from "./store";
import config from "../auth_config";

async function createClient() {
  let auth0Client = await createAuth0Client({
    domain: config.domain,
    client_id: config.clientId
  });

  return auth0Client;
}

async function loginWithPopup(client, options) {
  popupOpen.set(true);
  try {
    await client.loginWithPopup(options);

    user.set(await client.getUser());
    isAuthenticated.set(true);
  } catch (e) {
    // eslint-disable-next-line
    console.error(e);
  } finally {
    popupOpen.set(false);
  }
}

function logout(client) {
  return client.logout();
}

const auth = {
  createClient,
  loginWithPopup,
  logout
};

export default auth;
The file above begins by importing the required objects from the @auth0/auth0-spa-js package, the application store (store.js), and the authentication configurations from auth_config.js. Three authentication functions are then defined as follows:
createClient: Uses Auth0'screateAuth0Clientfunction and the authentication configuration to create a new authentication client and returns it.loginWithPopup: Takes in an authenticationclientinstance with defined options and uses these to call theloginWithPopupon the client to sign-in and user. It then setsisAuthenticatedtotrueanduserto the user details returned by the logged-in client.logout: This is simply a proxy to the Auth0client'slogoutmethod that ends a logged-in user's session.
Finally, these three functions are exported from the module.
Building the Task List
Creating a List Item Component
A task in the application has the following interface:
{
  id string;
  description string;
  completed boolean;
  user string;
}
The properties are described as follows:
id: An auto-generated identifier for each taskdescription: A description of the task e.g.Take out the trashcompleted: A boolean representing whether the task has been completed or notuser: The email of the user that created the task
You will create a task list item component that will display and control the behavior of a task item in the application. Inside the src folder, create a new folder with the name components. Inside this folder, create the file TaskItem.svelte, and input the following code:
<script>
  import { tasks } from "../store";
  export let task = {};

  let isChecked;

  function taskDone() {
    console.log(isChecked);

    let updatedTasks = $tasks.map((currentTask) => {
      if (currentTask.id === task.id) {
        currentTask.completed = isChecked;
        return currentTask;
      }
      return currentTask;
    });

    tasks.set(updatedTasks);
    console.log($tasks);
  }
</script>

<style>
  .completed {
    color: red;
    text-decoration: line-through;
  }
</style>

<main>
  <li class="list-group-item">
    <input
      type="checkbox"
      class="form-check-input"
      id="exampleCheck1"
      bind:checked={isChecked}
      on:change={(e) => taskDone(e)} />
    <span class:completed={task.completed}>{task.description}</span>
  </li>
</main>
The component above takes in a task prop and displays a list item li with the task description and a checkbox for the user to tick when the task is complete. When the checkbox is ticked, the taskDone method is called, which uses the isChecked local variable to update the task's completed property.
Styles are also added for a completed task by applying the .completed class when the completed property of the task is true.
Building the Task List page
For some basic styling, the Bootstrap library will be used. To apply Bootstrap, go into the public/index.html file and add the library (using a CDN link) in the head section under the meta tags as shown below:
<head>
  <meta charset="utf-8" />
  <meta name="viewport" content="width=device-width,initial-scale=1" />
  <link
    rel="stylesheet"
    href="https://cdn.jsdelivr.net/npm/bootstrap@4.5.3/dist/css/bootstrap.min.css"
    integrity="sha384-TX8t27EcRE3e/ihU7zmQxVncDAy5uIKz4rEkgIXeMed4M0jlfIDPvg6uqKI2xXr2"
    crossorigin="anonymous"
  />

  <title>Svelte app</title>

  <link rel="icon" type="image/png" href="/favicon.png" />
  <link rel="stylesheet" href="/global.css" />
  <link rel="stylesheet" href="/build/bundle.css" />

  <script defer src="/build/bundle.js"></script>
</head>
Next, remove the reference to global.css. You will not be needing it, and some of the styles in the file clash with those you will define later on.
With all the components/services required in place, you can now start building the Task List page. You will be replacing all the code currently in the src/App.svelte file, so go into this file and clear any existing code in it.
This file will consist of three sections: the script section, the styles section, and the template. To begin, add the script section by adding the following code in the file:
<script>
  import { onMount } from "svelte";
  import auth from "./authService";
  import { isAuthenticated, user, user_tasks, tasks } from "./store";
  import TaskItem from "./components/TaskItem.svelte";

  let auth0Client;
  let newTask;

  onMount(async () => {
    auth0Client = await auth.createClient();

    isAuthenticated.set(await auth0Client.isAuthenticated());
    user.set(await auth0Client.getUser());
  });

  function login() {
    auth.loginWithPopup(auth0Client);
  }

  function logout() {
    auth.logout(auth0Client);
  }

  function addItem() {
    let newTaskObject = {
      id: genRandom(),
      description: newTask,
      completed: false,
      user: $user.email
    };

    console.log(newTaskObject);

    let updatedTasks = [...$tasks, newTaskObject];

    tasks.set(updatedTasks);

    newTask = "";
  }

  function genRandom(length = 7) {
    var chars =
      "0123456789abcdefghijklmnopqrstuvwxyzABCDEFGHIJKLMNOPQRSTUVWXYZ";
    var result = "";
    for (var i = length; i > 0; --i)
      result += chars[Math.round(Math.random() * (chars.length - 1))];
    return result;
  }
</script>
The script begins by importing all required objects (onMount from svelte, isAuthenticated, user, user_tasks, and tasks from the store), services (the authService module), and components (TaskList.svelte).
Next, two local variables, auth0Client and newTask, are defined to hold the Auth0 client created during application startup and a task item typed into the form field (to be created later) respectively.
The onMount Svelte lifecycle method is then called with a callback that creates a new Auth0 client once the page loads and sets the authentication state. Lastly, in this script section, four (4) component methods are defined, which do the following:
login: Calls theloginWithPopupmethod from the authentication servicelogout: Calls thelogoutmethod from the authentication serviceaddItem: Creates a newtaskitem object according to thetaskinterface and adds it to thetasksin the application's state.genRandom: A random number generator to generate task item unique identifiers.
Next, add the styles section by placing the following code below the script section:
<style>
  #main-application {
    margin-top: 50px;
  }
</style>
This simply sets a margin of 10px at the top of the application's template for the authenticated screen, which will be defined next.
Adding authentication to the Task List page
The next step is to create the application screen by defining the template. The screen will consist of a Bootstrap navigation bar that will display the application name and, based on the authentication state, will display the email of the name and email of the logged-in user. It will also conditionally display a "Log In" or "Log Out" link.
Below the navigation bar, the application will also display a Welcome Screen or the task list and the task creation form based on the authenticated state.
Below the style section, add the following code for the application template:
<main> <!-- App Bar --> <nav class="navbar navbar-expand-lg navbar-dark bg-dark"> <a class="navbar-brand" href="/#">Task Manager</a> <button class="navbar-toggler" type="button" data-toggle="collapse" data-target="#navbarText" aria-controls="navbarText" aria-expanded="false" aria-label="Toggle navigation" > <span class="navbar-toggler-icon" /> </button> <div class="collapse navbar-collapse" id="navbarText"> <div class="navbar-nav mr-auto user-details"> {#if $isAuthenticated} <span class="text-white"> {$user.name} ({$user.email})</span> {:else}<span> </span>{/if} </div> <span class="navbar-text"> <ul class="navbar-nav float-right"> {#if $isAuthenticated} <li class="nav-item"> <a class="nav-link" href="/#" on:click="{logout}">Log Out</a> </li> {:else} <li class="nav-item"> <a class="nav-link" href="/#" on:click="{login}">Log In</a> </li> {/if} </ul> </span> </div> </nav> <!-- Application --> {#if !$isAuthenticated} <div class="container mt-5"> <div class="row"> <div class="col-md-10 offset-md-1"> <div class="jumbotron"> <h1 class="display-4">Task Management made Easy!</h1> <p class="lead">Instructions</p> <ul> <li>Login to start 🔐</li> <li>Create Tasks 📝</li> <li>Tick off completed tasks ✅</li> </ul> <a class="btn btn-primary btn-lg mr-auto ml-auto" href="/#" role="button" on:click="{login}" >Log In</a > </div> </div> </div> </div> {:else} <div class="container" id="main-application"> <div class="row"> <div class="col-md-6"> <ul class="list-group"> {#each $user_tasks as item (item.id)} <TaskItem task="{item}" /> {/each} </ul> </div> <div class="col-md-6"> <input class="form-control" bind:value="{newTask}" placeholder="Enter New Task" /> <br /> <button type="button" class="btn btn-primary" on:click="{addItem}"> Add Task </button> </div> </div> </div> {/if} </main>
With the template in place, you can now run the application. If the application is currently running, terminate the process with the Ctrl+C command and rerun it using npm run dev. Return to your browser and reload the http://localhost:5000 address. You will see the Welcome screen below loaded in your browser:
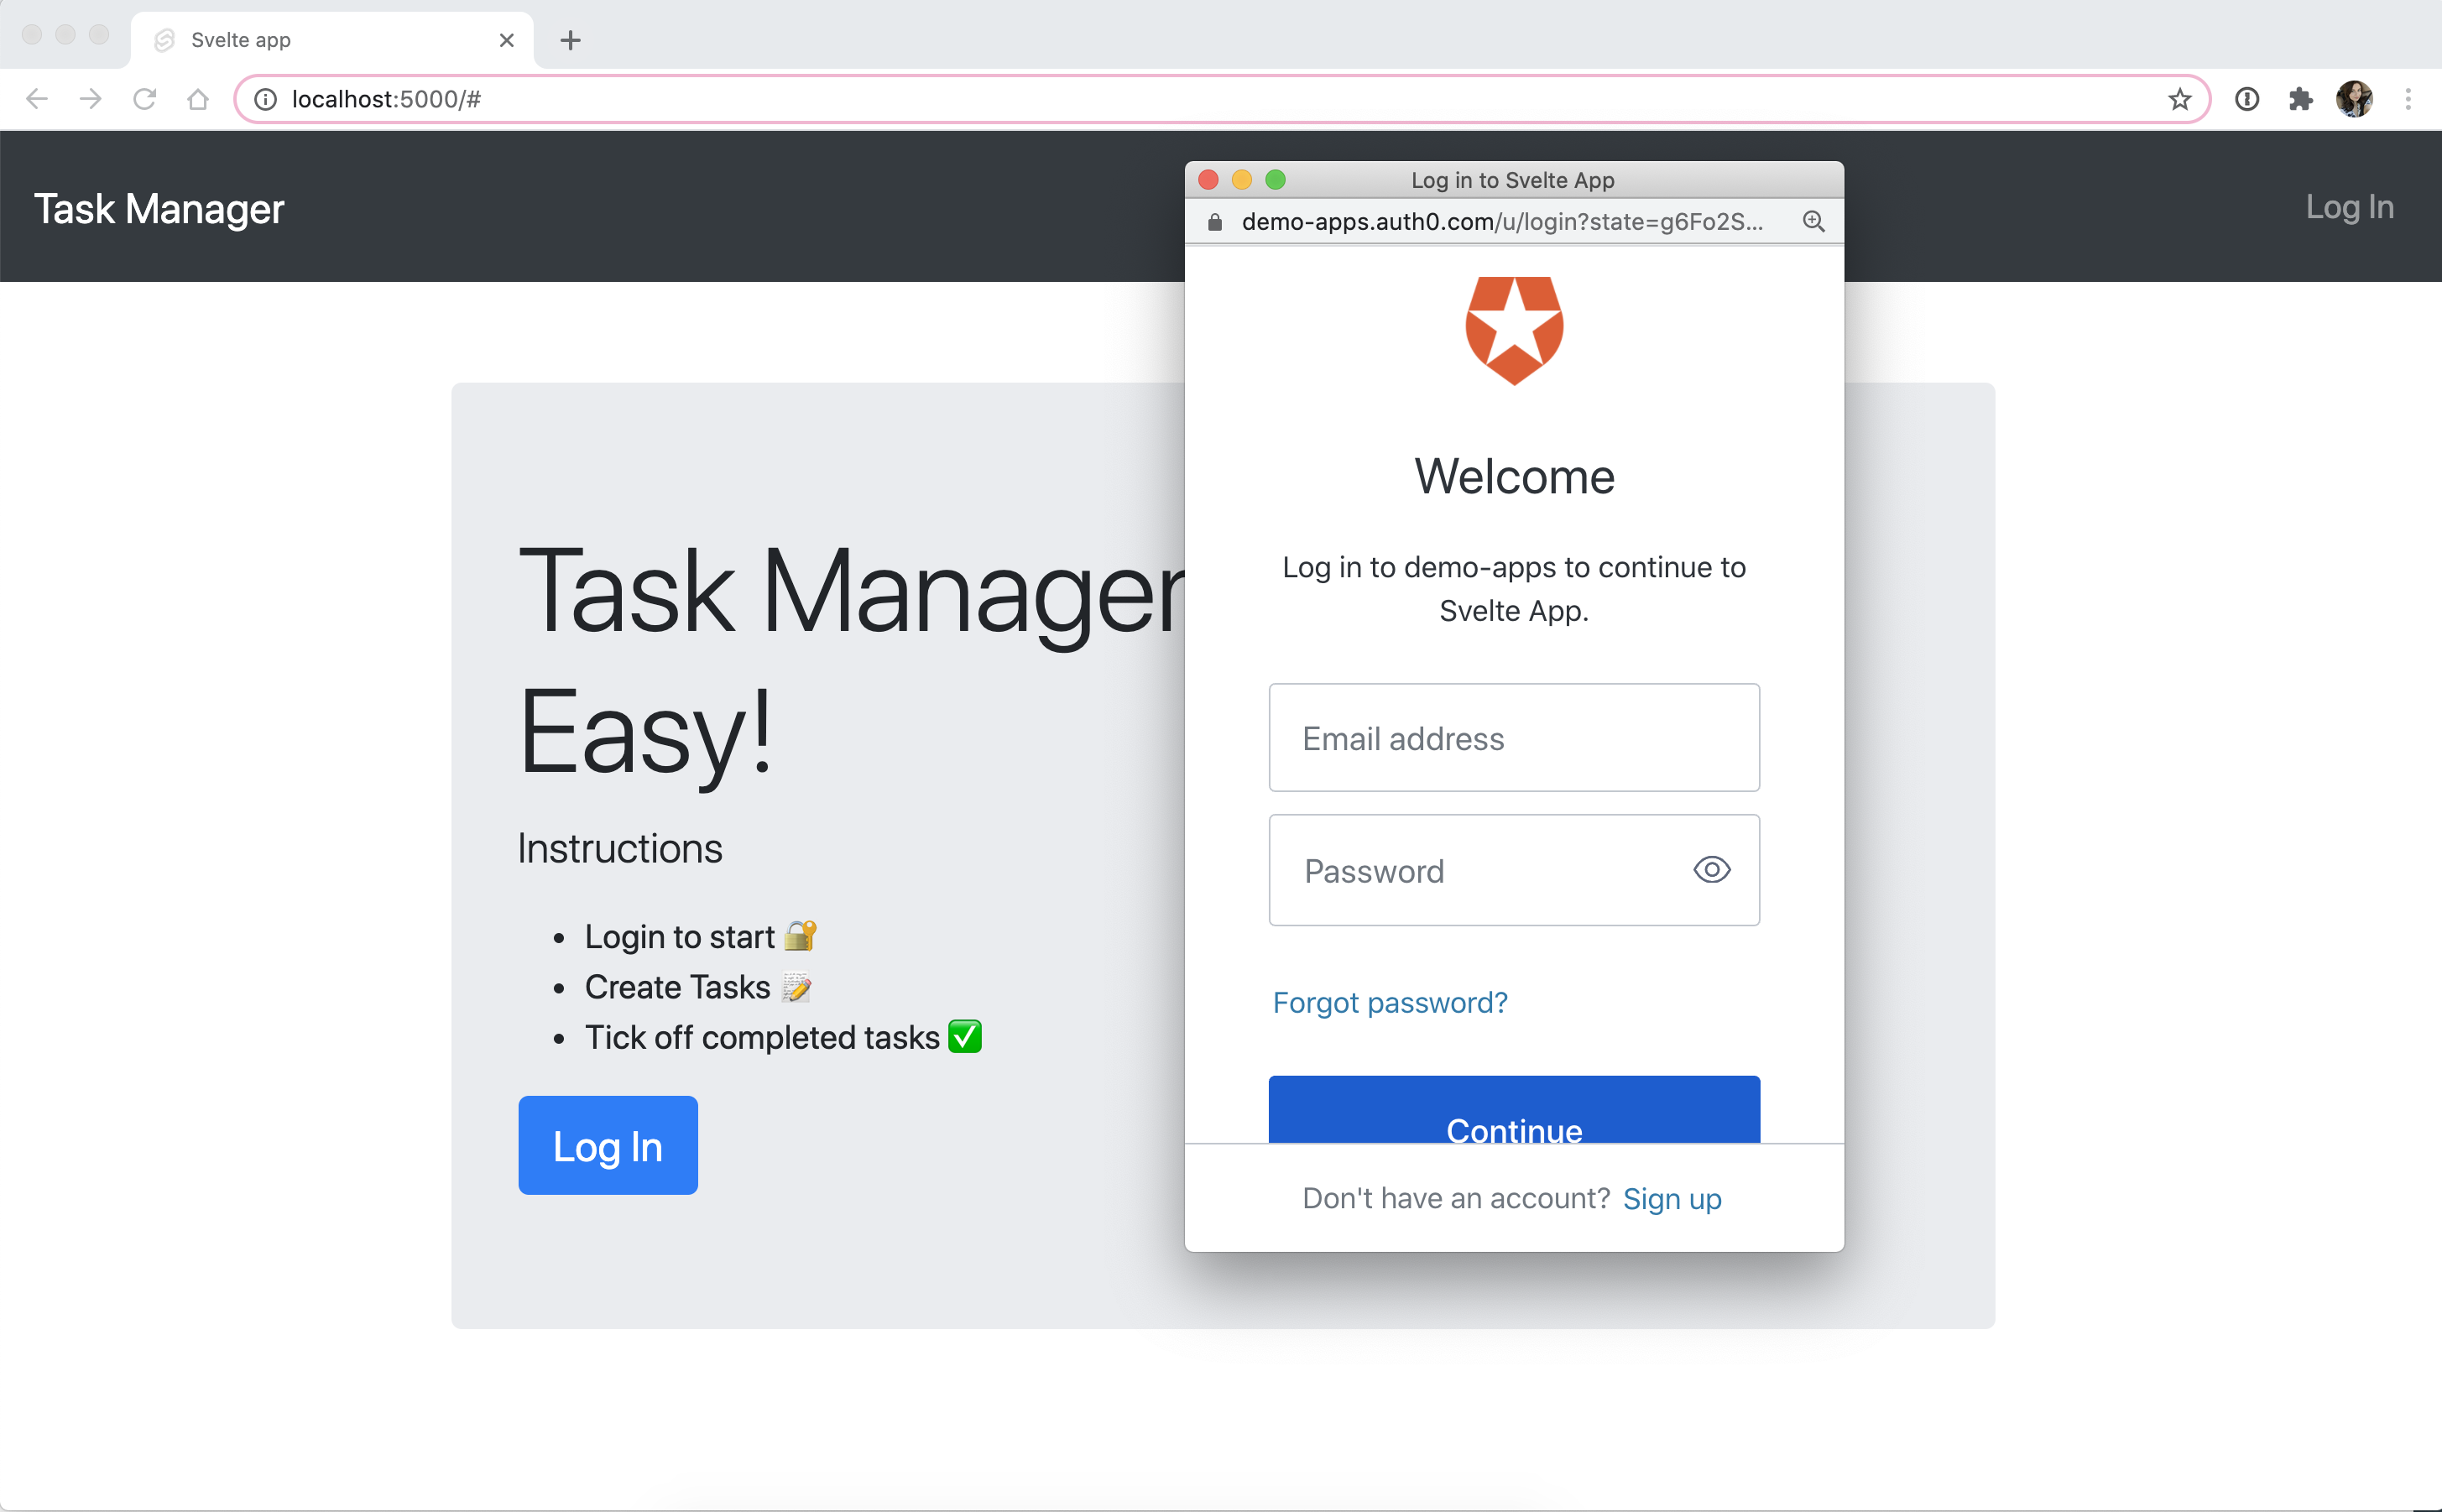
Now click on any of the "Log In" links to sign in to the application. This will pop up the Auth0 log-in screen as shown below:
You can use any of the authentication options displayed, but for this demo, use the Google login button. Once the process is completed, you will be authenticated, and the task list page will be displayed as shown below:
Note: If you are logging in for the first time on the app, you will be asked to authorize access by your Gmail account. Accept this permission request to proceed.
As seen, the task list is empty. That is because you have not added any task items, so go ahead add new tasks and tick some off. You should now have a screen similar to the one below:
When you click the "Log Out", you will be returned to the application welcome screen as the user is automatically logged out.
Conclusion
Svelte is a very fast and easy-to-use frontend framework with a simple API that does not cheat you on any features of modern frontend frameworks, but rather does it efficiently. With Auth0, you have one less thing to worry about, as you can now easily authenticate your Svelte apps as demonstrated in this tutorial.
If any part of your code is not working as expected, I advise that you go through the article once again to see if there's anything you may have missed. You can also check out the final code in this GitHub repository.
Happy Coding :)
About the author

Fikayo Adepoju
Full-Stack Developer
