
TL;DR NGINX Plus R10 brings native JSON Web Token (JWT) support to the popular server. This enhanced capability allows NGINX Plus to validate JWTs and reject requests that do not have valid JWTs associated with them. This is very useful in protecting API clients and in this post we'll take a look at how we can leverage this new feature in our applications.
NGINX Plus R10 has only been out for a few weeks but it's got us very excited. The latest release boasts many new features and improvements including: "Dual-stack" support for ECC and RSA Certificates, transparent proxy support, nginScript support, and more. The feature we are most excited about is native support for JSON Web Tokens (JWT).
With the R10 release, NGINX Plus makes it easy to protect your APIs and services with JWTs. In this post, we'll look at why you would want to offload the authorization aspect of your app to NGINX and then we'll build an application that does exactly this. We'll use Auth0 to issue the JWTs for us, but the same workflow is applicable to any JWT issuer.
NGINX Plus JWT Support
Many companies employ NGINX as a reverse proxy or load balancer for their applications. This means that NGINX sits between the users making requests and your actual application servers. NGINX is the first point of contact between a request and your API or service. From here, the request is routed to the correct server for further processing and finally a response is served. If your API requires a user to be authenticated to access a resource, the validation of the request is typically performed after the request has passed through NGINX.
If the user requesting a protected resource is not authenticated, they've just wasted CPU cycles on both your NGINX server, bandwidth between NGINX and your application server, and resources on your application server, all so you could tell them they need to login.
The NGINX Plus auth_jwt directive verifies that the user is authenticated and has permissions to access a resource before the request is routed to your application server. If the request coming in does not have a valid JWT, the request is short-circuited and NGINX replies with an appropriate 401 Unauthorized response. No additional resources wasted.
In addition to not wasting resources, having NGINX Plus handle JWT verification allows developers to focus on implementing business logic instead of building authentication systems. Since NGINX Plus can pass the authenticated user claims directly to the application server, performance gains could also be argued as the app server has less to do. The overhead of adding JWT verification to NGINX is also trivial, as NGINX is rarely the bottleneck in the infrastructure.
“NGINX Plus native JWT support means developers can offload JWT verification and focus on business logic”
Tweet This
Configuring NGINX Plus with JWT Support
With the benefits of having NGINX Plus handle JWT verification for us clear as day, let's see how we can get this implemented.
Since NGINX Plus is only available on Linux distributions, we'll be using an Ubuntu virtual machine for our demo.
Building our Application Server
For starters, let's create a mock API server. I'll just create a quick server with Node.js and Express and expose a couple of different routes. Take a look at the implementation of our application server below:
// Declare dependencies
var express = require('express');
var app = express();

// Add some public routes that are accessible to everyone
app.get('/', function(req, res){
    res.send('<h1>Welcome to the Hompeage. <small>(Everyone can view this page)</small></h1>');
})

app.get('/about', function(req, res){
    res.send('<h1>Welcome to the about page<small>(Everyone can view this page)</small></h1>');
})

// Add some protected routes that only authenticated users will have access to
app.get('/api/leads', function(req, res){
    res.json({leads:[{id: 12345, name: 'ACME Corp'}, {id: 23456, name:'LeadGen'}, {id:45677, name: 'Organic Leads'}]})
})

app.get('/api/employees', function(req, res){
    res.json({employees:[{name: 'Ado Kukic', username:'@ado'}, {name: 'Diego Poza', username:'@tony'}, {name:'Prosper Otemuyiwa', username:'@unicodedeveloper'}, {name:'Sebastian Peyrott', username:'@speyrott'}, {name:'Kim Maida', username:'@kim.maida'}]})
})

app.listen(9000);
Our server exposes four routes. Two public, two protected. Without NGINX Plus to protect our API routes, we'd have to add a couple more dependencies, add some middleware to check and verify that the incoming request had a valid JWT, implement logic for when the token is not valid and more. Luckily, we are using NGINX Plus, so we don't have to do a single other thing. We can simply deploy this server by running node server.js and accessing our application at localhost:9000.
Configuring NGINX Plus
NGINX Plus is a premium product. It requires an annual fee, but you can also try it for free here. You can find the installation instructions on the official NGINX Plus website. I'll assume that you already have NGINX Plus installed on your machine. If you have an older version of NGINX Plus installed, you can easily upgrade to the latest R10 release by running:
// Debian or Ubuntu
sudo apt-get update
sudo apt-get install nginx-plus

// RHEL, CentOS, or Amazon Linux
sudo yum upgrade nginx-plus

// FreeBSD
sudo pkg upgrade nginx-plus
Before continuing, check that the version of NGINX Plus installed on your machine is nginx-plus-r10 or higher. With the appropriate version installed, let's configure our NGINX Plus server. Open the nginx.conf file and paste the following:
user nginx;
worker_process auto;

events {}

http {
  # Here we are defining the server that we'll pass the requests to
  upstream api_server {
    server 127.0.0.1:9000;
  }
  server {
    # Our NGINX Plus server will listen on Port 80
    listen 80;

    # By default all routes will proxy to our Node.js server at localhost:9000
    location / {
      proxy_pass http://api_server;
    }

    # For any of the /api/* routes, we'll ensure that the user has a valid JWT
    location /api/ {
      # We'll name our domain or realm our Auth0 Domain
      # This is not required so you can name it anything
      auth_jwt "YOUR-AUTH0-DOMAIN.auth0.com";
      # We'll need to load a JWK that contains our secret credentials that will be used to verify incoming JWT's
      auth_jwt_key_file /etc/nginx/secret.json;

      # If an incoming JWT is valid, we'll proxy to our Node.js server
      proxy_pass http://api_server;
    }
  }
}
We'll need to create a secret.json file next. You can create this file anywhere, as long as it's accessible by NGINX, so we'll just create it our nginx directory.
The secret.json file will contain a JSON Web Key (JWK) which will hold our signing key. This file can either be a .json file or a .jwk file, as long as the format is correct. Learn more about what compromises a JWK here.
For our implementation, our JWK will look like:
{"keys":
    [{
        "k":"YOUR-AUTH0-SECRET",
        "kty":"oct"
    }]
}
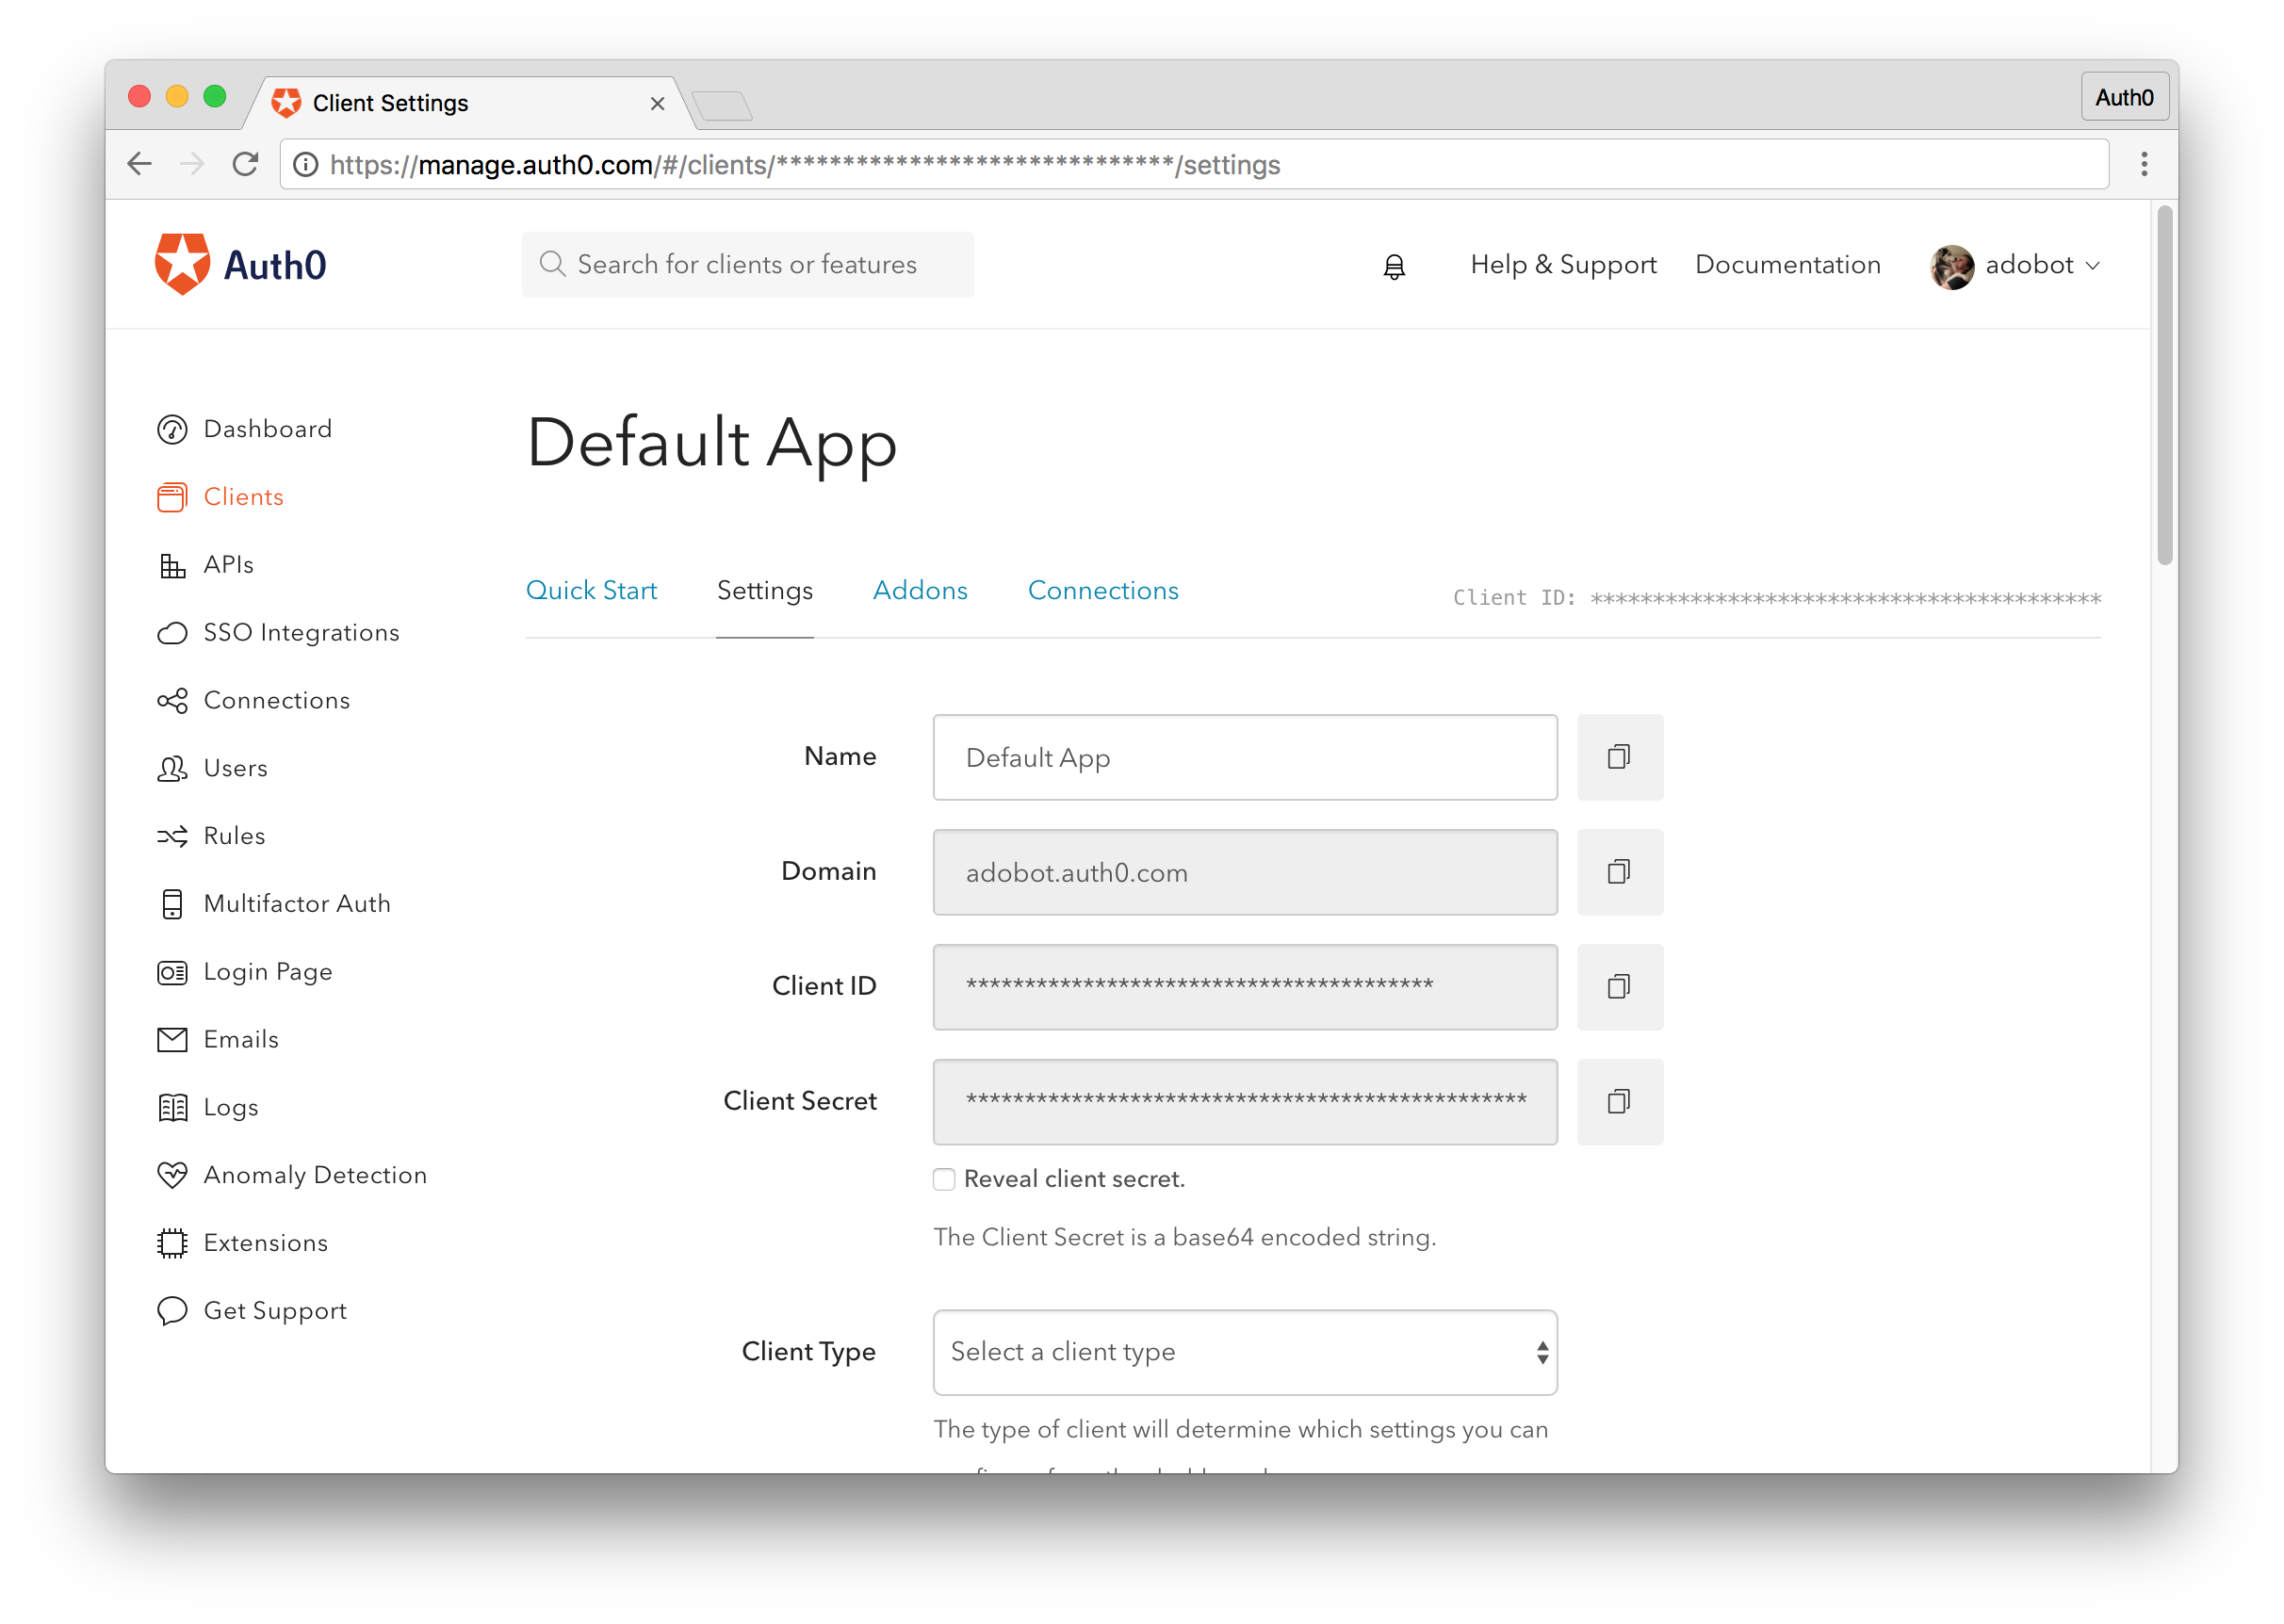
Let's go ahead and get our Auth0 client credentials so we can test our implementation. If you don't already have an Auth0 account, sign up for a free one here. Log in to your management dashboard, navigate to the client you wish you to use, and retreive your Domain and Client Secret. Replace the YOUR-AUTH0-DOMAIN from the nginx.conf file and with your domain and YOUR-AUTH0-SECRET with your secret and save the files.
To start your NGINX server, run the sudo nginx command.
Navigate to localhost. You'll see the response from the Node.js server we created earlier and the text displayed: "Welcome to the Homepage". Our proxy server works. NGINX took the request from localhost:80 and forwarded to our Node.js server at localhost:9000.

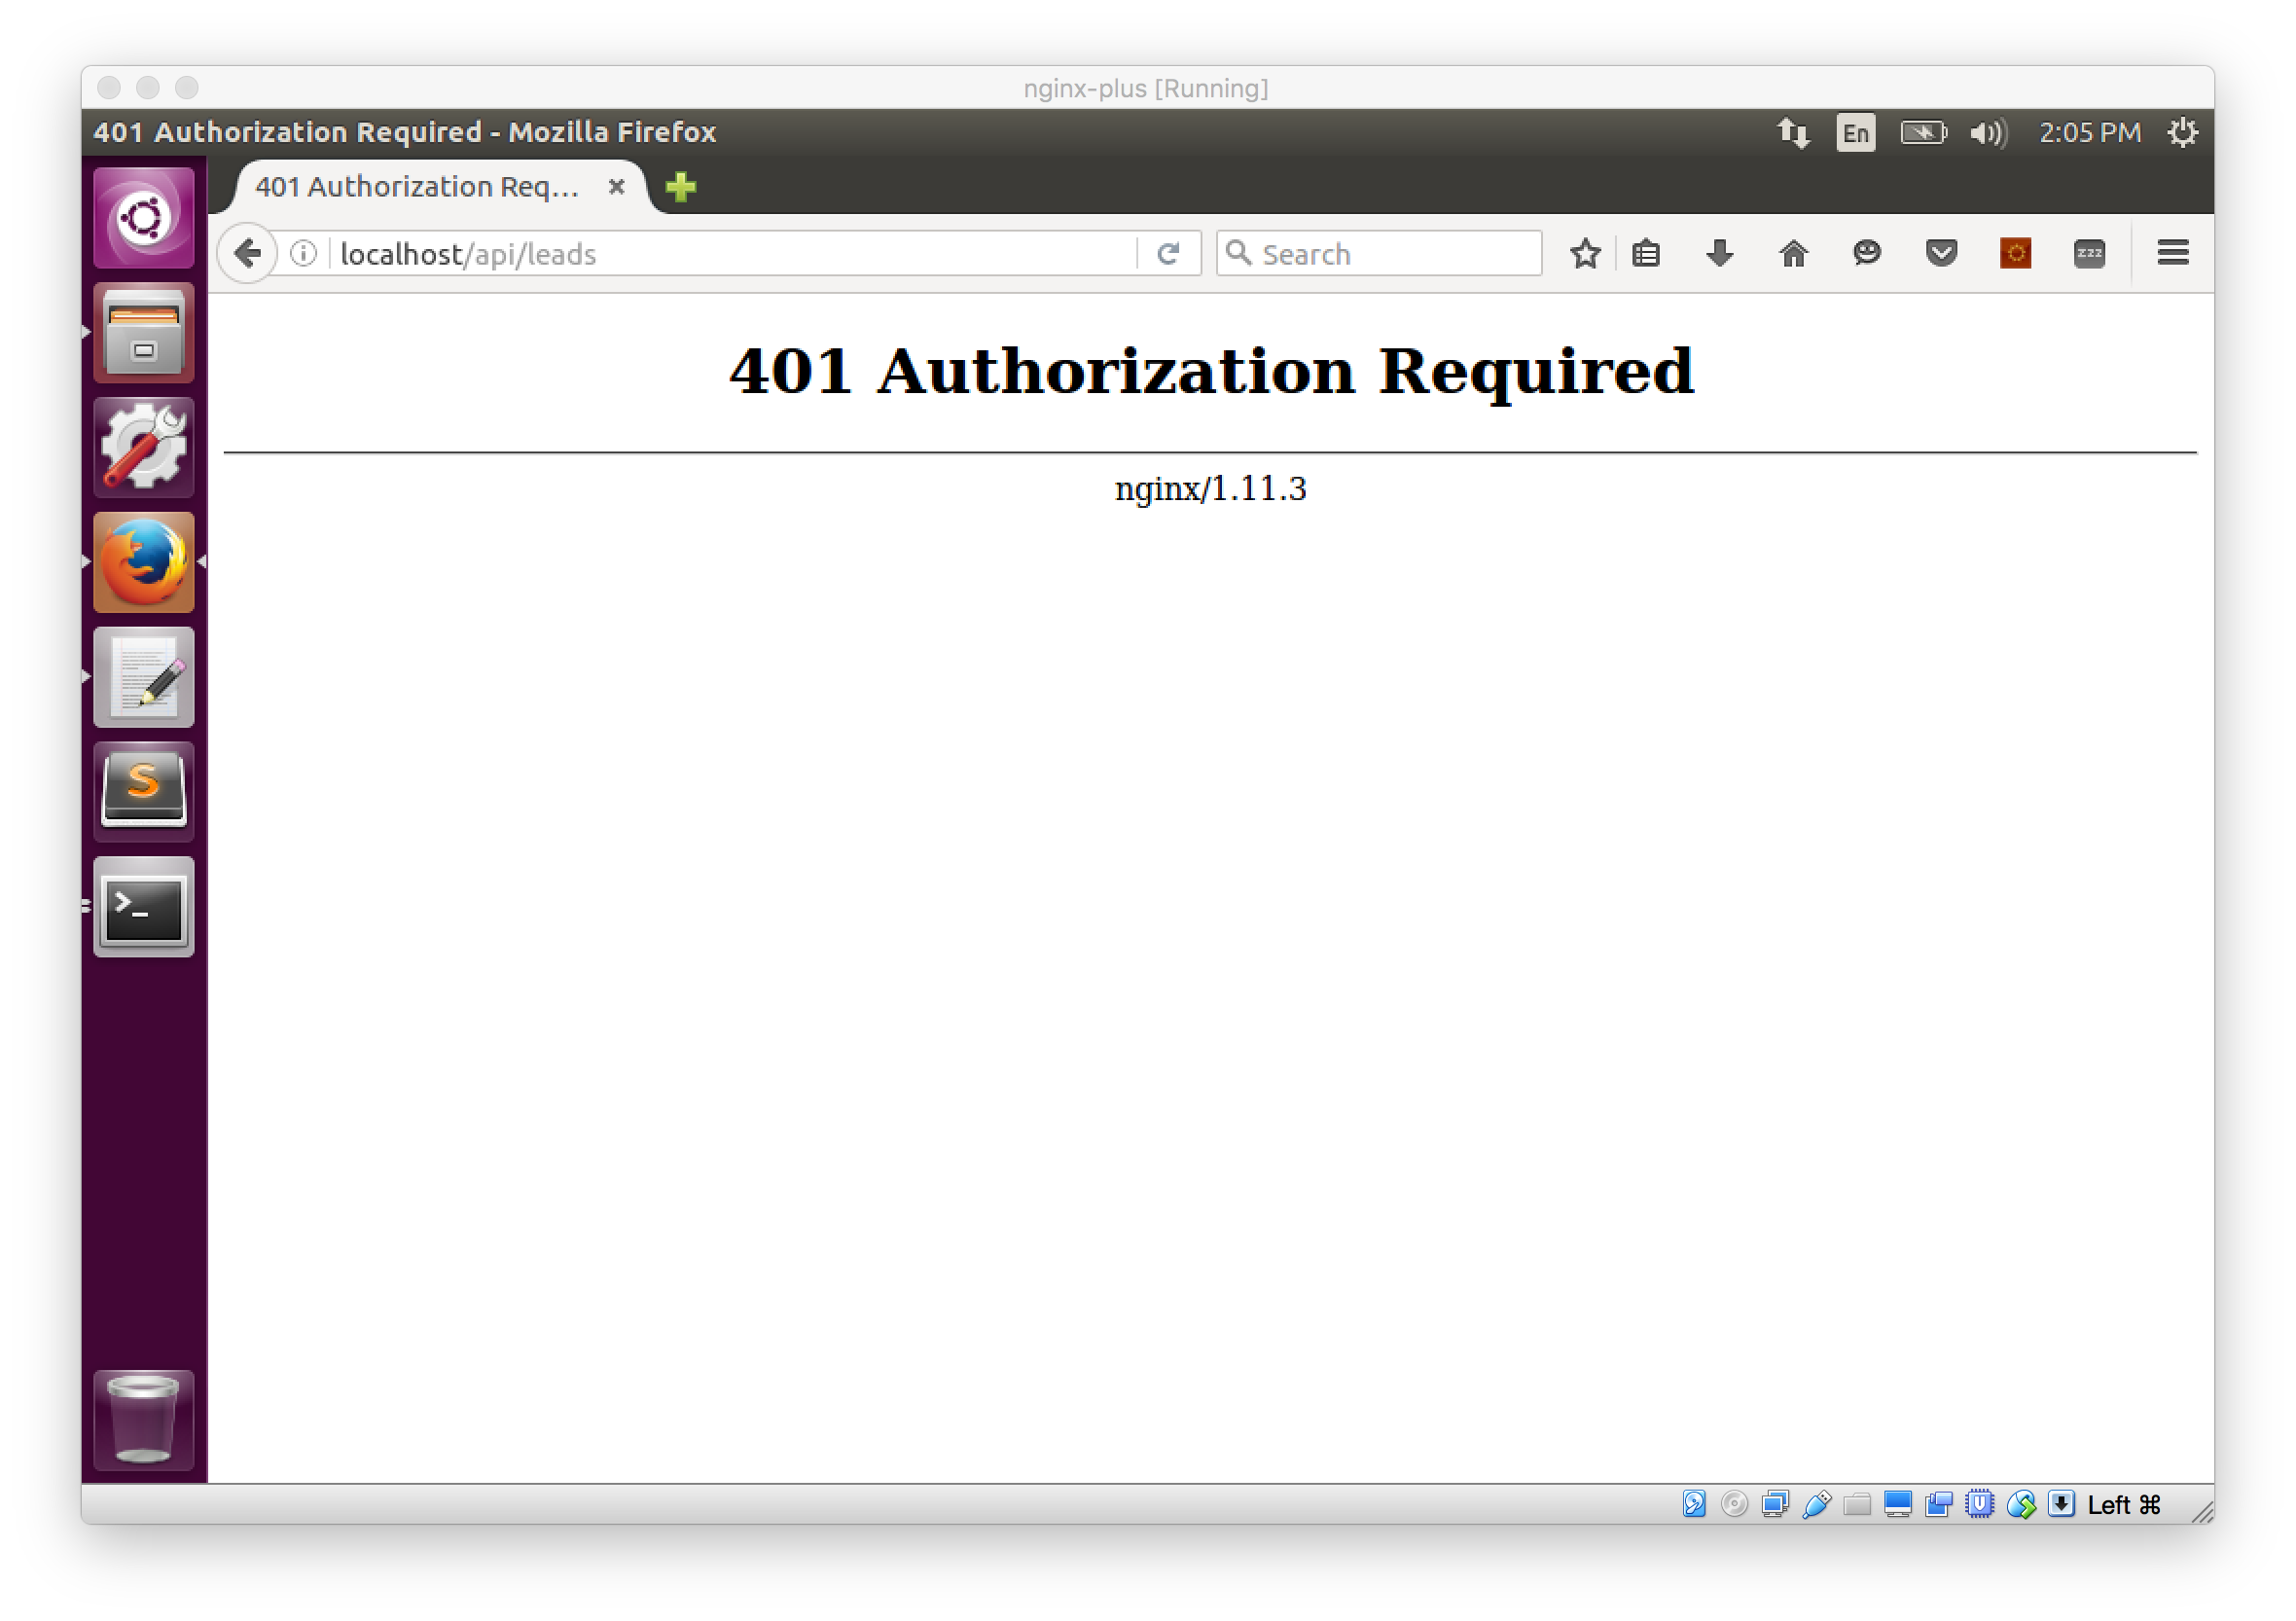
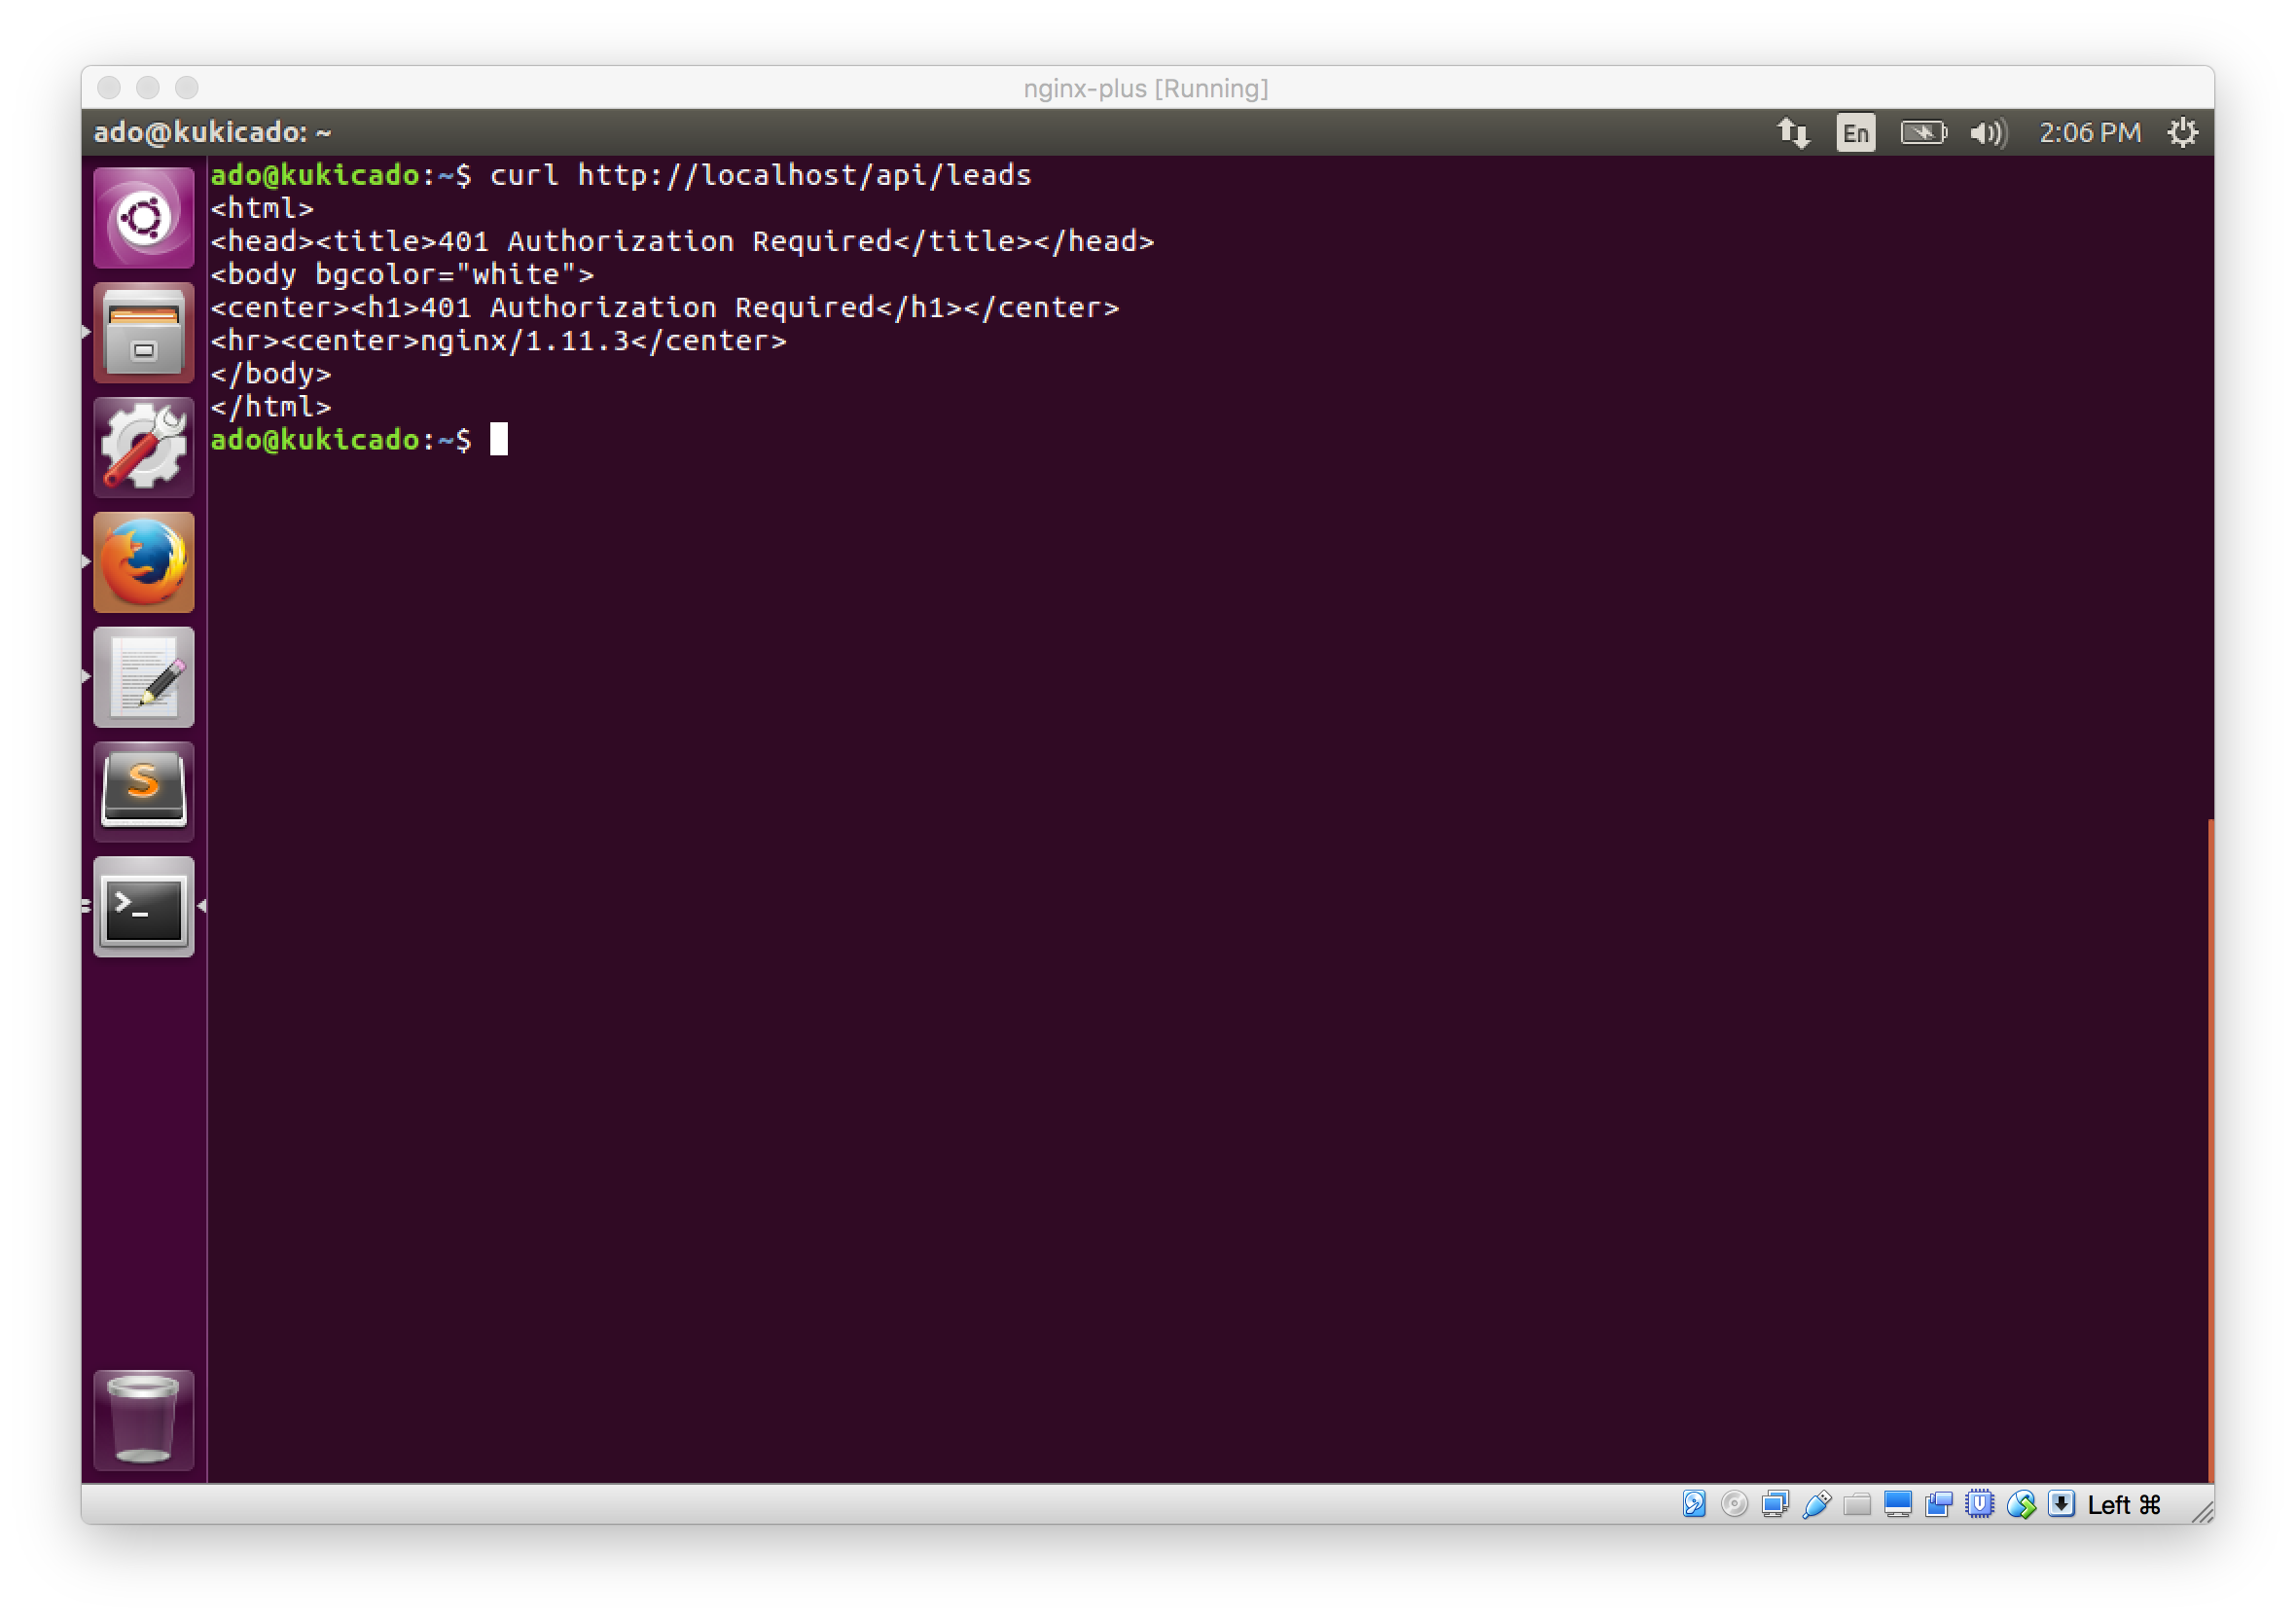
Now, let's try to access an API route, navigate to localhost/api/leads. You will see a 401 Unauthorized message served from NGINX. We didn't write this page or have an implementation for it in our Node.js server. When NGINX received the request, it looked for a JWT and since we didn't pass one in, the request was rejected.
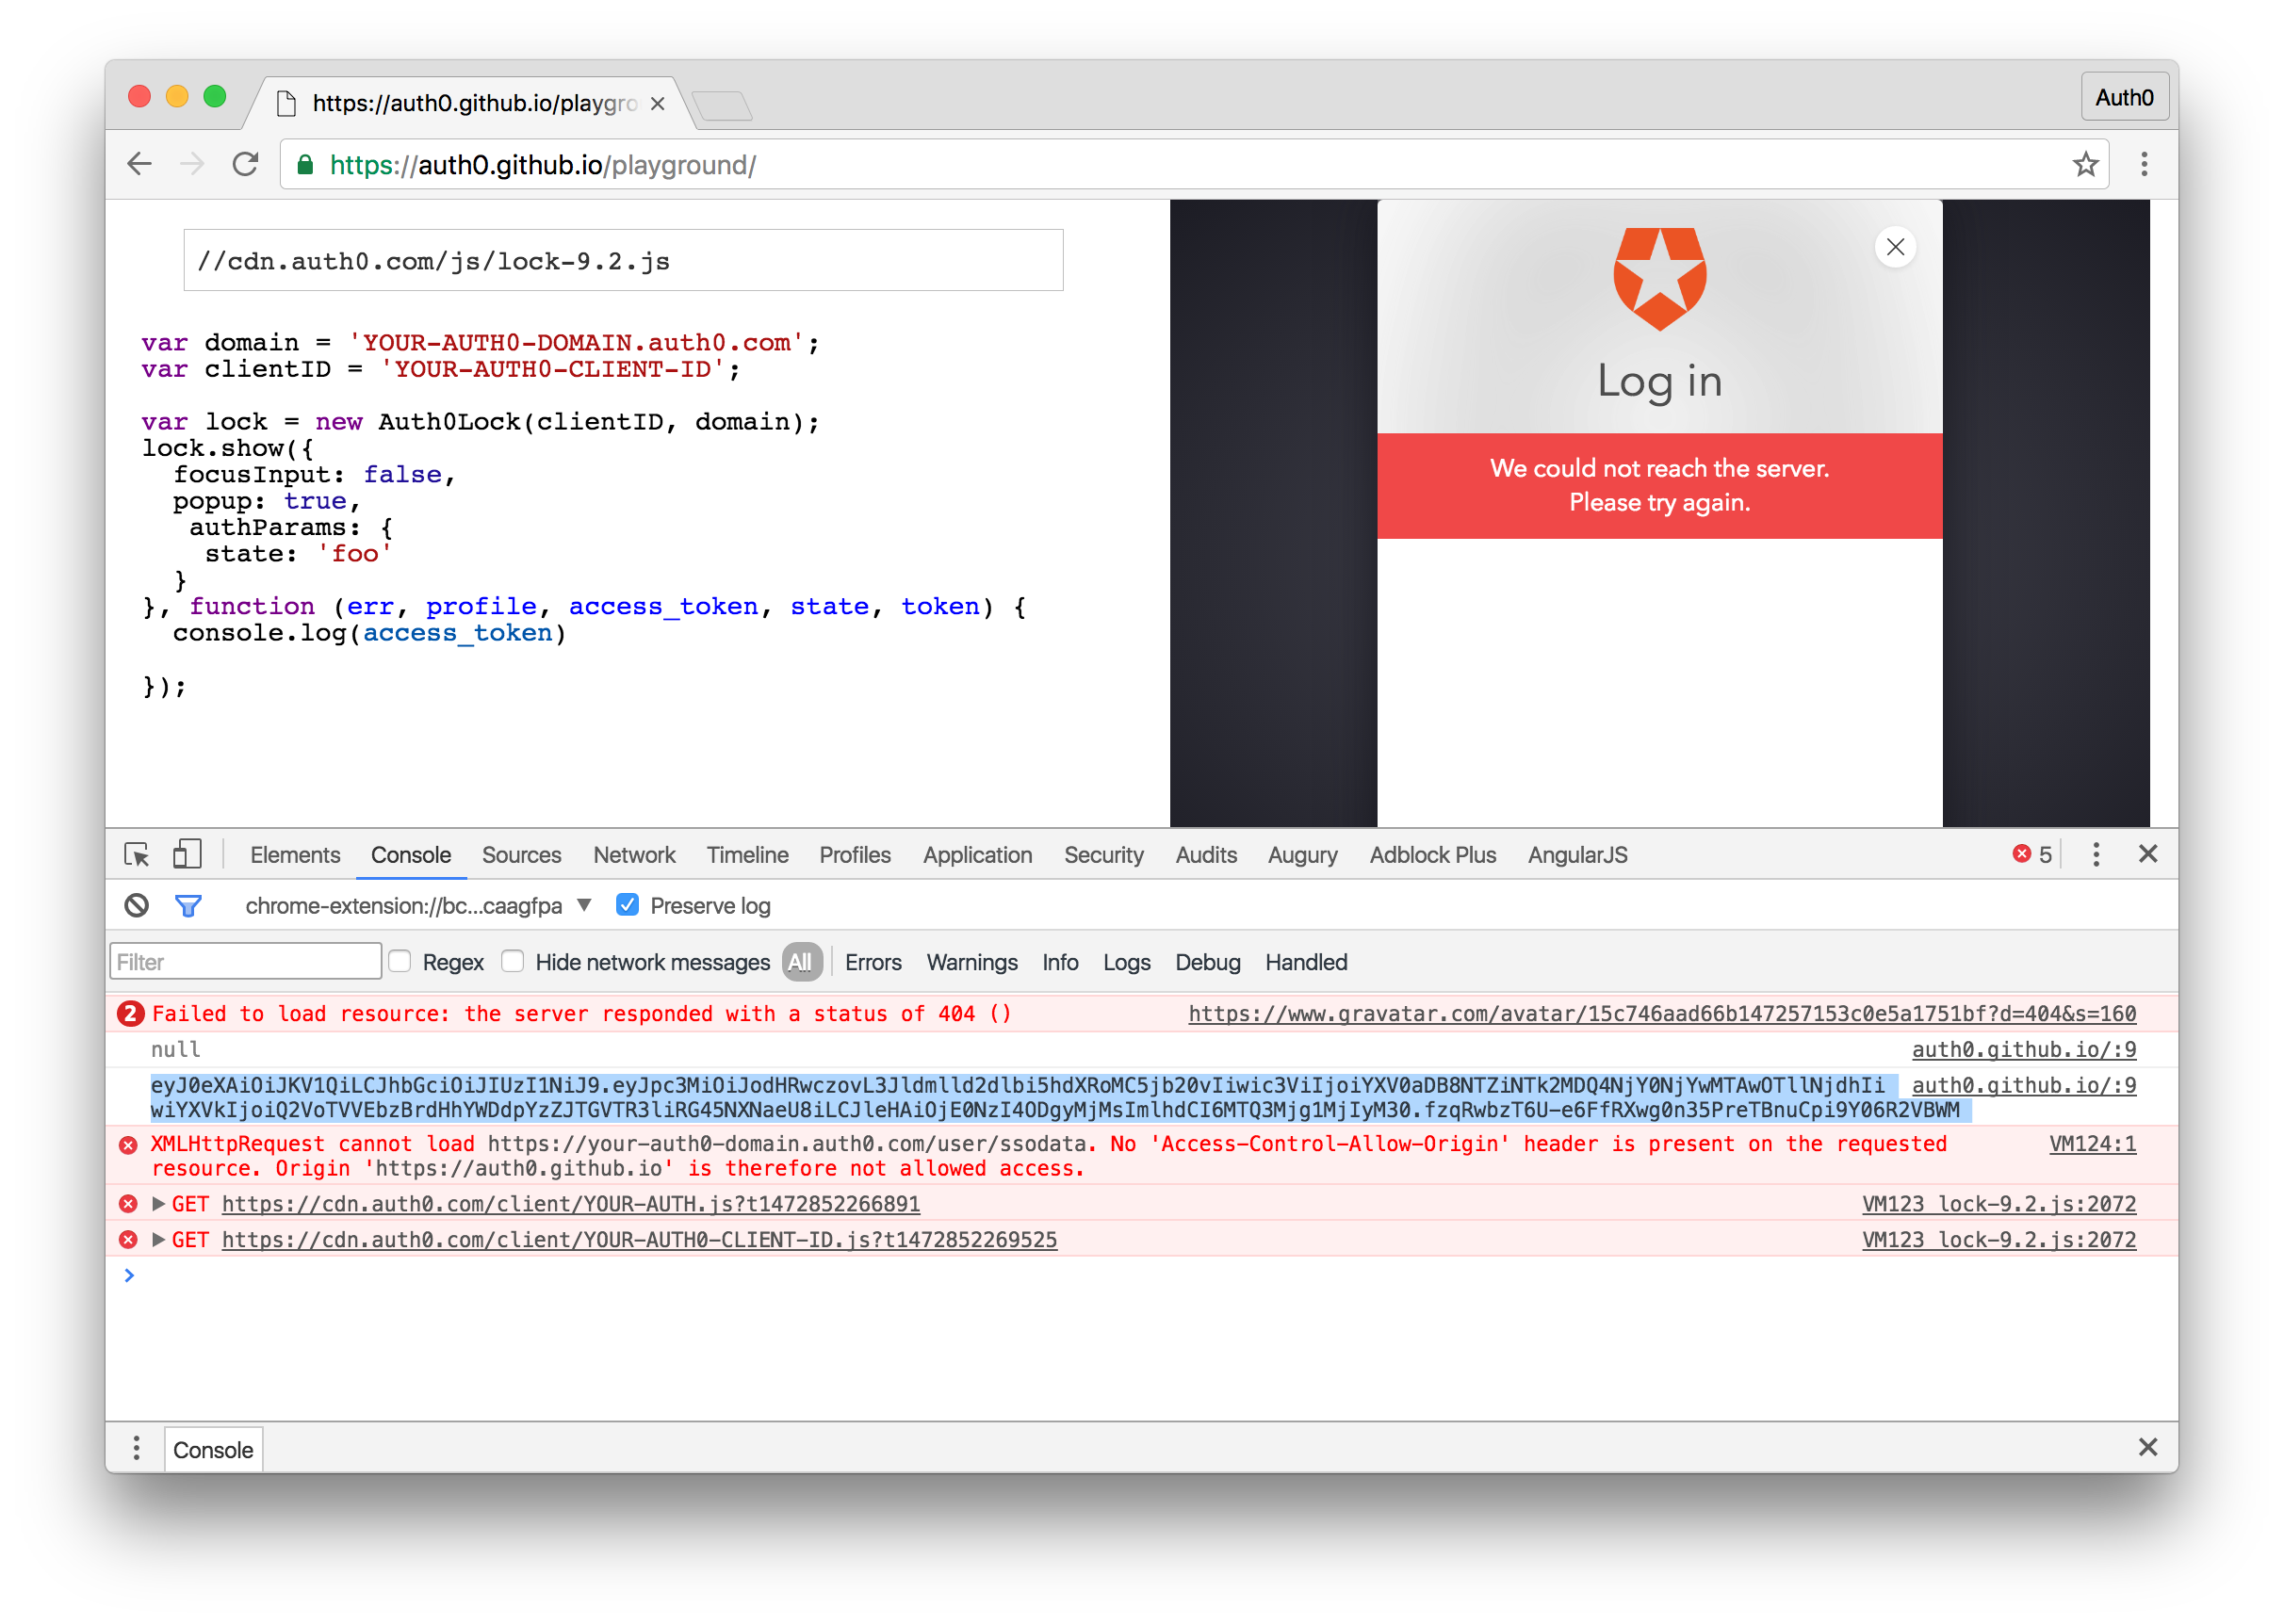
Let's send a request with a valid JWT. The easiest way to get a valid JWT for our Auth0 implementation is to visit the Auth0 playground. Here, all you need to do is add your ClientID and Domain and you will be able to login with the Lock widget. Let's console.log the token we get upon a succesful login and copy it. For reference, our Auth0 playground code will be:
var domain = 'YOUR-AUTH0-DOMAIN.auth0.com';
var clientID = 'YOUR-AUTH0-CLIENTID';

var lock = new Auth0Lock(clientID, domain);
lock.show({
  focusInput: false,
  popup: true,
   authParams: {
    state: 'foo'
  }
}, function (err, profile, access_token, state, token) {
  // Console.log the access_token or JWT
  console.log(access_token)
});
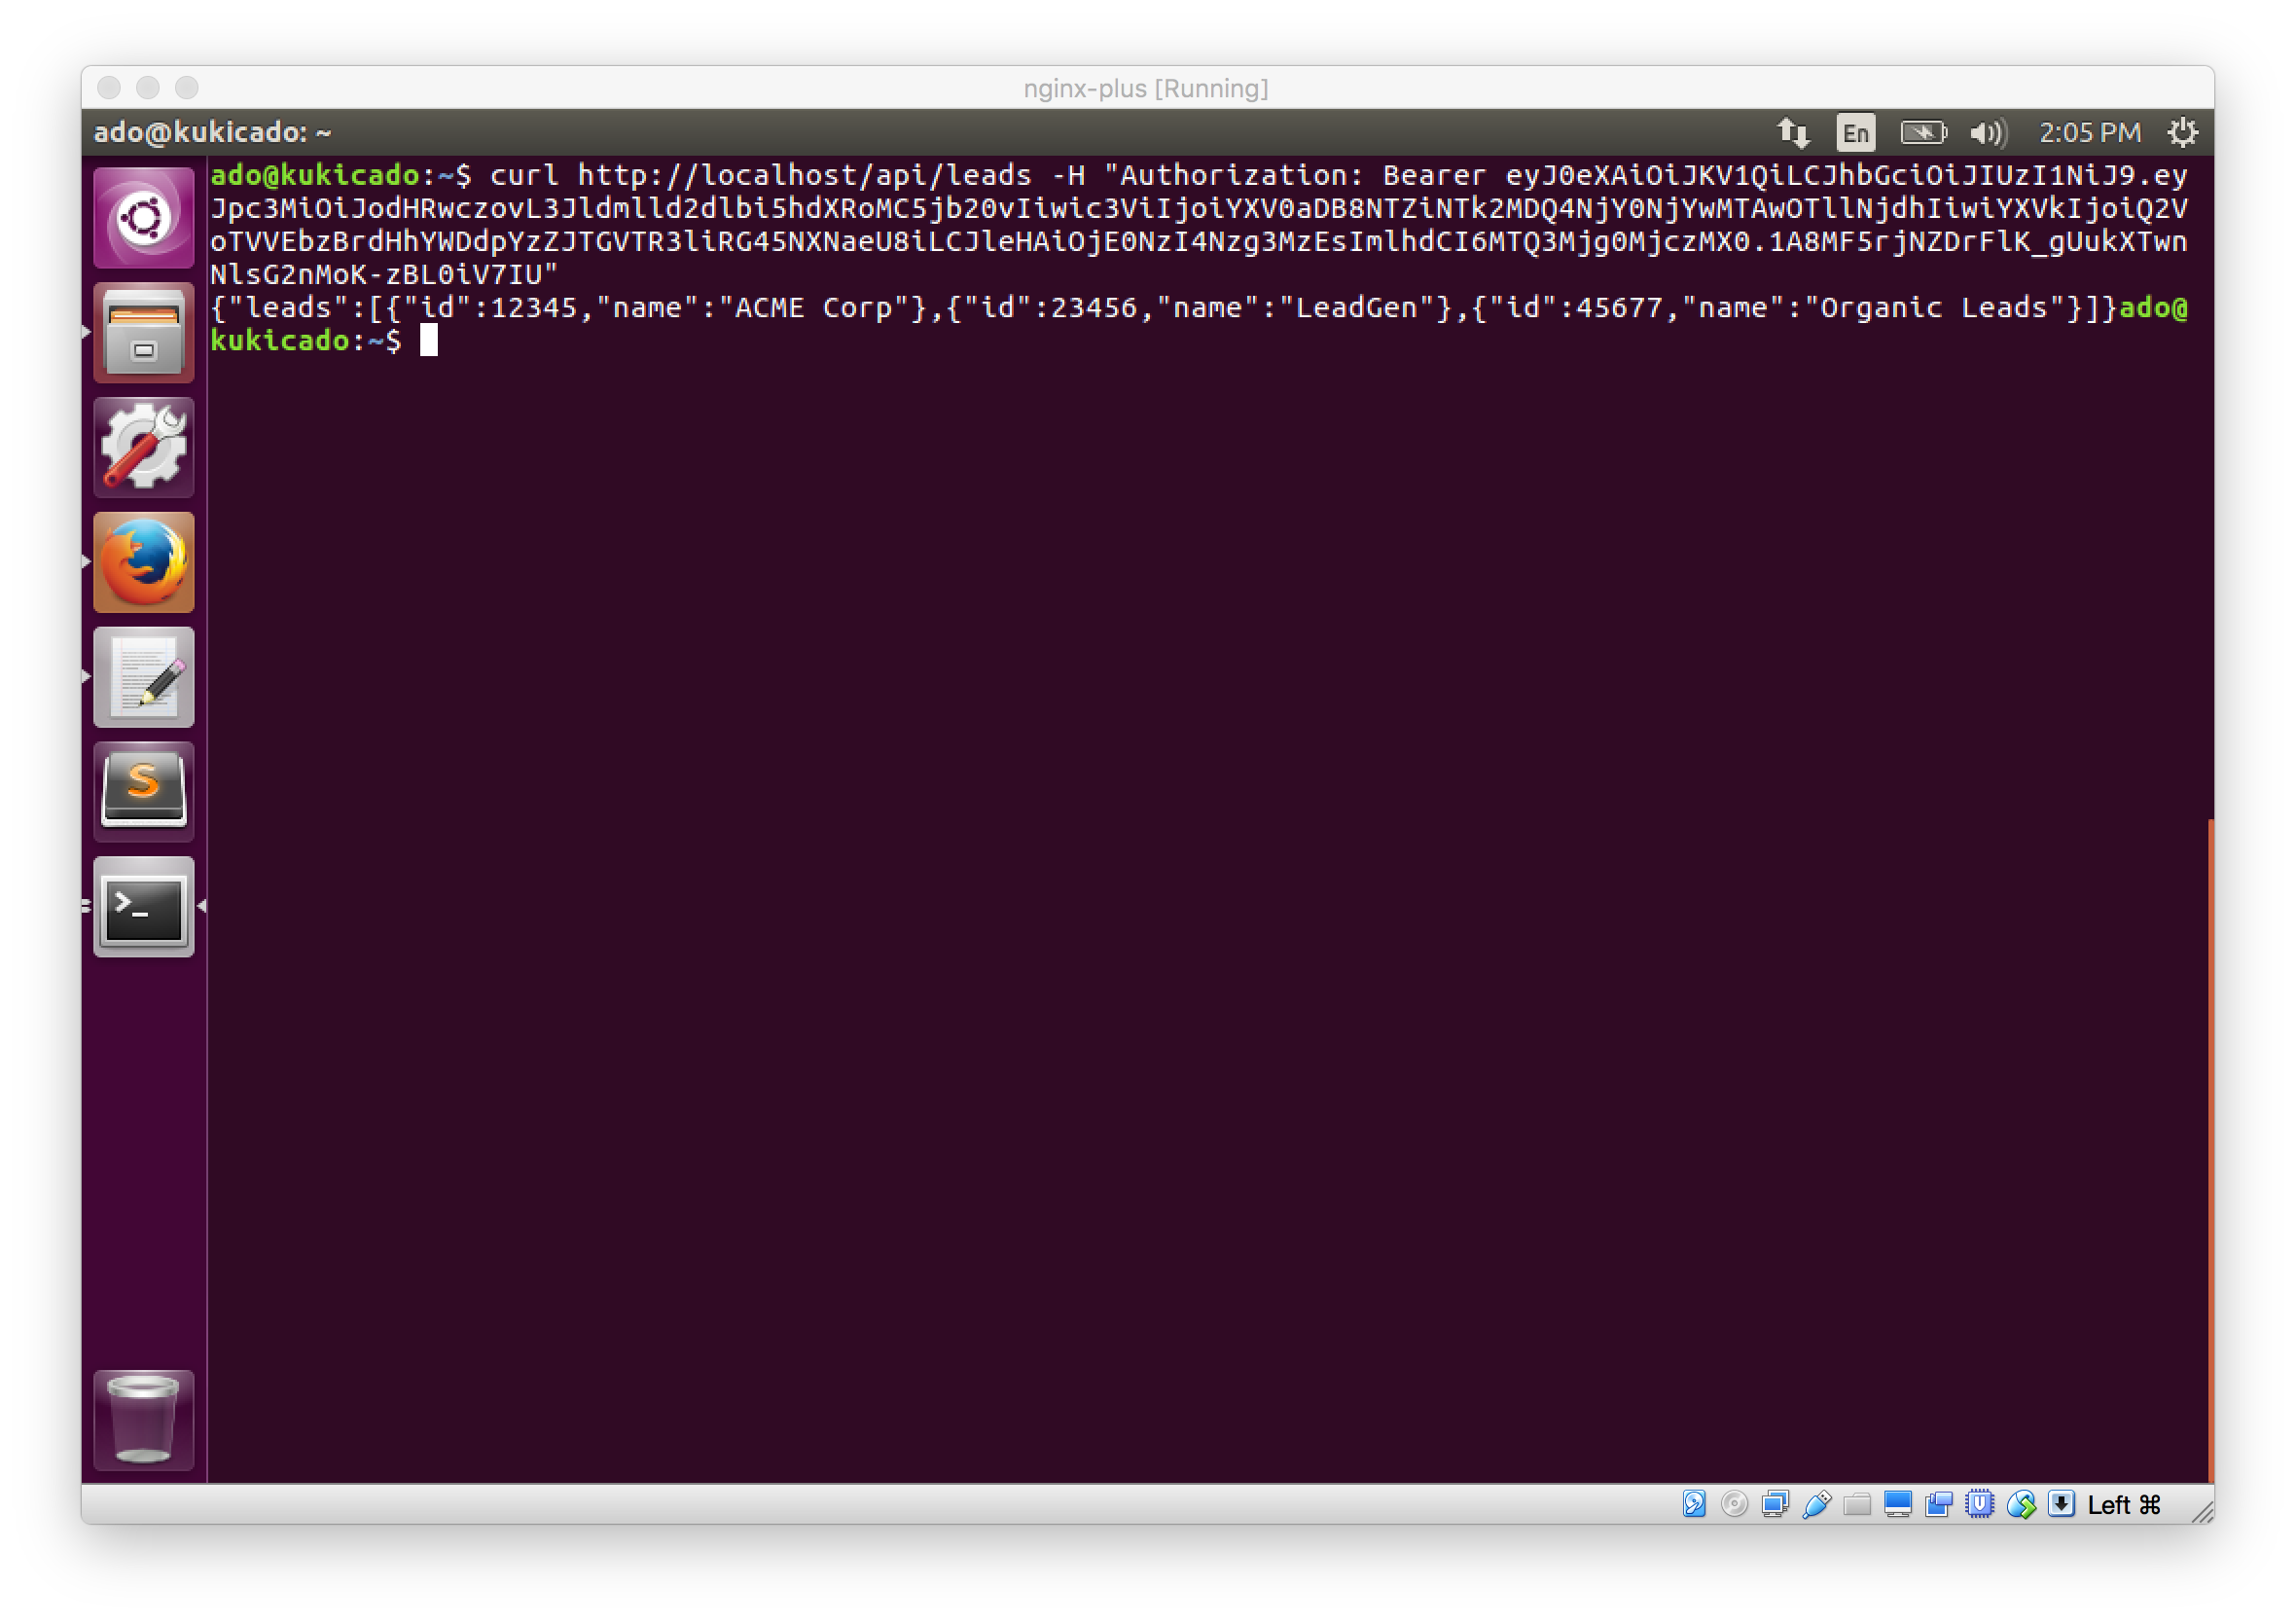
Now that we have a valid JWT, let's make another request to our NGINX server, this time passing the JWT alongside the request. To accomplish this, we'll use curl, but you can use a GUI app like Postman to do this as well. Our command to the server will be as follows:
curl http://localhost/api/leads -H "Authorization: Bearer {JWT}"
The -H flag will append a header which we'll define as the Authorization header. The Authorization header value requires the word Bearer followed by a space and then the JWT. Let's run this command by hitting the return or enter key and our response will be the list of leads we defined in our Node.js server.
To double check and make sure that this works, try making a request without passing the Authorization header. Try running curl http://localhost/api/leads and you'll see the 401 Unauthorized response.
By default NGINX Plus looks for the Authorization header with the JWT, but we can easily change this so we can send the token as a query parameter or even a cookie. For directions on how to do that, check out this post on the NGINX Plus blog.
Note: Notice that on your local machine, you can go to localhost:9000/api/leads and see the response. This is intended as we are not validating JWTs on our Node.js server. In a real world scenario, you would not allow direct access to localhost:9000 outside of your private network.
Conclusion
Today, we looked at how NGINX Plus can take the burden of validating JWTs off our application servers. We showed how you can integrate Auth0's identity platform to handle the issuance of JWTs. Since we adhere to standards, everything we covered today is also applicable to non-Auth0 JWT implementations, but for the quickest and most secure option, give us a try.
About the author

Ado Kukic
Former Auth0 Employee (Auth0 Alumni)