
TL;DR: In the second part of this tutorial, you will learn how to integrate your Android application with a backend API. For starters, you will spin up a simple REST API (you will have different alternatives to achieve that), then you will adjust your app to replace the static to-do list with one provided by this API. In the end, you will leverage the app integration with Auth0 to make it use a private (also referred to as secured) endpoint to persist new to-do items. You can find the final code developed in this article in the following GitHub repository: Android Tutorial, Part 2: Building and Securing Your First App.
“Learn how to build and secure Android apps and how to integrate them with backend APIs!”
Tweet This
Previously, on Part 1
In the first part of this tutorial, you started by scaffolding a new Android project with the help of Android Studio, then you configured your app to use the Android Material component library to enhance the User Interface (UI). After that, you learned how to show a static list of to-do items in your app and how to create a form to enable users to insert new items. In the end, you learned how to handle user registration and authentication in your Android app with Auth0.
If you haven't followed the instructions on the previous part, you can fork and clone this GitHub repository to get a copy of the app created there. However, before proceeding, make sure you follow the instructions on the Creating and configuring an Auth0 account and Adding and configuring the Auth0 dependency sections to configure the app with your Auth0 properties.
Spinning Up a Backend API
In this section, you will spin up a backend API locally to support your Android app. This API will provide to your app two endpoints:
- a public one that returns a list of to-do items;
- and a private one that allows authenticated users to add new items to this list.
With this API, you will have the opportunity to learn how to handle these two different types of endpoints (public and private) in your Android app.
To run this API, you have two alternatives. You can either clone a GitHub repository and use Node.js to run the API, or you can use Docker to fetch an image from Docker Hub and run it in a container. Feel free to choose the alternative that suits your better.
Using Node.js and NPM to run the backend API
If you prefer to run the API with Node.js, you will have to clone this GitHub repository, then you will have to use NPM to install its dependencies and run it in your machine. The following commands will help you achieve that:
# clone the repository
git clone https://github.com/auth0-blog/to-dos-api-express.git

# move into it
cd to-dos-api-express

# install the dependencies
npm install

# run it locally
npm start
Note: As this project depends on an in-memory MongoDB database to run, the
npm installcommand might take a few seconds to download this database and complete the operation.
Using Docker to run the backend API
If you prefer using Docker instead of Node.js and NPM, you can use the following command to create a containerized instance of the backend API:
# use docker to run the backend API
docker run -p 3001:3001 -d --name to-dos-api auth0blog/to-dos-api-express
Note: To run the command above, you will need Docker installed in your machine. If you don't have this tool yet and would prefer using this approach, check this resource.
This command will download this Docker image and use it to run a container called to-dos-api that listens on port 3001.
Testing the backend API
After following the instructions above to run the backend API, you can issue HTTP requests to the public endpoint to test if everything is working as expected. For example, if you are on Unix-like systems (e.g., Ubuntu, Fedora, or Mac OS), you can issue the following curl command to test the API:
# issuing a GET HTTP request to the public endpoint
curl localhost:3001
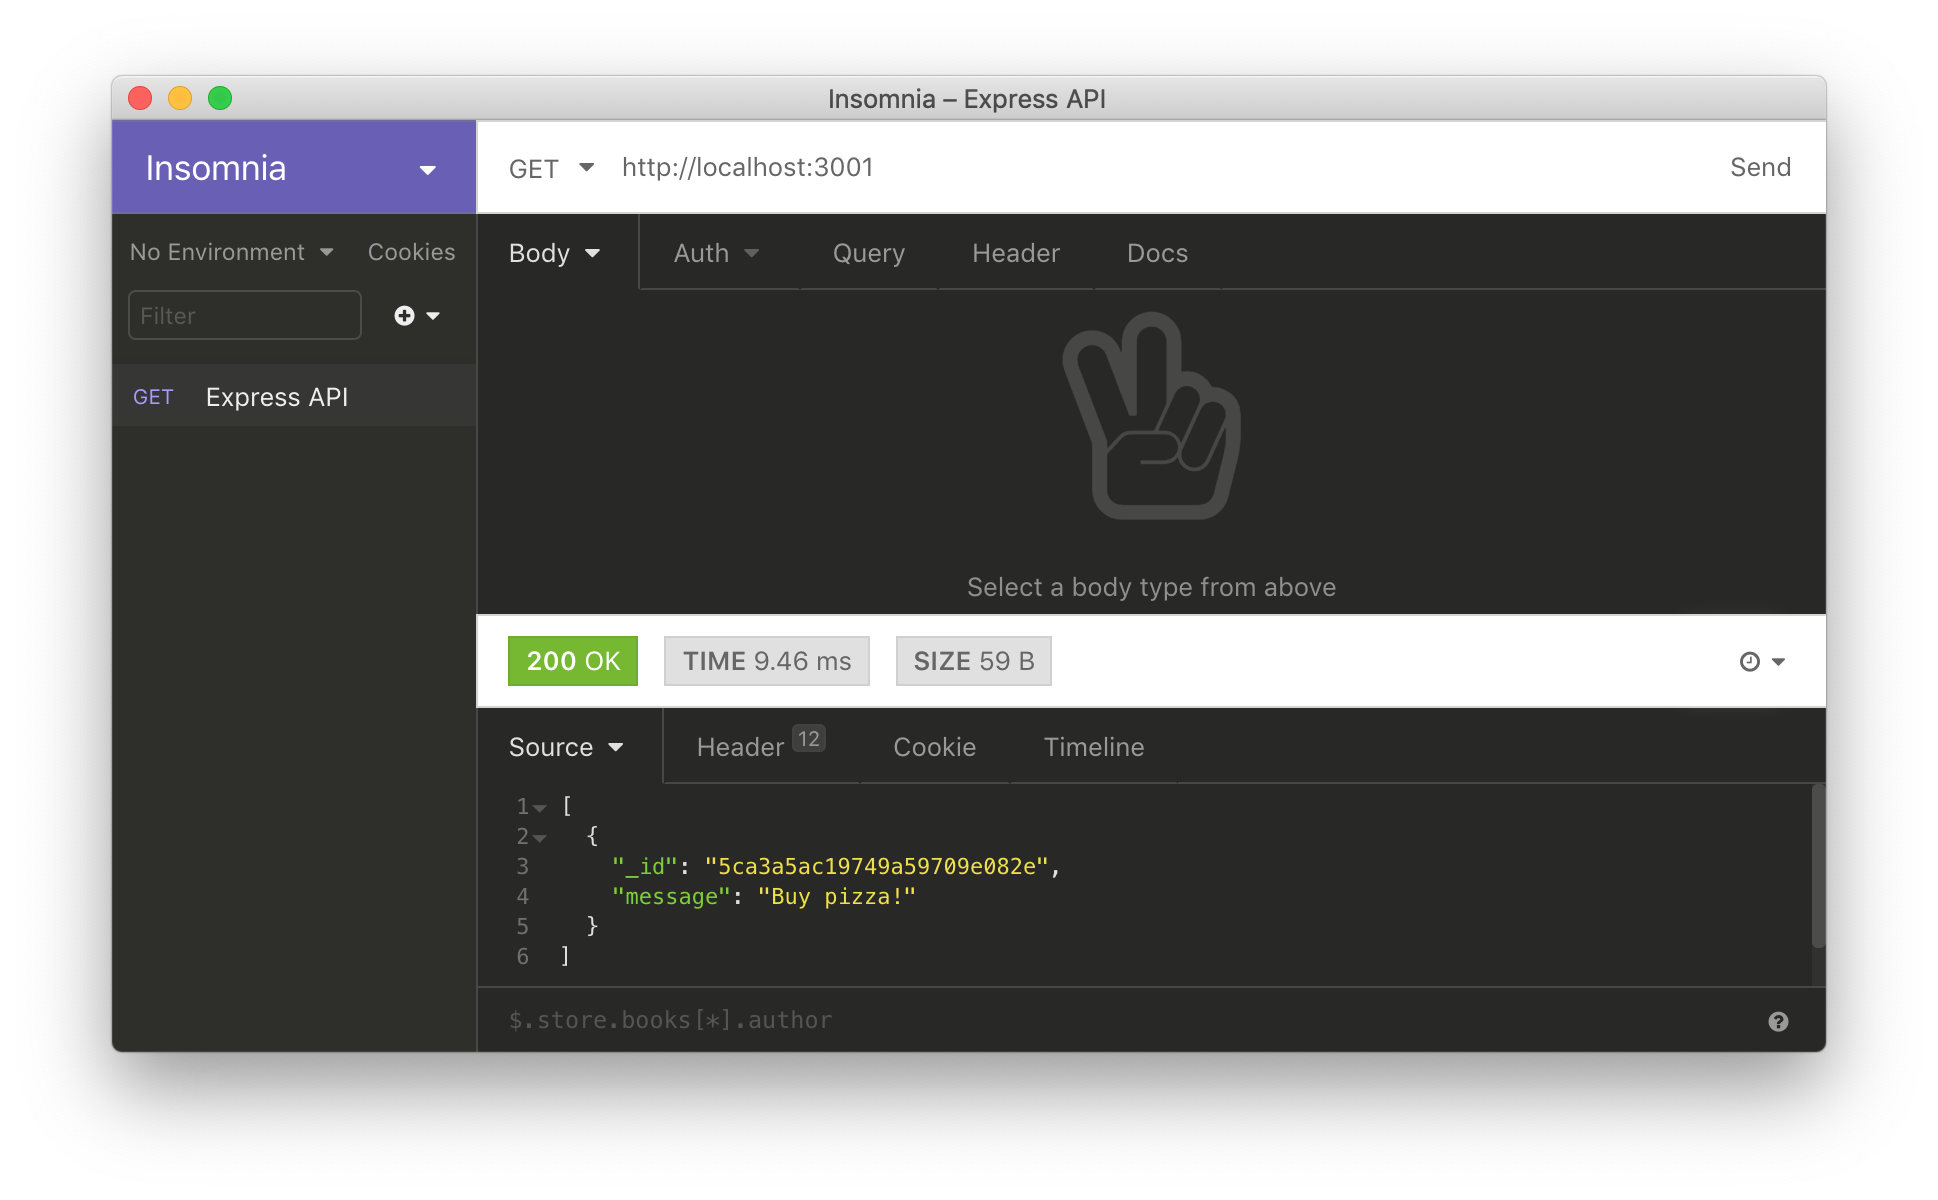
If you prefer using a graphical HTTP client (like Postman or Insomnia), you will have to configure it to issue a GET HTTP request to http://localhost:3001.
Consuming Backend APIs in Android Apps
After spinning up the backend API, you are ready to start working on your Android app again. In this section, you will replace the static to-do list that your app loads with one provided by the API. To issue requests to your API, you will use a popular Android HTTP library called Volley.
So, back on Android Studio, you will open the build.gradle file and update it as follows:
// ./app/build.gradle

dependencies {
    // ... leave the rest untouched and add ...
    implementation 'com.android.volley:volley:1.1.1'
}
Then, you will click on the Sync Now link that the IDE shows to download Volley. After that, you will open the AndroidManifest.xml file and update it as follows:
<!-- ./app/src/main/AndroidManifest.xml -->

<manifest ...>

    <uses-permission android:name="android.permission.INTERNET" />

    <application
        ...
        android:usesCleartextTraffic="true">
        <!-- activities definition -->
    </application>

</manifest>
You are making two changes in this file:
- First, you are adding a setting (
uses-permission) that tells the Android device that your app needsINTERNETto function. - Second, you are adding a property (
usesCleartextTraffic) to your app definition to tell the Android device that your app is allowed to use insecure HTTP connections. Without this configuration, you would need to use HTTPS in your backend API while testing the application.
Note: It is highly recommended that you do not publish a production-ready Android app with the
usesCleartextTraffic="true"property. To release secure applications, you must ensure that your backend APIs can handle HTTPS connections and that your apps use them.
After making these adjustments to your app, the next thing you will do is to create an entity model to represent the to-do item returned by the backend API. To do so, create a new class called ToDoItem inside the com.auth0.todo package and add the following code to it:
// ./app/src/main/java/com/auth0/todo/ToDoItem.java

package com.auth0.todo;

public class ToDoItem {
    private final String id;
    private final String message;

    ToDoItem(String _id, String message) {
        this.id = _id;
        this.message = message;
    }

    public String getId() {
        return id;
    }

    public String getMessage() {
        return message;
    }
}
As you can see, the to-do items that the API return are quite simple. They have only two properties: id and message. The id property is the identifier of an item on the backend API, and the message property is the description of this item. You will use this entity to parse the results returned by the API and, on the next section, to serialize data while pushing new items to it.
With that in place, the next thing you will have to do is to open the ToDoListAdapter class and replace its code with this:
// ./app/src/main/java/com/auth0/todo/util/ToDoListAdapter.java

package com.auth0.todo.util;

import android.content.Context;
import android.view.LayoutInflater;
import android.view.View;
import android.view.ViewGroup;
import android.widget.BaseAdapter;
import android.widget.TextView;

import com.auth0.todo.R;
import com.auth0.todo.ToDoItem;

import java.util.ArrayList;
import java.util.List;

public class ToDoListAdapter extends BaseAdapter {
    private LayoutInflater inflater;
    private List<ToDoItem> toDoList = new ArrayList<>();

    public ToDoListAdapter(Context context) {
        inflater = LayoutInflater.from(context);
    }

    @Override
    public View getView(int position, View view, ViewGroup parent) {
        ToDoItem toDoItem = (ToDoItem) getItem(position);
        if (view == null) {
            view = inflater.inflate(R.layout.to_do_item, null);
        }

        TextView textView = view.findViewById(R.id.to_do_message);
        textView.setText(toDoItem.getMessage());

        return view;
    }

    @Override
    public Object getItem(int position) {
        return toDoList.get(position);
    }

    @Override
    public long getItemId(int position) {
        return position;
    }

    @Override
    public int getCount() {
        return toDoList.size();
    }

    public void setToDoList(List<ToDoItem> toDoList) {
        this.toDoList = toDoList;
        notifyDataSetChanged();
    }
}
The changes you are making here are related to replacing String with the new entity class (i.e., with ToDoItem). You need this because, instead of handling lists of strings, your app will now handle lists of instances of this entity class.
Lastly, open the MainActivity class and replace its code with this:
// ./app/src/main/java/com/auth0/todo/MainActivity.java

package com.auth0.todo;

import android.content.Intent;
import android.os.Bundle;
import android.view.View;
import android.widget.ListView;

import com.android.volley.RequestQueue;
import com.android.volley.Response;
import com.android.volley.VolleyError;
import com.android.volley.toolbox.JsonArrayRequest;
import com.android.volley.toolbox.Volley;
import com.auth0.todo.identity.AuthAwareActivity;
import com.auth0.todo.util.ToDoListAdapter;

import org.json.JSONArray;
import org.json.JSONException;
import org.json.JSONObject;

import java.util.ArrayList;
import java.util.List;

import androidx.appcompat.app.AlertDialog;

public class MainActivity extends AuthAwareActivity implements Response.Listener<JSONArray>, Response.ErrorListener {
    private ToDoListAdapter toDoListAdapter;

    @Override
    protected void onCreate(Bundle savedInstanceState) {
        super.onCreate(savedInstanceState);
        setContentView(R.layout.activity_main);

        // create and configure the adapter
        this.toDoListAdapter = new ToDoListAdapter(this);
        ListView microPostsListView = findViewById(R.id.to_do_items);
        microPostsListView.setAdapter(toDoListAdapter);

        // issue the request
        String url = "http://10.0.2.2:3001";
        RequestQueue queue = Volley.newRequestQueue(this);
        JsonArrayRequest microPostsRequest = new JsonArrayRequest(url, this, this);
        queue.add(microPostsRequest);
    }

    @Override
    public void onResponse(JSONArray response) {
        try {
            List<ToDoItem> toDoItems = new ArrayList<>(response.length());
            for (int i = 0; i < response.length(); i++) {
                JSONObject item = response.getJSONObject(i);
                String id = item.getString("_id");
                String message = item.getString("message");

                toDoItems.add(new ToDoItem(id, message));
            }
            toDoListAdapter.setToDoList(toDoItems);
        } catch (JSONException error) {
            new AlertDialog.Builder(this)
                    .setTitle("Error")
                    .setMessage(error.toString())
                    .show();
        }
    }

    @Override
    public void onErrorResponse(VolleyError error) {
        toDoListAdapter.setToDoList(new ArrayList<ToDoItem>());
        new AlertDialog.Builder(this)
                .setTitle("Error")
                .setMessage(error.getMessage())
                .show();
    }

    public void openToDoForm(View view) {
        if (authenticationHandler.hasValidCredentials()) {
            startActivity(new Intent(this, ToDoFormActivity.class));
        }
    }
}
The list below summarizes the changes made here:
You are making this class implement two Volley interfaces:
Response.Listener<JSONArray>andResponse.ErrorListener. By implementing these interfaces, you make this class capable of handling successful and unsuccessful responses sent by the API.You are making this class use Volley to issue an HTTP request to the
http://10.0.2.2:3001URL. Your app will issue this request when Android uses this class to create an activity (onCreate(Bundle savedInstanceState)). As described on the Set up Android Emulator networking resource, you can use the10.0.2.2IP address to make an app on an Android emulator communicate with the development machine (3001is the port of the backend API in your machine). As such, if you are using a real device, you will have to replace this IP address.You are implementing the
onResponsemethod (which is defined by theResponse.Listenerinterface) to transform theresponsesent by the API into a list of to-do items (List<ToDoItem>). Then, you are using this list to update thetoDoListAdapter, which ends up updating the UI as well.You are implementing the
onErrorResponsemethod (which is defined by theResponse.ErrorListenerinterface) to handle errors that occur while issuing requests to the API. In this case, you are clearing up thetoDoListAdapter(which removes all items from the UI) and showing a quick error message (with the help of theAlertDialogclass) describing the problem.You are changing the way your app starts the
ToDoFormActivityclass. Now, instead of expecting a result back from this activity, you will let it work detached from theMainActivity. By doing that, when your users finish using theToDoFormActivity, your app will recreate theMainActivityand will fetch a new (and up-to-date) to-do list.
After changing the MainActivity class, you are ready to see the new version of your app in action. So, click on the green play button and wait until the IDE finishes building and running the app. If everything works as expected, you will see your new app running on the Android device and showing a single to-do item: "Buy pizza!".

Consuming Private Endpoints in Android Apps
After learning how to make your Android app consume a public endpoint, the next thing you will do is to learn how to integrate it with a private/secure endpoint. As you are already using Auth0 to secure your app, you will use this service to secure your backend API as well. Then, you will use access tokens to secure the communication (the HTTP requests) between the two parties: the app and the API.
An access token is a credential that can be used by an application to access an API. They inform the API that the bearer of the token has been authorized to access the API. - Access Tokens
Registering the API on Auth0
While integrating the Android app with Auth0, you needed to create a representation of the app in your Dashboard. Now, you will need to do a similar process, but this time you will register the backend API.
To do so, open the APIs section on your Auth0 dashboard and click on the Create API button. Then, fill in the form presented by Auth0 as follows:
- Name: Enter a friendly name to your API (e.g., "To-Do API")
- Identifier: Enter
https://to-dos-api. Auth0 recommends using an URL-like identifier, but this doesn't need to be a real URL. - Signing Algorithm: Leave this field as
RS256.
After that, click on the Create button to finish the process.
Running a secure backend API
Now that you have your API registered in your Auth0 dashboard, you will need to run another version of the backend API you started earlier. This new version was configured to secure the endpoint that accepts new to-do items. So, if you are running the backend API with Node.js, stop the server (Ctrl + C), and issue the following commands to start the new version:
# checkout the auth0 branch
git checkout auth0

# install the new dependencies
npm install

# set your env variables
export AUTH0_DOMAIN=...
export AUTH0_API=...

# run the application
npm start
Note that you must use your Auth0 properties to set the environment variables defined above. More specifically, set AUTH0_DOMAIN to the domain you chose while creating your Auth0 account (or tenant) (e.g., blog-samples.auth0.com), and AUTH0_API to the identifier of the API you just created (i.e., https://to-do-api).
On the other hand, if you decided to use Docker to run your backend API, you will have to run the following commands:
# stop and remove the to-dos instance
docker rm -f to-dos

# set your env variables
AUTH0_DOMAIN=...
AUTH0_API=...

# run the auth0 version of the image
docker run \
  -p 3001:3001 \
  -e "AUTH0_DOMAIN="$AUTH0_DOMAIN \
  -e "AUTH0_API="$AUTH0_API \
  --name to-dos \
  -d auth0blog/to-dos-api-express:auth0
Just like on the Node.js alternative, use your Auth0 properties to set the environment variables defined above. That is, set AUTH0_DOMAIN to the domain you chose while creating your Auth0 account (or tenant) (e.g., blog-samples.auth0.com), and AUTH0_API with the identifier of the API you just created (i.e., https://to-do-api).
After running the new version of the backend API, you can test it to see if it is working. If you are on a Unix-like system, you can check the API with the following commands:
# issue a GET request
curl http://localhost:3001

# issue a POST request
curl -X POST -H 'Content-Type: application/json' -d '{
  "message": "Buy some milk."
}' http://localhost:3001/
If everything works as expected, the first command will get you a list of to-do items, just like before. However, the second request will not work. As the new version of the API is restricting access to the POST endpoint, you will need access tokens to be able to insert items again. Luckily, you already configured your Android app to get these tokens when your users log in.
Note: If you would like to learn how to build the backend API you are using, check this resource: Node.js and Express Tutorial: Building and Securing RESTful APIs.
Adding new to-do items to the secure API
With the new backend API up and running, you can head back to your Android project and adjust it to send new to-do items to the API. There, open the ToDoFormActivity class and replace its code with this:
// ./app/src/main/java/com/auth0/todo/ToDoFormActivity.java

package com.auth0.todo;

import android.content.Context;
import android.content.Intent;
import android.os.Bundle;
import android.view.View;
import android.widget.EditText;

import com.android.volley.Request;
import com.android.volley.RequestQueue;
import com.android.volley.Response;
import com.android.volley.VolleyError;
import com.android.volley.toolbox.JsonObjectRequest;
import com.android.volley.toolbox.Volley;
import com.auth0.todo.identity.AuthAwareActivity;

import org.json.JSONException;
import org.json.JSONObject;

import java.util.HashMap;
import java.util.Map;

import androidx.appcompat.app.AlertDialog;

public class ToDoFormActivity extends AuthAwareActivity {

    @Override
    protected void onCreate(Bundle savedInstanceState) {
        super.onCreate(savedInstanceState);
        setContentView(R.layout.activity_to_do_form);
    }

    public void addToDoItem(View view) {
        EditText editText = findViewById(R.id.editText);
        String message = editText.getText().toString();

        try {
            final Context context = this;
            JSONObject newPost = new JSONObject();
            newPost.put("message", message);

            String url = "http://10.0.2.2:3001";
            JsonObjectRequest postRequest = new JsonObjectRequest(Request.Method.POST, url, newPost,
                    new Response.Listener<JSONObject>() {
                        @Override
                        public void onResponse(JSONObject response) {
                            startActivity(new Intent(context, MainActivity.class));
                        }
                    },
                    new Response.ErrorListener() {
                        @Override
                        public void onErrorResponse(VolleyError error) {
                            new AlertDialog.Builder(context)
                                    .setTitle("Error")
                                    .setMessage(error.getMessage())
                                    .show();
                        }
                    }
            ) {
                @Override
                public Map<String, String> getHeaders() {
                    Map<String, String> headers = new HashMap<>();
                    headers.put("Authorization", "Bearer " + authenticationHandler.getAccessToken());
                    return headers;
                }
            };

            // Add the request to the RequestQueue.
            RequestQueue queue = Volley.newRequestQueue(context);
            queue.add(postRequest);
        } catch (JSONException e) {
            System.out.println(e.getMessage());
        }
    }
}
The new version of this file updates the implementation of the addToDoItem method to use Volley to issue a request to the backend API. As you can see, this method creates an instance of the JSONObject class and adds an attribute called message to it (this attribute gets the value that the user inputs on the text field). Then, this method uses JsonObjectRequest to issue a POST HTTP request to your backend API with the JSONObject instance.
Note: Just like the one that the
MainActivityissues, this request is aiming at thehttp://10.0.2.2:3001URL (which is the IP address of the host machine that is running the Android emulator). So, if you are not using an emulator (i.e., if you are using a real device), make sure you replace this URL accordingly.
If everything works as expected, Volley will call the onResponse implementation you defined, which will make your app send the user back to the main activity. If an error occurs, Volley will call the onErrorResponse implementation, which will show a new AlertDialog with the error message.
What is important to notice in that the JsonObjectRequest you are creating is overriding (@Override) the getHeaders method to add the access token (authenticationHandler.getAccessToken()) in the Authorization header. As explained in Auth0's documentation:
Access tokens should be used as a Bearer credential and transmitted in an HTTP
Authorizationheader to the API. - Access Tokens
With that in place, you can rerun your Android app. After using your app to log in, by clicking on the + floating button you will be able to use the ToDoFormActivity to add new items to the backend API.
Conclusion
“I just built my first Android app and made it consume a secure backend API!”
Tweet This
Bingo! You just learned how to build and secure Android apps with ease. In this series, you started from scratch, creating a brand new Android project. Then you went all the way to make an app that allows users to log in and that communicates with a secure backend API to persist data. With this setup, you are ready to move on and start building amazing and production-ready apps.
About the author

Bruno Krebs
R&D Content Architect (Auth0 Alumni)