
TL;DR: HTML forms might seem like a trivial matter, but they are important to get right. In this tutorial we will look at how to implement forms with Angular 2 and learn about the classes provided by the framework to do so. We'll see how to introduce validation to our forms, and even create a real-life asynchronous validator to check some input against an API. Check out the repo to go straight to the code.
If you'd like to see our other Angular 2 content, we've also covered pipes, dependency injection, HTTP, authentication, and routing.
Whether we like it or not, forms are arguably one of the most important aspects of any web application. While it might be tempting to simply do the bare minimum when it comes to wiring up forms, we really should give them a good amount of attention. Users primarily interact with our applications through forms, which means a lack of thought towards their implementation can do anything from annoy our users to lead them to look at using competing apps.
Angular 2 comes with a brand new approach to forms that makes it easier to construct and apply validation to them. Using the FormBuilder class, we have access to a set of built-in validators that take care of the basics for us and, when we want to get fancy, we can easily write our own. Angular 2 forms also support asynchronous validation, which allows us to do some really cool things like send requests to a backend to check whether a username or email is already taken.
In this tutorial, we'll take a look at how to use the classes and directives related to forms in Angular 2 by creating a series of user registration forms. We'll start out with the most basic of Angular 2 forms: one in which we just need the NgForm directive. After that, we'll move into more complex scenarios and introduce validation. We'll finish off by writing our own async form validator which sends a request to a NodeJS API to check for whether or not a username or email already exist.
Getting Started
We'll be using a real backend for this tutorial which is a HapiJS app that allows us to create and login users. Clone the project and fire up the server to use it with the code samples here.
Creating a Simple Angular 2 Form
If you don't already have an Angular 2 project wired up, a good way to get started is to grab a seed project such as ng2-play. Alternatively, you can install the angular-cli (which I'm basing this tutorial on) to generate an app.
Once that's done, let's create a component for our first form. We'll start with the HTML.
  <!-- src/client/app/simple-form/simple-form.component.html -->

  <form #registrationForm="ngForm" (ngSubmit)="registerUser(registrationForm.value)">

    <div class="form-group">
      <label for="username">Username</label>
      <input id="username" type="text" class="form-control" placeholder="Username" ngControl="username">
    </div>

    <div class="form-group">
      <label for="email">Email</label>
      <input id="email" type="text" class="form-control" placeholder="Email" ngControl="email">
    </div>

    <div class="form-group">
      <label for="password">Password</label>
      <input id="password" type="password" class="form-control" placeholder="Password" ngControl="password">
    </div>

    <div class="form-group">
      <button type="submit" class="btn btn-primary">Register</button>
    </div>

  </form>
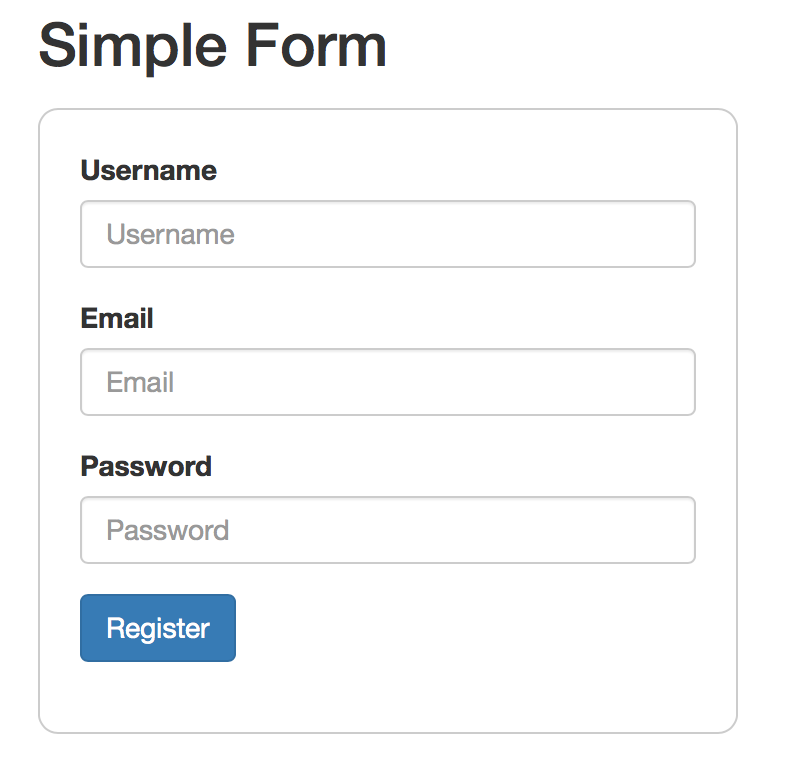
We've got what looks like a pretty standard form that uses Bootstrap for styling. The important things to note for this form are the directives that we're using, which include ngForm, ngSubmit, and ngControl. When we use the hash as we are with #registrationForm="ngForm", we're creating a local variable for the form that is pointed to the ngForm directive. This means we can now use registrationForm's properties and methods elsewhere within our <form>.
One of the properties that an ngForm instance has is value which is an object that has keys and values for any elements that we have an NgControl directive on. So what exactly is NgControl? Well, it's a class that binds a Control object to an element. In this case, the element that it's applied to is an input. We'll take a closer look at Control objects later on.
This is really all we need in our HTML to have our form wired up, but we also need to tell the component class that we want to have access to the form directives that come from Angular 2. At the same time, let's create the function that will be responsible for sending our user data to the backend.
// src/client/app/simple-form/simple-form.component.ts

import {Component} from 'angular2/core';
import {FORM_DIRECTIVES} from 'angular2/common';
import {Http} from 'angular2/http';
import {CREATE_USER_ENDPOINT} from '../shared/api';

@Component({
  moduleId: __moduleName,
  selector: 'simple-form',
  templateUrl: 'simple-form.component.html',
  styleUrls: ['simple-form.component.css'],
  // Here we tell Angular that we want the form
  // directives to be available in this component
  directives: [FORM_DIRECTIVES]
})
export class SimpleFormComponent {

  constructor(private http: Http) {}

  registerUser(user) {
    let data = JSON.stringify(user);
    this.http.post(CREATE_USER_ENDPOINT, data)
      .subscribe(
        data => alert('Your account has been created!'),
        error => alert(error.json().message)
      );
  }

}
We get access to all of the form directives by importing them with FORM_DIRECTIVES. To make them accessible to the component, we need to pass them into the directives array in the @Component decorator. The registerUser method makes a simple POST request to our server with the form data, and we are just doing a simple alert on success or error for now.
Keep in mind that the form data is coming through as the user parameter because we passed registrationForm.value from the template. If we had only passed registrationForm, then we would be getting all of the properties and methods that come along with an NgForm in our registerUser method, which isn't what we want. However, why don't we take a look at some of the useful properties that come with NgForm:
dirty: boolean- indicates whether or not the user has entered any data into the form, even if they delete itpristine: boolean- opposite ofdirtycontrol: ControlGroup- information about theControlGroupthat the form belongs to (more on that later)controls: Object- the individualNgControls that are applied to the input elements
This is a great start--we've got data coming through from the form and it's being sent to the backend to be saved in the database. However, the big flaw here is that we're not doing any kind of validation. Our backend is protected with its own validation, but we should also make sure our front end has good validation in place to improve the user experience. Let's set up validation next.
Adding Validation to the Form
If we want to add validation to our forms then we need to introduce some classes that come with Angular 2 that are particular to them, including FormBuilder, Control and Validators.
FormBuilder will create an object for us so that we can explictly configure our forms. We can then add validation to our individual form inputs by using the static methods that come from the Validators class. To do so, we simply need to pass them into our Controls in the component.
// src/client/app/validated-form/validated-form.component.ts

import {Component} from 'angular2/core';
import {FORM_DIRECTIVES, FormBuilder, Control, ControlGroup, Validators} from 'angular2/common';
import {Http} from 'angular2/http';
import {CREATE_USER_ENDPOINT} from '../shared/api';

@Component({
  moduleId: __moduleName,
  selector: 'validated-form',
  templateUrl: 'validated-form.component.html',
  styleUrls: ['validated-form.component.css'],
  directives: [FORM_DIRECTIVES]
})
export class ValidatedFormComponent {

  registrationForm: ControlGroup;
  username: Control;
  email: Control;
  password: Control;
  submitAttempt: boolean = false;

  constructor(private http: Http, private builder: FormBuilder) {

    // Synchronous validators are passed in as the second
    // argument to our Controls
    this.username = new Control('', Validators.required)
    this.email = new Control('', Validators.required)
    // If we want to use more than one synchronous validators, we need to compose them
    this.password = new Control('', Validators.compose([Validators.required, Validators.minLength(8)]))

    this.registrationForm = builder.group({
      username: this.username,
      email: this.email,
      password: this.password
    });
  }

  registerUser(user) {
    this.submitAttempt = true;
    ...
  }

}
Even though the code here looks new, we were actually using Controls in the simple form case, but we were doing so implicitly by pointing ngControl on our input elements to a name. If we want to give definition to the Control, then we can do so explicitly by pointing our input properties to a new Control.
The first argument that goes in is the initial text that we want to have rendered in the element. Since we don't want anything to be there, we can just provide an empty string. The second argument is for any synchronous validators that we want to use and these can either be ones that Angular provides, or they can be custom ones we create ourselves. The validators that Angular provides are:
required- some input must be providedminLength- a number specifying the minimum length allowedmaxLength- a number specifying the maximum length allowedpattern- a pattern (regex) that the input needs to follow
The validator that we've set up on the Control for password looks a bit different. We want to use two validators on this input, one saying that it's a required field and the other saying that it must have a minimum length of eight digits. To do this, we need to use Validators.compose and provide an array with the validators we're interested in. When we compose validators, any errors that are on an input element will be returned as a union.
After we define our controls, we're registering our entire form as a ControlGroup with the FormBuilder class. By applying a group to our Controls, we can aggregate the values of each of them. It's also easier for us to check for errors because an error in one of the Controls will invalidate the entire group.
We're also creating a property called submitAttempt and setting it to true when we submit the form. This gives us a way to wait until the form has actually been submitted before we report any errors to the user, which is arguably better for their experience. We can also check whether the whole form is valid before we send the user's data to the backend to be saved.
Now we need to apply these changes to the template.
  <!-- src/client/app/validated-form/validated-form.component.html -->

  <form [ngFormModel]="registrationForm" (ngSubmit)="registerUser(registrationForm.value)">

    <div class="form-group" [ngClass]="{ 'has-error' : !username.valid && submitAttempt }">
      <label class="control-label" for="username">Username</label>
      <em *ngIf="!username.valid && submitAttempt">Required</em>
      <input id="username" type="text" class="form-control" placeholder="Username" ngControl="username">
    </div>

    <div class="form-group" [ngClass]="{ 'has-error' : !email.valid && submitAttempt }">
      <label class="control-label" for="email">Email</label>
      <em *ngIf="!email.valid && submitAttempt">Required</em>
      <input id="email" type="text" class="form-control" placeholder="Email" ngControl="email">
    </div>

    <div class="form-group" [ngClass]="{ 'has-error' : !password.valid && submitAttempt }">
      <label class="control-label" for="password">Password</label>
      <em *ngIf="password.hasError('required') && submitAttempt">Required</em>
      <em *ngIf="password.hasError('minlength') && submitAttempt">Must be at least 8 characters</em>
      <input id="password" type="password" class="form-control" placeholder="Password" ngControl="password">
    </div>

    <div class="form-group">
      <button type="submit" class="btn btn-primary">Register</button>
    </div>

  </form>
There are a few changes to note here. To start, we've taken out #registrationForm="ngForm" and instead placed [ngFormModel] on the <form> tag. This property binding is used to bind our ControlGroup that we set up in the component to the <form> tag. With that, we can use the registrationForm as we would have previously, sending the value from it to our submit handler and such.
Since we're using Bootstrap, we can take advantage of NgClass to conditionally apply classes. In this case we are applying the has-error class to each form group if the inputs are invalid and if a submit attempt has been made. This class will turn the label red and give a red border around the input element.
We're also conditionally inserting a bit of text to indicate the error for each element which, again, is based on the input's validity and whether a submit attempt has been made.
Angular 2 Custom Form Validation
We've talked about synchronous validators already. If the ones that are provided by Angular aren't sufficient, then we can easily create our own by following the same pattern that is used for the in-built ones.
Instead of creating a synchronous custom validator in this tutorial, we'll make an asynchronous one. This is a great feature of validators in Angular 2: we can easily make them handle async operations. This is really useful if we want to do things like check if a username or email already exists in a database. In fact, that's exactly what we'll do in this example.
The HapiJS backend that we're using has an endpoint for checking whether a username or email is already taken. If it is taken, a 400 response is returned with an error message indicating so. We can use this, along with an async validator, to let users know if their input is already reserved.
Let's start with the custom validator itself.
// client/app/shared/username-email-validator.ts

import {Http, HTTP_PROVIDERS} from 'angular2/http';
import {Injector} from 'angular2/core'
import {Control} from 'angular2/common';
import {Observable} from 'rxjs/Rx';
import 'rxjs/Rx';
import {CHECK_USER_ENDPOINT} from './api';

interface IUsernameEmailValidator {
  [key:string]: boolean
}

function checkUser(control: Control, source: string) : Observable<IUsernameEmailValidator> {

  // Manually inject Http
  let injector = Injector.resolveAndCreate([HTTP_PROVIDERS]);
  let http = injector.get(Http);

  // Return an observable with null if the
  // username or email doesn't yet exist, or
  // an objet with the rejetion reason if they do
  return new Observable((obs: any) => {
    control
      .valueChanges
      .debounceTime(400)
      .flatMap(value => http.post(CHECK_USER_ENDPOINT, JSON.stringify({ [source]: value })))
      .subscribe(
        data => {
          obs.next(null);
          obs.complete();
        },
        error => {
          let message = error.json().message;
          let reason;
          if (message === 'Username taken') {
            reason = 'usernameTaken';
          }
          if (message === 'Email taken') {
            reason = 'emailTaken';
          }
          obs.next({ [reason]: true });
          obs.complete();
        }
    );
  });
}

export class UsernameEmailValidator {

  constructor() {}

  static checkUsername(control: Control) {
    return checkUser(control, 'username');
  }

  static checkEmail(control: Control) {
    return checkUser(control, 'email');
  }
}
There's a lot going on here, so let's break it down. To start, we need to be aware that when we pass in a function or method as a Validator to our Controls, we can get a hold of whatever the user is typing into the input with a parameter--namely, one of type Control. This custom validation class has two methods, one for checking whether the username exists, and the other for checking the email. Since the same endpoint can report on both cases, we're sharing a function called checkUser that does the actual HTTP call and checking.
In the checkUser function, we start by manually injecting Http so that we can make our API calls. We're injecting it manually here so that we can work with static methods and follow the pattern used by the in-built Angular 2 validators. If we tried to inject Http in the constructor of the class like we would typically do, we'd get an error when we tried to call this.http in the static methods.
Async validators need to return a Promise or an Observable, and we're going with an Observable in this case since Http itself deals with observables. The Control that gets passed in from the input exposes valueChanges observable, and we can tap into this to send the user's input to the API. We shouldn't be sending every single letter that the user inputs to the API, so we call debounceTime(500) to wait for half a second before sending. This will effectively "pause" things until the user has stopped typing.
Next, we flatMap the values over to an Http call. Since we are checking both username and email at the same endpoint, we need to dynamically specify the key for our user input value. We can do this with a computed property, which is what we've done with [source].
Finally, we subscribe to the results of the HTTP call and call obs.next with the appropriate response. If no error comes back, it means we the username or email doesn't yet exist and there are no errors to report. However, if we reach the error condition (which we do when a 400 is returned), it means that the username or email isn't available. We then do a check for the reason so we can dynamically provide an object to return for the validator. This object takes the shape of { validationError: true }. Notice that we're not providing the opposite of this when there is no error present, but we are rather just passing null. This is the proper way to let validation "fall through" and pass.
Applying the Custom Validator to the Component
Now back over in our component, we need to apply the custom validator. Note that async validators are passed in as the third argument to the Control.
// src/client/app/custom-validated-form/custom-validated-form.component.ts

...

import {UsernameEmailValidator} from '../shared/username-email-validator';

...

export class CustomValidatedFormComponent {

  ...

  constructor(private builder: FormBuilder, private http: Http) {

    this.username = new Control('', Validators.required, UsernameEmailValidator.checkUsername);
    this.email = new Control('', Validators.required, UsernameEmailValidator.checkEmail);
    this.password = new Control('', Validators.required);

    this.registrationForm = builder.group({
      username: this.username,
      email: this.email,
      password: this.password
    });
  }

  registerUser(user) {
    ...
  }

}
With that in place in the component, we can apply proper error messaging to the template.
  <!-- src/client/app/custom-validated-form/custom-validated-form.component.html -->

  <form [ngFormModel]="registrationForm" (ngSubmit)="registerUser(registrationForm.value)">
    <div class="form-group" [ngClass]="{ 'has-error' : username.hasError('usernameTaken') }">
      <label for="username">Username</label>
      <span *ngIf="username.hasError('usernameTaken')" class="username-email-taken">Username is taken</span>
      <input type="text" class="form-control" placeholder="Username" ngControl="username">
    </div>

    <div class="form-group" [ngClass]="{ 'has-error' : email.hasError('emailTaken') }">
      <label for="email">Email</label>
      <span *ngIf="email.hasError('emailTaken')" class="username-email-taken">Email is taken</span>
      <input type="text" class="form-control" placeholder="Email" ngControl="email">
    </div>

    <div class="form-group">
      <label for="password">Password</label>
      <input type="password" class="form-control" placeholder="Password" ngControl="password">
    </div>

    <div class="form-group">
      <button type="submit" class="btn btn-primary">Register</button>
    </div>
  </form>
Notice here that we aren't waiting until a submit attempt is made because we want to report the error to the user in "real time".

Aside: Angular 2 Authentication with Auth0
IMPORTANT: The use of
id_tokens has been deprecated. Please see the documentation on implicit grant to learn how to secure your API and make authenticated HTTP requests. An updated article will be published on how to implement this with the latest version of Angular.
Angular 2 forms are great, and the validation that we can do with them makes our lives easier. However, for the case of user registration and login, there is still a lot we need to consider for our apps, which often means a lot of manual work. This includes things like password reset, integrating social login, using multifactor authentication, and more.
With Auth0, all of this is done for us out of the box, and we don't need to worry at all about form validation. Adding authentication to an Angular 2 app is really simple and, depending on your setup, can be done in under 10 minutes.
Step 0: Sign Up for Auth0 and Configure
If you don't already have any Auth0 account, sign up for one now to follow along with the other steps.
Step 1: Add Auth0Lock to Your App
Lock is the beautiful (and totally customizable) login box widget that comes with Auth0. The script for it can be brought in from a CDN link or with npm.
Note: If you use npm to get Auth0Lock, you will need to include it in your build step.
  <!-- src/client/index.html -->

  ...

  <!-- Auth0 Lock script -->
  <script src=“https://cdn.auth0.com/js/lock/10.0/lock.min.js"></script>

  <!-- Setting the right viewport -->
  <meta name="viewport" content="width=device-width, initial-scale=1.0, maximum-scale=1.0, user-scalable=no" />

  ...
Step 2: Add an Authentication Service
It's best to set up an injectable service for authentication that can be used across the application.
With Auth0, we get access to the user's profile and JWT in the lock.on callback where we listen for the authenticated event that is fired when a user succesfully logs in and these items can be saved in local storage for use later.
// src/client/shared/auth.service.ts

import {Injectable, NgZone} from 'angular2/core';
import {Router} from 'angular2/router';
import {AuthHttp, tokenNotExpired} from 'angular2-jwt';

// Avoid name not found warnings
declare var Auth0Lock: any;

@Injectable()
export class Auth {
  lock = new Auth0Lock('YOUR_AUTH0_CLIENT_ID', 'YOUR_AUTH0_DOMAIN');
  refreshSubscription: any;
  user: Object;
  zoneImpl: NgZone;

  constructor(private authHttp: AuthHttp, zone: NgZone, private router: Router) {
    this.zoneImpl = zone;
    this.user = JSON.parse(localStorage.getItem('profile'));

    // Add callback for lock `authenticated` event
    var self = this;
    this.lock.on("authenticated", authResult => {
      self.lock.getProfile(authResult.idToken, (error, profile) => {

        if (error) {
          // handle error
          return;
        }

        // If authentication is successful, save the items
        // in local storage
        localStorage.setItem('profile', JSON.stringify(profile));
        localStorage.setItem('id_token', authResult.idToken);
        self.zoneImpl.run(() => self.user = profile);
      });
    });
  }

  public authenticated() {
    // Check if there's an unexpired JWT
    return tokenNotExpired();
  }

  public login() {
    // Show the Auth0 Lock widget
    this.lock.show();
  }

  public logout() {
    localStorage.removeItem('profile');
    localStorage.removeItem('id_token');
    this.zoneImpl.run(() => this.user = null);
    this.router.navigate(['Home']);
  }
}
Step 3: Add a Click Handler to Login
We can use the methods from our authentication service in any of our components which means we can easily add a click handler to a "Login" and "Logout" button.
  <!-- src/client/app.component.html -->

  ...

  <button (click)="auth.login()" *ngIf="!auth.authenticated()">Log In</button>
  <button (click)="auth.logout()" *ngIf="auth.authenticated()">Log Out</button>

  ...
Once the user logs in, a JSON Web Token will be saved for them in local storage. This JWT can then be used to make authenticated HTTP requests to an API.
Step 4: Make Authenticated HTTP Requests
With angular2-jwt, we can automatically have our JWTs sent in HTTP requests. To do so, we need to inject and use AuthHttp.
// src/client/ping/ping.component.ts

import {Component} from 'angular2/core';
import {Http} from 'angular2/http';

import {AuthHttp} from 'angular2-jwt';
import {Auth} from './auth.service';
import 'rxjs/add/operator/map';

@Component({
  selector: 'ping',
  template: `
    <h1>Send a Ping to the Server</h1>
    <button class="btn btn-primary" (click)="securedPing()" *ngIf="auth.authenticated()">Secured Ping</button>
    <h2>{{message}}</h2>
  `
})
export class Ping {
  API_URL: string = 'http://localhost:3001';
  message: string;

  constructor(private http: Http, private authHttp: AuthHttp, private auth: Auth) {}

  securedPing() {
    this.authHttp.get(`${this.API_URL}/secured/ping`)
      .map(res => res.json())
      .subscribe(
        data => this.message= data.text,
        error => this.message = error._body
      );
  }
}
Step 5: Done!
That's all there is to it to add authentication to your Angular 2 app with Auth0!
Wrapping Up
Implementing HTML forms can seem trivial, but it's something that can get tricky pretty fast when we want to introduce validation. Thankfully, Angular 2 gives us some great tools to use to make working with forms really simple. Angular really shines with async validators so that we can have a streamlined construct to handle asynchronous operations in our form validation. All around, Angular 2 improves the developer experience when working with forms, which hopefully translates to an improved end user experience as well.
“Angular 2 gives us some great tools to use to make working with forms really simple.”
Tweet This
About the author

Ryan Chenkie
Developer
Ryan is a Google Developer Expert, the host of the Entrepreneurial Coder Podcast, the author of Securing Angular Applications, and an all-around fanatic about application security.View profile