Building Retrieval-Augmented Generation (RAG) applications are all the rage, and for a good reason. They let you tap into vast knowledge bases to answer questions, generate content, and power all sorts of AI-driven experiences. But what happens when you need to control who can access what information? That's where things get interesting.
We're diving deep into building a secure RAG pipeline using LangGraph, Python, and Auth0 FGA. Forget simple vector lookups; we're talking about a graph-based approach that lets you orchestrate complex workflows, integrate tools, and enforce fine-grained access control.
Proposed Solution: Secure Retrieval with LangGraph, OpenAI, and Auth0 FGA
The solution employs a workflow that integrates document retrieval, user-specific authorization filtering, and LLM response generation.
We’ll build a pipeline that uses:
- LangChain & LangGraph: A helpful toolkit for chaining the steps of an RAG pipeline (loading data, creating embeddings, retrieving, and prompting).
- LLMs (OpenAI or any other): For both embeddings (similarity search) and text generation.
- Auth0 FGA: A fine-grained authorization service that checks, for each document, if a user has the “viewer” relationship.
LangChain & LangGraph
LangChain and LangGraph are two complementary tools that simplify the development of LLM applications, each bringing unique strengths to the table.
LangChain is a library that streamlines the assembly of components—such as document loaders, vector stores, and prompt templates—into a robust and cohesive framework. This makes it easier to build, maintain, and scale your RAG pipeline efficiently.
LangGraph takes a different approach by enabling you to visualize and construct your workflows as a graph. With its ability to handle complex graphs, branching logic, and advanced flow structures, LangGraph empowers developers to design sophisticated pipelines that go beyond linear processes. By mapping out the connections between components visually, it enhances modularity and simplifies debugging and optimization. Read more here to get started: https://langchain-ai.github.io/langgraph/.
LLMs
Although we’ll demonstrate OpenAI’s embeddings and Chat APIs, you can easily replace them with other providers (e.g., Anthropic, LLaMA, or Azure OpenAI). The main tasks here are:
- Embedding documents so you can do similarity searches.
- Generating text from the retrieved documents to answer the user’s query.
FGA, OpenFGA and Auth0 FGA
FGA (Fine-Grained Authorization) is about controlling who can do what with which resources, down to an individual level. In a typical role-based system, you might say, “Admins can see everything, and Regular Users can see some subset.” But in a real-world app—especially one that deals with many documents—this might not be flexible enough.
OpenFGA (and Auth0 FGA) addresses this by letting you define authorization relationships. The relationships defined in the authorization model can be either direct or indirect. Simply put, direct relationships are directly assigned between a consumer and a resource (we call them user and object) and stored in the database. Indirect relationships are the relationships we can infer based on the data and the authorization model.
If you would like to learn the basics of using FGA for RAG, check out this blog post on RAG and Access Control: Where Do You Start?.
Learn how to get started with Auth0 FGA for a RAG application.
Implementation: Step-by-Step
Below is a sample setup in Python. We’ll keep it simple so you can see the big picture. Feel free to adapt for your chosen LLM or a more robust data store.
Set Up Prerequisites
To follow this tutorial and secure your application, you’ll need the following:
- Python 3.9 or newer.
- An Auth0 FGA account. If you don’t have one, you can create one for free.
- An OpenAI account and API key.
Download and install the sample code
To get started, clone the auth0-ai-samples repository from GitHub:
git clone https://github.com/auth0-samples/auth0-ai-samples.git
cd auth0-ai-samples/authorization-for-rag/langgraph-agentic-python
# Create a virtual env
python -m venv venv
# Activate the virtual env
source ./venv/bin/activate
# Install dependencies
pip install -r requirements.txt
The application is written in Python and is structured as follows:
main.py— The main entry point of the application, and it is where we define the RAG pipelinedocs/*.md— Sample markdown files are to be used as context for the LLM. There are two types of docs, public and private. Private documents are only accessible to certain individuals.helpers/memory_store.py— Creates an in-memory vector store that acts as the base retriever in the chain.helpers/read_documents.py— Utility to read the markdown files from thedocsfolder.scripts/fga_init.py— Utility to initialize the Auth0 FGA authorization model and sample data.
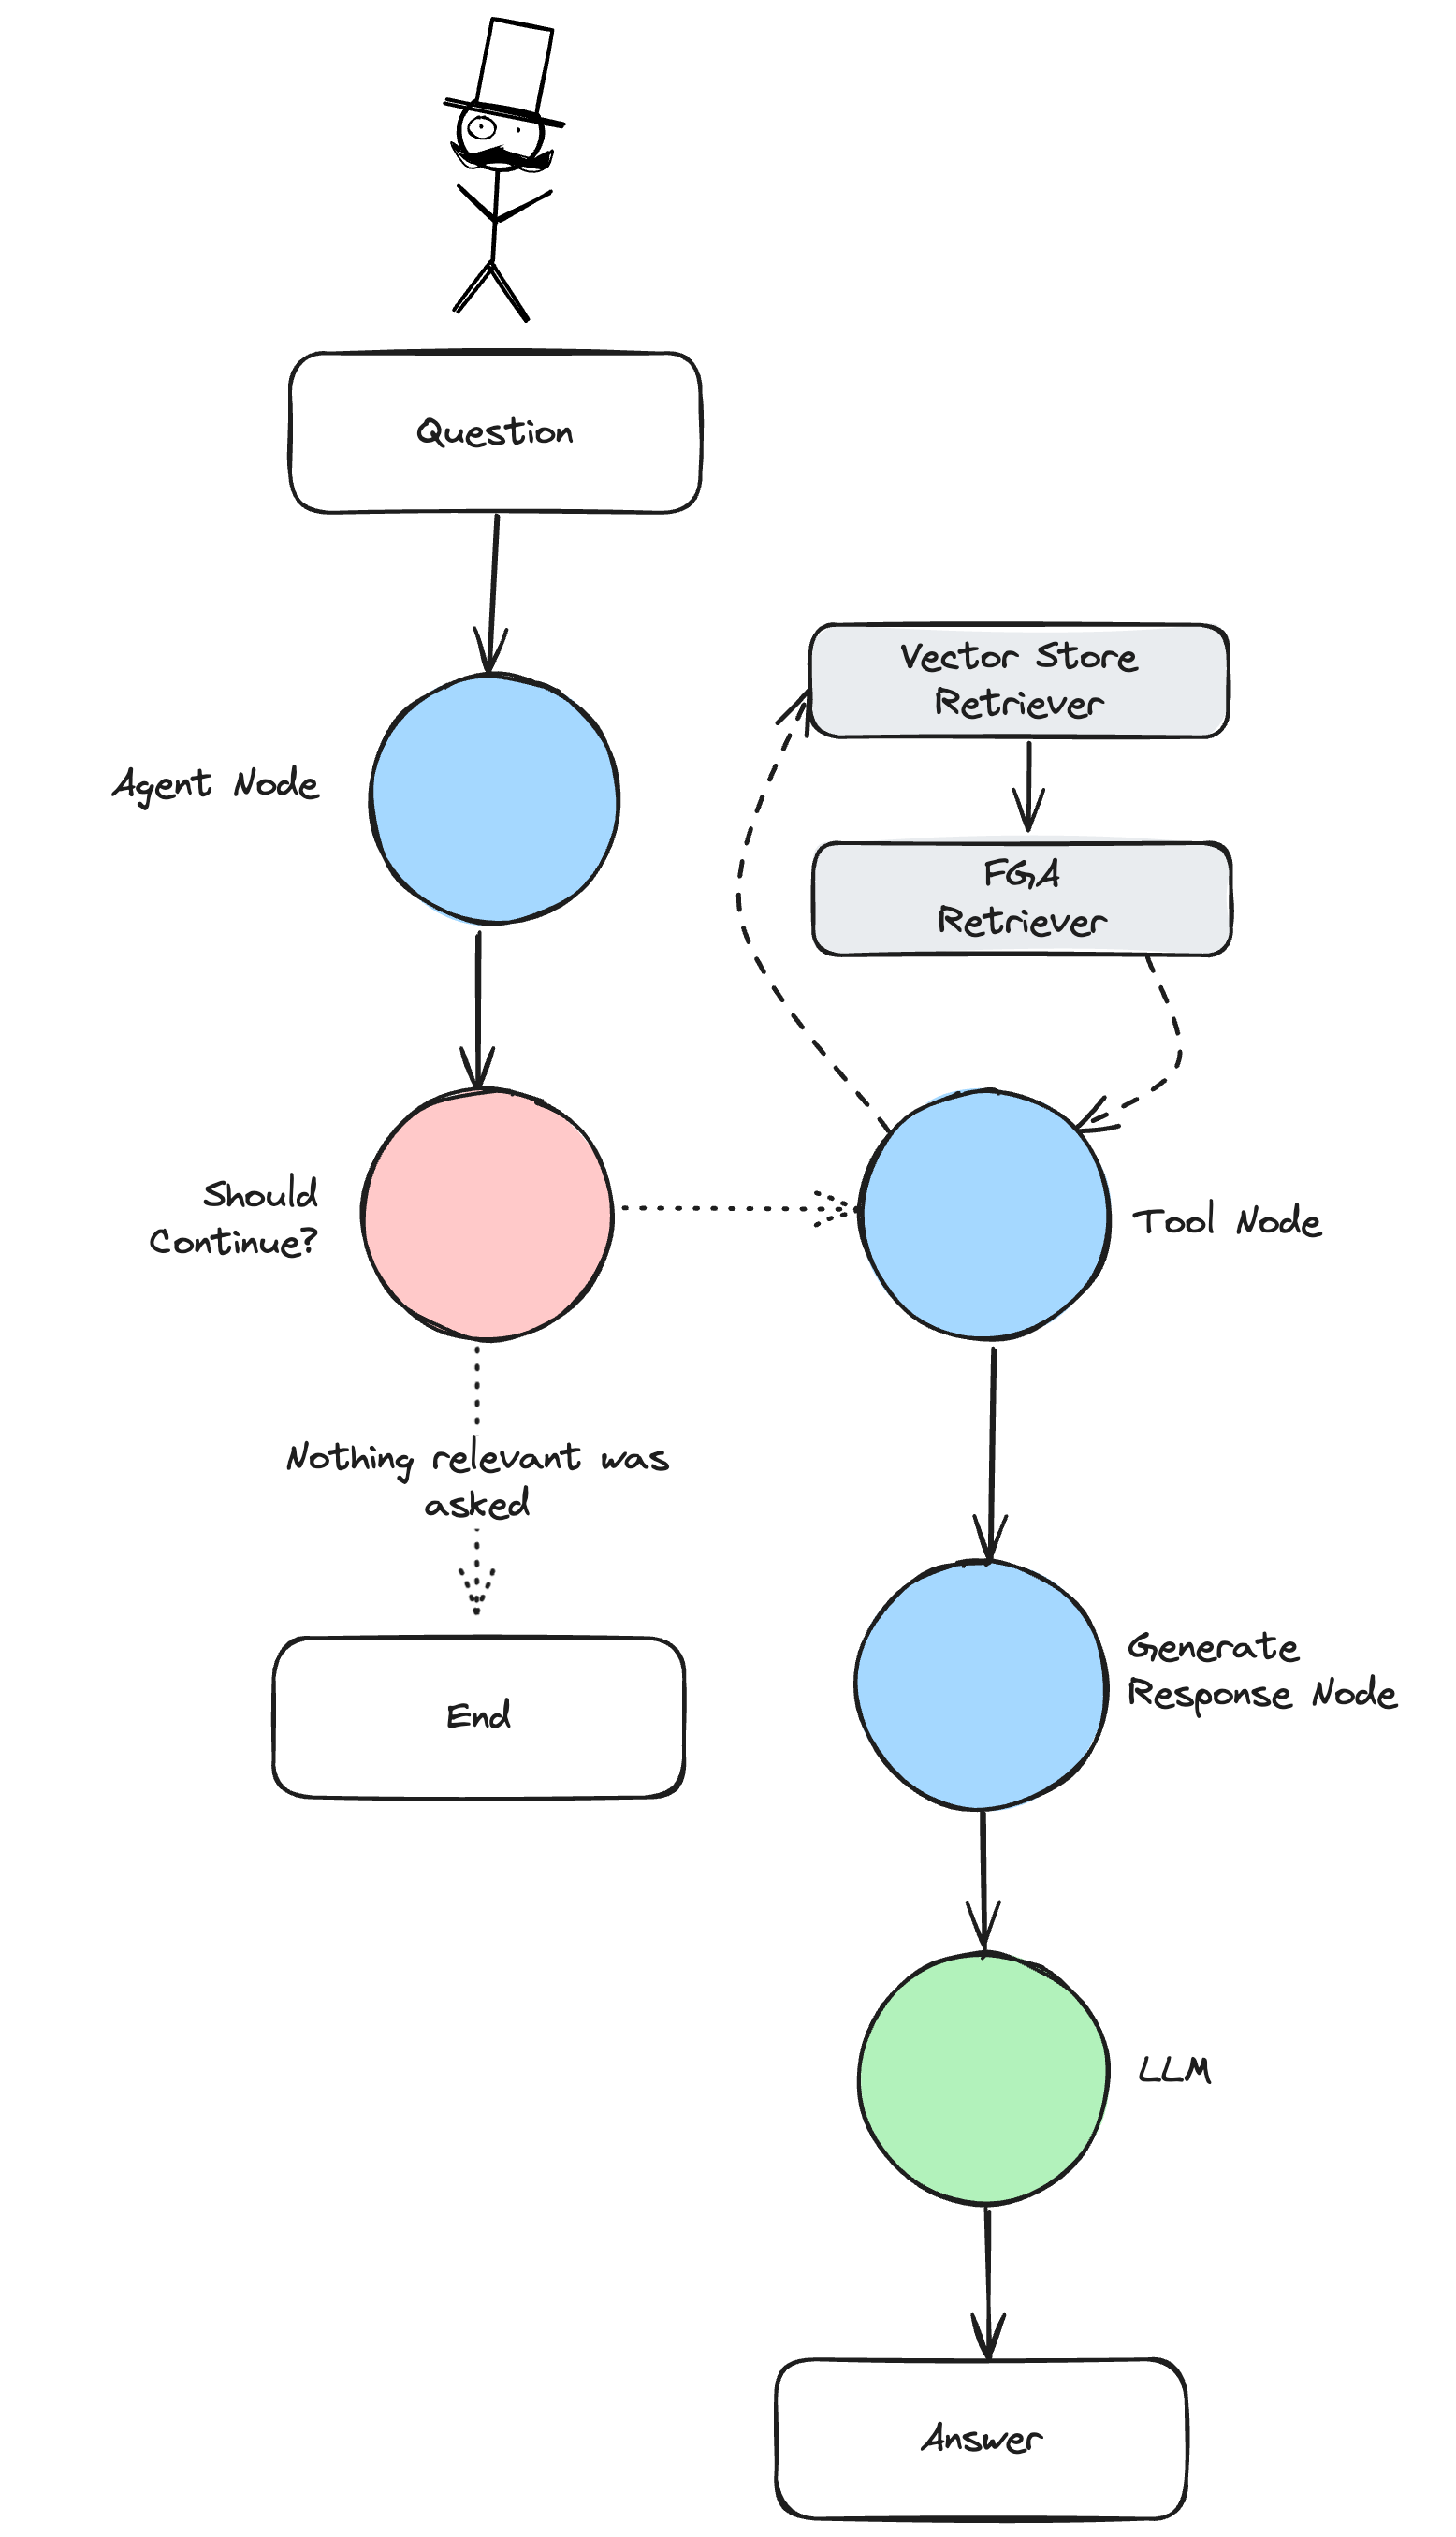
RAG Pipeline
The main.py file defines the RAG graph using LangGraph to interact with the underlying LLM model and retrieve data from our context. In your project, your data may be sourced from different platforms and systems, make sure you check the proper documentation about loaders in the Langchain ecosystem.
The following diagram represents the RAG architecture we are defining:
Python Implementation
Let’s now explore the code at main.py, which is where all the magic happens. We’ll start splitting the code into relevant chunks, so it will be easier to follow and understand.
Let’s start by defining a LangChain tool that is responsible for querying the RAG for context by querying the vector database and filtering the relevant documents based on the user access:
@tool
def agent_retrieve_context_tool(query: str):
    """Call to get information about a company, e.g., What is the financial outlook for ZEKO?"""
    documents = read_documents()
    vector_store = MemoryStore.from_documents(documents)

    user_id = "admin"

    retriever = FGARetriever(
        retriever=vector_store.as_retriever(),
        build_query=lambda doc: ClientBatchCheckItem(
            user=f"user:{user_id}",
            object=f"doc:{doc.metadata.get('id')}",
            relation="viewer",
        ),
    )

    relevant_docs = retriever.invoke(query)

    if len(relevant_docs) > 0:
        return "\n\n".join([doc.page_content for doc in relevant_docs])

    return "I don't have any information on that."

tools = [agent_retrieve_context_tool]
The FGARetriever defined in the retrieve node is designed to abstract the base retriever from the FGA query logic. The build_query argument lets us specify how to query our FGA model, in this case, by asking if the user is a viewer of the document.
build_query=lambda doc: ClientBatchCheckItem(
    user=f"user:{user_id}",
    object=f"doc:{doc.metadata.get('id')}",
    relation="viewer",
),
Then we need to define the nodes in the Graph, each node will process unique functions, so we will explore them separately, starting with the agent_node, which is responsible for querying the LLM model based on the user’s input.
Each node in LangGraph receives state as an object and can return state updates, for example:
def agent_node(state: State):
    """
    Generate the response from the agent.
    """
    llm_response = llm.invoke(state["messages"])
    return {"messages": [llm_response]}
After the agent_node runs, we are using a conditional edge to determine the next step. In our particular case, the node agent_should_continue will finalize the execution of the graph if the LLM response didn’t trigger a tool call. But if we detect a tool call, then we continue the graph execution with the tools node.
def agent_should_continue(state: State):
    """
    Determines whether the conversation should continue based on the user input.
    """
    last_message = state["messages"][-1]
    if last_message.tool_calls:
        return "tools"

    return END
The tools node is a bit different from the others, as it builds on top of the Tool we declared at the start and uses the ToolNode method to simplify the logic. This method will wrap our tool into a node that adds a response from the tool into the chat messages state.
But that’s not all, as after we process the tool call, and we retrieve the proper context to answer the user’s input, we need to call, once again, the LLM model to generate an answer.
def generate_response_node(state: State):
    """
    Generate the response from the agent based on the result of the RAG tool.
    """
    prompt = PromptTemplate(
        template="""You are an assistant for question-answering tasks. Use the following pieces of retrieved-context to answer the question. If you don't know the answer, just say that you don't know. Use three sentences maximum and keep the answer concise. Question: {question}. Context: {context}. Answer:""",
        input_variables=["question", "context"],
    )

    question = state["messages"][0].content
    context = state["messages"][-1].content

    chain = prompt | llm

    llm_response = chain.invoke(
        {"question": question, "context": context}, prompt=prompt
    )

    return {"messages": [llm_response]}
If you read the previous article, this may be familiar, but this is a simple chain that uses a prompt with a question and context to provide a good and relevant answer to the user.
Now, with all the parts in place, we can build the graph:
# Create the OpenAI chat tool
llm = ChatOpenAI(model="gpt-4o-mini").bind_tools(tools)

# Build the graph
graph_builder = StateGraph(State)
tool_node = ToolNode(tools)

# Define the nodes
graph_builder.add_node("agent", agent_node)
graph_builder.add_node("tools", tool_node)
graph_builder.add_node("generate_response", generate_response_node)

# Define the edges
graph_builder.add_edge(START, "agent")
graph_builder.add_conditional_edges(
    "agent",
    agent_should_continue,
    ["tools", END],
)
graph_builder.add_edge("tools", "generate_response")

# Compile the graph
graph = graph_builder.compile()
That’s awesome! Now, if you set up all the environment variables, you could run the code. If you are not sure how to set them up, don’t worry; we will do that next.
Create an Auth0 FGA Account
If you already have an Auth0 account, you can use the same credentials to log in to the Auth0 FGA dashboard at https://dashboard.fga.dev. If you don't have an Auth0 account, hop over to https://dashboard.fga.dev and create a free account.
Once you are logged in, you should see a dashboard similar to the one below.
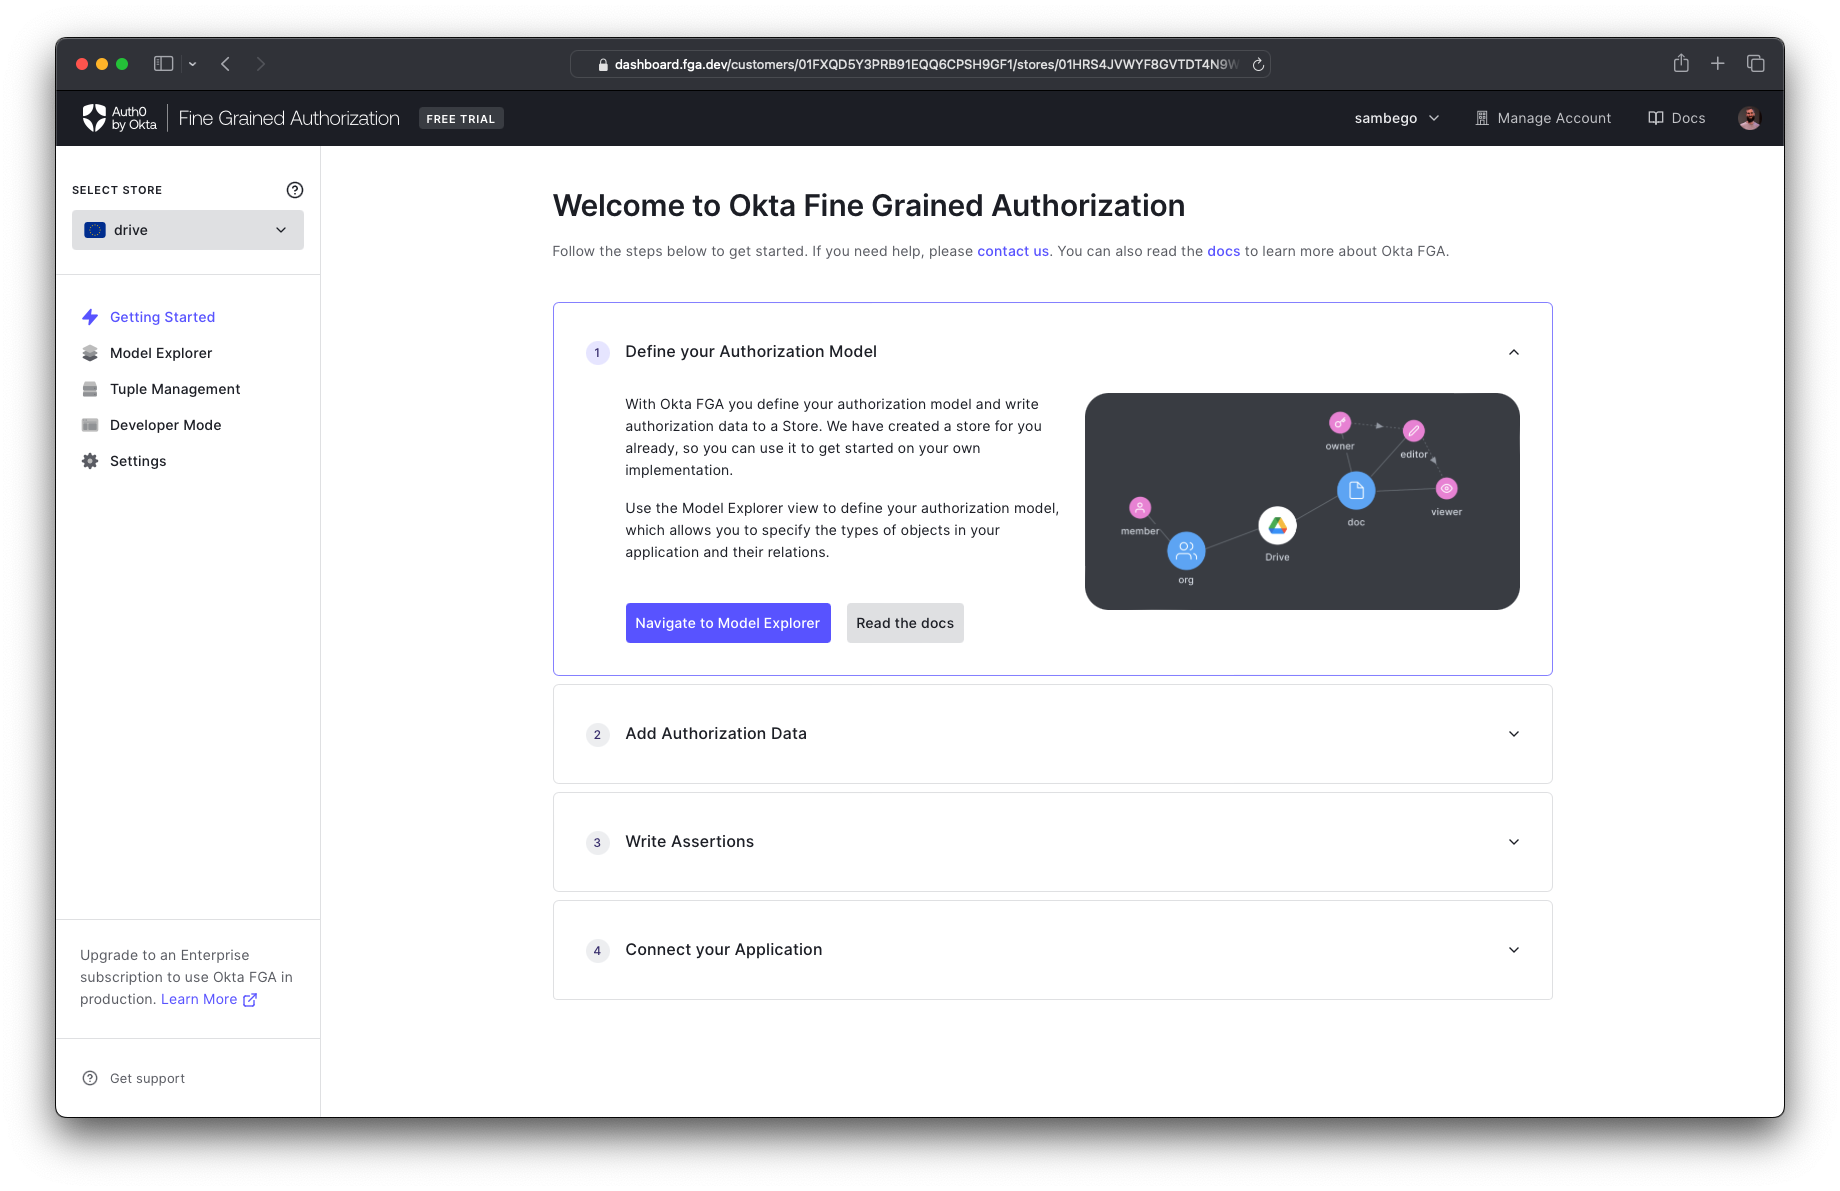
When you log into the Auth0 FGA dashboard for the first time, you may be asked to create a new store. This store will serve as the home for your authorization model and all the data the engine requires to make authorization decisions. Simply pick a name and create your store to get started.
Create an Auth0 FGA Client
Once you are in the dashboard, you’ll need a client to make API calls to Auth0 FGA. To create a client, navigate to Settings, and in the Authorized Clients section, click Create Client. Give your client a name, mark all three client permissions, and then click Create.
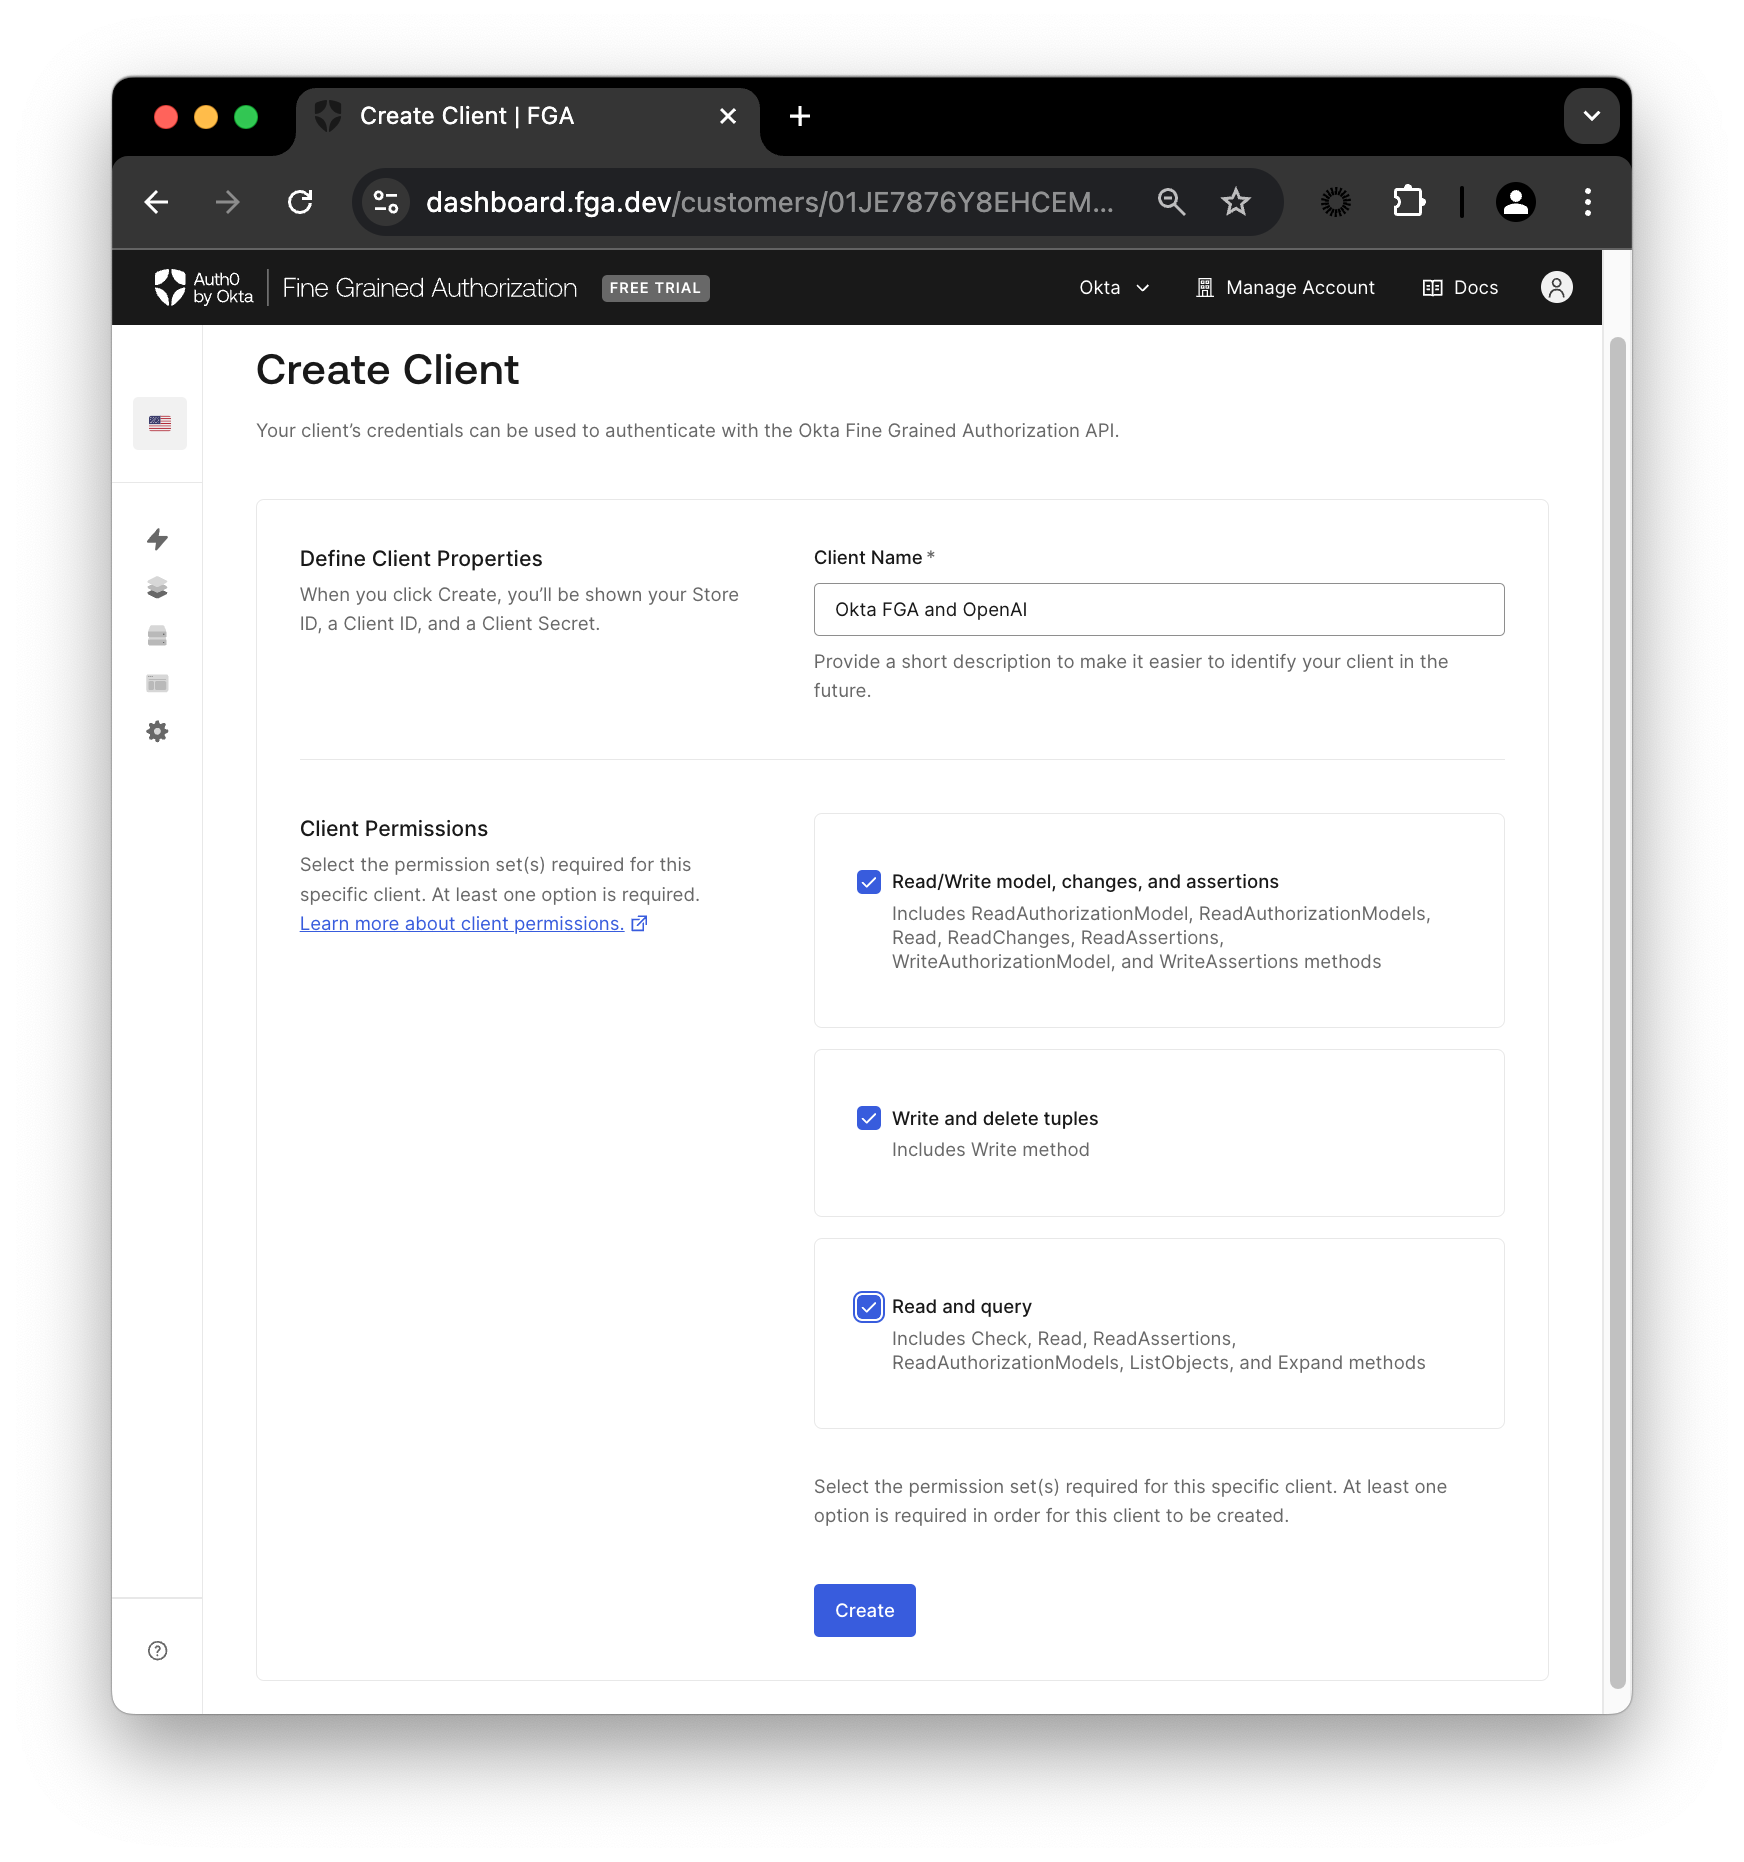
When you create the client, Auth0 FGA will provide you with some data like a Store ID, a Client ID and a Client Secret. Don’t close that yet, you’ll need those values next.
At the root of the project, there’s a .env.example file. Copy the file and paste it as .env. Then, open the file and edit the three FGA-related variables using the values provided by Auth0 FGA. When you are ready, click continue, and the modal will display the values for the missing variables (FGA_API_URL and FGA_API_AUDIENCE).
At this step, you can also add your OpenAI API Key, which you’ll need to run the demo.
Configure the Auth0 FGA model
Now that the application is set up, you can run the provided script to initialize the model and some sample data. To set things up, run:
python ./scripts/fga_init.py
You can verify that the script worked by navigating to the model's page in Auth0 FGA. The following model should now have been created:
model
 schema 1.1

type user

type doc
 relations
   define owner: [user]
   define viewer: [user, user:*]
You can visit the Auth0 FGA documentation to learn more about modeling Auth0 FGA and creating an authorization model.
On top of the model, the script also created two tuples. Tuples in Auth0 FGA define the relationships between the types.
First, it defined a tuple to give all users access to the public doc:
- User —
user:* - Object —
public-doc - Relation —
viewer
Then, it created a second tuple to give the admin user access to the private doc:
- User —
user:admin - Object —
private-doc - Relation —
viewer
You can visit the Auth0 FGA documentation to learn more about tuples and how to create them.
Query the Graph
Invoke the graph to process a query and generate a response.
# Run the graph
result = graph.invoke(
    {"messages": [("human", "What is the financial outlook for ZEKO?")]}
)
print(result["messages"][-1].content)
Fantastic! You now know how to build and scale a secure RAG with Python and LangGraph. It’s time to test things out.
To run the graph, simply call the main.py file:
python main.py
If you follow the steps, you’ll see responses like the following:
Example with no access:
The retrieved context does not provide any specific forecast or predictions for ZEKO (Zeko Advanced Systems Inc.). It mainly outlines the company's mission, technologies, and products without detailing any financial or market forecasts. Therefore, I don't know the forecast for ZEKO.

Example with access:
The forecast for Zeko Advanced Systems Inc. (ZEKO) for fiscal year 2025 is generally bearish. Projected revenue growth is expected to remain subdued at 2-3%, with net income growth projected at 1-2%, primarily due to margin pressures and competitive challenges. Investors should be cautious, given the potential headwinds the company faces.
Depending on the user you use in the agent_retrieve_context_tool, you’ll see different results, experiment also by adding and removing privileges from the Auth0 FGA dashboard.
Learn More about Auth0 for AI Agents, Auth0 FGA, and GenAI
Before you go, we have some great news to share: we are working on more content and sample apps in collaboration with amazing GenAI frameworks like LlamaIndex, LangGraph, CrewAI, Vercel AI, and others.
Auth0 for AI Agents is our upcoming product to help you protect your user's information in GenAI-powered applications.
Make sure to join the Auth0 Lab Discord server to hear more and ask questions.
Happy coding!
About the author

Juan Cruz Martinez
Staff Developer Advocate