
TL;DR: AdonisJs is a Node.js MVC framework. Currently, AdonisJs has over 700 stars on GitHub. AdonisJs makes it easy for you to write web applications with less code. In this tutorial, I'll show you how easy it is to build a web application with AdonisJs and add authentication to it. Check out the repo to get the code.
AdonisJs is a full-stack, open-source Node.js framework that encapsulates all the tedious parts of web development and provides you a nice API to work with. AdonisJs saves you time and effort because it ships with a lot of features out of the box. These features include the following:
- Lucid ORM (Effective Implementation of Active Record)
- Database Migrations
- Authentication System
- Mailing System
- Data Validator
AdonisJs makes good use of already written and well-tested modules from the JavaScript community. The documentation is very detailed, and there is a vibrant community of users and collaborators who engage on Gitter, Trello, and Twitter.
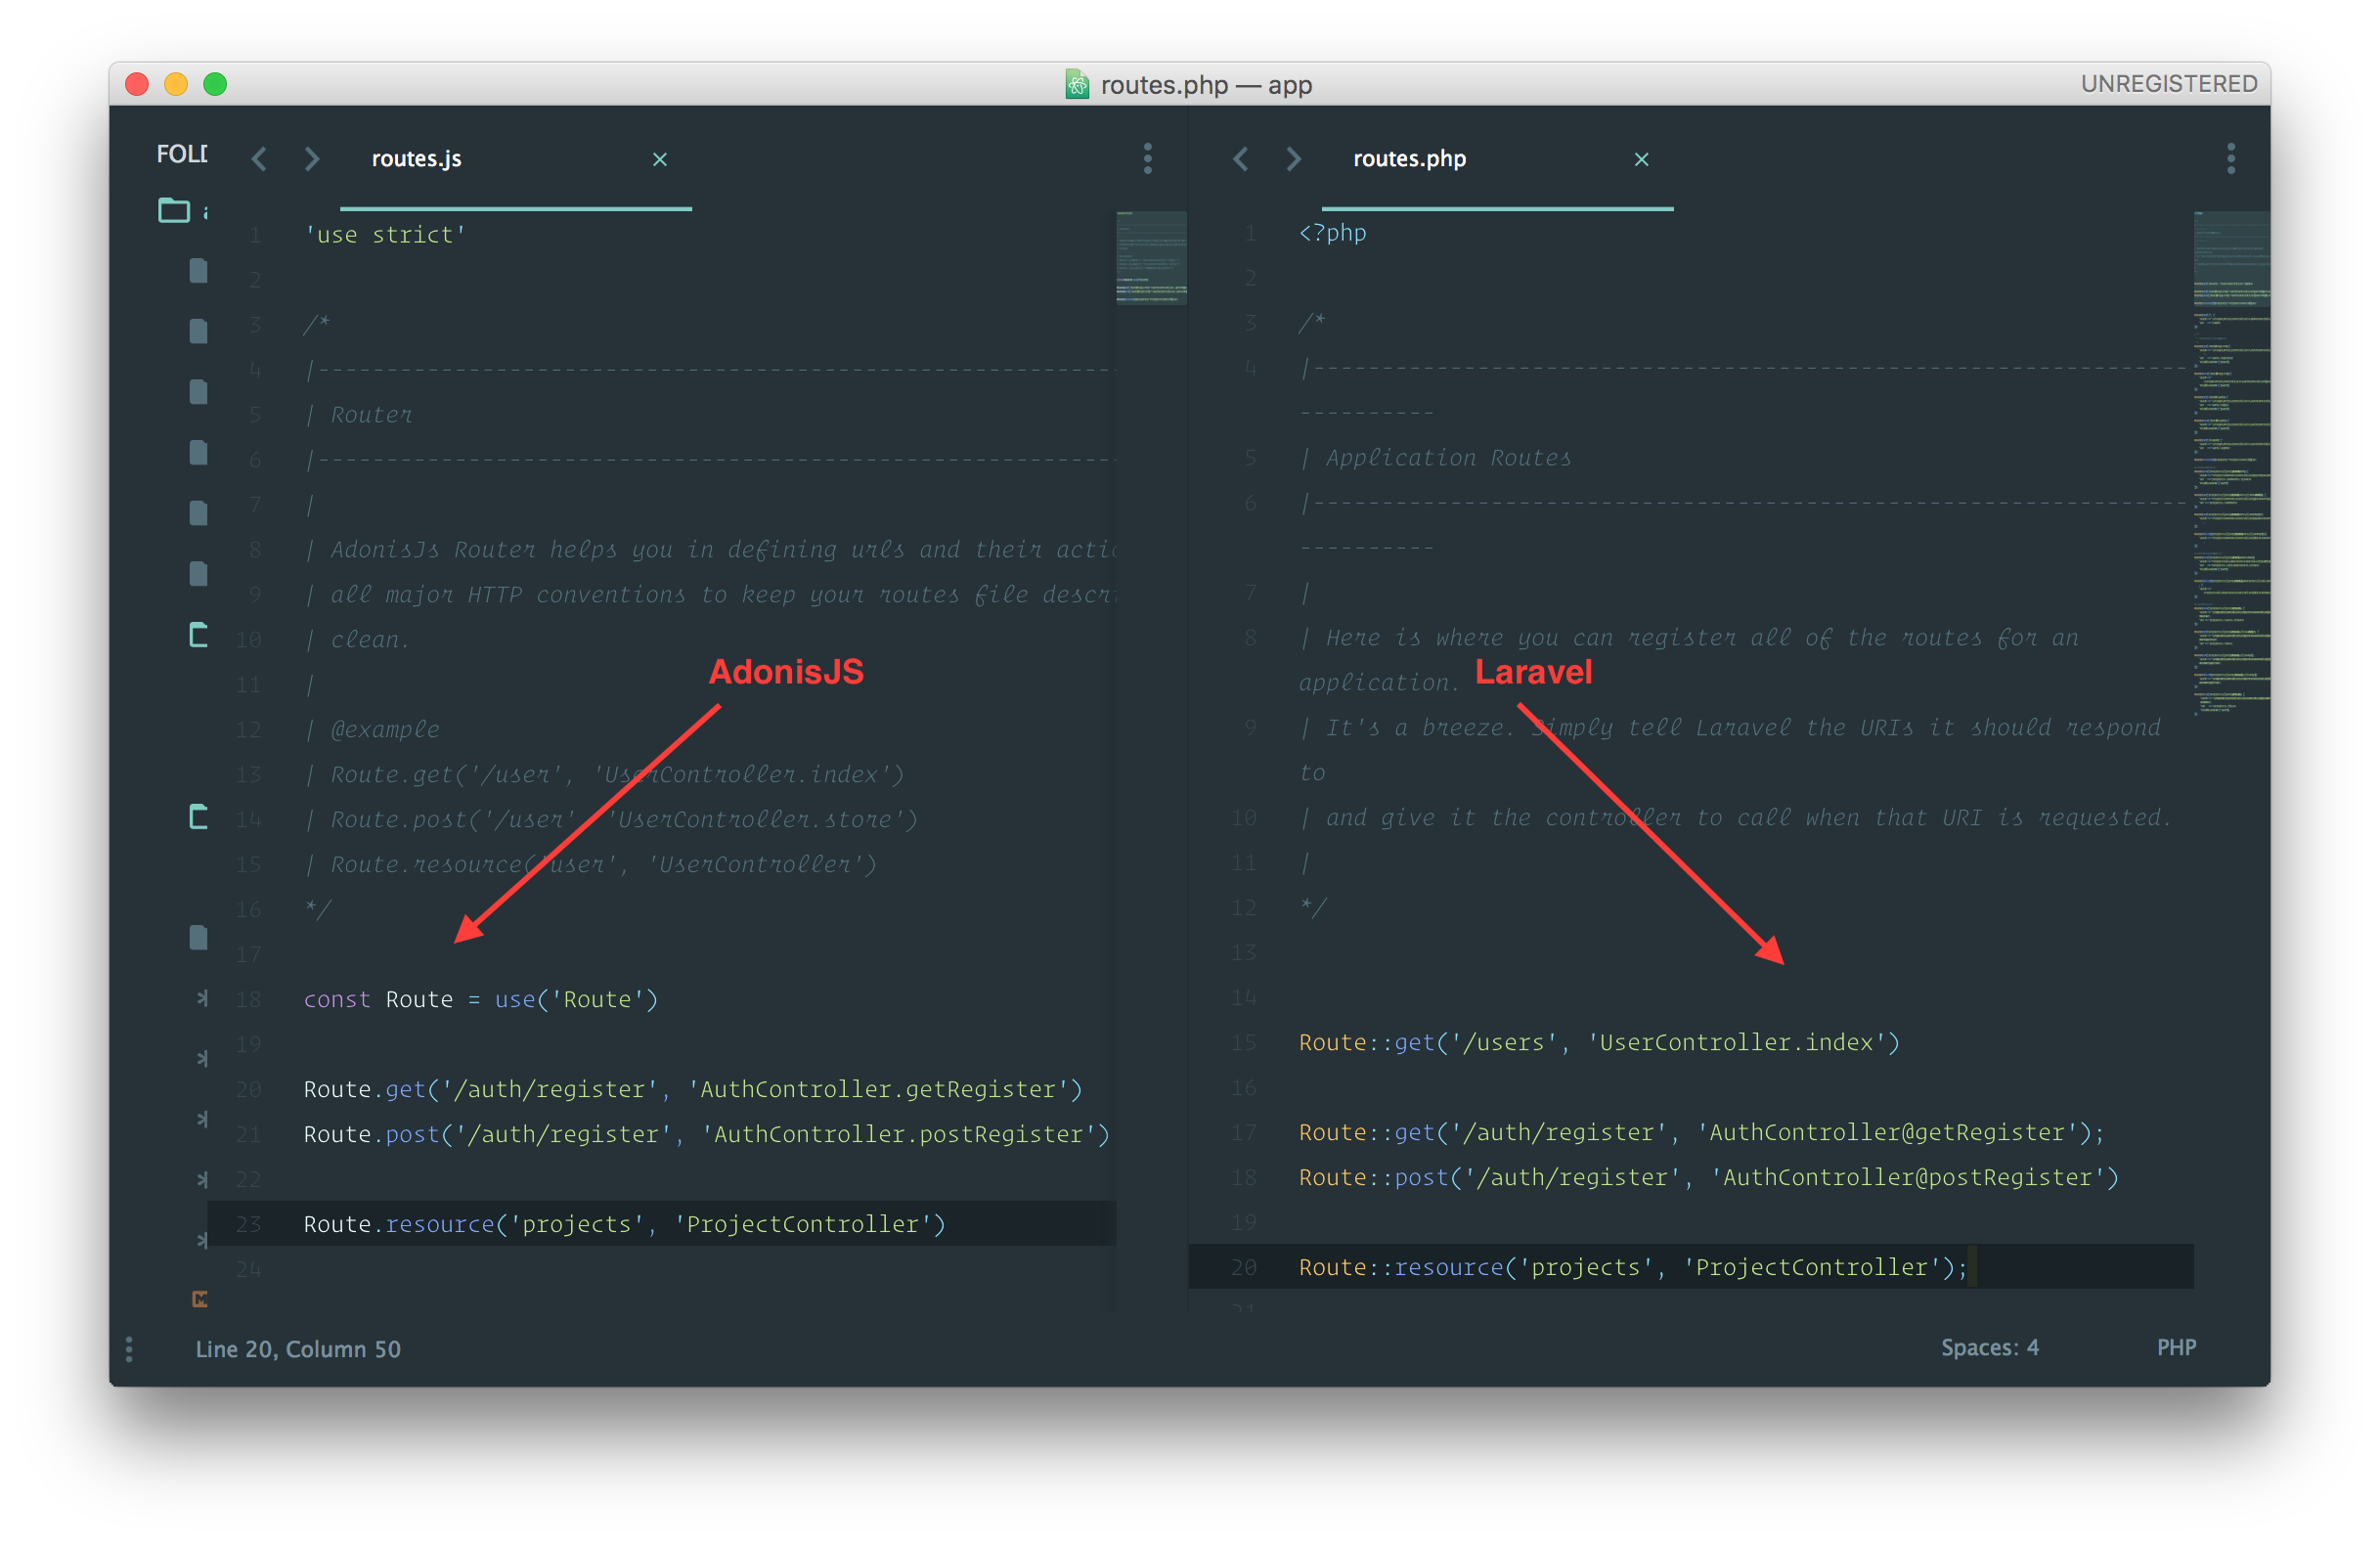
AdonisJs | Laravel
AdonisJS has a striking resemblance to Laravel. In fact, the creator of AdonisJs Aman Virk admitted that the framework was inspired by Laravel. Aman Virk had a reason for creating AdonisJS. Here are some of the similarities with Laravel:
- Routing
- IOC (Inversion of Control) and Dependency Injection (DI)
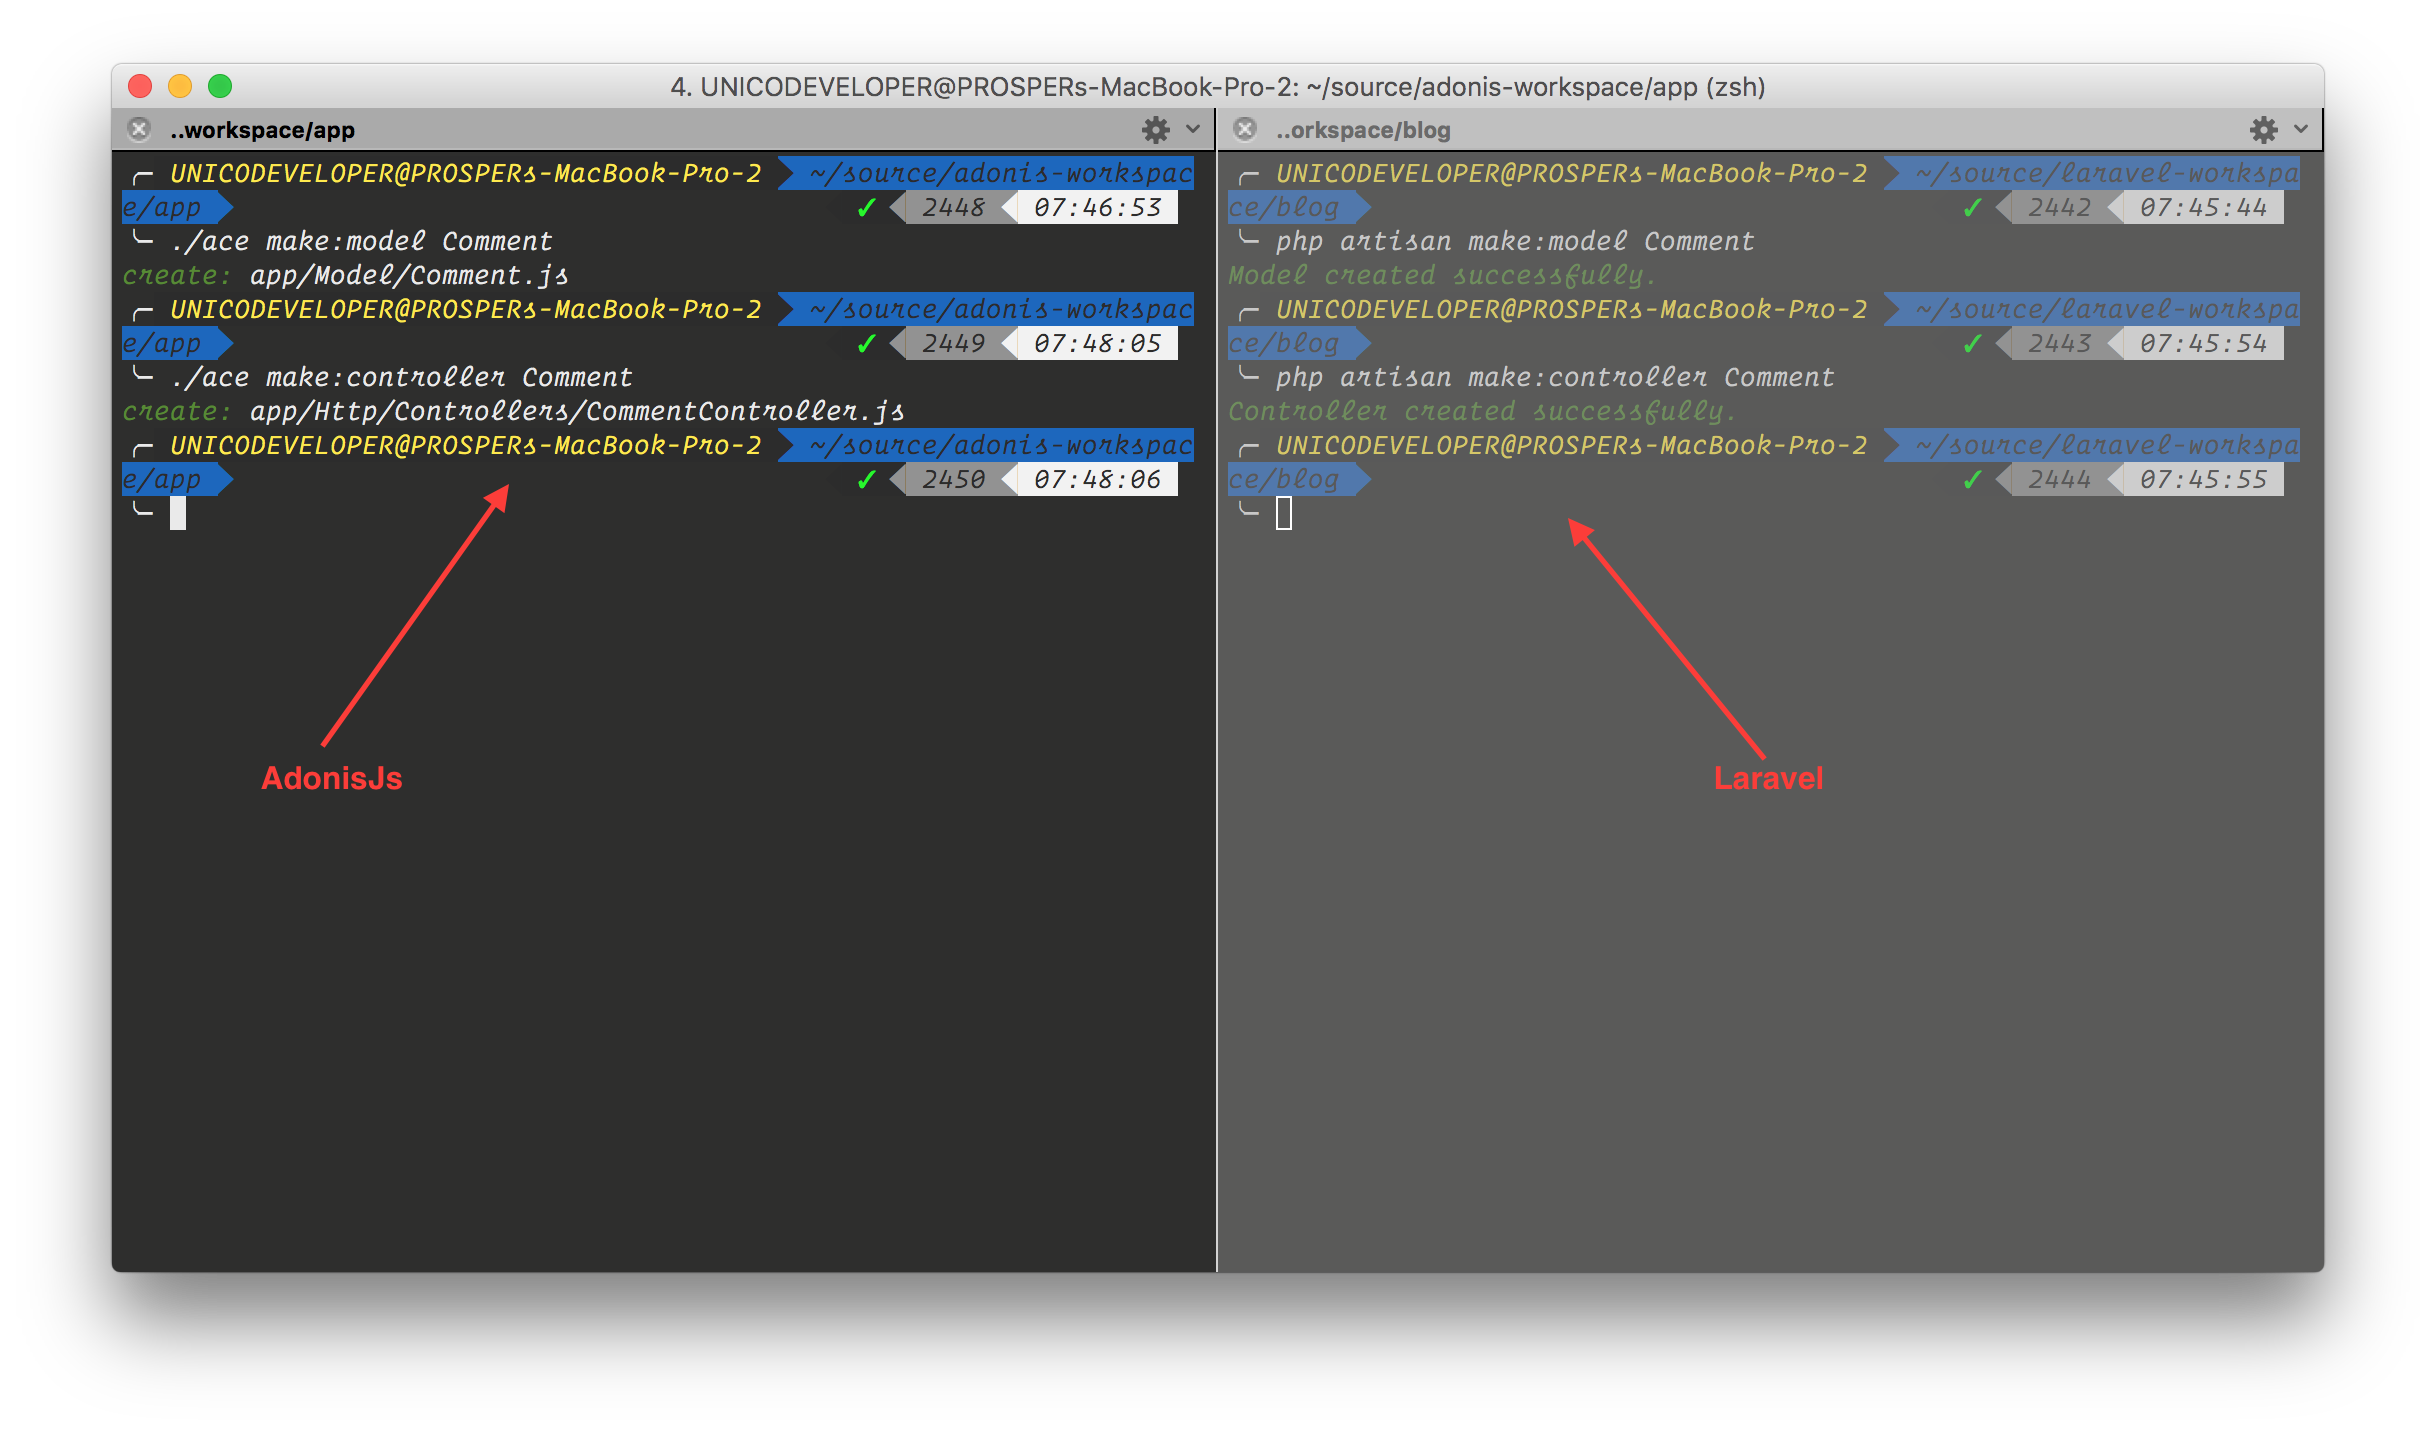
- Scaffolding
- Query Builder
- Model Factories and Database Seeding
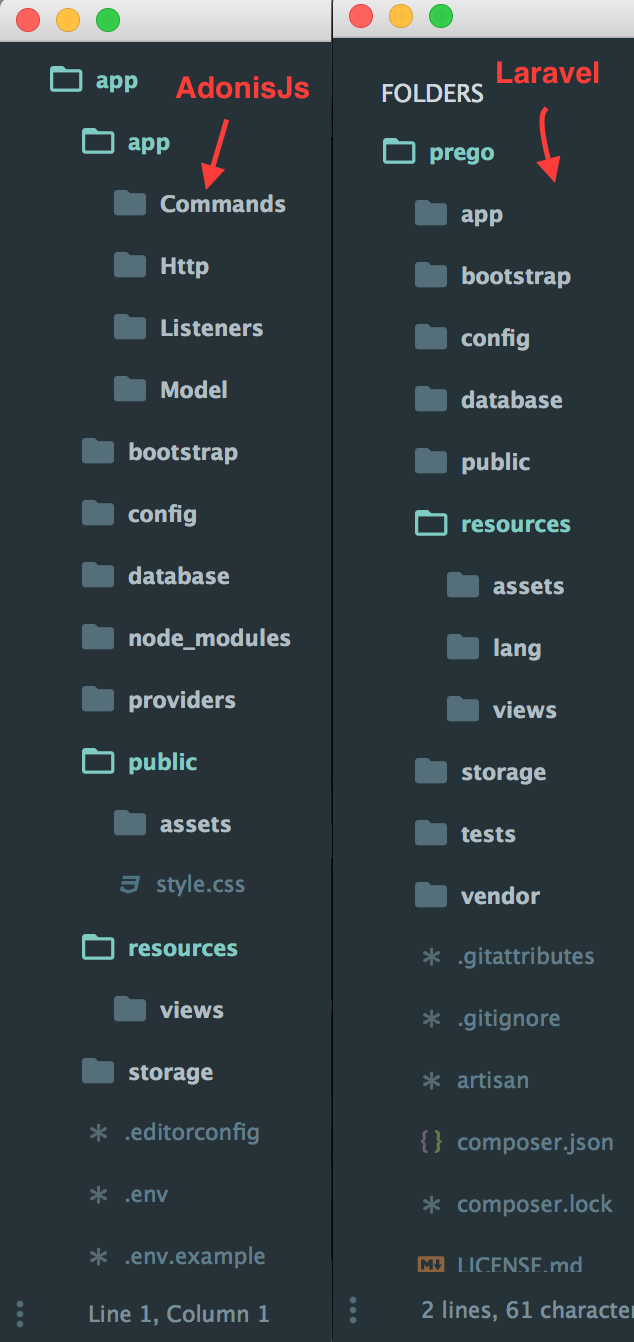
- Directory Structure
We'll be building a simple character-listing app with AdonisJs 3.0, just like we did with Laravel. Our app will simply list 10 Game of Thrones characters and their real names. Once we add authentication to the app, all logged-in users will have the privilege of knowing these celebrity characters personally.
Let's get started.
AdonisJs uses Npm to manage its dependencies. So, before using AdonisJs, make sure you have node and npm installed on your machine. We can install AdonisJs by cloning the repo from GitHub like so:
git clone --dissociate https://github.com/adonisjs/adonis-app GOT
or using the adonis-cli installer. If you cloned from GitHub, then you have to run npm install immediately after the previous command to install all the dependencies.
We'll spin up a new app using the adonis command like so: adonis new GOT. Check out the AdonisJs docs to learn how to set up the AdonisJs installer.
Explore Directory Structure
AdonisJs applications follow the Model-View-Controller design pattern.

In a nutshell,
- Models query your database and return the necessary data.
- Views are pages that render data. In AdonisJs, they are
.njkfiles. - Controllers handle user requests, retrieve data from the models and pass them on to the views.
Read more about MVC here.
Setting Up the Controller
Open up your terminal and run the command below to create a ListController.
./ace make:controller ListController
Open up app/Http/Controllers/ListController.js and configure it like so:
'use strict'

class ListController {
    * show (request, response) {
       const characters = {
         'Daenerys Targaryen' : 'Emilia Clarke',
         'Jon Snow'           : 'Kit Harington',
         'Arya Stark'         : 'Maisie Williams',
         'Melisandre'         : 'Carice van Houten',
         'Khal Drogo'         : 'Jason Momoa',
         'Tyrion Lannister'   : 'Peter Dinklage',
         'Ramsay Bolton'      : 'Iwan Rheon',
         'Petyr Baelish'      : 'Aidan Gillen',
         'Brienne of Tarth'   : 'Gwendoline Christie',
         'Lord Varys'         : 'Conleth Hill'
       }

       yield response.sendView('welcome',  { characters: characters })
    }
}

module.exports = ListController
We are making use of ES2015 generators, so we don't need to use callbacks. yield comes in handy to return the response with the aid of sendView back to the welcome.jnik view. We'll create that view in a later part of this post.
Setting Up the Model
AdonisJs models are stored by default in the app/Model directory. Only the User model is needed in this application, and it will be created when we run the auth:setup command later in this post. However, if you want to create more models, you can simply run the command below like so:
./ace make:model <modelName>
where <modelName> represents the name of the model you want to create.
Setting Up The Routes
Open up app/Http/routes.js and configure it like so:
'use strict'

/*
|--------------------------------------------------------------------------
| Router
|--------------------------------------------------------------------------
|
| AdonisJs Router helps you in defining urls and their actions. It supports
| all major HTTP conventions to keep your routes file descriptive and
| clean.
|
| @example
| Route.get('/user', 'UserController.index')
| Route.post('/user', 'UserController.store')
| Route.resource('user', 'UserController')
*/

const Route = use('Route')

Route.get('/', 'ListController.show')
Once a request hits the / route, it invokes the show method of the ListController and renders the returned value in the welcome view. We'll configure the welcome view later in this post.
Setting Up Authentication
AdonisJs provides us with a fully featured system for authenticating HTTP requests using multiple authenticators via the AdonisJs Authentication Provider. We'll configure the authentication provider to use the traditional session-based login system.
Open up config/auth.js and ensure the authenticator is set to session.
...
/*
  |--------------------------------------------------------------------------
  | Authenticator
  |--------------------------------------------------------------------------
  |
  | Authenticator is a combination of HTTP Authentication scheme and the
  | serializer to be used for retrieving users. Below is the default
  | authenticator to be used for every request.
  |
  | Available Schemes - basic, session, jwt, api
  | Available Serializers - Lucid, Database
  |
  */
  authenticator: 'session',

  /*
  |--------------------------------------------------------------------------
  | Session Authenticator
  |--------------------------------------------------------------------------
  |
  | Session authenticator will make use of sessions to maintain the login
  | state for a given user.
  |
  */
  session: {
    serializer: 'Lucid',
    model: 'App/Model/User',
    scheme: 'session',
    uid: 'email',
    password: 'password'
  },
  ....
Note: It is configured to make use of session authenticator by default.
The authentication provider can generate the required migrations for you using an ace command. Next, open up your terminal and run the following command like so:
./ace auth:setup

As you can see, two model files were created, User.js and Token.js. Two migration files were also created.
User.js
'use strict'

const Lucid = use('Lucid')

class User extends Lucid {

  apiTokens () {
    return this.hasMany('App/Model/Token')
  }

}

module.exports = User
Token.js
'use strict'

const Lucid = use('Lucid')

class Token extends Lucid {

  user () {
    return this.belongsTo('App/Model/User')
  }

}

module.exports = Token
A user can have many API tokens, but a token belongs to just one user. This is exactly how the Laravel Eloquent Model relationships work. In AdonisJs, this is called Lucid Models.
Note: If you are upgrading an old application, be careful to do the following:
- Run
npm i --save adonis-auth - Register the authentication provider to the providers list in
bootstrap/app.js. - Set up a global middleware in
app/Http/kernel.jsby addingAdonis/Middleware/AuthInitto theglobalMiddlewarevariable.
Next, open up resources/views/welcome.njk and configure it like so:
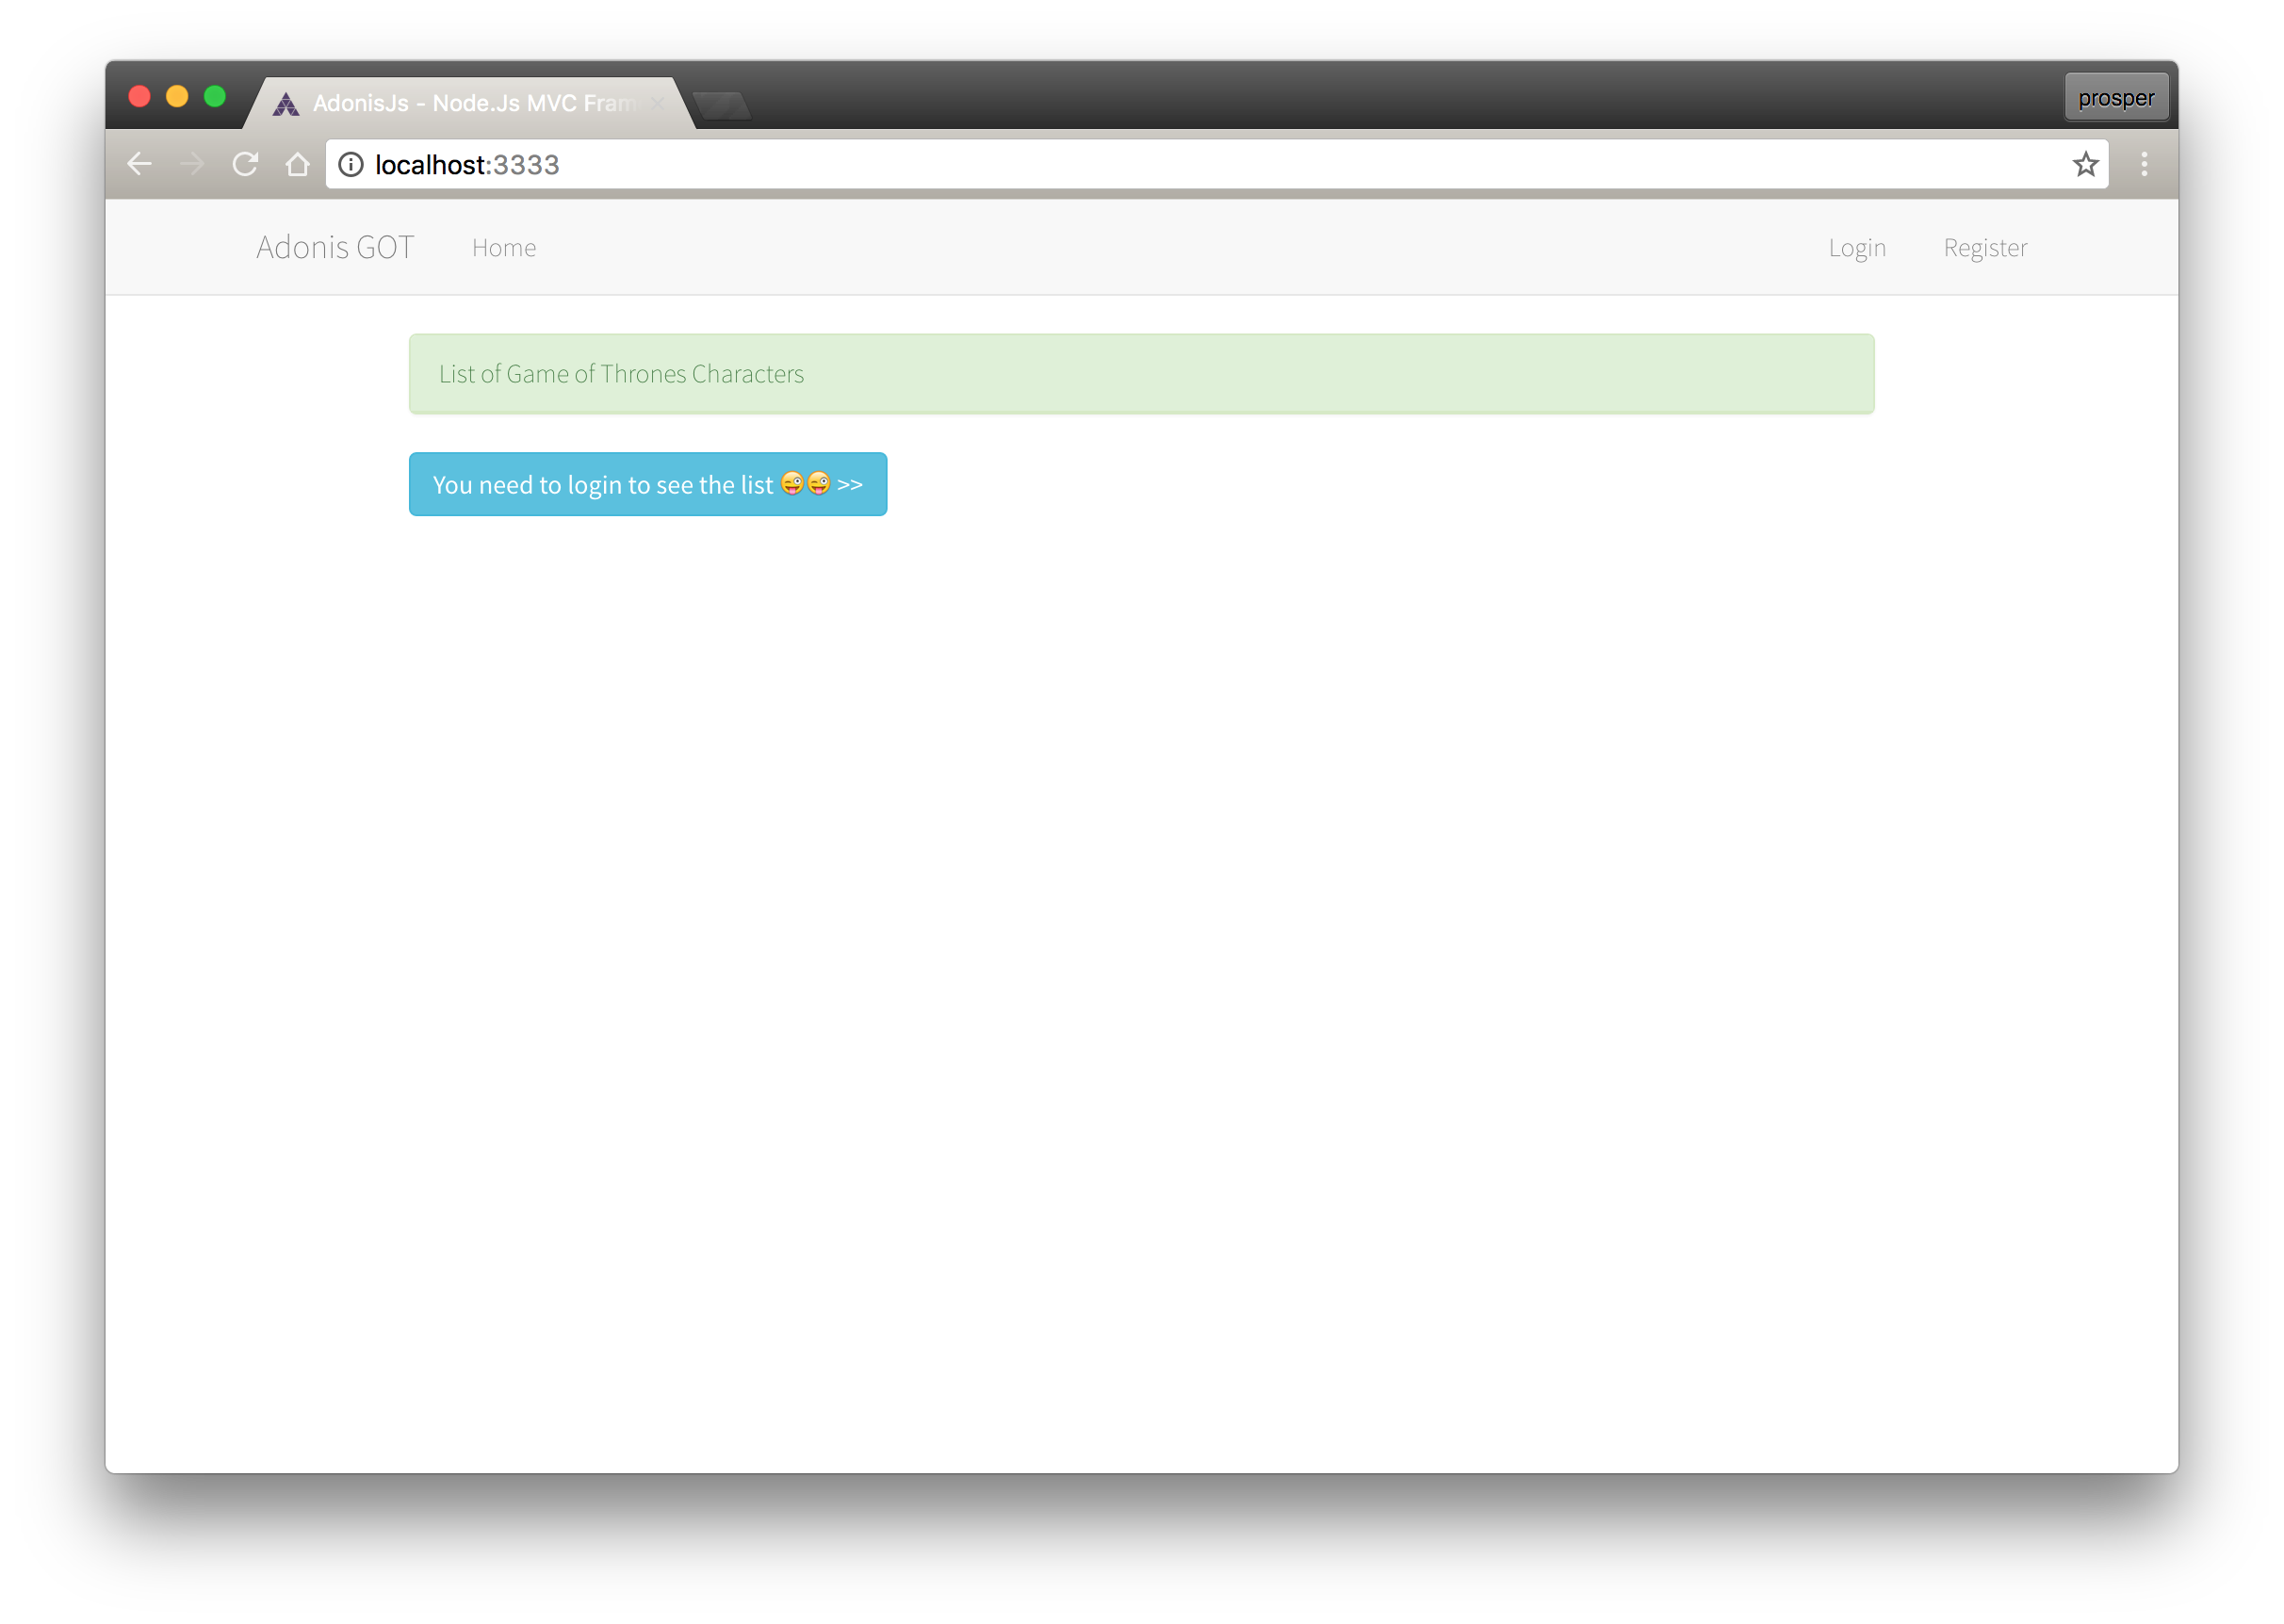
{% extends 'master' %}

{% block content %}
  <div class="container">
    <div class="row">
        <div class="col-md-10 col-md-offset-1">
            <div class="panel panel-success">
                <div class="panel-heading">List of Game of Thrones Characters</div>

                    <AmpContent>
                      <!-- Table -->
                      <table class="table">
                          <tr>
                              <th>Character</th>
                              <th>Real Name</th>
                          </tr>
                          {% for stageName, realName in characters %}
                            <tr>
                              <td>{{ stageName }}</td><td>{{ realName }}</td>
                            </tr>
                          {% endfor %}
                      </table>

</NonAmpContent>

            </div>

            <AmpContent>
              <a href="/login" class="btn btn-info"> You need to login to see the list 😜😜 >></a>

</NonAmpContent>

        </div>
    </div>
</div>
{% endblock %}
Here, we are looping through the characters object passed from the ListController for appropriate rendering in the welcome view.
request.currentUser - This helper method returns the information for a currently logged-in user. You can check if a user has been authenticated or not by just using the if condition to determine if it returns an actual object or a null value, which is falsey.
Currently, the master.njk file doesn't have bootstrap configured and there is no navbar. So, open up resources/views/master.njk and configure it like so:
<!doctype html>
<html>
<head>
  <meta charset="utf-8">
  <meta http-equiv="X-UA-Compatible" content="IE=edge">
  <meta name="viewport" content="width=device-width, initial-scale=1.0, maximum-scale=1.0, user-scalable=no">

  <title>AdonisJs - Node.Js MVC Framework</title>

  <link href='http://fonts.googleapis.com/css?family=Source+Sans+Pro:400,200,300,600,700,900' rel='stylesheet' type='text/css'>
  <link rel="stylesheet" href="https://cdnjs.cloudflare.com/ajax/libs/twitter-bootstrap/3.3.6/css/bootstrap.min.css"  crossorigin="anonymous">
  <link rel="icon" href="/assets/favicon.png" type="image/x-icon">
  <link rel="stylesheet" type="text/css" href="style.css">
</head>

<body id="app-layout">
    <nav class="navbar navbar-default navbar-static-top">
        <div class="container">
            <div class="navbar-header">

                <!-- Collapsed Hamburger -->
                <button type="button" class="navbar-toggle collapsed" data-toggle="collapse" data-target="#app-navbar-collapse">
                    <span class="sr-only">Toggle Navigation</span>
                    <span class="icon-bar"></span>
                    <span class="icon-bar"></span>
                    <span class="icon-bar"></span>
                </button>

                <!-- Branding Image -->
                <a class="navbar-brand" href="/">
                    GOT
                </a>
            </div>

            <div class="collapse navbar-collapse" id="app-navbar-collapse">
                <!-- Left Side Of Navbar -->
                <ul class="nav navbar-nav">
                    <li><a href="/home">Home</a></li>
                </ul>

                <!-- Right Side Of Navbar -->
                <ul class="nav navbar-nav navbar-right">
                    <!-- Authentication Links -->

                    <AmpContent>
                        <li><a href="/login">Login</a></li>
                        <li><a href="/register">Register</a></li>

</AmpContent>

<NonAmpContent>

                        <li class="dropdown">
                            <a href="#" class="dropdown-toggle" data-toggle="dropdown" role="button" aria-expanded="false">
                                {{ currentUser.username }} <span class="caret"></span>
                            </a>

                            <ul class="dropdown-menu" role="menu">
                                <li><a href="/logout"><i class="fa fa-btn fa-sign-out"></i>Logout</a></li>
                            </ul>
                        </li>

</NonAmpContent>

                </ul>
            </div>
        </div>
    </nav>

    {% block content %}{% endblock %}


    <!-- JavaScript files -->
    <script src="https://cdnjs.cloudflare.com/ajax/libs/jquery/2.2.3/jquery.min.js"></script>
    <script src="https://cdnjs.cloudflare.com/ajax/libs/twitter-bootstrap/3.3.6/js/bootstrap.min.js"></script>
</body>
</html>
Setting Up the Routes and Views
We need to add routes for login, logout, and register. Open up app/Http/routes.js and configure it like so:
'use strict'

/*
|--------------------------------------------------------------------------
| Router
|--------------------------------------------------------------------------
|
| AdonisJs Router helps you in defining urls and their actions. It supports
| all major HTTP conventions to keep your routes file descriptive and
| clean.
|
| @example
| Route.get('/user', 'UserController.index')
| Route.post('/user', 'UserController.store')
| Route.resource('user', 'UserController')
*/

const Route = use('Route')

Route.get('/', 'ListController.show')

Route.get('/login', 'AuthController.index')
Route.post('/login', 'AuthController.login')

Route.get('/register', 'RegisterController.index')
Route.post('register', 'RegisterController.doRegister')
Let's create views for these routes. Create a resources/views/register.njk file and add the code below:
register.njk
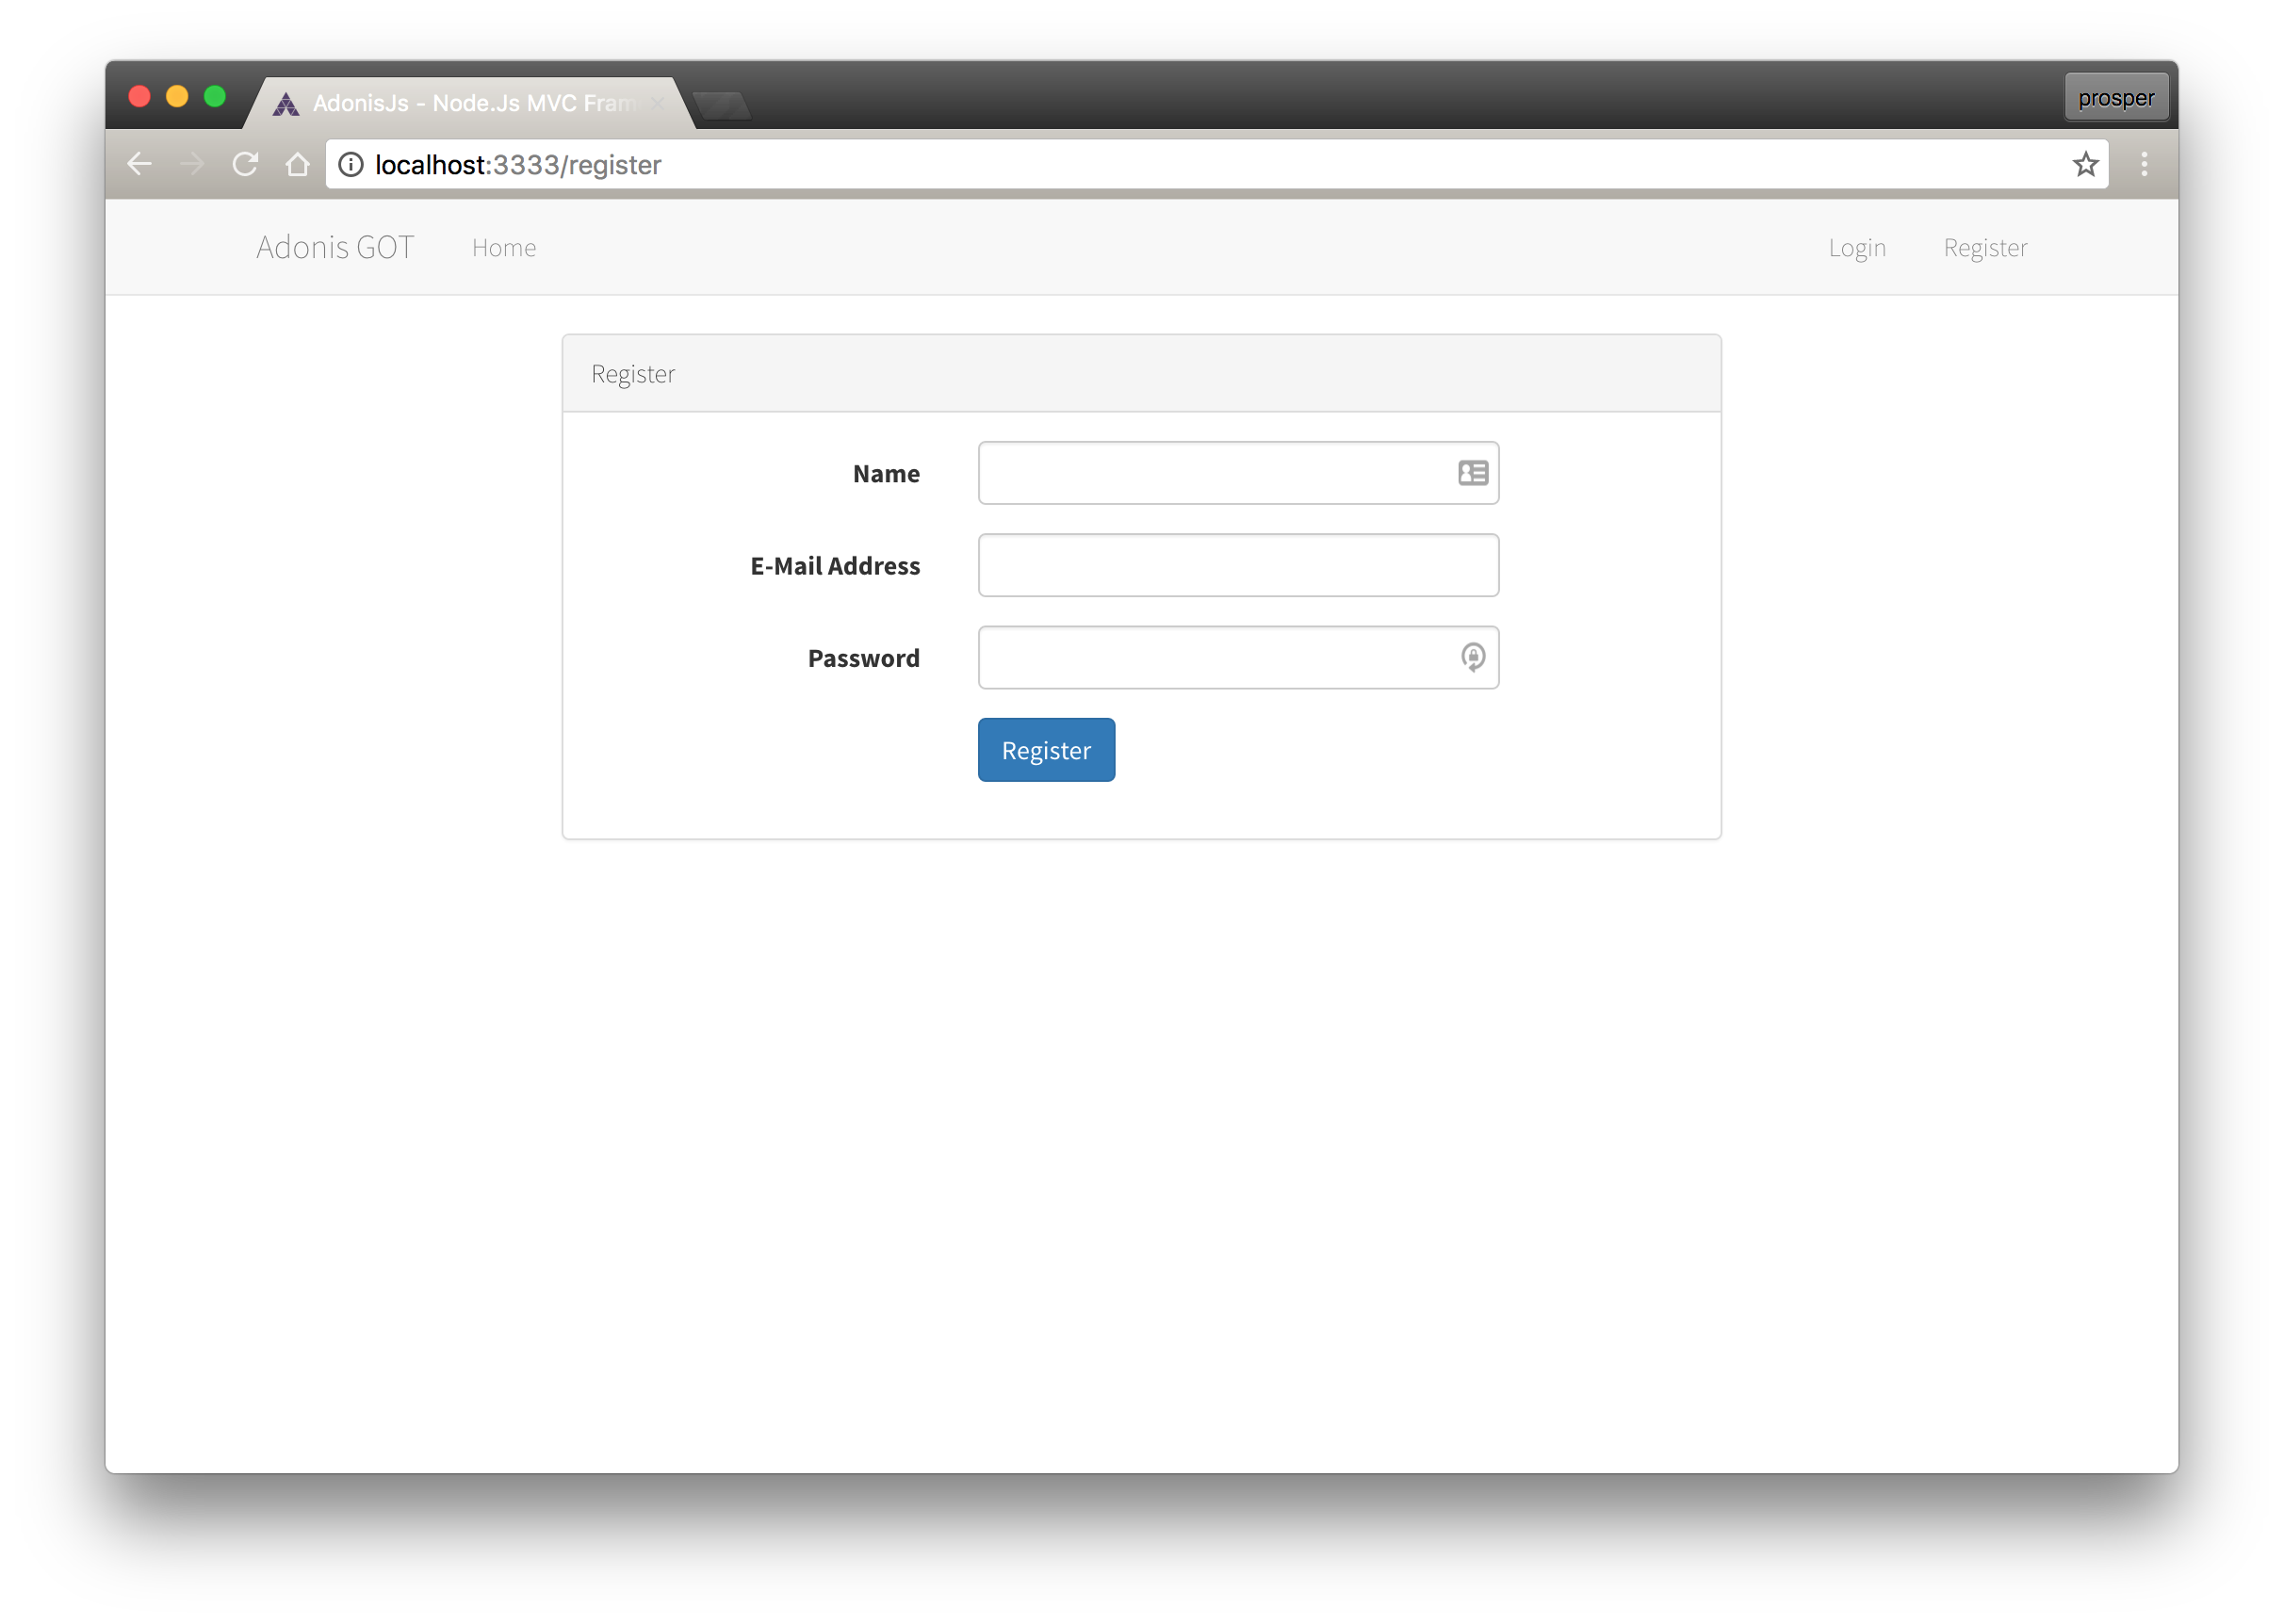
{% extends 'master' %}
{% block content %}
<div class="container">
    <div class="row">
        <div class="col-md-8 col-md-offset-2">
            <div class="panel panel-default">
                <div class="panel-heading">Register</div>
                <div class="panel-body">
                    <form class="form-horizontal" role="form" method="POST" action="/register">
                       {{ csrfField }}
                        <div class="form-group">
                            <label for="name" class="col-md-4 control-label">Name</label>
                            <div class="col-md-6">
                                <input id="name" type="text" class="form-control" name="name" required>
                            </div>
                        </div>
                        <div class="form-group">
                            <label for="email" class="col-md-4 control-label">E-Mail Address</label>
                            <div class="col-md-6">
                                <input id="email" type="email" class="form-control" name="email" required>
                            </div>
                        </div>
                        <div class="form-group">
                            <label for="password" class="col-md-4 control-label">Password</label>
                            <div class="col-md-6">
                                <input id="password" type="password" class="form-control" name="password" required>
                            </div>
                        </div>
                        <div class="form-group">
                            <div class="col-md-6 col-md-offset-4">
                                <button type="submit" class="btn btn-primary">
                                    <i class="fa fa-btn fa-user"></i> Register
                                </button>
                            </div>
                        </div>
                    </form>
                </div>
            </div>
        </div>
    </div>
</div>
{% endblock %}
Create resources/views/login.njk file and add the code below:
login.njk
{% extends 'master' %}
{% block content %}
<div class="container">
    <div class="row">
        <div class="col-md-8 col-md-offset-2">
            <div class="panel panel-default">
                <div class="panel-heading">Login</div>
                <div class="panel-body">
                    <form class="form-horizontal" role="form" method="POST" action="/login">
                      {{ csrfField }}
                        <div class="form-group">
                            <label for="email" class="col-md-4 control-label">E-Mail Address</label>
                            <div class="col-md-6">
                                <input id="email" type="email" class="form-control" name="email" required>
                            </div>
                        </div>
                        <div class="form-group">
                            <label for="password" class="col-md-4 control-label">Password</label>
                            <div class="col-md-6">
                                <input id="password" type="password" class="form-control" name="password" required>
                            </div>
                        </div>
                        <div class="form-group">
                            <div class="col-md-6 col-md-offset-4">
                                <button type="submit" class="btn btn-primary">
                                    <i class="fa fa-btn fa-sign-in"></i> Login
                                </button>
                            </div>
                        </div>
                    </form>
                </div>
            </div>
        </div>
    </div>
</div>
{% endblock %}
Now that we have all the routes and views set up, we need to set up the controllers for our application.
Setting Up Controllers
From the terminal, run these commands to create the RegisterController and AuthController files:
./ace make:controller Register
./ace make:controller Auth
Open up app/Http/Controllers/RegisterController.js and configure it like so:
RegisterController
'use strict'

class RegisterController {
    * index(request, response) {
        yield response.sendView('register')
    }
}

module.exports = RegisterController
AuthController
'use strict'

class AuthController {
    * index(request, response) {
        yield response.sendView('login')
    }
}

module.exports = AuthController
Our login, register and landing pages should be looking like this now:
Landing Page
Login Page

Register Page
Run Migrations
Migrations are like version control for your database, allowing a team to easily modify and share the application's database schema. In AdonisJs, they are placed in the database/migrations directory. Each migration file name contains a timestamp that allows AdonisJs to determine the order of the migrations. For the sake of simplicity, we will stick to SQLite. However, you are free to use MYSQL or PostgreSQL.
We already have the migration files needed from the auth:setup command that we ran earlier. Check your .env file to ensure all the connection parameters are set up properly. Now, install Sqlite3 from your terminal like so:
npm i --save sqlite3
Once the installation is done, run the command below to create database tables from our migrations.
./ace migration:run
Now that our database tables have been successfully created, let's code up authentication logic for our application.
Update Auth & Register Controllers
Open up app/Http/Controllers/AuthController.js and update it like so:
AuthController.js
'use strict'

const User = use('App/Model/User')
const Hash = use('Hash')

class AuthController {

    * index(request, response) {
        yield response.sendView('login')
    }

    * login(request, response) {
        const email = request.input('email')
        const password = request.input('password')

        const loginMessage = {
            success: 'Logged-in Successfully!',
            error: 'Invalid Credentials'
        }

        // Attempt to login with email and password
        const authCheck = yield request.auth.attempt(email, password)
        if (authCheck) {
            return response.redirect('/')
        }

        yield response.sendView('login', { error: loginMessage.error })
    }

    * logout(request, response) {
        yield request.auth.logout()

        return response.redirect('/')
    }
}

module.exports = AuthController
The login method takes in both the request and response objects. The request object contains the user's login details. These details are passed to the request.auth.attempt method to validate them against the database. If successful, the user is logged in and redirected back to the homepage; otherwise the user is served an error on the login page. The logout method simply invokes the request.auth.logout helper method, which destroys the user's session and redirects back to the homepage.
Open up app/Http/Controllers/RegisterController.js and update it like so:
RegisterController.js
'use strict'

const User = use('App/Model/User')
const Hash = use('Hash')

class RegisterController {
    * index(request, response) {
        yield response.sendView('register')
    }

    * doRegister(request, response) {
        const user = new User()
        user.username = request.input('name')
        user.email = request.input('email')
        user.password = yield Hash.make(request.input('password'))

        yield user.save()

        var registerMessage = {
            success: 'Registration Successful! Now go ahead and login'
        }

        yield response.sendView('register', { registerMessage : registerMessage })
    }
}

module.exports = RegisterController
Here, we got the user form input values, hashed the password, and saved the user's details. Now try to register a user and log in. Everything should work perfectly!
Page with list of GOT Characters

Using the Auth Middleware
Middlewares provide a convenient mechanism for filtering HTTP requests entering your application. For example, AdonisJs includes a middleware that verifies that the user of your application has been authenticated. If the user has not been authenticated, the middleware will redirect the user to the login screen. However, if the user has been authenticated, the middleware will allow the request to proceed further. The app/Http/Kernel.js contains a listing of the available middleware.
Let's check out how the auth middleware works.
Add a new route to your routes.js file like so:
Route.get('/got', function * (request, response) {
    response.status(200).json({ user: 'prosper' })
}).middleware('auth')
Now, log out and then try to access that route. An InvalidLoginException will be thrown. Check out the docs for more info on creating and customizing middleware in AdonisJs.
Aside: Using Auth0 with AdonisJS
Auth0 issues JSON Web Tokens on every login for your users. This means that you can have a solid identity infrastructure, including single sign-on, user management, support for social identity providers (Facebook, Github, Twitter, etc.), enterprise identity providers (Active Directory, LDAP, SAML, etc.) and your own database of users with just a few lines of code.
We can easily set up authentication in our AdonisJS apps by using the Lock Widget. If you don't already have an Auth0 account, sign up for one now. Navigate to the Auth0 management dashboard, select Applications from the navigational menu, then select the app you want to connect with AdonisJS. Now head over to the Nodejs Quickstart docs and follow the steps highlighted there.
Wrapping Up
Congratulations! You have just built your first app with AdonisJs. If you already use Laravel, then you'll feel just at home with the AdonisJs framework. You haven't used Laravel? Check out this excellent article on building an app with it. One major challenge with using AdonisJs is the lack of adequate resources and tutorials on how to use the framework. The framework is still very young but promising. With the right amount of support from developers, it might turn out to be the next big thing in JavaScript land. Have you built an app with AdonisJs? What are your thoughts about it? Let me know in the comment section.
About the author

Prosper Otemuyiwa
Former Auth0 Employee (Auth0 Alumni)