

TL;DR: This post discusses how to authenticate against Auth0 in your Cypress end-to-end tests successfully. You will use a small sample React application to illustrate patterns you can use to programmatically log your user into Auth0 while running Cypress tests, in a manner that adheres to most Cypress and Auth0 best practices. To see a working example of the techniques described in this article, please feel free to clone this repo.
“Learn how to perform end-to-end integration tests on SPAs secured with Auth0.”
Tweet This
Prerequisites
As mentioned, you will be using a React application written with modern JavaScript language features (ES2015+), so a good understanding of modern web technologies is recommended. If you’re not quite there yet, there are a wealth of fantastic resources for modern JS development, including courses from Wes Bos, Tyler McGinnis, and others.
You will also need to have Node.js and NPM installed. Check out the Node.js website for download links and an installation guide.
You are also expected to have an Auth0 account and have valid user permissions so that you can authenticate into your application. So, if you don't have an Auth0 account yet, sign up for a free now.
Try out the most powerful authentication platform for free.
Get started →Lastly, a basic understanding of what Cypress is and why it’s useful is expected. If you do not know Cypress, check out this article for more.
Auth0 Setup & Configuration
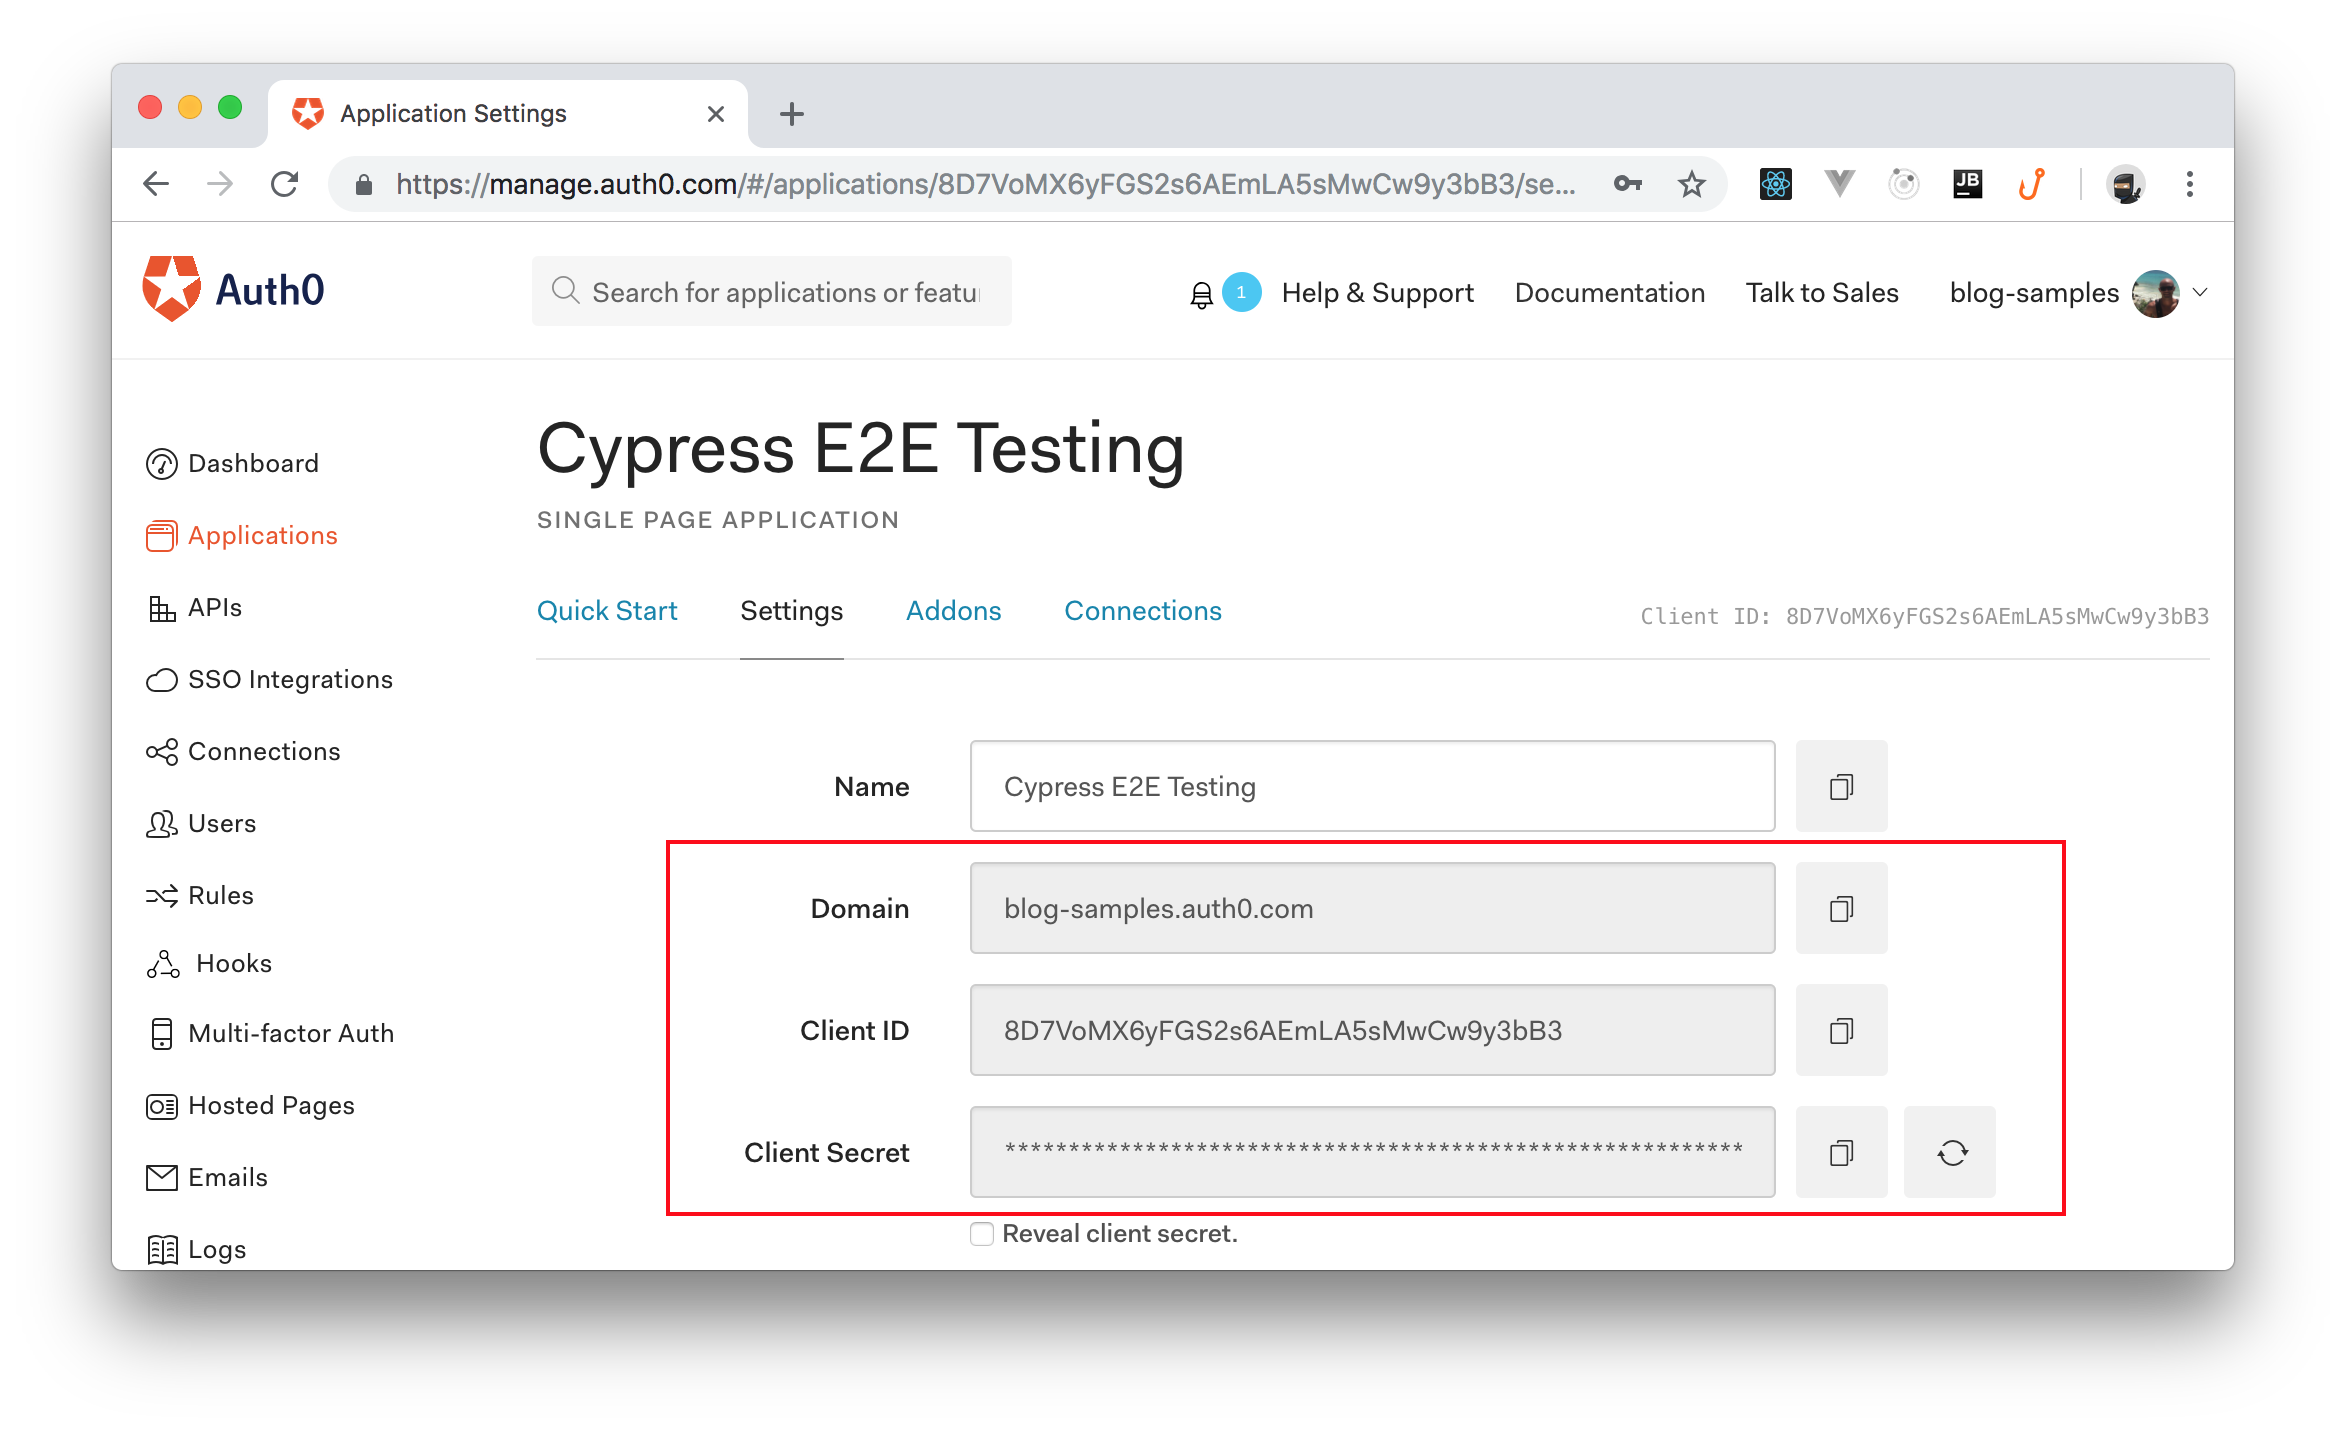
To see the whole process in action, you will need to create an Auth0 Application on your Auth0 dashboard. To do so, head to the Applications section of your dashboard and click on the Create Application button. When you click on this button, you will see a dialog. On this dialog, you will have to add a name for your application (e.g., "Cypress E2E Testing") and you will have to select Single Page Web App as its type.
Now, clicking on the Create button will make Auth0 redirect you to the Quick Start page of your new application. From there, you can head to the Settings tab and configure it as follows:
- Scroll down to the Allowed Callback URLs field and enter in the following value:
http://localhost:3000/callback. After user authentication occurs, Auth0 will only redirect successfully if the route in question is listed here. - Enter
http://localhost:3000into the Allowed Web Origin field. - Enter
http://localhost:3000into the Allowed Logout URLs field. - Scroll down to the bottom of the Settings page and click Show Advanced Settings.
- Click on the Grant Types tab, and check the Password grant.
- Click Save Changes.
Now, you can create a user account for the end-to-end testing scripts. To do so, head to the Users section of your dashboard and click on Create User. On the dialog shown by Auth0, fill the form as follows:
- Email: Enter a random email address (e.g.,
e2e-testing@mydomain.com) - Password: Enter a random password (e.g.,
s#m3R4nd0m-pass) - Repeat Password: Enter the same password.
- Connection: Use the
Username-Password-Authentication
After that, click on Save to finish the process.
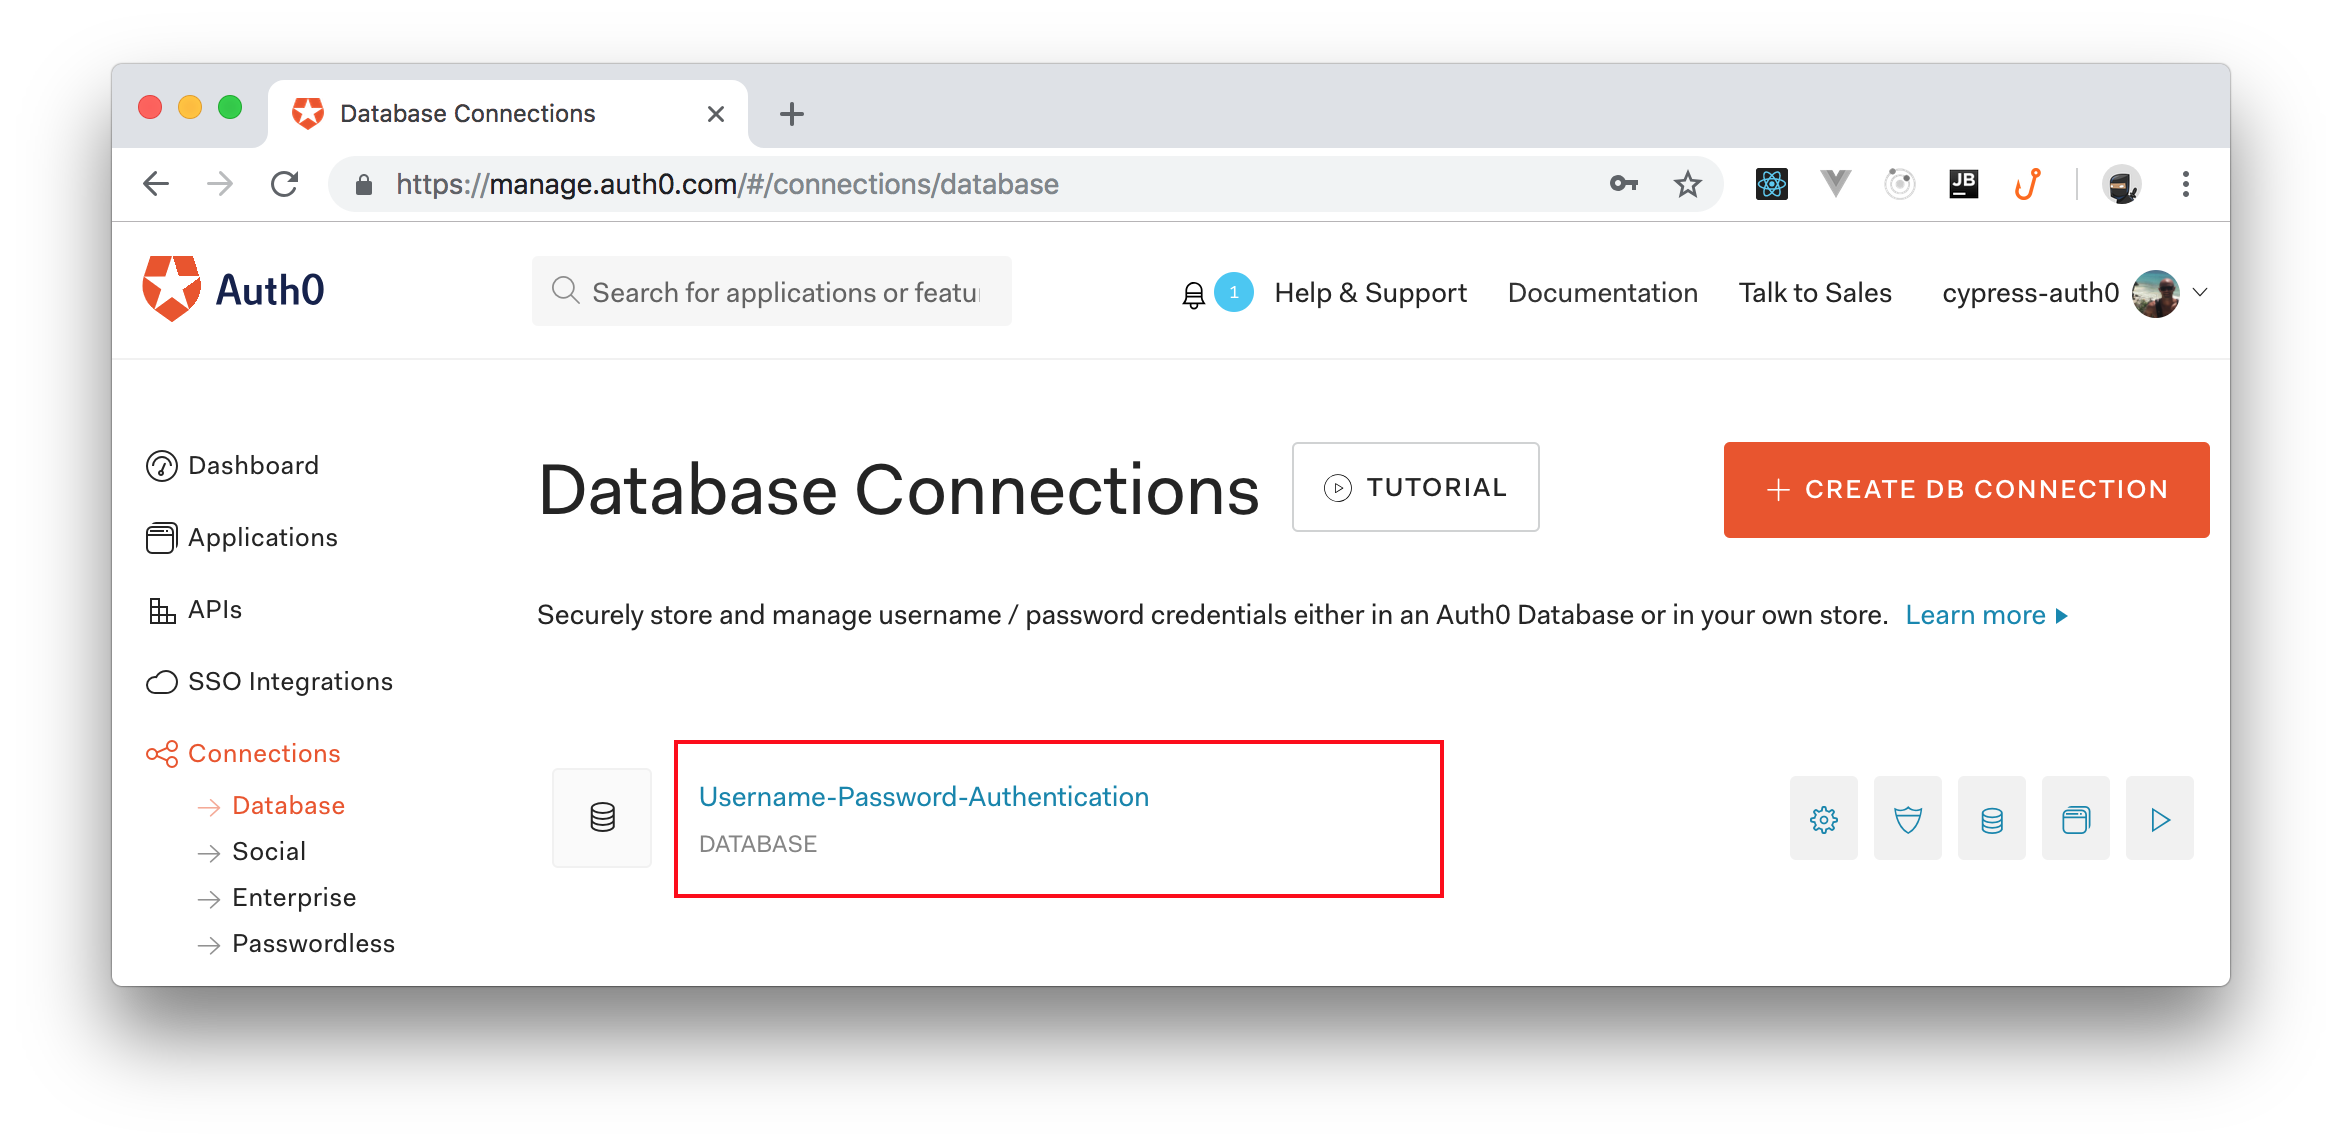
Lastly, you will have to go to your tenant's settings and set Username-Password-Authentication as the value of the Default Directory property. As mentioned in this page, this field defines the "name of the connection to be used for Password Grant exchanges". In this case, the Username-Password-Authentication value comes from the default the default Database Connections that Auth0 adds to all new tenants.
Just don't forget to save the changes made to your tenant.
The Sample App
First things first, clone this repo and check out the base branch:
# clone the repo
git clone https://github.com/dlo83/auth0-cypress-demo.git

# move into it
cd auth0-cypress-demo

# checkout the base branch
git checkout base
Note: You can also refer to the finished product on the
masterbranch. Then, be sure tonpm installandnpm run startin your terminal to spin up the application.
This app will be quite simple: it is a React application with a few routes, powered by React Router 4. One of the routes will be protected — that is, only accessible for authenticated users — and the other, public.
There will be one other route which serves an important purpose: the /callback route. This route is where the user is redirected after successfully entering their Auth0 credentials. When this route is hit, the application checks to ensure that the state information in the URL's query string matches the state stored in the persisted cookie.
If these protected route patterns are unfamiliar to you, I highly recommend checking out Bruno Krebs' article for more.
Cypress
Cypress is a modern front-end testing tool that makes writing integration tests a breeze. This tool is, essentially, a one-stop shop for all your end-to-end testing needs, combining a fast, state-of-the-art testing framework, graphical and headless test runners, and easy-to-use assertion library in one package.
Authentication with Cypress
So you’re sold on Cypress and you’re using Auth0 for your authentication needs. Now, it is time to see how you can make the two play nicely together!
Imagine that you want to write a test to ensure that a user can visit a page only available behind authentication. How would you do this?
The naive approach would be to:
- Visit the web application and invoke a redirect to the Auth0 login page (via a button click, route change, etc.)
- Enter in your Auth0 username and password
- Submit the form
- Wait for the redirect to your web application and proceed as needed
There’s a problem with this, though. To paraphrase co-founder of Cypress, Brian Mann:
The best practice is never to visit or test third-party sites over which you have no control.
Then, since you don’t have control over the Auth0 website, it doesn’t make sense to try and mimic a user’s login flow through the UI.
So what do you have to do?
“Don't waste time covering services that you do not control on your end-to-end tests.”
Tweet This
Cypress Best Practices
Thankfully, a Cypress contains an example recipe that can help you. The general pattern for dealing with Single Sign-On authentication is as follows:
- Use Cypress’
cy.request()command to make an HTTP request to your authentication service (in this case, Auth0) - Parse the tokens in the response
- Set tokens on local storage
Note: Auth0 now recommends using cookies in lieu of local storage. Not a problem. You will adhere to this recommendation in your implementation.
Now that you have a strategy in place, you can get started.
Cypress Commands
As stated above, your first course of action is to make an HTTP request against Auth0 using Cypress cy.request() command. A request with Cypress would look something like this:
const options = {
  method: 'POST',
    url: 'https://my.url.com/endpoint',

    body: {
      username: 'my_username'
      password: 'my_password'
      ...
    }
}

cy.request(options)
That's great and all, but you can imagine that having to write the code above every time you want to log in could be quite cumbersome and violate DRY (Don't Repeat Yourself) principles. Thankfully, Cypress has a feature called Custom Commands that allow you to encapsulate this code and make it reusable across your tests.
So, insert the following code to the end of the cypress/support/commands.js file:
Cypress.Commands.add('login', (overrides = {}) => {
  Cypress.log({
    name: 'loginViaAuth0',
  });

  const options = {
    method: 'POST',
    url: Cypress.env('auth_url'),
    body: {
      grant_type: 'password',
      username: Cypress.env('auth_username'),
      password: Cypress.env('auth_password'),
      audience: Cypress.env('auth_audience'),
      scope: 'openid profile email',
      client_id: Cypress.env('auth_client_id'),
      client_secret: Cypress.env('auth_client_secret'),
    },
  };
  cy.request(options);
});
Now, when you want to trigger a request to authenticate against Auth0, you simply have to call cy.login() from your code. The custom command name to use in your consuming code (in this case, login) corresponds to the first argument given to the add() method.
OK, so you have your custom Cypress login command, but what's with the Cypress.env values for the keys in the body object?
Cypress Environment Variables
Because you re providing sensitive information in your Cypress request to Auth0, you need to authenticate. And, it's imperative to store this information outside of your test suite.
At the root of your project, create a file called cypress.env.json and, before populating this file, add this line to your .gitignore file:
cypress.env.json
This ensures that you do not accidentally commit any sensitive details to your Git repository. Please, do not forget this step!
Now, back in your cypress.env.json file, add the following code to it:
{
  "auth_audience": "https://my_tenant.auth0.com/api/v2/",
  "auth_url": "https://my_tenant.auth0.com/oauth/token",
  "auth_client_id": "my_client_id",
  "auth_client_secret": "my_client_secret",
  "auth_username": "my_username",
  "auth_password": "my_password"
}
You will have to update each one of the properties above with your own Auth0 values:
auth_audience: For this one, you will have to replacemy_tenant.auth0.comwith your own Auth0 domain (e.g.,blog-samples.auth0.com). You can find this information on the Auth0 application you created before.auth_url: Here, you will have to do the same thing. You will have to replacemy_tenant.auth0.comwith your own Auth0 domain.auth_client_id: In this case, you will have to use the Client ID property of the Auth0 Application you created before.auth_client_secret: Lastly, for this property, you will have to use the Client Secret property of the Auth0 Application you created.
For the last two properties (auth_username and auth_password) you will have to use the credentials used while creating the end-to-end testing user.
Configure React App Environment Variables
Cypress isn't the only tool in your application that has to take environment variables. You will have to define environment variables for your React application as well, albeit in a different file.
- Rename the
.env.samplefile in the root of the project to simply.env. - Replace the
my-tenant.auth0.comvalue (on theREACT_APP_AUTH0_DOMAINvariable) with your tenant domain (e.g.,blog-samples.auth0.com). - Insert your Client ID for the
REACT_APP_AUTH0_CLIENT_IDvariable. Unlike thecypress.env.jsonfile, there should be no quotes around this value here.
Grant Strategies
While creating your Auth0 Application, you enabled the Password grant. But what exactly is a grant, anyway?
Auth0 defines a grant as follows:
OAuth 2.0 supports several types of grants, which are methods by which you can gain access tokens. Different grant types allow different types of access and, based on the needs of your app, some grant types are more appropriate than others.
That last sentence is the key here. Normally, when authenticating with Auth0, you are redirected to log in through Auth0's hosted login page. But, since you are in a testing environment (and again, you don't want to test what you don't control), you have to find some other way to authenticate against Auth0 without redirecting away from your application. That's where the Password Grant comes in. The Password grant relies on authenticating a user via provided username and password credentials.
Writing tests using Cypress Login Command
OK. You have created your Cypress Custom Command for login. Also, you have configured your Auth0 account and you have updated your Cypress environment variables. Now, you will see how you can take advantage of everything you've done to log into Auth0 programmatically using Cypress!
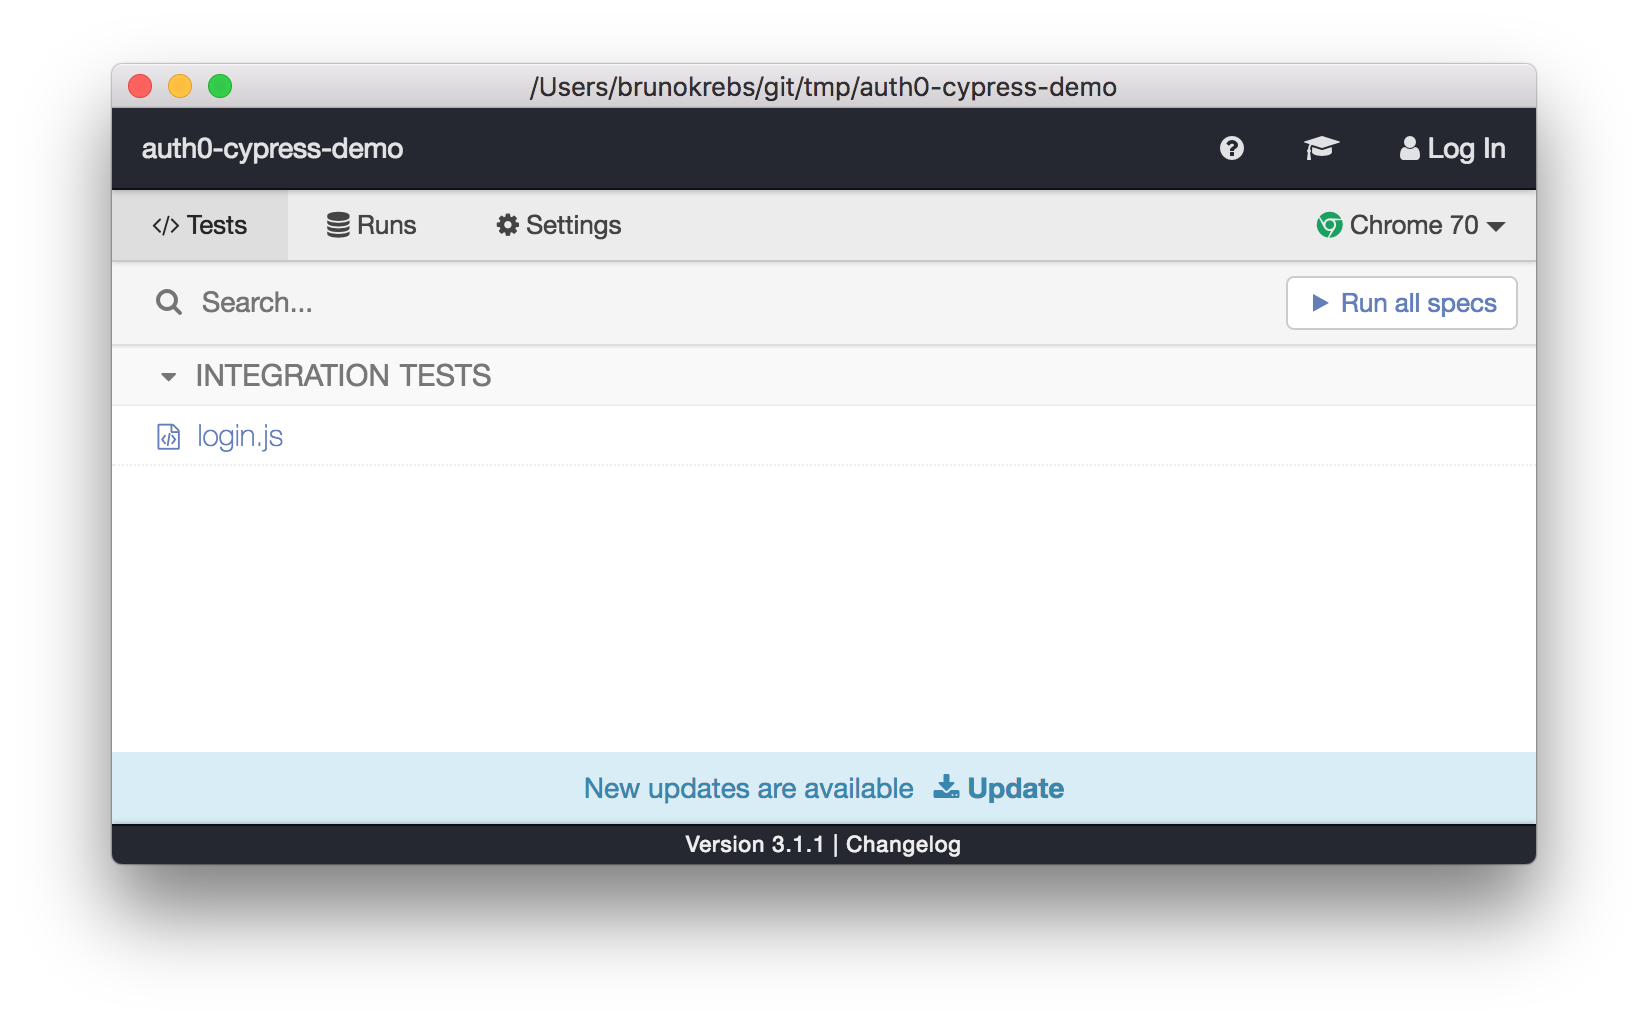
In your project, create a new directory called integration inside cypress. Then, add a file called login.js to it with the following code:
describe('login', () => {
  it('should successfully log into our app', () => {
    cy.login()
      .then((resp) => {
        return resp.body;
      })
      .then((body) => {
        const {access_token, expires_in, id_token} = body;
        const auth0State = {
          nonce: '',
          state: 'some-random-state'
        };
        const callbackUrl = `/callback#access_token=${access_token}&scope=openid&id_token=${id_token}&expires_in=${expires_in}&token_type=Bearer&state=${auth0State.state}`;
        cy.visit(callbackUrl, {
          onBeforeLoad(win) {
            win.document.cookie = 'com.auth0.auth.some-random-state=' + JSON.stringify(auth0State);
          }
        });
      })
  });
});
Now, in your terminal, run the following commands from the root directory of your React project:
# install all dependencies
npm install

# run the React app on the background
npm start &

# run cypress
npm run cypress:open
This will make the Cypress dashboard open.
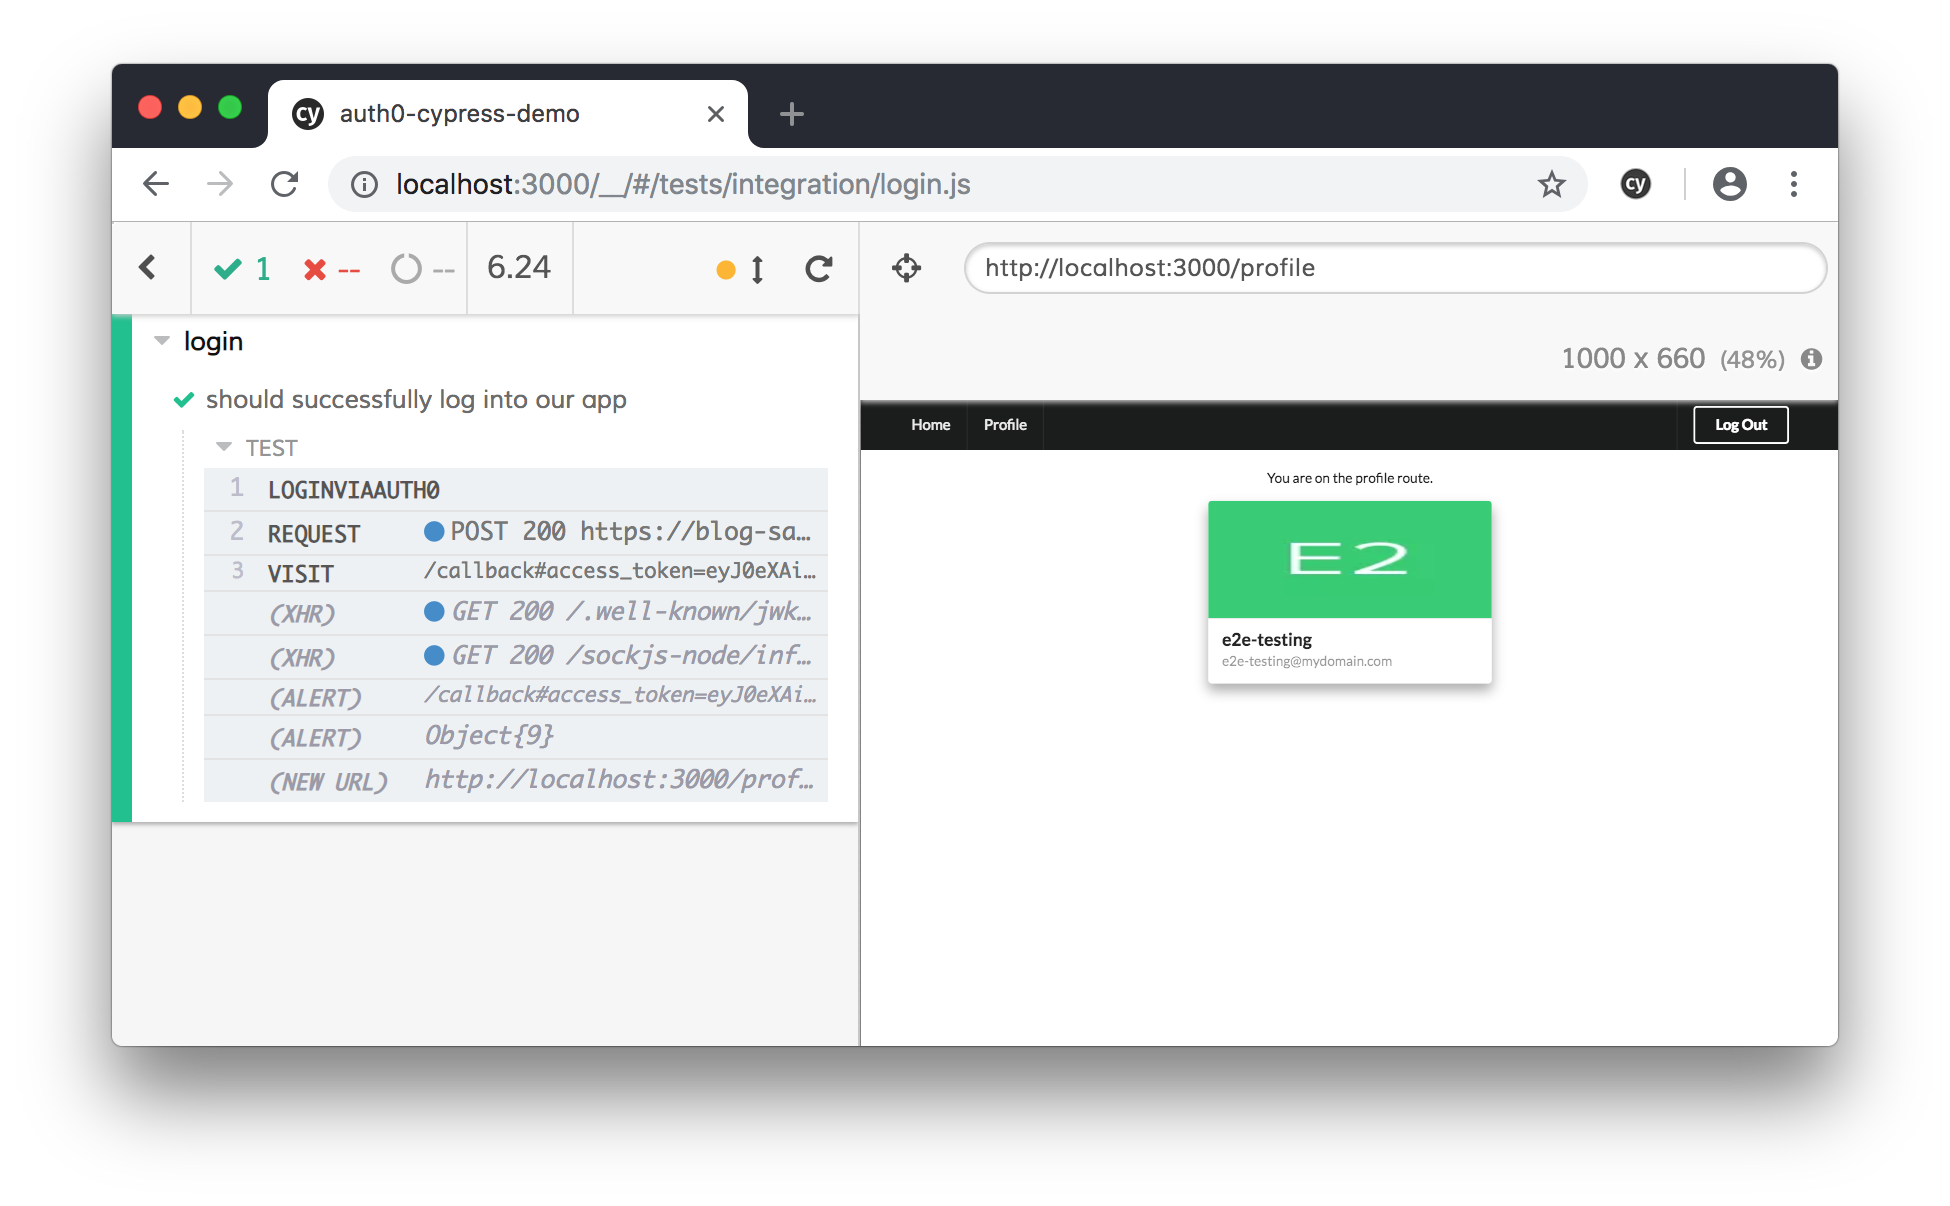
From there, you can click on the login.js integration test in the Cypress test runner. You should now see an instance of Chrome launched, with your user automatically logged in to Auth0! Click on the Profile page to see your logged in user's email address for verification.
“I just learned how to perform end-to-end integration tests on SPAs secured with Auth0.”
Tweet This
Wrap Up
In this article, you started by learning about one of Cypress' core tenets when it comes to testing: avoid testing sites over which one does not have control. Next, you took a quick look on Cypress Custom Commands and how they make your lives easier by encapsulating repetitive testing logic. Then, you learned about Grant Strategies, which are methods by which you can gain access tokens. More specifically, you learned about the Resource Owner Password Grant strategy, which allows you to receive a token by providing username and password credentials, thereby circumventing the need to visit the Auth0 login page.
Note: Keep in mind that you must not use this grant on your public clients. This is an exception to this rule because it is an end-to-end test that won't be used by real users.
Finally, you learned about how you can use your custom login command in a test, set your access token in memory, and successfully log into your application as part of your Cypress test.
I hope you've enjoyed reading this article, and have gained an understanding of how you can incorporate Cypress into your Auth0 application. If you have any questions or concerns, please feel free to leave a comment down below.
Thanks for reading!