
Introduction
If you’re building your application with Python and it needs to process images, you have a choice of libraries, including OpenCV, scikit-image, Python Imaging Library and Pillow.
We won't debate which library is the best here; they all have their merits. This article will focus on Pillow, a powerful library that provides a wide array of image processing features and is simple to use. To make the tutorial more interactive and easy to follow, we'll run all the code using Jupyter Notebooks.
Pillow
Pillow is a fork of the Python Imaging Library (PIL). PIL is a library that offers several standard functions for manipulating images. It's a powerful library but hasn't been updated since 2009 and doesn't support Python 3.
Pillow builds on PIL, adding more features and support for Python 3. It supports a range of image file formats such as PNG, JPEG, PPM, GIF, TIFF, and BMP. We'll see how to perform various operations on images using this library, such as cropping, resizing, adding text to images, rotating, greyscaling, and more.
Project Setup
You can follow along by downloading our sample Jupyter notebook from GitHub, or you can create your own project and install the following packages:
python3 -m pip install --upgrade jupyter
python3 -m pip install --upgrade Pillow
Downloading the images
To follow along, you can download the images (courtesy of Unsplash) that we'll use in the article.
All the code examples will assume the required images are in the same directory as your Jupyter Notebook file.
Downloading the code
You’ll find the code for all the Pillow exercise in this article in a Jupyter Notebook in this GitHub repository.
The Image Object
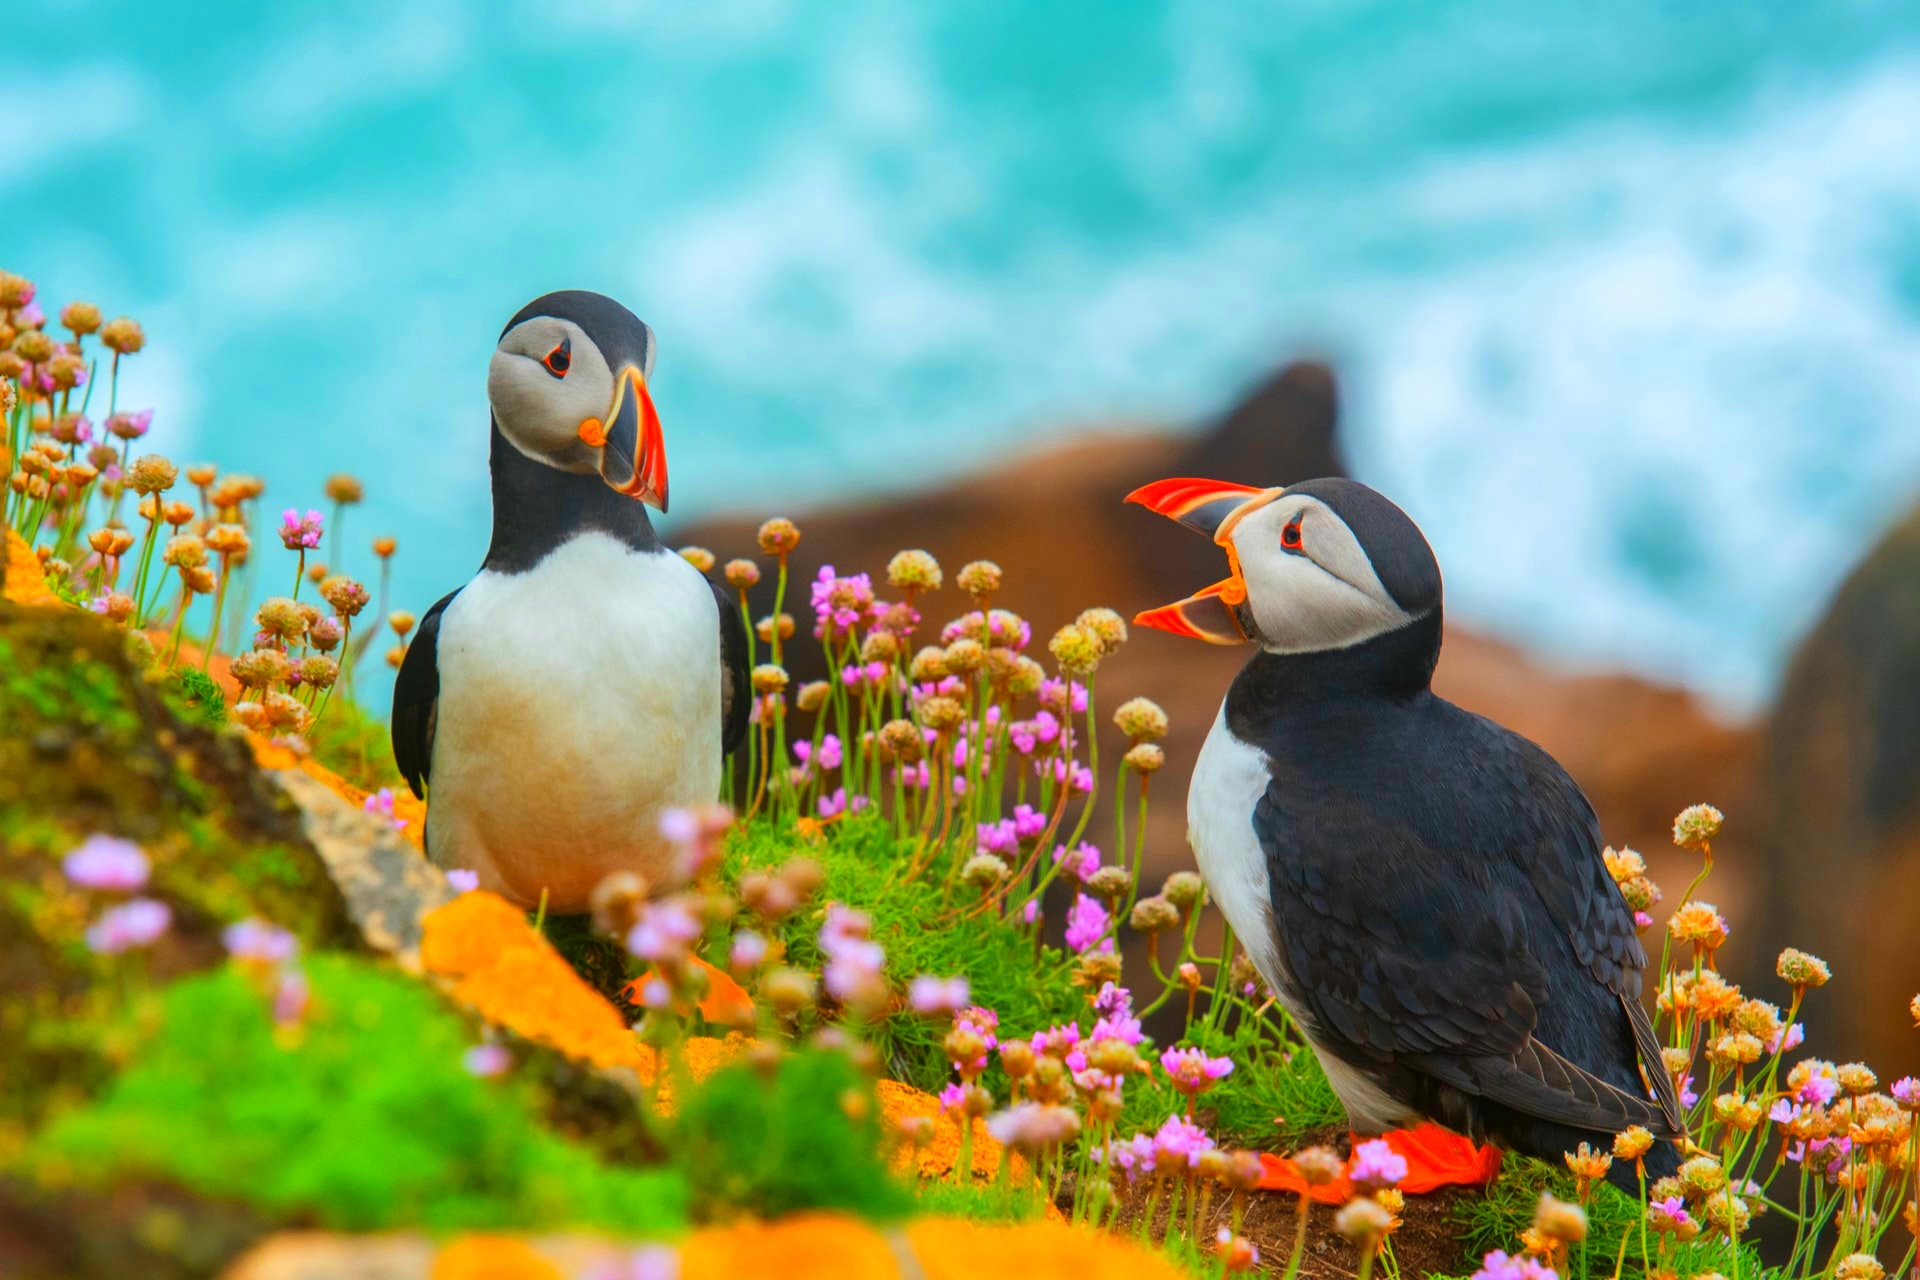
Loading and displaying an image
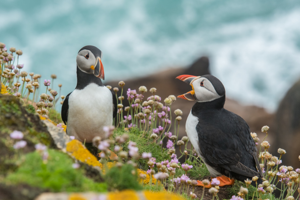
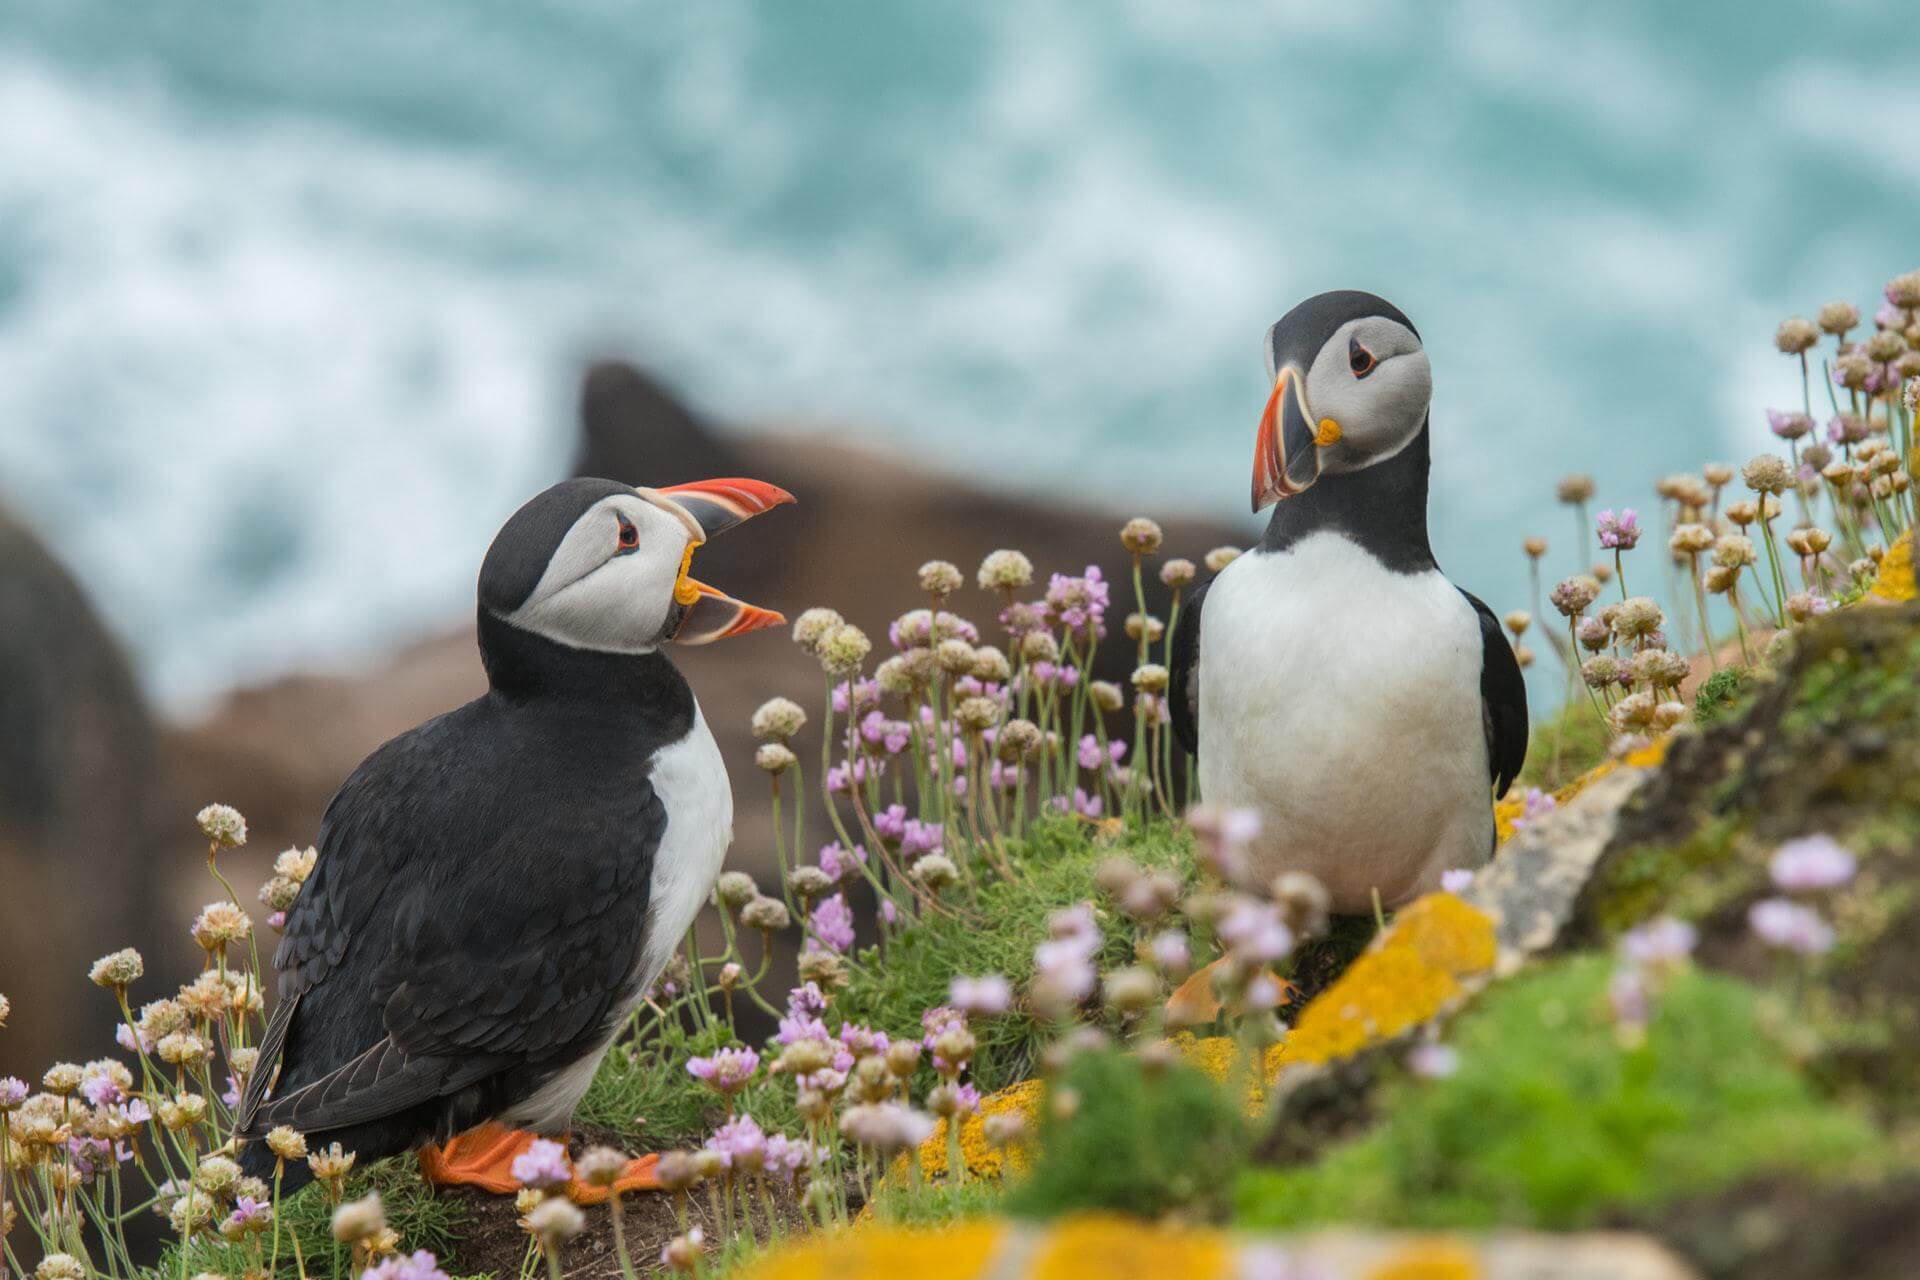
Of all the classes in Pillow, you’ll probably use Image the most. It's defined in the Image module and is the class that represents images and provides methods for loading or creating them, processing them, and displaying them.
To load an image from a file, use the open() function in the Image module, which takes the filepath for the image as its argument:
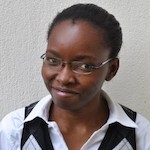
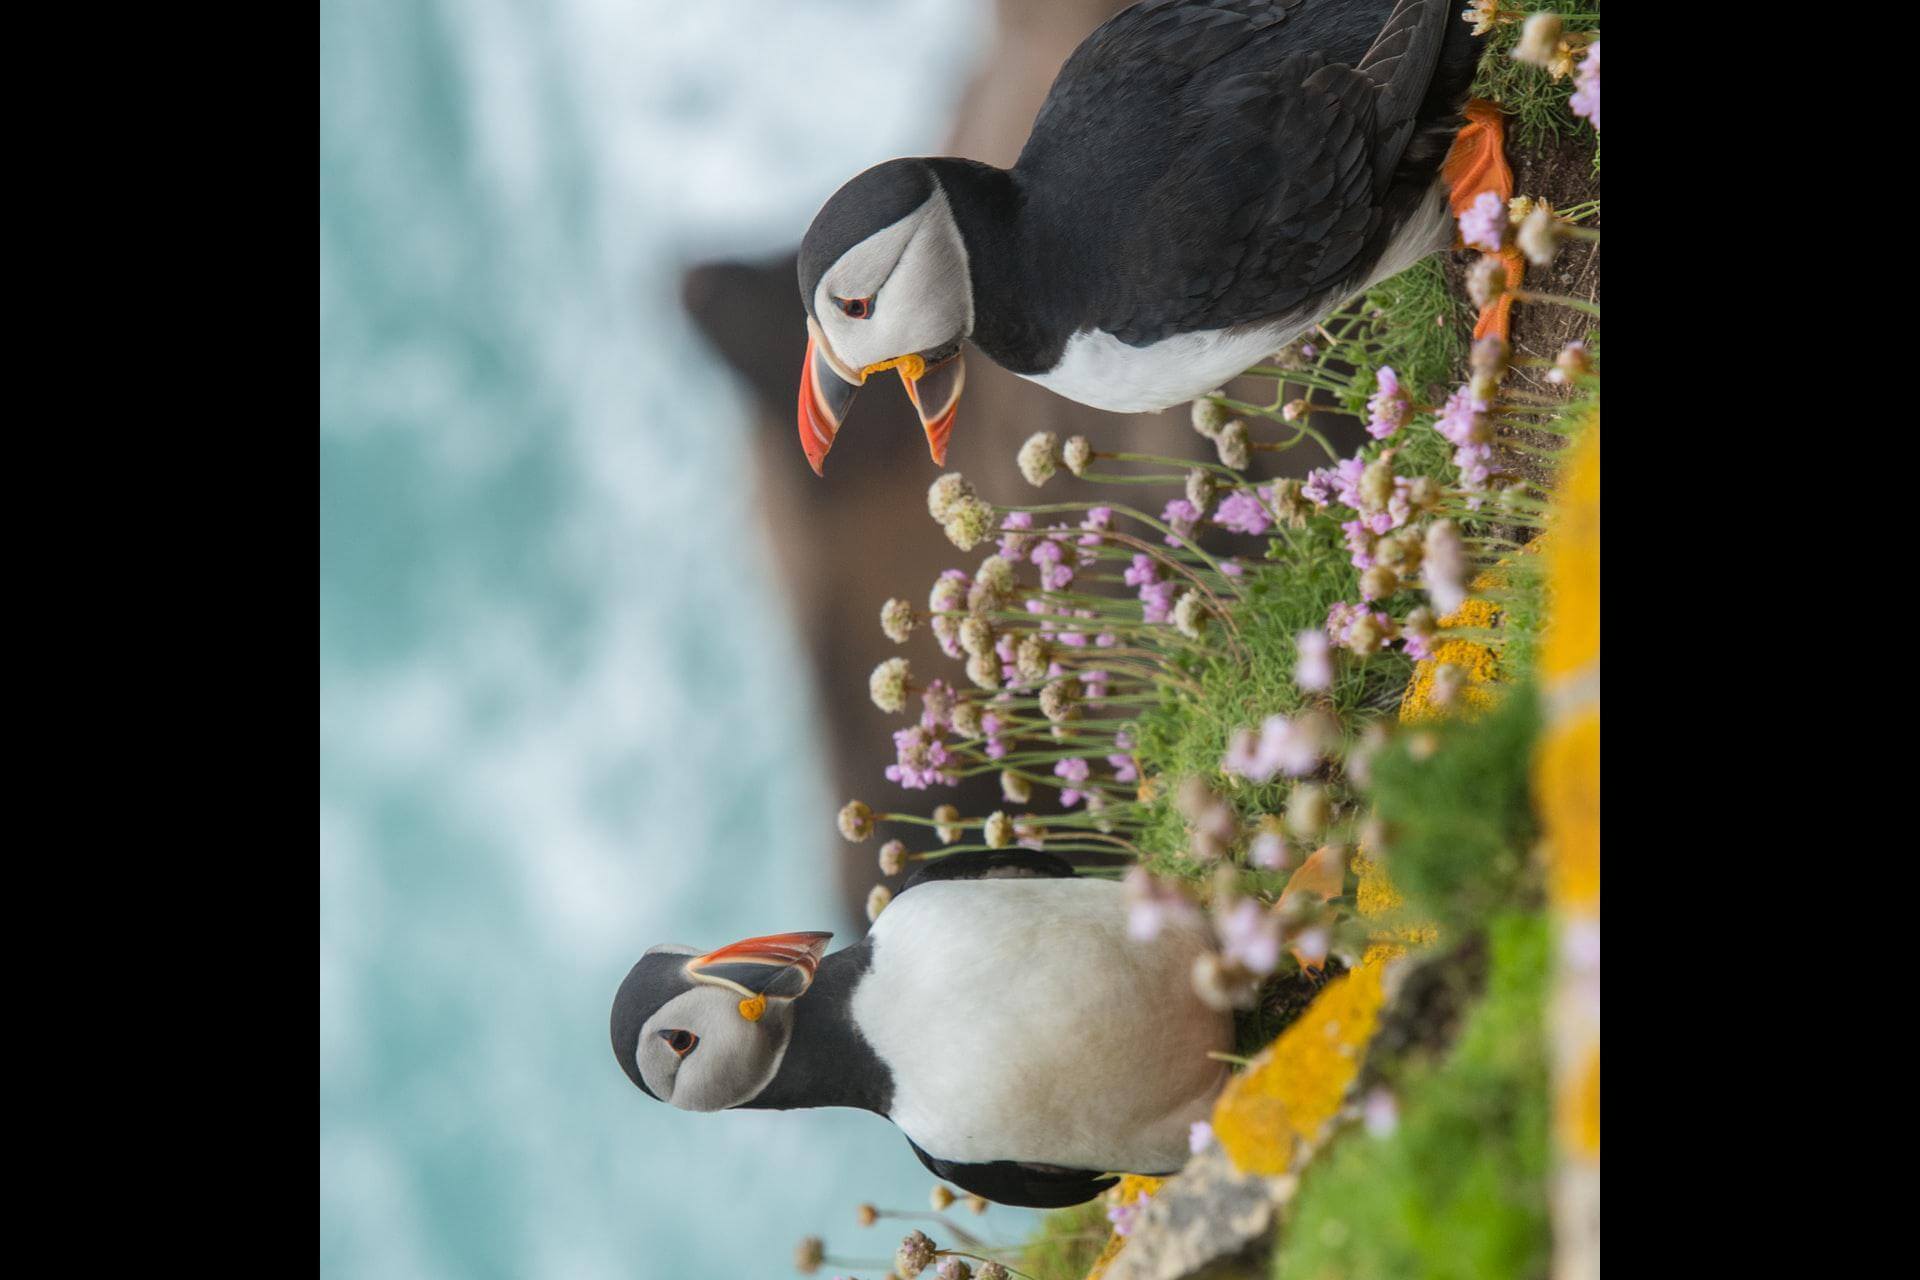
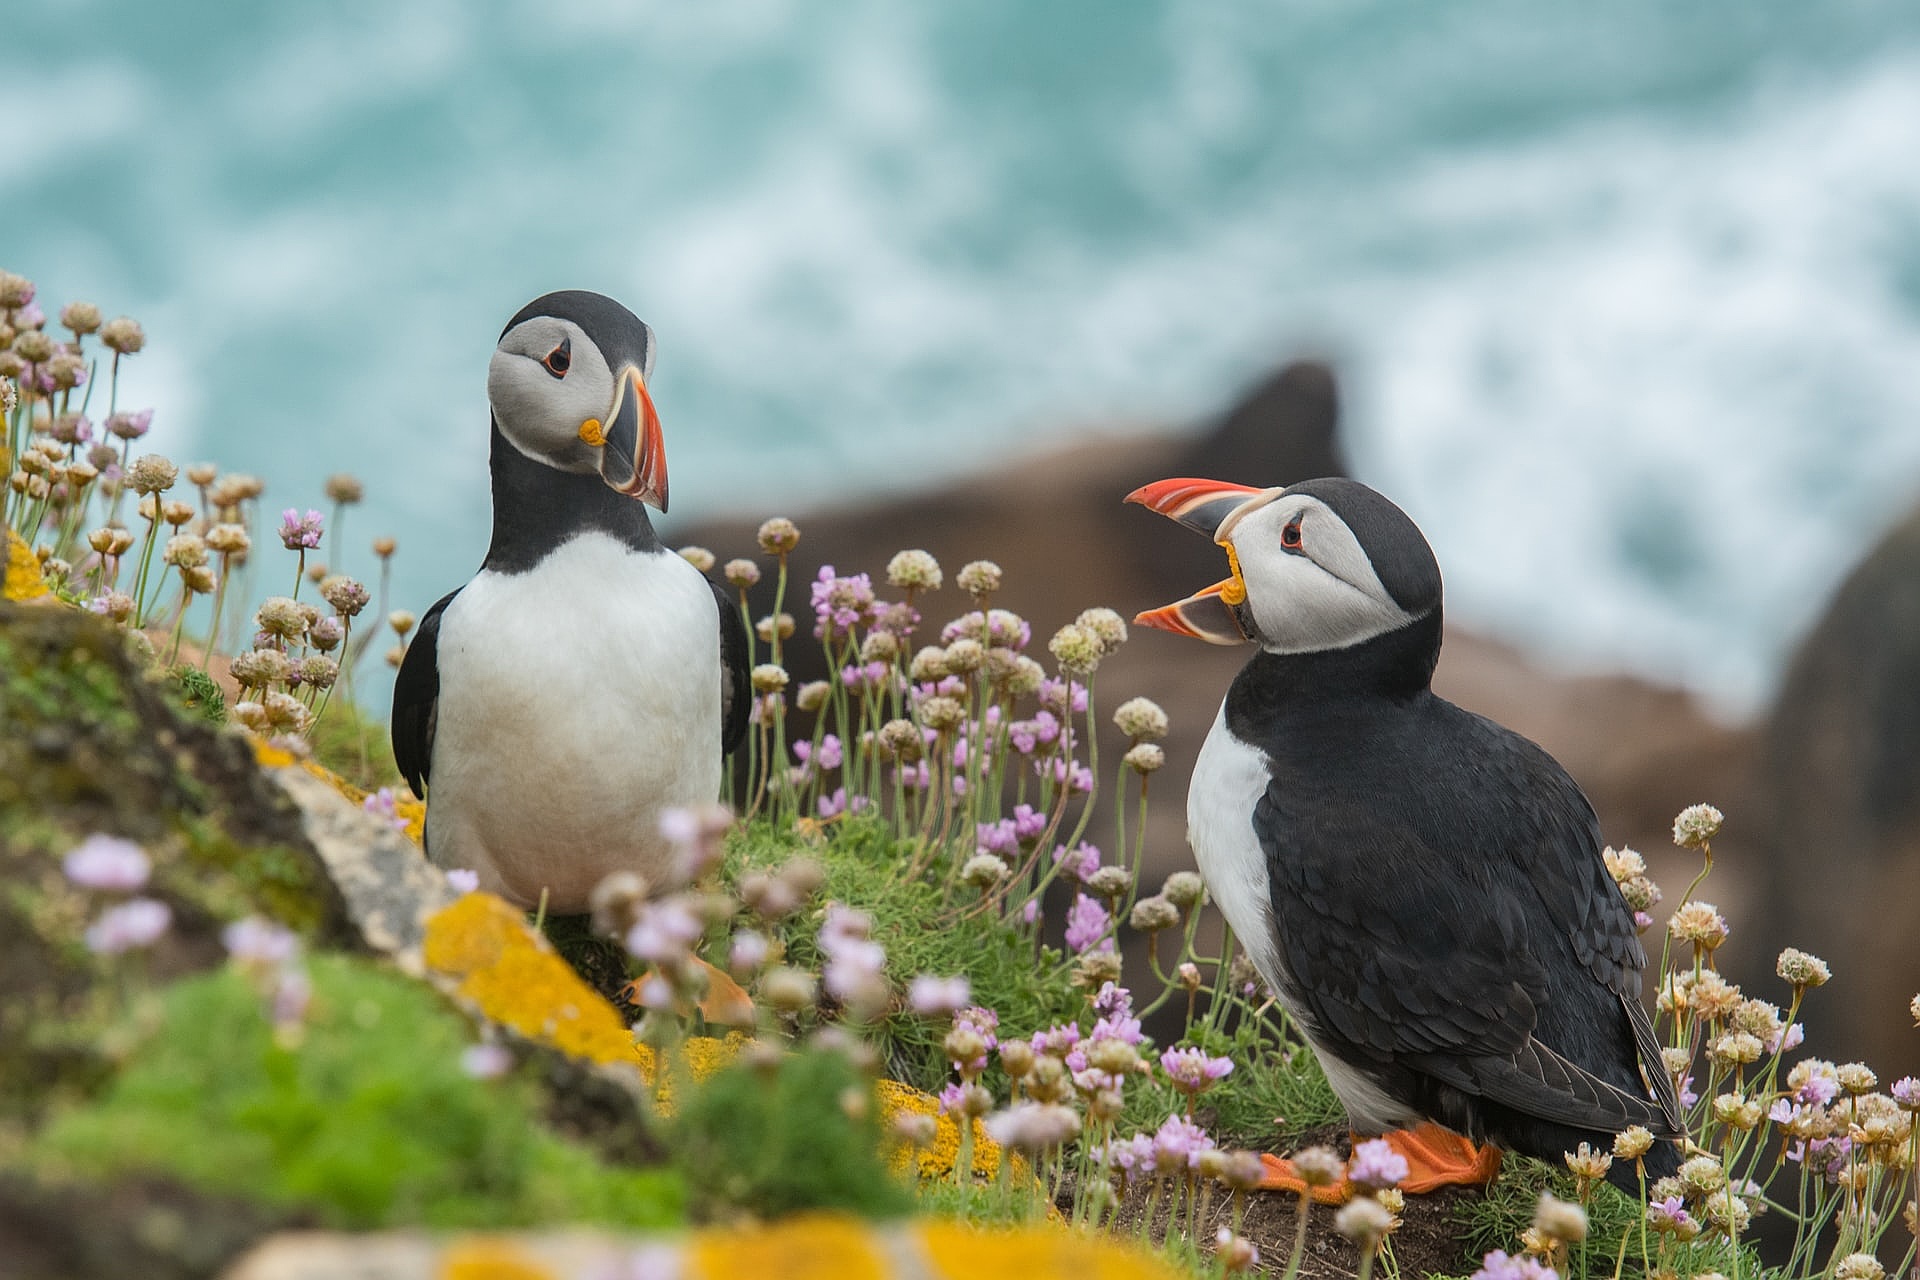
# Pillow is a fork of PIL, so we’re importing from PIL
from PIL import Image

# Load an image from a file
puffin_image = Image.open('demo_image.jpg')

# To display a Pillow image object in Jupyter Notebook,
# just run a cell whose result is that image.
puffin_image
Run the cell. Here’s what it should look like in Jupyter Notebook:
If you’re using a command-line Python REPL (or something similar) instead of a Jupyter Notebook, you’ll need to call on an external viewer application to see the image. You can do this with Image’s show() method, as shown below:
# If you’re using the Python REPL instead of Jupyter Notebook,
# use Image.show() to create a temporary file for the image
# and display it with the default system image viewer.
puffin_image.show()
show() launches your system’s external viewer, using it to display the image. On Windows, it will usually launch Paint; on macOS, it will launch Preview; and on Linux and other Unix-based systems, it will launch xv.
Getting information about an image
You can get some information about an Image object using its attributes. Enter the following into a new cell and run it:
# The file format of the source file.
print(f"Image's file format: {puffin_image.format}")

# The pixel format used by the image. Typical values are "1", "L", "RGB", or "CMYK."
print(f"Image’s pixel format: {puffin_image.mode}")

# Image size, in pixels. The size is given as a 2-tuple (width, height).
print(f"Image size (width, height): {puffin_image.size}")

# Colour palette table, if any.
print(f"Image palette: {puffin_image.palette}")

# Output:
# Image's file format: JPEG
# Image’s pixel format: RGB
# Image size (width, height): (1920, 1280)
# Image palette: None
For more on what you can do with the Image class, check out the documentation.
Resizing Images
The resize() method
Image’s resize() method takes a two-integer tuple argument representing the width and height of the new resized image.
Here’s an example that takes the image you loaded and resizes both its width and height to 300 pixels — enter it into a new cell and run it:
# Image.resize() makes a resized copy of the original image.
puffin_image_resized = puffin_image.resize((300, 300))
puffin_image_resized
resize() doesn't modify the image but returns another Image instance with the new dimensions.
image = Image.open('demo_image.jpg')
new_image = image.resize((400, 400))
new_image.save('image_400.jpg')

print(image.size) # Output: (1920, 1280)
print(new_image.size) # Output: (400, 400)
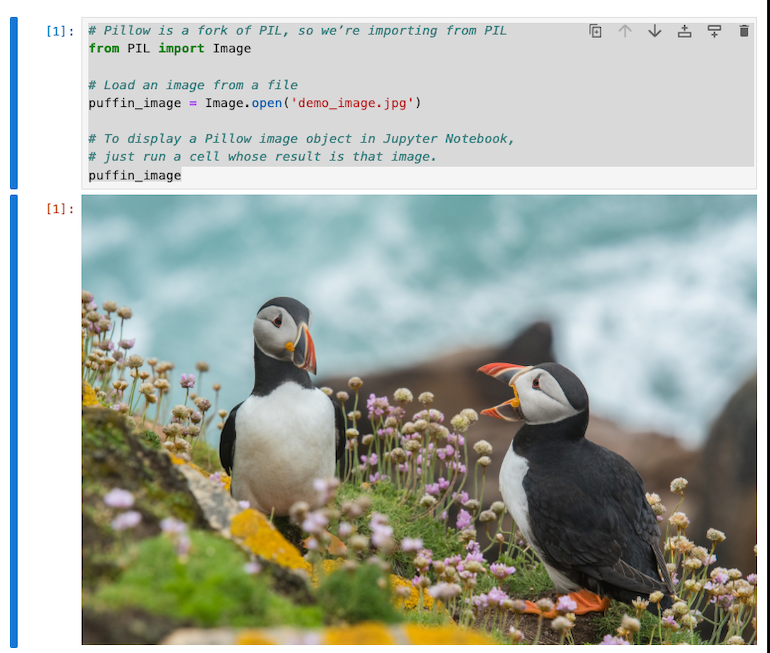
Since resize() changes the image’s dimensions to the ones you provide, it doesn’t preserve the image’s aspect ratio unless you purposely do so. The resulting image may end up looking stretched or compressed, which may not be the effect you want. You can see this in the newly-created image from the code above; it looks a bit squished horizontally:

The thumbnail() method
If you want to resize images and keep their aspect ratios, use Image’s thumbnail() method instead. Like resize(), thumbnail() takes a two-integer tuple argument. However, the values in the tuple represent the maximum x- and y-sizes allowed while also preserving the image’s aspect ratio.
Enter the code below into a new cell and run it:
# Unlike Image.resize(), which makes a copy of the original image,
# Image.thumbnail() modifies the original image.
# The dimensions you provide specify maximum x- and y-size
# and the method preserves the image’s aspect ratio.
# Let’s make a copy of the original and convert it
# into a thumbnail.
puffin_image_thumbnail = puffin_image.copy()
puffin_image_thumbnail.thumbnail((300, 300))
print(f"The thumbnail image’s size is: {puffin_image_thumbnail.size}.")
puffin_image_thumbnail
Note that unlike resize(), the thumbnail() method does not create a new Image instance. Instead, it modifies the original. That’s why the code above first makes a copy of the image.
The code above resize the image to 300 × 200 and preserves the original’s aspect ratio:
Another significant difference between the resize() and thumbnail() methods is that resize() enalrges an image if given parameters that are larger than the original image, while thumbnail() doesn't.
For example, given an image of size 400 × 200, a call to resize((1200, 600)) will create a larger-sized image 1200 pixels wide and 600 pixels tall, along with the expected loss of sharpness. A similar call to thumbnail((1200, 600)) using the original image will not enlarge the image since the thumbnail() method cannot expand an image beyond either of its original dimensions.
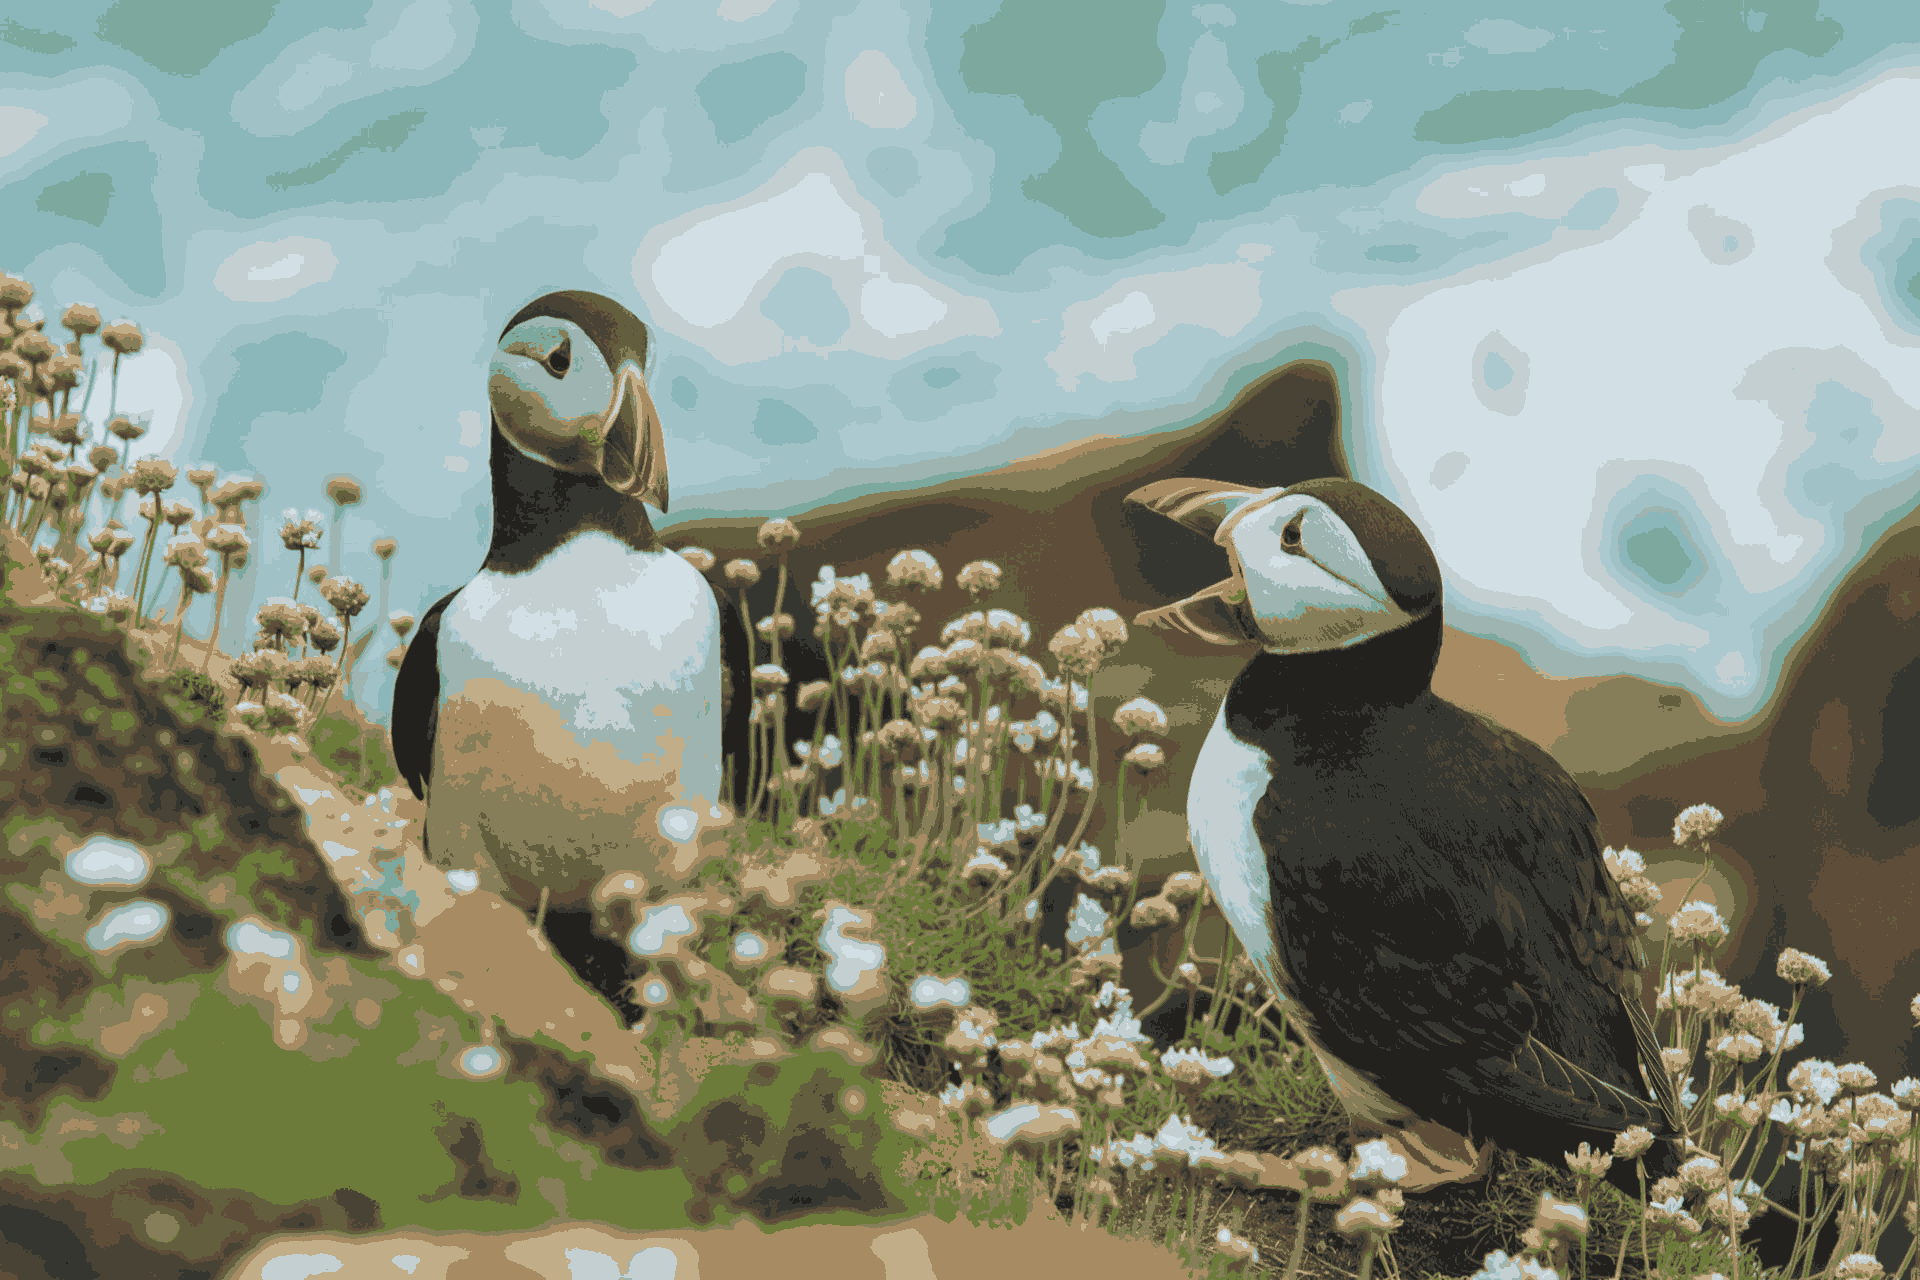
“Pixelating” an image with resizing
The rise of retrocomputing and retrogaming has created a lot of interest in old-school “pixelated” graphics. You can use a combination of Image’s thumbnail() and resize() methods to turn a modern, high-resolution image into a “retro” one like the one below:
![]()
Here’s the code that produces this effect:
# Pixelate the image

# Shrink the image while preserving the aspect ratio.
puffin_image_150px = puffin_image.copy()
puffin_image_150px.thumbnail((125, 125))

# Scale the image back up to its original size,
# but using “nearest neighbor” resampling.
puffin_image_pixelated = puffin_image_150px.resize((1920, 1200), resample=Image.Resampling.NEAREST)
puffin_image_pixelated
The code above takes advantage of the resize() method’s optional resample parameter, which specifies how to draw pixels when resizing the image. When making an image larger, the “nearest neighbor” resampling method creates a “retro” pixel effect.
Flipping Images
Pillow’s Image class provides the transpose() method for quick image flipping. transpose() takes the following arguments:
Image.FLIP_LEFT_RIGHTImage.FLIP_TOP_BOTTOMImage.ROTATE_90Image.ROTATE_180Image.ROTATE_270Image.TRANSPOSEImage.TRANSVERSE
Here’s how you would create a horizontal mirror image of the original:
image_lr_flip = puffin_image.transpose(Image.FLIP_LEFT_RIGHT)
image_lr_flip
The resulting image can be seen below. Notice that the puffin with the open beak is now on the left side of the photo:
Providing the transpose() method with Image.FLIP_TOP_BOTTOM creates a vertical mirror image:
image_tb_flip = puffin_image.transpose(Image.FLIP_TOP_BOTTOM)
image_tb_flip
The Image.ROTATE_90, Image.ROTATE_180, Image.ROTATE_270 arguments rotate the image counterclockwise 90, 180, and 270 degrees, respectively. The following rotates the image 180 degrees:
image_rot_180 = puffin_image.transpose(Image.ROTATE_180)
image_rot_180
Here’s the resulting image:
Transposing an image means mirroring it along the diagonal line that runs from the top left to the bottom right, while tranversing it means mirroring it along the diagonal line running from the bottom left to the top right. This is yet another case where showing is better than telling, so let’s make the code do that.
# Transposing an image mirrors it along the line running from
# the top left to the bottom right.
image_transpose = puffin_image.transpose(Image.TRANSPOSE)
image_transpose
# Transversing an image mirrors it along the line running from
# the bottom left to the top right.
image_transverse = puffin_image.transpose(Image.TRANSVERSE)
image_transverse
Rotating Images
You can rotate images with Pillow using Image’s rotate() method. This takes an integer or float argument representing the degrees to rotate an image (positive for counterclockwise, negative for clockwise) and returns a new Image object for the rotated image.
By default, the rotated image keeps the dimensions of the original image. This means that for angles other than multiples of 180, the image will be cut and/or padded to fit the original dimensions. Consider this code, which rotates an image 90 degrees counterclockwise:
# Rotating an image preserves its dimensions by default,
# so the image may be clipped.
puffin_image_rot_90 = puffin_image.rotate(90)
puffin_image_rot_90
Here’s the resulting image:
Notice that the image has been “clipped” to fit the original height, and its sides have been padded with black background (on some operating systems, the padding will be made of transparent pixels) to fit the original width.
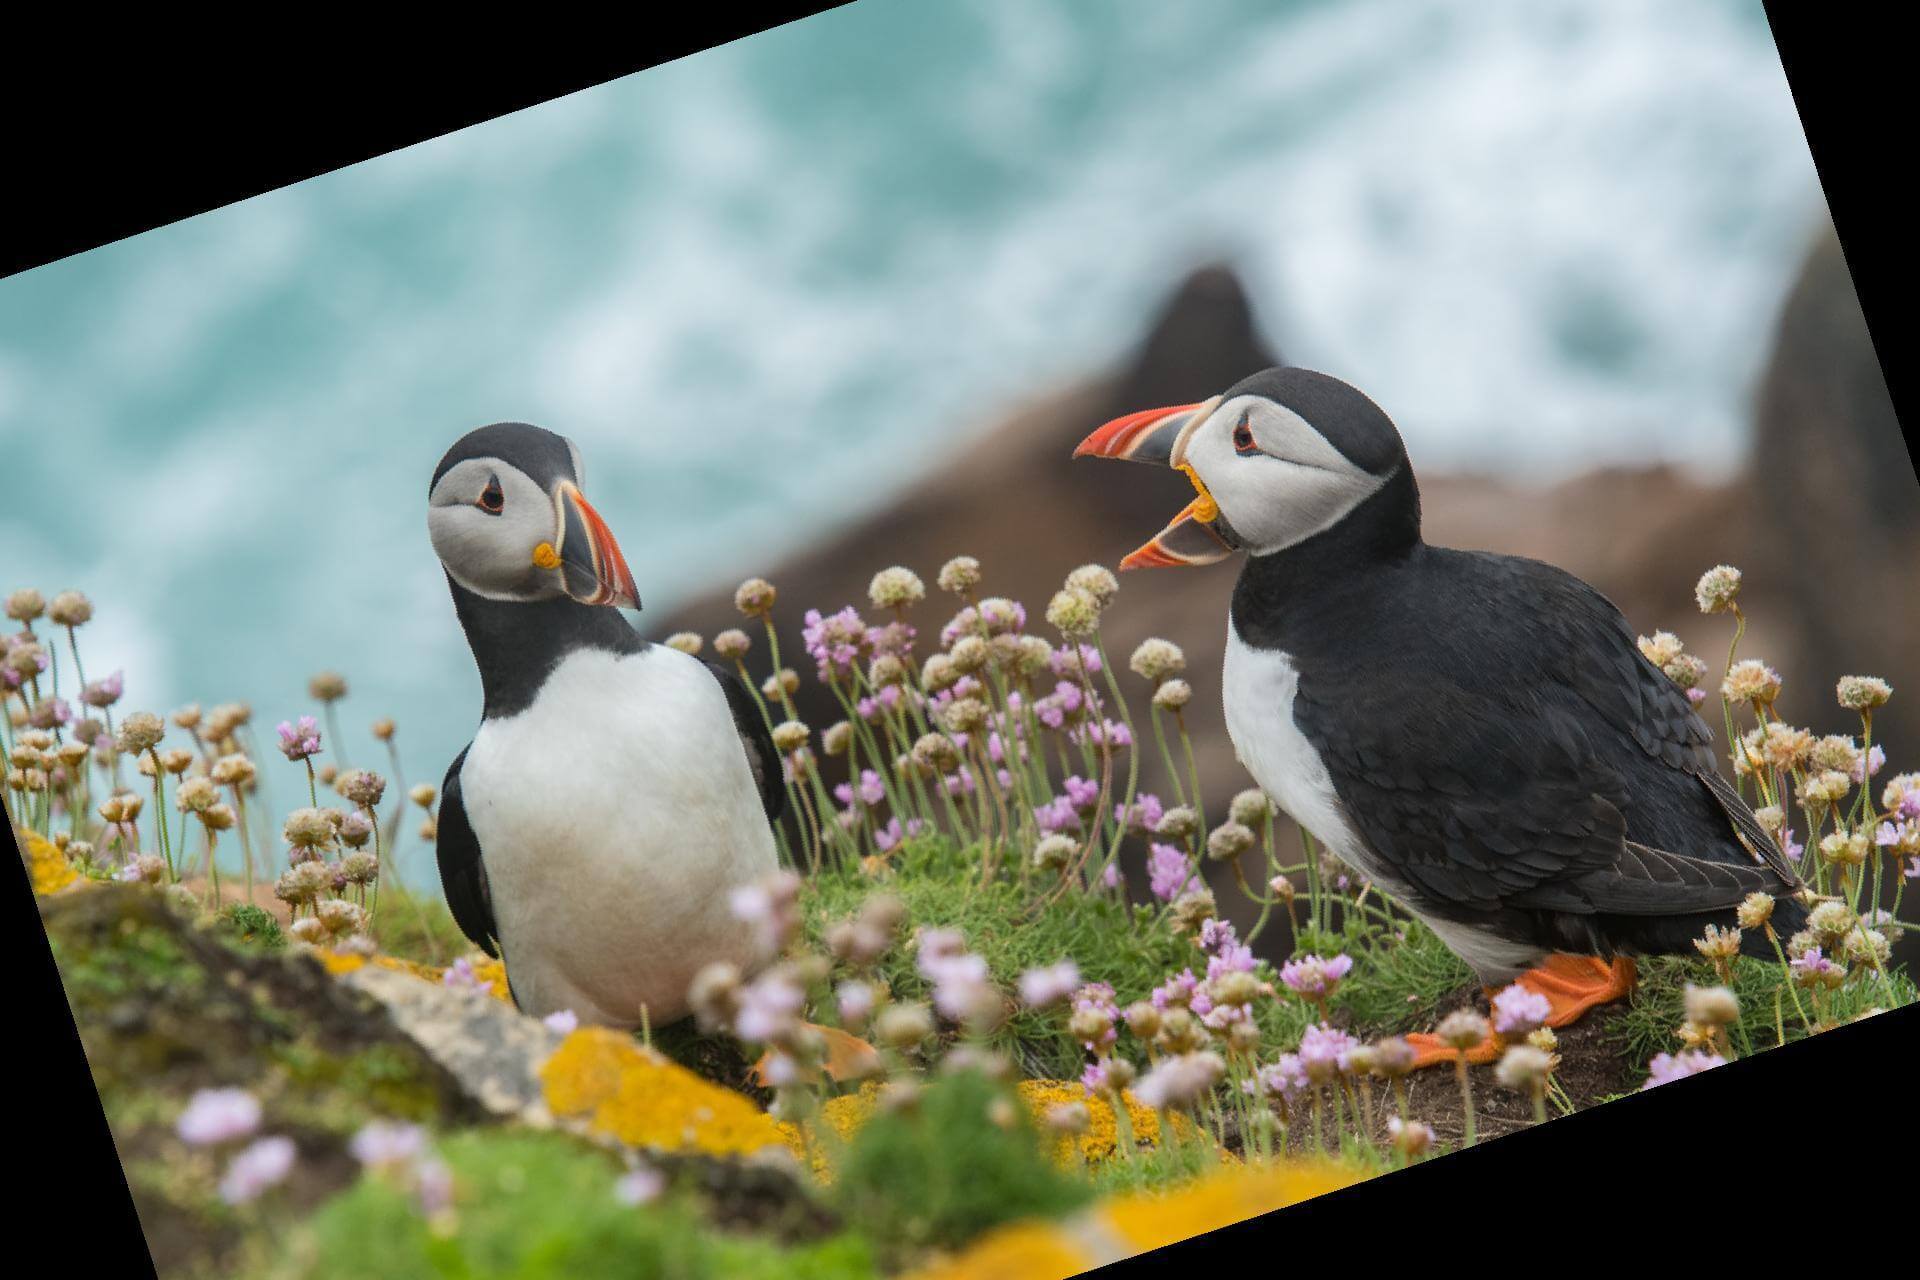
The example below, where the original image is rotated 18 degrees counterclockwise, shows this “clipping” effect more clearly.
# Rotate the image by 18 degrees.
puffin_image_rot_18 = puffin_image.rotate(18)
puffin_image_rot_18
The resulting image is shown below:
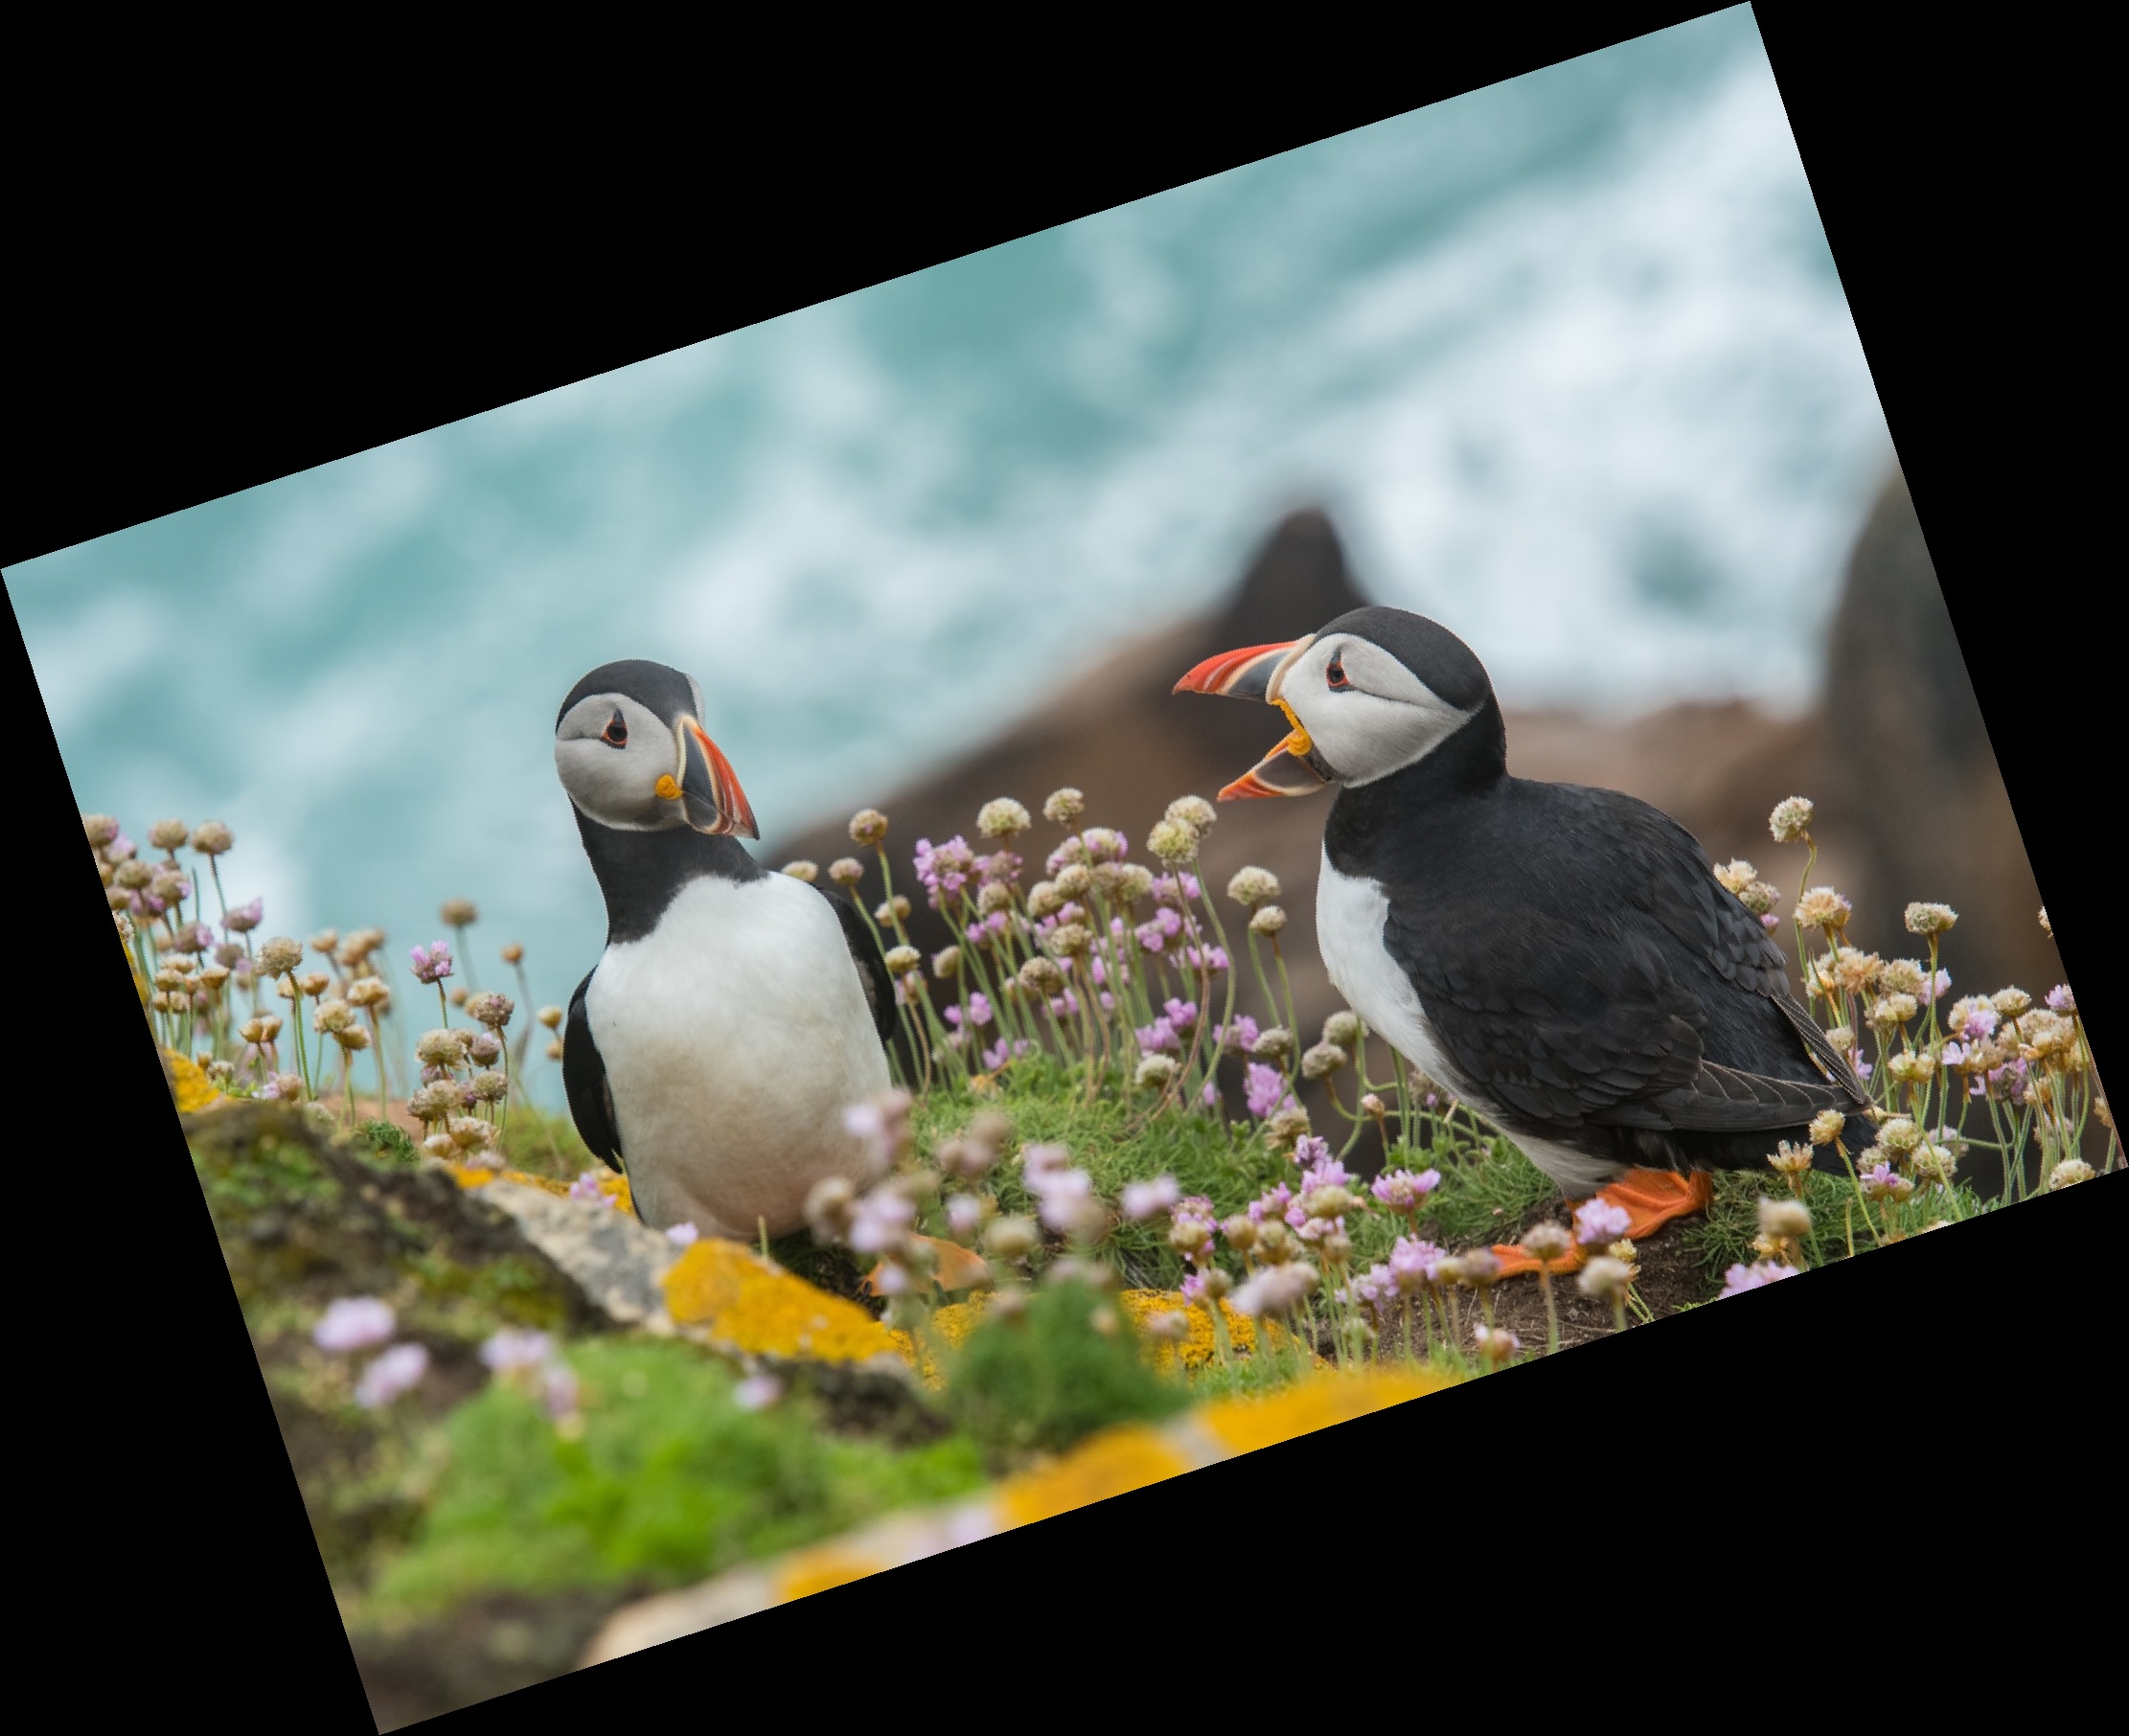
To expand the dimensions of the rotated image to fit the entire view, you pass a second argument to rotate() as shown below.
# Setting Image.rotate()’s optional “expand” parameter to True
# avoids clipping by scaling the resulting image to accommodate
# the rotation.
puffin_image_rot_18_expand = puffin_image.rotate(18, expand=True)
print(f"Original image dimensions: {puffin_image.size}")
print(f"Rotated expanded image dimensions: {puffin_image_rot_18_expand.size}")
puffin_image_rot_18_expand
Now the contents of the image will be fully visible, and the dimensions of the image will have increased to account for this:
Cropping Images
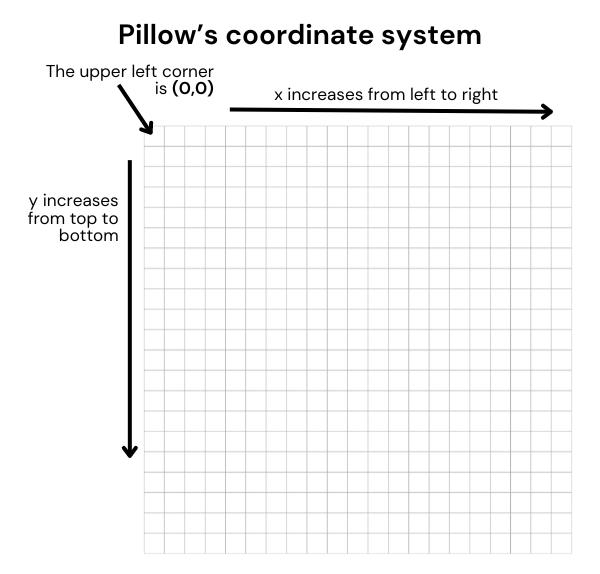
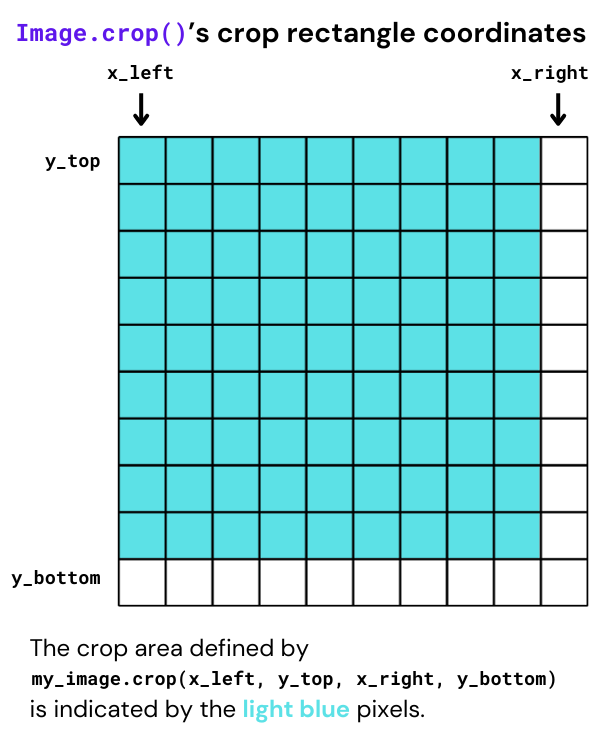
Use Image’s crop() method to create a new image by cropping a section from an existing one. This method takes a 4-tuple that defines the position and size of the cropped region, as shown in the method call example below:
my_image.crop(x_left, y_top, x_right, y_bottom)
Pillow’s coordinate system starts with (0, 0) in the upper left corner, with x increasing from left to right and y increasing from top to bottom:
The cropped section includes the left column and the upper row of pixels and goes up to — but doesn't include — the right column and bottom row of pixels. This is better explained with a diagram:
Here’s an example that creates a new image by cropping the rectangle described below:
- left: 200
- top: 300
- right: 700
- bottom: 600
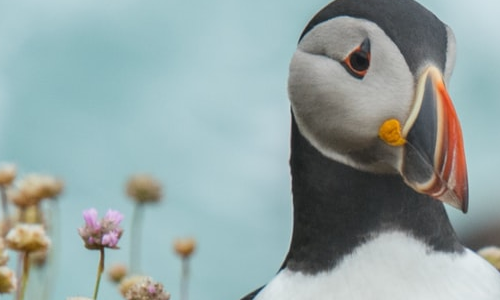
# Image.crop() returns a new image made from
# the rectangular area of the original specified by
# a 4-tuple (x_left, y_top, x_right, y_bottom).
box = (200, 300, 700, 600)
puffin_image_cropped = puffin_image.crop(box)
print(f"The cropped image’s size is: {puffin_image_cropped.size}.")
puffin_image_cropped
Here’s the printed output...
The cropped image’s size is: (500, 300).
...and here’s the resulting image:
Pasting an Image onto Another Image
Pillow enables you to paste an image onto another one. Some example use cases where this could be useful is in the protection of publicly available images by adding watermarks on them, the branding of images by adding a company logo, and in any other case where there is a need to merge two images.
Pasting without an opacity mask
The Image class’ paste() method pastes another image onto the current one. This is useful for protecting publicly available images by adding watermarks, branding images with a company logo, or simply creating compositions of two or more images.
paste() is unlike many Image methods (but like thumbnail()) in that it modifies the Image object in place rather than returning a new `one. Because of this, we'll first make a copy of our puffin image before performing the paste to continue with the other examples using the original.
# Pasting without an opacity mask

python_logo_image = Image.open('logo.png')

# paste() modifies the image in place,
#so let’s work with a copy.
puffin_image_with_logo = puffin_image.copy()

# We want the logo at the puffin image’s lower right corner.
logo_position = (
    (puffin_image_with_logo.width - python_logo_image.width),
    (puffin_image_with_logo.height - python_logo_image.height)
)

# Image.paste() pastes another image onto the current image.
puffin_image_with_logo.paste(python_logo_image, logo_position)
puffin_image_with_logo
The code above loads a new image, logo.png, and makes a copy of the puffin image. We want to paste the logo image onto the puffin image copy at the bottom right corner. The code calculates the coordinates for pasting the logo, which can be:
- A 2-tuple specifying the upper left corner of the pasted image,
- a 4-tuple defining the left, upper, right, and lower pixel coordinates of the pasted image, or
None, which simply pastes the image at the coordinates (0, 0).
In this case, we’re pasting the logo using a 2-tuple coordinate:
You can see the result below:
Pasting with an opacity mask
When you perform a paste(), transparent pixels are pasted as solid pixels by default. Hence the black (white on some OSs) box surrounding the logo. Most of the time, this isn't what you want. You can't have your watermark covering the underlying image's content. We would rather have transparent pixels appear as such.
To achieve this, you need to pass in an optional third argument to the paste() method. This argument is an Image object that acts as an opacity mask.
An opacity mask is an Image object where only the alpha value is significant, while its green, red, and blue values are ignored. If a mask is provided as an optional third argument to paste(), the method updates only the regions the mask indicated. You can use either 1, L, or RGBA images for masks. Pasting an RGBA image and using it as the mask pastes only the opaque portion of the image — not its transparent background.
The code below provides an example of this approach:
# Pasting with an opacity mask
puffin_image_with_logo = puffin_image.copy()

# Pasting the logo while using it as its own opacity mask
# ensures that transparent pixels are rendered properly.
puffin_image_with_logo.paste(python_logo_image, logo_position, python_logo_image)
puffin_image_with_logo
Here’s the result:
Drawing on Images
With Pillow, you can also draw on an image using the ImageDraw module. You can draw lines, points, ellipses, rectangles, arcs, bitmaps, chords, pie slices, polygons, shapes, and text.
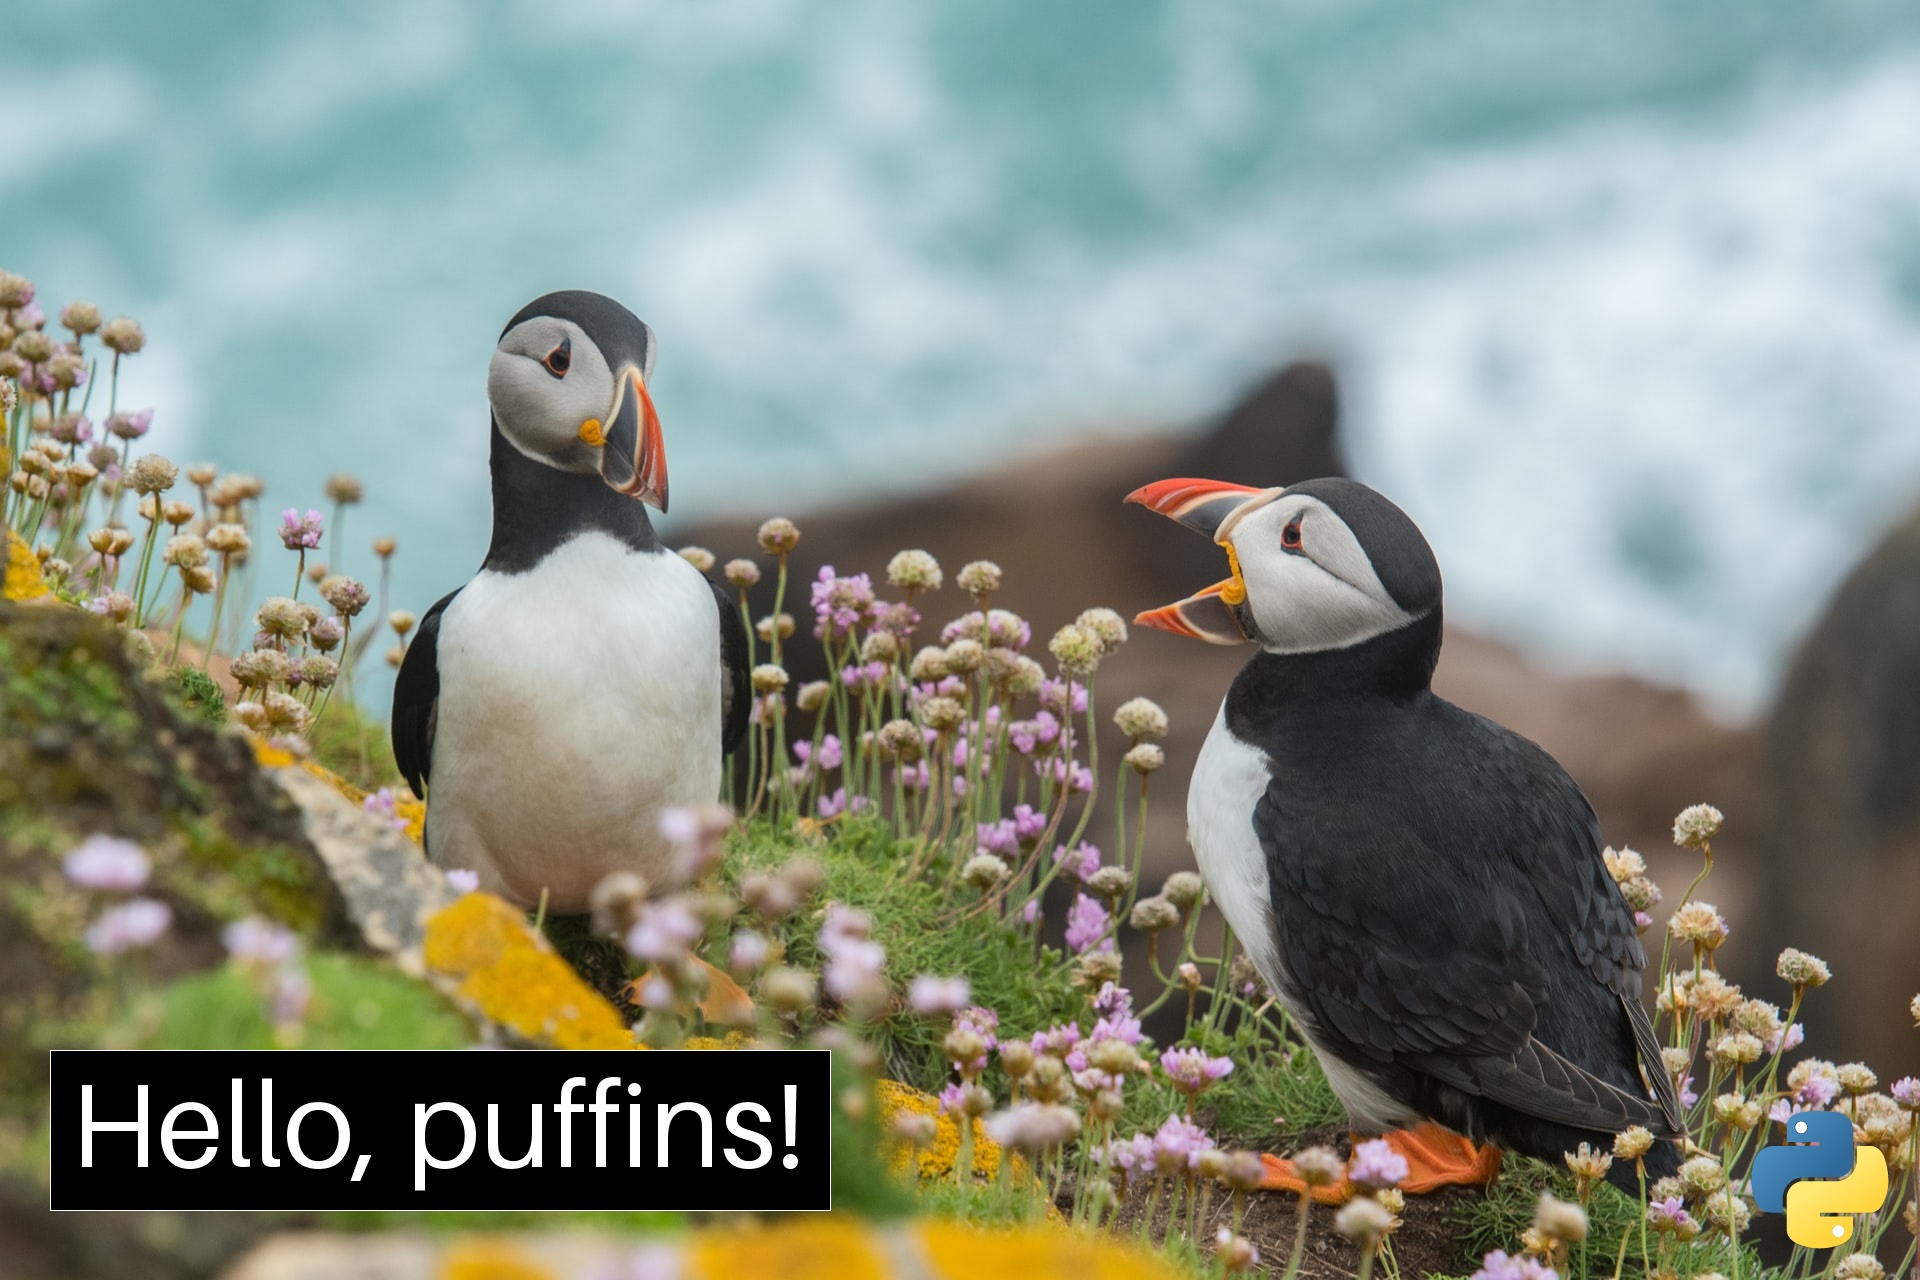
The code below draws a black rectangle with a fine white outline near the lower left corner of the puffin image from the previous code example. It then draws the text message “Hello, puffins!” in large white text inside the rectangle:
# The ImageDraw module provides basic 2-D graphics and text drawing.
from PIL import ImageDraw

puffin_image_with_title = puffin_image_with_logo.copy()

# ImageDraw.Draw() takes an image as an argument and returns
# an object we can use as a drawing surface.
title_canvas = ImageDraw.Draw(puffin_image_with_title)
title_canvas.rectangle((50, 1050, 830, 1210), outline='white', fill='black')
title_canvas.text((70, 1050), 'Hello, puffins!', fill='white', font_size=120)
puffin_image_with_title
Here’s the resulting image:
Transforming Image Colors
Converting an image from color to grayscale
Image’s convert() method can convert images between different pixel representations, such as the RGB (red-green-blue) format used by screens and the CMYK (cyan-magenta-yellow-black) format used in printing. Like most Image methods, convert() returns a new Image object.
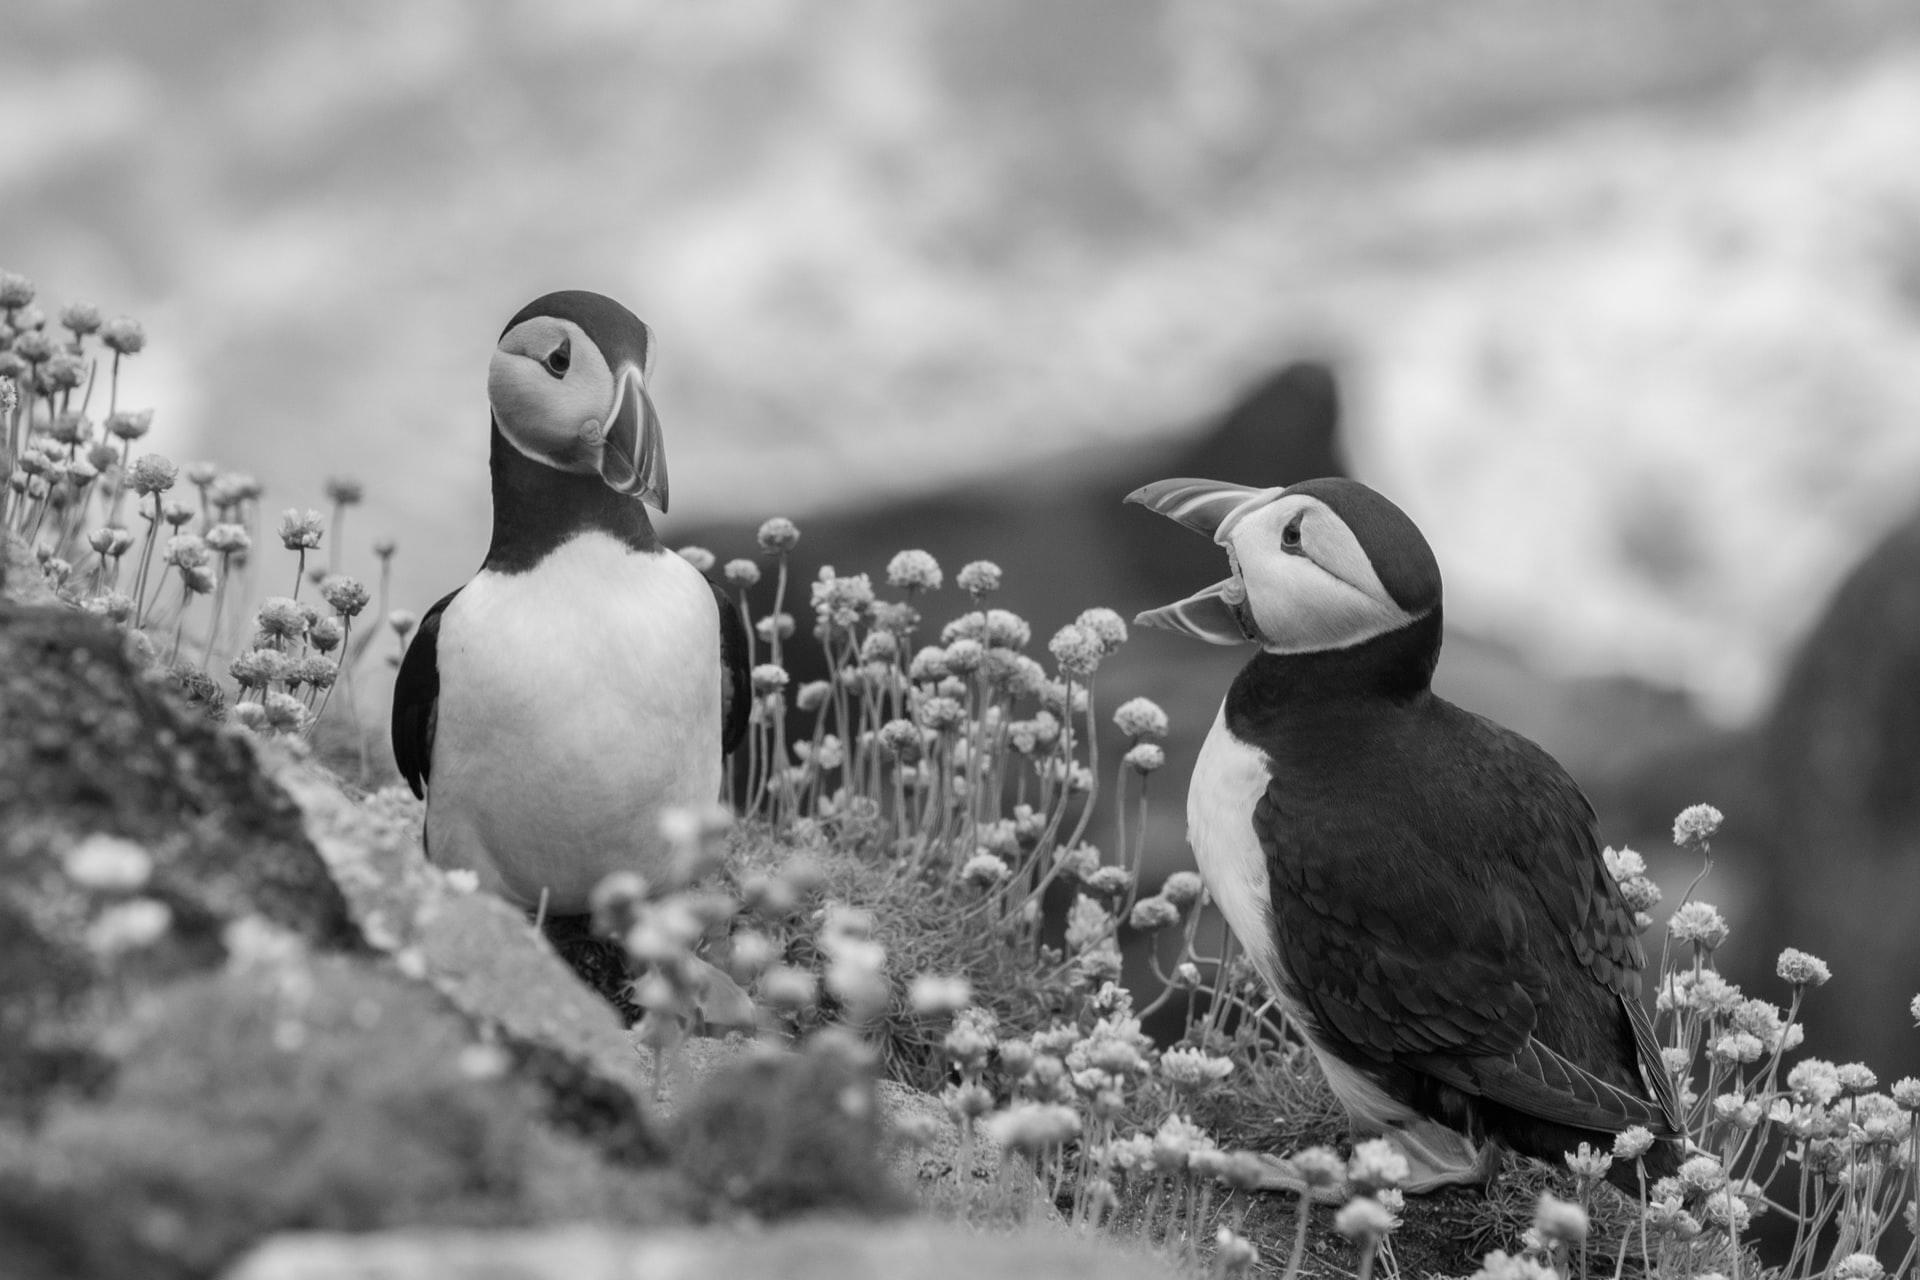
convert() also supports converting images to the L (luminance) format, which is a grayscale image format. The code below converts our puffin image from color to grayscale monochrome:
# Convert image to grayscale
grayscale_image = puffin_image.convert("L")
print(f"Original image mode: {puffin_image.mode}") # Output: RGB
print(f"Grayscale image mode: {grayscale_image.mode}") # Output: L
grayscale_image

# Output:
# Original image mode: RGB
# Grayscale image mode: L
Here’s the resulting image:
Reducing the number of colors in an image
In addition to pixelation, another way to make an image look “retro” is to reduce the number of colors it uses to 256 or fewer. You can do this with a single call to Image’s quantize() method.
The code below reduces the number of colors in our puffin photo to 16, producing an effect that should remind you of 1990s computer graphics:
# Image.quantize() creates a copy of the image in palette mode
# and reduces the colors to the given number.

# Reduce the image to a 16-color palette:
puffin_image_quantize = puffin_image.quantize(16)
print(f"Image’s pixel format: {puffin_image_quantize.mode}")
puffin_image_quantize
Here’s the resulting image:
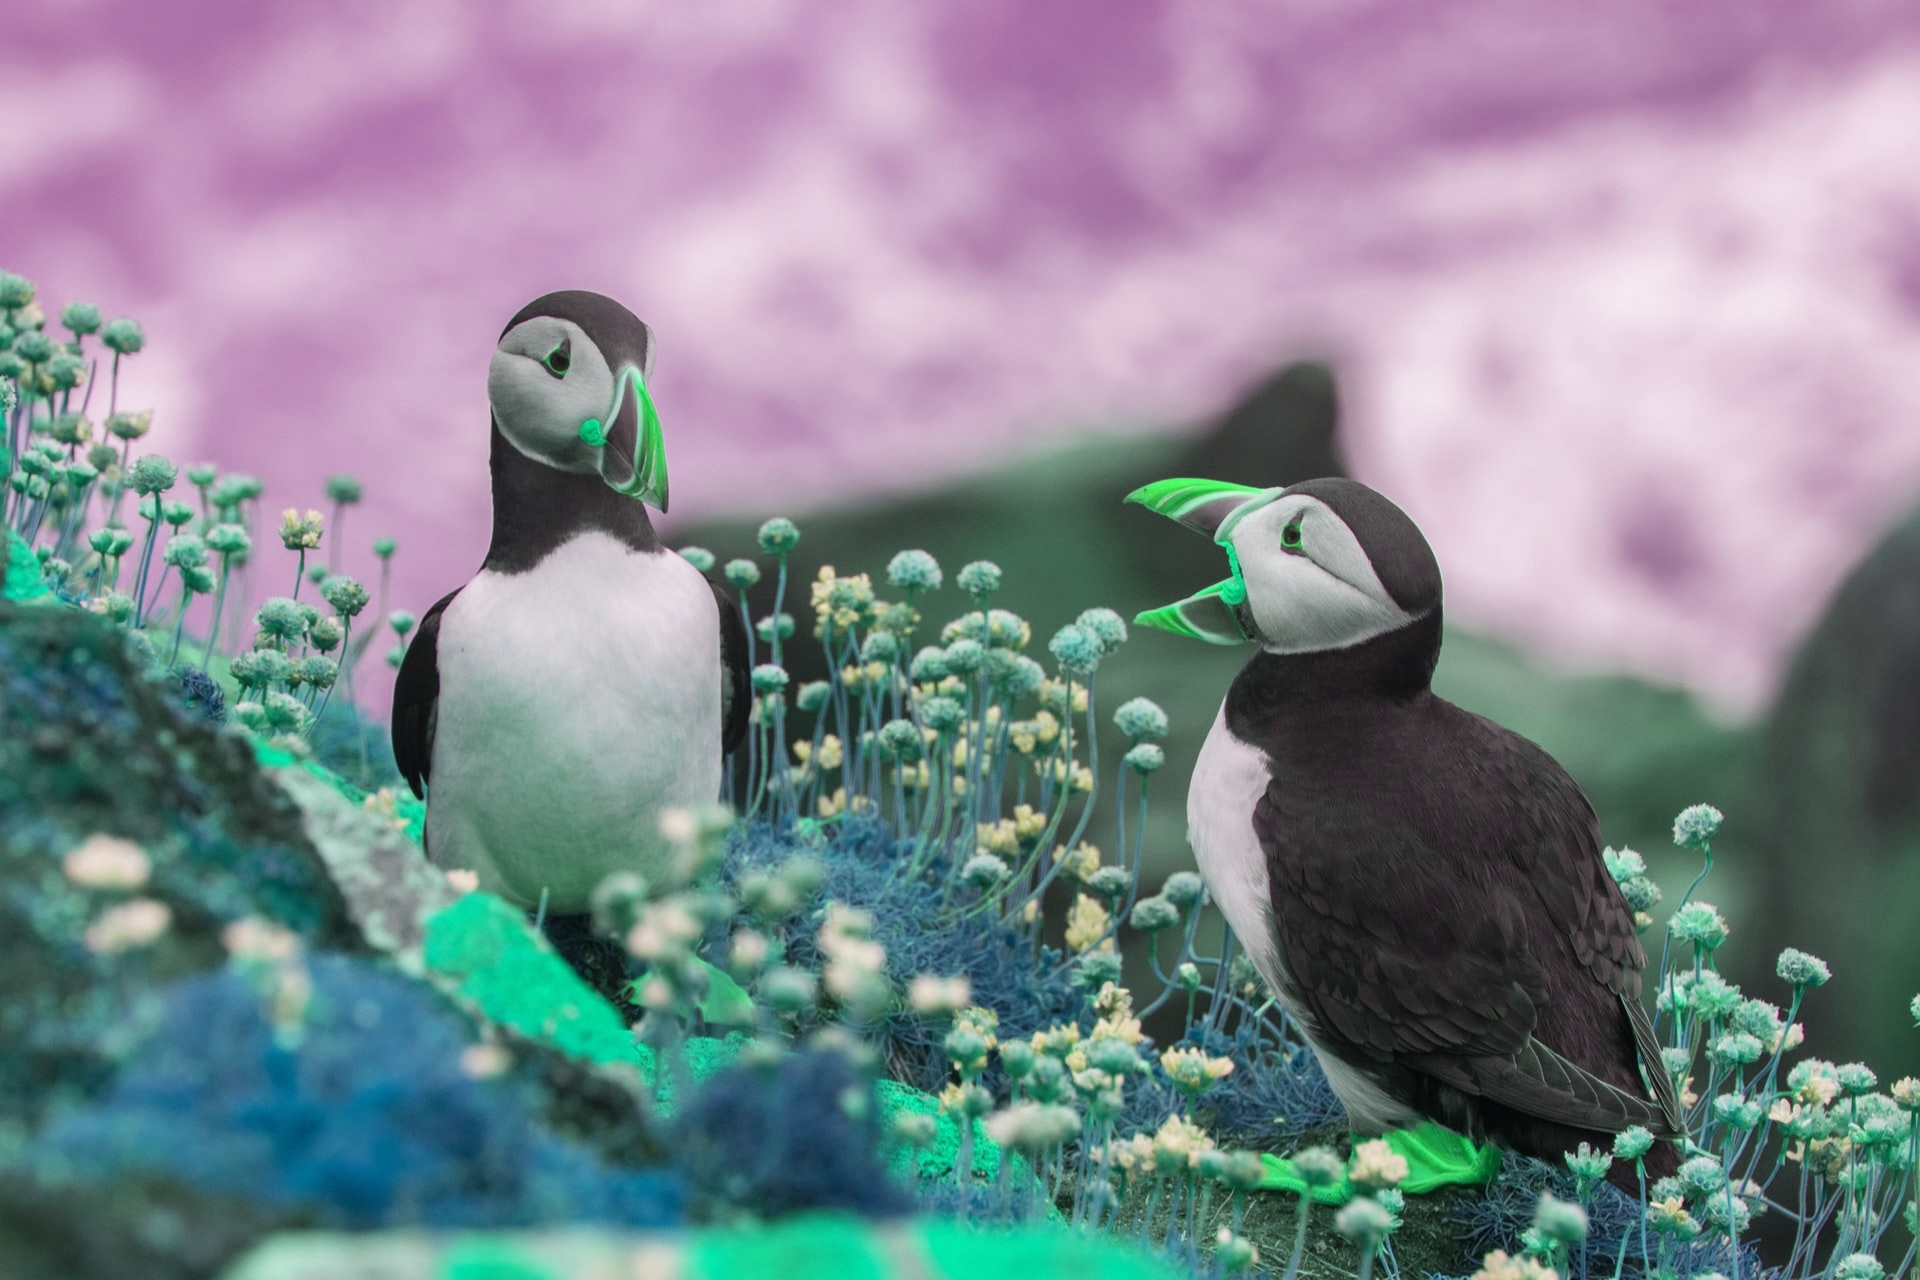
Splitting and Merging Bands
The split() method of Pillow’s Image class makes it possible to split a multi-band image into individual bands, such as the R, G, and B bands from an RGB image. split() creates new images, each containing one band from the original image.
split() has an inverse function, merge(), which merges a set of single band images into a new multi-band image. merge() takes a mode and a tuple of images and combines them into a new image.
The code below takes the original “puffin” image, splits it into three images — one for each of the R, G, and B bands — and then merges them so that:
- The blue color information replaces the original red color information
- The red color information replaces the original green color information
- The green color information replaces the original blue color information
(red_channel,
 green_channel,
 blue_channel) = puffin_image.split()

print(f"Image’s pixel format: {puffin_image.mode}") # Output: RGB
print(f"Red channel’s pixel format: {red_channel.mode}") # Output: L
print(f"Green channel’s pixel format: {green_channel.mode}") # Output: L
print(f"Blue channel’s pixel format: {blue_channel.mode}") # Output: L

# Output:
# Image’s pixel format: RGB
# Red channel’s pixel format: L
# Green channel’s pixel format: L
# Blue channel’s pixel format: L

grb_image = Image.merge("RGB", (blue_channel, red_channel, green_channel))
grb_image
The result is striking:
Enhancing Images
Pillow allows you to enhance an image by adjusting its contrast, color, brightness, and sharpness using classes in the ImageEnhance module.
Enhancing contrast
Here’s code that boosts the contrast of the “puffin” image:
from PIL import ImageEnhance

puffin_image_enhanced_contrast = ImageEnhance.Contrast(puffin_image)
puffin_image_enhanced_contrast.enhance(3.0)
Here’s the image after enhancing its contrast:
The code above adjusts the image contrast by a factor of 3; smaller values will produce more subtle effects. A factor of 1.0 returns a copy of the original image; lower factors produce images with lower contrast.
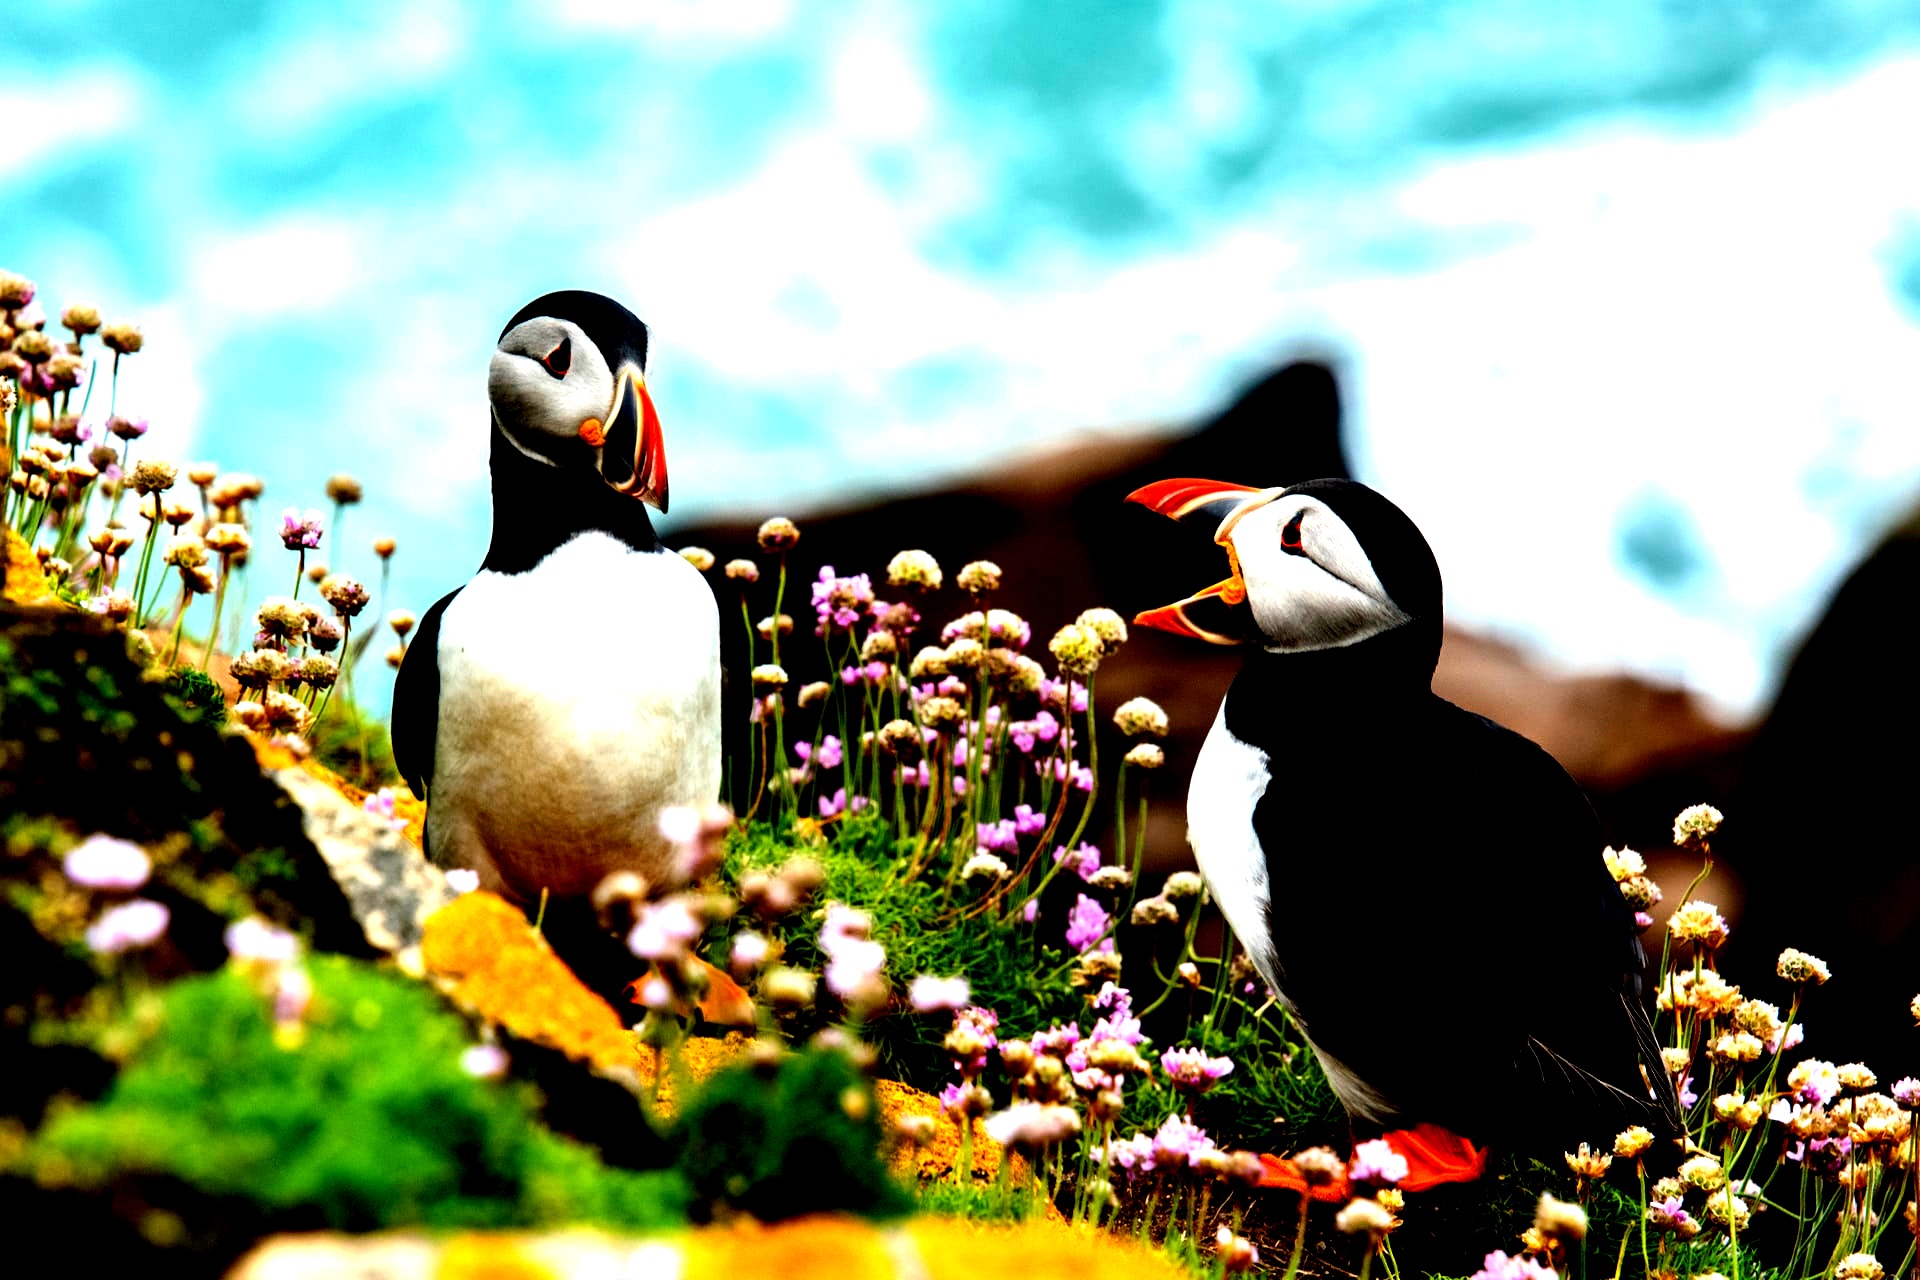
Enhancing color
Below, we increase the color of the image. If we used a factor of 0.0, we would get a black and white image.
puffin_image_enhanced_color = ImageEnhance.Color(puffin_image)
puffin_image_enhanced_color.enhance(3.0)
Here’s the color-enhanced image:
Enhancing brightness
Below we make the image brighter. A factor of 0.0 would produce a black image.
puffin_image_enhanced_brightness = ImageEnhance.Brightness(puffin_image)
puffin_image_enhanced_brightness.enhance(3.0)
Here’s the brightened image:
Enhancing sharpness
Below, we make the image sharper. An enhancement factor of 0.0 would produce a blurred image, and a factor of 2.0 would give a sharpened image.
puffin_image_enhanced_sharpness = ImageEnhance.Sharpness(puffin_image)
puffin_image_enhanced_sharpness.enhance(3.0)
Saving Your Image Work
To save an image, use Image’s save() method. For example, here’s how you’d save the image from the Enhancing sharpness exercise above as a PNG file:
puffin_image_enhanced_sharpness.save("puffins_sharp.png")
Pillow sees the file extension has been specified as .png and converts it to PNG before saving it to a file.
To save it as a JPEG image, use this:
puffin_image_enhanced_sharpness.save("puffins_sharp.jpg")
You can provide a second argument to save() to explicitly specify a file format. puffin_image_enhanced_sharpness.save("puffins_sharp.png", "PNG") will do the same thing as the previous save(). Usually, it's unnecessary to supply this second argument as Pillow will determine the file storage format to use from the filename extension, but if you're using non-standard extensions, you should always specify the format this way.
Try out the most powerful authentication platform for free.
Get started →Conclusion
In this article, we've covered some of the more common image-processing operations in applications. Pillow is a powerful library, and we have yet to discuss everything it can do. If you want to find out more, be sure to read the documentation.