
TL;DR: In this article we will see how easy it is to load balance dockerized Node.js applications with NGINX. We will create a simple Node.js application that serves an HTML file, containerize it with Docker, and containerize an NGINX instance that uses round-robin algorithm to load balance between two running instances of this application.
“Check out how easy it is to load balance dockerized Node.js applications with NGINX.”
Tweet This
Docker and Containers
Docker is a software container platform. Developers use Docker to eliminate “works on my machine” problem when collaborating with co-workers. This is done by putting pieces of a software architecture on containers (a.k.a. dockerize or containerize).
Using containers, everything required to make a piece of software run is packaged into isolated containers. Unlike Virtual Machines (VMs), containers do not bundle a full operating system—only libraries and settings required to make the software work are needed. This makes them efficient, lightweight, self-contained and guarantees that software will always run on the same configuration, regardless of where it’s deployed.
To learn more about Docker, take a look at this webinar.
Installing Docker
Everything that we will need to test this architecture is Docker. As the instances of our Node.js application and NGINX will run inside Docker containers, we won't need to install them on our development machine. To install Docker, simply follow the instructions on their website.
Creating the Node.js Application
To show NGINX load balancing in action, we are going to create a simple Node.js application that serves a static HTML file. After that, we are going to containerize this application and run it twice. Lastly, we will configure a dockerized NGINX instance to dispatch requests to both instances of our application.
In the end, we will be able to reach http://localhost:8080 on our local machine to "randomly" get results from one or another instance. In fact, the result won't be randomly decided, we will configure NGINX to use round-robin algorithm to decide which instance will respond on each request.
But let's tackle one step at a time. To create this application we will first create a directory for the application, and then create an index.js file that will respond to HTTP requests.
To create the directory, let's issue the following command: mkdir application. After that, let's create the index.js file in this directory and paste the following source code:
var http = require('http');
var fs = require('fs');

http.createServer(function (req, res) {
  res.writeHead(200, {'Content-Type': 'text/html'});
  res.end(`<h1>${process.env.MESSAGE}</h1>`);
}).listen(8080);
Everything that this Node.js script does is to answer HTTP requests to http://localhost:8080 with and HTML tag that contains a message defined in the MESSAGE environment variable. To better understand how this works, we can run the following commands:
export MESSAGE=Howdy!
node index
And then open http://localhost:8080 on a web browser. See? We got simple web page with the Howdy! message. Before proceeding, let's stop our application by hitting Ctrl + C.
Dockerizing the Node.js Applications
To dockerize our Node.js application, we will need to create a file called Dockerfile in the application directory. The content of this file will be:
FROM node
RUN mkdir -p /usr/src/app
COPY index.js /usr/src/app
EXPOSE 8080
CMD [ "node", "/usr/src/app/index" ]
Note: If you don't understand how a Dockerfile works, check out this reference.
After that we need to create an image, from this Dockerfile, which can be done through the following command:
docker build -t load-balanced-app .
And then we can run both instances of our application with the following commands:
docker run -e "MESSAGE=First instance" -p 8081:8080 -d load-balanced-app
docker run -e "MESSAGE=Second instance" -p 8082:8080 -d load-balanced-app
After running both commands, we will be able to open both instances on a web browser by going to http://localhost:8081 and http://localhost:8082. The first URL will show a message saying "First instance", the second URL will show a message saying "Second instance".
Load Balancing with a Dockerized NGINX Instance
Now that we have both instances of our application running on different Docker containers and responding on different ports on our host machine, let's configure an instance of NGINX to load balance requests between them. First we will start by creating a new directory.
mkdir nginx-docker
In this directory, we will create a file called nginx.conf with the following code:
upstream my-app {
    server 172.17.0.1:8081 weight=1;
    server 172.17.0.1:8082 weight=1;
}

server {
    location / {
        proxy_pass http://my-app;
    }
}
This file will be used to configure NGINX. On it we define an upstream group of servers containing both URLs that respond for the instances of our application. By not defining any particular algorithm to load balance requests, we are using round-robin, which is the default on NGINX. There are several other options to load balance requests with NGINX, for example the least number of active connections, or the least average response time.
After that, we define a server property that configures NGINX to pass HTTP requests to http://my-app, which is handled by the upstream defined before. Also, note that we hardcoded 172.17.0.1 as the gateway IP, this is the default gateway when using Docker. If needed, you can change it to meet your local configuration.
Now we will create the Dockerfile that will be used to dockerize NGINX with this configuration. This file will contain the following code:
FROM nginx
RUN rm /etc/nginx/conf.d/default.conf
COPY nginx.conf /etc/nginx/conf.d/default.conf
Having created both files, we can now build and run NGINX containerized on Docker. We achieve that by running the following commands:
docker build -t load-balance-nginx .
docker run -p 8080:80 -d load-balance-nginx
After issuing these commands, let's open a web browser and access http://localhost:8080. If everything went well, we will see a web page with one of the two messages: First instance or Second instance. If we hit reload on our web browser a few times, we will realized that from time to time the message displayed switches between First instance and Second instance. This is the round-robin load balancing algorithm in action.
“Learn how to load balancing Node.js apps with NGINX and Docker.”
Tweet This
Note: To use the other algorithms available on NGINX, check their documentation for more information.
Aside: Securing Node.js Applications with Auth0
Securing Node.js applications with Auth0 is easy and brings a lot of great features to the table. With Auth0, we only have to write a few lines of code to get solid identity management solution, single sign-on, support for social identity providers (like Facebook, GitHub, Twitter, etc.), and support for enterprise identity providers (like Active Directory, LDAP, SAML, custom, etc.).
In the following sections, we are going to learn how to use Auth0 to secure Node.js APIs written with Express.
Creating the Express API
Let's start by defining our Node.js API. With Express and Node.js, we can do this in two simple steps. The first one is to use NPM to install three dependencies: npm i express body-parser cors.
Note: If we are starting from scratch, we will have to initialize an NPM project first:
npm init -y. This will make NPM create a new project in the current directory. As such, before running this command, we have to create a new directory for our new project and move into it.
The second one is to create a Node.js script with the following code (we can call it index.js):
// importing dependencies
const express = require('express');
const bodyParser = require('body-parser');
const cors = require('cors');

// configuring Express
const app = express();
app.use(bodyParser.json());
app.use(cors());

// defining contacts array
const contacts = [
  { name: 'Bruno Krebs', phone: '+555133334444' },
  { name: 'John Doe', phone: '+191843243223' },
];

// defining endpoints to manipulate the array of contacts
app.get('/contacts', (req, res) => res.send(contacts));
app.post('/contacts', (req, res) => {
  contacts.push(req.body);
  res.send();
});

// starting Express
app.listen(3000, () => console.log('Example app listening on port 3000!'));
The code above creates the Express application and adds two middleware to it: body-parser to parse JSON requests, and cors to signal that the app accepts requests from any origin. The app also registers two endpoints on Express to deal with POST and GET requests. Both endpoints use the contacts array as some sort of in-memory database.
Now, we can run and test our application by issuing node index in the project root and then by submitting requests to it. For example, with cURL, we can send a GET request by issuing curl localhost:3000/contacts. This command will output the items in the contacts array.
Registering the API at Auth0
After creating our application, we can focus on securing it. Let's start by registering an API on Auth0 to represent our app. To do this, let's head to the API section of our management dashboard (we can create a free account) if needed) and click on "Create API". On the dialog that appears, we can name our API as "Contacts API" (the name isn't really important) and identify it as https://contacts.blog-samples.com/ (we will use this value later).
Securing Express with Auth0
Now that we have registered the API in our Auth0 account, let's secure the Express API with Auth0. Let's start by installing three dependencies with NPM: npm i express-jwt jwks-rsa. Then, let's create a file called auth0.js and use these dependencies:
const jwt = require('express-jwt');
const jwksRsa = require('jwks-rsa');

module.exports = jwt({
  // Fetch the signing key based on the KID in the header and
  // the singing keys provided by the JWKS endpoint.
  secret: jwksRsa.expressJwtSecret({
    cache: true,
    rateLimit: true,
    jwksUri: `https://${process.env.AUTH0_DOMAIN}/.well-known/jwks.json`,
  }),

  // Validate the audience and the issuer.
  audience: process.env.AUTH0_AUDIENCE,
  issuer: `https://${process.env.AUTH0_DOMAIN}/`,
  algorithms: ['RS256'],
});
The goal of this script is to export an Express middleware that guarantees that requests have an access_token issued by a trust-worthy party, in this case Auth0. Note that this script expects to find two environment variables:
AUTH0_AUDIENCE: the identifier of our API (https://contacts.mycompany.com/)AUTH0_DOMAIN: our domain at Auth0 (in my casebk-samples.auth0.com)
We will set these variable soons, but it is important to understand that the domain variable defines how the middleware finds the signing keys.
After creating this middleware, we can update our index.js file to import and use it:
// ... other require statements ...
const auth0 = require('./auth0');

// ... app definition and contacts array ...

// redefining both endpoints
app.get('/contacts', auth0(), (req, res) => res.send(contacts));
app.post('/contacts', auth0(), (req, res) => {
  contacts.push(req.body);
  res.send();
});

// ... app.listen ...
In this case, we have replaced the previous definition of our endpoints to use the new middleware that enforces requests to be sent with valid access tokens.
Running the application now is slightly different, as we need to set the environment variables:
export AUTH0_DOMAIN=blog-samples.auth0.com
export AUTH0_AUDIENCE="https://contacts.blog-samples.com/"
node index
After running the API, we can test it to see if it is properly secured. So, let's open a terminal and issue the following command:
curl localhost:3000/contacts
If we set up everything together, we will get a response from the server saying that "no authorization token was found".
Now, to be able to interact with our endpoints again, we will have to obtain an access token from Auth0. There are multiple ways to do this and the strategy that we will use depends on the type of the client application we are developing. For example, if we are developing a Single Page Application (SPA), we will use what is called the Implicit Grant. If we are developing a mobile application, we will use the Authorization Code Grant Flow with PKCE. There are other flows available at Auth0. However, for a simple test like this one, we can use our Auth0 dashboard to get one.
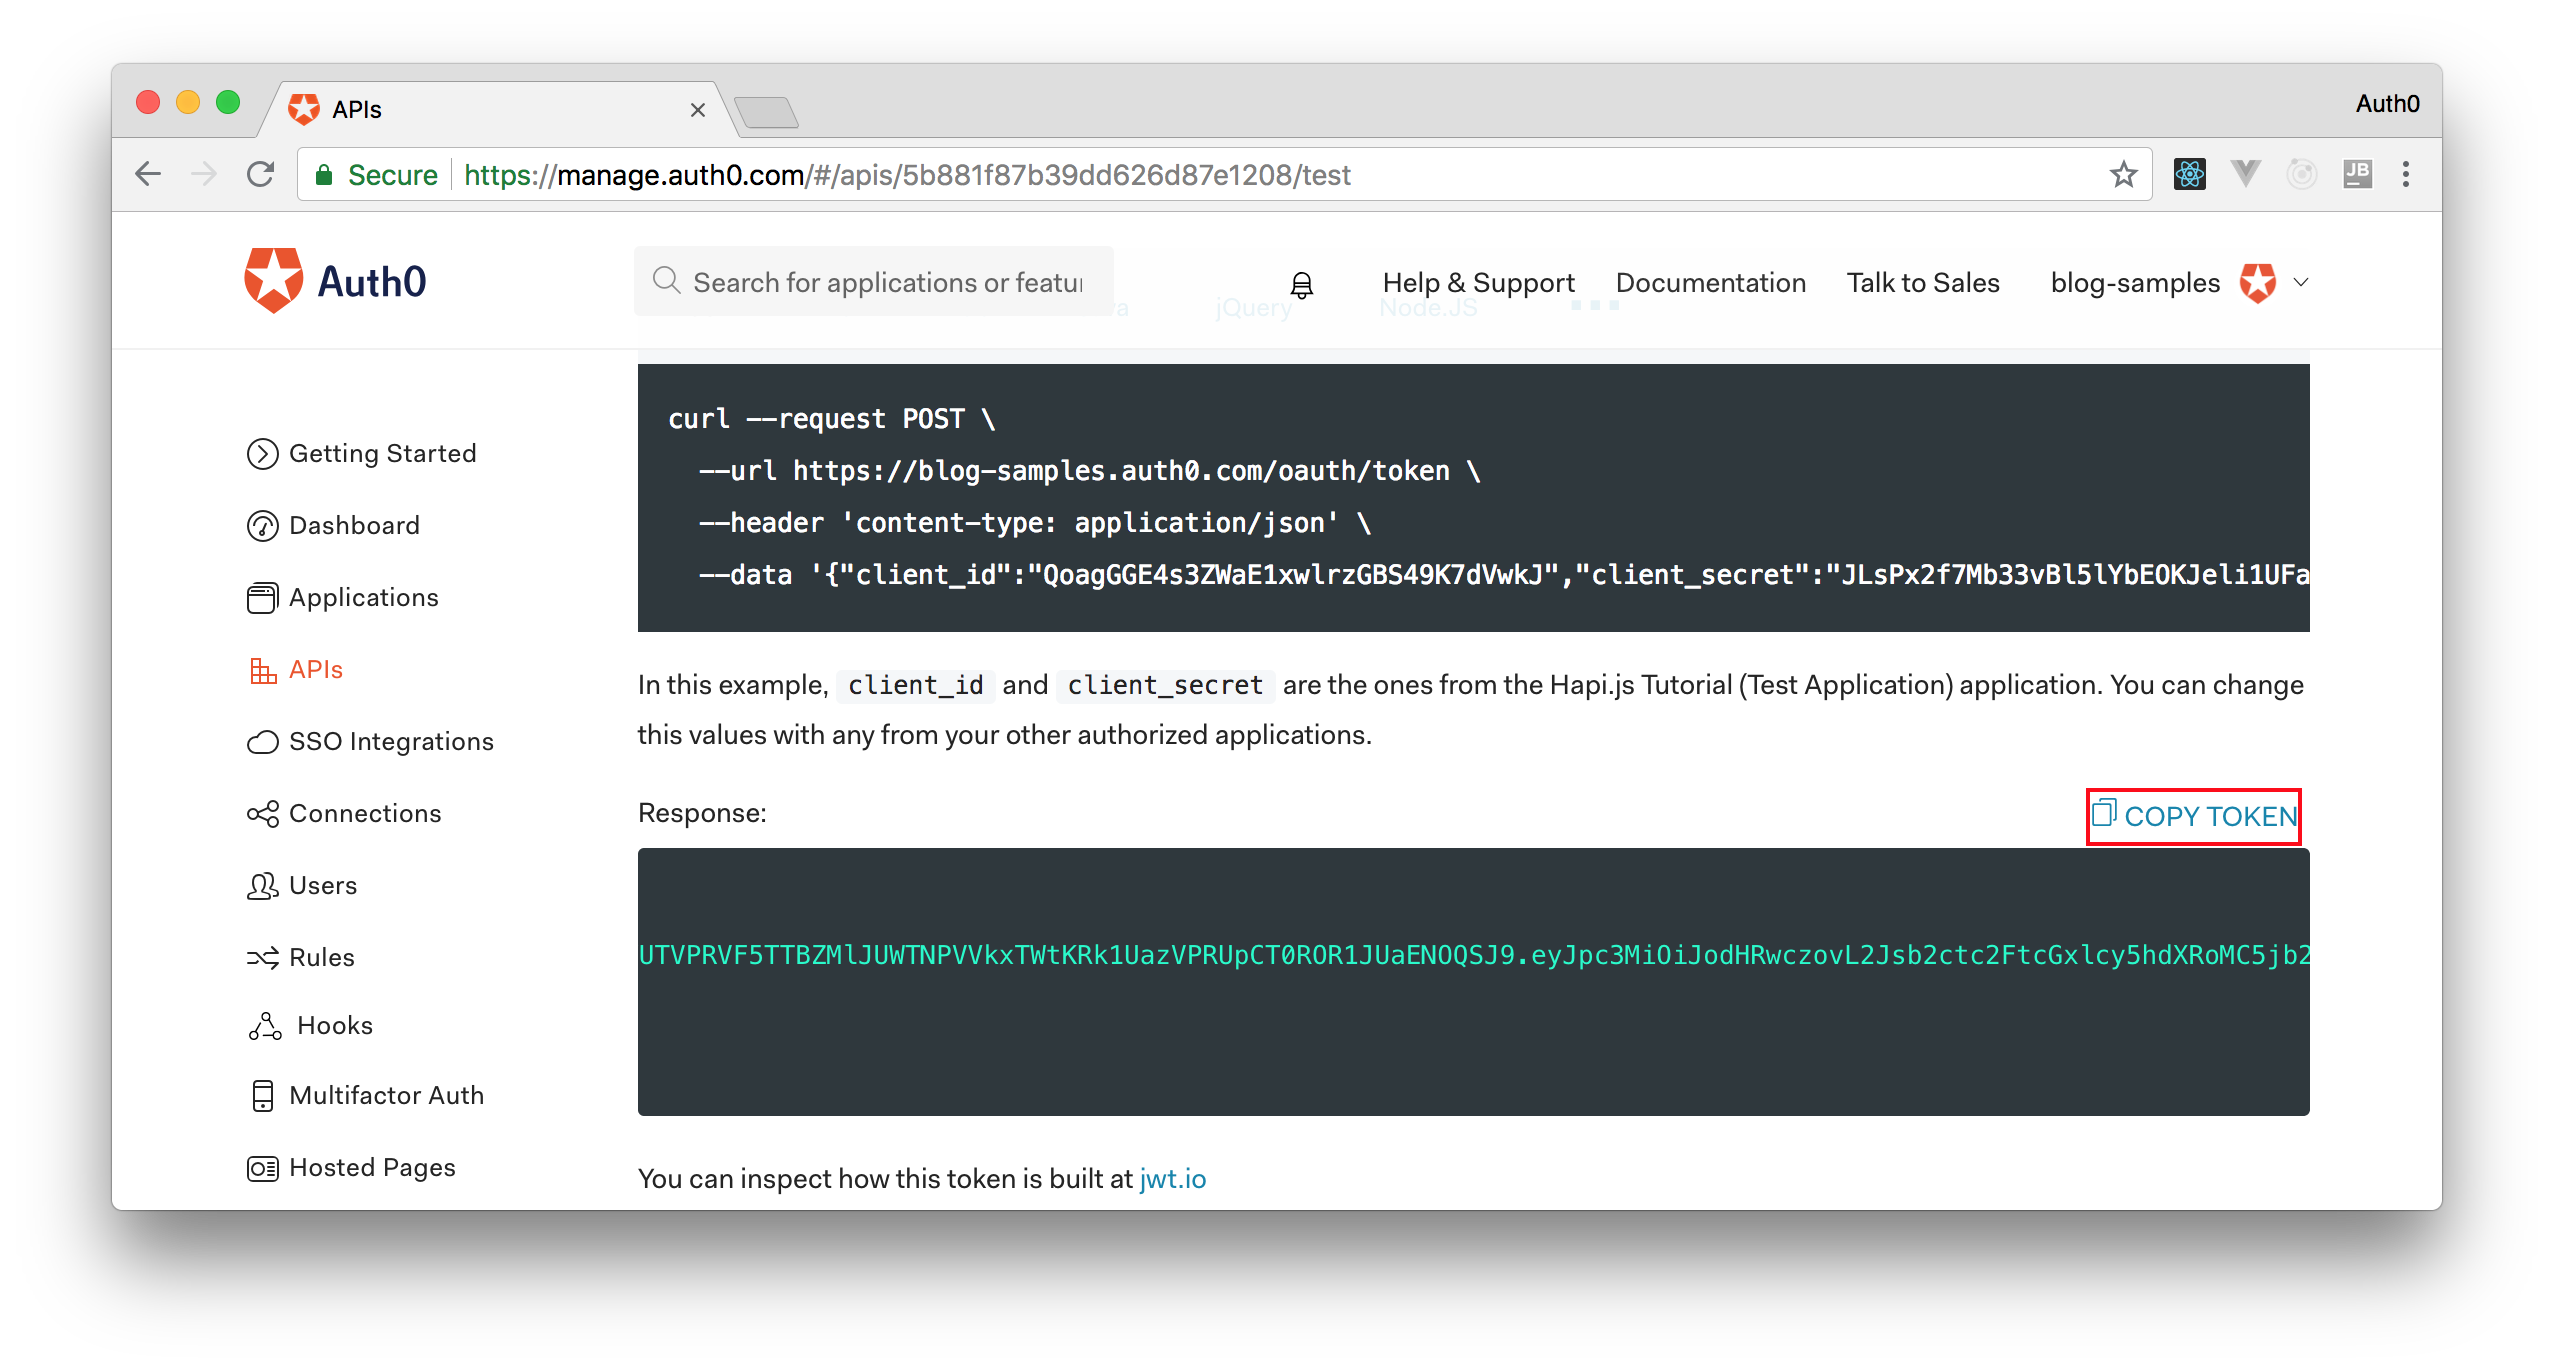
Therefore, we can head back to the APIs section in our Auth0 dashboard, click on the API we created before, and then click on the Test section of this API. There, we will find a button called Copy Token. Let's click on this button to copy an access token to our clipboard.
After copying this token, we can open a terminal and issue the following commands:
# create a variable with our token
ACCESS_TOKEN=<OUR_ACCESS_TOKEN>

# use this variable to fetch contacts
curl -H 'Authorization: Bearer '$ACCESS_TOKEN http://localhost:3000/contacts/
Note: We will have to replace
<OUR_ACCESS_TOKEN>with the token we copied from our dashboard.
As we are now using our access token on the requests we are sending to our API, we will manage to get the list of contacts again.
That's how we secure our Node.js backend API. Easy, right?
Conclusion
Loading balancing applications with Docker and NGINX is an easy process. In this article we have managed to achieve this goal with a few simple steps. All we had to do was to install Docker on our development machine, run two instances of a dockerized applications and then configure a dockerized NGINX instance to round-robin requests to the application instances.
To learn more about load balancing, NGINX and Docker, check out the following resources:
About the author

Bruno Krebs
R&D Content Architect (Auth0 Alumni)