
Assume you want to let users try your application's services for a given period of time, say 30 days. How can you let users register and then block them after the trial period expires? You can easily leverage Auth0 Actions to achieve this result.
Setting Up the Sample App
To show you how to enable a trial period for your application, this article will be referring to a sample web application that allows the user to access a fictitious online catalog.
The sample application you are going to use in this article is built with C# and requires .NET installed on your machine. However, the user registration customization you will implement is independent of your application's specific programming language and framework.
You can download the sample application by cloning its GitHub repository with the following command:
git clone https://github.com/auth0-blog/acme-aspnet-mvc.git
Once you download it, take a look at the README file and follow its instructions to configure the application to use Auth0. You need an Auth0 account, and if you don't yet have it, you can sign up for a free one.
If you want to learn the details of the sample application implementation, this blog post describes how it has been integrated with the Auth0 authentication services.
After configuring the sample application, you can run it with the following command:
dotnet run
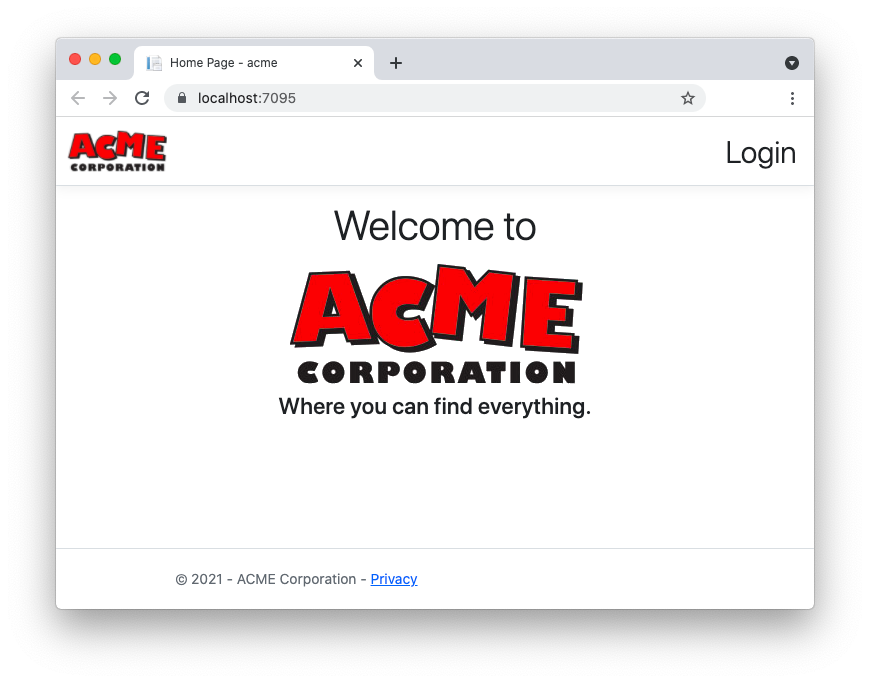
Now, head your browser to the https://localhost:7095/ address, you should get the following page:
Auth0 Actions and Flows
Once you have ensured that your application is properly configured and running, let's briefly explore Auth0's features that will allow you to implement the trial period: Auth0 Actions and Flows.
Auth0 Actions are JavaScript functions running in a Node.js environment executed when specific events happen in a few internal Auth0 Flows.
Auth0 Flows are the processes that can be extended with Actions. Each Flow is made up of one or more triggers and represents the logical pipeline through which information moves during a single point in the Auth0 journey.
For example, you can consider the Login Flow, which runs when a user logs in. This Flow has a post-login trigger: an event fired after the user logs in. You can handle this event through one or more Actions. In other words, you can see Actions as event handlers that run when a specific event fires in an Auth0 Flow.
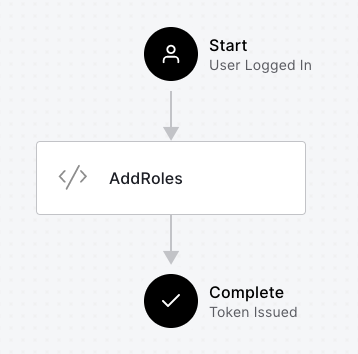
The following is a graphical representation of an Action (AddRoles) that will be executed in the Login Flow after the user logs in:
The following are the available Auth0 Flows you can customize with Actions:
- Login, running when a user logs in.
- Pre User Registration, running before a user is added to the users' store.
- Post User Registration, running after a user is added to the users' store.
- Post Change Password, running after the user changes their password.
- Send Phone Message, running when you configure a custom Multi-Factor Authentication (MFA) provider.
- Machine To Machine, running when an access token is issued to a client using the Client Credential Flow.
You will use a couple of these Flows to implement the trial period feature for the sample application.
To learn more about Actions, you can check out these blog posts for a quick introduction to Auth0 Actions and how they compare with the deprecated Rules and Hooks.
The Trial Period Implementation
Once you have an idea of what Auth0 Flows and Actions are, let's outline how to implement the trial period feature for the sample application. You can identify the following steps:
- Starting a trial: when the user registers with the application to access its catalog, you will calculate the trial expiration date and store it on the server side. You will do this step by creating an Action that customizes the Pre User Registration Flow. You will also learn you can leverage Auth0 to store the trial expiration date opportunely.
- Checking the trial validity: whenever the user logs in to the sample application, you have to compare the current date with the expiration date in order to determine whether the trial period is still valid. If the trial period is still active, the user is allowed to access the catalog. You will implement this step by customizing the Login Flow with an Action.
- Dealing with trial expiration: when the trial period expires, the user is not allowed to access the catalog. They will be redirected to a page inviting them to purchase full access to the application's services. The implementation of this step relies on the trial validity check Action and on a few changes to the sample application.
The next sections will detail how to implement each step.
Starting a Trial
Let's start by implementing the first step of the trial: registering the expiration date when the user registers with your application.
Access your Auth0 Dashboard and select Flows under the Actions item from the left side menu. You should see the following screen in your browser:
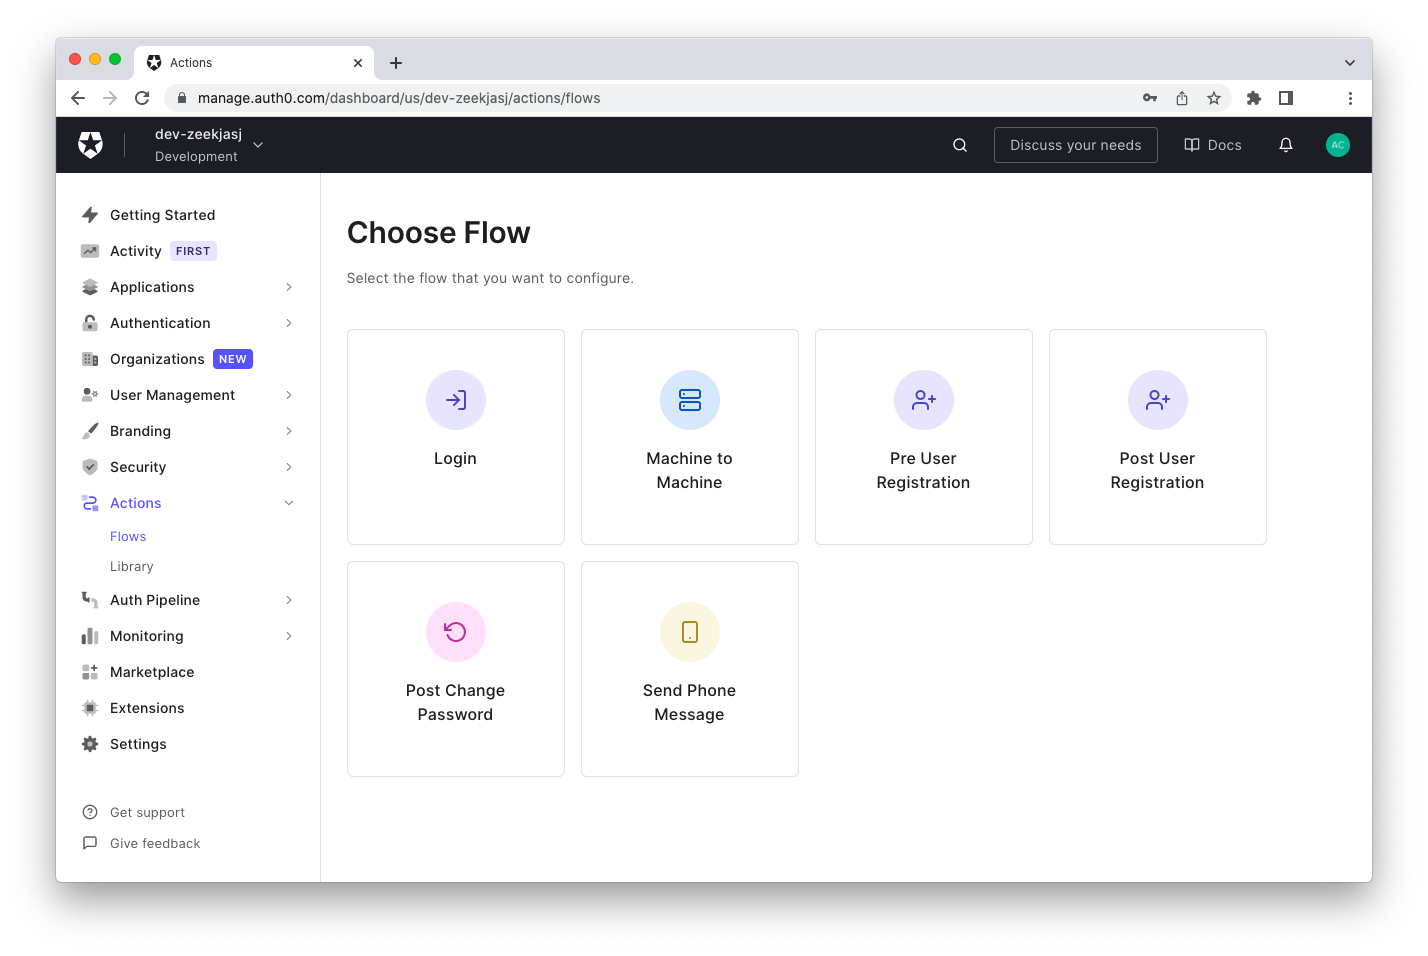
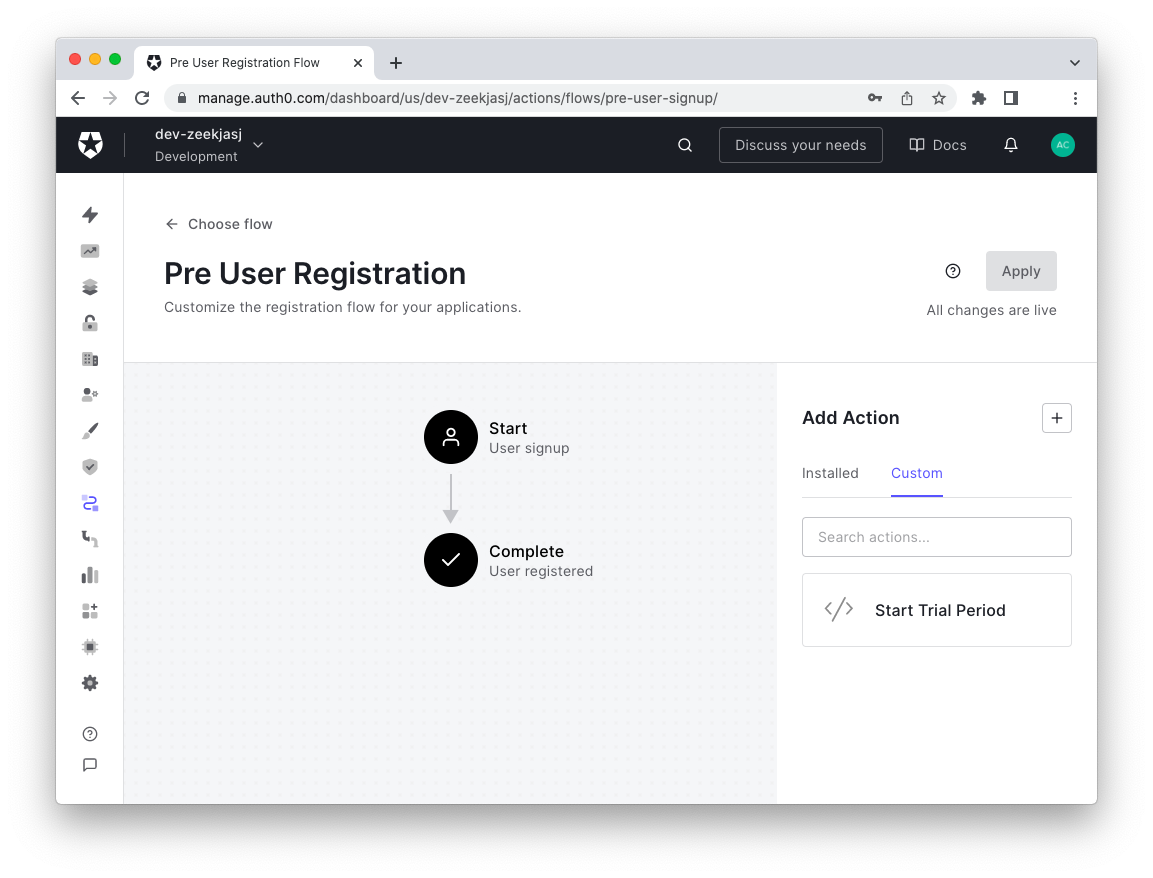
This screen shows the Auth0 Flows you can customize with your Actions. For our purposes, click the Pre User Registration tile, and you will enter the following page:
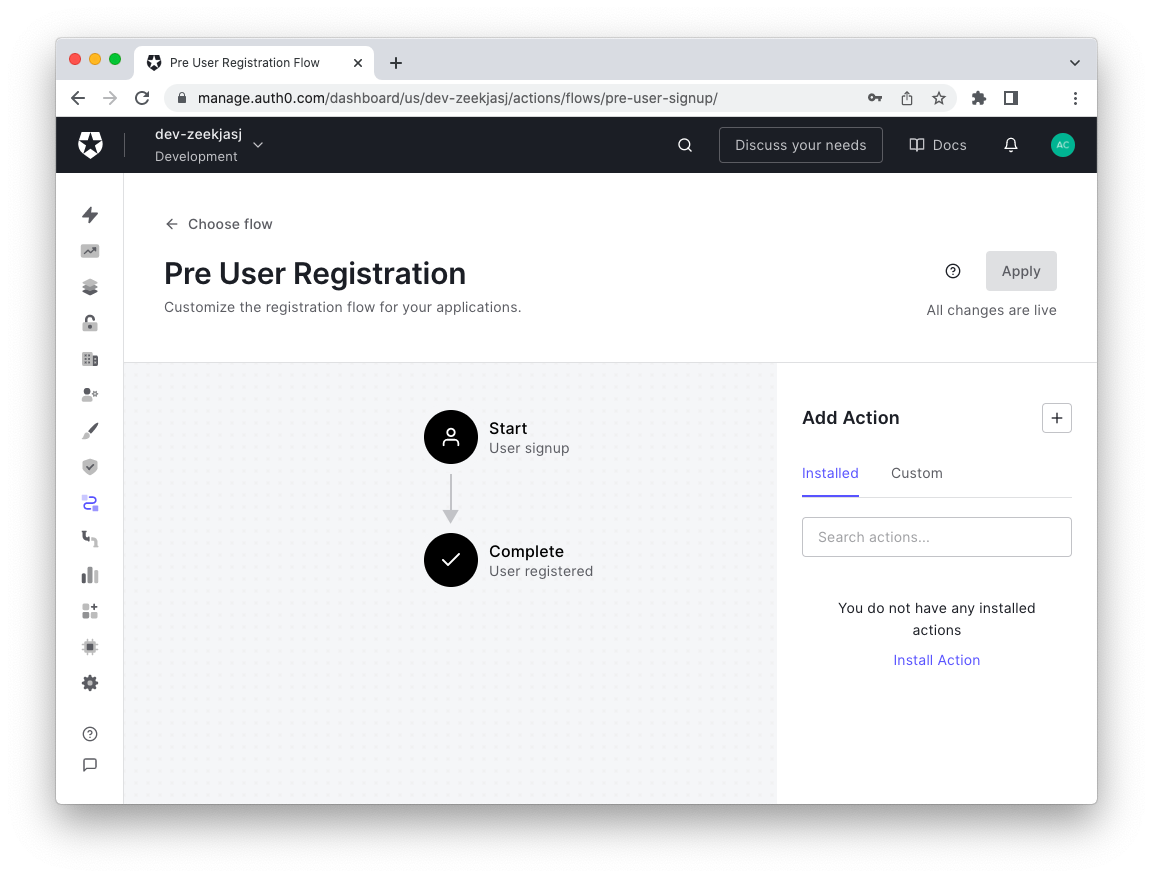
This page allows you to add one or more Actions to the Pre User Registration Flow. You can add two types of Actions:
- Installed Actions, i.e., ready to use Actions built by third parties and published in the Auth0 Marketplace.
- Custom Actions, i.e., Actions you create from scratch.
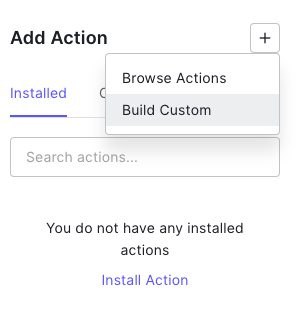
In this case, you will create your own custom Action. So, click the + icon to the upper-right corner of the Add Action section, and select the Build Custom menu item, as shown in the following picture:
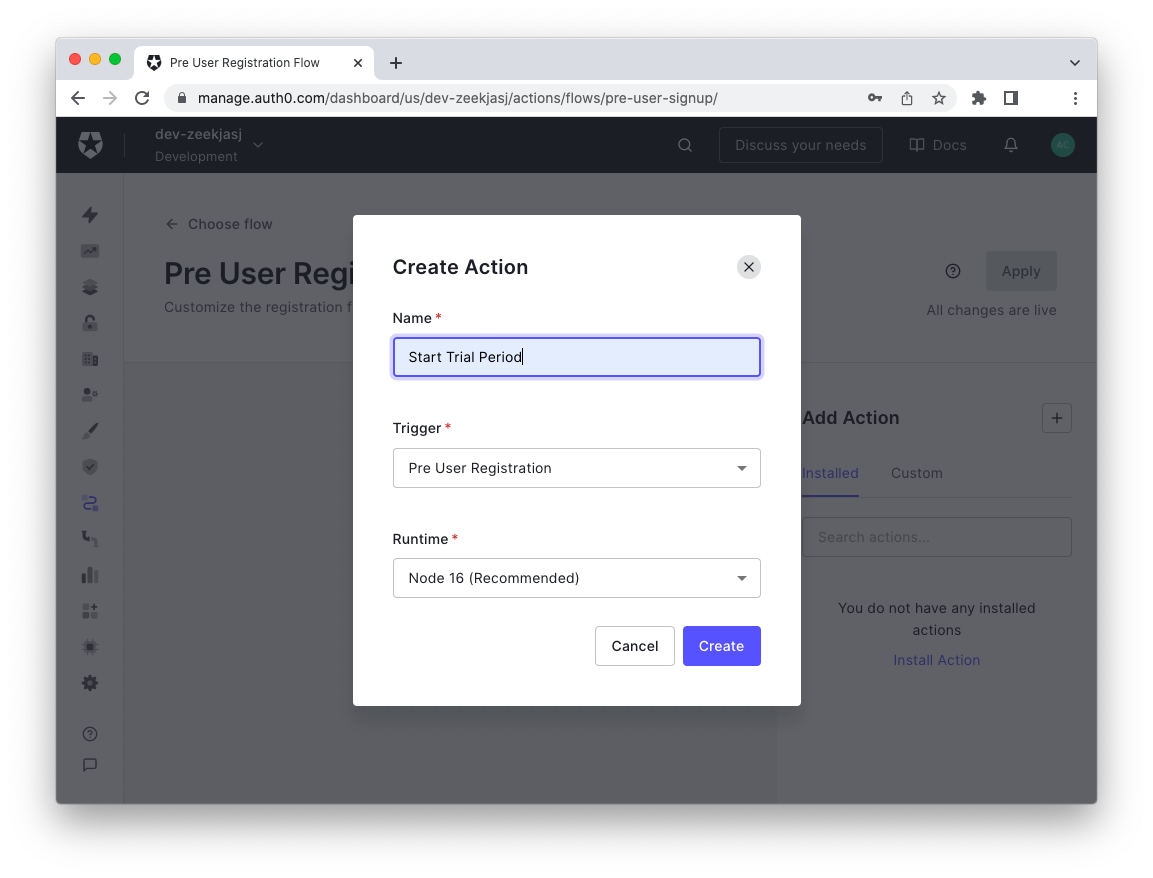
You will be asked to enter a name for the Action. Provide the Start Trial Period name and leave the other fields unchanged, as shown below:
Now, click the Create button, and you will enter the Action editor. Your screen should be like the following:
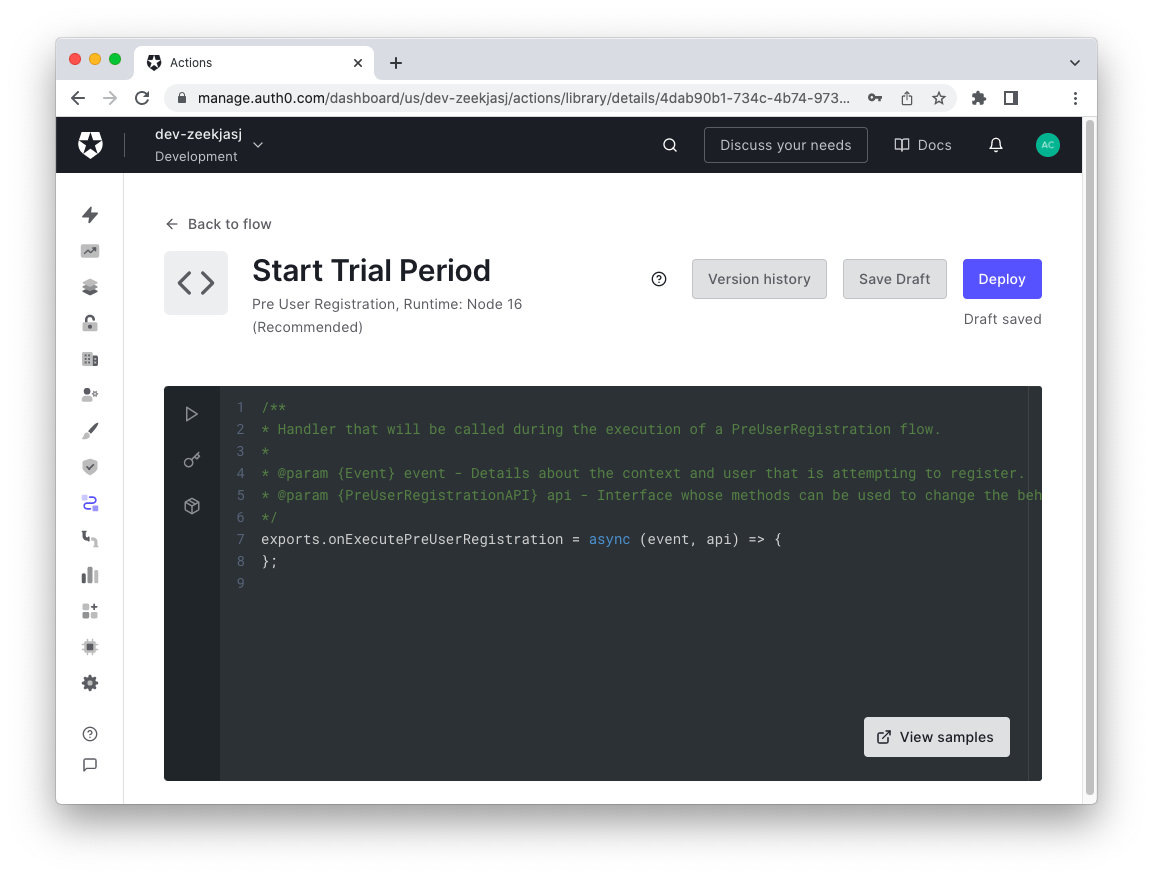
The code you find in the Action editor is the JavaScript function that will be executed after the user registers with the sample application. This function will be exported in the Node.js environment running on the Auth0 side.
The JavaScript function has an event parameter and an api parameter.
The event parameter provides some information about the current running environment. For example, it allows you to access the current user's data, the current request, the tenant, etc. For more details about the Pre User Registration event object, check out the documentation.
The api parameter provides methods for changing the behavior of the Flow. For example, it allows you to deny access to your application or set specific metadata for the user or the application. For more details about the Pre User Registration api object, check out the documentation.
To start the trial period for the user who is about to be registered, you have to write some code in the body of this JavaScript function. So, replace the content of the Action editor with the following code:
exports.onExecutePreUserRegistration = async (event, api) => {
  const today = new Date();
  const expirationDate = new Date();

  expirationDate.setDate(today.getDate() + 30);

  api.user.setAppMetadata("trial_expiration_date", expirationDate);
};
This code calculates the expiration date by adding 30 days to the current date and assigns it to the trial_expiration_date property of the app_metadata object bound to the current user. Actually, the setAppMetadata() method creates a new custom property for the app_metadata object if it doesn't exist. To learn more about managing metadata, check out the documentation.
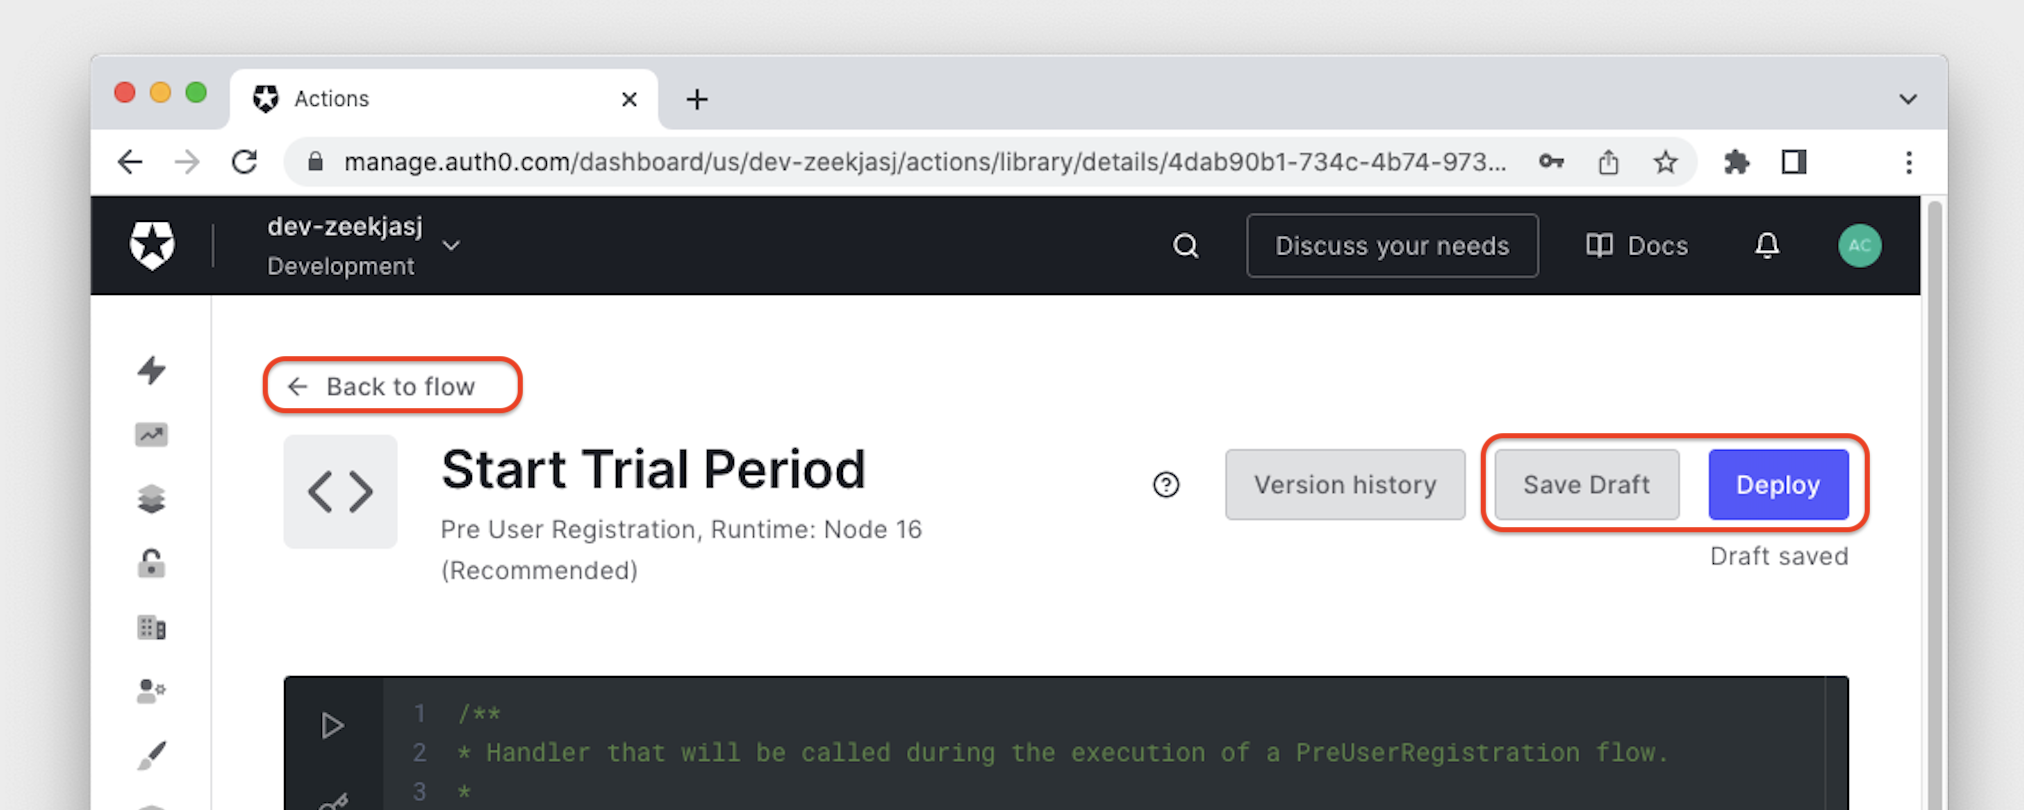
Now you have the Action that sets the trial expiration date for the user at registration time. Click the Save Draft button to save your changes, and then click the Deploy button to make the Action available to the Pre User Registration Flow. Then, go back to the Flow editor by clicking the <- Back to flow link at the top left:
In the Flow editor, click the Custom tab of the Add Action section. Now you should see the Action you just created, as shown below:
Drag the Start Trial Period Action from the Add Action section and drop it between the Start and Complete nodes of the Flow diagram. You should get the following:
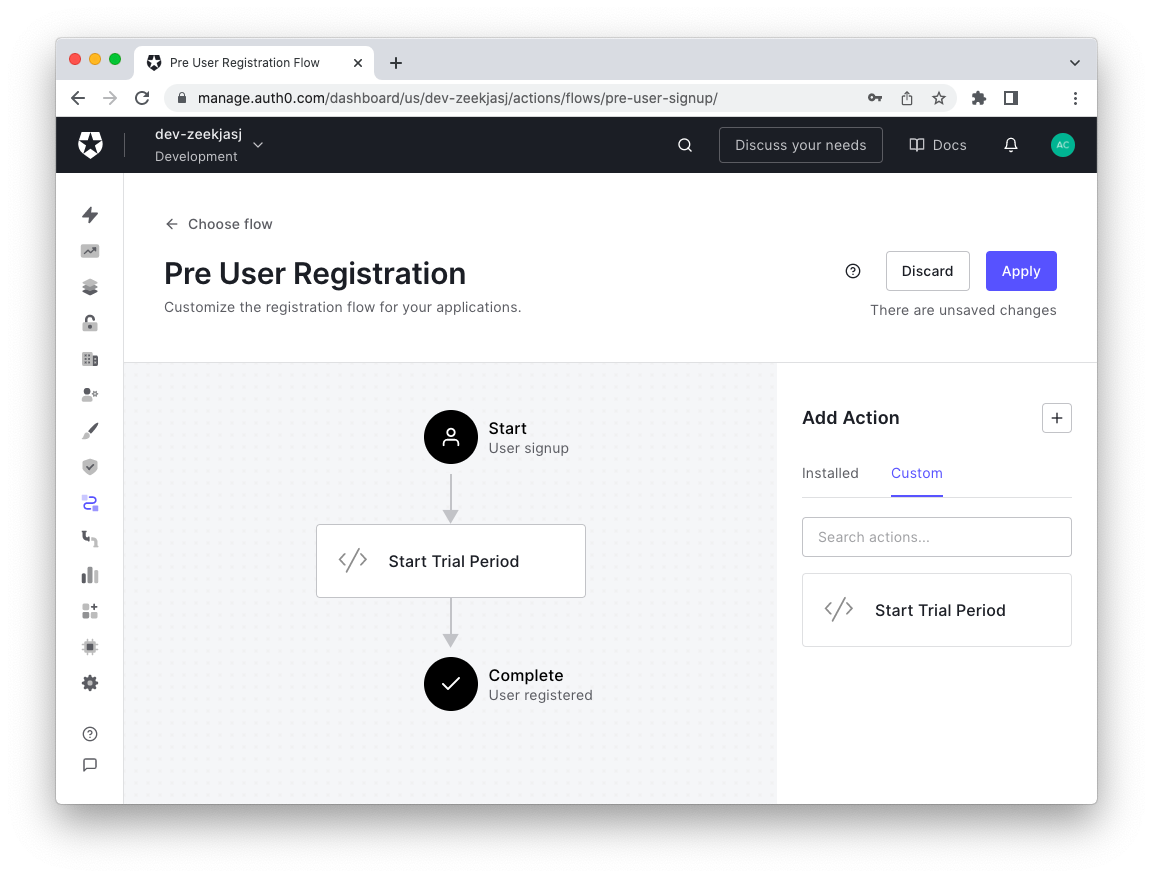
Click the Apply button to confirm your changes. Your application is now ready to create a trial period expiration date when a user registers with it.
Checking the Trial Validity
The next step focuses on checking if the trial period is not expired when the user logs in.
Move to the list of Flows in the Auth0 Dashboard and select the Login Flow. As you learned in the previous section, you have to create a custom Action by clicking the Build Custom menu item in the Add Action section of the Flow editor:
Assign the Check Trial Validity name your new Action and go to the Action editor by clicking the Create button. This time you will find the following code in the editor:
exports.onExecutePostLogin = async (event, api) => {
};
This is the JavaScript function that will be executed after the user logs in. As before, this function has two parameters, event and api, related to information about the current running environment and methods for changing the behavior of the current Flow. Although these parameters have the same names as before, their structure is different since they are strictly related to the current Flow. Refer to the post-login event object and post-login api object documentation and post-login api object documentation for specific details.
To check the validity of the trial period for the current user, replace the code in the Action editor with the following:
exports.onExecutePostLogin = async (event, api) => {
  const today = new Date();
  const expirationDate = new Date(event.user.app_metadata["trial_expiration_date"]);

  if (today > expirationDate) {
    api.access.deny("trial_expiration");
  }
};
This code retrieves the expiration date from the app_metadata object for the current user and compares it with the current date. If the current date is before the expiration date, the Action does nothing. Otherwise, access is denied through the api.access.deny() method. The string trial_expiration passed to the deny() method briefly explains the reason for the denied access.
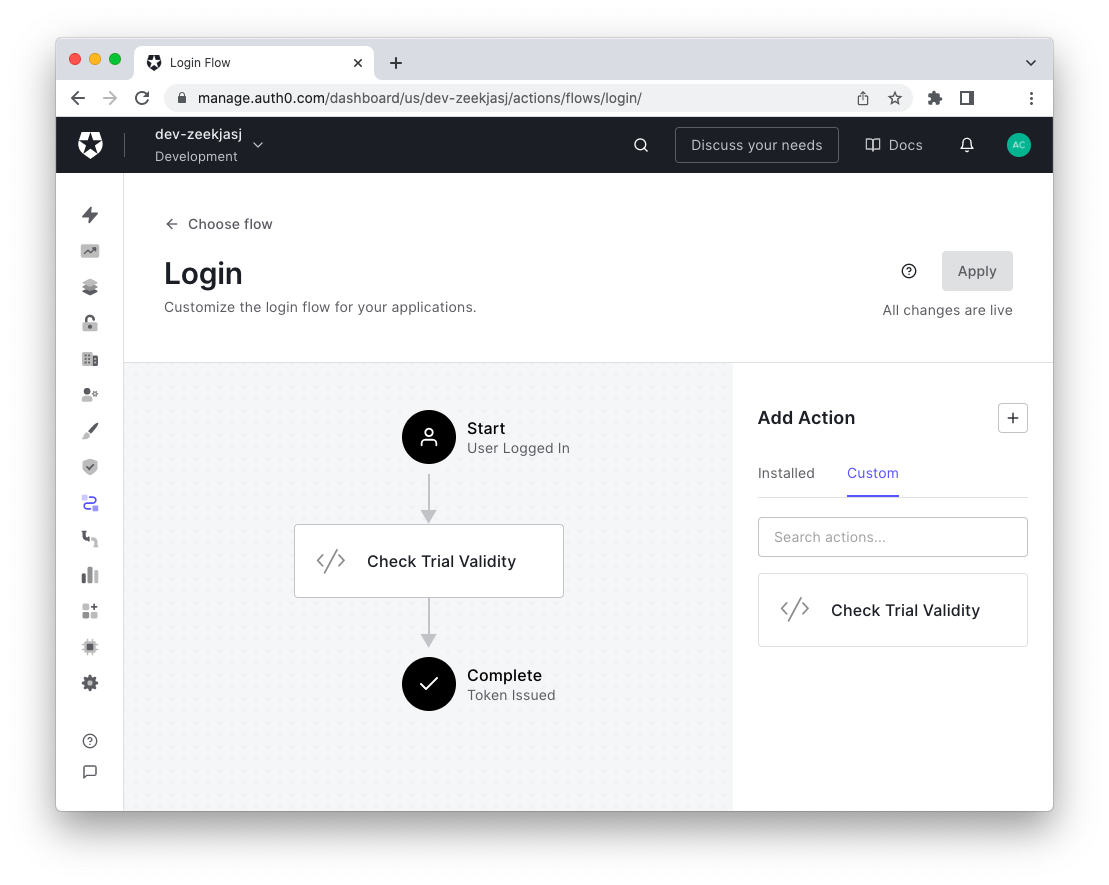
Now that your second Action is ready, you know what to do: save it, then deploy it, finally go back to the flow and drop it there. And if you did everything so far, your Login Flow should look like this:
Testing the Trial Period
Now you are ready to test what you've built so far.
Register a new user
If not already running, launch the sample application by typing the dotnet run command in a terminal window.
Actions are implemented and deployed on the Auth0 side and they run when any of the Auth0 Flows are involved. So, it doesn't matter if your application is already running. You don't need to restart it.
Then, click the Login link at the upper right corner of the application's home page. In the Auth0 Universal Login page, click the Sign up link highlighted below:
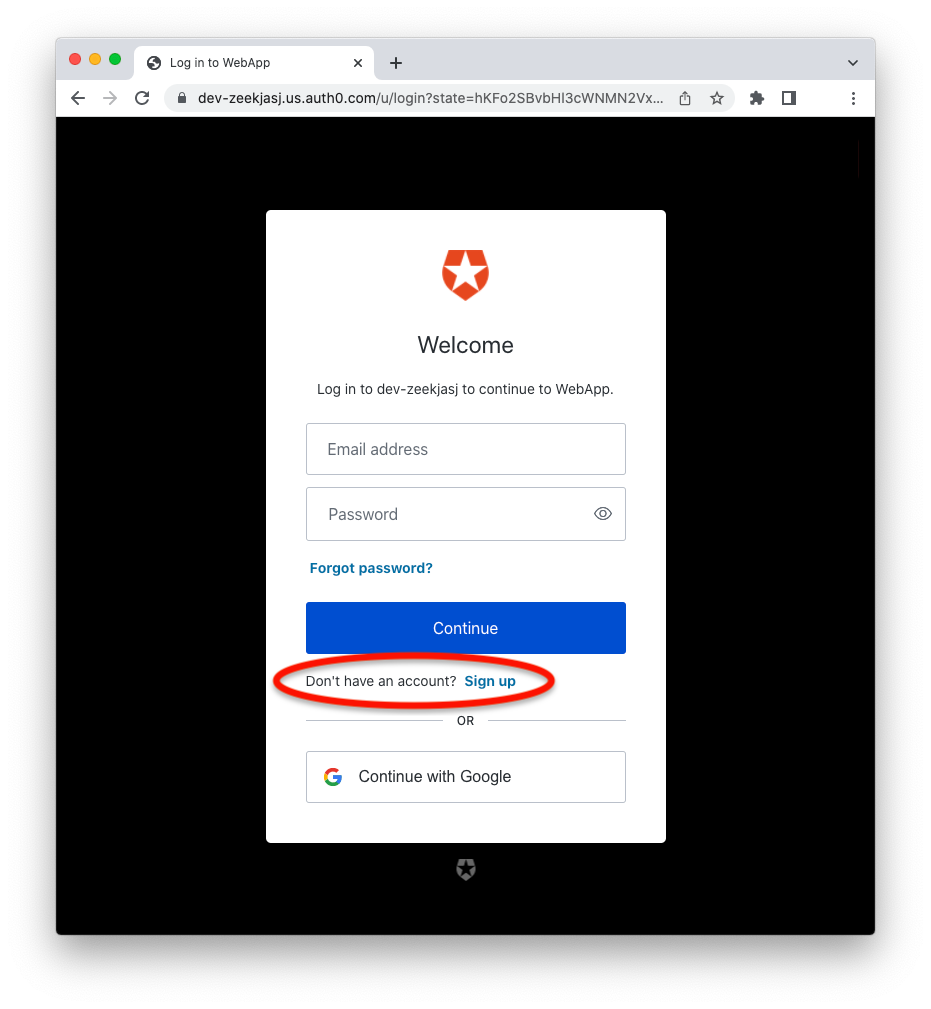
You will be asked to provide an email and a password to create a new user for your application. Once the new user is created, you can browse the application's catalog.
Check the trial expiration date
Let's take a look at what happened on the Auth0 side. Go to the User Management section of your Auth0 Dashboard and select the newly created user. Scrolling down the page containing the user data, you should find the app_metadata field with a JSON object similar to the following:
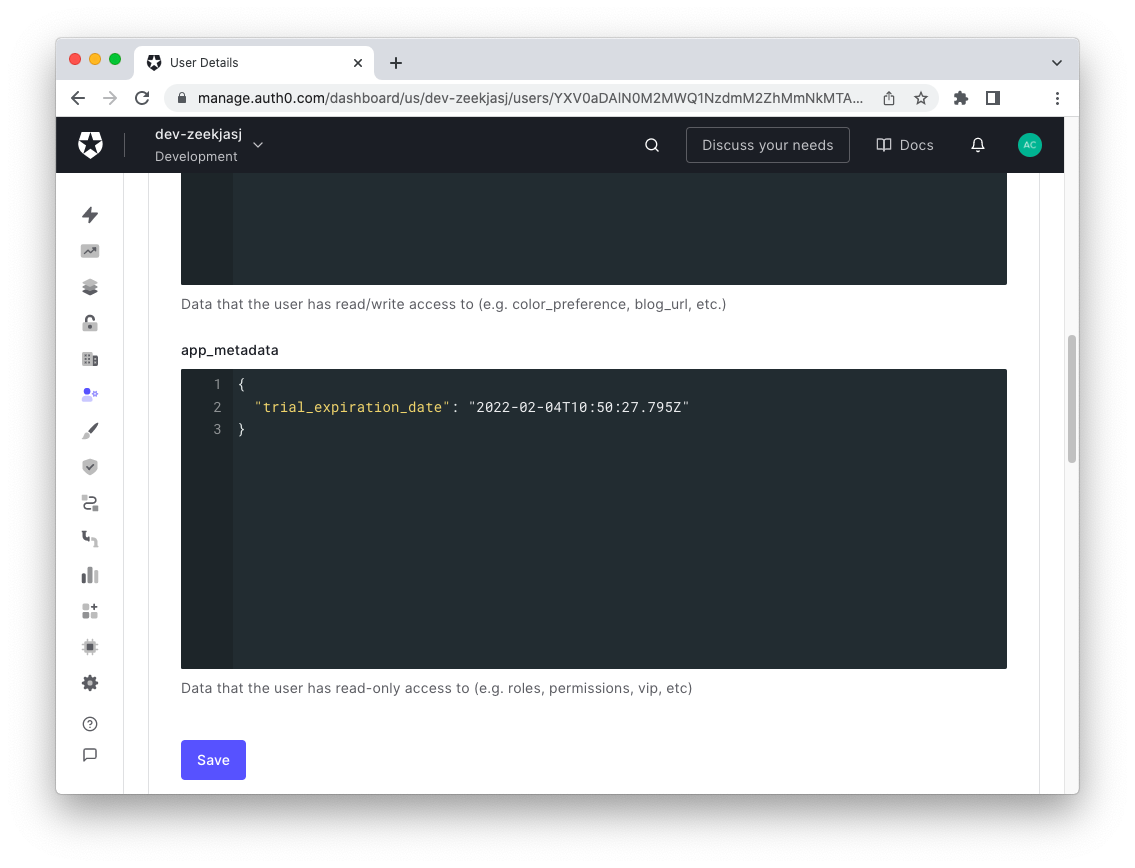
As you can see, this field shows the app_metadata object with the trial_expiration_date the Start Trial Period Action set at registration time.
Make the trial period expire
To verify that the Check Trial Validity Action works as expected, we can't wait... a month. You can accelerate the expiration of the trial period by simply editing the app_metadata field. So, change the value of the trial_expiration_date so that it is before the current date and click the Save button to update the user profile.
Test the trial period expiration
If you are logged in to the application, click the Logout link at the upper right corner of the page and log in to the application again.
This time you shouldn't be able to log in and access the application's catalog. What you will see is a page like the following:
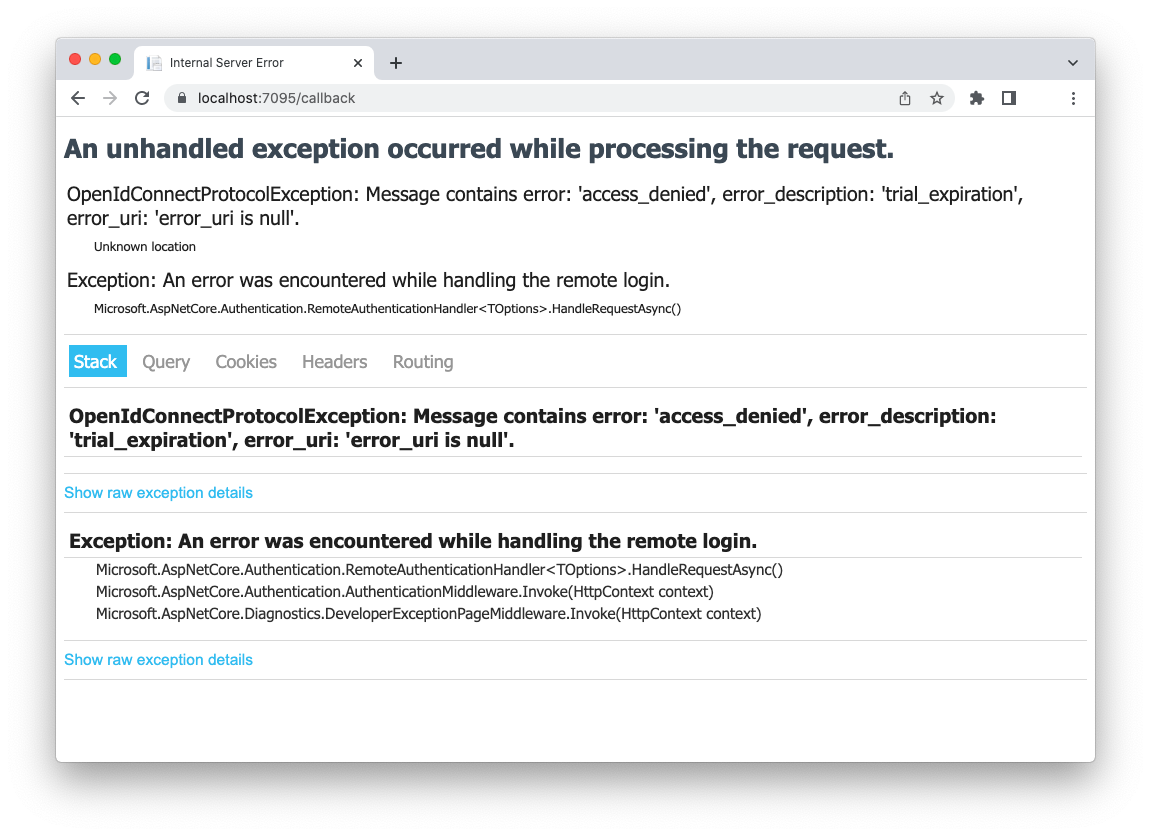
You can deduce that you can't log in to the application because your trial period is expired, but the user experience is actually not the best you expected.
Improving the User Experience
The approach to handling the expiration of the trial period that we have implemented so far is a little crude. Actually, the user will not have a good experience with it unless your application catches the reason for non-access and gives user-friendly feedback.
Properly handling the response from Auth0 and providing feedback to the user depends on your specific programming language and/or development framework.
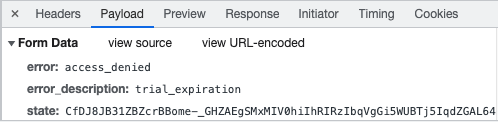
What you have to know is that the
deny()method called on the Action side triggers a request to your callback URL passing theerroranderror_descriptionvalues as form data, as shown in the following picture:
In this section, you will learn how to deal with this response in the sample application, which uses the ASP.NET Core MVC programming model and the Auth0 ASP.NET Core Authentication SDK.
To let the sample application users have a better experience when their trial period expires, you have to:
- Add a trial expiration dedicated page to your web application.
- Catch the access denied error and redirect your user to this dedicated page when the trial period expires.
Adding a trial expiration page
As said before, the sample application is built with C# in .NET. It uses the ASP.NET Core MVC framework, so the steps described in this subsection are strictly related to this development framework. The goal of this step is to add a Web page to your application, so feel free to adapt this step to your preferred development environment.
Go to the folder where you downloaded the sample application. Then, move to the Views/Home folder and create a TrialExpiration.cshtml file. Put the following code into that file:
@* Views/Home/TrialExpiration.cshtml *@

@{
    ViewData["Title"] = "Trial Expiration";
}
<div class="text-center">
    <h1>@ViewData["Title"]</h1>

    <p>
        Your trial period expired.<br>
        Subscribe to premium access!
    </p>
</div>
This is the markup of your trial expiration page.
Now, move to the Controllers folder under the project's root folder and add the code highlighted below to the HomeController.cs file:
using System.Diagnostics;
using Microsoft.AspNetCore.Mvc;
using acme.Models;

namespace acme.Controllers;

public class HomeController : Controller
{
  // ...existing code...

  // 👇 new code
  public IActionResult TrialExpiration()
  {
    return View();
  }
  // 👆 new code
}
This code renders the markup of your trial expiration page within the application layout.
Catching the access denied error
Now, let's enable the sample application to catch the access denied error and redirect users to the trial expiration page already created. Open the Program.cs file in the project's root folder and apply the changes highlighted in the following code snippet:
using Auth0.AspNetCore.Authentication;
// 👇 new code
using Microsoft.AspNetCore.Authentication.OpenIdConnect;
// 👆 new code

var builder = WebApplication.CreateBuilder(args);

builder.Services
  .AddAuth0WebAppAuthentication(options => {
    options.Domain = builder.Configuration["Auth0:Domain"];
    options.ClientId = builder.Configuration["Auth0:ClientId"];
    options.Scope = "openid profile email";

    // 👇 new code
    options.OpenIdConnectEvents = new OpenIdConnectEvents()
    {
      OnMessageReceived = (context) => {
        if (context.ProtocolMessage.Error == "access_denied" &&
              context.ProtocolMessage.ErrorDescription == "trial_expiration") {
            context.HandleResponse();
            context.Response.Redirect("/Home/TrialExpiration");
        }
        return Task.CompletedTask;
      }
    };
    // 👆 new code
  });

builder.Services.AddControllersWithViews();

// ...existing code...
The new code adds a handler to the OpenID Connect event OnMessageReceived. This handler simply checks that the received error is access_denied and the error description is trial_expiration. In this case, it redirects the user to the trial expiration page.
Now, stop your running application and restart it. As a result, the user will see the following page instead of the previously shown error page:
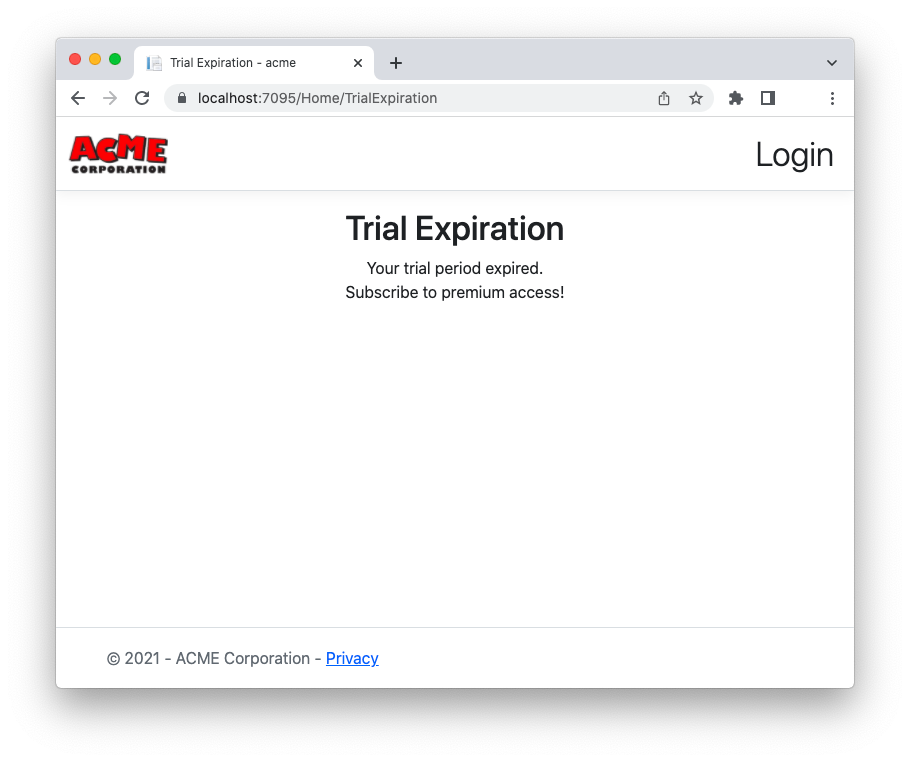
In the real world, the trial expiration page should provide a better user experience, like, for example, a form to sign up for the premium access and any other information that can help the user to continue using your application's services.
Summary
To recap, you started with a ready-to-use sample application already integrated with Auth0 and added a couple of Actions through the Auth0 Dashboard:
- The Start Trial Period Action, which associates the trial expiration date to the user when the user registers with the application, i.e., during the Pre User Registration Flow.
- The Check Trial Validity Action, which verifies if the current date is beyond the expiration date when the user logs in, i.e., during the Login Flow.
These two simple Actions prepared the infrastructure to handle the trial period feature for the sample application. Finally, to improve the user experience, you created a page where to land users when their trial period expires.
By exploring this example, I hope you now have a better idea of what Auth0 Actions allow you to do and how you can customize the standard Auth0 integration behavior.
About the author

Andrea Chiarelli
Principal Developer Advocate
I have over 20 years of experience as a software engineer and technical author. Throughout my career, I've used several programming languages and technologies for the projects I was involved in, ranging from C# to JavaScript, ASP.NET to Node.js, Angular to React, SOAP to REST APIs, etc.
In the last few years, I've been focusing on simplifying the developer experience with Identity and related topics, especially in the .NET ecosystem.