
TL;DR: This is the second part of a series on how to build a secure, modern full-stack application with Nest.js, React, TypeScript, and MongoDB. In the first section, you were able to build the backend API with Nest.js, secured your API by leveraging the Auth0 infrastructure, and then finally persisted data into your MongoDB database. Here, you will take the application further by building the frontend with React and TypeScript. The complete source code developed throughout this series can be found in this GitHub repository if you will prefer to head straight into the code.
Summarizing Part 1
After successfully creating the backend logic for the API in the first part of this tutorial, you ensured that some endpoints, such as were accessible only to authenticated users:
GET:/blog/postPUT:/blog/editDELETE:/blog/delete
As a proof of concept, you used a test application on Auth0 and obtained a test Access Token from your Auth0 API management dashboard. This ensures that access is controlled for your backend API, and hence, your application was protected. To catch up on the entire guideline and code structure of the first part of this series, click on this link and come back to this part once you are done.
Ensure that you are within the Backend application and start it with:
// move into the app
cd blog-backend

// start the application
npm run start:dev
Also, you can run a MongoDB instance from a different terminal:
sudo mongod
Building the Frontend with React and TypeScript
As mentioned earlier, rather than build the React application with JavaScript, TypeScript will be used instead. This is a total deviation from the conventional way of structuring and building applications with React. With brilliant type inference, autocompletion, and type safety, you can easily spot errors in your code at a very early stage.
“With TypeScript, you can easily spot errors in your code at a very early stage.”
Tweet This
Installing and configuring the TypeScript React starter
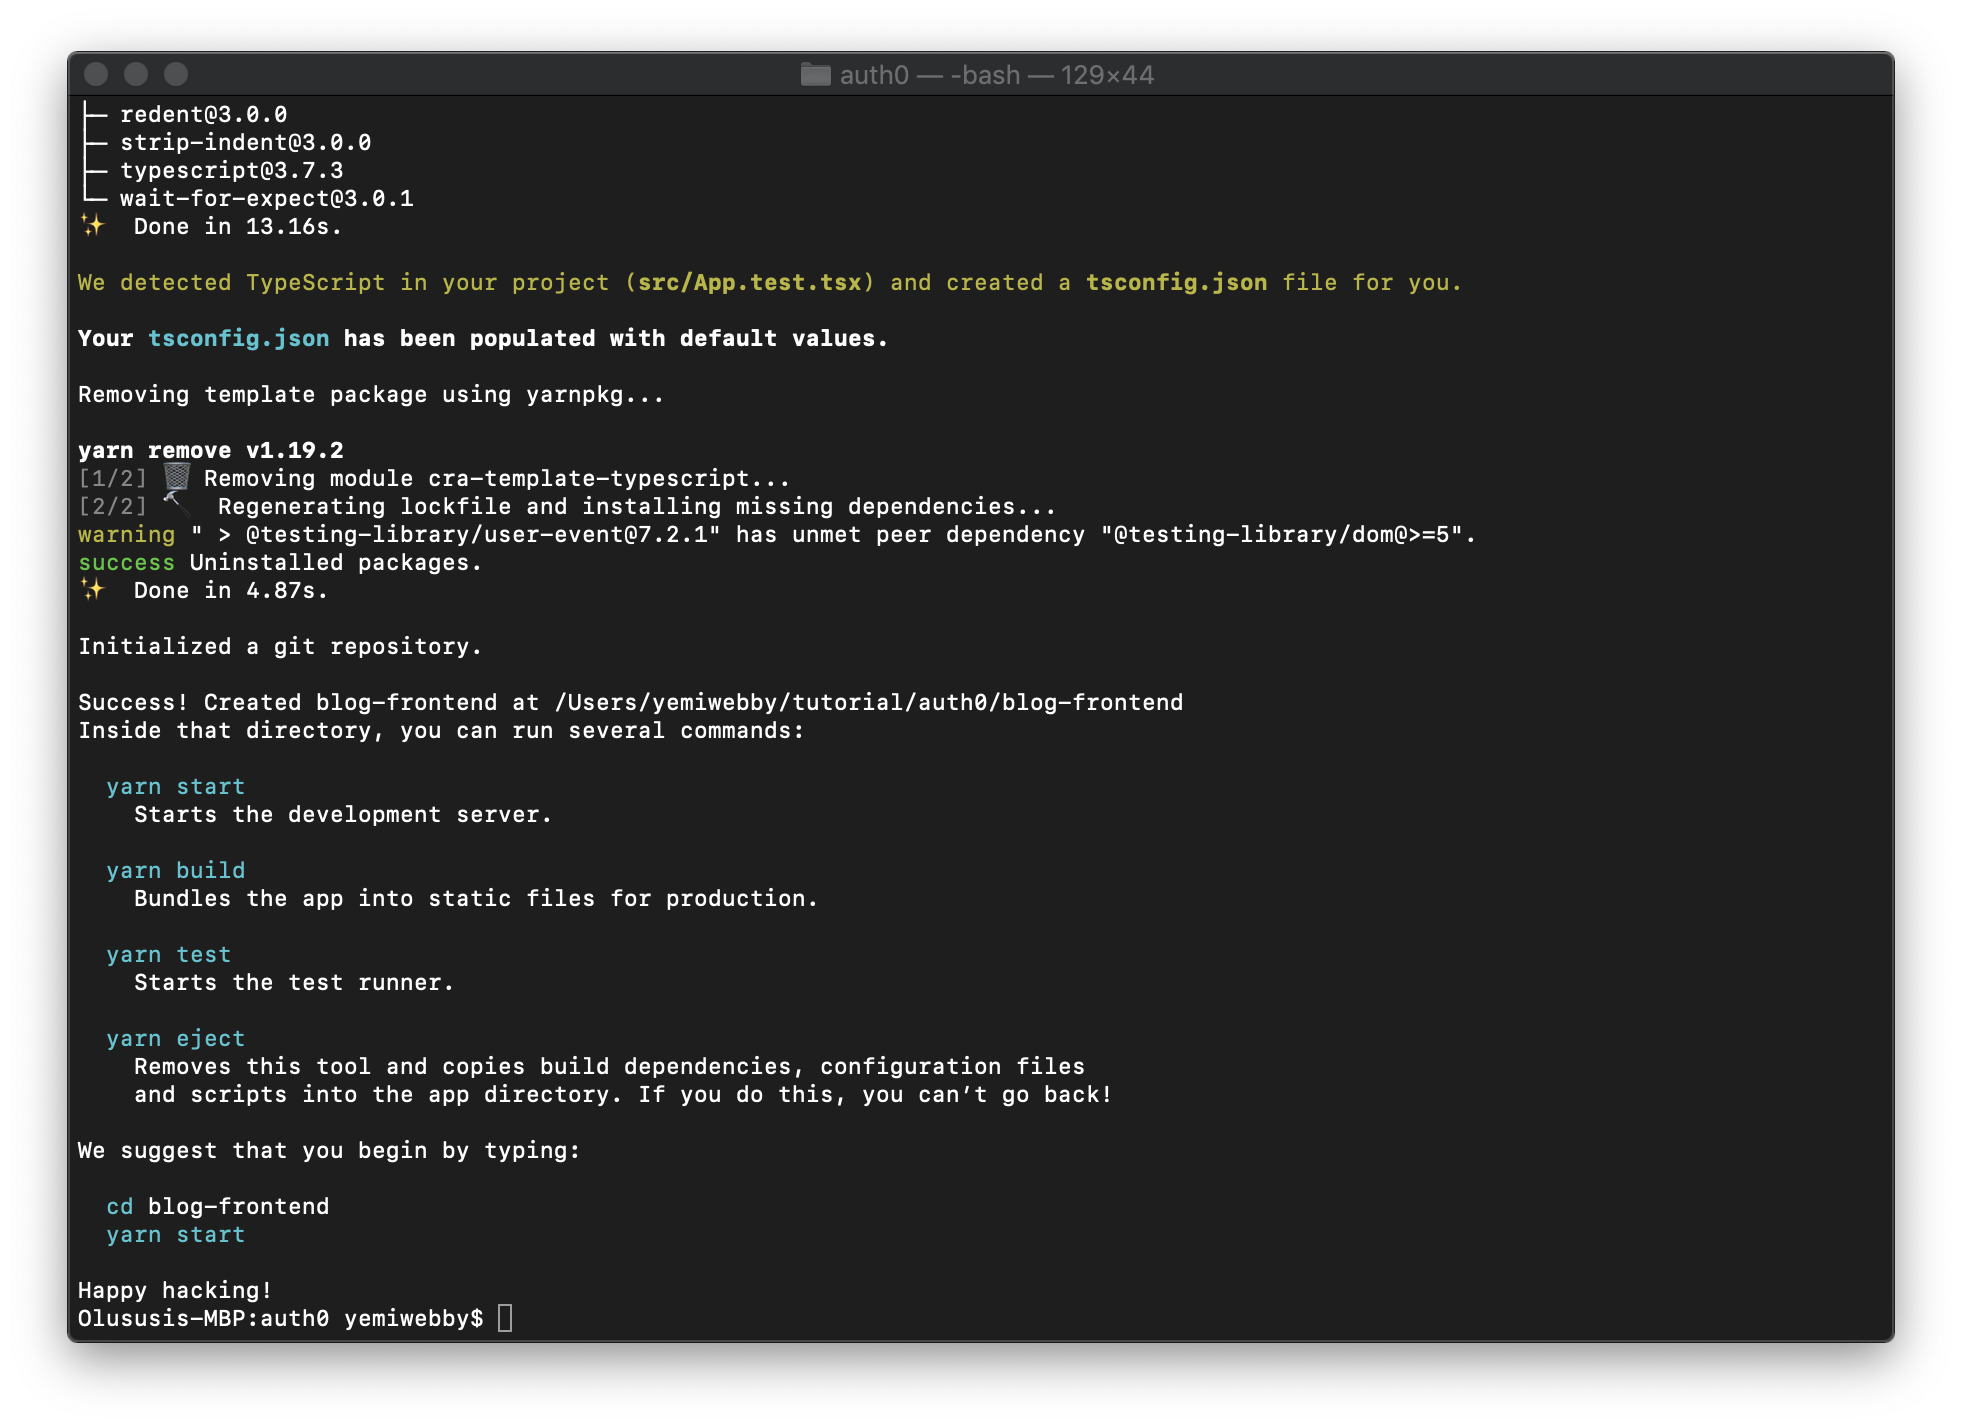
Next, you will install and setup the React application with a single command by using a tool named create-react-app. This tool has built-in support for working with TypeScript without any extra configuration required. To easily use the latest version of create-react-app for this tutorial, you’ll use the npx command, which is a package runner tool that comes with npm 5.2+. Now, run the following command to create and install a new React application named blog-frontend:
npx create-react-app blog-frontend --template typescript
The preceding command will create a new React application with the name blog-frontend. The --template typescript flag will set the default filetype for React components to .tsx.
Next, before you complete this section, the application will require navigating from one page to another. To set that up, you will need to install a routing library for your React application named React Router and its corresponding TypeScript definitions. You will use yarn to install the library and other packages for this project. This is because yarn is faster, especially for installing dependencies for a React application. Move into the newly created project folder and then install React Router with the following command:
// Move into the folder
cd blog-frontend

// Install React Router
yarn add react-router react-router-dom
You now have the React Router package, which will provide the routing functionality within your project. Next, run the following command to install the TypeScript definitions for React Router:
yarn add @types/react-router @types/react-router-dom
Once you are done, start the development server with:
// Run the application
yarn start
Navigate to localhost:3000 to view the application. You should see this:

“Yarn is fast. Especially for installing dependencies for a React application.”
Tweet This
Creating an Auth0 Single Page Application
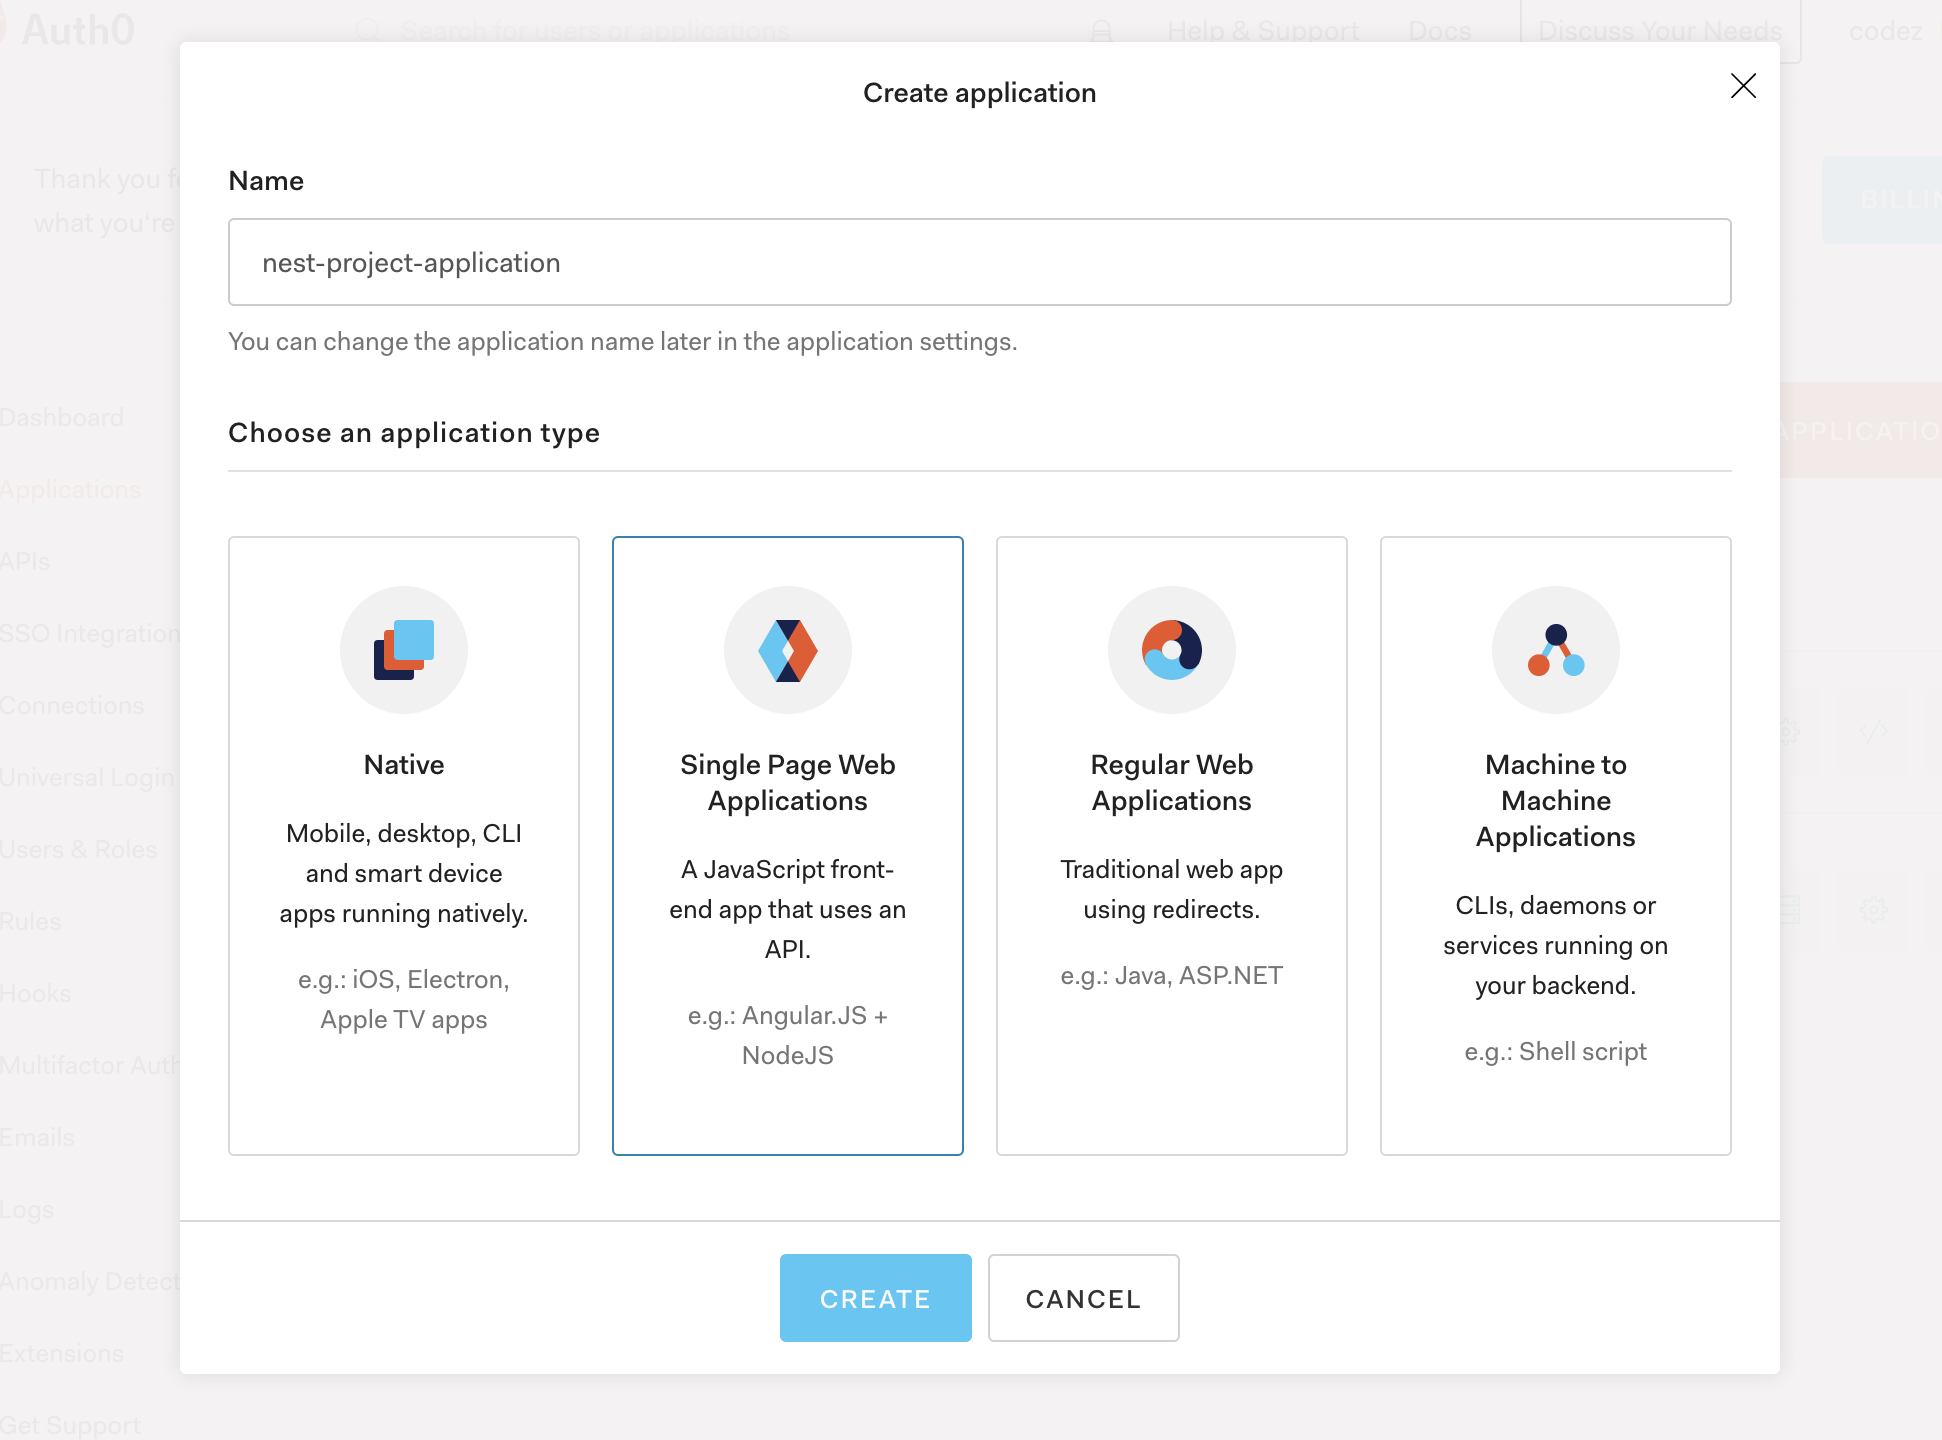
Before you start implementing the required logic for your application, you need to set up a single page application on Auth0. Sign in to your Auth0 Dashboard and head over to the application section of your Auth0 management dashboard and click on CREATE APPLICATION. Enter a preferred name (e.g., nest-project-application) for your application in the form that will be displayed. Next, choose Single Page Web Applications from the list of application type and then hit the CREATE button to complete this process:
Once you are done, you will be redirected to a page where you can view the details of your application. Now, click on the Settings tab on that page and scroll down to locate the following fields:
- Allowed Callback URLs
- Allowed Web Origins
- Allowed Logout URLs
Use http://localhost:3000 as the value for each of the field because your React application is accessible on that URL during development. Feel free to use a different URL if your application is in production already. Next, you can now click on the SAVE CHANGES button. Copy the Domain, Client ID, and Client Secret and save it somewhere as you will need it soon.
Install Auth0 Single Page Application SDK
When building JavaScript applications that require authentication and authorization, Auth0 has made provisions through its JavaScript SDK to simplify the process. Until recently, the preferred library to facilitate the integration of authentication was auth0.js. This is still being supported for use in JavaScript application, but Auth0 has encouraged its users to move to a newly created SDK. It is a newly upgraded library called Auth0 Single Page App SDK. It is designed for use in Single Page Applications to keep them secured using industry best practices and also comes with a lot of benefits such as:
- Follows industry and service best practices and protects developers from security pitfalls
- Weighs around 7kb minified and gzipped
- Requires less code for Single Page Apps
You will integrate the new SDK into your application. And as part of the steps required for this integration, you need to install the Auth0 SPA SDK. Stop the application from running by hitting CTRL + C on your computer and run the following command:
yarn add @auth0/auth0-spa-js
The preceding command will install the library within your application. To make this available globally within any components of your application, you will use React Context. This provides a way to pass data through the component tree without having to pass props down to a child component.
Creating React Context to Store the Application’s Authentication Information
In this section, you will properly configure the Auth0 SPA SDK in a way that it can provide functions to:
- Authenticate users
- Get the Id token generated for a user
- Retrieve the details of the currently logged in user
- Check if a user is authenticated
To begin, create a new folder named contexts within the src folder. Next, navigate into the newly created folder and create a new file named auth0-context.tsx within it. Populate the new file with the following content:
// blog-frontend/src/contexts/auth0-context.tsx

import React, { Component, createContext, useContext } from 'react';
import createAuth0Client from '@auth0/auth0-spa-js';
import Auth0Client from '@auth0/auth0-spa-js';

interface ContextValueType {
    isAuthenticated?: boolean,
    user?: any,
    isLoading?: boolean,
    handleRedirectCallback?: () => void,
    getIdTokenClaims?: (...p: any) => any,
    loginWithRedirect?: (...p: any) => any,
    getTokenSilently?: (...p: any) => any,
    logout?: (...p: any) => any
}

// create the context
export const Auth0Context: any = createContext<ContextValueType | null>(null);
export const useAuth0: any = () => useContext(Auth0Context);
interface IState {
    auth0Client: any,
    isLoading: boolean,
    isAuthenticated: boolean,
    user?: any;
}
export class Auth0Provider extends Component<{}, IState> {
First, you imported the required modules from React and the Auth0 SPA SDK. You proceeded to create an interface used to define the specific types of values that should be passed as an option when creating Auth0Context. Also, you passed the Auth0Context to React’s useContext() hook. This is to create a global state of the Auth0Context and make it easy to share across all components in the application.
Lastly, you created an interface for an Auth0Provider(), which extends the React component. The Auth0Provider() will be used to wrap the entire application so that the authentication functions can be called anywhere; you will do this later in the tutorial. Next, initialized the Auth0 SPA SDK with the appropriate configuration options as shown here:
// blog-frontend/src/contexts/auth0-context.tsx

...
export class Auth0Provider extends Component<{}, IState> {
    constructor(props: any) {
        super(props)
        this.state = {
            isLoading: true,
            isAuthenticated: false,
            user: null,
            auth0Client: Auth0Client,
        };
    }
    config: Auth0ClientOptions = {
        domain: `${process.env.REACT_APP_AUTH0_DOMAIN}`,
        client_id: `${process.env.REACT_APP_AUTH0_CLIENT_ID}`,
        redirect_uri: window.location.origin
    };
    componentDidMount() {
        this.initializeAuth0();
    }
    // initialize the auth0 library
    initializeAuth0 = async () => {
        const auth0Client = await createAuth0Client(this.config);
        this.setState({ auth0Client });
        // check to see if they have been redirected after login
        if (window.location.search.includes('code=')) {
            return this.handleRedirectCallback();
        }
        const isAuthenticated = await auth0Client.isAuthenticated();
        const user = isAuthenticated ? await auth0Client.getUser() : null;
        this.setState({ isLoading: false, isAuthenticated, user });
    };

    render() {
    }
}
Here, you created an Auth0Provider component and initialized Auth0 SPA SDK by passing the appropriate configuration to it through the private config() method with a type of Auth0ClientOptions to the initializeAuth0() method. You then call the initializeAuth0() method once the component is mounted.
Auth0 authentication process works by redirecting a user to an Auth0 universal login page from your application. Once this is successful, the user will be redirected back to your application with some additional contents in the URL, such as an authentication code. To properly handle this redirection, you checked for code= in the URL. If it exists, you will then call a handleRedirectCallback() method. You will create this method next.
Now, immediately after initializeAuth0() method, add the following contents to create the handleRedirectCallback() and update the render() method:
// blog-frontend/src/contexts/auth0-context.tsx

...
export class Auth0Provider extends Component<{}, IState> {
    ...
    handleRedirectCallback = async () => {
        this.setState({ isLoading: true });
        await this.state.auth0Client.handleRedirectCallback();
        const user = await this.state.auth0Client.getUser();
        this.setState({ user, isAuthenticated: true, isLoading: false });
        window.history.replaceState({}, document.title, window.location.pathname);
    };
    render() {
        const { auth0Client, isLoading, isAuthenticated, user } = this.state;
        const { children } = this.props;
        const configObject = {
            isLoading,
            isAuthenticated,
            user,
            loginWithRedirect: (...p: any) => auth0Client.loginWithRedirect(...p),
            getTokenSilently: (...p: any) => auth0Client.getTokenSilently(...p),
            getIdTokenClaims: (...p: any) => auth0Client.getIdTokenClaims(...p),
            logout: (...p: any) => auth0Client.logout(...p)
        };
        return <Auth0Context.Provider value={configObject}>{children}</Auth0Context.Provider>;
    }
}
You now have a good structure Auth0Context that can be imported and used within the application. For this to work within the application, you will wrap the main component of the app with the provider from this created Auth0Context later in the tutorial.
Defining React components for your application
Components are at the heart of React; it gives an application a proper structure and let's you encapsulate different parts of your user interface into reusable code. There are two main types of components in React:
- Class Components: They are ES6 classes.
- Functional Components: JavaScript functions. It is considered as the simplest way to write components by a lot of JavaScript developers, easier to read and understand.
For this tutorial, you will use functional components. This will include components to create, display, and edit a post in the database, respectively. With the help of React Hooks, functional components can now hold the state of data within an application.
To begin, create a new folder named components within the src folder. Next, create another subfolder within the newly create components folder and name it post. Now create three new files within the post folder with the following names:
Create.tsxEdit.tsxPost.tsx
The files above are reusable components that will hold the contents to create, edit, and display the contents of a particular post. To begin, open the Create.tsx file and add the following code:
// blog-frontend/src/components/post/Create.tsx

import React, { useState, useEffect } from 'react';
import { withRouter, useHistory } from 'react-router-dom';
import { useAuth0 } from '../../contexts/auth0-context';

function Create(): JSX.Element {
  let history = useHistory();
  const { user, getIdTokenClaims } = useAuth0();

  interface IValues {
    [key: string]: any;
  }
  const [author, setAuthor] = useState<string>('');
  const [values, setValues] = useState<IValues>([]);
  const [submitSuccess, setSubmitSuccess] = useState<boolean>(false);
  const [loading, setLoading] = useState<boolean>(false);

  useEffect(() => {
    if (user) {
      setAuthor(user.name)
    }
  }, [user])

  return (
  );

}
export default withRouter(Create)
From the code snippet above, you imported React, useState. After that, you imported the appropriate modules for routing and also useAuth0; which represents the Auth0 context that you created earlier. Next, you created a functional component that is expected to return a JSX element. Within this function, you created state variables and then set the author name as retrieved using the user object from the created Auth0Context.
Next, create methods to handle form submission by adding the following code in the Create.tsx file immediately after the useEffect hook:
// blog-frontend/src/components/post/Create.tsx

...
function Create(): JSX.Element {
  ...
  const handleFormSubmission = async (e: React.FormEvent<HTMLFormElement>): Promise<void> => {
    e.preventDefault();
    setLoading(true);
    const formData = {
      title: values.title,
      description: values.description,
      body: values.body,
      author
    }
    const submitSuccess: boolean = await submitform(formData);
    setSubmitSuccess(submitSuccess);
    setValues({...values, formData});
    setLoading(false);
    setTimeout(() => {
      history.push('/');
    }, 1500);
  }

  const submitform = async (formData: {}) => {
    try {
      const accessToken = await getIdTokenClaims();
      const response = await fetch(`${process.env.REACT_APP_SERVER_BASE_URL}/blog/post`, {
        method: "post",
        headers: new Headers({
          "Content-Type": "application/json",
          "Accept": "application/json",
          "authorization": `Bearer ${accessToken.__raw}`
        }),
        body: JSON.stringify(formData)
      });
      return response.ok;
    } catch (ex) {
      return false;
    }
  }
  const setFormValues = (formValues: IValues) => {
    setValues({...values, ...formValues})
  }
  const handleInputChanges = (e: React.FormEvent<HTMLInputElement>) => {
    e.preventDefault();
    setFormValues({ [e.currentTarget.name]: e.currentTarget.value })
  }
  return (
  );
}
export default withRouter(Create)
The handleFormSubmission() method will receive and process the values from the input fields before posting the information to the server. Remember that the backend API is already protected as configured in the first part of this series. To ensure that only authenticated users can send POST requests to the server, getIdTokenClaims() method is used to retrieve a Token that was uniquely generated to identify the currently logged in user. Once this is successful, use the useHistory() hook to redirect the user back to the homepage of the application.
Lastly, you can now add the following content to the return function of the Create component. This will display the form to create a new blog post in the application:
// blog-frontend/src/components/post/Create.tsx

...
function Create(): JSX.Element {
  ...
  return (
    <div>
    <div className={"col-md-12 form-wrapper"}>
      <h2> Create Post </h2>
      {!submitSuccess && (
        <div className="alert alert-info" role="alert">
          Fill the form below to create a new post.
                </div>
      )}
      {submitSuccess && (
        <div className="alert alert-info" role="alert">
          The form was successfully submitted!
                        </div>
      )}
      <form id={"create-post-form"} onSubmit={handleFormSubmission} noValidate={true}>
        <div className="form-group col-md-12">
          <label htmlFor="title"> Title </label>
          <input type="text" id="title" onChange={(e) => handleInputChanges(e)} name="title" className="form-control" placeholder="Enter title" />
        </div>
        <div className="form-group col-md-12">
          <label htmlFor="description"> Description </label>
          <input type="text" id="description" onChange={(e) => handleInputChanges(e)} name="description" className="form-control" placeholder="Enter Description" />
        </div>
        <div className="form-group col-md-12">
          <label htmlFor="body"> Write Content </label>
          <input type="text" id="body" onChange={(e) => handleInputChanges(e)} name="body" className="form-control" placeholder="Enter content" />
        </div>
        <div className="form-group col-md-12">
          <label htmlFor="author"> Author </label>
          <input type="text" id="author" defaultValue={author} onChange={(e) => handleInputChanges(e)} name="author" className="form-control" />
        </div>
        <div className="form-group col-md-4 pull-right">
          <button className="btn btn-success" type="submit">
            Create Post
          </button>
          {loading &&
            <span className="fa fa-circle-o-notch fa-spin" />
          }
        </div>
      </form>
    </div>
  </div>
  );
}
export default withRouter(Create)
Here, you created a form with the input fields to hold the values of the title, description, body, and author of a post. Each of the input fields has the method handleInputChanges() that runs on every keystroke, updating the React state with the value it obtains from the input field. Furthermore, depending on the state of the application, a boolean variable named submitSuccess will control the message that the application will display before and after creating a new post.
Next, open Edit.tsx file and start by adding the following content:
// blog-frontend/src/components/post/Edit.tsx

import React, { useState, useEffect } from 'react';
import { useHistory, useParams } from 'react-router-dom';
import { useAuth0 } from '../../contexts/auth0-context';

function Edit(): JSX.Element {
  const { getIdTokenClaims } = useAuth0();
  let history = useHistory();
  let { postId } = useParams();

  interface IValues {
    [key: string]: any;
  }

  const [post, setPost] = useState()
  const [values, setValues] = useState<IValues>([]);
  const [submitSuccess, setSubmitSuccess] = useState<boolean>(false)
  const [loading, setLoading] = useState(false);

  useEffect(() => {
    const fetchData = async (): Promise<void> => {
      const response = await fetch(`${process.env.REACT_APP_SERVER_BASE_URL}/blog/post/${postId}`);
      const json = await response.json();
      setPost(json)
    }
    fetchData();
  }, [postId]);

  return (
  )

}
export default Edit;
Similar to the Create component, you imported the appropriate modules from React, React Router, and the created Auth0Context. Also, you created the state variable for the application. To retrieve the contents of the post that needs to be edited, you obtained the postId from the URL using the useParams() React hook. With that in place, it was easy to then fetch the details of such post from the database.
Next, add the following methods within the component:
// blog-frontend/src/components/post/Edit.tsx

...
function Edit(): JSX.Element {
  ...
  const handleFormSubmission = async (e: React.FormEvent<HTMLFormElement>): Promise<void> => {
    e.preventDefault();
    setLoading(true);
    const submitSuccess: boolean = await submitForm();
    setSubmitSuccess(submitSuccess);
    setLoading(false);
    setTimeout(() => {
      history.push('/');
    }, 1500);
  }
  const submitForm = async (): Promise<boolean> => {
    try {
      const accessToken = await getIdTokenClaims();
      const response = await fetch(`${process.env.REACT_APP_SERVER_BASE_URL}/blog/edit?postID=${postId}`, {
        method: "put",
        headers: new Headers({
          "Content-Type": "application/json",
          Accept: "application/json",
          "authorization": `Bearer ${accessToken.__raw}`
        }),
        body: JSON.stringify(values)
      });
      return response.ok;
    } catch(ex) {
      return false;
    }
  }
  const setFormValues = (formValues: IValues) => {
    setValues({...values, ...formValues})
  }
  const handleInputChanges = (e: React.FormEvent<HTMLInputElement>) => {
    setFormValues({ [e.currentTarget.id]: e.currentTarget.value })
  }

  return (
  )

}
export default Edit;
Here, you handled the form submission of an edited post using the handleFormSubmission() method. And once that is successful, the user will be redirected back to the homepage. A unique token to identify the authenticated user was retrieved through the getIdTokenClaims() and set as one of the headers' options.
Next, add the following to the return() of the component:
// blog-frontend/src/components/post/Edit.tsx

...
function Edit(): JSX.Element {
  ...
  return (
    <div className={'page-wrapper'}>
    {post &&
      <div className={"col-md-12 form-wrapper"}>
        <h2> Edit Post  </h2>
        {submitSuccess && (
          <div className="alert alert-info" role="alert">
            The post has been edited successfully!
                        </div>
        )}
        <form id={"create-post-form"} onSubmit={handleFormSubmission} noValidate={true}>
          <div className="form-group col-md-12">
            <label htmlFor="title"> Title </label>
            <input type="text" id="title" defaultValue={post.title} onChange={(e) => handleInputChanges(e)} name="title" className="form-control" placeholder="Enter title" />
          </div>
          <div className="form-group col-md-12">
            <label htmlFor="description"> Description </label>
            <input type="text" id="description" defaultValue={post.description} onChange={(e) => handleInputChanges(e)} name="description" className="form-control" placeholder="Enter Description" />
          </div>
          <div className="form-group col-md-12">
            <label htmlFor="body"> Write Content </label>
            <input type="text" id="body" defaultValue={post.body} onChange={(e) => handleInputChanges(e)} name="body" className="form-control" placeholder="Enter content" />
          </div>
          <div className="form-group col-md-4 pull-right">
            <button className="btn btn-success" type="submit">
              Edit Post
            </button>
            {loading &&
              <span className="fa fa-circle-o-notch fa-spin" />
            }
          </div>
        </form>
      </div>
    }
  </div>
  )
}
export default Edit;
The input fields within the form returned from the snippet above will be populated with the details of a particular post that was retrieved earlier for editing purposes. Any changes made to the values of each of the input fields will be handled by the handleInputChanges() method.
To view the details of a single post, open the Post.tsx file and paste the following code in it:
// blog-frontend/src/components/post/Post.tsx

import React, { useState, useEffect } from 'react';
import { useParams } from 'react-router';

function Post() {
  let { postId } = useParams();
  const [post, setPost] = useState<any>({});

  useEffect(() => {
    const fetchData = async (): Promise<void> => {
      const response = await fetch(`${process.env.REACT_APP_SERVER_BASE_URL}/blog/post/${postId}`);
      const json = await response.json();
      setPost(json);
    }
    fetchData();
  }, [postId]);

    return (
        <section className="post-area">
        <div className="container">
          <div className="row">
            <div className="col-lg-1 col-md-0" />
            <div className="col-lg-10 col-md-12">
              {post &&
                <div className="main-post">
                  <div className="post-top-area">
                    <h5 className="pre-title">Nest React Blog</h5>
                    <h3 className="title">
                      <span>
                        <b>{post.title}</b>
                      </span>
                    </h3>
                    <p className="para">
                      {post.body}
                    </p>
                  </div>
                </div>
              }
            </div>
          </div>
        </div>
      </section>
    );
}
export default Post;
Here, you obtained the postId as a parameter from the URL and used it to fetch the details of a single post before displaying it for users. To successfully perform this data fetching within the component, you used the useEffect() hook, which is similar to componentDidMount() and componentDidUpdate() if you are familiar with the class component in React.
The Home component
To be able to view the complete list of posts created within the application and also create the appropriate link to delete, edit, and view the details of a particular post, you will create a new file within the src/components folder and name it Home.tsx. Next, paste the following code within the newly created file:
// blog-frontend/src/components/Home.tsx

import React, { useState, useEffect } from 'react';
import { Link, useHistory } from 'react-router-dom';
import { useAuth0 } from '../contexts/auth0-context';

function Home():JSX.Element {
  let history = useHistory()
  const { isAuthenticated, getIdTokenClaims, user } = useAuth0();
  const [posts, setPosts] = useState();

  const deletePost = async(id: string) => {
    const accessToken = await getIdTokenClaims();
    await fetch(`${process.env.REACT_APP_SERVER_BASE_URL}/blog/delete?postID=${id}`, {
      method: "delete",
      headers: new Headers({
        "Content-Type": "application/json",
        Accept: "application/json",
        "authorization": `Bearer ${accessToken.__raw}`
      })
    });
    _removePostFromView(id);
    history.push('/');
  }

  const _removePostFromView = (id: string) => {
    const index = posts.findIndex((post: { _id: string; }) => post._id === id);
    posts.splice(index, 1);
  }

  useEffect(() => {
    const fetchPosts = async (): Promise<any> => {
      const response = await fetch(`${process.env.REACT_APP_SERVER_BASE_URL}/blog/posts`);
      const json = await response.json();
      setPosts(json)
    }
    fetchPosts();
  }, [])
    return (
    );
}
export default Home;
Here, you imported the appropriate module from React, React Router, and the Auth0Context. You then proceeded to the created method named deletePost() to delete a single post. This method takes the post id with a type of string as a parameter. Finally, you used useEffect() to retrieve all the created posts from the database and update the state of the application with it.
Next, paste the following code within the return() method to display all the created post:
// blog-frontend/src/components/Home.tsx

...
function Home():JSX.Element {
  ...
    return (
        <section className="blog-area section">
        <div className="container">
          <div className="row">
            {posts && posts.map((post: { title: React.ReactNode; _id: any; author: any; }) => (
              <div className="col-lg-4 col-md-6" key={post._id}>
              <div className="card h-100">
                <div className="single-post post-style-1">
                  <div className="blog-image">
                    <img src="https://images.ctfassets.net/23aumh6u8s0i/7stduDuP1cBQXQpmzaBMTd/6f589aa58fe112ced6e1a3901a9c3dad/blog-image_psvipq" alt="Blog" />
                  </div>
                  <span className="avatar">
                    <img src="https://images.ctfassets.net/23aumh6u8s0i/5RgCRgruCESPZUobN5RL6G/a8082500f2e6dc7fb4007c0cdfd0cbe3/WEB_FREAK_50PX-01_yaqxg7" alt="Profile" />
                  </span>
                  <div className="blog-info">
                    <h4 className="title">
                      <span>
                        <b>{post.title}</b>
                      </span>
                    </h4>
                  </div>
                </div>
                <ul className="post-footer">
                  <li>
                    <Link to={`/post/${post._id}`} className="btn btn-sm btn-outline-secondary">View Post </Link>
                  </li>
                  <li>
                    {
                      isAuthenticated && (user.name === post.author) &&
                      <Link to={`/edit/${post._id}`} className="btn btn-sm btn-outline-secondary">Edit Post </Link>
                    }
                  </li>
                  <li>
                    {
                      isAuthenticated && (user.name === post.author) &&
                      <button className="btn btn-sm btn-outline-secondary" onClick={() => deletePost(post._id)}>Delete Post</button>
                    }
                  </li>
                </ul>
              </div>
            </div>
            ))}
          </div>
        </div>
      </section>
    );
}
export default Home;
Here, you retrieved the lists of the created post from the application’s state as an array, iterate over it, and display it within using HTML elements. Also, to ensure that authenticated users can only delete or edit a post created by them, you used the user{} object from the Auth0Context to ascertain that the author of the post is the same as the authenticated user. From this implementation, an unauthenticated user will only be able to view the post created and not able to carry out operations like delete and edit.
Creating the navigation bar
Next, you will create a navigation bar for the application. This will contain the link for the user to be able to log in and out of the application. To begin, create a new file within src/components folder and name it Navbar.tsx. Once that is done, paste the following code in the new file:
// blog-frontend/src/components/Navbar.tsx

import React from 'react';
import { Link, withRouter } from 'react-router-dom';
import { useAuth0 } from '../contexts/auth0-context';
function Navbar() {
    const { isLoading, user, loginWithRedirect, logout, isAuthenticated } = useAuth0();
    return (
        <header>
            <div className="container-fluid position-relative no-side-padding">
                <span className="logo">
                {user && user.picture && <img src={user.picture} alt="My Avatar" />}
                {!user && <img src={'https://res.cloudinary.com/yemiwebby-com-ng/image/upload/v1513770253/WEB_FREAK_50PX-01_yaqxg7.png'} alt="My Avatar" />}
                </span>
                <div className="menu-nav-icon" data-nav-menu="#main-menu">
                    <i className="ion-navicon" />
                </div>
                <ul className="main-menu visible-on-click" id="main-menu">
                    <li><Link className={"nav-link"} to={"/"}> Nest React TypeScript Blog </Link></li>
                    <li>
                    <Link className={"nav-link"} to={"/"}>
                        {!isLoading && !user && (
                            <>
                                <button className="btn btn-dark" onClick={loginWithRedirect}>
                                    Sign In
                                </button>
                            </>
                        )}
                        {!isLoading && user && (
                            <>
                                <div>
                                    <label className="mr-2">{user.name}</label>
                                    <button className="btn btn-dark" onClick={() => logout({ returnTo: window.location.origin })}>
                                        Sign Out
                                    </button>
                                </div>
                            </>
                        )}
                    </Link>
                    </li>
                    <li><Link className={"nav-link"} to={"/"}> Home </Link></li>
                    {isAuthenticated && (
                    <li><Link className={"nav-link"} to={"/create"}> Create </Link></li>
                    )}
                </ul>
            </div>
        </header>
    );
}
export default withRouter(Navbar);
Once a user clicks on the Sign In button, he or she will be redirected to the Auth0 universal login page for authentication. After being successfully authenticated, you will retrieve the user’s name and display it within the navigation bar.
Update the application’s entry point and configure routing
In this step, you will import the necessary components from the React Router package, and configure the App component to render different components depending on the route that is loaded. This will allow you to navigate through different pages of the application. Once a user visits a route, for example, /create, React Router will use the path specified to render the contents and logic within the appropriate component defined to handle such route.
Here you will configure the App component to render differently depending on the route that is loaded. This will allow you to navigate through different pages of the application. To achieve that, open the src/App.tsx and replace its contents with:
// blog-frontend/src/App.tsx

import React from 'react';
import { Switch, Route } from 'react-router-dom';
import Navbar from './components/Navbar';
import Home from './components/Home';
import Post from './components/post/Post';
import Edit from './components/post/Edit';
import Create from './components/post/Create';

function App(): JSX.Element {
  return (
    <div className="App">
    <Navbar />
      <div className={'container'}>
        <Switch>
          <Route path={"/"} exact={true} component={Home} />
          <Route path={"/post/:postId"} component={Post}/>
          <Route path={"/edit/:postId"} component={Edit}/>
          <Route path={"/create"} component={Create} />
        </Switch>
      </div>
    </div>
  );
}
export default App;
You imported all the necessary components from the React Router package and you also imported the reusable components for creating, editing, and viewing posts’ details.
The ./src/index.tsx file is the entry point for this application and renders the application. Open this file and import both the Auth0Provider from the created Auth0Context and React Router into it. Update this file as shown here:
// blog-frontend/src/index.tsx

import React from 'react';
import ReactDOM from 'react-dom';
import './index.css';
import App from './App';
import { Auth0Provider } from './contexts/auth0-context';
import { BrowserRouter } from 'react-router-dom';
ReactDOM.render(
    <Auth0Provider>
        <BrowserRouter>
            <App />
        </BrowserRouter>
    </Auth0Provider>,
    document.getElementById('root')
);
To make the Auth0Context available within the application, you need to wrap your entire application with the Auth0Provider. Also, noticed the use of BrowserRouter? It is the parent component that is used to store all routing information.
To make the application appealing, download the CSS file from this repository and paste it in src/index.css file. Also, open the public/index.html and update it by including the following CDN files for Bootstrap and Font Awesome:
  <link rel="stylesheet" href="https://stackpath.bootstrapcdn.com/bootstrap/4.1.3/css/bootstrap.min.css">
  <link rel="stylesheet" href="https://cdnjs.cloudflare.com/ajax/libs/font-awesome/4.7.0/css/font-awesome.min.css">
Creating an Environment variable
To save your Auth0 application credentials, you will create a .env within the root of your application and return to your Auth0 management dashboard to obtain all the necessary information, such as Domain and Client ID. Open the newly created .env file and use the following content for it:
// .env

REACT_APP_AUTH0_CLIENT_ID=YOUR_AUTH0_CLIENT_ID
REACT_APP_AUTH0_DOMAIN=YOUR_AUTH0_DOMAIN
REACT_APP_AUTH0_AUDIENCE=http://localhost:5000/api
REACT_APP_AUTH0_REDIRECT_URI=http://localhost:3000
REACT_APP_SERVER_BASE_URL=http://localhost:5000
Here, you have used the Create React App’s way of using environment variables by prefixing all the variables with “REACTAPP”. Please replace all the placeholders with the appropriate credentials obtained from your Auth0 dashboard.
Enable communication between both applications
By default, browsers have security measures that disabled interaction and sharing of resources between applications of different domains, unless it is explicitly allowed by any of the application. This means that sending HTTP requests from this application to the backend service will be disabled at the moment. To enable and ensure the interaction of this frontend application with the backend service, you will need to enable CORS (Cross-Origin Resource Sharing). A simple approach to achieve this is by including app.enableCors() within the entry point of the backend application that was created in the first part of this series. Open the backend application and navigate to src/main.ts and update its content as shown here:
// blog-backend/src/main.ts

import { NestFactory } from '@nestjs/core';
import { AppModule } from './app.module';
async function bootstrap() {
  const app = await NestFactory.create(AppModule);
  app.enableCors(); // add this line
  await app.listen(5000);
}
bootstrap();
With this in place, both applications can now share resources without any issue.
Test the Application
To test the application and ensure that it works as designed, run the application with:
yarn start
Also, ensure that the backend application and the MongoDB instance is running. Otherwise, open two different terminals and navigate to the backend application from one and run npm run start:dev. Next, start the MongoDB instance from the other using sudo mongod. Now navigate to http://localhost:3000 to view the application.

Conclusion
As seen in this tutorial, TypeScript assured you of what to expect from all variables, interfaces, and methods declared in your projects. If you are not the test-driven development kind of developer, trust me, TypeScript will save you a lot of headache by giving you more confidence with the logic implemented in your projects and ensuring that there are no unnecessary surprises once you get a call from your boss or project manager at work about the deployment made on Friday.
Furthermore, if you are going to work on a project that you would like to maintain for a longer time, then I think that you should consider building it with TypeScript.
I do hope that you found this tutorial very helpful.
About Auth0
Auth0 by Okta takes a modern approach to customer identity and enables organizations to provide secure access to any application, for any user. Auth0 is a highly customizable platform that is as simple as development teams want, and as flexible as they need. Safeguarding billions of login transactions each month, Auth0 delivers convenience, privacy, and security so customers can focus on innovation. For more information, visit https://auth0.com.
About the author

Olususi Oluyemi
Software Engineer / Technical Content Creator