

TL;DR - Auth0 is collaborating with Cloudflare to make it easier for developers building remote MCP servers to configure authentication and authorization. Remote MCP servers will allow AI applications to access external services securely. This post details how to use Auth0 to secure a remote MCP server built with Cloudflare Workers to access an external service. It uses a sample Todo API as that external service.
What are MCP Servers?
Developers are using large language models (LLMs) and AI applications to help build and deploy their code. Those applications are great when using data LLMs have already been trained on, but what if they could connect to external services to get even more information? That’s where the Model Context Protocol (MCP) comes in. MCP is a protocol that allows LLMs to connect with external tools and APIs in a standardized way. Using MCP, AI applications can connect with external services without knowing how each API works. MCP achieves this by using a client-server model.
- MCP Client — A client maintains the connection to MCP servers from inside of an LLM-based application.
- MCP Server — A server is always running and listening to be called by an MCP Client.
Remote MCP servers are accessible on the Internet. Users sign in, and grant permissions to MCP clients using authorization flows with which they are already familiar. This opens up new use cases for users who may not want to run a MCP server locally on their machine, but are comfortable interacting with APIs and granting access online.
Securing a Remote MCP Server with Auth0 and Cloudflare
Auth0 has collaborated with Cloudflare to help developers secure remote MCP servers powered by Cloudflare Workers. With the pace of MCP adoption rapidly increasing, Cloudflare has continued to keep up with innovation - adding features to its platform that handle the hard parts of building remote MCP servers, like workers-oauth-provider, an OAuth Provider that makes authorization easy. By securing your MCP server with Auth0, AI applications can now interact with an external API by connecting through the remote MCP server and make API calls on behalf of an authenticated user.
In the rest of this blog post, we will walkthrough a practical example of this. We will set up and use an AI application to connect with a sample Todos API using an MCP server secured by Auth0. The server and API are Cloudflare Workers projects and will use Auth0 to request and receive access and refresh tokens.

We will first create the necessary accounts and set up the Todos API, then deploy and configure an MCP server that will connect to Auth0, and finally, the MCP Client can request information from the Todos API.
Get Started
To follow along, you will want to set up your local developer environment. To get started:
- Create an Auth0 Account.
- Create a Cloudflare Account.
- Install Visual Studio Code (or your favorite code editor).
Once you create those accounts, you will want to
- Install Node.js (v18+).
- Install Git.
- Install the Cloudflare Wrangler CLI. Read the documentation on installing Wrangler here.
Get the Todo API and Remote Auth0 MCP server sample applications
The sample Todos API and remote MCP server are within the Cloudflare AI monorepo. Clone the repo, navigate to each application, and install the dependencies using the following commands in the terminal.
For the Todos API:
git clone https://github.com/cloudflare/ai.git
cd ai/demos/remote-mcp-auth0/todos-api
npm install
The TodosAPI is built with the Hono web framework,
For the remote MCP Server:
cd ../mcp-auth0-oidc
npm install
With both of the projects available locally and dependencies installed, proceed to the next step to secure the Todos API with Auth0.
Configure the Todos API with Auth0
Let’s configure the Todos API to be secured by Auth0. Doing this will allow the remote MCP server to receive both access and refresh tokens and perform actions on behalf of the end user. To get started, login to your Auth0 account to visit the Auth0 Dashboard.
Create an API on the Auth0 Dashboard by going to Applications > APIs. Then click Create API.
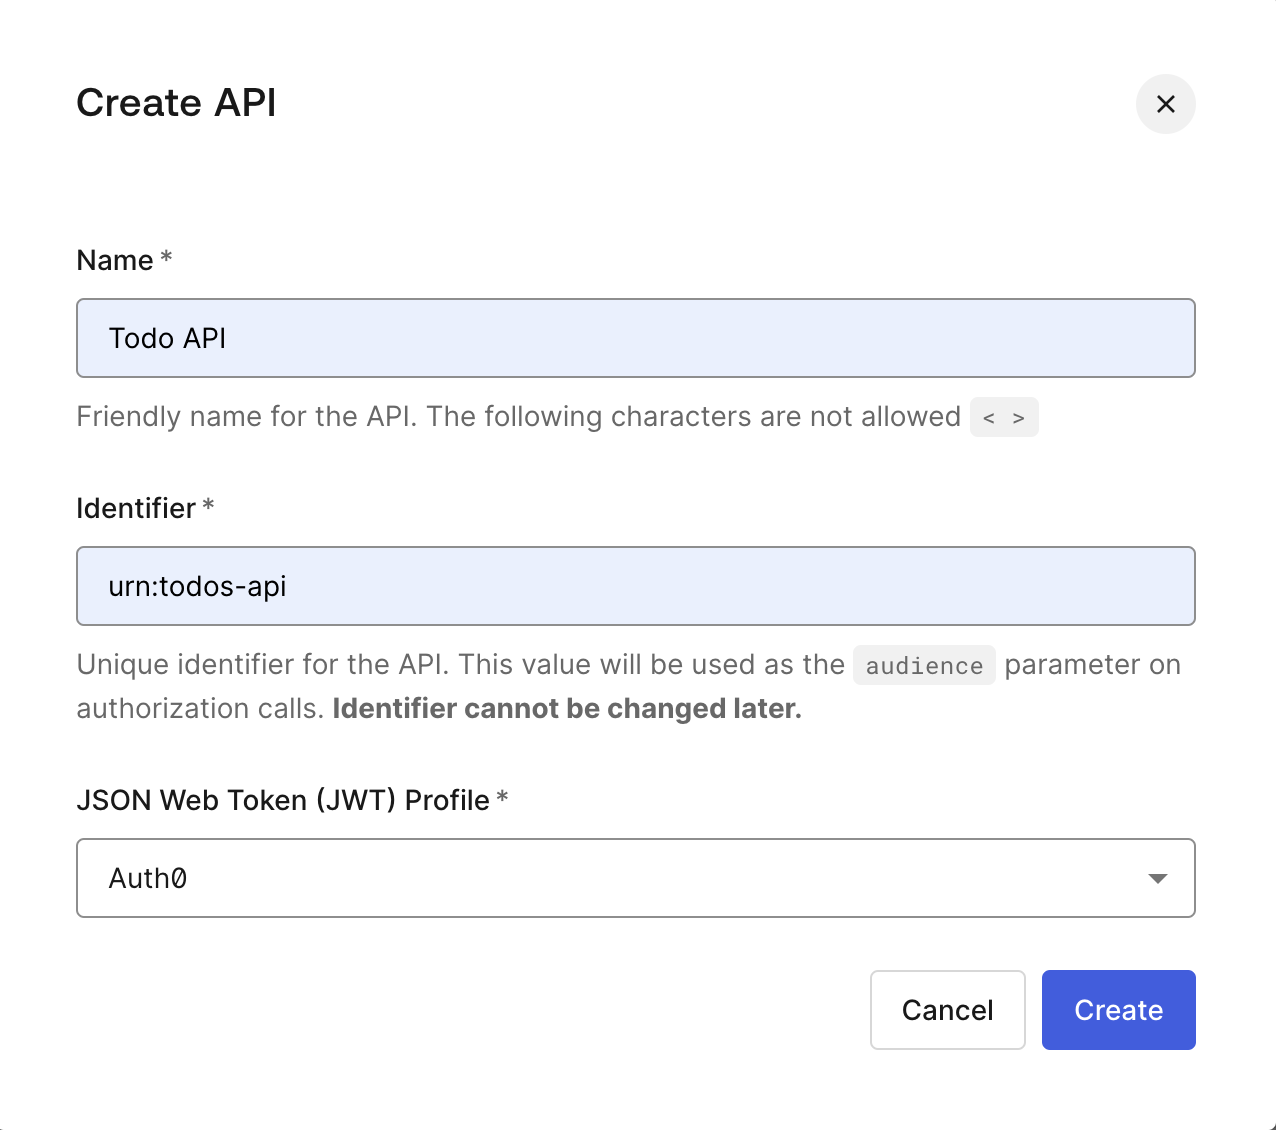
Next, enter the following values in the following fields:
- In the Name field, enter “Todos API”.
- In the Identifier field, enter
urn:todos-api. This value will be used as the audience parameter when the MCP server makes an authorization call to the Todos API. - Press the Create button
The next step is to allow a refresh token to be retrieved when requested by the remote MCP server. Go to Applications > APIs and click on the entry for the Todos API. Visit Settings, scroll down to Access Settings, and toggle the Allow Offline Access button to enable it. Then click Save.
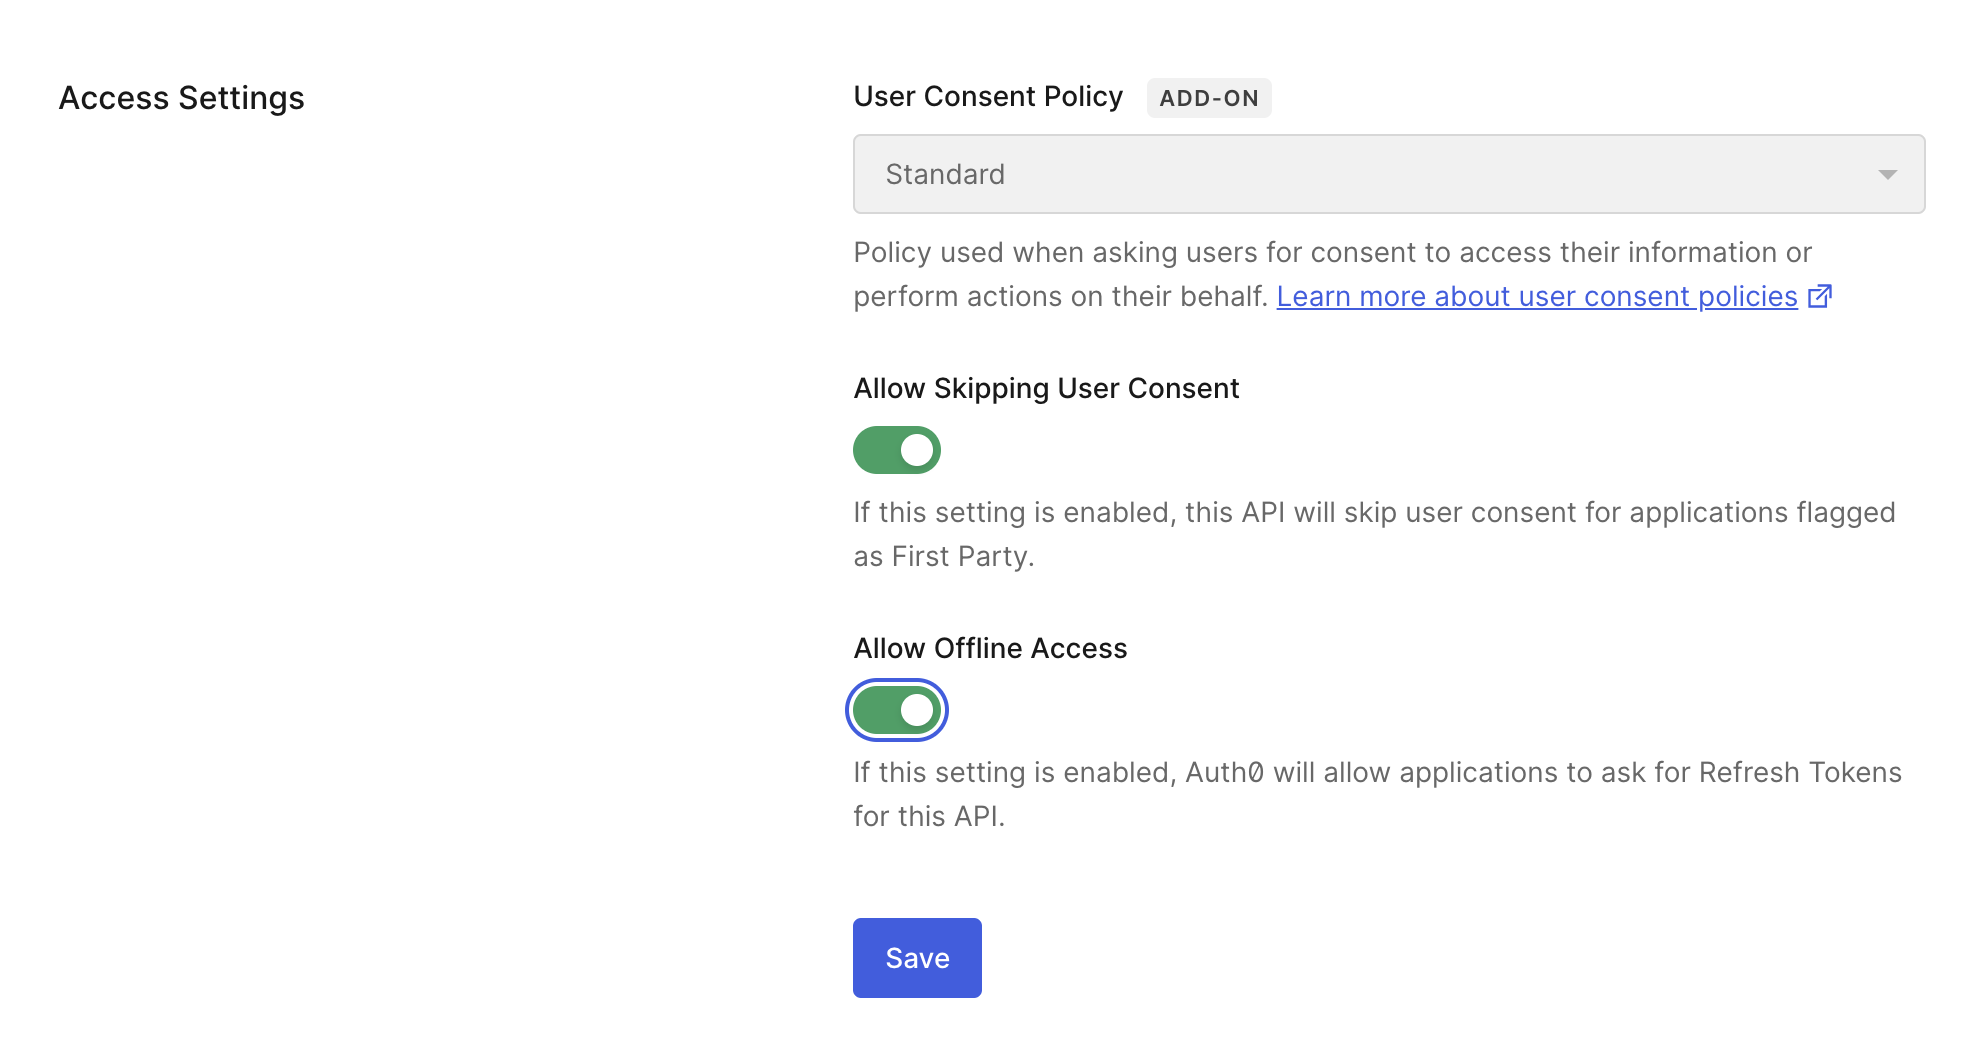
Toggling on the Allow Offline Access, allows a refresh token to be retrieved by the MCP server, so the user doesn’t have to keep re-authenticating when an access token expires.
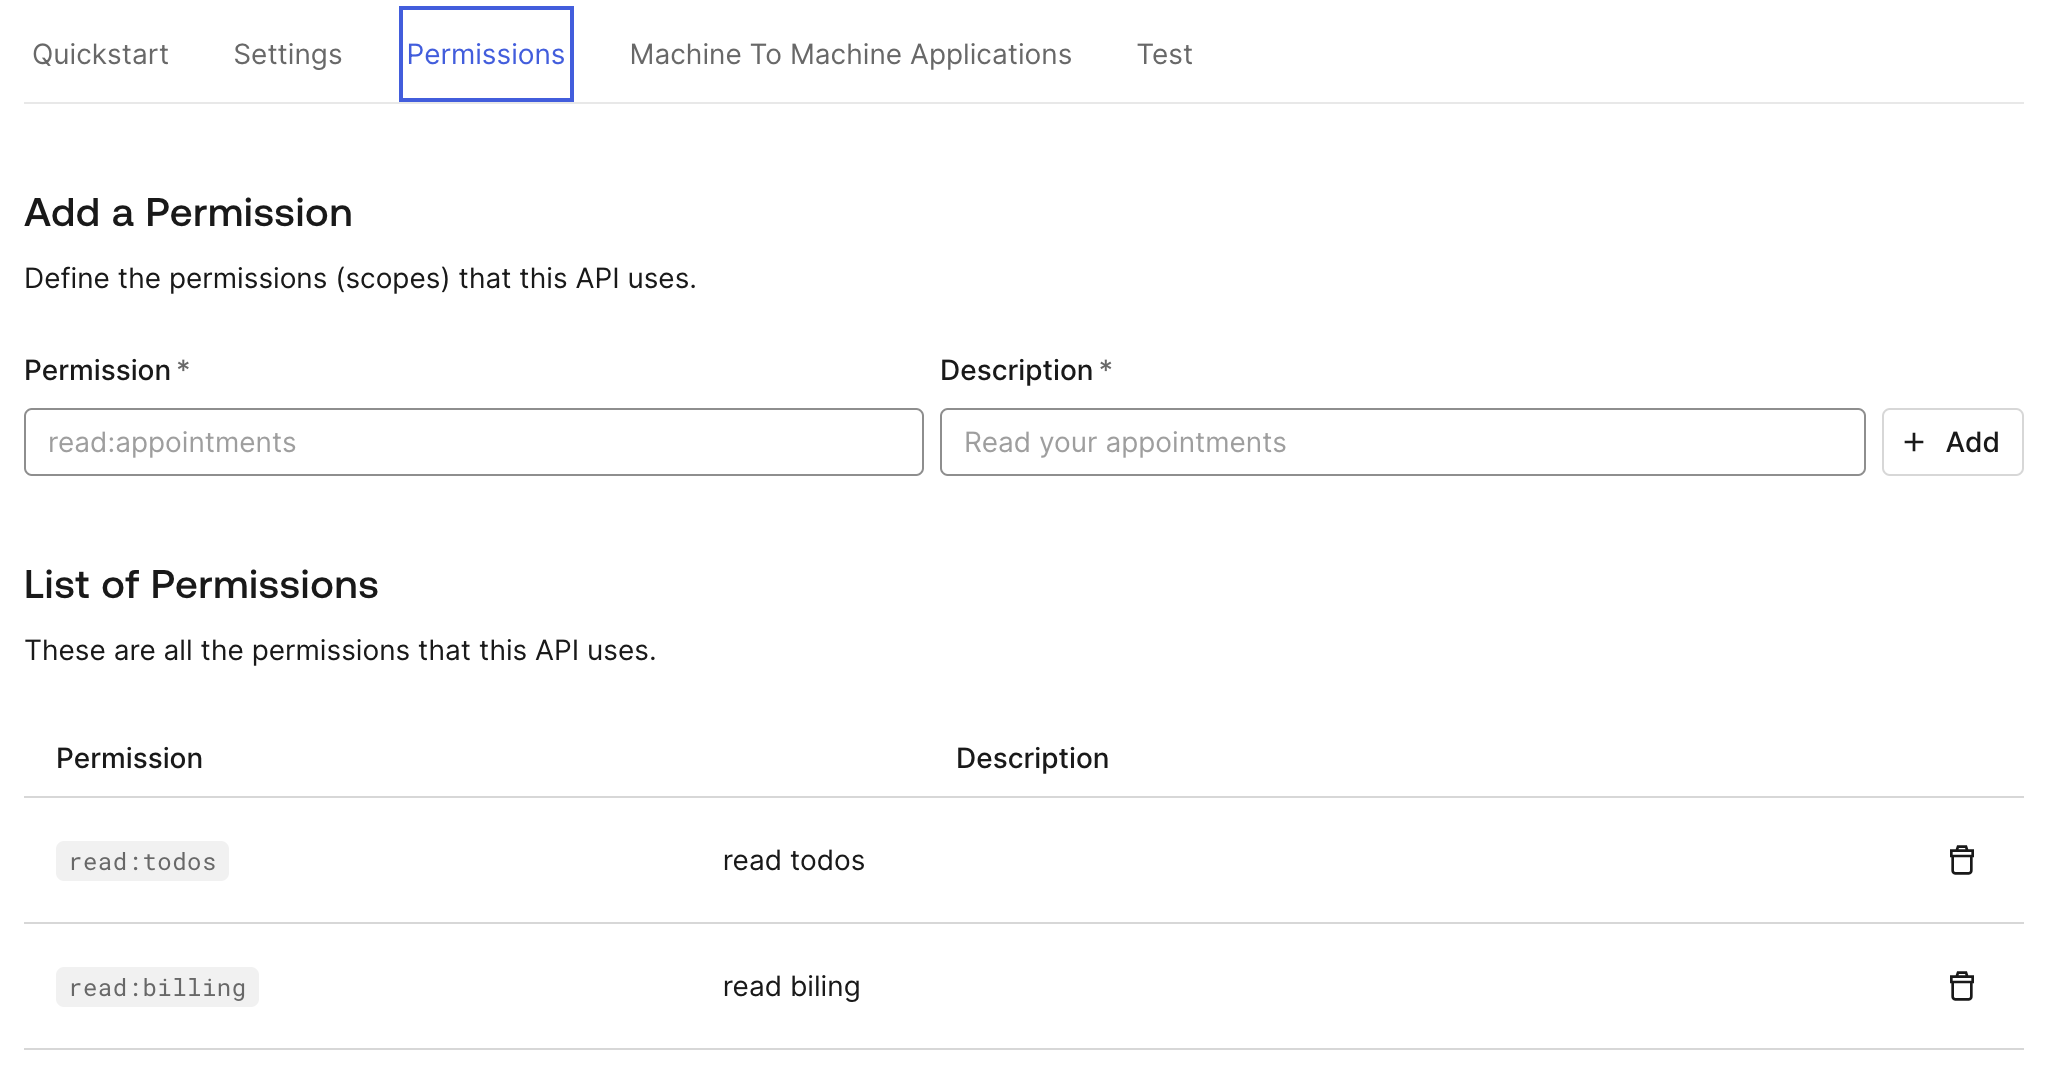
As a final step - the permissions (scopes) need to be configured in the Auth0 Dashboard. These will be granted when a user authorizes an application to gain access to an API. In the API settings for the Todos API, go to the Permissions tab and add read:todos and read:billing as permissions, add a description, and press the + Add button to effectively create the permissions.
With the permissions in place, the Todos API is created and configured within Auth0. You need to give the Todos API the information from Auth0.
Open the Todos API project in your preferred code editor, set configuration values to connect it to the API you just created in the Auth0 Dashboard, and then deploy it via the Wrangler CLI.
In the root of the Todos API project, create a .dev.vars file. With the following format:
AUTH0_DOMAIN=
AUTH0_AUDIENCE=urn:todos-api
Note that you already have the AUTH0_AUDIENCE from when you created your API. Now, you’ll need to fill in the Auth0 Domain.
Whenever a new API is created in the Auth0 Dashboard, you also get a test application that allows you to get access tokens and make requests to your protected API. You can see the test application under Applications>Applications.
Now that you are in the Applications section of the Dashboard click on the “Todos API (Test Application)”, which will load the settings and copy the Domain value. The domain will be used in the next step when we update the Todos API project.
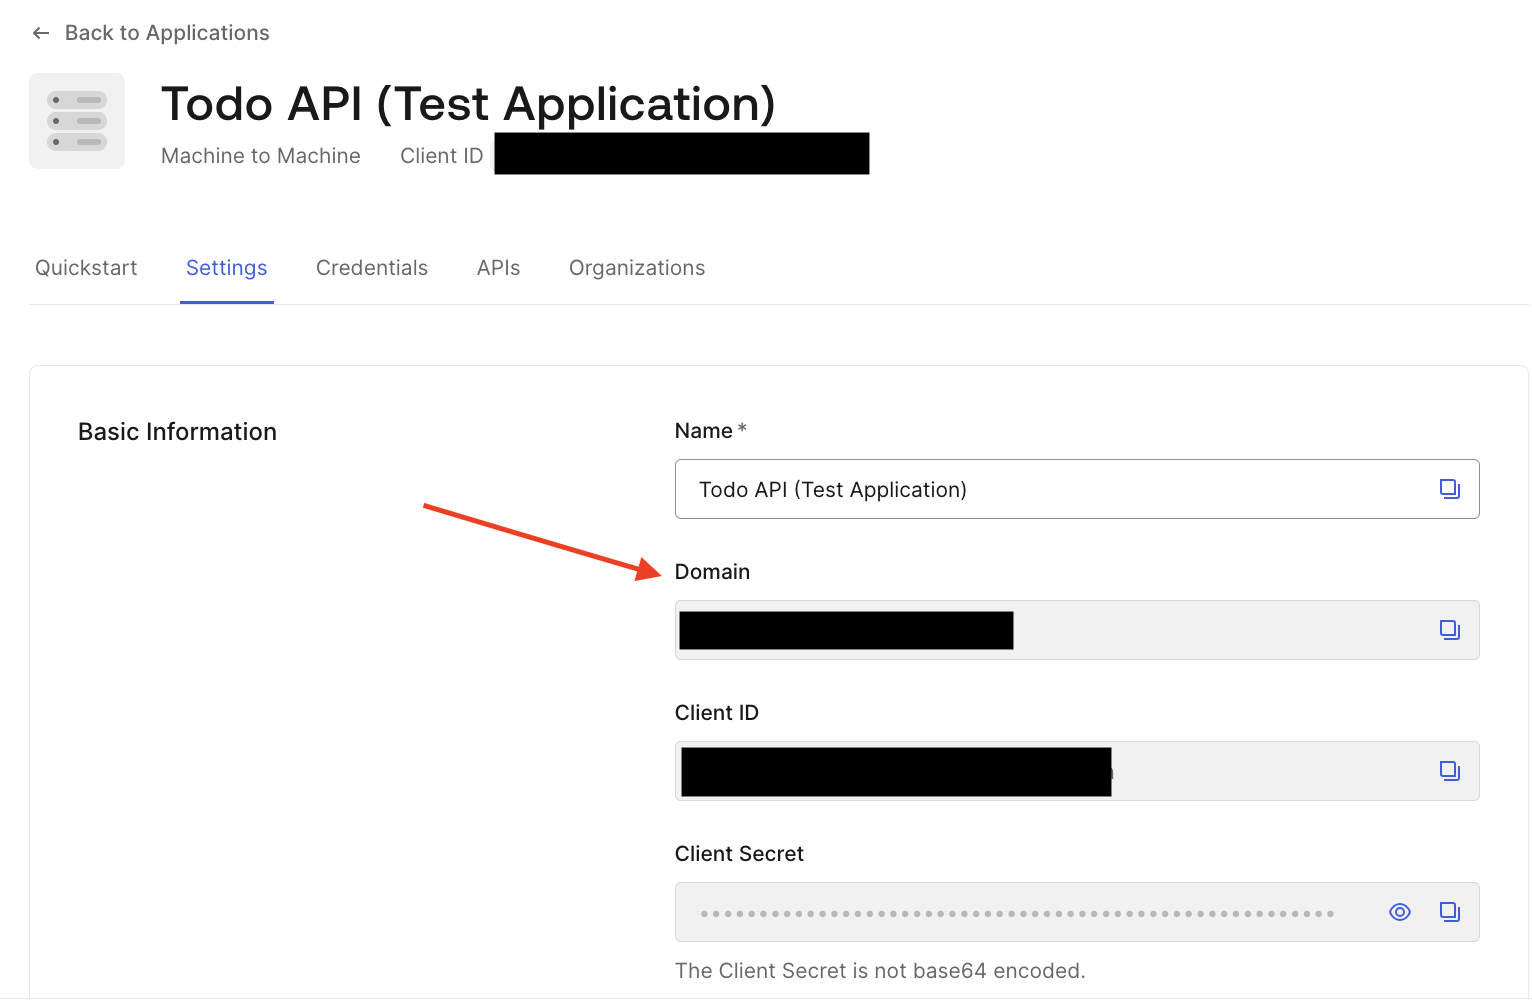
Update your .dev.vars file to contain the Domain like so:
AUTH0_DOMAIN=Your Auth0 domain (e.g., acme.auth0.com)
AUTH0_AUDIENCE=urn:todos-api
Testing the Todos API
With the Todos API configured both in Auth0 and locally, you can make requests to it.
Run the Todos API with the following command:
npm run dev
This will start the worker and allow you to make requests to the Todos API.
To get the access_token to call the API, on the Auth0 Dashboard go to Applications > APIs, click on the Todos API then select the Test tab. This will give you the cURL command to request the access token.
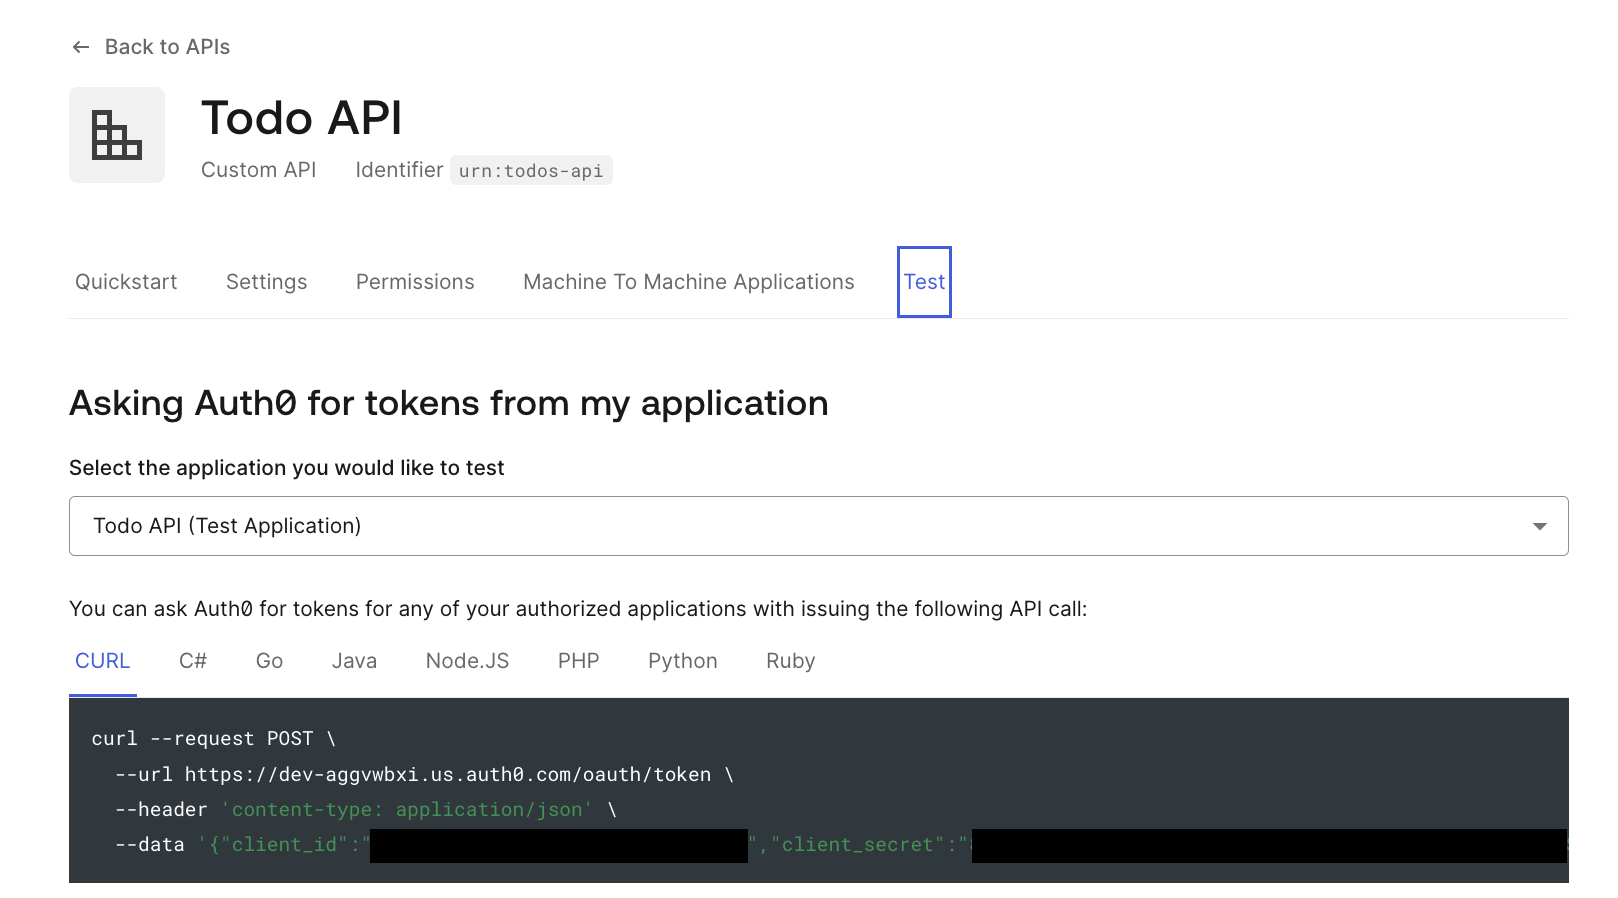
In your terminal, run the command from the Test tab, and be sure to use the client_id and client_secret values from Auth0.
curl --request POST \
  --url https://dev-aggvwbxi.us.auth0.com/oauth/token \
  --header 'content-type: application/json' \
  --data '{"client_id":".....","client_secret":".....","audience":"urn:todos-api","grant_type":"client_credentials"}'
The cURL command will show the response with the access token like below:
{
  "access_token": ".......",
  "token_type": "Bearer"
}
Next, make a request to the API passing the access token in the Authorization header.
curl --request GET \
  --url http://localhost:8788/api/me \
  --header 'Authorization: Bearer eyJhbGciOiJSUzI1NiIsInR5cCI6Im...'
On a successful call, you will see the claims of the JWT token in the response.
Deploy the Todos API to Cloudflare
The Todos API is a Cloudflare Workers project, which means it can process Wrangler commands. With everything you have in place so far, you can use Wrangler to set secrets locally and deploy the API to Cloudflare. Using the terminal, navigate to your project folder and run the following commands:
wrangler secret put AUTH0_DOMAIN
wrangler secret put AUTH0_AUDIENCE
Now that the secrets are set, you can deploy the Todos API to Cloudflare with the following command:
wrangler deploy
Now that the Todos API is deployed to Cloudflare and secured by Auth0. Keep the project open as we’ll use the terminal in the next step to configure and deploy the remote MCP server.
Configure and Deploy the Remote MCP Server
In this step, we will configure the remote MCP server secured with Auth0 and make requests to the Todos API. This includes creating an application for it in the Auth0 Dashboard and deploying it to Cloudflare.
Head back to the Auth0 Dashboard and create a web application by going to Applications → Applications. Click Create Application and enter the following values:
- For the Name field, enter “Remote MCP Server”
- Choose Regular Web Applications as the Application Type
- Click the Create button
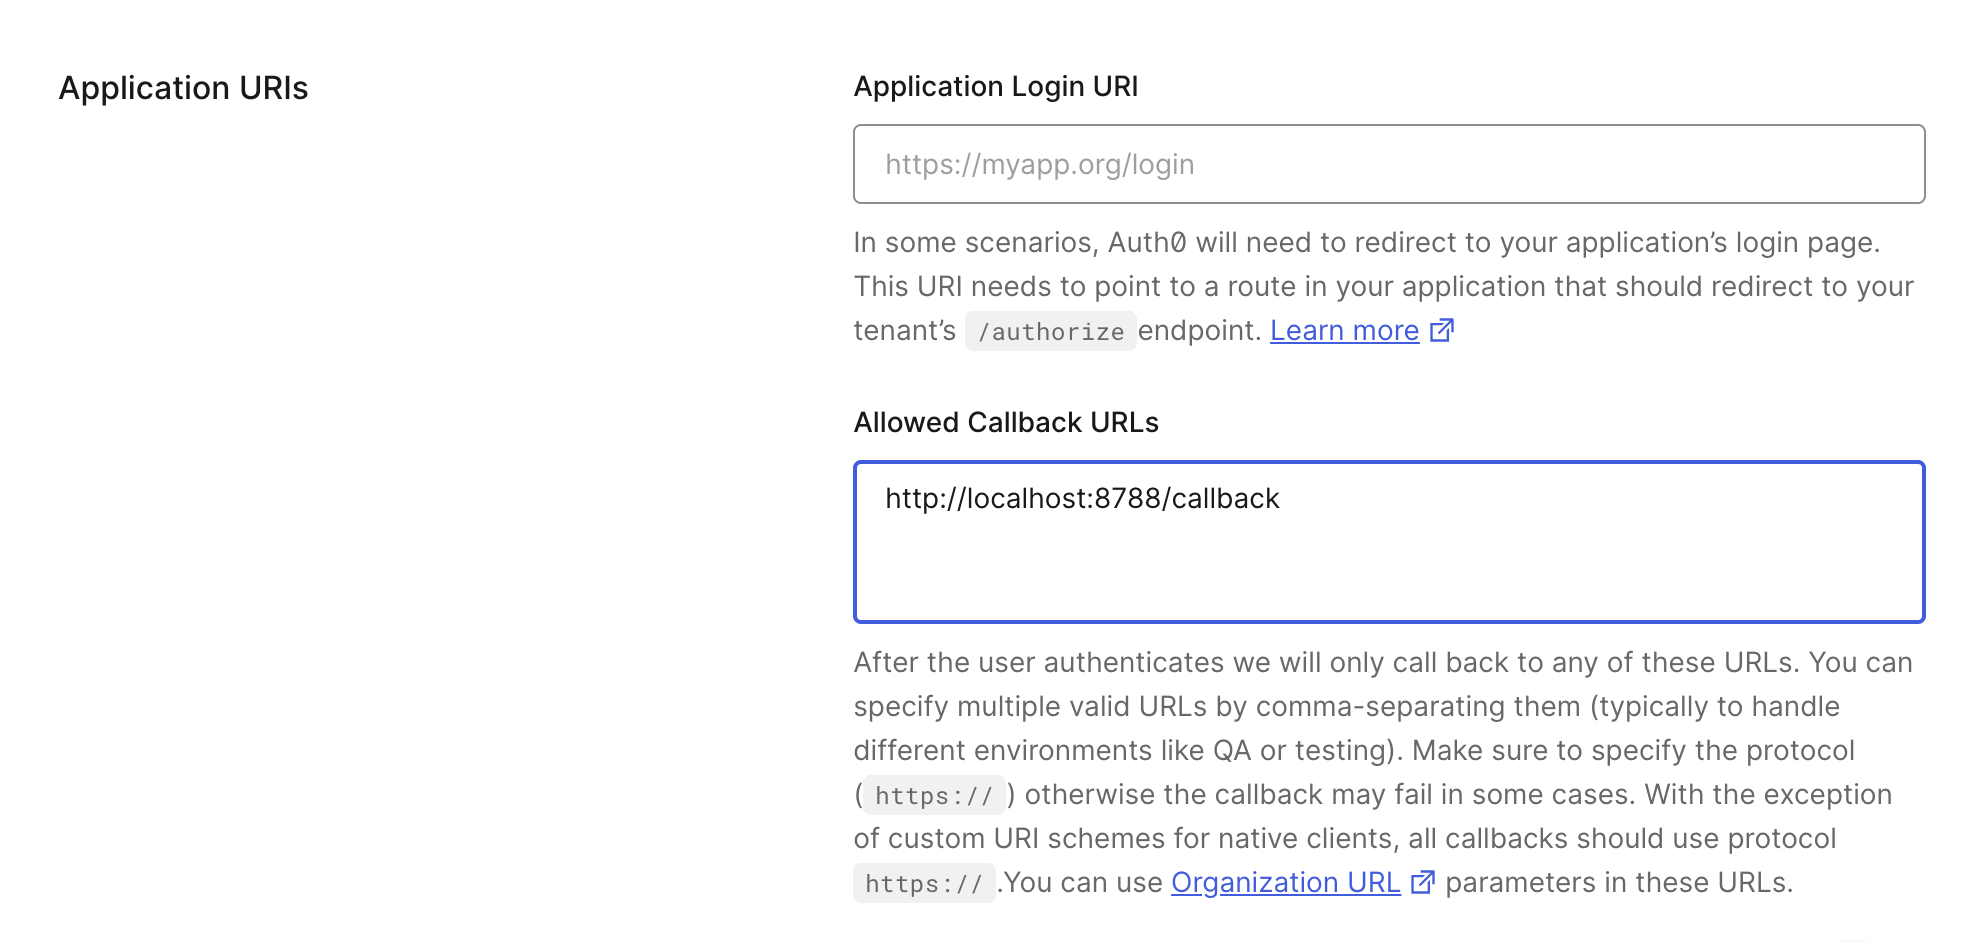
Next, we will configure the callback URL, which is the URL to which the application will be redirected back to the caller after the user authenticates. To set this, head to the MCP Server application Settings, scroll to Allowed Callback URLs in the Application URIs section and add the following URL.
http://localhost:8788/callback
Note: This URL will change when you deploy it to production.
Next up is creating a Cloudflare Workers KV namespace. This namespace is used by the remote MCP server and workers-oauth-provider to handle authorization requests.
To create a KV namespace with Wrangler, in the terminal, run the following command:
wrangler kv namespace create "OAUTH_KV"
Open the Remote MCP Server project in your code editor and paste the resulting values in the existing wrangler.jsonc file using the format below:
//wrangler.jsonc

{
  "kv_namespaces": [
    {
      "binding": "OAUTH_KV",
      "id": "<BINDING_ID>"
    }
  ]
}
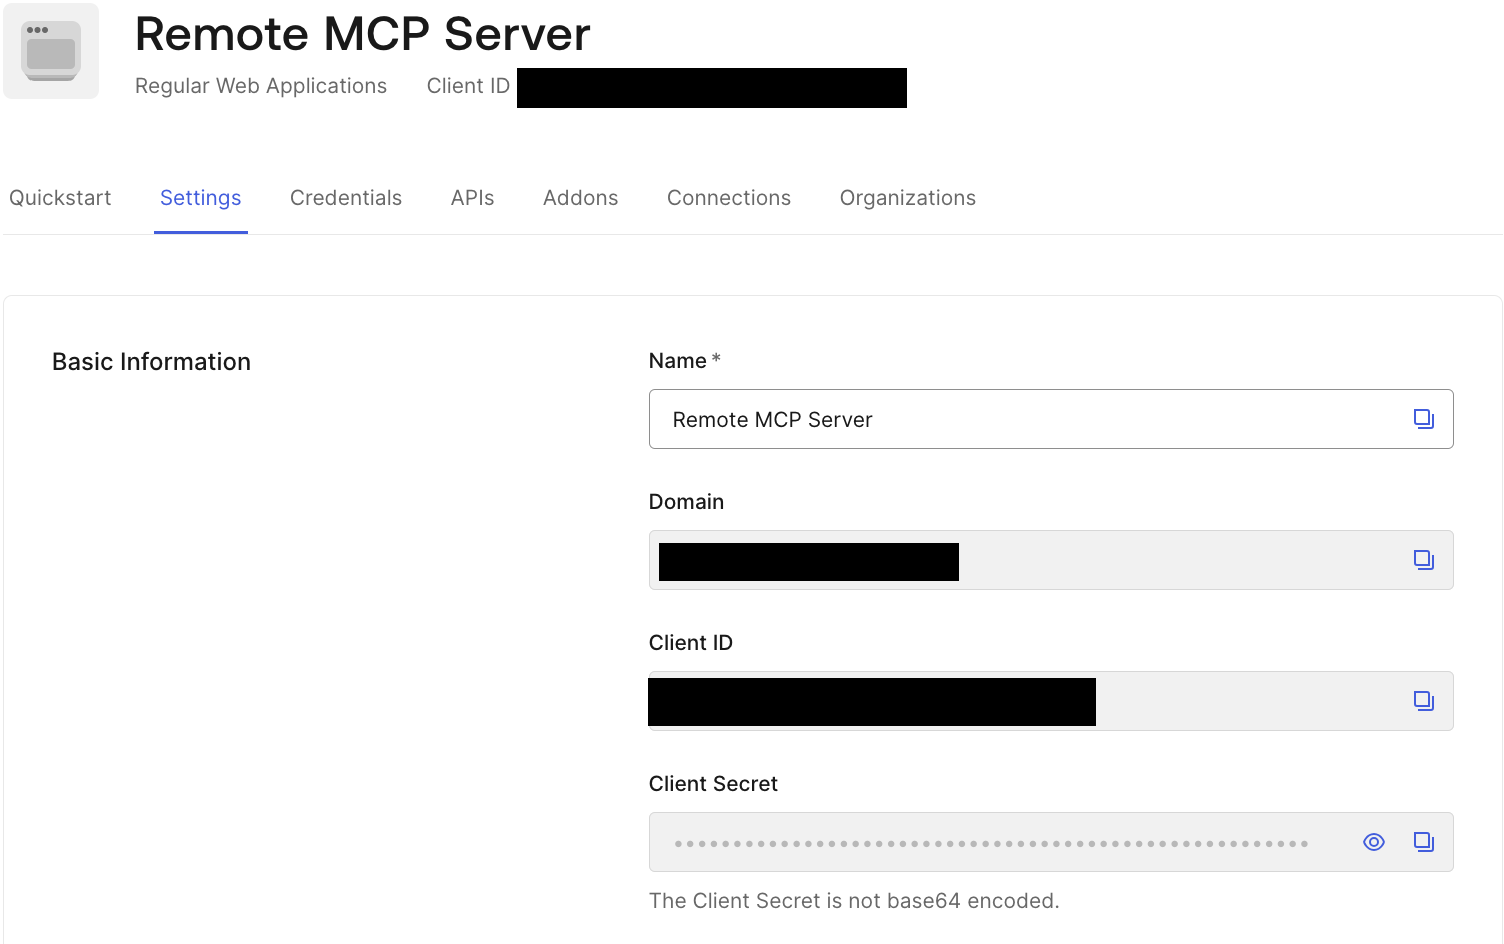
Now that the KV namespace has been created, the next step is to update configuration values for Wrangler to deploy the remote MCP server to Cloudflare. To configure the application you’ll need a few values from your application settings in the Auth0 Dashboard.
Go to Applications → Applications, then click on the Remote MCP Server application. There, you can take note of your Auth0 Domain, Client ID, and Client Secret.
With the project open in your preferred code editor, create a .dev.vars in the root of the project and add the following values:
AUTH0_DOMAIN=Your Auth0 domain (e.g., acme.auth0.com)
AUTH0_CLIENT_ID=The Client ID of the application created in Auth0
AUTH0_CLIENT_SECRET=The Client Secret of the application created in Auth0
AUTH0_AUDIENCE=urn:todos-api
AUTH0_SCOPE=openid email profile offline_access read:todos
NODE_ENV=development
API_BASE_URL=http://localhost:8789
Deploy the MCP Server to Cloudflare
To deploy the remote MCP server to Cloudflare, you first need to set the secrets in Wrangler. To do this, run the following commands:
wrangler secret put AUTH0_DOMAIN
wrangler secret put AUTH0_CLIENT_ID
wrangler secret put AUTH0_CLIENT_SECRET
wrangler secret put AUTH0_AUDIENCE
wrangler secret put AUTH0_SCOPE
wrangler secret put API_BASE_URL
Once the secrets are set, run the following commands to deploy the MCP Server to Cloudflare.
wrangler deploy
With the MCP server deployed, we can update the Allowed Callback URLs in the Application settings within the Auth0 Dashboard using the deployed MCP server URL using this URL pattern.
To change the Allowed Callback URLs, on the Auth0 Dashboard go to Applications > Applications, click on Settings, scroll down to Application URIs and then add the following URL.
https://mcp-auth0-oidc.<your-subdomain>.workers.dev/callback
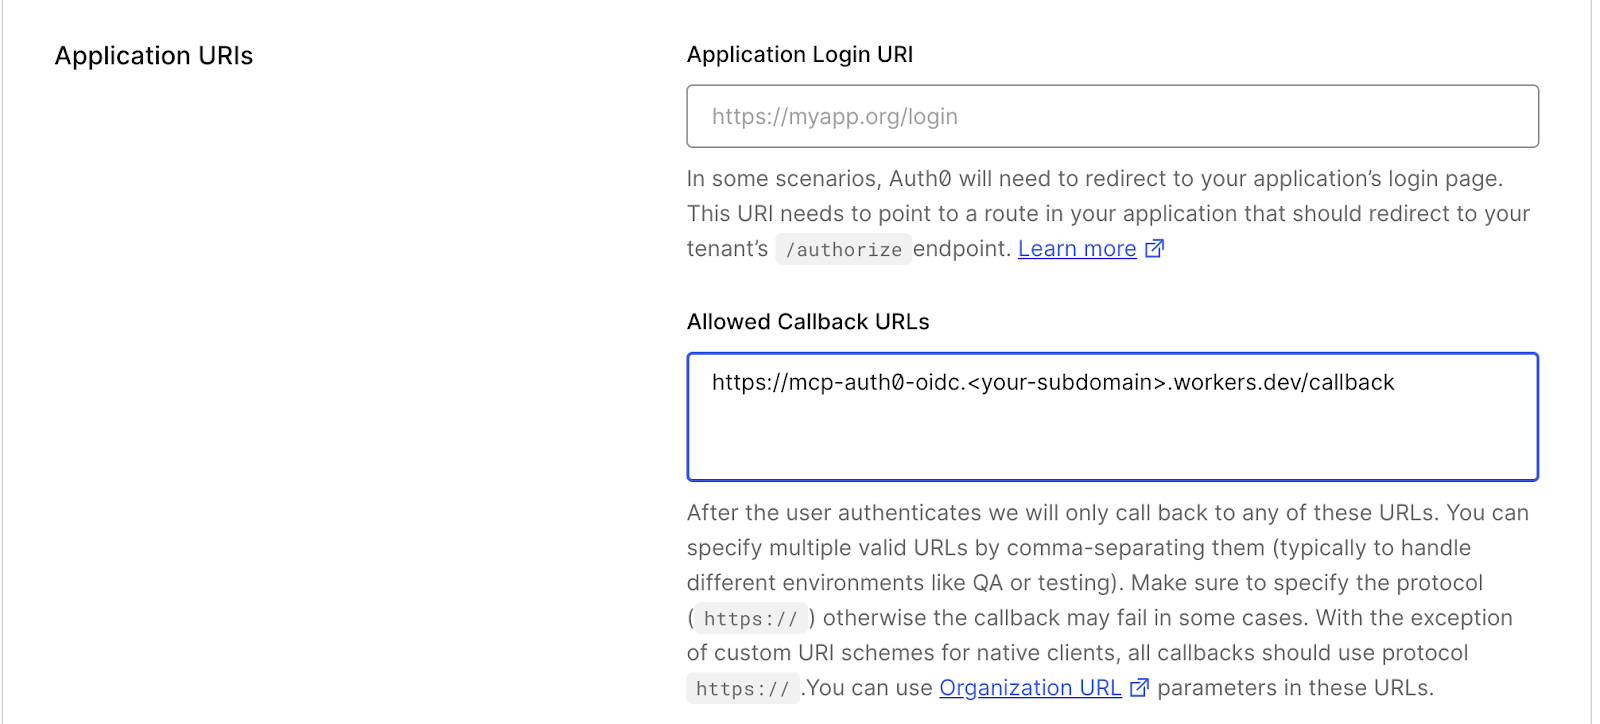
This will make sure that after the user authenticates, they will redirect back to the remote MCP server to make calls to the Todos API. With these steps in place, it’s now time to see the remote MCP server in action.
Test the Remote MCP Server Call
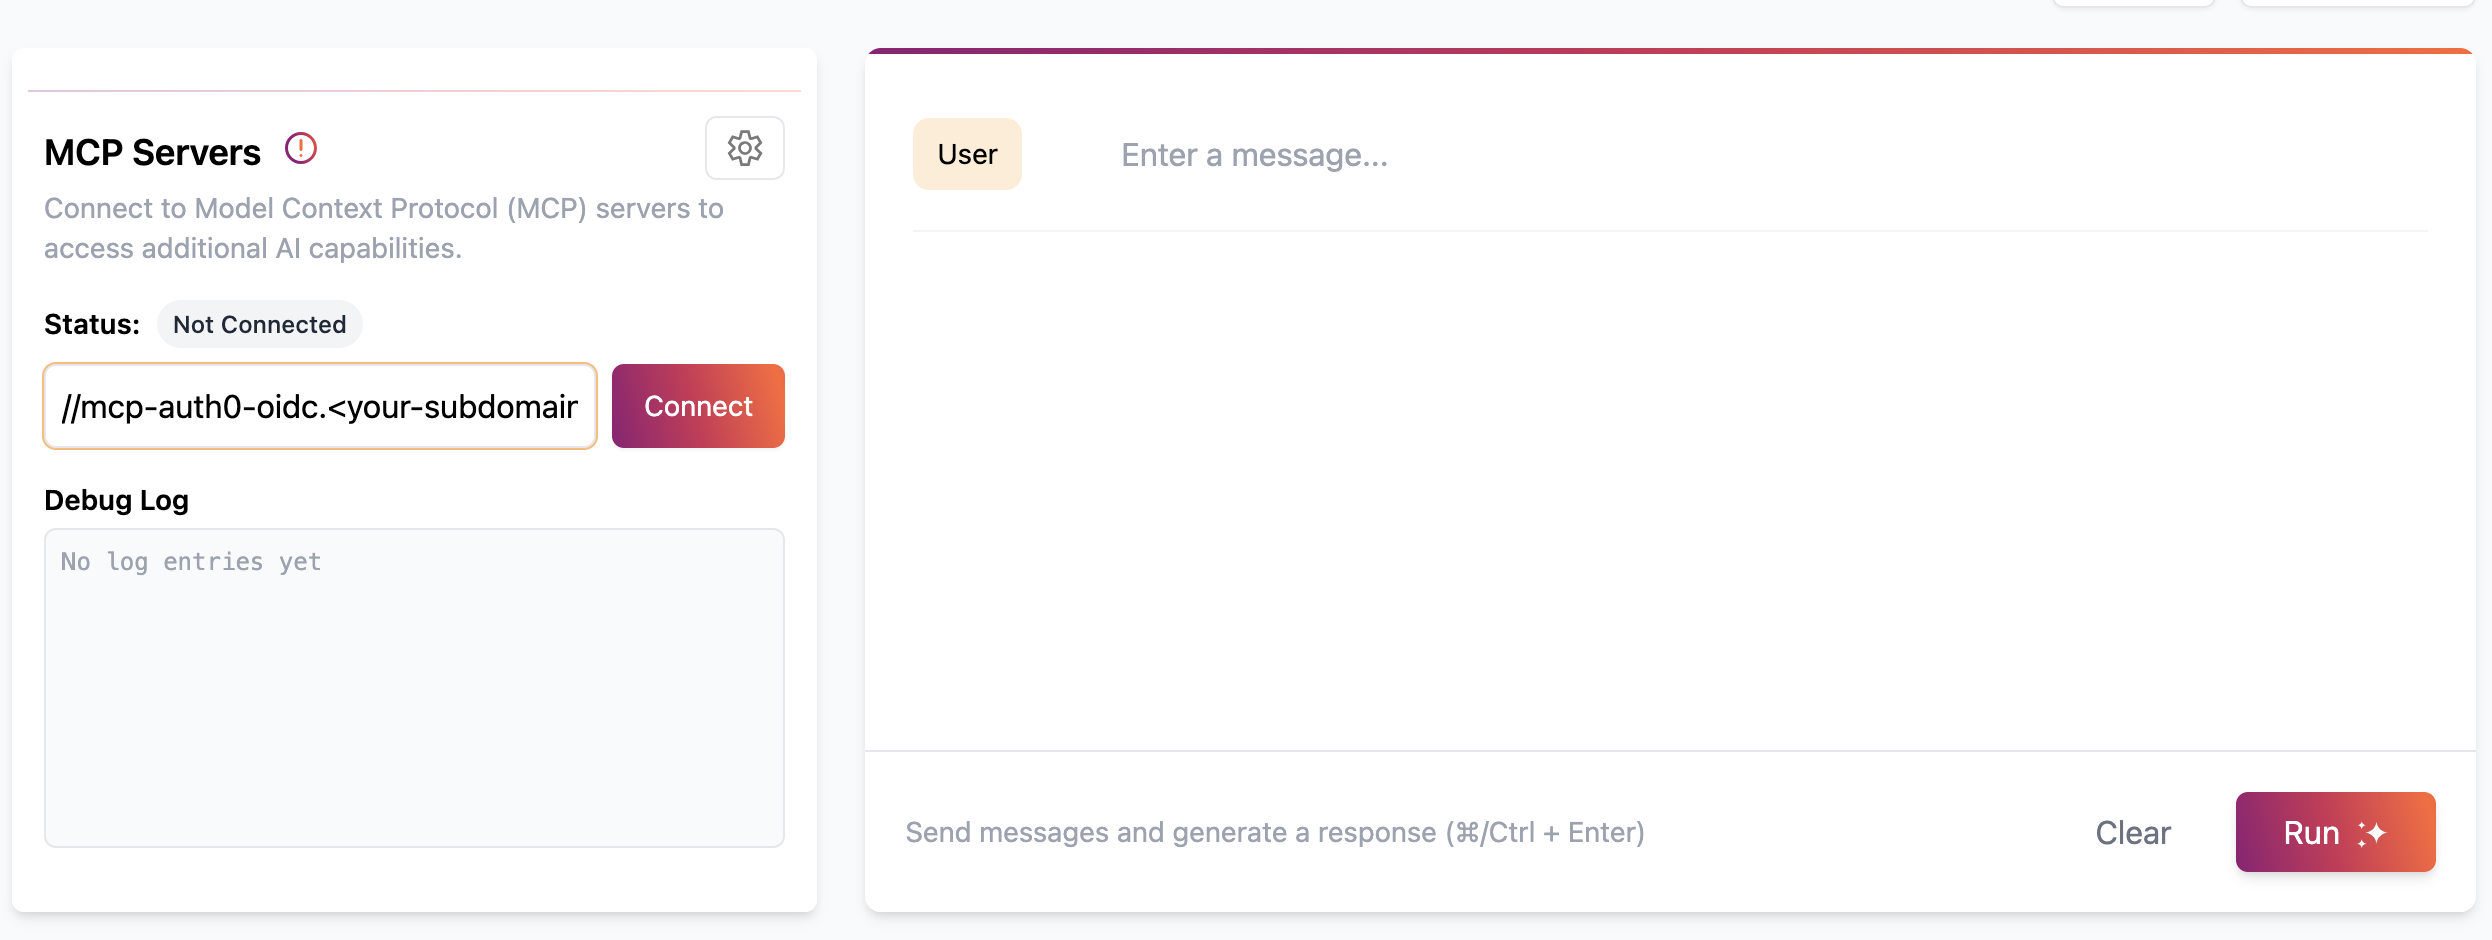
To test making calls to the Todos API, use the Workers AI LLM Playground. Navigate to Cloudflare’s AI Playground and connect to the Remote MCP Server URL:
https://mcp-auth0-oidc.<your-subdomain>.workers.dev/sse
Place the URL in the section labeled MCP Servers and click Connect.
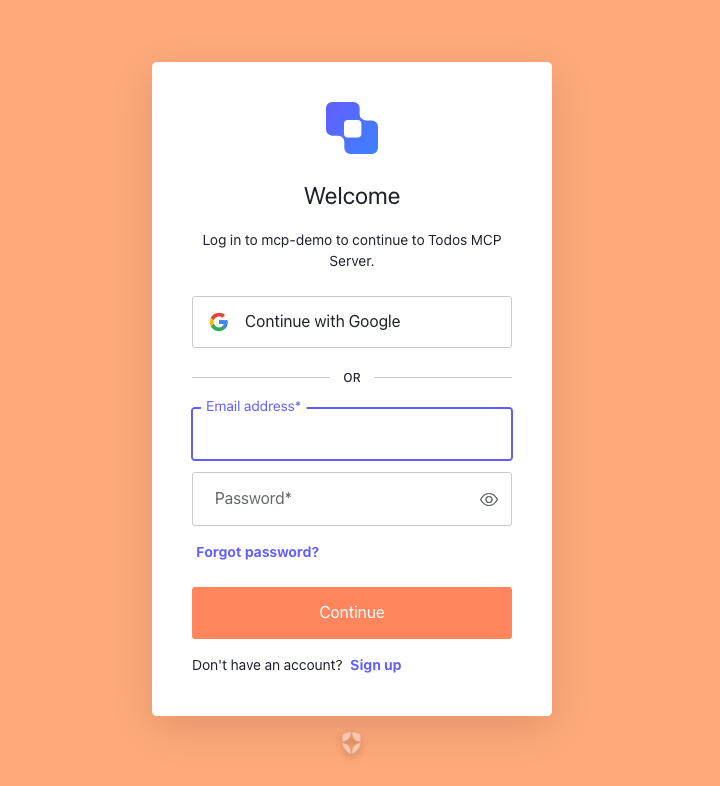
Then you’ll go through the authorization flow; you need to allow access:
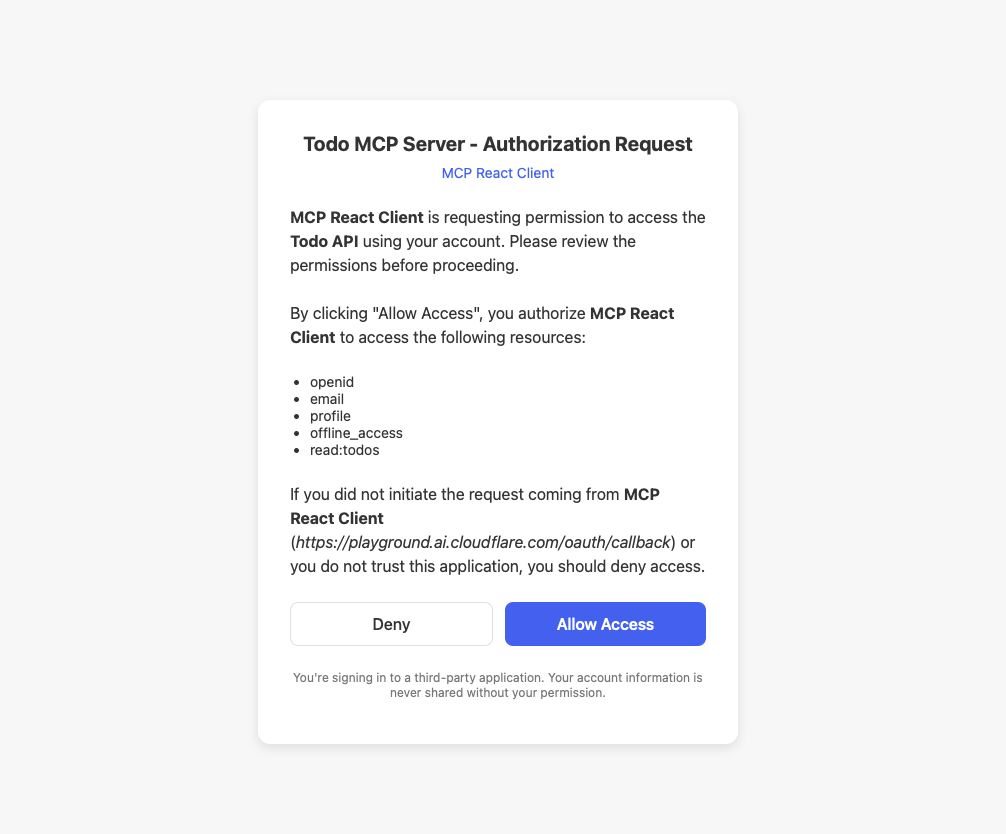
This will open the browser, have the user authenticate with Auth0, and allow the remote MCP server to access the resources of the Todos API.
Once permission is given, you can use the LLM to make requests to the MCP server to get information from the Todos API.
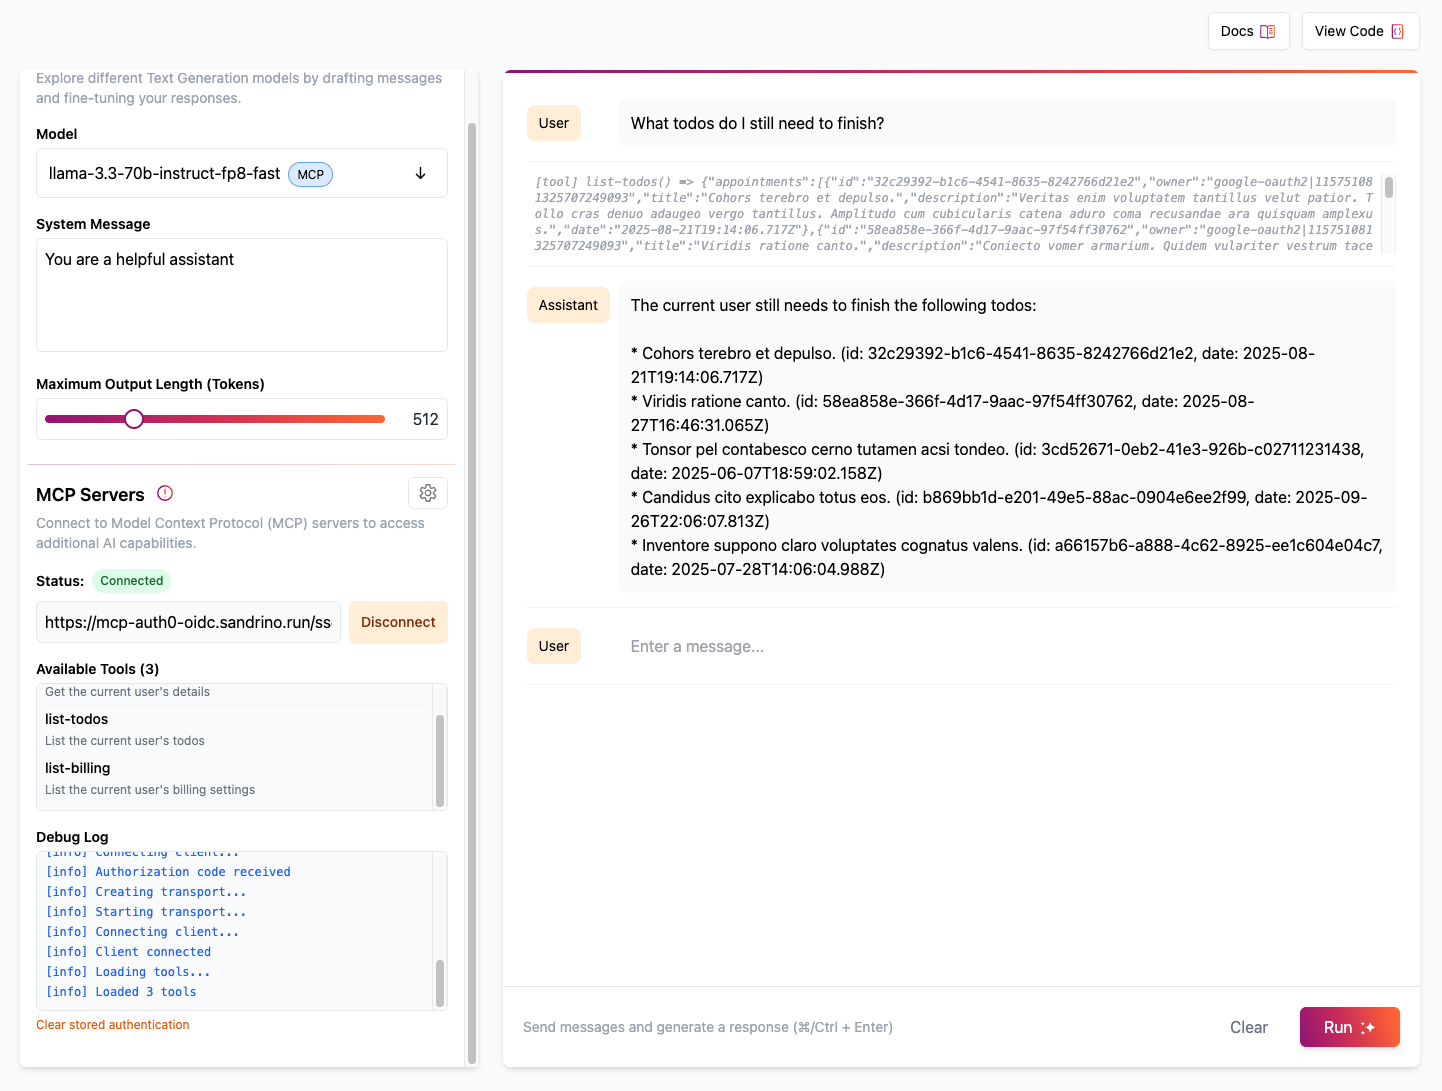
The Todos API allows requests for todos and billing information. Note that the billing information request will fail to show that the LLM can only make requests for information that it has permissions for.
Configuring a Remote MCP Server in Claude
Now that you understand how to secure a remote MCP server with Auth0 and know how to deploy it to Cloudflare, it might be good to see how to set it up to your favourite MCP Host. Let’s set up your server in Claude Desktop.
Open Claude Desktop, navigate to the Settings then click on Developer and Edit Config. This will show you Claude’s folder on your computer and the file named claude_desktop_config.json.
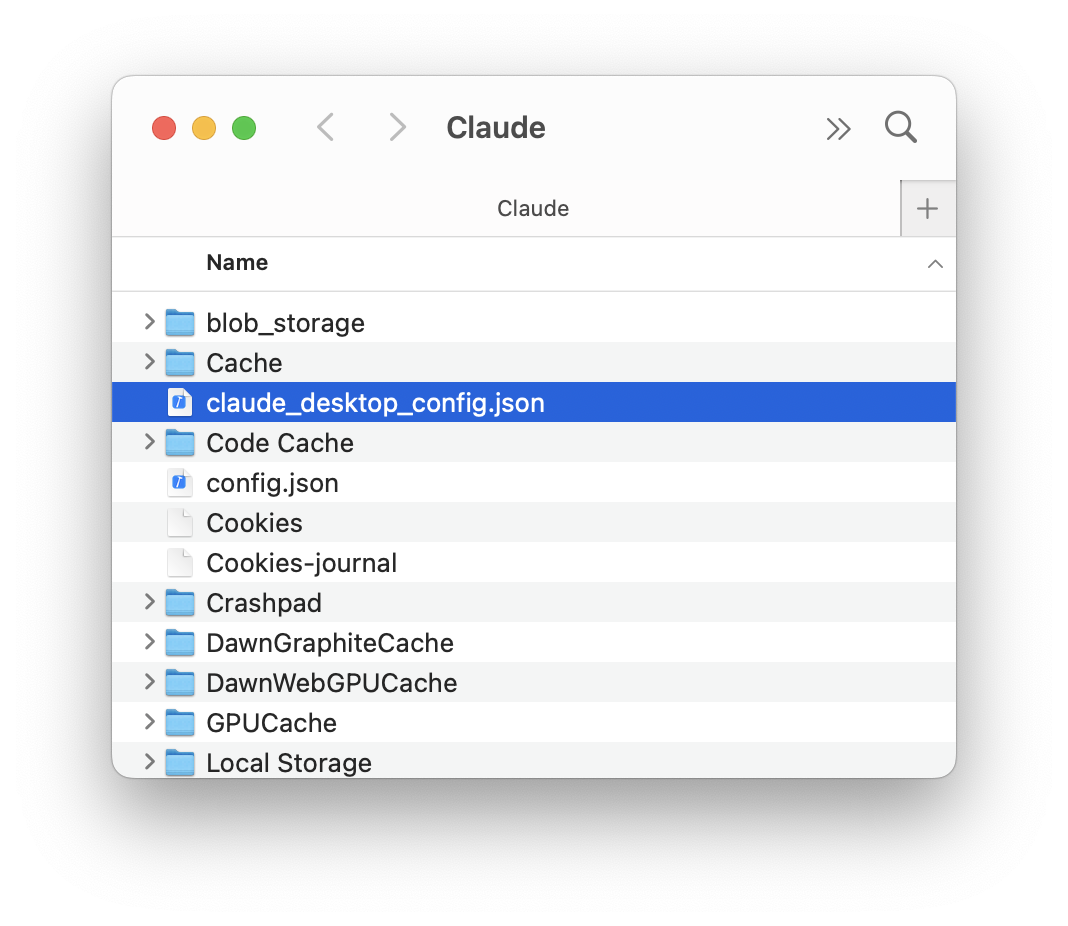
Open that file in your favorite editor, and add the following:
{
  "mcpServers": {
    "math": {
      "command": "npx",
      "args": [
        "mcp-remote",
        "https://mcp-auth0-oidc.<your-subdomain>.workers.dev/sse"
      ]
    }
  }
}
Remember to update the URL to use your Remote MCP Server URL in the arguments list. This configuration names a “math” server that runs with npx as command and passes the package mcp-remote and the URL as parameters to npx.
The mcp-remote package is responsible for connecting an MCP Host with stdio like Claude Desktop and Cursor to securely access a Remote MCP Server like the one you just deployed.
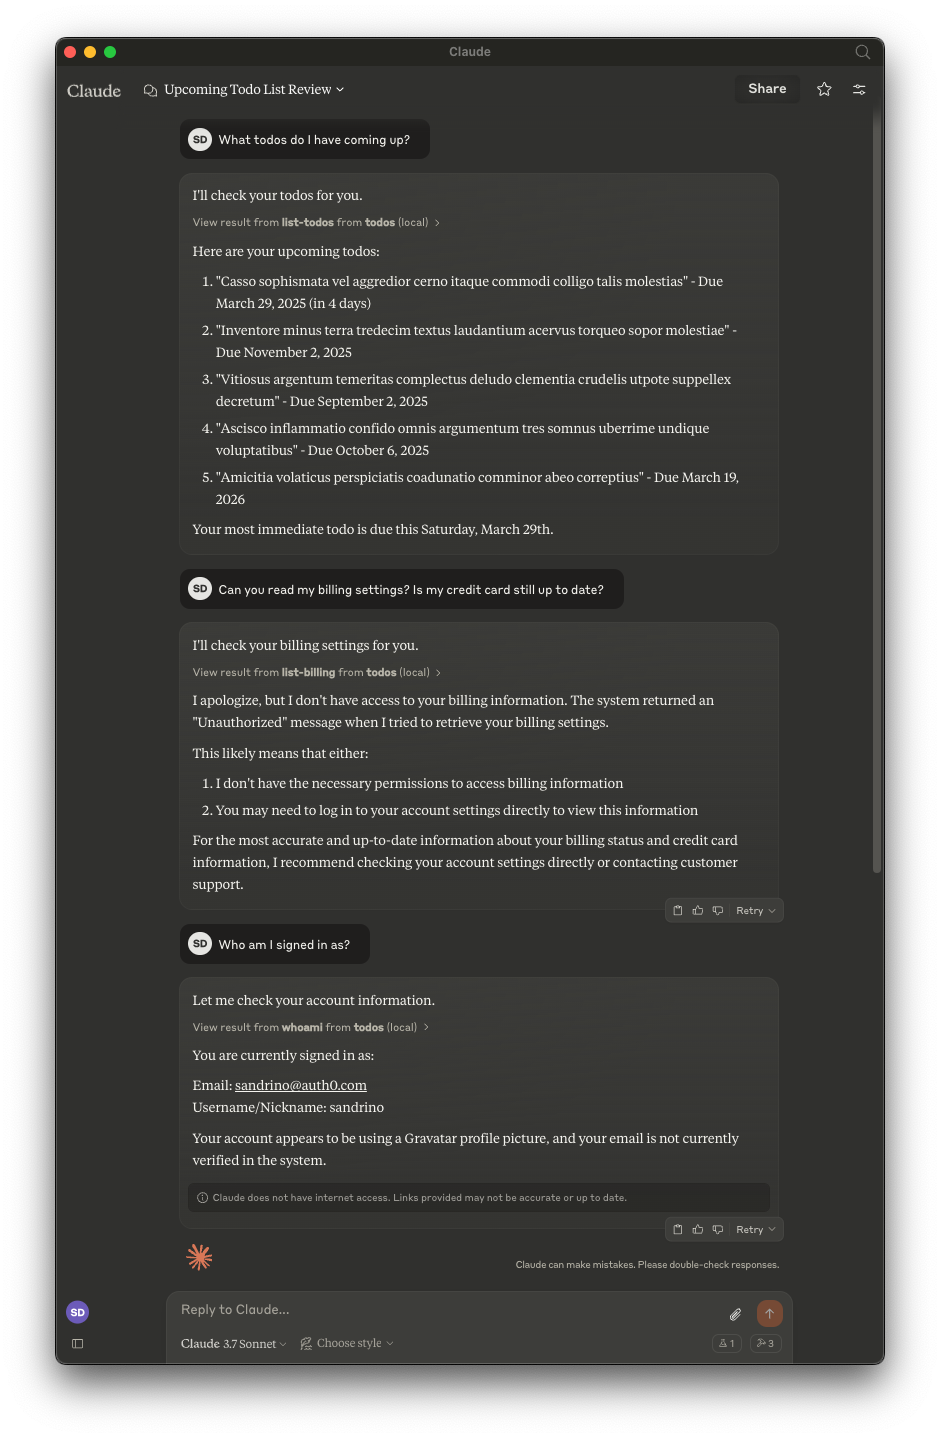
Once you save the configuration and restart Claude, you’ll be able to prompt Claude about your list of todos:
Conclusion
In this post we walked through the steps needed to secure a MCP Server with Auth0, and connect it to a third party API. You also learned how to deploy your MCP Server to Cloudflare. The MCP server uses Auth0 as a third party identity provider and allows AI tools to call the protected API on behalf of the user.
Remote MCP Servers offer tools that can make LLMs more convenient and give faster access to the information that matters to users. If you are building with GenAI you should check out our brand new product Auth0 for AI Agents, to enable AI agents to securely access tools, workflows, and data with fine-grained control and just a few lines of code.
You can take a look at the code that was used in these demos on GitHub to try it out for yourself.
This blog may contain hyperlinks to non-Okta websites that are created and maintained by third parties who are solely responsible for the content on such websites.