Blazor allows you to build your WebAssembly (also known as WASM) applications by leveraging the .NET platform. Thanks to Auth0, you can also easily secure them by adding support for authentication and authorization, as this article will show. Let's start!
Building a Blazor WebAssembly Application
In a previous article, you built a Blazor application by using the Server Hosting model. It was a simple quiz application that shows a list of questions with multiple answers and assigns you a score based on the correct answers you provide.
Now you are going to implement the same application by using the WebAssembly hosting model. To learn more about Blazor hosting models, please check out the specific section in that mentioned article.
As explained in that article, the WebAssembly hosting model makes your application be compiled in WebAssembly and run in your browser. However, depending on the structure of your project, you have two options to create your application:
- You may have just the client-side application that will call an existing Web API
- You may have both the client-side application and the Web API application. In this case, the Web API application also serves the Blazor WebAssembly app to the browsers. This option is called ASP.NET Core hosted.
For this project, you will choose the second option. In fact, you will have the client-side application, which will be responsible for showing the UI and managing the user interaction, and the Web API application, which will provide the quiz to the client.
To build this application, you need .NET 6.0 SDK or above installed on your machine.
You create a new Blazor WebAssembly project by typing the following command:
dotnet new blazorwasm -o QuizManagerClientHosted --hosted
Note: If you want to create only the client-side application, you have to omit the
--hostedflag in the previous command.
If you take a look at the QuizManagerClientHosted folder, you will find the folder structure shown below:
QuizManagerClientHosted
│   .gitignore
│   QuizManagerClientHosted.sln
├── Client
├── Server
└── Shared
Each of these folders contains a .NET project. While the Client and the Server folders are straightforward, you may wonder what the Shared folder contains. It contains a class library project with the code shared by the client-side and the server-side applications. In the case of the application you are going to re-implement, it will contain the data model.
So, move into the Shared folder and remove the WeatherForecasts.cs file. Create a new file in the Shared folder called QuizItem.cs with the following content:
// Shared/QuizItem.cs

namespace QuizManagerClientHosted.Shared;
public class QuizItem
{
  public string Question { get; set; }
  public List<string> Choices { get; set; }
  public int AnswerIndex { get; set; }
  public int Score { get; set; }

  public QuizItem()
  {
    Choices = new List<string>();
  }
}
This class implements the model for each item of the quiz. It provides a question, a list of possible answers, the zero-based index of the correct answer, and the score assigned when the user gives the correct answer.
Creating the server
Move in the Server/Controllers folder and remove the WeatherForecastController.cs file. Then, add in the same folder a new file named QuizController.cs and put the following code inside it:
// Server/Controllers/QuizController.cs

using QuizManagerClientHosted.Shared;
using Microsoft.AspNetCore.Mvc;

namespace QuizManagerClientHosted.Server.Controllers;

[ApiController]
[Route("[controller]")]
public class QuizController : ControllerBase
{
  private static readonly List<QuizItem> Quiz = new List<QuizItem> {
    new QuizItem
      {
        Question = "Which of the following is the name of a Leonardo da Vinci's masterpiece?",
        Choices = new List<string> {"Sunflowers", "Mona Lisa", "The Kiss"},
        AnswerIndex = 1,
        Score = 3
      },
    new QuizItem
      {
        Question = "Which of the following novels was written by Miguel de Cervantes?",
        Choices = new List<string> {"The Ingenious Gentleman Don Quixote of La Mancia", "The Life of Gargantua and of Pantagruel", "One Hundred Years of Solitude"},
        AnswerIndex = 0,
        Score = 5
      }
    };

  [HttpGet]
  public List<QuizItem> Get()
  {
    return Quiz;
  }
}
As you can see, this is the Web API version of the QuizService class you created in the Blazor server application. You notice the initialization of the Quiz static variable with a few QuizItem instances and the definition of the Get() action returning that variable.
For more information on how to create a Web API in ASP.NET Core, see this tutorial.
Creating the client
In order to create the Blazor client application, move into the Client/Pages folder and remove the Counter.razor and the FetchData.razor files. Then, add to this folder a file named QuizViewer.razor with the following content:
// Client/Pages/QuizViewer.cs

@page "/quizViewer"
@using QuizManagerClientHosted.Shared
@inject HttpClient Http

<h1>Take your quiz!</h1>
<p>Your current score is @currentScore</p>

@if (quiz == null)
{
  <p><em>Loading...</em></p>
}
else
{
  int quizIndex = 0;
  @foreach (var quizItem in quiz)
  {
    <section>
    <h3>@quizItem.Question</h3>
    <div class="form-check">
      @{
        int choiceIndex = 0;
        quizScores.Add(0);
      }
      @foreach (var choice in quizItem.Choices)
      {
        int currentQuizIndex = quizIndex;
        <input class="form-check-input"
          type="radio"
          name="@quizIndex"
          value="@choiceIndex"
          @onchange="@((eventArgs) => UpdateScore(Convert.ToInt32(eventArgs.Value), currentQuizIndex))" />@choice
        <br>

        choiceIndex++;
      }
    </div>
    </section>

    quizIndex++;
  }
}

@code {
  List<QuizItem> quiz;
  List<int> quizScores = new List<int>();
  int currentScore = 0;

  protected override async Task OnInitializedAsync()
  {
    quiz = await Http.GetFromJsonAsync<List<QuizItem>>("Quiz");
  }

  void UpdateScore(int chosenAnswerIndex, int quizIndex)
  {
    var quizItem = quiz[quizIndex];

    if (chosenAnswerIndex == quizItem.AnswerIndex)
    {
      quizScores[quizIndex] = quizItem.Score;
    }
    else
    {
      quizScores[quizIndex] = 0;
    }
    currentScore = quizScores.Sum();
  }
}
The @page directive defines this Razor component as a page, which is a UI element that is directly reachable through an address (/quizViewer in this case) in the Blazor's routing system. Then, you have the @using directive, which provides access to the shared data model created above (QuizItem.cs). The @inject directive asks the dependency injection system to get an instance of the HttpClient class.
After these initializations, you find the markup defining the UI. As you can see, this part is a mix of HTML and C# code whose purpose is to build the list of questions with the respective possible answers represented as radio buttons.
The final block of the component is enclosed in the @code directive. This is where you put the logic of the component. In the case of the QuizViewer component, you have the OnInitializedAsync() and the UpdateScore() methods. The first method is called when the component is initialized, and it basically gets the quiz data by invoking the Quiz endpoint of the Web API you created before. The UpdateScore() method is called when the user clicks one of the proposed answers, and it updates the list of the assigned scores according to the answer chosen by the user. In the same method, the value of the current score is computed and assigned to the currentScore variable. The value of this variable is shown above the list of questions, as you can see in the markup.
To complete your application, replace the content of the NavMenu.razor file in the Client/Shared folder with the following code:
// Shared/NavMenu.razor

<div class="top-row ps-3 navbar navbar-dark">
    <div class="container-fluid">
        <a class="navbar-brand" href="">QuizManager</a>
        <button title="Navigation menu" class="navbar-toggler" @onclick="ToggleNavMenu">
            <span class="navbar-toggler-icon"></span>
        </button>
    </div>
</div>

<div class="@NavMenuCssClass" @onclick="ToggleNavMenu">
    <nav class="flex-column">
        <div class="nav-item px-3">
            <NavLink class="nav-link" href="" Match="NavLinkMatch.All">
                <span class="oi oi-home" aria-hidden="true"></span> Home
            </NavLink>
        </div>
        <div class="nav-item px-3">
            <NavLink class="nav-link" href="quizViewer">
                <span class="oi oi-list-rich" aria-hidden="true"></span> Quiz
            </NavLink>
        </div>
    </nav>
</div>

@code {
    private bool collapseNavMenu = true;

    private string? NavMenuCssClass => collapseNavMenu ? "collapse" : null;

    private void ToggleNavMenu()
    {
        collapseNavMenu = !collapseNavMenu;
    }
}
As you may have noticed, this code redefines the navigation menu by removing the default items pointing to the Counter and FetchData components and including an item to reach the QuizViewer component.
Running your Blazor WebAssembly application
Your Blazor WebAssembly application is complete and ready to run.
⚠️ If you are using a Mac, please, read! ⚠️
At the time of writing, Mac users are affected by an issue when running an ASP.NET Core application via the .NET CLI. You may get the following dialog window when run :

This is due to a known issue with the .NET CLI on macOS. The current workaround requires that you open the QuizManagerClientHosted.Server.csproj file and add the <UseAppHost>false</UseAppHost> element as shown below:
<!-- QuizManagerClientHosted.Server.csproj -->

<Project Sdk="Microsoft.NET.Sdk.Web">

<PropertyGroup>
  <TargetFramework>net6.0</TargetFramework>
  <Nullable>enable</Nullable>
  <ImplicitUsings>enable</ImplicitUsings>
  <!--👇 new element --->
  <UseAppHost>false</UseAppHost>
</PropertyGroup>

<!-- ...existing elements... -->

</Project>
If you use Visual Studio, you are not affected by this issue.
In the root folder of the project, type the following command:
dotnet run --project Server
Take a look at your terminal window to get the address your application is listening to. It is in the form https://localhost:<YOUR_PORT_NUMBER>. In my case, I got the address https://localhost:7291, and I will refer to it throughout the article.
Starting with .NET 6.0, any ASP.NET project created through a template is assigned a random port between 5000 and 5300 for HTTP and between 7000 and 7300 for HTTPS. See this document for more information.
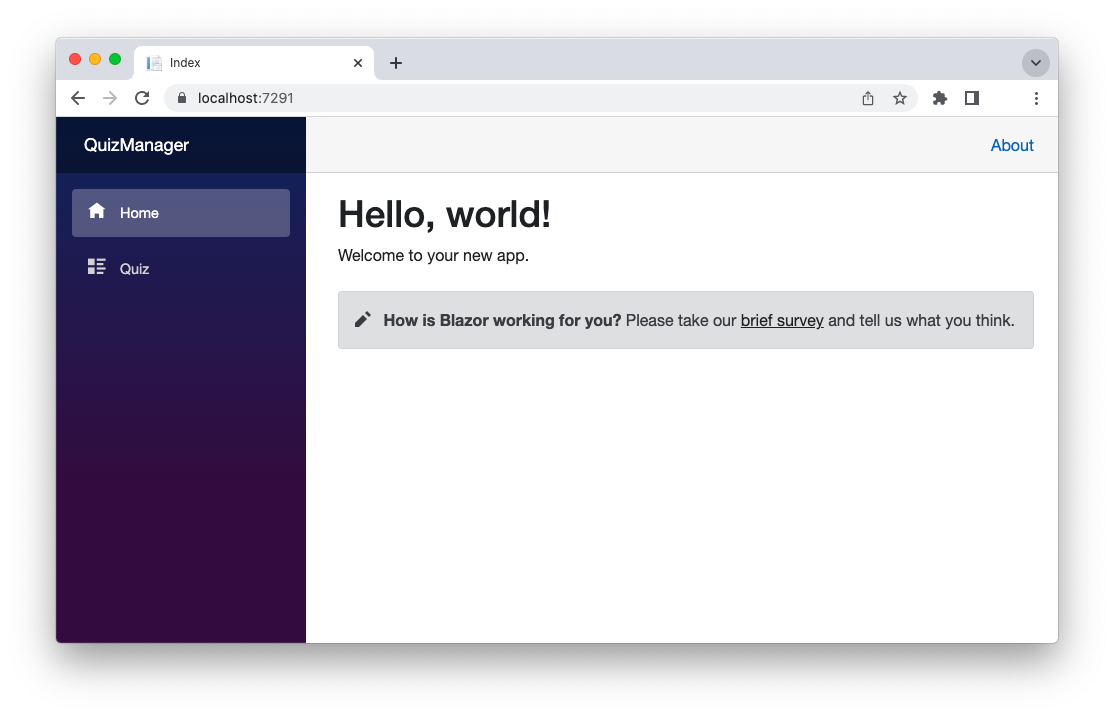
Pointing your browser to your application's address, you should see the following page:
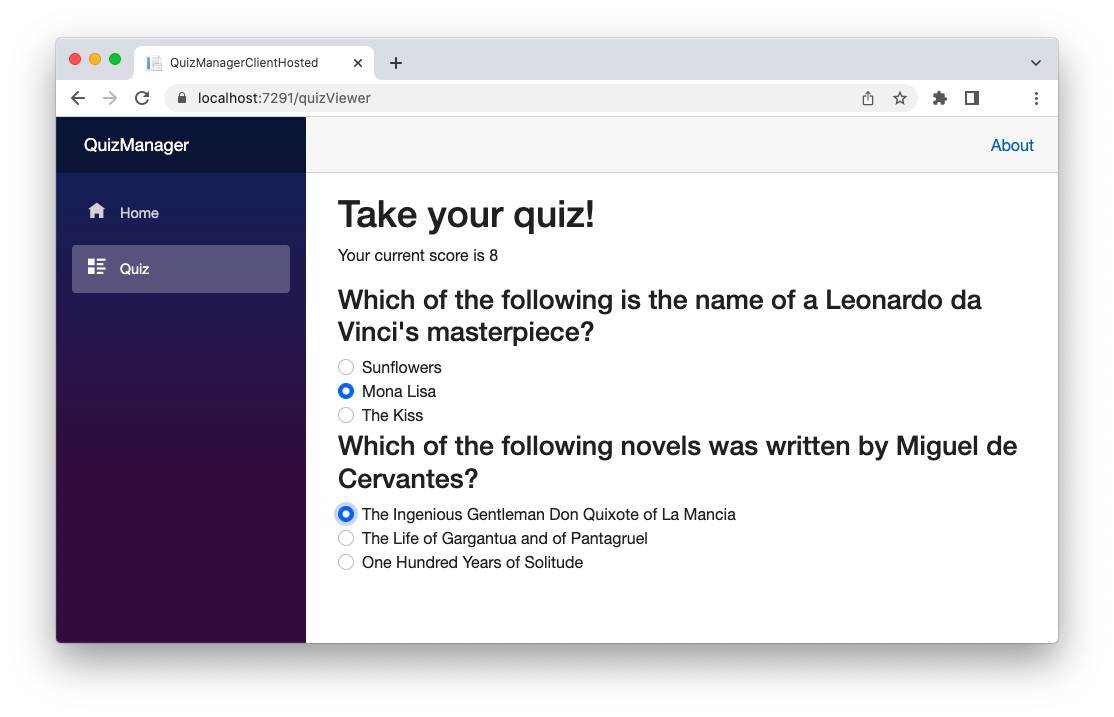
Clicking the Quiz item on the navigation bar, you should be able to take a simple quiz as shown in the following screenshot:
Even if the look and feel of this application is basically the same as the Blazor Server implementation, the application architecture is quite different. In this case, you have the client side compiled into WebAssembly and running in your browser, while the server side is running in the built-in Web server. In addition, with this architecture, the client and the server interact with classic HTTP requests. You can check this by analyzing the network traffic with the developer tools of your browser.
Registering the Blazor WASM App with Auth0
Now that you have the WebAssembly version of the Quiz Manager application, learn how to secure it. You will use Auth0 since it provides an easy way to integrate authentication and authorization without having to deal with the complexity of the underlying technology. To use Auth0, you need to provide some information and configure your application to make the two parties communicate with each other. If you don't have an Auth0 account yet, you can sign up for a free one right now.
Try out the most powerful authentication platform for free.
Get started →After accessing the Auth0 Dashboard, move to the Applications section, and follow these steps:
- Click the Create Application button.
- Provide a friendly name for your application (for example, Quiz Blazor WASM Client) and select Single Page Web Applications as the application type.
- Finally, click the Create button.
After you register the application, move to the Settings tab and take note of your Auth0 Domain and your Client ID. Then, assign the value https://localhost:<YOUR_PORT_NUMBER>/authentication/login-callback to the Allowed Callback URLs field and the value https://localhost:<YOUR_PORT_NUMBER> to the Allowed Logout URLs field. Replace the <YOUR_PORT_NUMBER> placeholder with the actual port number assigned to your application. In my case, those values are https://localhost:7291/authentication/login-callback and https://localhost:7291.
The first value tells Auth0 which URL to call back after users authenticate. The second value tells Auth0 which URL users should be redirected to after they log out.
Finally, click the Save Changes button to apply them.
Adding Support for Authentication
Now, you need to configure your Blazor project by applying some changes to make it aware of Auth0.
Configure your Blazor app
So, move to the Client/wwwroot folder and create an appsettings.json file with the following content:
{
  "Auth0": {
    "Authority": "https://<YOUR_AUTH0_DOMAIN>",
    "ClientId": "<YOUR_CLIENT_ID>"
  }
}
Replace the placeholders <YOUR_AUTH0_DOMAIN> and <YOUR_CLIENT_ID> with the respective values taken from the Auth0 dashboard.
Add support for authentication
Now, add the authentication package to the Blazor client project by running the following command in the Client folder:
dotnet add package Microsoft.AspNetCore.Components.WebAssembly.Authentication
After adding the package, still in the Client folder, edit the Program.cs file by changing its content as follows:
// Client/Program.cs

using Microsoft.AspNetCore.Components.Web;
using Microsoft.AspNetCore.Components.WebAssembly.Hosting;
using QuizManagerClientHosted.Client;

var builder = WebAssemblyHostBuilder.CreateDefault(args);
builder.RootComponents.Add<App>("#app");
builder.RootComponents.Add<HeadOutlet>("head::after");

builder.Services.AddScoped(sp => new HttpClient { BaseAddress = new Uri(builder.HostEnvironment.BaseAddress) });

// 👇 new code
builder.Services.AddOidcAuthentication(options =>
{
  builder.Configuration.Bind("Auth0", options.ProviderOptions);
  options.ProviderOptions.ResponseType = "code";
});
// 👆 new code

await builder.Build().RunAsync();
You added the call to AddOidcAuthentication() with specific options. In particular, you specified using the parameters from the Auth0 section of the appsettings.json configuration file. Also, you specified the type of authentication and authorization flow you want to use; in this specific case, the Authorization Code flow is recommended.
To complete the implementation of authentication support in your application, open the index.html file under the Client/wwwroot folder and add the reference to the AuthenticationService.js script as shown below:
<!-- Client/wwwroot/index.html -->
<!DOCTYPE html>
<html>
  <!-- existing markup -->
  <body>
    <!-- existing markup -->
    <script src="_framework/blazor.webassembly.js"></script>
    <!--👇 new addition -->
    <script src="_content/Microsoft.AspNetCore.Components.WebAssembly.Authentication/AuthenticationService.js"></script>
    <!--👆 new addition -->
  </body>
</html>
This script is responsible for performing the authentication operations on the WebAssembly client side.
Adjust the UI of your Blazor app
At this point, you prepared the infrastructure for your Blazor app to support authentication. Now you need to make some changes to the UI.
The first step is to enable support for the authorization Razor components. So, open the _Imports.razor file in the Client folder and add a reference to the Microsoft.AspNetCore.Components.Authorization and Microsoft.AspNetCore.Authorization namespaces. The content of that file will look as follows:
@* Client/_Imports.razor *@

@using System.Net.Http
@using System.Net.Http.Json
@using Microsoft.AspNetCore.Components.Authorization  //👈 new addition
@using Microsoft.AspNetCore.Authorization             //👈 new addition
@using Microsoft.AspNetCore.Components.Forms
@using Microsoft.AspNetCore.Components.Routing
@using Microsoft.AspNetCore.Components.Web
@using Microsoft.AspNetCore.Components.Web.Virtualization
@using Microsoft.AspNetCore.Components.WebAssembly.Http
@using Microsoft.JSInterop
@using QuizManagerClientHosted.Client
@using QuizManagerClientHosted.Client.Shared
Then, open the App.razor file in the same folder and replace its content with the following:
<!-- Client/App.razor -->

<CascadingAuthenticationState>
    <Router AppAssembly="@typeof(App).Assembly">
        <Found Context="routeData">
            <AuthorizeRouteView RouteData="@routeData" DefaultLayout="@typeof(MainLayout)">
                <Authorizing>
                    <p>Determining session state, please wait...</p>
                </Authorizing>
                <NotAuthorized>
                    <h1>Sorry</h1>
                    <p>You're not authorized to reach this page. You need to log in.</p>
                </NotAuthorized>
            </AuthorizeRouteView>
            <FocusOnNavigate RouteData="@routeData" Selector="h1" />
        </Found>
        <NotFound>
            <PageTitle>Not found</PageTitle>
            <LayoutView Layout="@typeof(MainLayout)">
                <p role="alert">Sorry, there's nothing at this address.</p>
            </LayoutView>
        </NotFound>
    </Router>
</CascadingAuthenticationState>
You used the AuthorizeRouteView Blazor component to customize the content according to the user's authentication status. The CascadingAuthenticationState component will propagate the current authentication state to the inner components so that they can work on it consistently.
The next step is to create a new Razor component that allows the user to log in and see their name when authenticated. So, create a new file named AccessControl.razor in the Client/Shared folder with the following content:
@* Client/Shared/AccessControl.razor *@

@using Microsoft.AspNetCore.Components.Authorization
@using Microsoft.AspNetCore.Components.WebAssembly.Authentication

@inject NavigationManager Navigation
@inject SignOutSessionStateManager SignOutManager

<AuthorizeView>
    <Authorized>
        Hello, @context.User.Identity.Name!
        <a href="#" @onclick="BeginSignOut">Log out</a>
    </Authorized>
    <NotAuthorized>
        <a href="authentication/login">Log in</a>
    </NotAuthorized>
</AuthorizeView>

@code{
    private async Task BeginSignOut(MouseEventArgs args)
    {
        await SignOutManager.SetSignOutState();
        Navigation.NavigateTo("authentication/logout");
    }
}
The component uses the AuthorizeView component to show different content according to the user's authentication status. Basically, it shows the Log in link when the user is not authenticated. It shows the name of the user and the Log out link when the user is authenticated.
Note the URL the user is redirected to when they click the Log out link (authentication/logout). You will learn about that URL in a moment.
Now, open the MainLayout.razor file in the Shared folder and add the AccessControl component just before the About link. The final code should look like the following:
@* Client/Shared/MainLayout.razor *@

@inherits LayoutComponentBase

<div class="page">
    <div class="sidebar">
        <NavMenu />
    </div>

    <main>
        <div class="top-row px-4">
            <AccessControl />    //👈 new code
            <a href="https://docs.microsoft.com/aspnet/" target="_blank">About</a>
        </div>

        <article class="content px-4">
            @Body
        </article>
    </main>
</div>
When you registered your Blazor app with Auth0, you specified a couple of URLs as the allowed URLs for login callback and logout. To manage these URLs, you need to implement a page responsible for handling different authentication stages. For this purpose, create a new Authentication.razor file in the Client/Pages folder with the following code:
@* Client/Pages/Authentication.razor *@

@page "/authentication/{action}"
@using Microsoft.AspNetCore.Components.WebAssembly.Authentication
@using Microsoft.Extensions.Configuration

@inject NavigationManager Navigation
@inject IConfiguration Configuration

<RemoteAuthenticatorView Action="@Action">
    <LogOut>
        @{
            var authority = (string)Configuration["Auth0:Authority"];
            var clientId = (string)Configuration["Auth0:ClientId"];

             Navigation.NavigateTo($"{authority}/v2/logout?client_id={clientId}");
        }
    </LogOut>
</RemoteAuthenticatorView>

@code{
    [Parameter] public string Action { get; set; }
}
As you can see, this component implements a page containing the RemoteAuthenticatorView component. This component manages the users' authentication status and interacts with the authorization server on the Auth0 side. While the login interaction doesn't require any specific code, you need to manage the logout transaction. In fact, by design Blazor clears your authentication state on the client side but doesn't disconnect you from Auth0. To close your session on the Auth0 side, you need to explicitly call the logout endpoint, as shown in the code above.
Disclaimer: At the time of writing, the logout function seems not to be stable due to an apparently Blazor problem. Check out this issue on the Blazor project's repository to learn more.
Finally, you need to add the Authorize attribute to the QuizViewer.razor page to protect it from unauthorized access. Open the QuizViewer.razor file in the Pages folder and add the attribute as shown below:
@* Client/Pages/QuizViewer.razor *@

@page "/quizViewer"
@attribute [Authorize]            //👈 new addition

@using QuizManagerClientHosted.Shared

// ... exisiting code ...
Note that the presence of the
Authorizeattribute on the page doesn't prevent the client from calling the API on the server. You need to protect the API on the server side as well.
At this point, you can stop your Blazor app, if it is still running, and restart it to test the authentication integration. Once the app is running, by clicking the Quiz menu item, you should see the following screen:
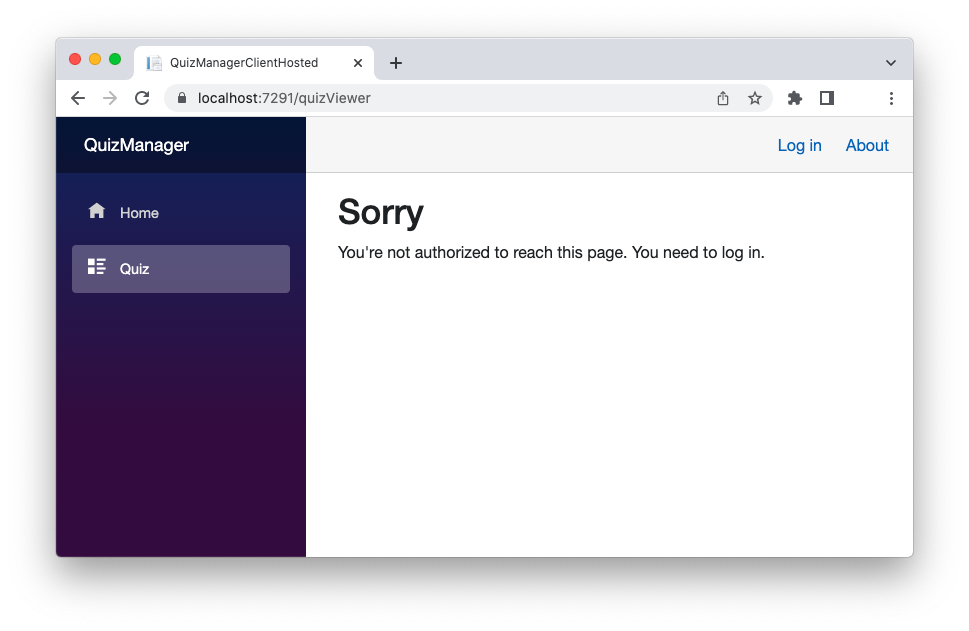
Note the Log In in the upper right corner. By clicking on it, the Auth0 Universal Login page is shown, and the authentication process takes place. After authentication, you will be able to access the QuizViewer page.
Leverage Auth0's authentication and authorization services in your .NET applications.
DOWNLOAD THE FREE EBOOK
Securing the API with Auth0
The data shown on the QuizViewer page are loaded from the /quiz API implemented in the server project. This API is not protected, so any client could access it. In fact, the Blazor WASM client is able to access it without any problem. However, in a production-ready scenario, you need to protect the API to prevent unauthorized access. Although the API security implementation is out of the scope of this tutorial, you need to perform a few changes to the API in the server project to secure it.
If you want to learn more about protecting Web APIs in .NET, please check out this article.
Register the API
Like what you did with the Blazor WASM application, you need to register the API with Auth0. So, head your browser to the Auth0 Dashboard, move to the API section, and follow these steps:
- Click the Create API button.
- Provide a friendly name for your API (for example, Quiz API) and a unique identifier (also known as audience) in the URL format (for example,
https://quizapi.com). - Leave the signing algorithm to RS256 and click the Create button.
This way, Auth0 is aware of your Web API and will allow you to control access.
Protecting the API
In the server project under the Server folder, open the appsettings.json and modify its content as follows:
{
  "Logging": {
    "LogLevel": {
      "Default": "Information",
      "Microsoft.AspNetCore": "Warning"
    }
  },
  "AllowedHosts": "*",
  "Auth0": {
    "Domain": "<YOUR_AUTH0_DOMAIN>",
    "Audience": "<YOUR_API_IDENTIFIER>"
  }
}
Replace the <YOUR_AUTH0_DOMAIN> placeholder with the Auth0 domain value you used for the Blazor WASM client. Also, replace the <YOUR_API_IDENTIFIER> placeholder with the unique identifier you defined for your API in the Auth0 Dashboard: it should be https://quizapi.com, if you kept the suggested value.
Still in the Server folder, run the following command to install the library that will handle the authorization process:
dotnet add package Microsoft.AspNetCore.Authentication.JwtBearer
Then, open the Program.cs file and apply the changes shown below:
// Server/Startup.cs

// ... exisiting code ...
using Microsoft.AspNetCore.Authentication.JwtBearer;
//👆 new code

var builder = WebApplication.CreateBuilder(args);

// Add services to the container.
//👇 new code
builder.Services.AddAuthentication(JwtBearerDefaults.AuthenticationScheme)
    .AddJwtBearer(JwtBearerDefaults.AuthenticationScheme, c =>
    {
        c.Authority = $"https://{builder.Configuration["Auth0:Domain"]}";
        c.TokenValidationParameters = new Microsoft.IdentityModel.Tokens.TokenValidationParameters
        {
            ValidAudience = builder.Configuration["Auth0:Audience"],
            ValidIssuer = $"https://{builder.Configuration["Auth0:Domain"]}"
        };
    });
//👆 new code

builder.Services.AddControllersWithViews();
builder.Services.AddRazorPages();

var app = builder.Build();

// ... exisiting code ...

app.UseRouting();

//👇 new code
app.UseAuthentication();
app.UseAuthorization();
//👆 new code

app.MapRazorPages();

// ... exisiting code ...
You added the reference to the Microsoft.AspNetCore.Authentication.JwtBearer namespace and added the statements that configure the server to handle the authorization process through Auth0. Finally, you configured the middleware to process authentication and authorization.
Now, open the QuizController.cs file in the Server/Controllers folder and apply the following changes:
// Server/Controllers/QuizController.cs

using QuizManagerClientHosted.Shared;
using Microsoft.AspNetCore.Mvc;
using Microsoft.AspNetCore.Authorization;  //👈 new addition

namespace QuizManagerClientHosted.Server.Controllers;

[ApiController]
[Route("[controller]")]
[Authorize]            //👈 new addition
public class QuizController : ControllerBase
{
  // ... existing code ...
}
You added the reference to the Microsoft.AspNetCore.Authorization namespace and decorated the QuizController class with the Authorize attribute.
Remember: if you want to learn in depth how to protect your API with Auth0, read this article.
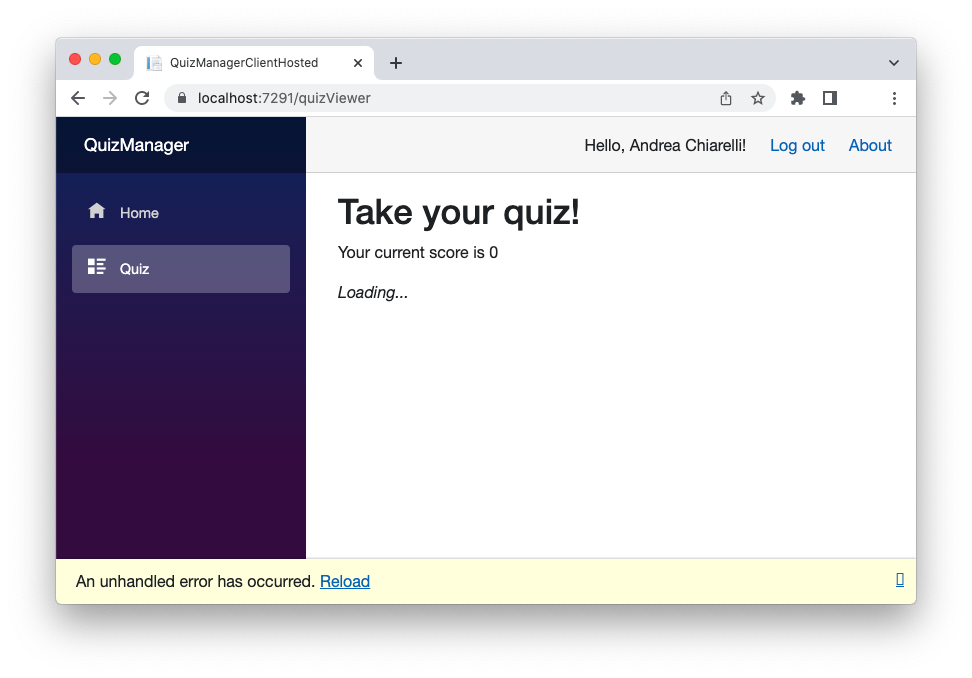
Now your API is protected. To check if everything is working as expected, move to the root of the project and restart it. Then, log in to the application and click the Quiz menu item. This time you shouldn't be able to display the quiz data. Your screen should be like the following:
If you take a look at the network section of your browser's developer tool, you will find that the call to the /quiz endpoint gets an HTTP 401 status code, as in the following example:
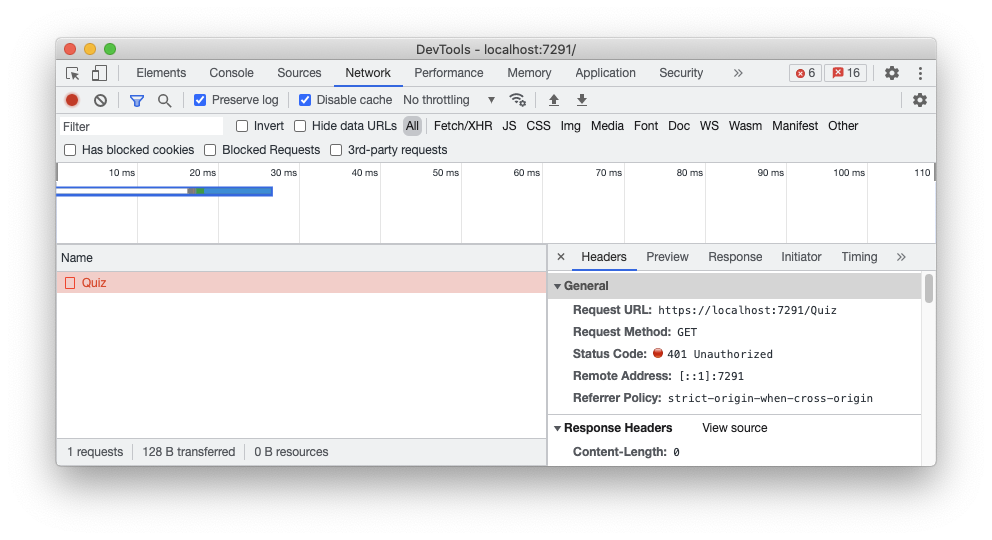
This confirms that the server prevents unauthorized access to the API.
“Learn how to call a protected API with Blazor WebAssembly.”
Tweet This
A new Auth0-powered .NET app in less than a minute? Try out our templates
Install the NuGet package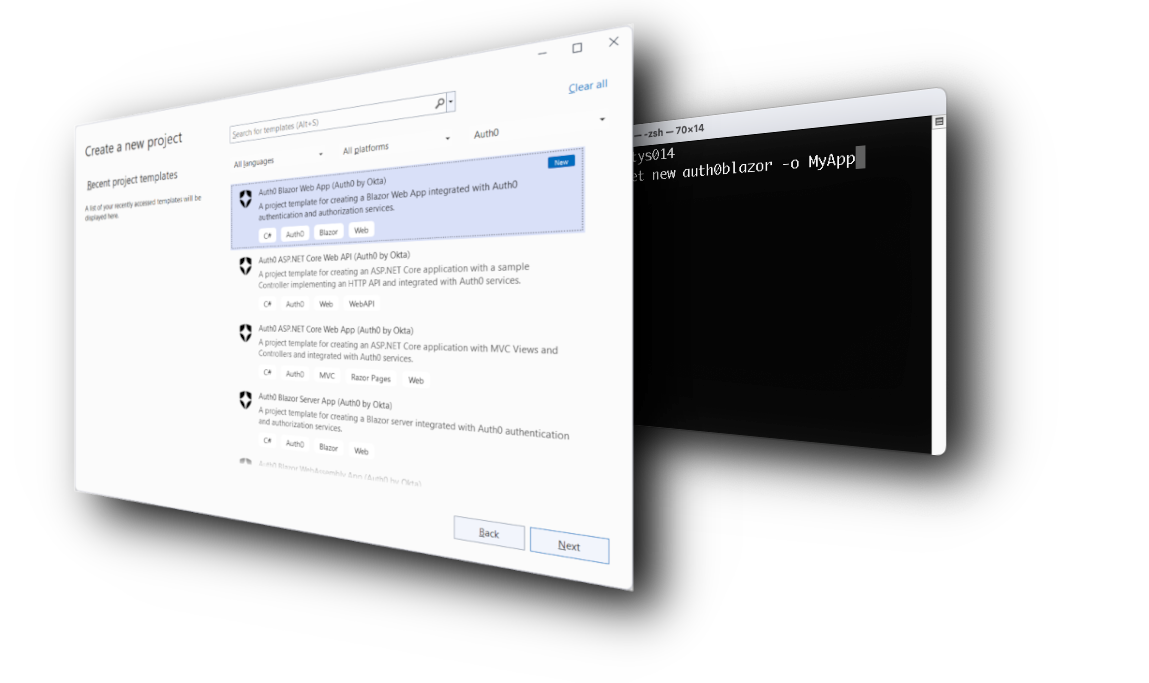
Calling the Protected API
To enable your Blazor WASM application to access the protected API, you need to get an access token from Auth0 and provide it along with your API call. You might think to write some code that attaches this token when you make an HTTP request to the server. However, you can centralize the access token attachment to your API calls in a straightforward way.
Creating the HTTP client
Start by moving to the Client folder and installing the Microsoft.Extensions.Http package with the following command:
dotnet add package Microsoft.Extensions.Http
This package allows you to create named HTTP clients and customize their behavior. In your case, you will create an HTTP client that automatically attaches an access token to each HTTP request.
Open the Program.cs file in the Client folder and add a reference to the Microsoft.AspNetCore.Components.WebAssembly.Authentication as shown below:
// Client/Program.cs

using Microsoft.AspNetCore.Components.Web;
using Microsoft.AspNetCore.Components.WebAssembly.Hosting;
using QuizManagerClientHosted.Client;
//👇 new addition
using Microsoft.AspNetCore.Components.WebAssembly.Authentication;

// ... existing code ...
In the same file, apply the changes pointed out in the following code snippet:
// Client/Program.cs

// ... existing code ...

builder.RootComponents.Add<HeadOutlet>("head::after");

//👇 old code
//builder.Services.AddScoped(sp => new HttpClient { BaseAddress = new Uri(builder.HostEnvironment.BaseAddress) });

//👇 new code
builder.Services.AddHttpClient("ServerAPI",
      client => client.BaseAddress = new Uri(builder.HostEnvironment.BaseAddress))
    .AddHttpMessageHandler<BaseAddressAuthorizationMessageHandler>();

builder.Services.AddScoped(sp => sp.GetRequiredService<IHttpClientFactory>()
  .CreateClient("ServerAPI"));
//👆 new code

// ... existing code ...
You replaced the existing line of code that created an HTTP client with two lines of code. The AddHttpClient() method defines a named HttpClient instance (ServerAPI) with the current server's address as the base address to use when requesting a resource. Also, the BaseAddressAuthorizationMessageHandler class is added to the HttpClient instance as the HTTP message handler. This class is provided by the Microsoft.AspNetCore.Components.WebAssembly.Authentication namespace and is responsible for attaching the access token to any HTTP request to the application's base URI.
The actual HttpClient instance is created by the CreateClient() method of the IHttpClientFactory service implementation.
Specifying the API audience
Now, open the appsettings.json file in the Client/wwwroot folder and add the Audience element as shown below:
{
  "Auth0": {
    "Authority": "https://<YOUR_AUTH0_DOMAIN>",
    "ClientId": "<YOUR_CLIENT_ID>",
    "Audience": "<YOUR_API_IDENTIFIER>"
  }
}
Replace the <YOUR_API_IDENTIFIER> placeholder with the unique identifier you defined for your API in the Auth0 Dashboard (e.g., https://quizapi.com).
Now, back in the Client/Program.cs file, apply the change highlighted below:
// Client/Program.cs

// ... existing code ...

builder.Services.AddOidcAuthentication(options =>
{
  builder.Configuration.Bind("Auth0", options.ProviderOptions);
  options.ProviderOptions.ResponseType = "code";
  //👇 new code
  options.ProviderOptions.AdditionalProviderParameters.Add("audience", builder.Configuration["Auth0:Audience"]);
});

await builder.Build().RunAsync();
You added an additional audience parameter to let Auth0 know you want to call the API identified by the Audience setting value.
Making the call
After this global configuration, you can call the quiz endpoint of your Web API. So, open the QuizViewer.razor file in the Client\Pages folder and change its content as follows:
@* Client/Pages/QuizViewer.razor *@

@page "/quizViewer"
@attribute [Authorize]

@using QuizManagerClientHosted.Shared
//👇 new code
@using Microsoft.AspNetCore.Components.WebAssembly.Authentication
//👆 new code
@inject HttpClient Http


// ... existing code ...

@code {

    // ... existing code ...

    protected override async Task OnInitializedAsync()
    {
        //👇 changed code
        try
        {
            quiz = await Http.GetFromJsonAsync<List<QuizItem>>("quiz");
        }
        catch (AccessTokenNotAvailableException exception)
        {
            exception.Redirect();
        }
        //👆 changed code
    }

  // ... existing code ...
}
You imported the Microsoft.AspNetCore.Components.WebAssembly.Authentication namespace. Then, you simply arranged the OnInitializedAsync() method by wrapping it with a try-catch statement.
After applying these changes, restart your application, log in, and try to move to the Quiz page. This time you should be able to access your protected API and show the Quiz page.
Recap
This tutorial guided you in creating and securing a Blazor WebAssembly application by using Auth0. You learned how to build a simple Blazor WebAssembly application and some Razor components. You went through the process of registering your application with Auth0 and enabling it to support authentication. Finally, you protected the API hosted by the server side of your application and called that API passing the access token.
The full source code of the application secured in this tutorial can be downloaded from this GitHub repository.
About the author

Andrea Chiarelli
Principal Developer Advocate
I have over 20 years of experience as a software engineer and technical author. Throughout my career, I've used several programming languages and technologies for the projects I was involved in, ranging from C# to JavaScript, ASP.NET to Node.js, Angular to React, SOAP to REST APIs, etc.
In the last few years, I've been focusing on simplifying the developer experience with Identity and related topics, especially in the .NET ecosystem.