
Angular is one of my favorite frameworks for building single-page applications (SPAs). As a Java developer, its separation of components, services, and pipes made a lot of sense to me. It's a web framework that allows you to declaratively describe your UI by creating small, reusable components. I believe it was a huge influencer in TypeScript's popularity. It's also backed by Google, which means it will likely be around for a long time.
I like to build CRUD (create, read, update, and delete) apps to understand frameworks. I think they show a lot of the base functionality you need when creating an app. Once you complete the basics of CRUD, most of the integration work is finished, and you can move on to implementing the necessary business logic.
In this tutorial, you'll learn how to build a secure CRUD app with Spring Boot and Angular. The final will result will use OAuth 2.0 authorization code flow and package the Angular app in the Spring Boot app for distribution as a single artifact. At the same time, I'll show you how to keep Angular's productive workflow when developing locally.
You'll need to install several tools to follow along with this tutorial.
Prerequisites:
You can also watch a demo of the completed example in the screencast below:
Configure and Run a Spring Boot and Angular App
I'm a frequent speaker at conferences and Java User Groups (JUGs) around the world. I've been a Java developer for 20+ years and ❤️ the Java community. I've found that speaking at JUGs is a great way to interact with the community and get raw feedback on presentations.
The @boulderjug meetup was full of enthusiastic developers tonight! Thanks to everyone who joined in the fun and asked good questions.
You can find my “What the Heck is OAuth?“ presentation on @speakerdeck: https://t.co/7SHGLNmSjJ#oauth2#oidc#identitypic.twitter.com/WHx02lm0kH
— Matt Raible (@mraible) February 8, 2023
Why am I telling you this? Because I thought it'd be fun to create a "JUG Tours" app that allows you to create/edit/delete JUGs and view upcoming events.
I realize that taking 20 minutes to build this app can be cumbersome, so I've already built it in @oktadev/auth0-spring-boot-angular-crud-example. The project uses Spring Boot 3.2.0 and Angular 17. I hope this helps you clone, configure, and run! Seeing something running is such a joyful experience. 🤗
git clone https://github.com/oktadev/auth0-spring-boot-angular-crud-example jugtours
cd jugtours
Open a terminal window and run auth0 login to configure the Auth0 CLI to get an API key for your tenant. Then, run auth0 apps create to register this app with the appropriate URLs:
auth0 apps create \
  --name "Bootiful Angular" \
  --description "Spring Boot + Angular = ❤️" \
  --type regular \
  --callbacks http://localhost:8080/login/oauth2/code/okta,http://localhost:4200/login/oauth2/code/okta \
  --logout-urls http://localhost:8080,http://localhost:4200 \
  --reveal-secrets
Copy the outputted values from this command into a new .okta.env file:
export OKTA_OAUTH2_ISSUER=https://<your-auth0-domain>/
export OKTA_OAUTH2_CLIENT_ID=<your-client-id>
export OKTA_OAUTH2_CLIENT_SECRET=<your-client-secret>
If you're on Windows, use set instead of export to set these environment variables, and name the file .okta.env.bat:
set OKTA_OAUTH2_ISSUER=https://<your-auth0-domain>/
set OKTA_OAUTH2_CLIENT_ID=<your-client-id>
set OKTA_OAUTH2_CLIENT_SECRET=<your-client-secret>
Then, run source .okta.env (or .okta.env.bat on Windows) to set these environment variables in your current shell.
Finally, run ./mvnw (or mvnw on Windows) to start the app.
source .okta.env # run .okta.env.bat on Windows
./mvnw -Pprod # use mvnw -Pprod on Windows
To view the app, you can then open http://localhost:8080 in your favorite browser.
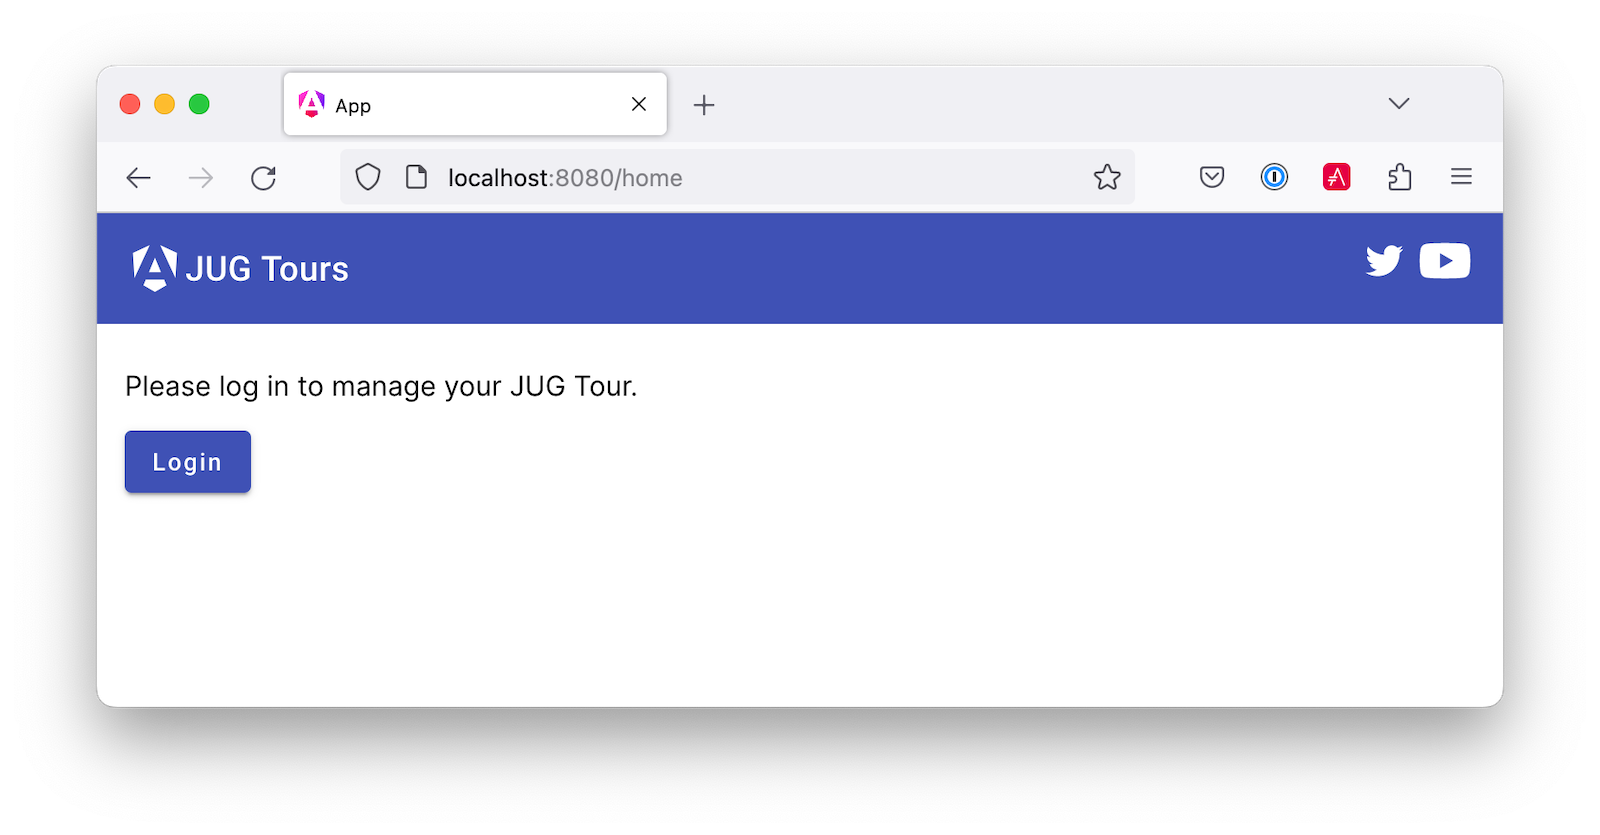
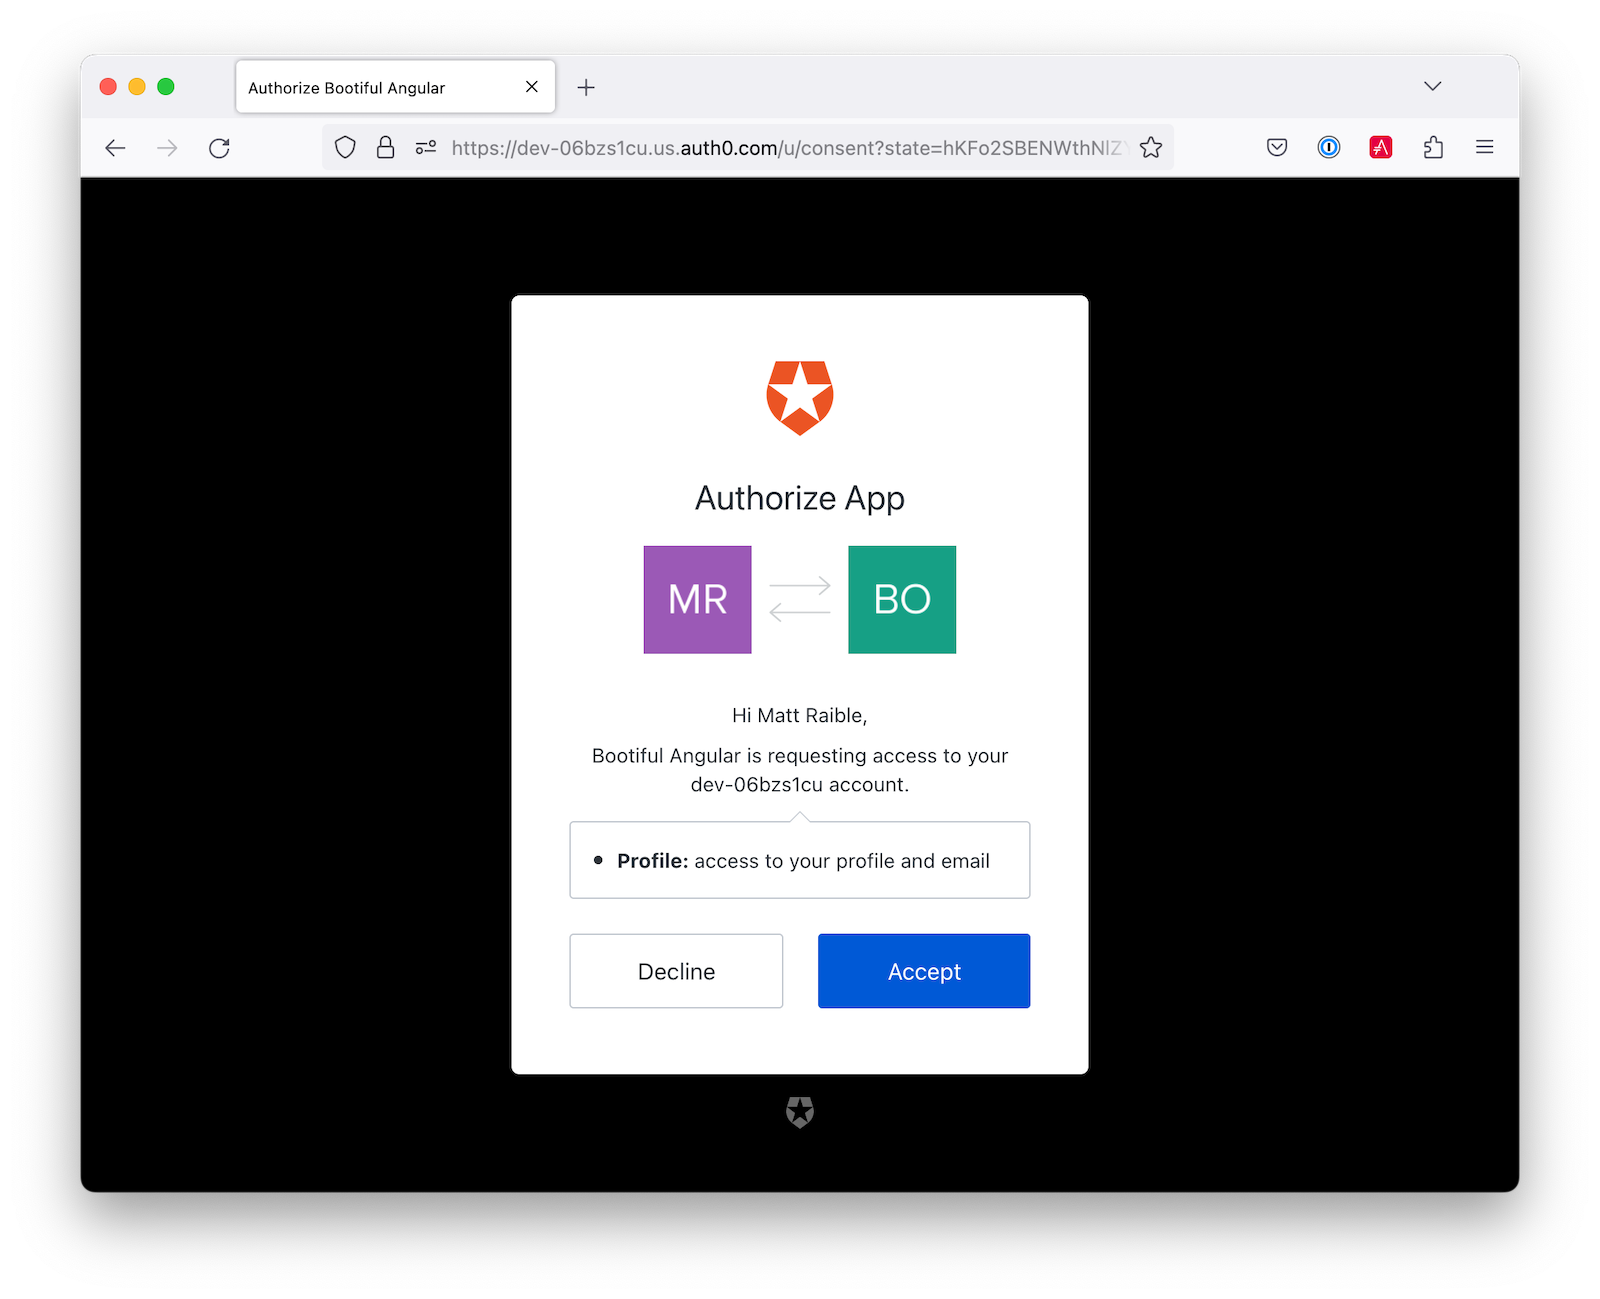
Click Login, and you'll be prompted to log in with Auth0. You'll also be asked for consent. This is because the app is requesting access to your profile and email address. Click Accept to continue.
Once you're authenticated, you'll see a link to manage your JUG Tours.
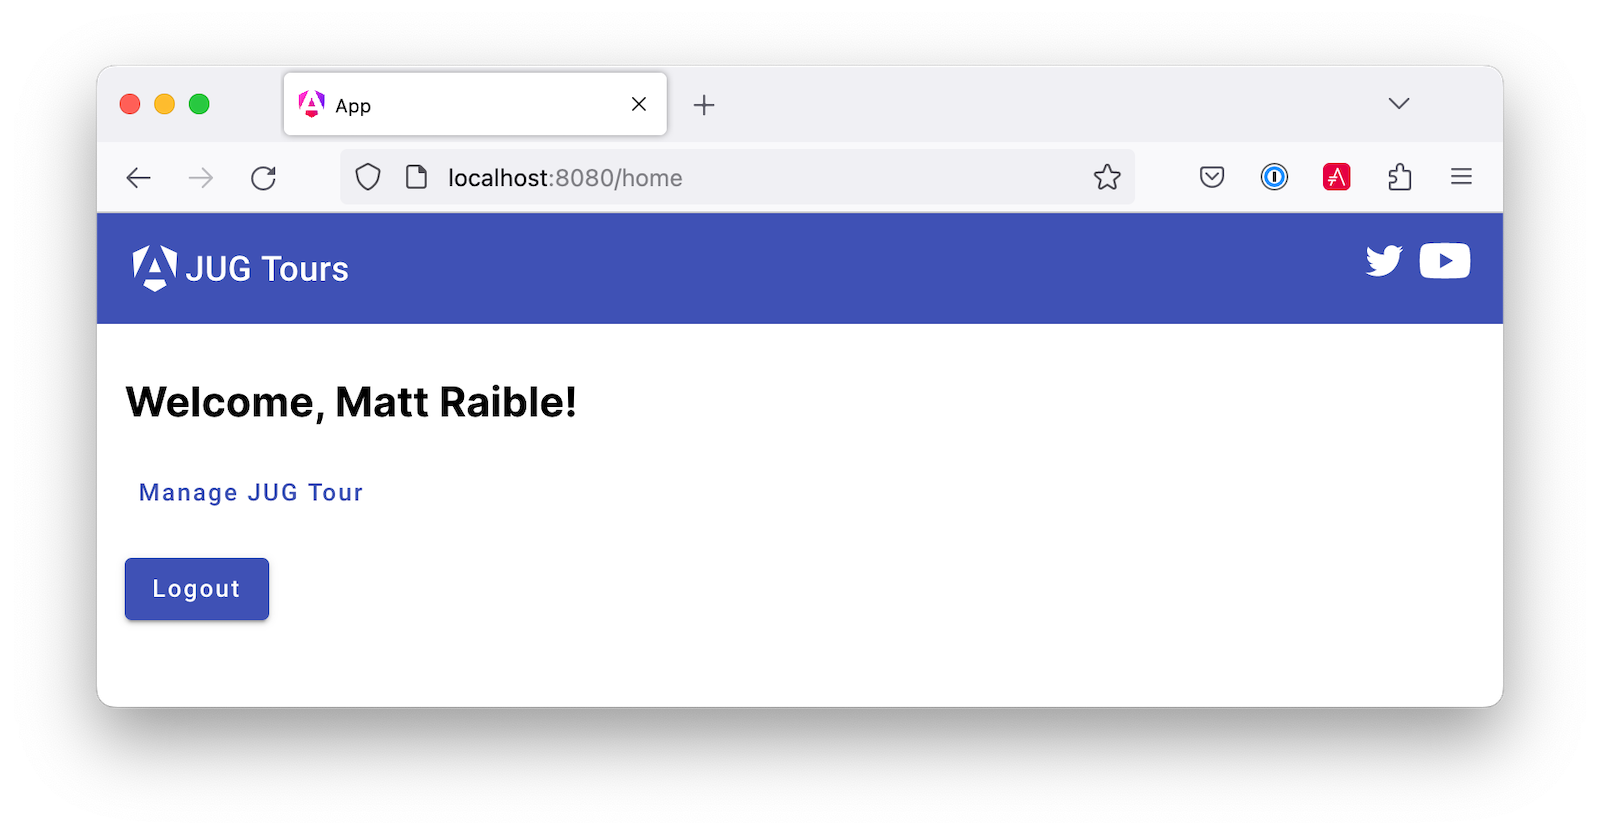
You should be able to add new groups and events, as well as edit and delete them.
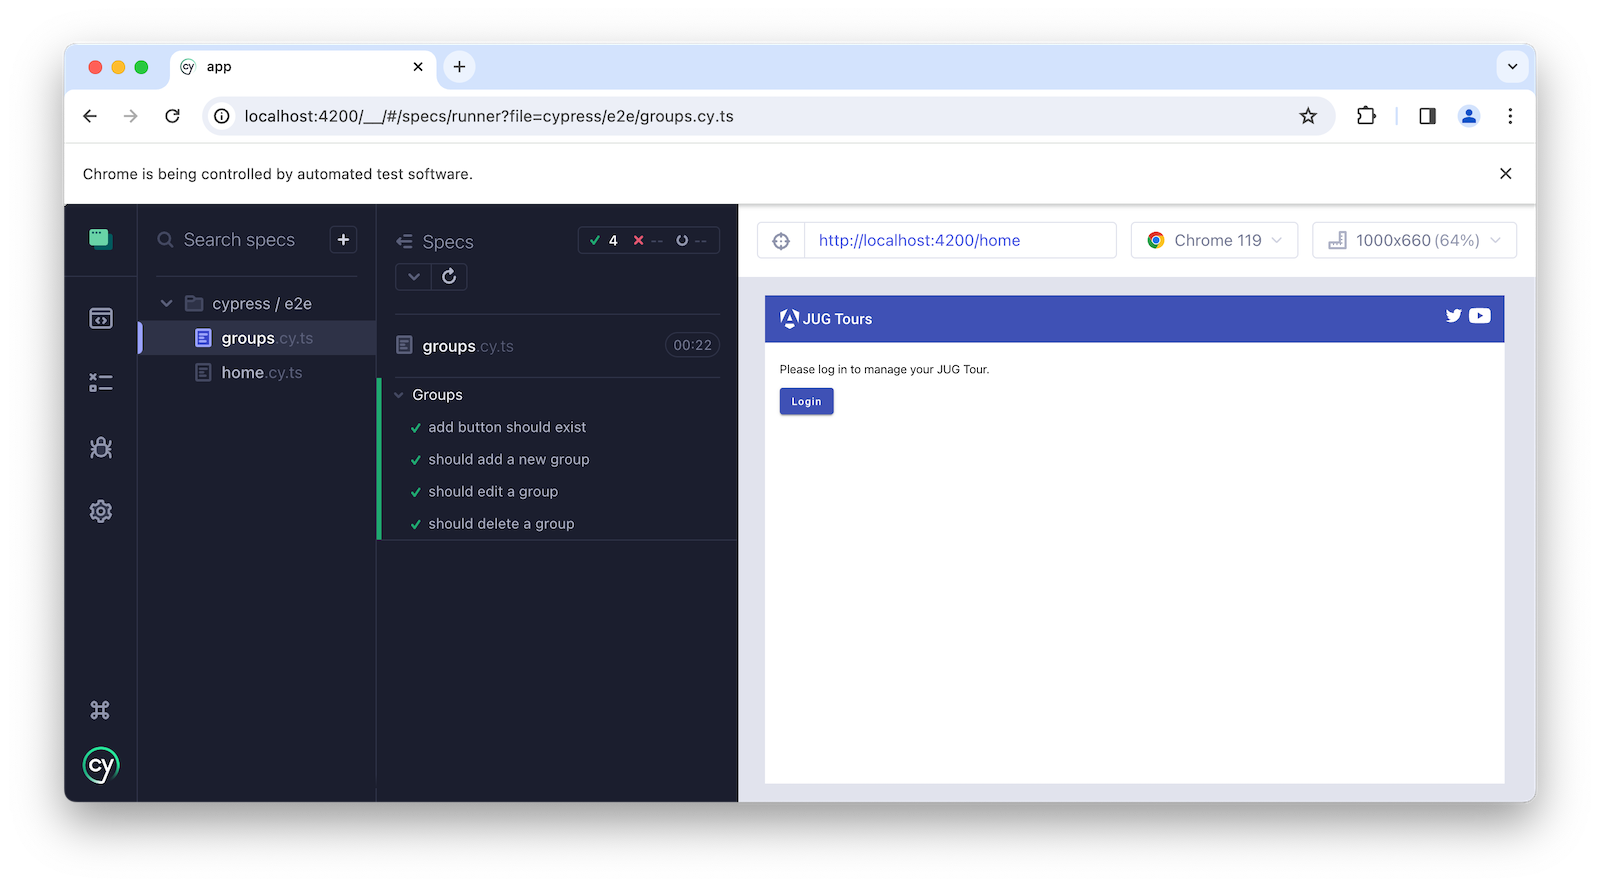
Verify Cypress end-to-end tests pass
You can verify everything works by executing the Cypress tests that are included in the project. First, add environment variables for your credentials to the .okta.env (or .okta.env.bat) file you created earlier.
export CYPRESS_E2E_DOMAIN=<your-auth0-domain> # use the raw value, no https prefix
export CYPRESS_E2E_USERNAME=<your-email>
export CYPRESS_E2E_PASSWORD=<your-password>
Then, run source .okta.env (or .okta.env.bat on Windows) to set these environment variables.
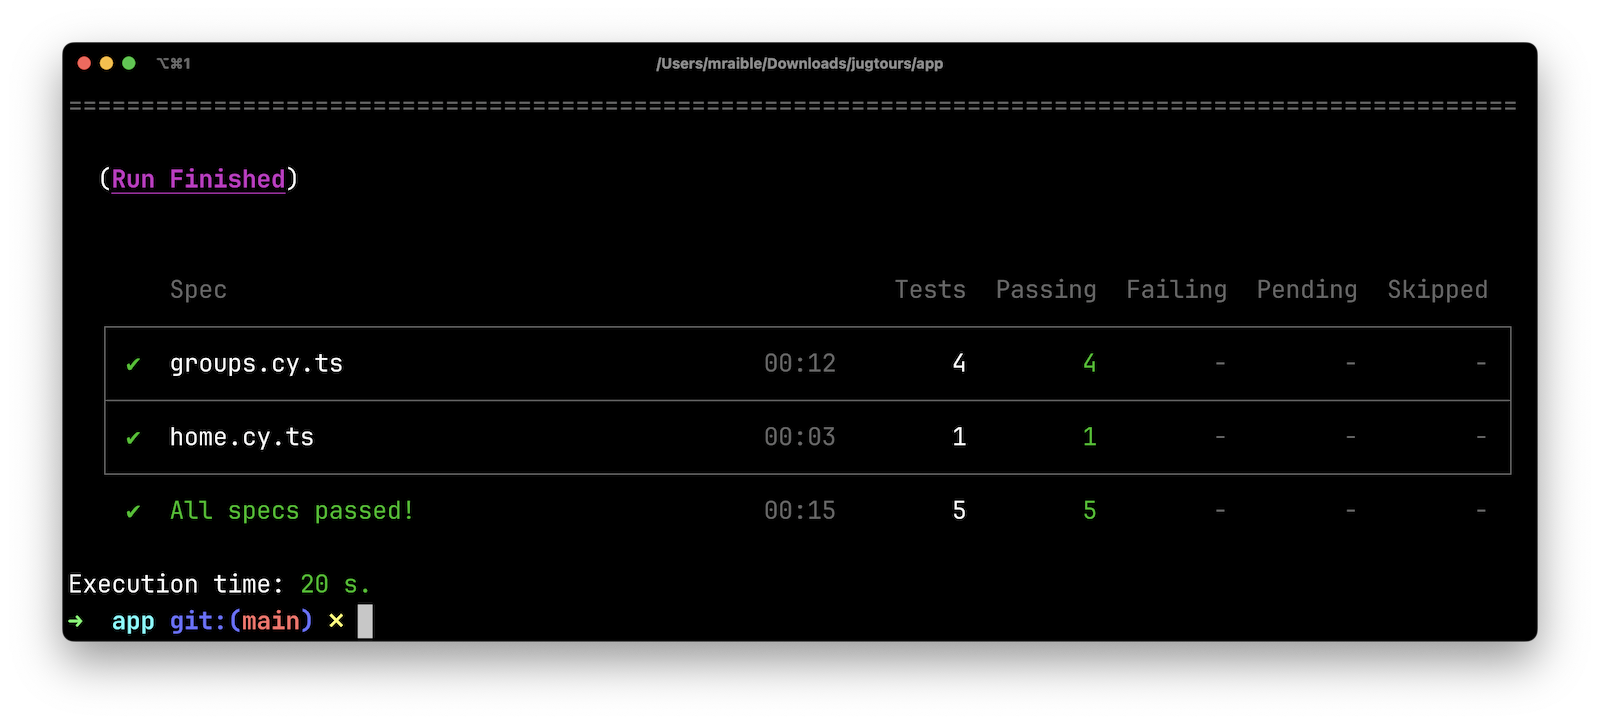
Finally, run npm run e2e to start the app and run the Cypress tests.
cd app
npm run e2e
Pretty slick, don't you think? 🤠
Read on if you'd like to see how I created this app!
Create a Java REST API with Spring Boot
The easiest way to create a new Spring Boot app is to navigate to start.spring.io and make the following selections:
- Project:
Maven Project - Group:
com.okta.developer - Artifact:
jugtours - Dependencies:
JPA,H2,Web,Validation
Click Generate Project, expand jugtours.zip after downloading, and open the project in your favorite IDE.
You can also use this link or HTTPie to create the project from the command line:
https start.spring.io/starter.tgz type==maven-project bootVersion==3.2.0 \
  dependencies==data-jpa,h2,web,validation \
  language==java platformVersion==17 \
  name==jugtours artifactId==jugtours \
  groupId==com.okta.developer packageName==com.okta.developer.jugtours \
  baseDir==jugtours | tar -xzvf -
Add a JPA domain model
Open the jugtours project in your favorite IDE. Create a src/main/java/com/okta/developer/jugtours/model directory and a Group.java class in it.
package com.okta.developer.jugtours.model;

import jakarta.persistence.*;
import jakarta.validation.constraints.NotNull;

import java.util.Set;

@Entity
@Table(name = "user_group")
public class Group {

    @Id
    @GeneratedValue
    private Long id;
    @NotNull
    private String name;
    private String address;
    private String city;
    private String stateOrProvince;
    private String country;
    private String postalCode;
    @ManyToOne(cascade = CascadeType.PERSIST)
    private User user;
    @OneToMany(fetch = FetchType.EAGER, cascade = CascadeType.ALL)
    private Set<Event> events;

    // JPA requires a default constructor
    public Group() {}

    public Group(String name) {
        this.name = name;
    }

    // getters and setters, equals, hashcode, and toString omitted for brevity
    // Why not Lombok? See https://twitter.com/mariofusco/status/1650439733212766208
    // Want Lombok anyway? See https://bit.ly/3HkaYMm and revert
}
Create an Event.java class in the same package.
package com.okta.developer.jugtours.model;

import jakarta.persistence.Entity;
import jakarta.persistence.GeneratedValue;
import jakarta.persistence.Id;
import jakarta.persistence.ManyToMany;

import java.time.Instant;
import java.util.Set;

@Entity
public class Event {

    @Id
    @GeneratedValue
    private Long id;
    private Instant date;
    private String title;
    private String description;

    @ManyToMany
    private Set<User> attendees;

    public Event() {}

    public Event(Instant date, String title, String description) {
        this.date = date;
        this.title = title;
        this.description = description;
    }

    // you can generate the getters and setters using your IDE!
}
And a User.java class.
package com.okta.developer.jugtours.model;

import jakarta.persistence.Entity;
import jakarta.persistence.Id;
import jakarta.persistence.Table;

import java.util.Objects;

@Entity
@Table(name = "users")
public class User {

    @Id
    private String id;
    private String name;
    private String email;

    public User() {}

    public User(String id, String name, String email) {
        this.id = id;
        this.name = name;
        this.email = email;
    }

    // getters and setters omitted for brevity
}
Create a GroupRepository.java to manage the group entity.
package com.okta.developer.jugtours.model;

import org.springframework.data.jpa.repository.JpaRepository;

import java.util.List;

public interface GroupRepository extends JpaRepository<Group, Long> {
    Group findByName(String name);
}
To load some default data, create an Initializer.java class in the com.okta.developer.jugtours package.
package com.okta.developer.jugtours;

import com.okta.developer.jugtours.model.Event;
import com.okta.developer.jugtours.model.Group;
import com.okta.developer.jugtours.model.GroupRepository;
import org.springframework.boot.CommandLineRunner;
import org.springframework.stereotype.Component;

import java.time.Instant;
import java.util.Collections;
import java.util.stream.Stream;

@Component
class Initializer implements CommandLineRunner {

    private final GroupRepository repository;

    public Initializer(GroupRepository repository) {
        this.repository = repository;
    }

    @Override
    public void run(String... strings) {
        Stream.of("Utah JUG", "Dallas JUG", "Tampa JUG", "Nashville JUG", "Detroit JUG")
            .forEach(name -> repository.save(new Group(name)));

        Group jug = repository.findByName("Tampa JUG");
        Event e = new Event(Instant.parse("2024-04-24T18:00:00.000Z"),
            "What the Heck is OAuth?",
            "Learn how and where OAuth can benefit your applications.");
        jug.setEvents(Collections.singleton(e));
        repository.save(jug);

        repository.findAll().forEach(System.out::println);
    }
}
Start your app with mvn spring-boot:run, and you should see groups and events being created.
Add a GroupController.java class (in src/main/java/.../jugtours/web) that allows you to CRUD groups.
package com.okta.developer.jugtours.web;

import com.okta.developer.jugtours.model.Group;
import com.okta.developer.jugtours.model.GroupRepository;
import jakarta.validation.Valid;
import org.slf4j.Logger;
import org.slf4j.LoggerFactory;
import org.springframework.http.HttpStatus;
import org.springframework.http.ResponseEntity;
import org.springframework.web.bind.annotation.*;

import java.net.URI;
import java.net.URISyntaxException;
import java.util.Collection;
import java.util.Optional;

@RestController
@RequestMapping("/api")
class GroupController {

    private final Logger log = LoggerFactory.getLogger(GroupController.class);
    private final GroupRepository groupRepository;

    public GroupController(GroupRepository groupRepository) {
        this.groupRepository = groupRepository;
    }

    @GetMapping("/groups")
    Collection<Group> groups() {
        return groupRepository.findAll();
    }

    @GetMapping("/group/{id}")
    ResponseEntity<?> getGroup(@PathVariable Long id) {
        Optional<Group> group = groupRepository.findById(id);
        return group.map(response -> ResponseEntity.ok().body(response)).orElse(new ResponseEntity<>(HttpStatus.NOT_FOUND));
    }

    @PostMapping("/group")
    ResponseEntity<Group> createGroup(@Valid @RequestBody Group group) throws URISyntaxException {
        log.info("Request to create group: {}", group);
        Group result = groupRepository.save(group);
        return ResponseEntity.created(new URI("/api/group/" + result.getId())).body(result);
    }

    @PutMapping("/group/{id}")
    ResponseEntity<Group> updateGroup(@Valid @RequestBody Group group) {
        log.info("Request to update group: {}", group);
        Group result = groupRepository.save(group);
        return ResponseEntity.ok().body(result);
    }

    @DeleteMapping("/group/{id}")
    public ResponseEntity<?> deleteGroup(@PathVariable Long id) {
        log.info("Request to delete group: {}", id);
        groupRepository.deleteById(id);
        return ResponseEntity.ok().build();
    }
}
Restart the app, hit http://localhost:8080/api/groups with HTTPie, and you should see the list of groups.
http :8080/api/groupsYou can create, read, update, and delete groups with the following commands.
http POST :8080/api/group name='Toronto JUG' city='Toronto' country=CA
http :8080/api/group/6
http PUT :8080/api/group/6 id=6 name='Toronto JUG' address='16 York St'
http DELETE :8080/api/group/6
Create an Angular App with the Angular CLI
The Angular CLI was a revolutionary tool when it was released in 2016. It's now the standard way to create new Angular projects and the easiest way to get started with Angular. Many web frameworks have adopted similar tools to improve their developer experience.
You don't have to install Angular CLI globally. The npx command can install and run it for you.
npx @angular/cli@17 new app --routing --style css --ssr false
Of course, you can use the tried-and-true npm i -g @angular/cli and ng new app --routing --style css --ssr false if you prefer. You can even remove the version number if you want to live on the edge.
After the app creation process completes, navigate into the app directory and install Angular Material to make the UI look beautiful, particularly on mobile devices.
cd app
ng add @angular/material
You'll be prompted to choose a theme, set up typography styles, and include animations. Select the defaults.
Modify app/src/app/app.component.html and move the CSS at the top to app.component.css.
Call your Spring Boot API and display the results
Update app.component.ts to fetch the list of groups when it loads.
import { Component, OnInit } from '@angular/core';
import { RouterOutlet } from '@angular/router';
import { HttpClient, HttpClientModule } from '@angular/common/http';
import { Group } from './model/group';

@Component({
  selector: 'app-root',
  standalone: true,
  imports: [RouterOutlet, HttpClientModule],
  templateUrl: './app.component.html',
  styleUrl: './app.component.css'
})
export class AppComponent implements OnInit {
  title = 'JUG Tours';
  loading = true;
  groups: Group[] = [];

  constructor(private http: HttpClient) {
  }

  ngOnInit() {
    this.loading = true;
    this.http.get<Group[]>('api/groups').subscribe((data: Group[]) => {
      this.groups = data;
      this.loading = false;
    });
  }
}
Before this compiles, you'll need to create a app/src/app/model/group.ts file with the following contents:
export class Group {
  id: number | null;
  name: string;

  constructor(group: Partial<Group> = {}) {
    this.id = group?.id || null;
    this.name = group?.name || '';
  }
}
Then, modify the app.component.html file to display the list of groups.
<main class="main">
  <div class="content">
    <div class="left-side">
      <h1>{{title}}</h1>
    </div>
    <div class="divider" role="separator" aria-label="Divider"></div>
    <div class="right-side">
      <div class="pill-group">
        @if (loading) {
        <p>Loading...</p>
        }
        @for (group of groups; track group) {
        <span class="pill">{{group.name}}</span>
        }
      </div>
    </div>
  </div>
</main>
<router-outlet></router-outlet>
Create a file called proxy.conf.js in the src folder of your Angular project and use it to define your proxies:
const PROXY_CONFIG = [
  {
    context: ['/api'],
    target: 'http://localhost:8080',
    secure: true,
    logLevel: 'debug'
  }
]

module.exports = PROXY_CONFIG;
Update angular.json and its serve command to use the proxy.
"serve": {
  "builder": "@angular-devkit/build-angular:dev-server",
  "configurations": {
    "production": {
      "buildTarget": "app:build:production"
    },
    "development": {
      "buildTarget": "app:build:development",
      "proxyConfig": "src/proxy.conf.js"
    }
  },
  "defaultConfiguration": "development"
},
Stop your app with Ctrl+C and restart it with npm start. Now you should see a list of groups in your Angular app!
Build an Angular GroupList component
Angular is a component framework that allows you to separate concerns easily. You don't want to render everything in your main AppComponent, so create a new component to display the list of groups.
ng g c group-list
This command will create a new component in src/app/group-list with a TypeScript file, HTML template, CSS file, and a test file. Standalone components are created by default in Angular 17. They allow you to isolate components to be self-contained and, therefore, easier to distribute.
Replace the code in group-list.component.ts with the following:
import { Component } from '@angular/core';
import { Group } from '../model/group';
import { HttpClient, HttpClientModule } from '@angular/common/http';
import { RouterLink } from '@angular/router';
import { MatButtonModule } from '@angular/material/button';
import { MatTableModule } from '@angular/material/table';
import { MatIconModule } from '@angular/material/icon';
import { DatePipe } from '@angular/common';

@Component({
  selector: 'app-group-list',
  standalone: true,
  imports: [RouterLink, MatButtonModule, MatTableModule, MatIconModule, DatePipe, HttpClientModule],
  templateUrl: './group-list.component.html',
  styleUrl: './group-list.component.css'
})
export class GroupListComponent {
  title = 'Group List';
  loading = true;
  groups: Group[] = [];
  displayedColumns = ['id', 'name', 'events', 'actions'];
  feedback: any = {};

  constructor(private http: HttpClient) {
  }

  ngOnInit() {
    this.loading = true;
    this.http.get<Group[]>('api/groups').subscribe((data: Group[]) => {
      this.groups = data;
      this.loading = false;
      this.feedback = {};
    });
  }

  delete(group: Group): void {
    if (confirm(`Are you sure you want to delete ${group.name}?`)) {
      this.http.delete(`api/group/${group.id}`).subscribe({
        next: () => {
          this.feedback = {type: 'success', message: 'Delete was successful!'};
          setTimeout(() => {
            this.ngOnInit();
          }, 1000);
        },
        error: () => {
          this.feedback = {type: 'warning', message: 'Error deleting.'};
        }
      });
    }
  }

  protected readonly event = event;
}
Update its HTML template to use Angular Material's table component.
<nav aria-label="breadcrumb"> <ol class="breadcrumb"> <li class="breadcrumb-item"><a routerLink="/">Home</a></li> <li class="breadcrumb-item active">Groups</li> </ol> </nav> <a [routerLink]="['/group/new']" mat-raised-button color="primary" style="float: right" id="add">Add Group</a> <h2>{{title}}</h2> @if (loading) { <div> <p>Loading...</p> </div> } @else { @if (feedback.message) { <div class="alert alert-{{feedback.type}}">{{ feedback.message }}</div> } <table mat-table [dataSource]="groups"> <ng-container matColumnDef="id"> <mat-header-cell *matHeaderCellDef> ID </mat-header-cell> <mat-cell *matCellDef="let item"> {{ item.id }} </mat-cell> </ng-container> <ng-container matColumnDef="name"> <mat-header-cell *matHeaderCellDef> Name </mat-header-cell> <mat-cell *matCellDef="let item"> {{ item.name }} </mat-cell> </ng-container> <ng-container matColumnDef="events"> <mat-header-cell *matHeaderCellDef> Events </mat-header-cell> <mat-cell *matCellDef="let item"> @for (event of item.events; track event) { {{event.date | date }}: {{ event.title }} <br/> } </mat-cell> </ng-container> <ng-container matColumnDef="actions"> <mat-header-cell *matHeaderCellDef> Actions </mat-header-cell> <mat-cell *matCellDef="let item"> <a [routerLink]="['../group', item.id ]" mat-raised-button color="accent">Edit</a> <button (click)="delete(item)" mat-button color="warn"><mat-icon>delete</mat-icon></button> </mat-cell> </ng-container> <mat-header-row *matHeaderRowDef="displayedColumns"></mat-header-row> <mat-row *matRowDef="let row; columns: displayedColumns;"></mat-row> </table> }
Create a HomeComponent to display a welcome message and a link to the groups page. This component will be the default route for the app.
ng g c home
Update home.component.html with the following:
<a mat-button color="primary" href="/groups">Manage JUG Tour</a>
Add an import for MatButtonModule to home.component.ts:
import { MatButtonModule } from '@angular/material/button';

@Component({
  selector: 'app-home',
  standalone: true,
  imports: [MatButtonModule],
  ...
})
Change app.component.html to remove the list of groups above <router-outlet>:
<div class="content" role="main">
  <router-outlet></router-outlet>
</div>
And remove the groups fetching logic from app.component.ts:
import { Component } from '@angular/core';
import { RouterOutlet } from '@angular/router';

@Component({
  selector: 'app-root',
  standalone: true,
  imports: [RouterOutlet],
  templateUrl: './app.component.html',
  styleUrl: './app.component.css'
})
export class AppComponent {
  title = 'JUG Tours';
}
Add a route for the HomeComponent and GroupListComponent to app.routes.ts:
import { Routes } from '@angular/router';
import { HomeComponent } from './home/home.component';
import { GroupListComponent } from './group-list/group-list.component';

export const routes: Routes = [
  { path: '', redirectTo: '/home', pathMatch: 'full' },
  {
    path: 'home',
    component: HomeComponent
  },
  {
    path: 'groups',
    component: GroupListComponent
  }
];
Update the CSS in styles.css to have rules for the breadcrumb and alert classes:
/* https://careydevelopment.us/blog/angular-how-to-add-breadcrumbs-to-your-ui */
ol.breadcrumb {
  padding: 0;
  list-style-type: none;
  margin: 5px 0 0 0;
}

.breadcrumb-item + .active {
  color: inherit;
  font-weight: 500;
}

.breadcrumb-item {
  color: #3F51B5;
  font-size: 1rem;
  text-decoration: underline;
  cursor: pointer;
}

.breadcrumb-item + .breadcrumb-item {
  padding-left: 0.5rem;
}

.breadcrumb-item + .breadcrumb-item::before {
  display: inline-block;
  padding-right: 0.5rem;
  color: rgb(108, 117, 125);
  content: "/";
}

ol.breadcrumb li {
  list-style-type: none;
}

ol.breadcrumb li {
  list-style-type: none;
  display: inline
}

.alert {
  padding: 0.75rem 1.25rem;
  margin-bottom: 1rem;
  border: 1px solid transparent;
}

.alert-success {
  color: #155724;
  background-color: #d4edda;
  border-color: #c3e6cb;
}

.alert-error {
  color: #721c24;
  background-color: #f8d7da;
  border-color: #f5c6cb;
}
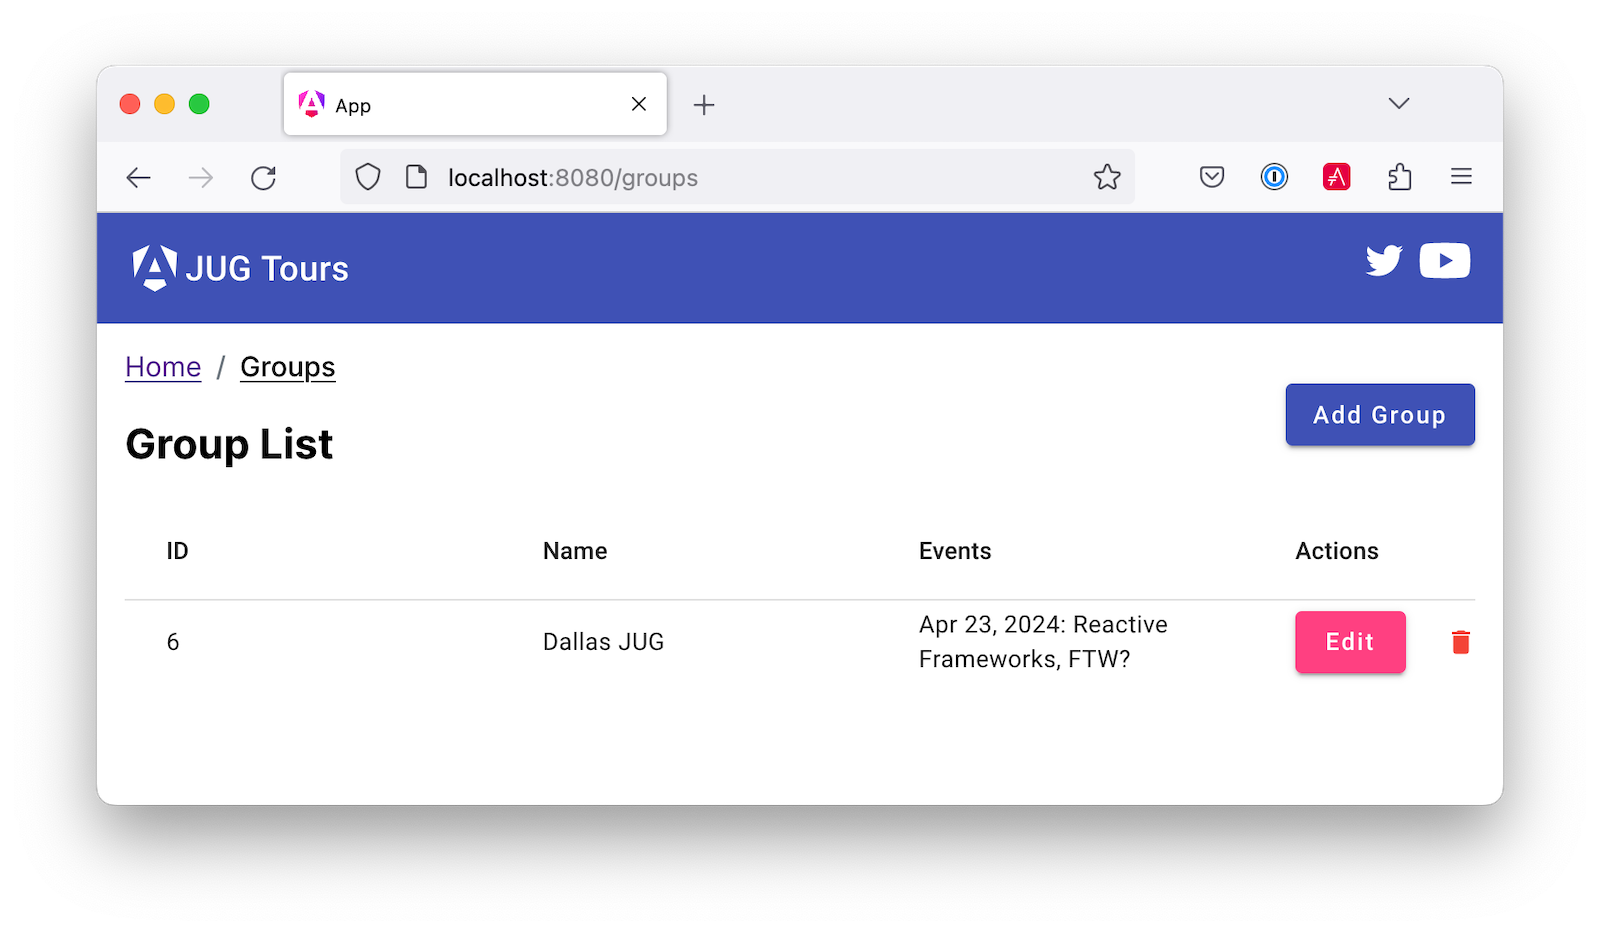
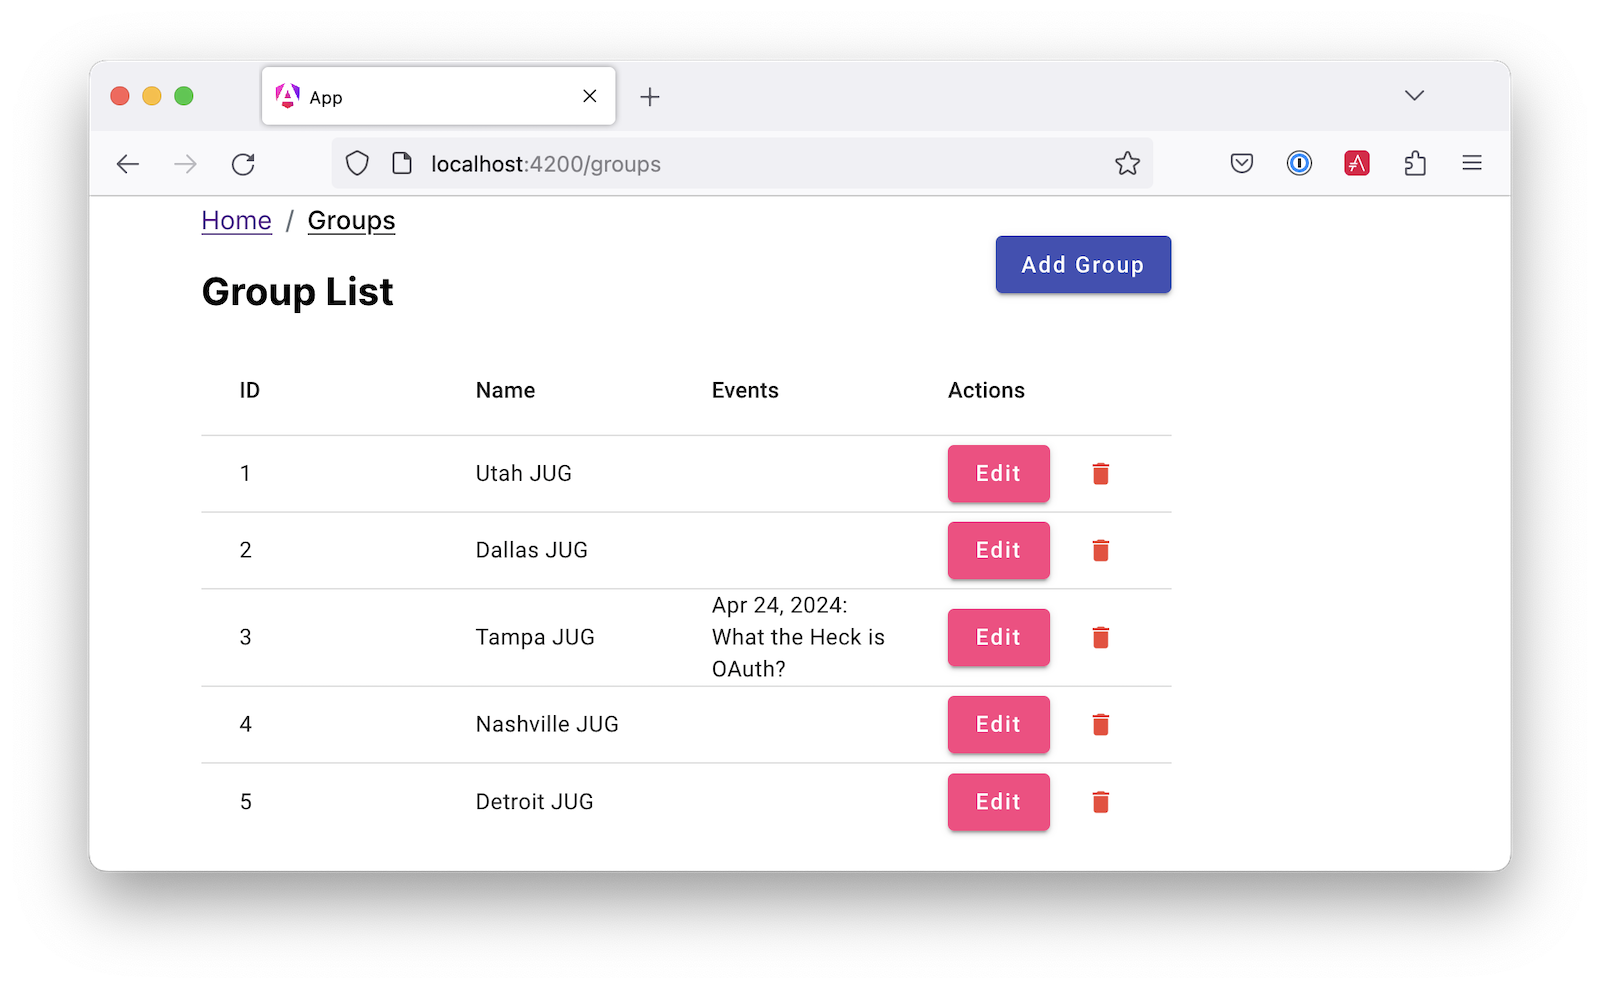
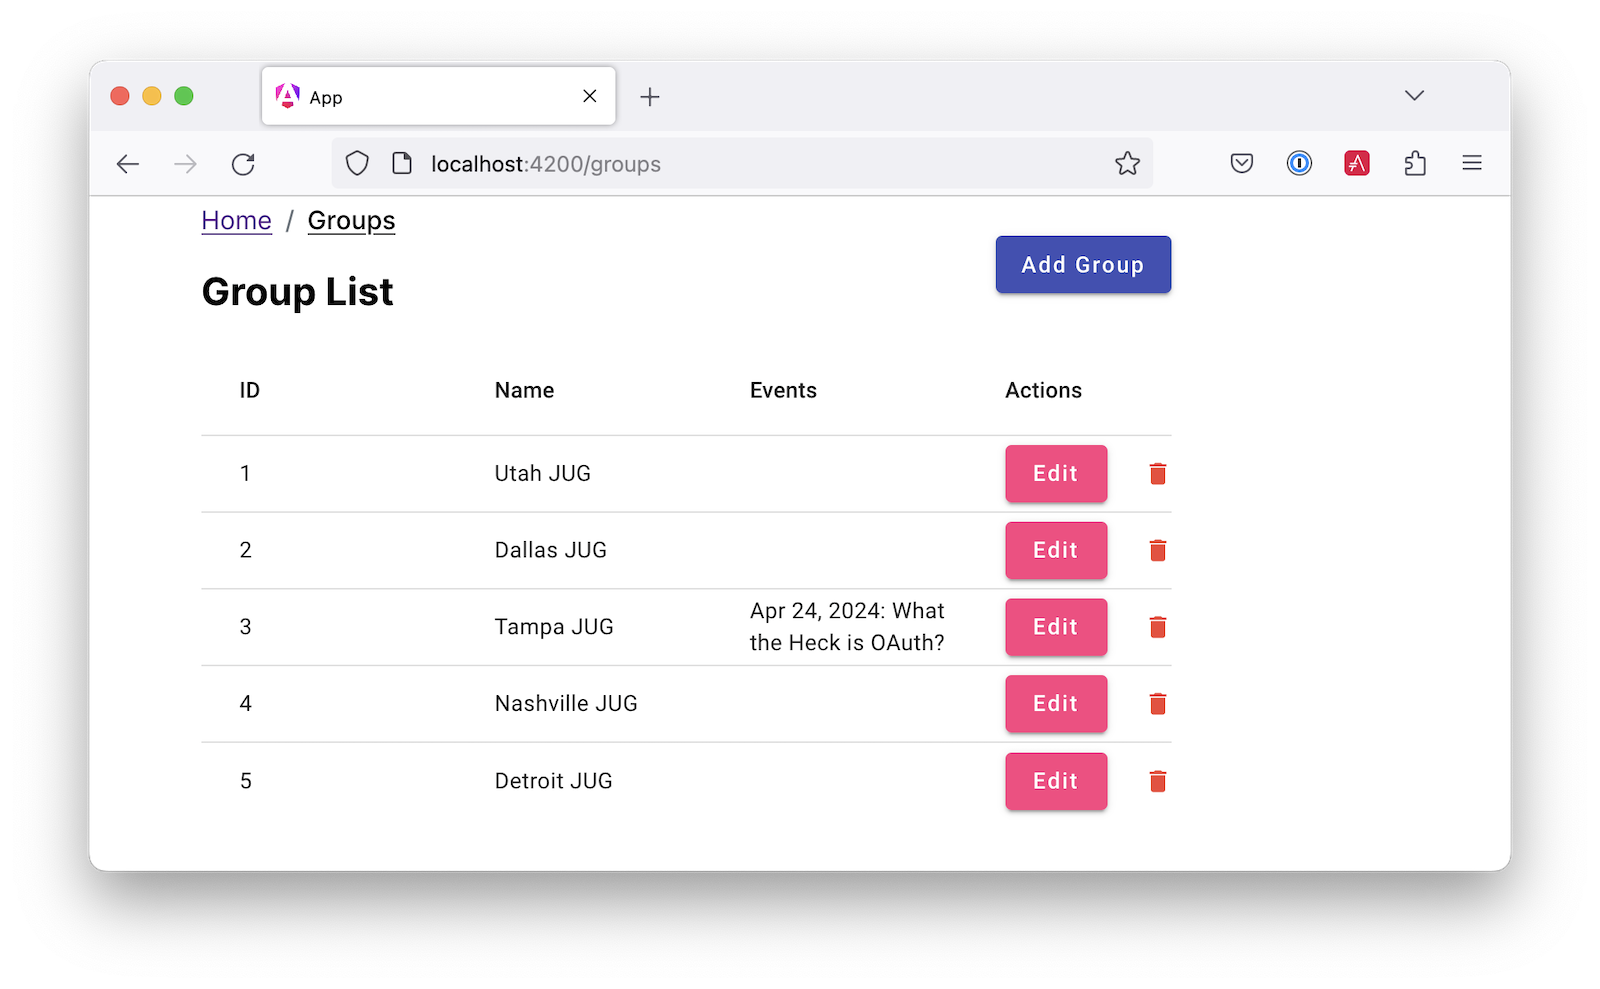
Run npm start in your app directory to see how everything looks. Click on Manage JUG Tour, and you should see a list of the default groups.
To squish the Actions column to the right, add the following to group-list.component.css:
.mat-column-actions {
  flex: 0 0 120px;
}
Your Angular app should update itself as you make changes.
It's great to see your Spring Boot API's data in your Angular app, but it's no fun if you can't modify it!
Build an Angular GroupEdit component
Create a group-edit component and use Angular's HttpClient to fetch the group resource with the ID from the URL.
ng g c group-edit
Add a route for this component to app.routes.ts:
import { GroupEditComponent } from './group-edit/group-edit.component';

export const routes: Routes = [
  ...
  {
    path: 'group/:id',
    component: GroupEditComponent
  }
];
Replace the code in group-edit.component.ts with the following:
import { Component, OnInit } from '@angular/core';
import { ActivatedRoute, Router, RouterLink } from '@angular/router';
import { map, of, switchMap } from 'rxjs';
import { Group } from '../model/group';
import { Event } from '../model/event';
import { HttpClient, HttpClientModule } from '@angular/common/http';
import { MatInputModule } from '@angular/material/input';
import { FormsModule } from '@angular/forms';
import { MatButtonModule } from '@angular/material/button';
import { MatDatepickerModule } from '@angular/material/datepicker';
import { MatIconModule } from '@angular/material/icon';
import { MatNativeDateModule } from '@angular/material/core';
import { MatTooltipModule } from '@angular/material/tooltip';

@Component({
  selector: 'app-group-edit',
  standalone: true,
  imports: [
    FormsModule,
    HttpClientModule,
    MatInputModule,
    MatButtonModule,
    MatDatepickerModule,
    MatIconModule,
    MatNativeDateModule,
    MatTooltipModule,
    RouterLink
  ],
  templateUrl: './group-edit.component.html',
  styleUrl: './group-edit.component.css'
})
export class GroupEditComponent implements OnInit {
  group!: Group;
  feedback: any = {};

  constructor(private route: ActivatedRoute, private router: Router,
              private http: HttpClient) {
  }

  ngOnInit() {
    this.route.params.pipe(
      map(p => p['id']),
      switchMap(id => {
        if (id === 'new') {
          return of(new Group());
        }
        return this.http.get<Group>(`api/group/${id}`);
      })
    ).subscribe({
      next: group => {
        this.group = group;
        this.feedback = {};
      },
      error: () => {
        this.feedback = {type: 'warning', message: 'Error loading'};
      }
    });
  }

  save() {
    const id = this.group.id;
    const method = id ? 'put' : 'post';

    this.http[method](`/api/group${id ? '/' + id : ''}`, this.group).subscribe({
      next: () => {
        this.feedback = {type: 'success', message: 'Save was successful!'};
        setTimeout(async () => {
          await this.router.navigate(['/groups']);
        }, 1000);
      },
      error: () => {
        this.feedback = {type: 'error', message: 'Error saving'};
      }
    });
  }

  async cancel() {
    await this.router.navigate(['/groups']);
  }

  addEvent() {
    this.group.events.push(new Event());
  }

  removeEvent(index: number) {
    this.group.events.splice(index, 1);
  }
}
Create a model/event.ts file so this component will compile.
export class Event {
  id: number | null;
  date: Date | null;
  title: string;

  constructor(event: Partial<Event> = {}) {
    this.id = event?.id || null;
    this.date = event?.date || null;
    this.title = event?.title || '';
  }
}
Update model/group.ts to include the Event class.
import { Event } from './event';

export class Group {
  id: number | null;
  name: string;
  events: Event[];

  constructor(group: Partial<Group> = {}) {
    this.id = group?.id || null;
    this.name = group?.name || '';
    this.events = group?.events || [];
  }
}
The GroupEditComponent needs to render a form, so update group-edit.component.html with the following:
<nav aria-label="breadcrumb">
  <ol class="breadcrumb">
    <li class="breadcrumb-item"><a routerLink="/">Home</a></li>
    <li class="breadcrumb-item"><a routerLink="/groups">Groups</a></li>
    <li class="breadcrumb-item active">Edit Group</li>
  </ol>
</nav>

<h2>Group Information</h2>
@if (feedback.message) {
<div class="alert alert-{{feedback.type}}">{{ feedback.message }}</div>
}
@if (group) {
<form #editForm="ngForm" (ngSubmit)="save()">
  @if (group.id) {
  <mat-form-field class="full-width">
    <mat-label>ID</mat-label>
    <input matInput [(ngModel)]="group.id" id="id" name="id" placeholder="ID" readonly>
  </mat-form-field>
  }
  <mat-form-field class="full-width">
    <mat-label>Name</mat-label>
    <input matInput [(ngModel)]="group.name" id="name" name="name" placeholder="Name" required>
  </mat-form-field>
  @if (group.events.length) {
  <h3>Events</h3>
  }
  @for (event of group.events; track event; let i = $index) {
  <div class="full-width">
    <mat-form-field style="width: 35%">
      <mat-label>Date</mat-label>
      <input matInput [matDatepicker]="picker"
             [(ngModel)]="group.events[i].date" name="group.events[{{i}}].date" placeholder="Date">
      <mat-datepicker-toggle matSuffix [for]="picker"></mat-datepicker-toggle>
      <mat-datepicker #picker></mat-datepicker>
    </mat-form-field>
    <mat-form-field style="width: 65%">
      <mat-label>Title</mat-label>
      <input matInput [(ngModel)]="group.events[i].title" name="group.events[{{i}}].title" placeholder="Title">
    </mat-form-field>
    <button mat-icon-button (click)="removeEvent(i)" aria-label="Remove Event"
            style="float: right; margin: -70px -5px 0 0">
      <mat-icon>delete</mat-icon>
    </button>
  </div>
  }
  <div class="button-row" role="group">
    @if (group.id) {
    <button type="button" mat-mini-fab color="accent" (click)="addEvent()"
            aria-label="Add Event" matTooltip="Add Event"
            style="float: right; margin-top: -4px">
      <mat-icon>add</mat-icon>
    </button>
    }
    <button type="submit" mat-raised-button color="primary" [disabled]="!editForm.form.valid" id="save">Save</button>
    <button type="button" mat-button color="accent" (click)="cancel()" id="cancel">Cancel</button>
  </div>
</form>
}
If you look closely, you'll notice this component allows you to edit events for a group. This component is an excellent example of how to handle nested objects in Angular.
Update group-edit.component.css to make things look better on all devices:
form, h2 {
  min-width: 150px;
  max-width: 700px;
  width: 100%;
  margin: 10px auto;
}

.alert {
  max-width: 660px;
  margin: 0 auto;
}

.full-width {
  width: 100%;
}
Now, with your Angular app running, you should be able to add and edit groups! Yaasss! 👏👏👏

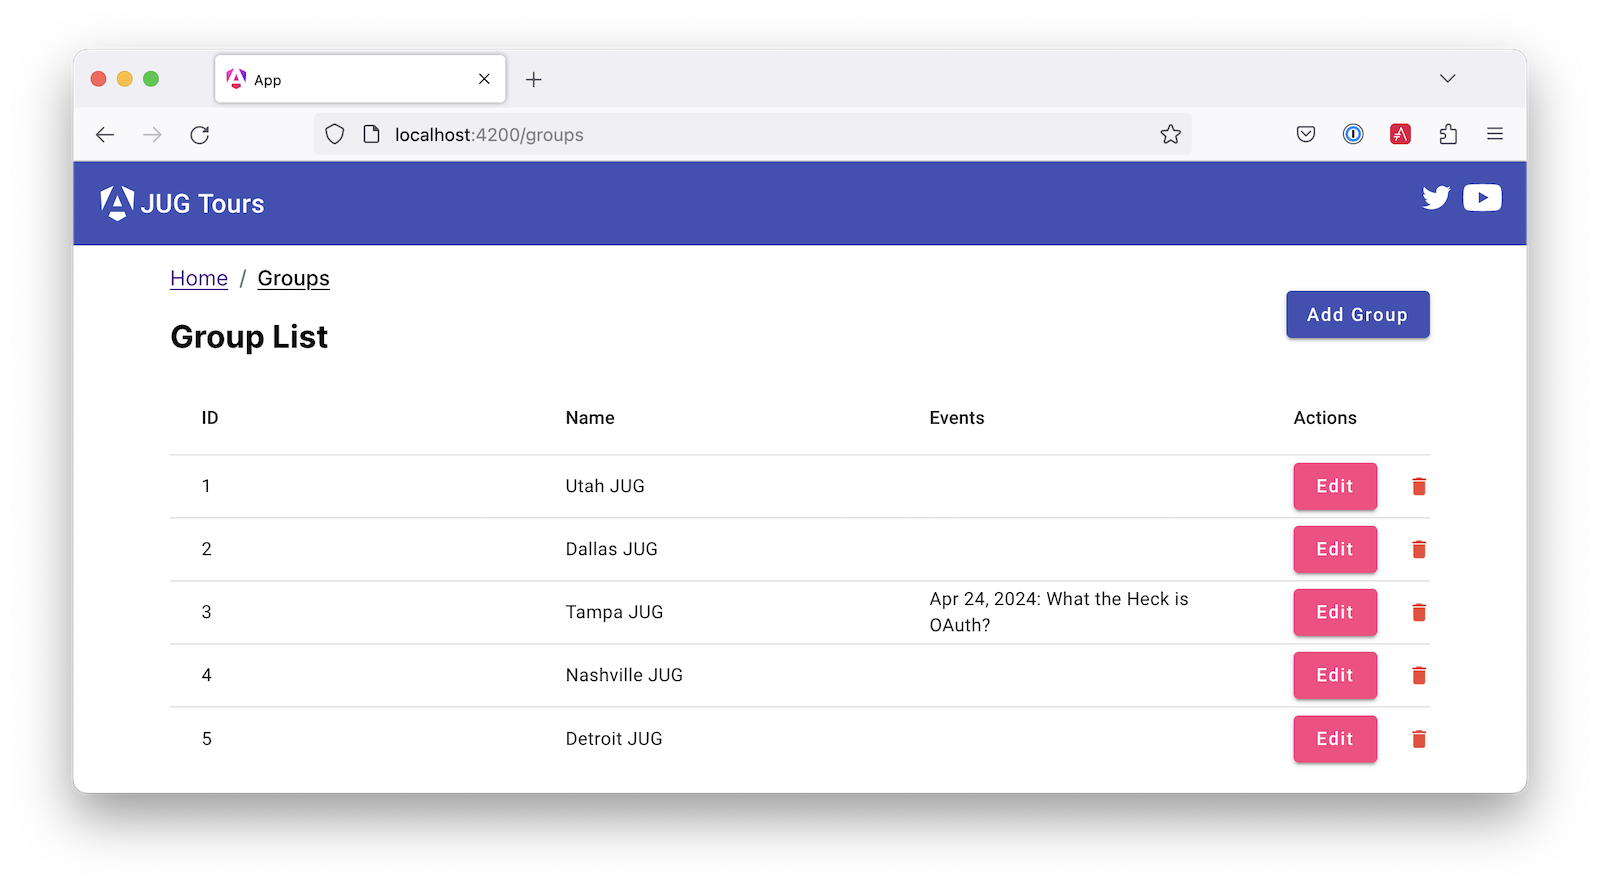
To make the navbar at the top use Angular Material colors, add the following to the top of app.component.html:
<mat-toolbar role="banner" color="primary">
  <svg id="angular-logo" height="35" xmlns="http://www.w3.org/2000/svg" viewBox="0 0 960 960" fill="#fff">
    <g>
      <polygon points="562.6,109.8 804.1,629.5 829.2,233.1"/>
      <polygon points="624.9,655.9 334.3,655.9 297.2,745.8 479.6,849.8 662,745.8"/>
      <polygon points="384.1,539.3 575.2,539.3 479.6,307"/>
      <polygon points="396.6,109.8 130,233.1 155.1,629.5"/>
    </g>
  </svg>
  <span>{{ title }}</span>
  <div class="spacer"></div>
  <a aria-label="OktaDev on Twitter" target="_blank" rel="noopener" href="https://twitter.com/oktadev" title="Twitter">
    <svg id="twitter-logo" height="35" data-name="Logo" xmlns="http://www.w3.org/2000/svg" viewBox="0 0 400 400">
      <rect width="400" height="400" fill="none"/>
      <path
        d="M153.62,301.59c94.34,0,145.94-78.16,145.94-145.94,0-2.22,0-4.43-.15-6.63A104.36,104.36,0,0,0,325,122.47a102.38,102.38,0,0,1-29.46,8.07,51.47,51.47,0,0,0,22.55-28.37,102.79,102.79,0,0,1-32.57,12.45,51.34,51.34,0,0,0-87.41,46.78A145.62,145.62,0,0,1,92.4,107.81a51.33,51.33,0,0,0,15.88,68.47A50.91,50.91,0,0,1,85,169.86c0,.21,0,.43,0,.65a51.31,51.31,0,0,0,41.15,50.28,51.21,51.21,0,0,1-23.16.88,51.35,51.35,0,0,0,47.92,35.62,102.92,102.92,0,0,1-63.7,22A104.41,104.41,0,0,1,75,278.55a145.21,145.21,0,0,0,78.62,23"
        fill="#fff"/>
    </svg>
  </a>
  <a aria-label="OktaDev on YouTube" target="_blank" rel="noopener" href="https://youtube.com/oktadev" title="YouTube">
    <svg id="youtube-logo" height="35" data-name="Logo" xmlns="http://www.w3.org/2000/svg"
         viewBox="0 0 24 24" fill="#fff">
      <path d="M0 0h24v24H0V0z" fill="none"/>
      <path
        d="M21.58 7.19c-.23-.86-.91-1.54-1.77-1.77C18.25 5 12 5 12 5s-6.25 0-7.81.42c-.86.23-1.54.91-1.77 1.77C2 8.75 2 12 2 12s0 3.25.42 4.81c.23.86.91 1.54 1.77 1.77C5.75 19 12 19 12 19s6.25 0 7.81-.42c.86-.23 1.54-.91 1.77-1.77C22 15.25 22 12 22 12s0-3.25-.42-4.81zM10 15V9l5.2 3-5.2 3z"/>
    </svg>
  </a>
</mat-toolbar>
Since this is not a standalone component, you must import MatToolbarModule in app.component.ts.
import { MatToolbarModule } from '@angular/material/toolbar';

@Component({
  selector: 'app-root',
  standalone: true,
  imports: [RouterOutlet, MatToolbarModule],
  ...
})
Make some adjustments in app.component.css to make the toolbar look nicer.
- Change the margin for
.social-linksto.5remand remove the rules for.social-links pathand.social-links a:hoverbelow it. - Add a
.spacerrule withflex: 1 1 autoin its properties. - Change the
.contentrule to be as follows:
.content {
  display: flex;
  margin: 10px auto;
  padding: 0 16px;
  max-width: 960px;
  flex-direction: column;
  align-items: stretch;
}
Now the app fills the screen more, and the toolbar has matching colors.
Secure Spring Boot with OpenID Connect and OAuth
I love building simple CRUD apps to learn a new tech stack, but I think it's even cooler to build a secure one. So let's do that!
Spring Security added support for OpenID Connect (OIDC) in version 5.0, circa 2017. This is awesome because it means you can use Spring Security to secure your app with a third-party identity provider (IdP) like Auth0. This is a much better option than trying to build your own authentication system and store user credentials.
Add the Okta Spring Boot starter to do OIDC authentication in your pom.xml. This will also add Spring Security to your app.
<dependency>
    <groupId>com.okta.spring</groupId>
    <artifactId>okta-spring-boot-starter</artifactId>
    <version>3.0.6</version>
</dependency>
Install the Auth0 CLI (if you haven't already) and run auth0 login in a shell.
Next, run auth0 apps create to register a new OIDC app with appropriate callbacks:
auth0 apps create \
  --name "Bootiful Angular" \
  --description "Spring Boot + Angular = ❤️" \
  --type regular \
  --callbacks http://localhost:8080/login/oauth2/code/okta,http://localhost:4200/login/oauth2/code/okta \
  --logout-urls http://localhost:8080,http://localhost:4200 \
  --reveal-secrets
Copy the returned values from this command into an .okta.env file:
export OKTA_OAUTH2_ISSUER=https://<your-auth0-domain>/
export OKTA_OAUTH2_CLIENT_ID=<your-client-id>
export OKTA_OAUTH2_CLIENT_SECRET=<your-client-secret>
If you're on Windows, use set instead of export to set these environment variables and name the file .okta.env.bat:
set OKTA_OAUTH2_ISSUER=https://<your-auth0-domain>/
set OKTA_OAUTH2_CLIENT_ID=<your-client-id>
set OKTA_OAUTH2_CLIENT_SECRET=<your-client-secret>
Add *.env to your .gitignore file so you don't accidentally expose your client secret.
Then, run source .okta.env (or .okta.env.bat on Windows) to set these environment variables in your current shell.
Finally, run ./mvnw (or mvnw on Windows) to start the app.
source .okta.env
./mvnw spring-boot:run
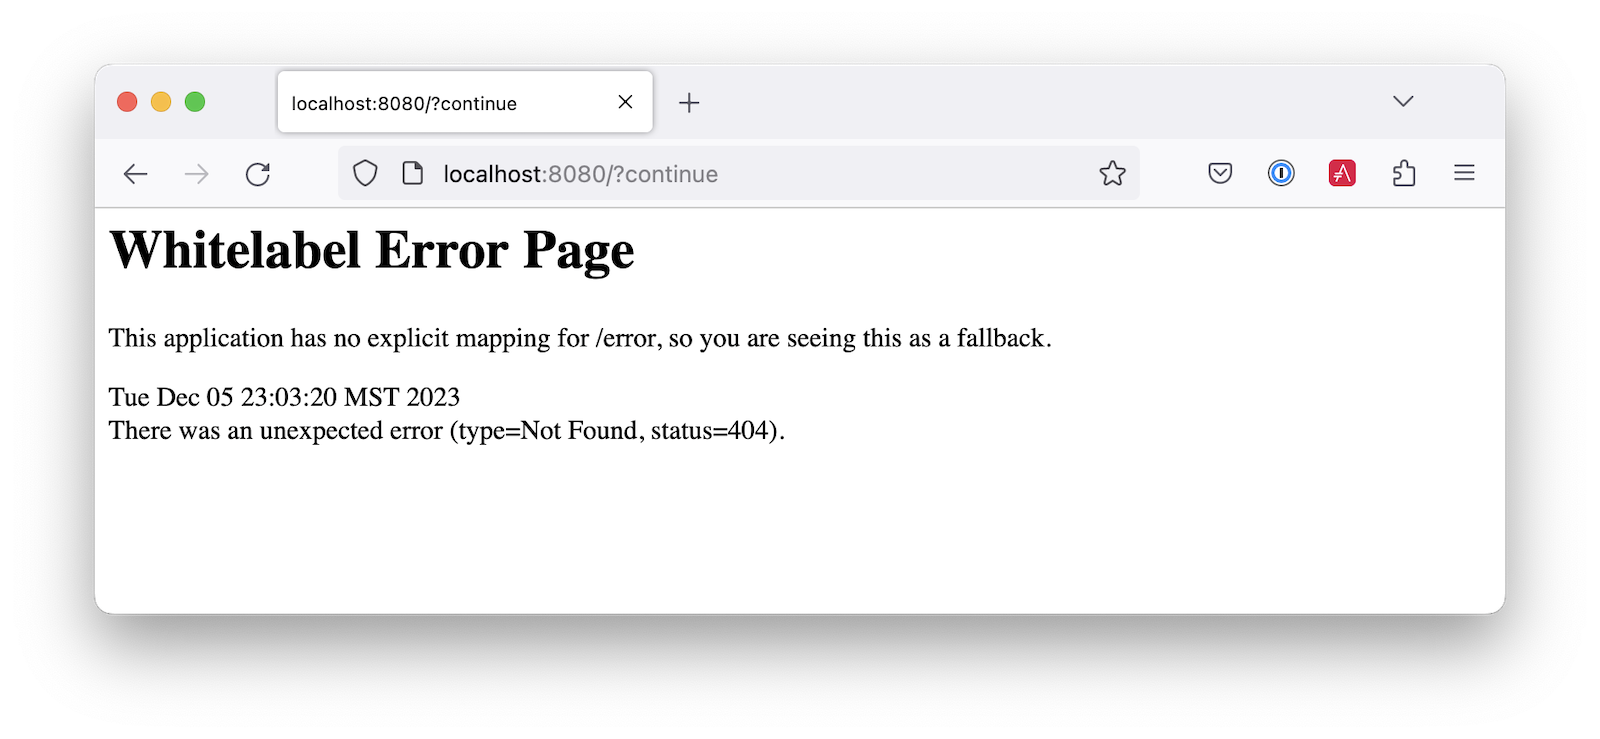
You can then open http://localhost:8080 in your favorite browser. You'll be redirected to authenticate and returned afterward. You'll see a 404 error from Spring Boot since you have nothing mapped to the default / route.
Configure Spring Security for maximum protection
To make Spring Security Angular-friendly, create a SecurityConfiguration.java file in src/main/java/.../jugtours/config. Create the config directory and put this class in it.
package com.okta.developer.jugtours.config;

import com.okta.developer.jugtours.web.CookieCsrfFilter;
import org.springframework.context.annotation.Bean;
import org.springframework.context.annotation.Configuration;
import org.springframework.security.config.annotation.web.builders.HttpSecurity;
import org.springframework.security.web.SecurityFilterChain;
import org.springframework.security.web.authentication.www.BasicAuthenticationFilter;
import org.springframework.security.web.csrf.CookieCsrfTokenRepository;
import org.springframework.security.web.csrf.CsrfTokenRequestAttributeHandler;

import static org.springframework.security.config.Customizer.withDefaults;

@Configuration
public class SecurityConfiguration {

    @Bean
    public SecurityFilterChain filterChain(HttpSecurity http) throws Exception {
        http.authorizeHttpRequests((authz) -> authz
                .requestMatchers("/", "/index.html", "*.ico", "*.css", "*.js", "/api/user").permitAll()
                .anyRequest().authenticated())
            .oauth2Login(withDefaults())
            .oauth2ResourceServer((oauth2) -> oauth2.jwt(withDefaults()))
            .csrf((csrf) -> csrf
                .csrfTokenRepository(CookieCsrfTokenRepository.withHttpOnlyFalse())
                .csrfTokenRequestHandler(new CsrfTokenRequestAttributeHandler()))
            .addFilterAfter(new CookieCsrfFilter(), BasicAuthenticationFilter.class);

        return http.build();
    }
}
This class has a lot going on, so let me explain a few things. In previous versions of Spring Security, there was an authorizeRequests() lambda you could use to secure paths. Since Spring Security 3.1, it's deprecated, and you should use authorizeHttpRequests(). The authorizeRequests() lambda is permissive by default, which means any paths you don't specify will be allowed. The recommended way, shown here with authorizeHttpRequests(), denies by default. This means you have to specify the resources you want to allow Spring Security to serve up, as well as the ones that the Angular app has.
The requestMatchers line defines the URLs allowed for anonymous users. You will soon configure things so your Spring Boot app serves up your Angular app, hence the reason for allowing /, /index.html, and web files. You might also notice an exposed /api/user path.
Configuring CSRF (cross-site request forgery) protection with CookieCsrfTokenRepository.withHttpOnlyFalse() means that the XSRF-TOKEN cookie won't be marked HTTP-only, so Angular can read it and send it back when it tries to manipulate data. The CsrfTokenRequestAttributeHandler is no longer the default, so you have to configure it as the request handler. To learn more, you can read this Stack Overflow answer. Basically, since we're not sending the CSRF token to an HTML page, we don't have to worry about BREACH attacks. This means we can revert to the previous default from Spring Security 5.
You'll need to create the CookieCsrfFilter class that's added because Spring Security 6 no longer sets the cookie for you. Create it in the web package.
package com.okta.developer.jugtours.web;

import jakarta.servlet.FilterChain;
import jakarta.servlet.ServletException;
import jakarta.servlet.http.HttpServletRequest;
import jakarta.servlet.http.HttpServletResponse;
import org.springframework.security.web.csrf.CsrfToken;
import org.springframework.web.filter.OncePerRequestFilter;

import java.io.IOException;

/**
 * Spring Security 6 doesn't set an XSRF-TOKEN cookie by default.
 * This solution is
 * <a href="https://github.com/spring-projects/spring-security/issues/12141#issuecomment-1321345077">
 * recommended by Spring Security.</a>
 */
public class CookieCsrfFilter extends OncePerRequestFilter {

    /**
     * {@inheritDoc}
     */
    @Override
    protected void doFilterInternal(HttpServletRequest request, HttpServletResponse response,
                                    FilterChain filterChain) throws ServletException, IOException {
        CsrfToken csrfToken = (CsrfToken) request.getAttribute(CsrfToken.class.getName());
        response.setHeader(csrfToken.getHeaderName(), csrfToken.getToken());
        filterChain.doFilter(request, response);
    }
}
Create src/main/java/.../jugtours/web/UserController.java and populate it with the following code. Angular will use this API to 1) find out if a user is authenticated and 2) perform global logout.
package com.okta.developer.jugtours.web;

import jakarta.servlet.http.HttpServletRequest;
import org.springframework.http.HttpHeaders;
import org.springframework.http.HttpStatus;
import org.springframework.http.ResponseEntity;
import org.springframework.security.core.annotation.AuthenticationPrincipal;
import org.springframework.security.oauth2.client.registration.ClientRegistration;
import org.springframework.security.oauth2.client.registration.ClientRegistrationRepository;
import org.springframework.security.oauth2.core.user.OAuth2User;
import org.springframework.web.bind.annotation.GetMapping;
import org.springframework.web.bind.annotation.PostMapping;
import org.springframework.web.bind.annotation.RestController;

import java.text.MessageFormat;

import static java.util.Map.of;

@RestController
public class UserController {
    private final ClientRegistration registration;

    public UserController(ClientRegistrationRepository registrations) {
        this.registration = registrations.findByRegistrationId("okta");
    }

    @GetMapping("/api/user")
    public ResponseEntity<?> getUser(@AuthenticationPrincipal OAuth2User user) {
        if (user == null) {
            return new ResponseEntity<>("", HttpStatus.OK);
        } else {
            return ResponseEntity.ok().body(user.getAttributes());
        }
    }

    @PostMapping("/api/logout")
    public ResponseEntity<?> logout(HttpServletRequest request) {
        // send logout URL to client so they can initiate logout
        var issuerUri = registration.getProviderDetails().getIssuerUri();
        var originUrl = request.getHeader(HttpHeaders.ORIGIN);
        Object[] params = {issuerUri, registration.getClientId(), originUrl};
        // Yes! We @ Auth0 should have an end_session_endpoint in our OIDC metadata.
        // It's not included at the time of this writing, but will be coming soon!
        var logoutUrl = MessageFormat.format("{0}v2/logout?client_id={1}&returnTo={2}", params);
        request.getSession().invalidate();
        return ResponseEntity.ok().body(of("logoutUrl", logoutUrl));
    }
}
You'll also want to add user information when creating groups so that you can filter by your JUG tour. Add a UserRepository.java in the same directory as GroupRepository.java.
package com.okta.developer.jugtours.model;

import org.springframework.data.jpa.repository.JpaRepository;

public interface UserRepository extends JpaRepository<User, String> {
}
Add a new findAllByUserId(String id) method to GroupRepository.java.
List<Group> findAllByUserId(String id);
Then inject UserRepository into GroupController.java and use it to create (or grab an existing user) when adding a new group. While you're there, modify the groups() method to filter by user.
package com.okta.developer.jugtours.web;

import com.okta.developer.jugtours.model.Group;
import com.okta.developer.jugtours.model.GroupRepository;
import com.okta.developer.jugtours.model.User;
import com.okta.developer.jugtours.model.UserRepository;
import org.slf4j.Logger;
import org.slf4j.LoggerFactory;
import org.springframework.http.HttpStatus;
import org.springframework.http.ResponseEntity;
import org.springframework.security.core.annotation.AuthenticationPrincipal;
import org.springframework.security.oauth2.core.user.OAuth2User;
import org.springframework.web.bind.annotation.*;

import jakarta.validation.Valid;
import java.net.URI;
import java.net.URISyntaxException;
import java.security.Principal;
import java.util.Collection;
import java.util.Map;
import java.util.Optional;

@RestController
@RequestMapping("/api")
class GroupController {

    private final Logger log = LoggerFactory.getLogger(GroupController.class);
    private final GroupRepository groupRepository;
    private final UserRepository userRepository;

    public GroupController(GroupRepository groupRepository, UserRepository userRepository) {
        this.groupRepository = groupRepository;
        this.userRepository = userRepository;
    }

    @GetMapping("/groups")
    Collection<Group> groups(Principal principal) {
        return groupRepository.findAllByUserId(principal.getName());
    }

    @GetMapping("/group/{id}")
    ResponseEntity<?> getGroup(@PathVariable Long id) {
        Optional<Group> group = groupRepository.findById(id);
        return group.map(response -> ResponseEntity.ok().body(response))
            .orElse(new ResponseEntity<>(HttpStatus.NOT_FOUND));
    }

    @PostMapping("/group")
    ResponseEntity<Group> createGroup(@Valid @RequestBody Group group,
                                      @AuthenticationPrincipal OAuth2User principal) throws URISyntaxException {
        log.info("Request to create group: {}", group);
        Map<String, Object> details = principal.getAttributes();
        String userId = details.get("sub").toString();

        // check to see if user already exists
        Optional<User> user = userRepository.findById(userId);
        group.setUser(user.orElse(new User(userId,
            details.get("name").toString(), details.get("email").toString())));

        Group result = groupRepository.save(group);
        return ResponseEntity.created(new URI("/api/group/" + result.getId()))
            .body(result);
    }

    @PutMapping("/group/{id}")
    ResponseEntity<Group> updateGroup(@Valid @RequestBody Group group) {
        log.info("Request to update group: {}", group);
        Group result = groupRepository.save(group);
        return ResponseEntity.ok().body(result);
    }

    @DeleteMapping("/group/{id}")
    public ResponseEntity<?> deleteGroup(@PathVariable Long id) {
        log.info("Request to delete group: {}", id);
        groupRepository.deleteById(id);
        return ResponseEntity.ok().build();
    }
}
To highlight the changes, please review the groups() and createGroup() methods above. I think it's pretty slick that Spring JPA will create the findAllByUserId() method/query for you.
Update Angular to handle CSRF and be identity-aware
I like Angular because it's a secure-first framework. It has built-in support for CSRF, and it's easy to make it identity-aware. Let's do both!
Angular's HttpClient supports the client-side half of the CSRF protection. It'll read the cookie sent by Spring Boot and return it in an X-XSRF-TOKEN header. You can read more about this at Angular's Security docs.
Update your Angular app's authentication mechanism
Create a new AuthService class to communicate with your Spring Boot API for authentication information. Add the following code to a new file at app/src/app/auth.service.ts.
import { Injectable } from '@angular/core';
import { Location } from '@angular/common';
import { BehaviorSubject, lastValueFrom, Observable } from 'rxjs';
import { HttpClient, HttpHeaders } from '@angular/common/http';
import { map } from 'rxjs/operators';
import { User } from './model/user';

const headers = new HttpHeaders().set('Accept', 'application/json');

@Injectable({
  providedIn: 'root'
})
export class AuthService {
  $authenticationState = new BehaviorSubject<boolean>(false);

  constructor(private http: HttpClient, private location: Location) {
  }

  getUser(): Observable<User> {
    return this.http.get<User>('/api/user', {headers}, )
      .pipe(map((response: User) => {
          if (response !== null) {
            this.$authenticationState.next(true);
          }
          return response;
        })
      );
  }

  async isAuthenticated(): Promise<boolean> {
    const user = await lastValueFrom(this.getUser());
    return user !== null;
  }

  login(): void {
    location.href = `${location.origin}${this.location.prepareExternalUrl('oauth2/authorization/okta')}`;
  }

  logout(): void {
    this.http.post('/api/logout', {}, { withCredentials: true }).subscribe((response: any) => {
      location.href = response.logoutUrl;
    });
  }
}
Add the referenced User class to app/src/app/model/user.ts.
export class User {
  email!: number;
  name!: string;
}
AuthService depends on HttpClient, so you must update app.config.ts to import and use provideHttpClient.
import { provideHttpClient } from '@angular/common/http';

export const appConfig: ApplicationConfig = {
   providers: [provideRouter(routes), provideAnimations(), provideHttpClient()]
};
Modify home.component.ts to use AuthService to see if the user is logged in.
import { Component, OnInit } from '@angular/core';
import { MatButtonModule } from '@angular/material/button';
import { RouterLink } from '@angular/router';
import { User } from '../model/user';
import { AuthService } from '../auth.service';

@Component({
  selector: 'app-home',
  standalone: true,
  imports: [MatButtonModule, RouterLink],
  templateUrl: './home.component.html',
  styleUrl: './home.component.css'
})
export class HomeComponent implements OnInit {
  isAuthenticated!: boolean;
  user!: User;

  constructor(public auth: AuthService) {
  }

  async ngOnInit() {
    this.isAuthenticated = await this.auth.isAuthenticated();
    this.auth.getUser().subscribe(data => this.user = data);
  }
}
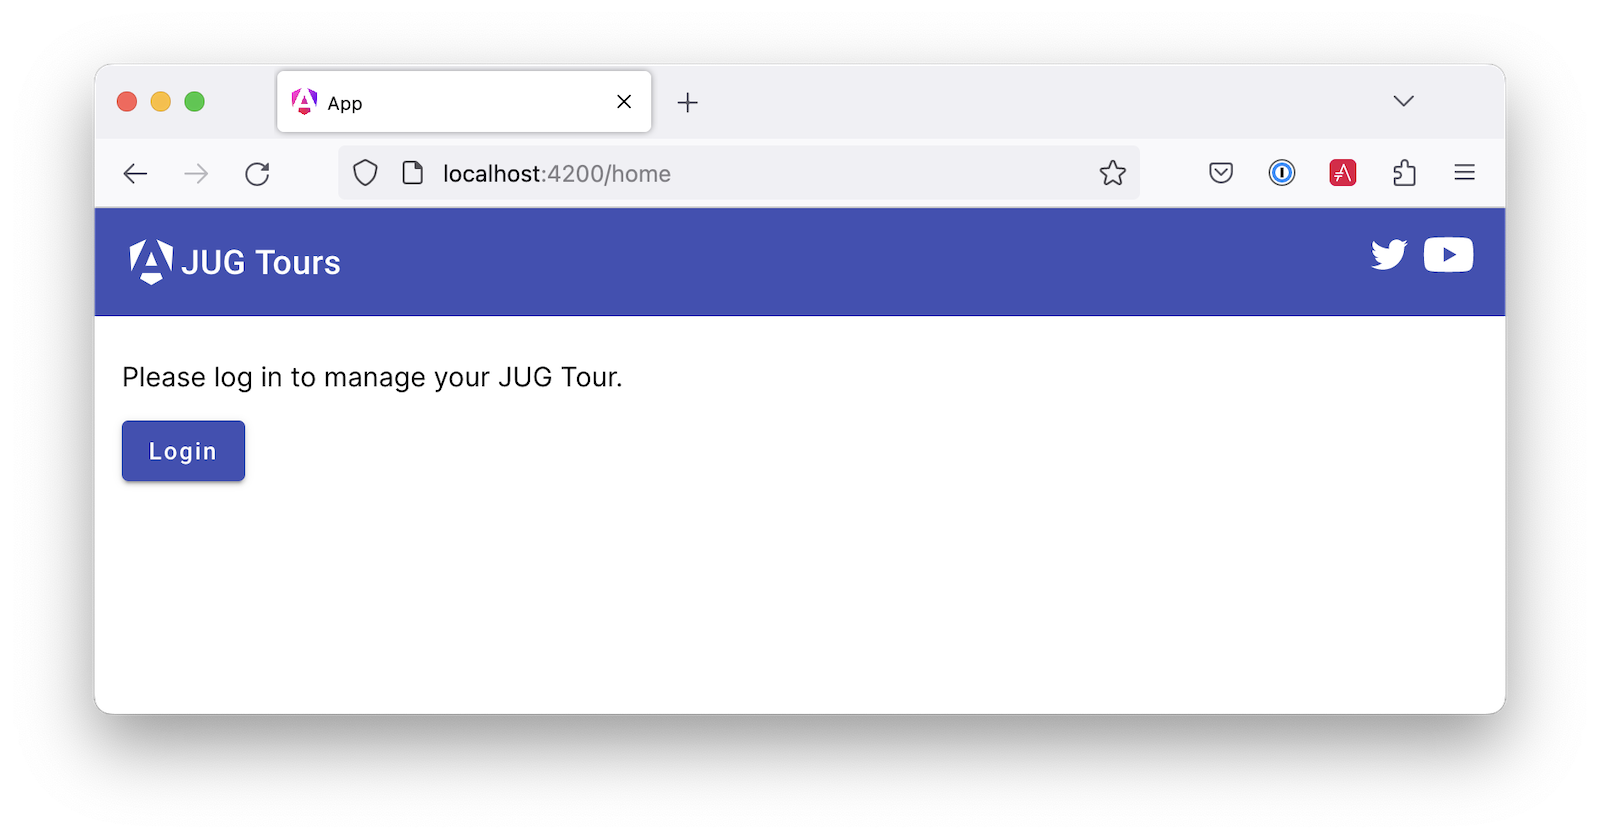
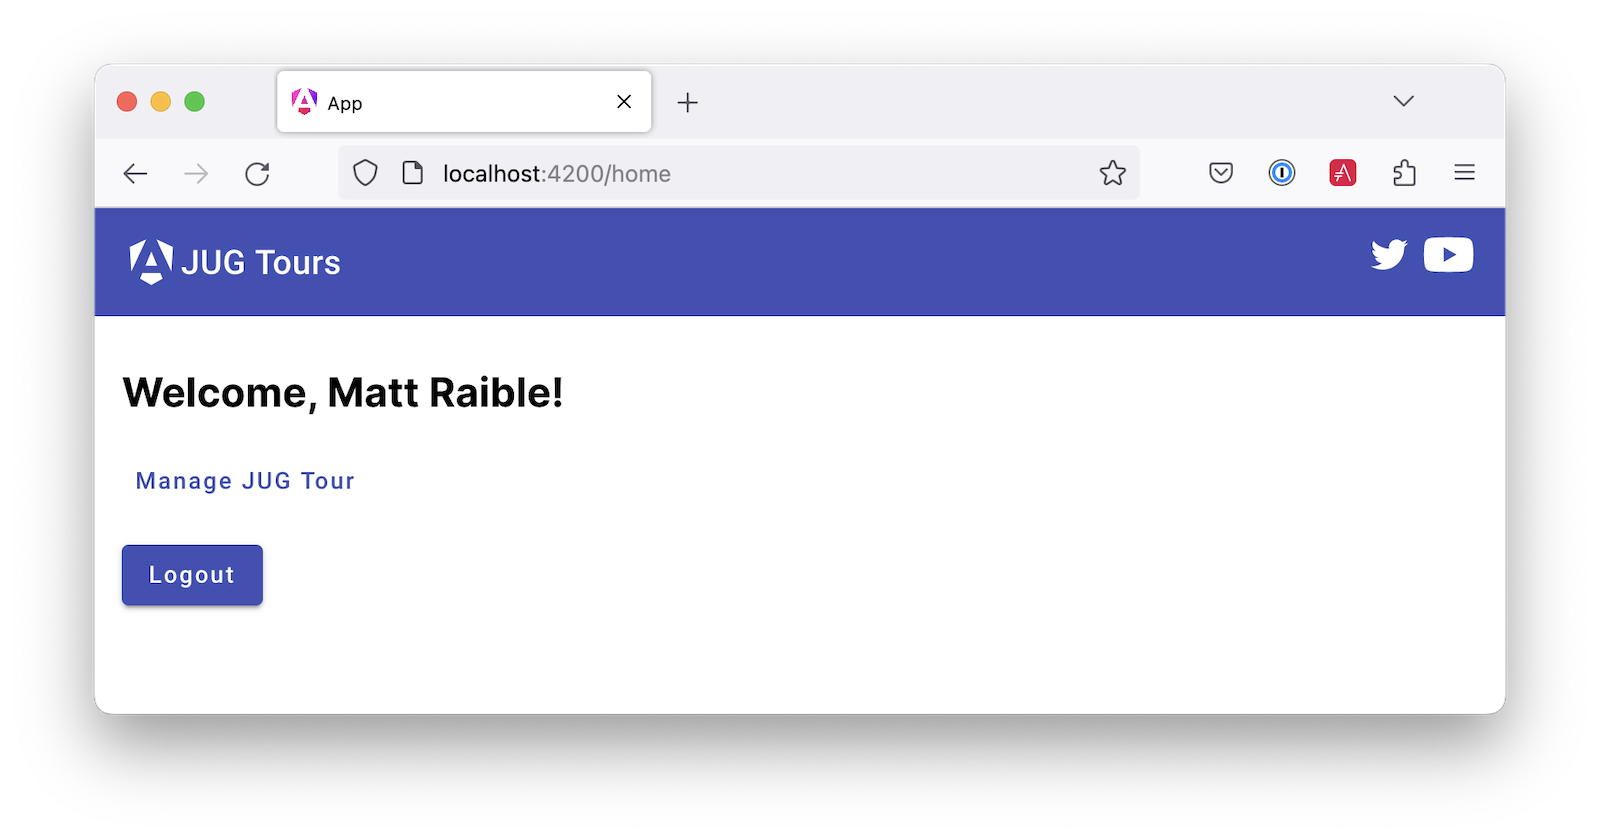
Modify home.component.html to show the Login button if the user is not logged in. Otherwise, show a Logout button.
@if (user) {
  <h2>Welcome, {{user.name}}!</h2>
  <a mat-button color="primary" routerLink="/groups">Manage JUG Tour</a>
  <br/><br/>
  <button mat-raised-button color="primary" (click)="auth.logout()" id="logout">Logout</button>
} @else {
  <p>Please log in to manage your JUG Tour.</p>
  <button mat-raised-button color="primary" (click)="auth.login()" id="login">Login</button>
}
Update app/src/proxy.conf.js to have additional proxy paths for /oauth2 and /login.
const PROXY_CONFIG = [
  {
    context: ['/api', '/oauth2', '/login'],
    ...
  }
]
After all these changes, you should be able to restart both Spring Boot and Angular and witness the glory of securely planning your very own JUG Tour!
Configure Maven to Package Angular with Spring Boot
To build and package your Angular app with Maven, you can use the frontend-maven-plugin and Maven's profiles to activate it. Add properties for versions and a <profiles> section to your pom.xml.
<properties>
    ...
    <frontend-maven-plugin.version>1.15.0</frontend-maven-plugin.version>
    <node.version>v18.18.2</node.version>
    <npm.version>9.8.1</npm.version>
</properties>

...

<profiles>
    <profile>
        <id>dev</id>
        <activation>
            <activeByDefault>true</activeByDefault>
        </activation>
        <properties>
            <spring.profiles.active>dev</spring.profiles.active>
        </properties>
    </profile>
    <profile>
        <id>prod</id>
        <build>
            <plugins>
                <plugin>
                    <artifactId>maven-resources-plugin</artifactId>
                    <executions>
                        <execution>
                            <id>copy-resources</id>
                            <phase>process-classes</phase>
                            <goals>
                                <goal>copy-resources</goal>
                            </goals>
                            <configuration>
                                <outputDirectory>${basedir}/target/classes/static</outputDirectory>
                                <resources>
                                    <resource>
                                        <directory>app/dist/app/browser</directory>
                                    </resource>
                                </resources>
                            </configuration>
                        </execution>
                    </executions>
                </plugin>
                <plugin>
                    <groupId>com.github.eirslett</groupId>
                    <artifactId>frontend-maven-plugin</artifactId>
                    <version>${frontend-maven-plugin.version}</version>
                    <configuration>
                        <workingDirectory>app</workingDirectory>
                    </configuration>
                    <executions>
                        <execution>
                            <id>install node</id>
                            <goals>
                                <goal>install-node-and-npm</goal>
                            </goals>
                            <configuration>
                                <nodeVersion>${node.version}</nodeVersion>
                                <npmVersion>${npm.version}</npmVersion>
                            </configuration>
                        </execution>
                        <execution>
                            <id>npm install</id>
                            <goals>
                                <goal>npm</goal>
                            </goals>
                            <phase>generate-resources</phase>
                        </execution>
                        <execution>
                            <id>npm test</id>
                            <goals>
                                <goal>npm</goal>
                            </goals>
                            <phase>test</phase>
                            <configuration>
                                <arguments>test -- --watch=false</arguments>
                            </configuration>
                        </execution>
                        <execution>
                            <id>npm build</id>
                            <goals>
                                <goal>npm</goal>
                            </goals>
                            <phase>compile</phase>
                            <configuration>
                                <arguments>run build</arguments>
                            </configuration>
                        </execution>
                    </executions>
                </plugin>
            </plugins>
        </build>
        <properties>
            <spring.profiles.active>prod</spring.profiles.active>
        </properties>
    </profile>
</profiles>
While you're at it, add the active profile setting to src/main/resources/application.properties:
spring.profiles.active=@spring.profiles.active@
After adding this, you should be able to run mvn spring-boot:run -Pprod and see your app running at http://localhost:8080.
If you start at the root, everything will work fine since Angular will handle routing. However, if you refresh the page when you're at http://localhost:8080/groups, you'll get a 404 error since Spring Boot doesn't have a route for /groups. To fix this, add a SpaWebFilter that conditionally forwards to the Angular app.
package com.okta.developer.jugtours.web;

import jakarta.servlet.FilterChain;
import jakarta.servlet.ServletException;
import jakarta.servlet.http.HttpServletRequest;
import jakarta.servlet.http.HttpServletResponse;
import org.springframework.web.filter.OncePerRequestFilter;

import java.io.IOException;

public class SpaWebFilter extends OncePerRequestFilter {

    /**
     * Forwards any unmapped paths (except those containing a period) to the client {@code index.html}.
     */
    @Override
    protected void doFilterInternal(HttpServletRequest request, HttpServletResponse response,
                                    FilterChain filterChain) throws ServletException, IOException {
        String path = request.getRequestURI();
        if (!path.startsWith("/api") &&
            !path.startsWith("/login") &&
            !path.startsWith("/oauth2") &&
            !path.contains(".") &&
            path.matches("/(.*)")) {
            request.getRequestDispatcher("/index.html").forward(request, response);
            return;
        }

        filterChain.doFilter(request, response);
    }
}
And add to your SecurityConfiguration.java class:
.addFilterAfter(new SpaWebFilter(), BasicAuthenticationFilter.class);
Now, if you restart, login, and navigate to /groups, refreshing will work as expected. 🤩
Verify Everything Works with Cypress
In this section, you'll learn how to integrate Cypress into this project to support end-to-end tests. Open a terminal, navigate to the app directory, and add the Cypress Angular Schematic:
ng add @cypress/schematicSelect the default answers when prompted. Then, update app/cypress/support/commands.ts to add a login(username, password) method:
/* eslint-disable @typescript-eslint/no-namespace */
/* eslint-disable @typescript-eslint/no-use-before-define */
// eslint-disable-next-line spaced-comment
/// <reference types="cypress" />

Cypress.Commands.add('login', (username: string, password: string) => {
  Cypress.log({
    message: [`🔐 Authenticating: ${username}`],
    autoEnd: false,
  })
  cy.origin(Cypress.env('E2E_DOMAIN'), {args: {username, password}},
    ({username, password}) => {
      cy.get('input[name=username]').type(username);
      cy.get('input[name=password]').type(`${password}{enter}`, {log: false});
    }
  );
});

declare global {
  namespace Cypress {
    interface Chainable {
      login(username: string, password: string): Cypress.Chainable;
    }
  }
}

// Convert this to a module instead of script (allows import/export)
export {};
Update app/cypress/support/e2e.ts to log in before each test and log out after.
import './commands';

beforeEach(() => {
  if (Cypress.env('E2E_USERNAME') === undefined) {
    console.error('E2E_USERNAME is not defined');
    alert('E2E_USERNAME is not defined');
    return;
  }
  cy.visit('/')
  cy.get('#login').click()
  cy.login(
    Cypress.env('E2E_USERNAME'),
    Cypress.env('E2E_PASSWORD')
  )
})

afterEach(() => {
  cy.visit('/')
  cy.get('#logout').click()
})
Rename app/cypress/e2e/spec.cy.ts to home.cy.ts and use it to verify that the home page loads.
describe('Home', () => {
  beforeEach(() => {
    cy.visit('/')
  });

  it('Visits the initial app page', () => {
    cy.contains('JUG Tours')
    cy.contains('Logout')
  })
})
Create a groups.cy.ts in the same directory to test CRUD on groups.
describe('Groups', () => {

  beforeEach(() => {
    cy.visit('/groups')
  });

  it('add button should exist', () => {
    cy.get('#add').should('exist');
  });

  it('should add a new group', () => {
    cy.get('#add').click();
    cy.get('#name').type('Test Group');
    cy.get('#save').click();
    cy.get('.alert-success').should('exist');
  });

  it('should edit a group', () => {
    cy.get('a').last().click();
    cy.get('#name').should('have.value', 'Test Group');
    cy.get('#cancel').click();
  });

  it('should delete a group', () => {
    cy.get('button').last().click();
    cy.on('window:confirm', () => true);
    cy.get('.alert-success').should('exist');
  });
});
Add environment variables with your credentials to the .okta.env (or .okta.env.bat) file you created earlier.
export CYPRESS_E2E_DOMAIN=<your-auth0-domain> # use the raw value, no https prefix
export CYPRESS_E2E_USERNAME=<your-email>
export CYPRESS_E2E_PASSWORD=<your-password>
Then, run source .okta.env (or .okta.env.bat on Windows) to set these environment variables and start the app.
mvn spring-boot:run -Pprod
In another terminal window, run the Cypress tests with Electron.
source .okta.env
cd app
npx cypress run --browser electron --config baseUrl=http://localhost:8080
Fix Unit Tests
If you run npm test, you'll see several failures. That's because the components have dependencies that aren't imported in the tests. Update home.component.spec.ts to import HttpClientTestingModule:
import { ComponentFixture, TestBed } from '@angular/core/testing';
import { HttpClientTestingModule } from '@angular/common/http/testing';
import { HomeComponent } from './home.component';

describe('HomeComponent', () => {
  let component: HomeComponent;
  let fixture: ComponentFixture<HomeComponent>;

  beforeEach(async () => {
    await TestBed.configureTestingModule({
      imports: [HomeComponent, HttpClientTestingModule],
    }).compileComponents();

    fixture = TestBed.createComponent(HomeComponent);
    component = fixture.componentInstance;
    fixture.detectChanges();
  });

  it('should create', () => {
    expect(component).toBeTruthy();
  });
});
In app.component.spec.ts, import MatToolBarModule and look for JUG Tours in the page.
import { TestBed } from '@angular/core/testing';
import { MatToolbarModule } from '@angular/material/toolbar';
import { RouterTestingModule } from '@angular/router/testing';
import { AppComponent } from './app.component';

describe('AppComponent', () => {
  beforeEach(async () => {
    await TestBed.configureTestingModule({
      imports: [RouterTestingModule, MatToolbarModule],
    }).compileComponents();
  });

  it('should create the app', () => {
    const fixture = TestBed.createComponent(AppComponent);
    const app = fixture.componentInstance;
    expect(app).toBeTruthy();
  });

  it(`should have the 'JUG Tours' title`, () => {
    const fixture = TestBed.createComponent(AppComponent);
    const app = fixture.componentInstance;
    expect(app.title).toEqual('JUG Tours');
  });

  it('should render title', () => {
    const fixture = TestBed.createComponent(AppComponent);
    fixture.detectChanges();
    const compiled = fixture.nativeElement as HTMLElement;
    expect(compiled.querySelector('mat-toolbar > span')?.textContent).toContain('JUG Tours');
  });
});
Then, update both group component tests to import HttpClientTestingModule and RouterTestingModule.
import { HttpClientTestingModule } from '@angular/common/http/testing';
import { RouterTestingModule } from '@angular/router/testing';

describe('...', () => {
  ...

  beforeEach(async () => {
    await TestBed.configureTestingModule({
      imports: [..., HttpClientTestingModule, RouterTestingModule]
    });
    ...
  });

  ...
});
Now, npm test should pass.
If you run mvn test without setting environment variables, your Java tests will fail too. To fix this, add a src/test/java/com/okta/developer/jugtours/TestSecurityConfiguration.java class to mock the OAuth provider.
package com.okta.developer.jugtours;

import org.springframework.boot.test.context.TestConfiguration;
import org.springframework.context.annotation.Bean;
import org.springframework.security.oauth2.client.InMemoryOAuth2AuthorizedClientService;
import org.springframework.security.oauth2.client.OAuth2AuthorizedClientService;
import org.springframework.security.oauth2.client.registration.ClientRegistration;
import org.springframework.security.oauth2.client.registration.ClientRegistrationRepository;
import org.springframework.security.oauth2.client.registration.InMemoryClientRegistrationRepository;
import org.springframework.security.oauth2.core.AuthorizationGrantType;
import org.springframework.security.oauth2.core.ClientAuthenticationMethod;
import org.springframework.security.oauth2.jwt.JwtDecoder;

import java.util.HashMap;
import java.util.Map;

import static org.mockito.Mockito.mock;

/**
 * This class allows you to run unit and integration tests without an IdP.
 */
@TestConfiguration
public class TestSecurityConfiguration {

    @Bean
    ClientRegistration clientRegistration() {
        return clientRegistrationBuilder().build();
    }

    @Bean
    ClientRegistrationRepository clientRegistrationRepository(ClientRegistration clientRegistration) {
        return new InMemoryClientRegistrationRepository(clientRegistration);
    }

    private ClientRegistration.Builder clientRegistrationBuilder() {
        Map<String, Object> metadata = new HashMap<>();
        metadata.put("end_session_endpoint", "https://example.org/logout");

        return ClientRegistration.withRegistrationId("oidc")
            .issuerUri("{baseUrl}")
            .redirectUri("{baseUrl}/{action}/oauth2/code/{registrationId}")
            .clientAuthenticationMethod(ClientAuthenticationMethod.CLIENT_SECRET_BASIC)
            .authorizationGrantType(AuthorizationGrantType.AUTHORIZATION_CODE)
            .scope("read:user")
            .authorizationUri("https://example.org/login/oauth/authorize")
            .tokenUri("https://example.org/login/oauth/access_token")
            .jwkSetUri("https://example.org/oauth/jwk")
            .userInfoUri("https://api.example.org/user")
            .providerConfigurationMetadata(metadata)
            .userNameAttributeName("id")
            .clientName("Client Name")
            .clientId("client-id")
            .clientSecret("client-secret");
    }

    @Bean
    JwtDecoder jwtDecoder() {
        return mock(JwtDecoder.class);
    }

    @Bean
    OAuth2AuthorizedClientService authorizedClientService(ClientRegistrationRepository clientRegistrationRepository) {
        return new InMemoryOAuth2AuthorizedClientService(clientRegistrationRepository);
    }
}
Then, update JugToursApplicationTests.java in the same directory to use the new configuration.
@SpringBootTest(classes = {JugtoursApplication.class, TestSecurityConfiguration.class})
Run mvn test again, and your tests will pass. 🎉
Use GitHub Actions to Build and Test Your App
Add a GitHub workflow at .github/workflows/main.yml to prove that your tests run in CI.
name: JUG Tours CI

on: [push, pull_request]

jobs:
  build:
    name: Build and Test
    runs-on: ubuntu-latest
    steps:
      - name: Checkout
        uses: actions/checkout@v4
      - name: Set up Java 17
        uses: actions/setup-java@v4
        with:
          distribution: 'temurin'
          java-version: 17
          cache: 'maven'
      - name: Run tests
        run: xvfb-run mvn verify -ntp -Pprod
      - name: Run e2e tests
        uses: cypress-io/github-action@v6
        with:
          browser: chrome
          start: mvn spring-boot:run -Pprod -ntp -f ../pom.xml
          install: false
          wait-on: http://localhost:8080
          wait-on-timeout: 120
          config: baseUrl=http://localhost:8080
          working-directory: app
        env:
          OKTA_OAUTH2_ISSUER: ${{ secrets.OKTA_OAUTH2_ISSUER }}
          OKTA_OAUTH2_CLIENT_ID: ${{ secrets.OKTA_OAUTH2_CLIENT_ID }}
          OKTA_OAUTH2_CLIENT_SECRET: ${{ secrets.OKTA_OAUTH2_CLIENT_SECRET }}
          CYPRESS_E2E_DOMAIN: ${{ secrets.CYPRESS_E2E_DOMAIN }}
          CYPRESS_E2E_USERNAME: ${{ secrets.CYPRESS_E2E_USERNAME }}
          CYPRESS_E2E_PASSWORD: ${{ secrets.CYPRESS_E2E_PASSWORD }}
      - name: Upload screenshots
        uses: actions/upload-artifact@v3
        if: failure()
        with:
          name: cypress-screenshots
          path: app/cypress/screenshots
You can see this workflow in action on GitHub, or you can try it yourself by creating a new GitHub repo and pushing your code to it.
Add environment variables for the above secrets to your GitHub repository at Settings > Secrets and variables > Actions > New Repository Secret.
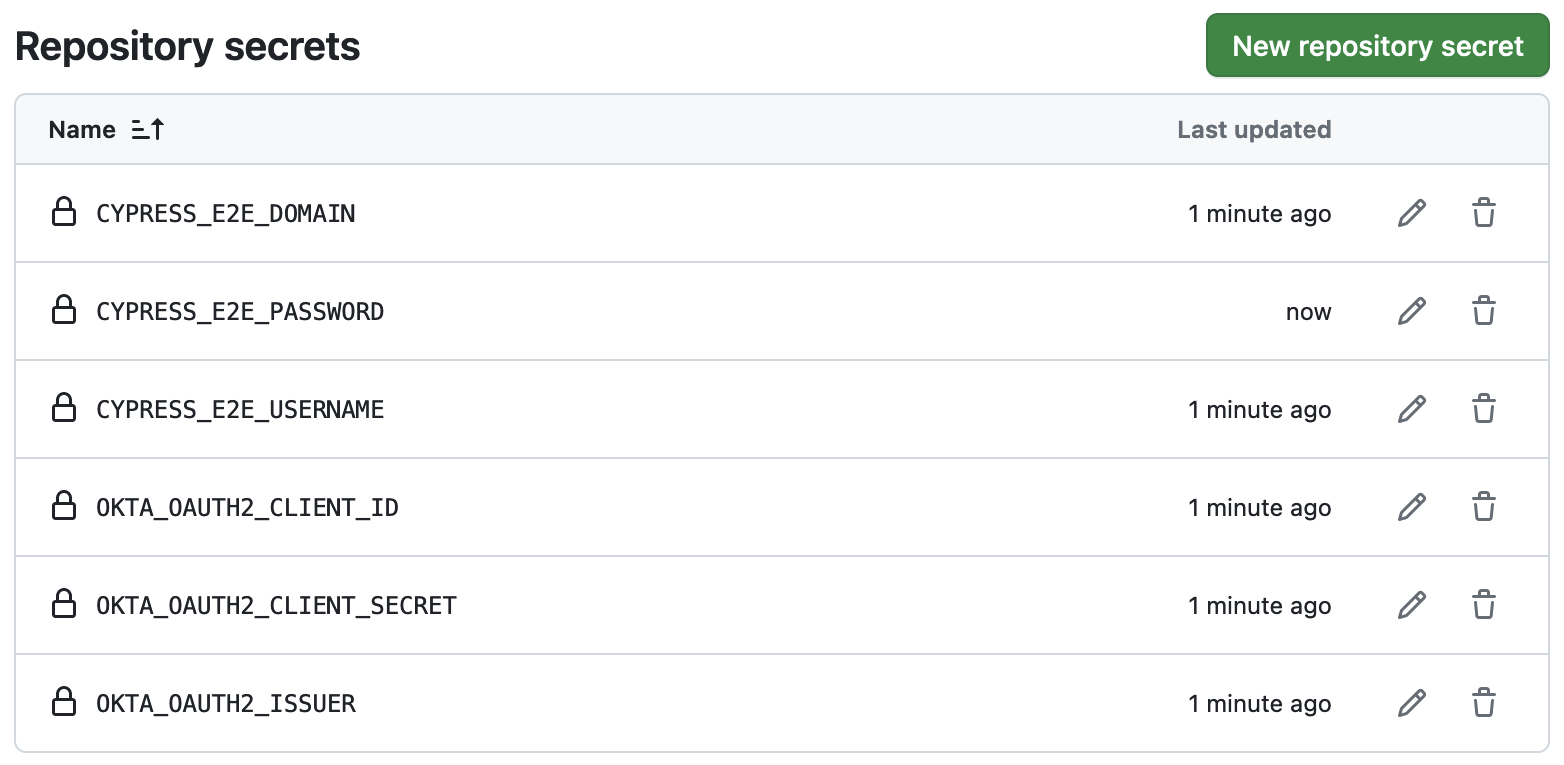
Push your changes to GitHub and watch the CI workflow run. ✅
Build Something Fabulous with Spring Boot and Angular!
I hope this post has helped you learn how to build secure Angular and Spring Boot apps. Using OpenID Connect is a recommended practice for authenticating full-stack apps like this one, and Auth0 makes it easy to do. Adding CSRF protection and packaging your Spring Boot + Angular app as a single artifact is super cool too!
We've written some other fun Spring Boot, Angular, and JHipster tutorials. Check them out!
- Build a Simple CRUD App with Spring Boot and Vue.js
- Use React and Spring Boot to Build a Simple CRUD App
- Add OpenID Connect to Angular Apps Quickly
- Full Stack Java with React, Spring Boot, and JHipster
I've also written a couple of InfoQ mini-books that you might find useful:
- The JHipster Mini-Book: Shows how I built 21-Points Health with JHipster (Angular, Spring Boot, Bootstrap, and more). It includes a chapter on microservices with Spring Boot, React, and Auth0.
- The Angular Mini-Book: A practical guide to Angular, Bootstrap, and Spring Boot. It uses Kotlin and Gradle, recommended security practices, and contains several cloud deployment guides.
If you have any questions, please leave a comment below. If you want to see the completed code for this tutorial, check out its GitHub repo. Follow us on Twitter and YouTube for more content like this.
About the author

Matt Raible
Developer Advocate (Auth0 Alumni)