There is no way to natively A/B test the Universal Login as of today. But, it can be achieved with the use of the Liquid templates that power the Universal Login, custom parameters passed from the client side, and an A/B testing platform such as Split.io, Google Optimize, or LaunchDarkly. A/B testing, also known as split testing, refers to a randomized experimentation process wherein two or more versions of a variable (web page, page element, etc.) are shown to different segments of website visitors at the same time to determine which version leaves the maximum impact and drives business metrics.
What Is the Universal Login?
Auth0 Universal Login (UL) defines your login flow, which is the key feature of an authorization server. Whenever a user needs to prove their identity, your applications redirect to Universal Login, and then Auth0 will do what is needed to guarantee the user's identity.
When using Universal Login, you don't have to do any integration work to handle different methods of authentication. You can start off using a simple username and password, and then add other features, such as social login and multi-factor authentication (MFA).
Configuring Universal Login is dynamic (and does not require application-level changes) because all functionality is driven by the web pages served by the centralized Authentication Server. Your applications benefit from any improvements Auth0 makes in the login flow without the need for you to change your code.
You can create a consistent, branded login experience by customizing the login page appearance and behavior from the Auth0 Dashboard. For advanced use cases, you can even change the code of each page.
To learn more about the differences between Universal Login and embedded login, read Centralized Universal Login vs. Embedded Login.
Universal Login Liquid Templates
The UL can be modified through the use of Liquid templates. To work with these Liquid templates, you will need to configure a Custom Domain. These templates allow you to define the HTML, CSS, and JS that are shipped to the client when making an authorize request. These Liquid templates allow you to run conditional logic based on the Liquid syntax. This functionality allows you to provide a unique UX based on things such as application, organization, tenant, locale, and specific screen. There is the ability to pass specific query parameters during an authorize request that can be accessed inside the Liquid template syntax for even further customization options. These parameters must be prefixed with ext- to be honored by the UL. These can be accessed through transaction.params.ext-{param}. With these parameters, we can now specify different versions of the UL to render for a user. Here is a Liquid template example of conditionally branding the UL based on one of the custom query parameters. This example leverages the param ext-alt-brand:
<!DOCTYPE html>
<html lang="{{locale}}">

  <head>
    <title>Welcome to {{ application.name }} </title>
    {%- auth0:head -%}
    <style>
      {% if transaction.params.ext-alt-brand == "portal_0" %}
      body {
        background-image: radial-gradient(blue, rgb(200, 200, 200));
      }
      #custom-prompt-logo {
        background-image: url('https://banner2.cleanpng.com/20180328/roq/kisspng-circle-logo-symbol-font-templates-5abbf957bfda53.1977074015222685037859.jpg');
      }
      {% elsif transaction.params.ext-alt-brand == "portal_1" %}
      body {
        background-image: url("https://images.unsplash.com/photo-1592450865877-e3a318ec3522?ixlib=rb-1.2.1&auto=format&fit=crop&w=2255&q=80");
        background-size: cover;
        background-position: center;
        background-repeat: no-repeat;
      }
      #custom-prompt-logo {
      background-image: url('https://bootstraplogos.com/wp-content/uploads/edd/2017/11/logo-51.png');
      }
      .prompt-wrapper {
        position: relative;
        display: flex;
        align-items: center;
        width: 480px;
        height: 100%;
        justify-content: center;
        background-color: rgb(247, 198, 233);
      }
      {% else %}
      body {
        background: linear-gradient(-45deg, #ff44dd, #3885ff, #3ec6eb, #1bc99f);
        background-size: 100% 100%;
      }
      #custom-prompt-logo {
        background-image: url('https://cdn.auth0.com/blog/auth0rta/theme/logos/auth0-logo-black.png');
      }
      {% endif %}
      {% if organization != null && organization != undefined %}
        #custom-prompt-logo {
            background-image: url({{ organization.metadata.logo_url }});
        }
        body {
            background: linear-gradient({{ organization.metadata.linear_gradient }})
        }
      {% endif %}

  </style>
  </head>
  <body class="_widget-auto-layout _use-custom-prompt-logo">
      <div class="prompt-wrapper">
        {%- auth0:widget -%}
      </div>
  </body>
</html>
When the value of the param ext-alt-brand is portal_0, the following version of the login page (say, version A) will be shown:

When the value of the param ext-alt-brand is portal_1, version B of the login page is shown:
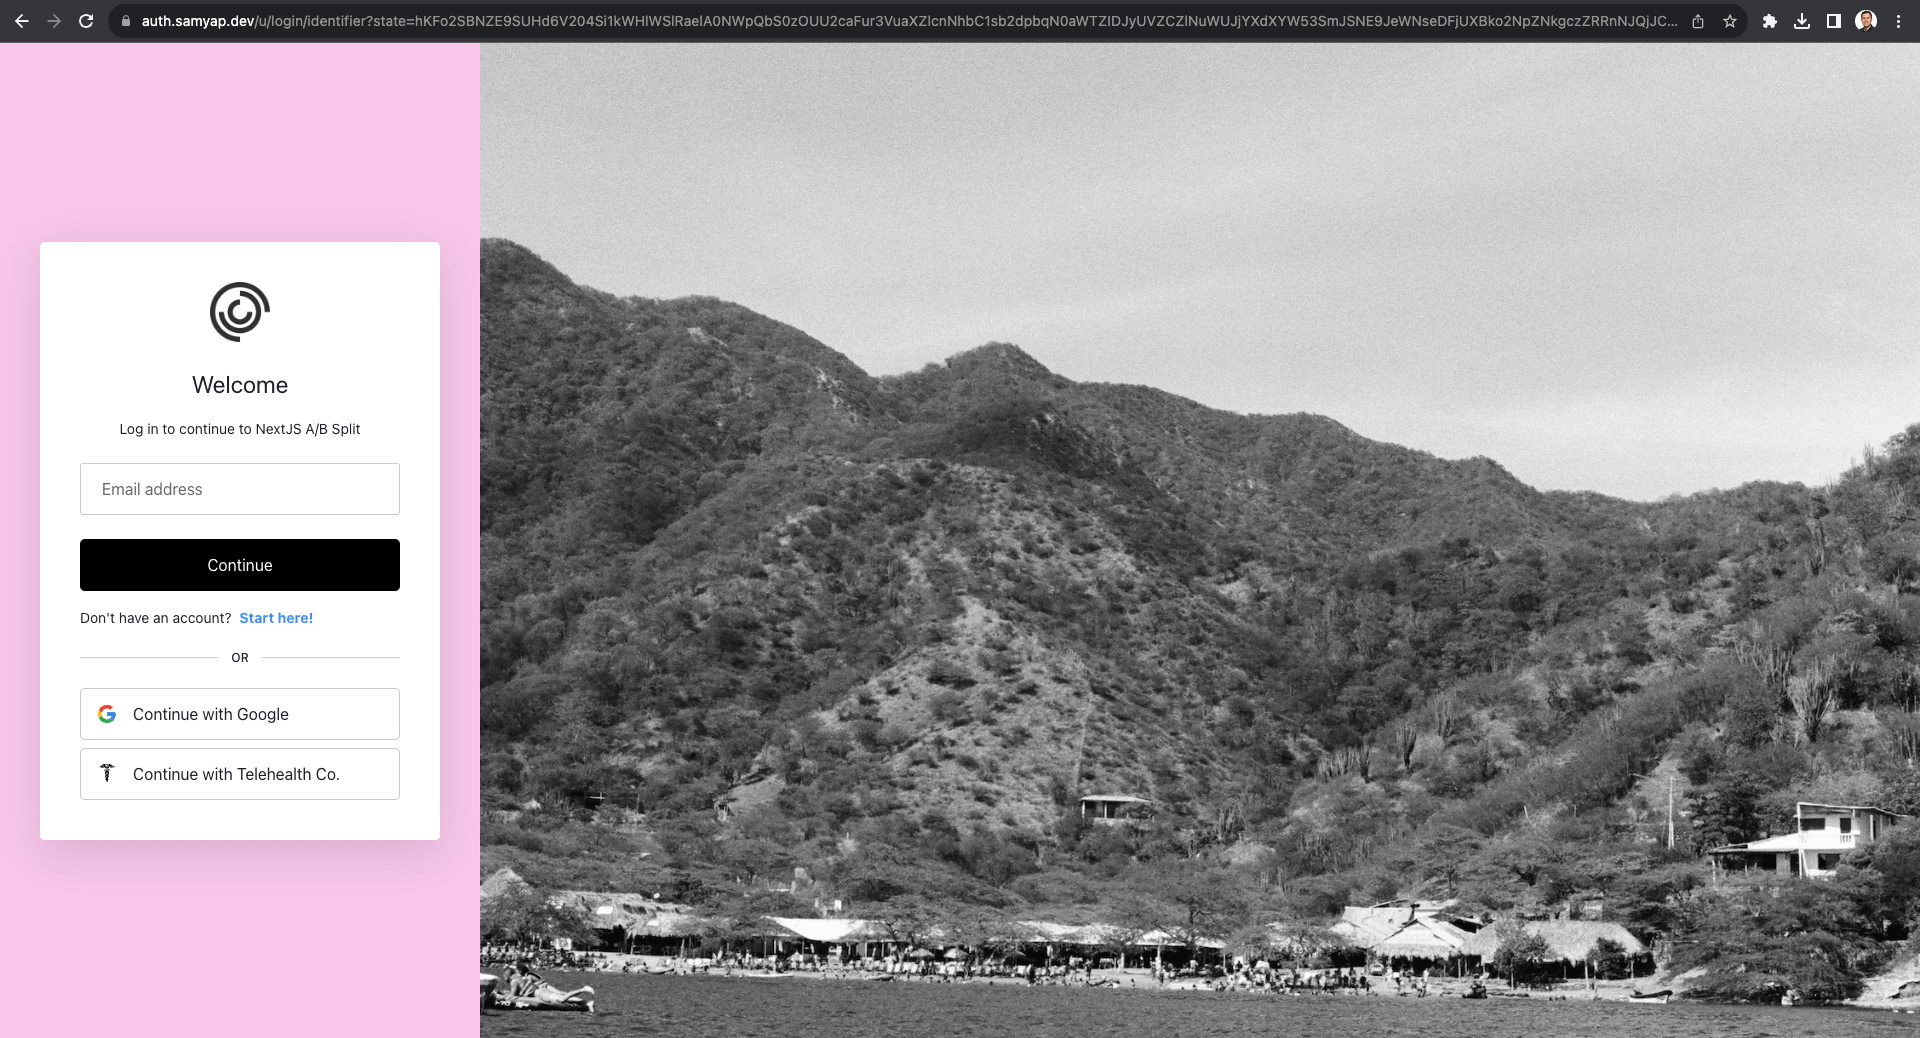
Note: You can see the domain and application are the same, yet we have a unique UX for an A/B test.
Client-Side Implementation
There are many ways to accomplish an A/B test with the Universal Login now that we understand how to render separate versions of the UX. A traditional A/B test will have equal weights between all of the options, and upon a user entering one of these flows, the first step would be to check the browser for a cookie indicating whether a particular user has entered into the experiment already.
If the user is new, they will be assigned one of the pathways for the experiment and then be delivered the content for the item. If a user has previously entered the experiment, we can examine their cookie to determine which pathway they belong to and continue delivering them that same content to provide a consistent UX for the lifetime of the experiment.
This can be implemented manually, but many providers offer this service OOTB, such as Split and LaunchDarkly, to help you make this piece more flexible as you run more experiments or implement feature flagging from a deployment perspective. For this writeup, I have built out examples leveraging both Split and Google Optimize.
To put the final piece in place, my application is built with Next.JS and deployed on Vercel to take advantage of their Edge Middleware capability. This piece is purely preference, and is very dependent on your current implementation of CIC. The Edge Middleware functionality on Vercel allows you to intercept requests on the edge and rewrite URLs extremely quickly. This allows you to decouple the A/B test from your client-side authentication logic. For instance, any place in my application can continue to leverage the same login route without needing more logic to be added. The Edge Middleware then interfaces with my A/B provider to read/write cookies as well as modify the login route to supply the proper parameter during the authorize request. You can view the source code for the Google Optimize example and the Split example on my GitHub.
Live Examples
Here are snippets of the live examples in action on Split. The cookie being set here is called flag-universal_login. This is version A in action:
Here is version B in action:
You can see the application is the same, and I can generate a different UX based on the cookie being set by my Split.io configuration.
Implementing Analytics
Now that we have demonstrated how to deliver different experiences to different users, the final step of the A/B testing journey will be to start gathering metrics about how users are interacting with your content. We already discussed that we can leverage the templates to bring in custom scripts to your Universal Login screens. You can use whatever service you like for tag management, such as Google Tag Manager.
Conclusion
At Auth0, we aim to provide a high-quality service and developer experience for our customers. The first interaction with your customers is often times a login screen, so we understand how important it is for the user experience to be top-notch. With our hosted Universal Login, we take away the burden of deploying and maintaining these highly secure workflows. With the capabilities of our templates outlined in this post, we are able to help your teams iterate more quickly and customize the experience to be sticky for your brand and ultimately help your business grow.
About the author

Sam Yapkowitz
Senior Solutions Engineer