- Add a custom login route handler to your application.
-
Update your SAML connection to:
- Accept incoming IdP-initiated SAML responses.
- Redirect to a default application that sends a Service Provider-initiated authentication request.
How it works
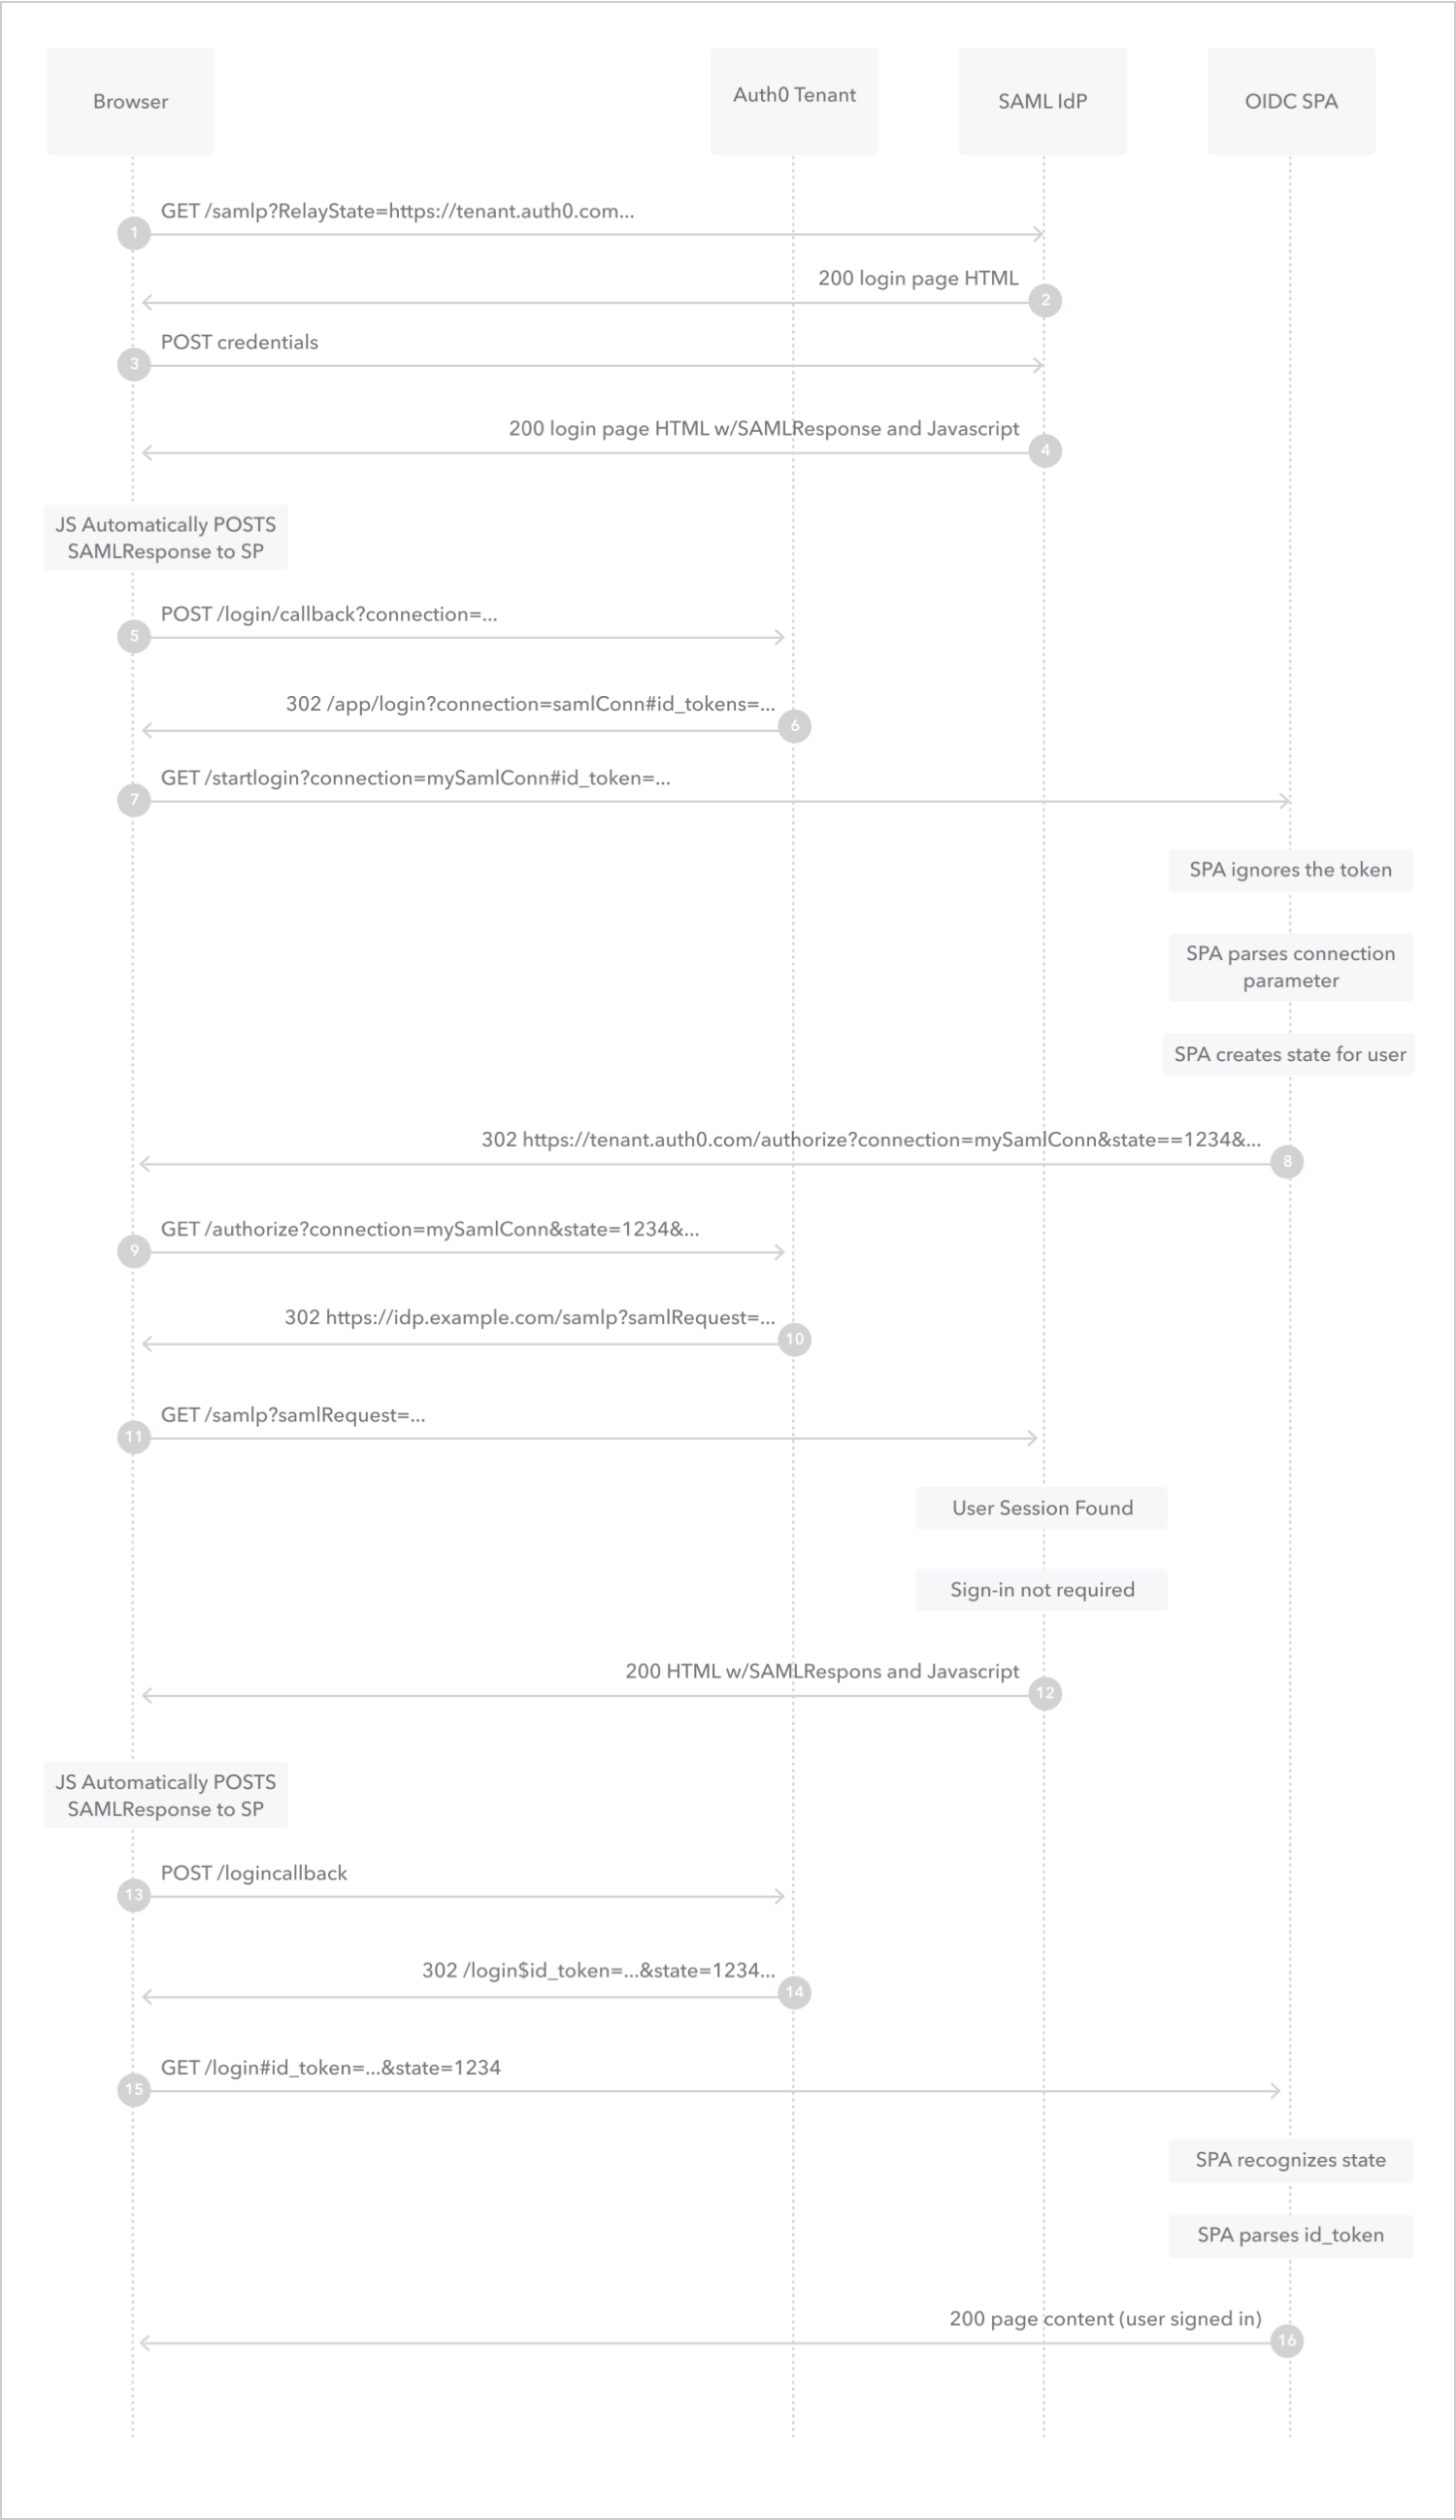
- User navigates to the SAML IdP’s login endpoint.
- SAML IdP returns the login page.
- User submits credentials to the SAML IdP.
- SAML IdP creates a session for the user and then returns an HTML page with Form Post and the SAML response.
- Page automatically sends the SAML response to the Auth0 tenant through an HTTP
POSTcall. - Auth0 tenant redirects the user’s browser to the OIDC application’s custom login route handler with the ID token as a URL fragment.
- Browser calls the custom login route handler of the OIDC application with the
connectionparameter and the ID token. - OIDC application ignores the ID token, parses the
connectionparameter, creates astateparameter for the session, and then redirects the user’s browser to the Auth0 tenant’s/authorizeendpoint. - Browser calls the Auth0 tenant’s
/authorizeendpoint with the providedconnectionandstateparameters. - Auth0 tenant generates a SAML login request and then redirects the user’s browser to SAML IdP’s login endpoint.
- Browser sends the SAML login request to the SAML IdP’s login endpoint.
- SAML IdP finds the user’s session and then returns an HTML page with Form Post and the SAML response.
- Page automatically sends the SAML response to the Auth0 tenant through an HTTP
POSTcall. - Auth0 tenant redirects the user’s browser to the application’s login route handler.
- Browser calls the application’s login route handler with the provided
stateparameter and ID token. - OIDC application verifies the
stateparameter, parses the ID token and creates an application session for the user.
Create the custom login route handler
The custom login route handler calls your application’s login method. The handler must accept theconnection parameter and include it in the authentication request sent to your Auth0 tenant.
We recommend that you associate the custom login route handler with a different endpoint than the one associated with your standard login route handler. For example, if your standard login route handler is associated with the /login endpoint, you could associate the custom login route handler with the /startlogin endpoint.
Example
If you are using the Auth0 Single Page App SDK, you can add a custom login route handler and update the login method to support the connection parameter like so:Create the query string
The query string contains theredirect_uri parameter. The parameter’s value must be URL encoded and is composed of:
- The application endpoint associated with the custom login route handler.
- The
connectionparameter with the value of your SAML connection name.
Example
If your application endpoint ishttps://exampleco.com/startlogin and your SAML connection name is my-saml-connection, the query string would be redirect_uri=https%3A%2F%2Fexampleco.com%2Fstartlogin%3Fconnection%3Dmy-saml-connection.
Configure the application
- Go to Auth0 Dashboard > Applications > Applications.
- Create a new Application to represent the OIDC application in Auth0.
- Update Allowed Callback URLs to include the application endpoint associated with your custom login route handler.
Configure the connection
- Go to Auth0 Dashboard > Authentication > Enterprise > SAML.
- Create a new SAML connection.
- Switch to the IdP-Initiated SSO view.
- Select Accept Requests.
- For Default Application, select the application you previously created.
- For Response Protocol, select OpenID Connect.
- For Query String, enter the query string you previously created.