Prerequisite
Create a Delegated Admin Dashboard application in Auth0.Install extension
- Go to Auth0 Dashboard > Extensions, and filter for Delegated Admin.
-
Select Delegated Administration Dashboard in the list of provided extensions. The Install Extension window will open.
-
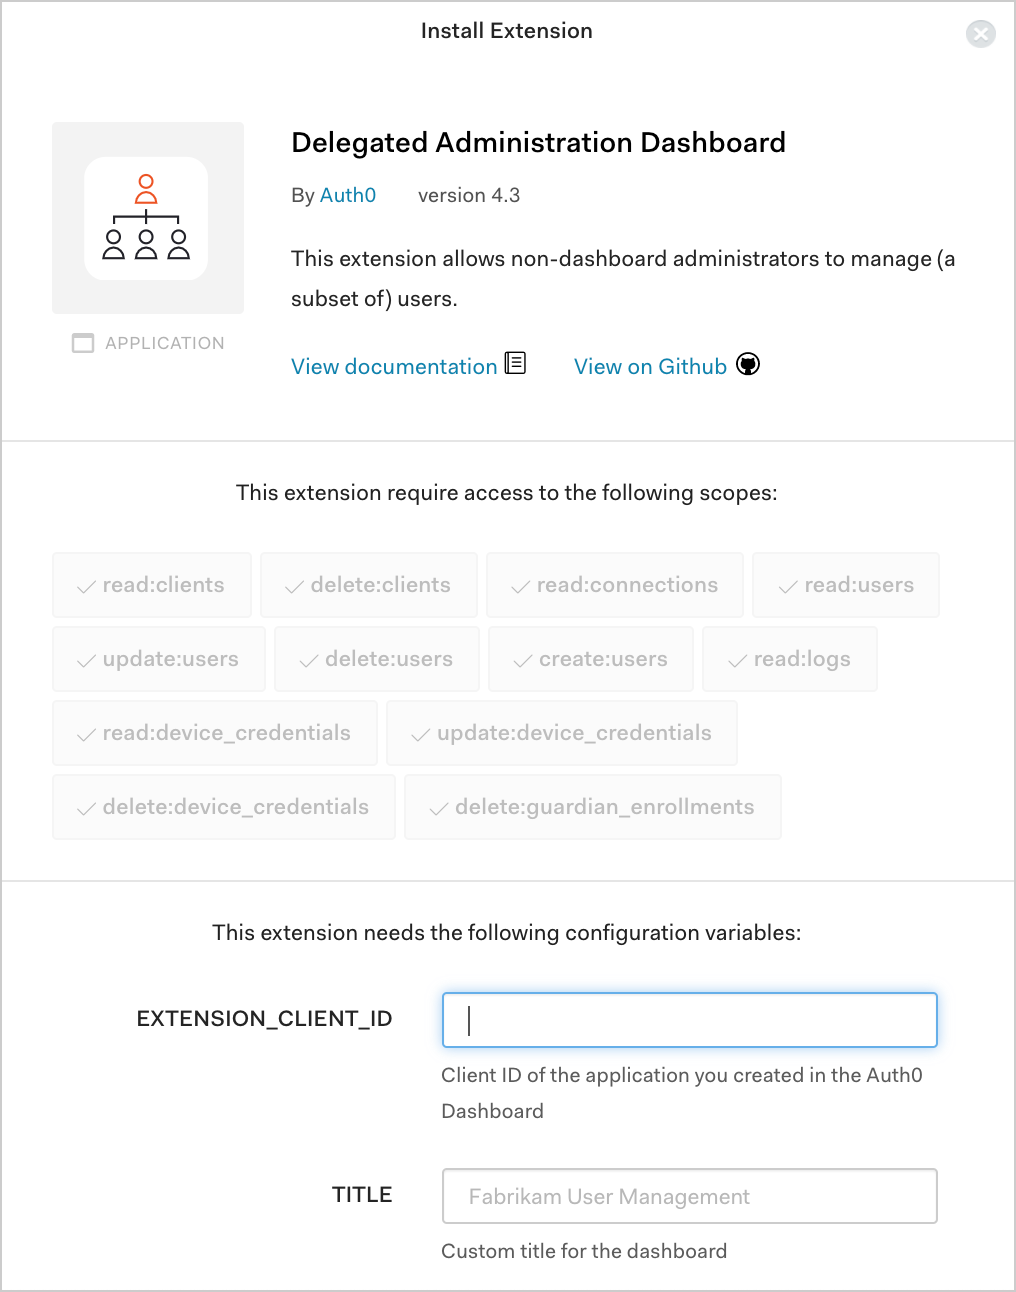
Set the following configuration variables, and select Install:
Setting the
AUTH0_CUSTOM_DOMAINvariable does not affect the extension URL; it only changes the authorization endpoint. When a custom domain is used, users that are logging into the extension will be navigated tohttps://AUTH0_CUSTOM_DOMAIN/logininstead of the defaulthttps://tenant-name.us.auth0.com/login. If you navigate to Auth0 Dashboard > Applications > Applications, you will see that the extension created an additional application. This application is authorized to access the Management API, so you shouldn’t modify it.
Add callback URLs to Application
- Navigate to Auth0 Dashboard > Applications > Applications, and select the name of the application with which you plan to use this extension. This should be the application with the Client ID you entered earlier when setting the configuration variables for the Delegated Administration Dashboard.
-
Locate Allowed Callback URLs, and add the appropriate callback URL for your region and your tenant’s extensibility runtime.
- Select Save Changes.
Use extension
- Go to Auth0 Dashboard > Extensions, and select the Installed Extensions view.
- Select Delegated Administration Dashboard. A new tab will open to display the login prompt. Because we disabled signups for the database connection while configuring it, the login screen will not display a Sign Up option. Once you provide valid credentials, you will be directed to your custom Delegated Administration Dashboard page, which will have the Title you provided at the top of the page, and if you provided a custom CSS file, that styling will be applied.