auth_config.json file in your text editor and update the domain and client_id with your details.
Add http://localhost:3000 in the “Allowed Callback URLs”, “Allowed Logout URLs”, “Allowed Web Origins” field.
-
Log the user in to your application.
The user authenticates to your SPA using using Universal Login, requesting an Access Token for the Management API.
In the typical SPA login, the callback is handled client-side by the same page, and a JWT is received after successful authentication. To learn more, read the Single-Page App Quickstart. -
The user initiates account linking. Your SPA must provide a UI for the user to initiate a link to their other accounts. For example, your SPA could contain a user’s settings page:
When the user clicks on the Link Account button, your app redirects the user to the Universal Login page, when they log in with the connection they want to link to. After successful authentication, use the obtained token to link the accounts.
You could also add a button for each connection (e.g. ‘Link Facebook Account’, ‘Link Google Account’) and redirect the user to/authorizewith theconnectionparameter set (e.g./authorize?connection=facebook).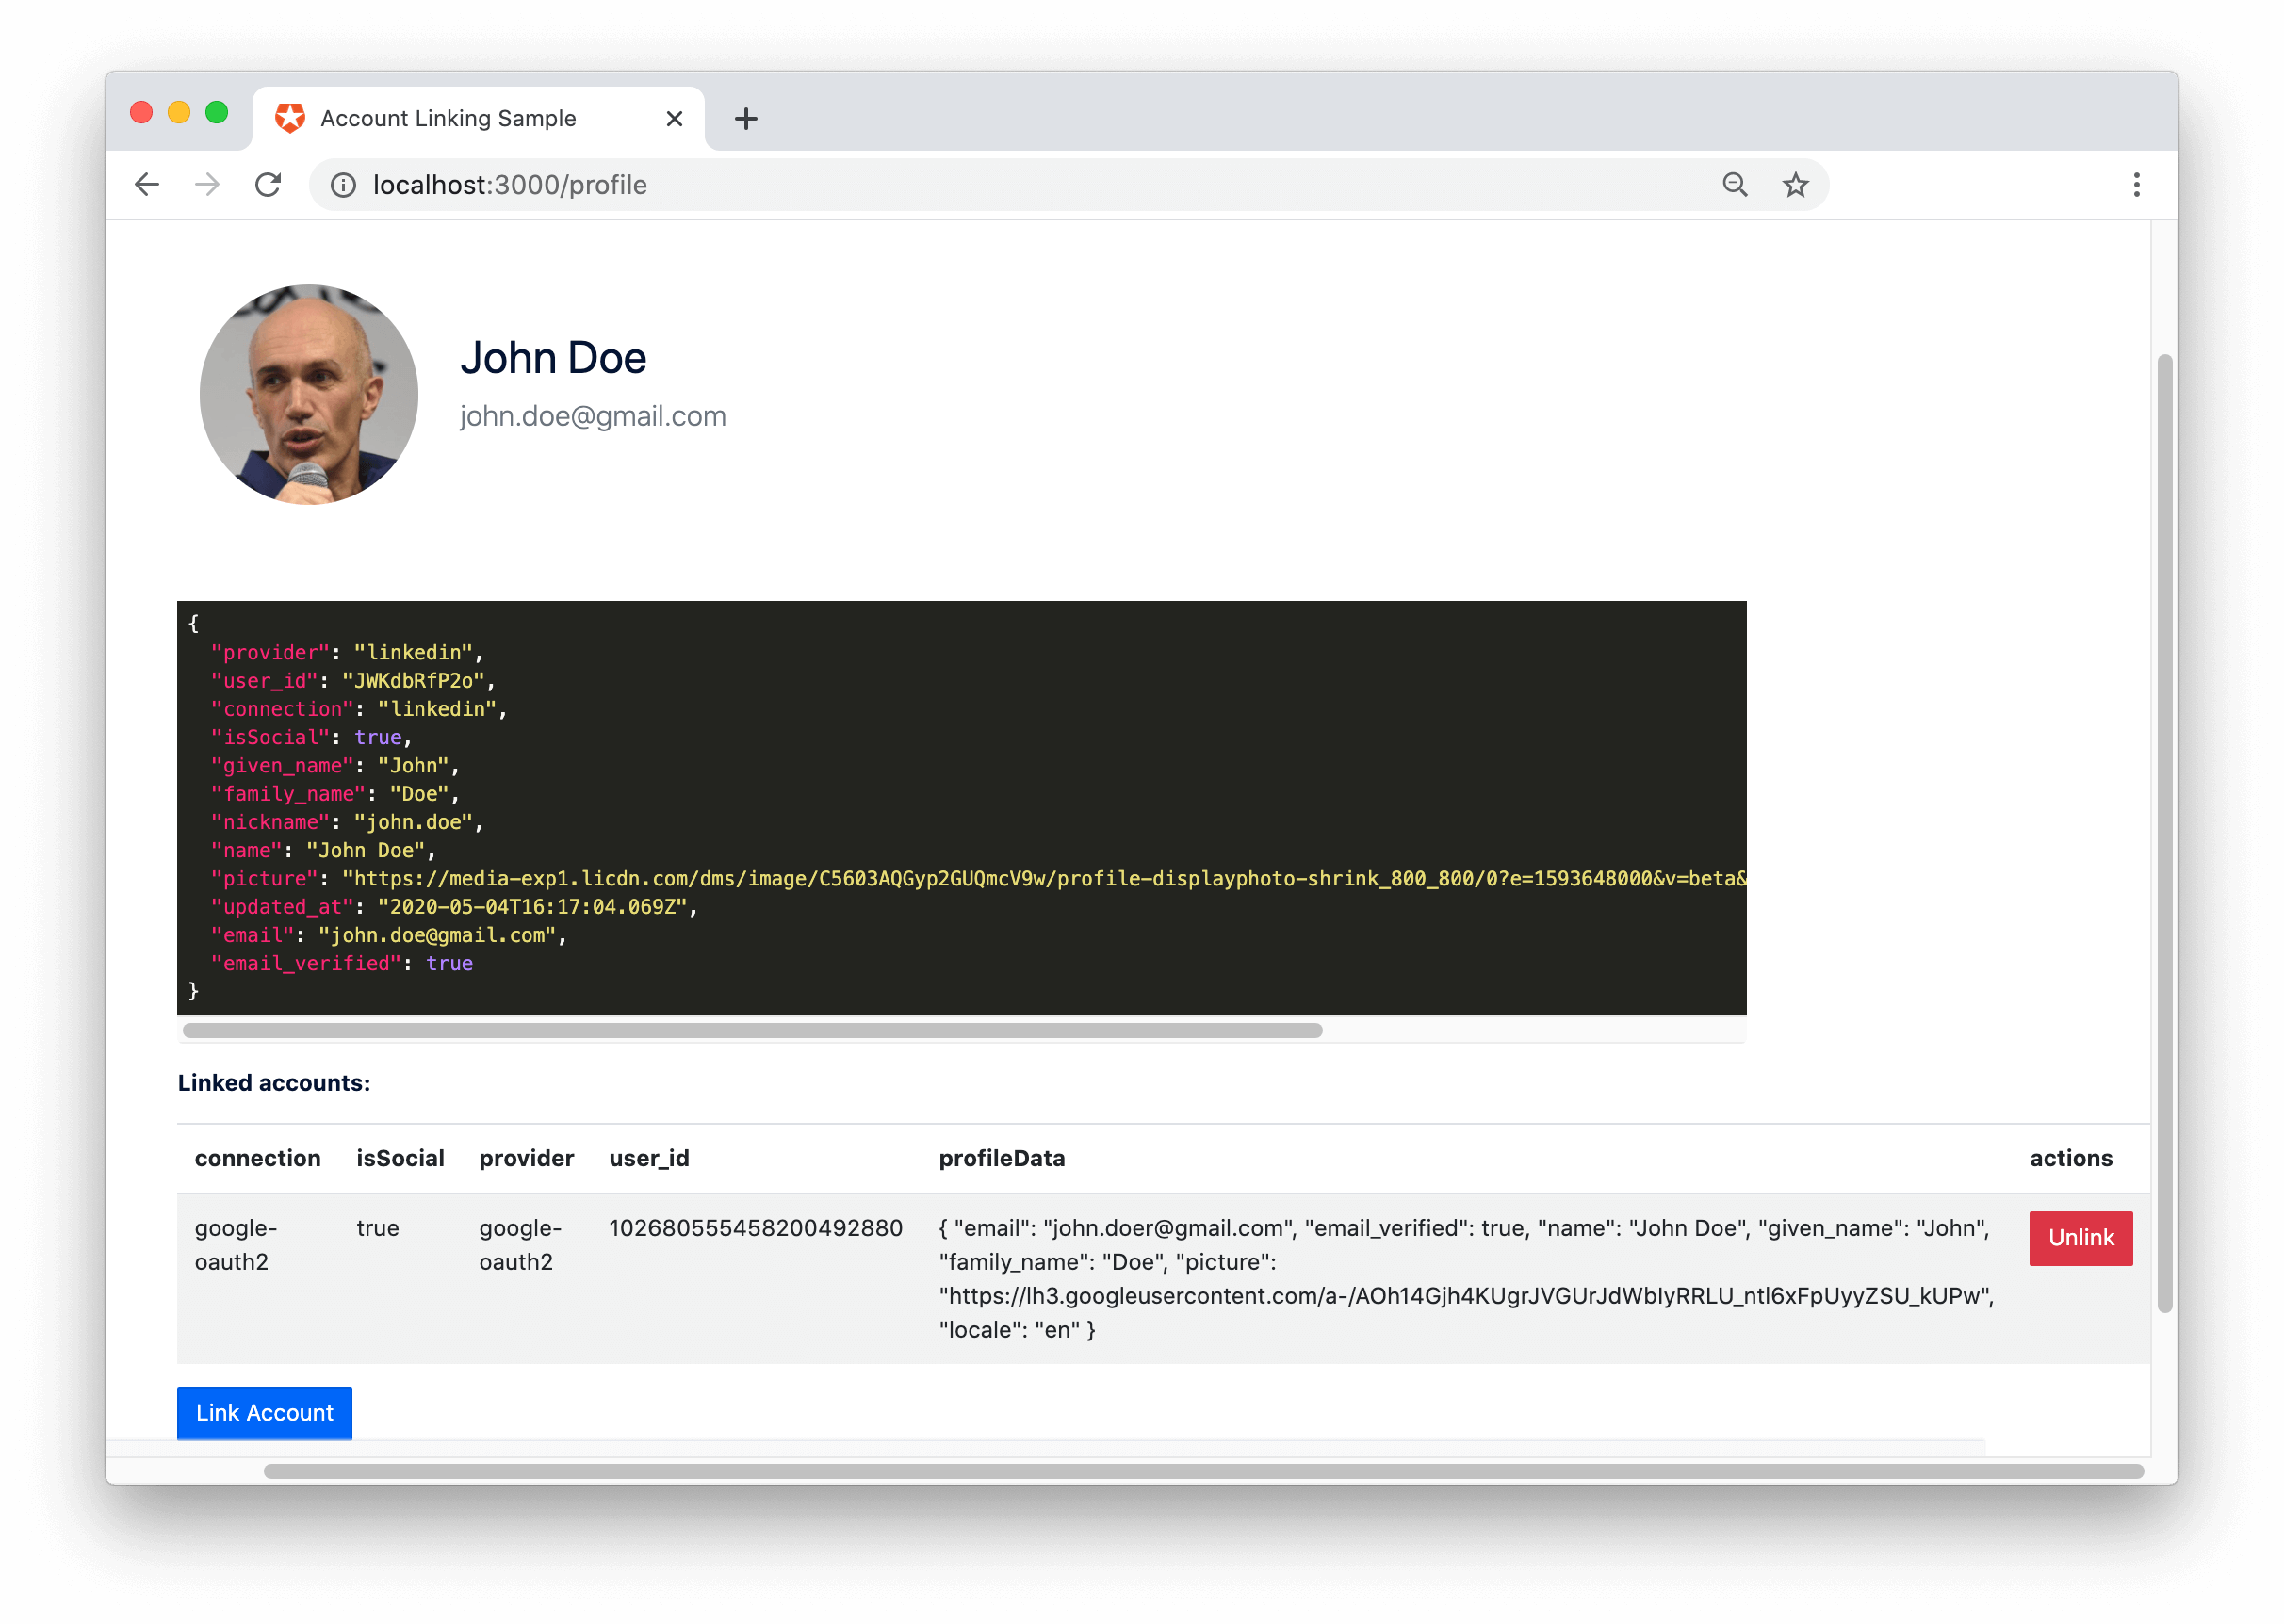
- Link accounts by calling the Auth0 Management API’s Link a User Account endpoint.
-
In the
linkAccountfunction, call the Management API. Authenticate with the API using the primary JWT, which is the Access Token, and link using the primary user’s ID and the secondary JWT, which is the secondary user’s ID Token.
Account Linking: Access Tokens vs. ID Tokens
Previously, in some cases, you could use ID Tokens to link and unlink user accounts. This functionality is being deprecated. You will have to use Access Tokens in all cases. The change in the unlinking of accounts is that you can no longer use an ID Token in the Authorization header. An Access Token must be used instead. The functionality is still available but not recommended and affected users are encouraged to migrate. See Migration Guide: Account Linking with Access Tokens vs. ID Tokens for details.