OpenAI has announced a powerful new capability: the ability to securely connect any Model Context Protocol (MCP) server directly through ChatGPT's interface. This is fantastic news for developers, especially if you already have an MCP server secured by Auth0. This integration allows ChatGPT to perform both read and write actions, turning your AI assistant into a robust tool for managing your tasks.
In this post, we'll walk you through the complete process of connecting your Auth0 secured Todos API to ChatGPT, from enabling Developer Mode and configuring your connector to authorizing the connection and interacting with your API in a chat.
Understanding ChatGPT Developer Mode and MCP
ChatGPT Developer Mode is a beta feature providing full Model Context Protocol (MCP) client support for all tools exposed by a connected MCP server. This enables ChatGPT to not only fetch data but also execute significant write operations by calling functions on your server.
A Crucial Note on Security: This mode is powerful and intended for developers who understand how to safely configure and test connectors. Always be vigilant for prompt injections, carefully review all tool calls (especially write actions to prevent data destruction), and ensure you trust any MCP server you connect, as malicious ones could attempt to steal information.
Prerequisites
To follow along, you'll need:
- A ChatGPT Pro or Plus account (Developer Mode is a beta feature).
- An existing Remote MCP server that you want ChatGPT to interact with.
- For detailed instructions on this setup, you can follow our guide on how to secure and deploy remote MCP servers with Auth0 and Cloudflare.
- We'll assume your API is configured in Auth0 and enforcing Auth0-issued access tokens.
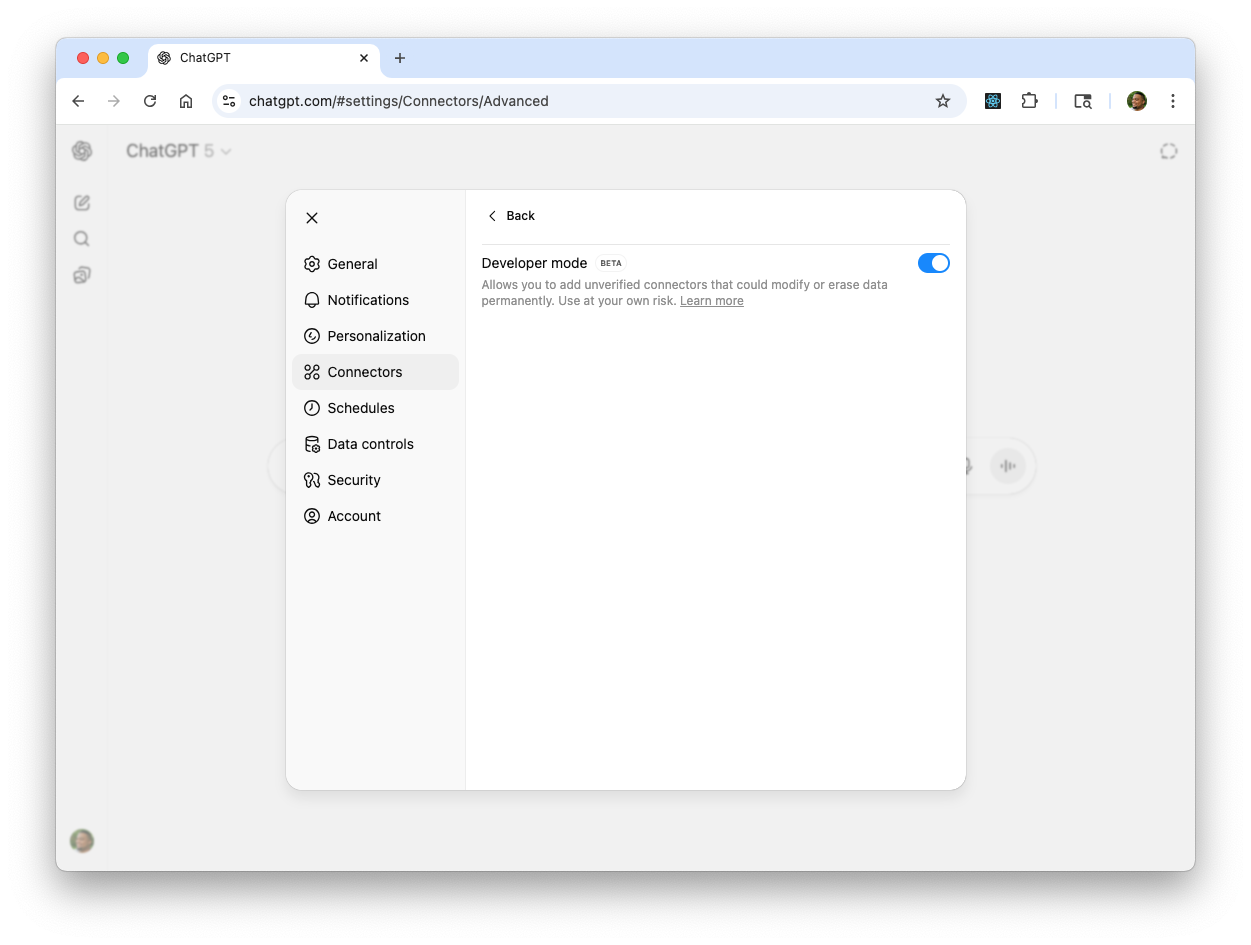
Step 1: Enable Developer Mode in ChatGPT
First, we need to enable this beta feature within ChatGPT.
- Open your ChatGPT interface and navigate to Settings.
- Select the Connectors tab.
- Click on Advanced settings.
- Toggle on Developer Mode. This unlocks the options for creating custom connectors.
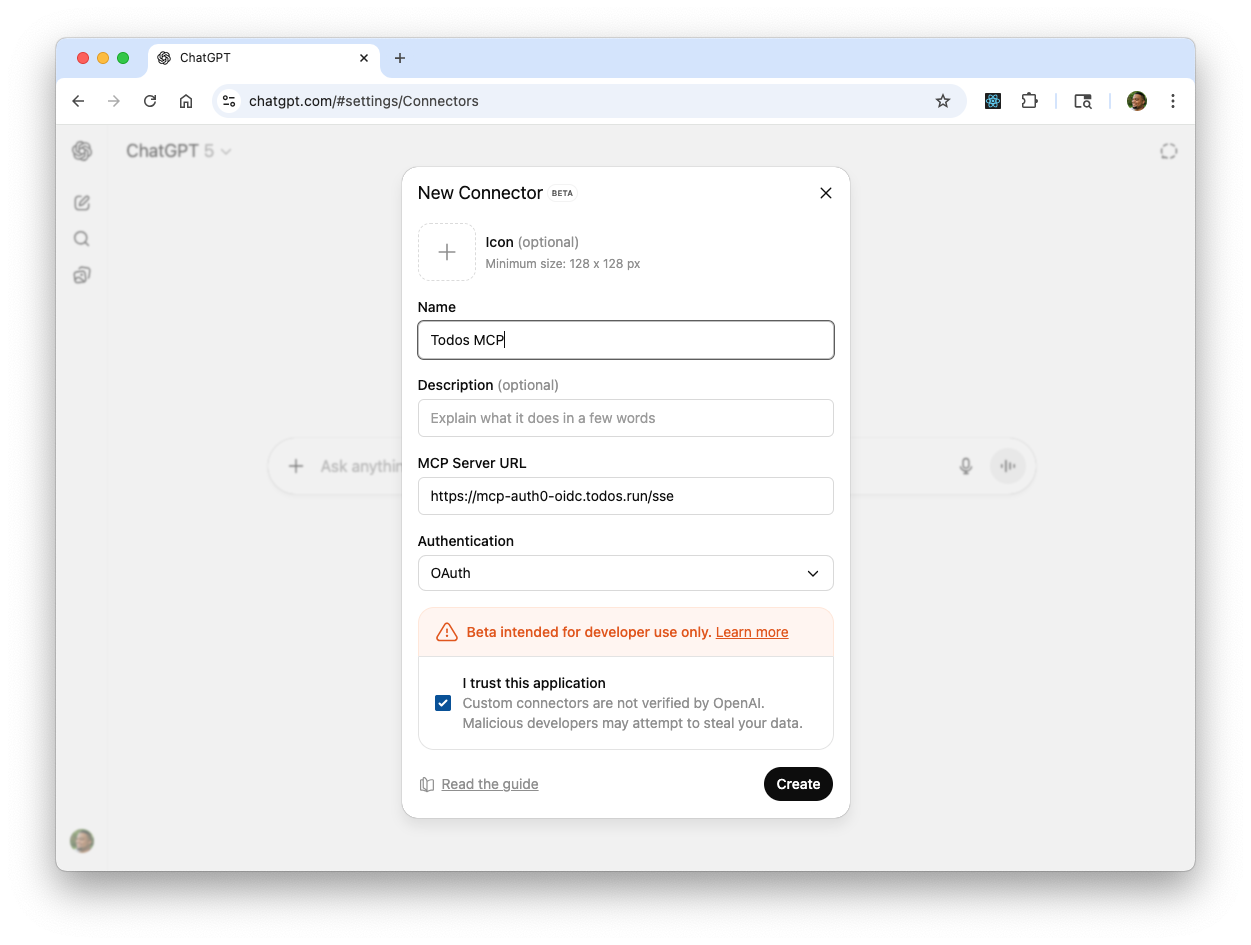
Step 2: Create a Custom Connector
Once Developer Mode is enabled, you have the option to create custom connectors. This is where you'll point ChatGPT to your MCP server.
- In the Connectors settings, click on Create.
- Provide the information for your MCP server:
- Name: Give it a descriptive name, like "My Test MCP" or "Todos API".
- Description (Optional): Add a brief description of what the API does.
- Icon (Optional): Provide an icon for easy identification.
- MCP server URL: Enter the full URL of your Auth0-secured API.
- Make sure Authentication is set to "OAuth." Auth0 will handle the authentication flow externally, so ChatGPT does not need to manage credentials directly.
- Confirm that you trust this application by clicking the checkbox
- Click Create.
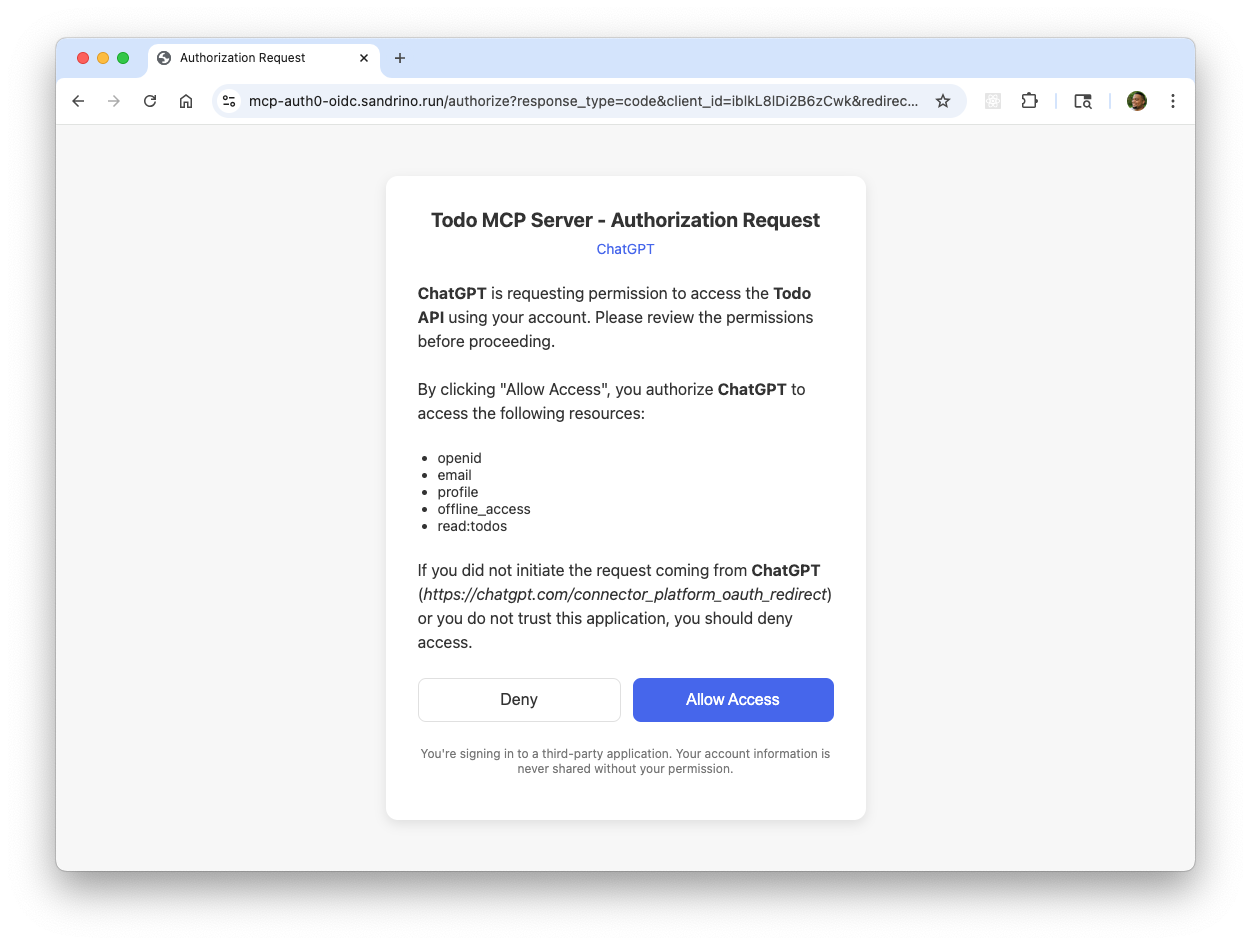
Step 3: Authorize the Connection with Auth0
Now, you need to authorize ChatGPT to connect to your MCP server.
- After clicking Create, ChatGPT will initiate the connection.
- Because your server is secured by Auth0, you will be redirected to the Auth0 Universal Login page.
- Log in with your user credentials and click Allow Access
- After a successful login and consent, you will be redirected back to ChatGPT. Your remote MCP server is now securely connected!
Step 4: Interact with Your Remote MCP Server in a Conversation
Let's see how you can now talk to your newly connected API.
Start a new chat in the main ChatGPT interface.Click the plus icon (+) in the composer and select More. Then choose Developer mode. This opens a new interface where you can select your custom data sources.Select your newly created connector (e.g., "My Test MCP") to add it as a source for this conversation.
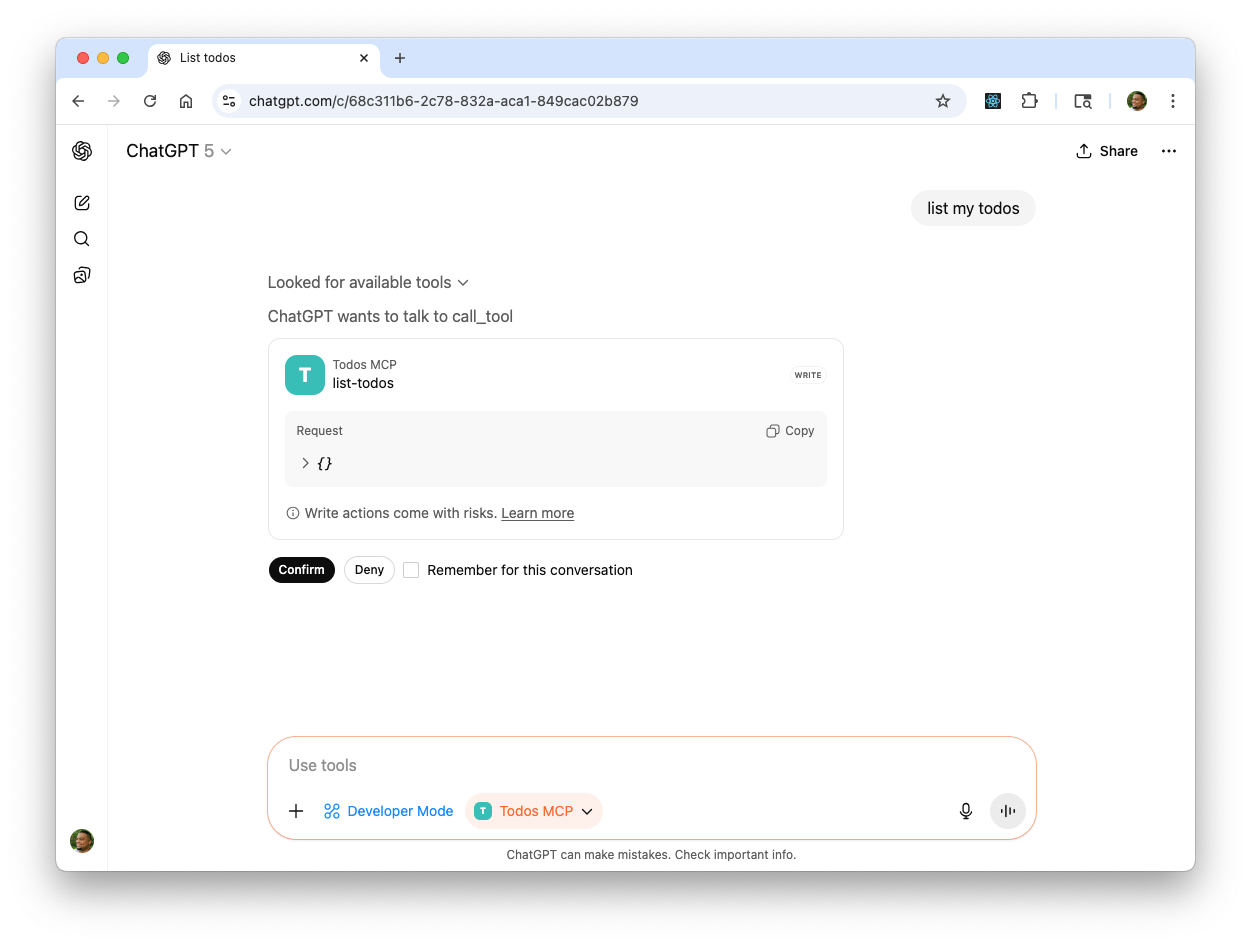
Now, you can ask it to perform an action using your API. For example, type the prompt: "list my todos". ChatGPT will recognize that this requires an action from your MCP server and propose a "tool call". It will show you the details of the call it intends to make.
Click Confirm to allow ChatGPT to send the request to your API.
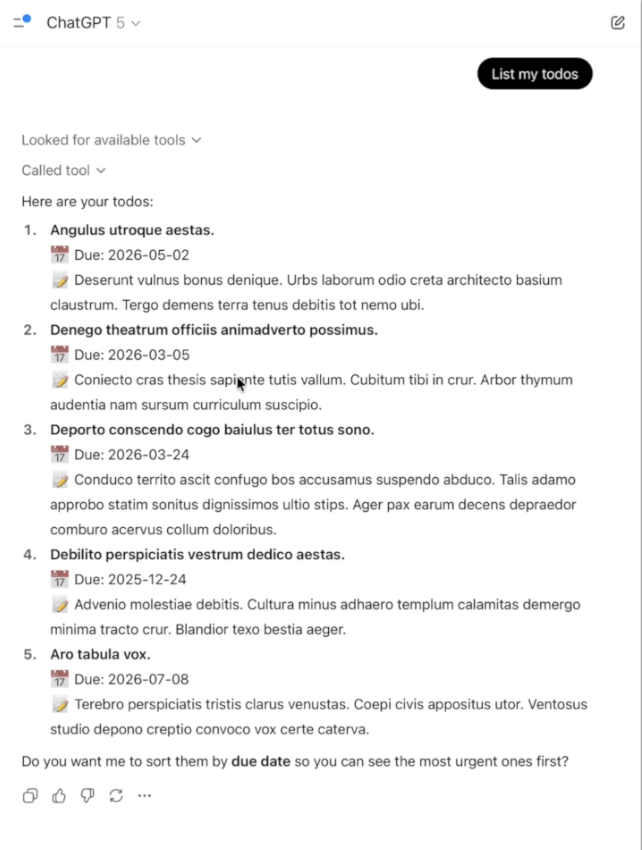
After you confirm, ChatGPT will display the results of the query, showing you the information retrieved directly from your Auth0-secured MCP server. You have successfully extended ChatGPT's capabilities to interact with your own secure services.
Recep and further reading
You've successfully added your Auth0 secured remote MCP server with ChatGPT, giving access to resources right inside of ChatGPT. This process involved:
- Enabling Developer Mode in ChatGPT settings.
- Creating a Custom Connector by providing your remote MCP server URL with OAuth authentication.
- Authorizing the Connection through the Auth0 Universal Login page.
- Interacting with your API in the chat window by selecting your custom connector and confirming tool calls.
Check out some other MCP Content we have on the Auth0 Blog
About the author

Will Johnson
Developer Advocate
Will Johnson is a Developer Advocate at Auth0. He loves teaching topics in a digestible way to empower more developers. He writes blog posts, records screencasts, and writes eBooks to help developers. He's also an instructor on egghead.io.
View profile