
TL;DR: In this tutorial, we'll see how easy it is to build a native desktop C# app and get up and running with JWT authentication. If you're unfamiliar with JWT(JSON Web Token), you can read more about it here. Check out the repo to get the code.
There are different frameworks for building native desktop C# apps. We have WPF (Windows Presentation Foundation) and Universal Windows. Universal Windows apps enable you to target every Windows device in one solution. You develop once, share most of your code, and deploy on Windows, Windows Phone, or Xbox. It reduces the effort needed in building and maintaining an app for each type of device.
The limitation of Universal Windows right now is that it only works from Windows 8 and above. Meanwhile, WPF has been around for a very long time. It was introduced with .NET Framework 3.0. It uses Direct3D rendering which employs graphics cards to render the output on the screen. Thus the drawing in the form will be smooth and also there is a chance to utilize the hardware capabilities installed in your machine. WPF controls are actually drawn over the screen, and hence you can customize controls totally and modify their behavior when required.
We'll be building the desktop app with WPF (Windows Presentation Foundation) using Visual Studio 2015 and .NET Framework 4.6.1.
Let's get started
- Open your Visual Studio. You can download from here.
- Create a new project and choose "WPF Application" as the project type.
- Under Templates at the left hand side, select Visual C# and in the middle panel, select WPF Application.
- Choose a folder for your project and give it a name. Then press "OK". Two files are created by default. One is the XAML file (MainWindow.xaml) and the other one is the CS file (MainWindow.xaml.cs).
In a WPF application, there are two ways to design a UI for your application. One is to simply drag and drop UI elements from the toolbox to the design window. The second way is to design your UI by writing XAML tags for UI elements. Visual Studio handles XAML tags when drag and drop feature is used for UI designing.
Setting Up the UI
MainWindow.xaml.cs
<Window x:Class="WpfClient.MainWindow"
      xmlns="http://schemas.microsoft.com/winfx/2006/xaml/presentation"
      xmlns:x="http://schemas.microsoft.com/winfx/2006/xaml"
      xmlns:d="http://schemas.microsoft.com/expression/blend/2008"
      xmlns:mc="http://schemas.openxmlformats.org/markup-compatibility/2006"
      xmlns:local="clr-namespace:WpfClient"
      mc:Ignorable="d"
      Title="WPF Client" Height="350" Width="525">
  <Frame x:Name="frame" Content="Frame" Margin="0" Source="/WpfClient;component/Pages/LoginPage.xaml" NavigationUIVisibility="Hidden"/>
</Window>
Take a good look at the Frame control and the Source attribute. I have linked the source attribute to another page. So, go ahead and create a directory called Pages. Right click on the folder. Click the add menu item and select page. Call it LoginPage. Now, this means when you run our application, the main window will load the content of the LoginPage.
Open up the LoginPage.xaml file and configure it like so:
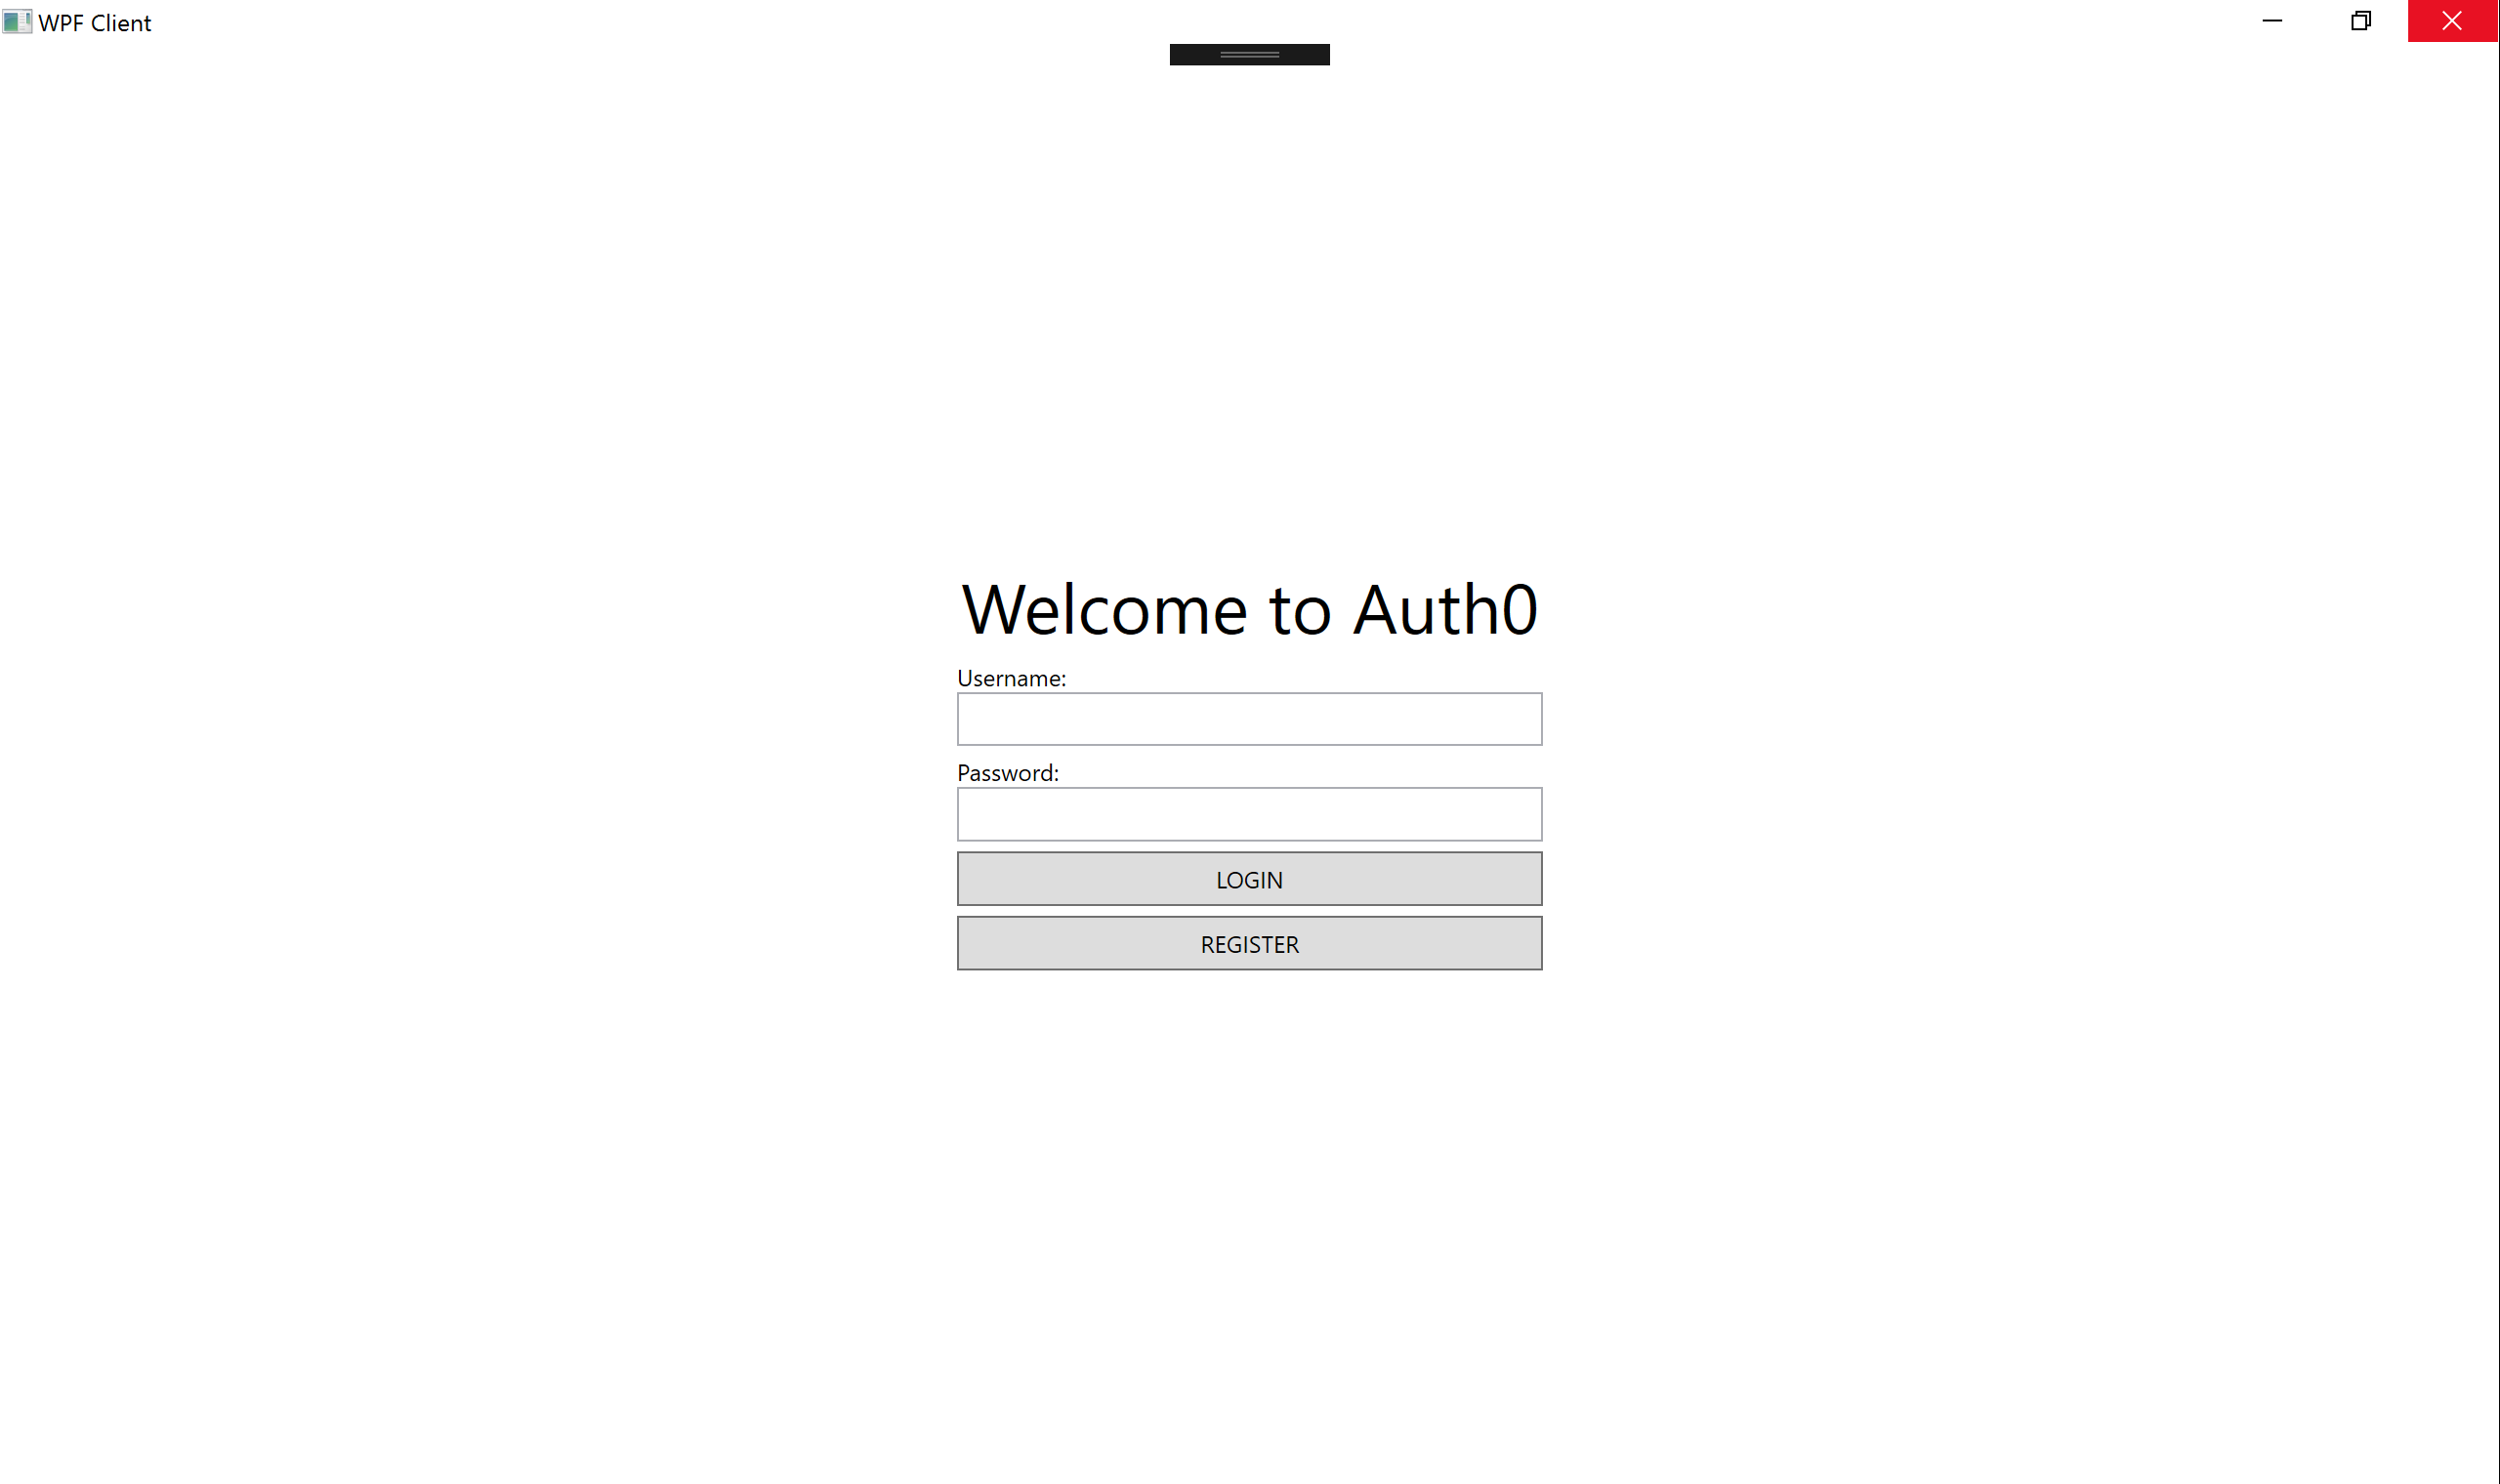
<Page x:Class="WpfClient.Pages.LoginPage"
      xmlns="http://schemas.microsoft.com/winfx/2006/xaml/presentation"
      xmlns:x="http://schemas.microsoft.com/winfx/2006/xaml"
      xmlns:mc="http://schemas.openxmlformats.org/markup-compatibility/2006"
      xmlns:d="http://schemas.microsoft.com/expression/blend/2008"
      xmlns:local="clr-namespace:WpfClient.Pages"
      mc:Ignorable="d"
      d:DesignHeight="485" d:DesignWidth="715"
      Title="Login">

    <Grid>
        <StackPanel HorizontalAlignment="Center" Margin="0" VerticalAlignment="Center" Width="300">
            <TextBlock Text="Welcome to Auth0" HorizontalAlignment="Center" FontSize="36" />
            <TextBlock Text="Username:" Margin="0,5,0,0" />
            <TextBox x:Name="tbxUsername" Padding="5" />
            <TextBlock Text="Password:" Margin="0,5,0,0" />
            <PasswordBox x:Name="pbxPassword" Padding="5" />
            <Button x:Name="btnLogin" Content="LOGIN" Padding="5" Margin="0,5,0,0" Click="btnLogin_Click" />
            <Button x:Name="btnRegister" Content="REGISTER" Padding="5" Margin="0,5,0,0" Click="btnRegister_Click" />
        </StackPanel>
    </Grid>
</Page>
Here, we have two TextBlocks, one TextBox, one PasswordBox and two Buttons for Login and Register simultaneously. Go ahead and create the RegisterPage too just like we created the LoginPage.
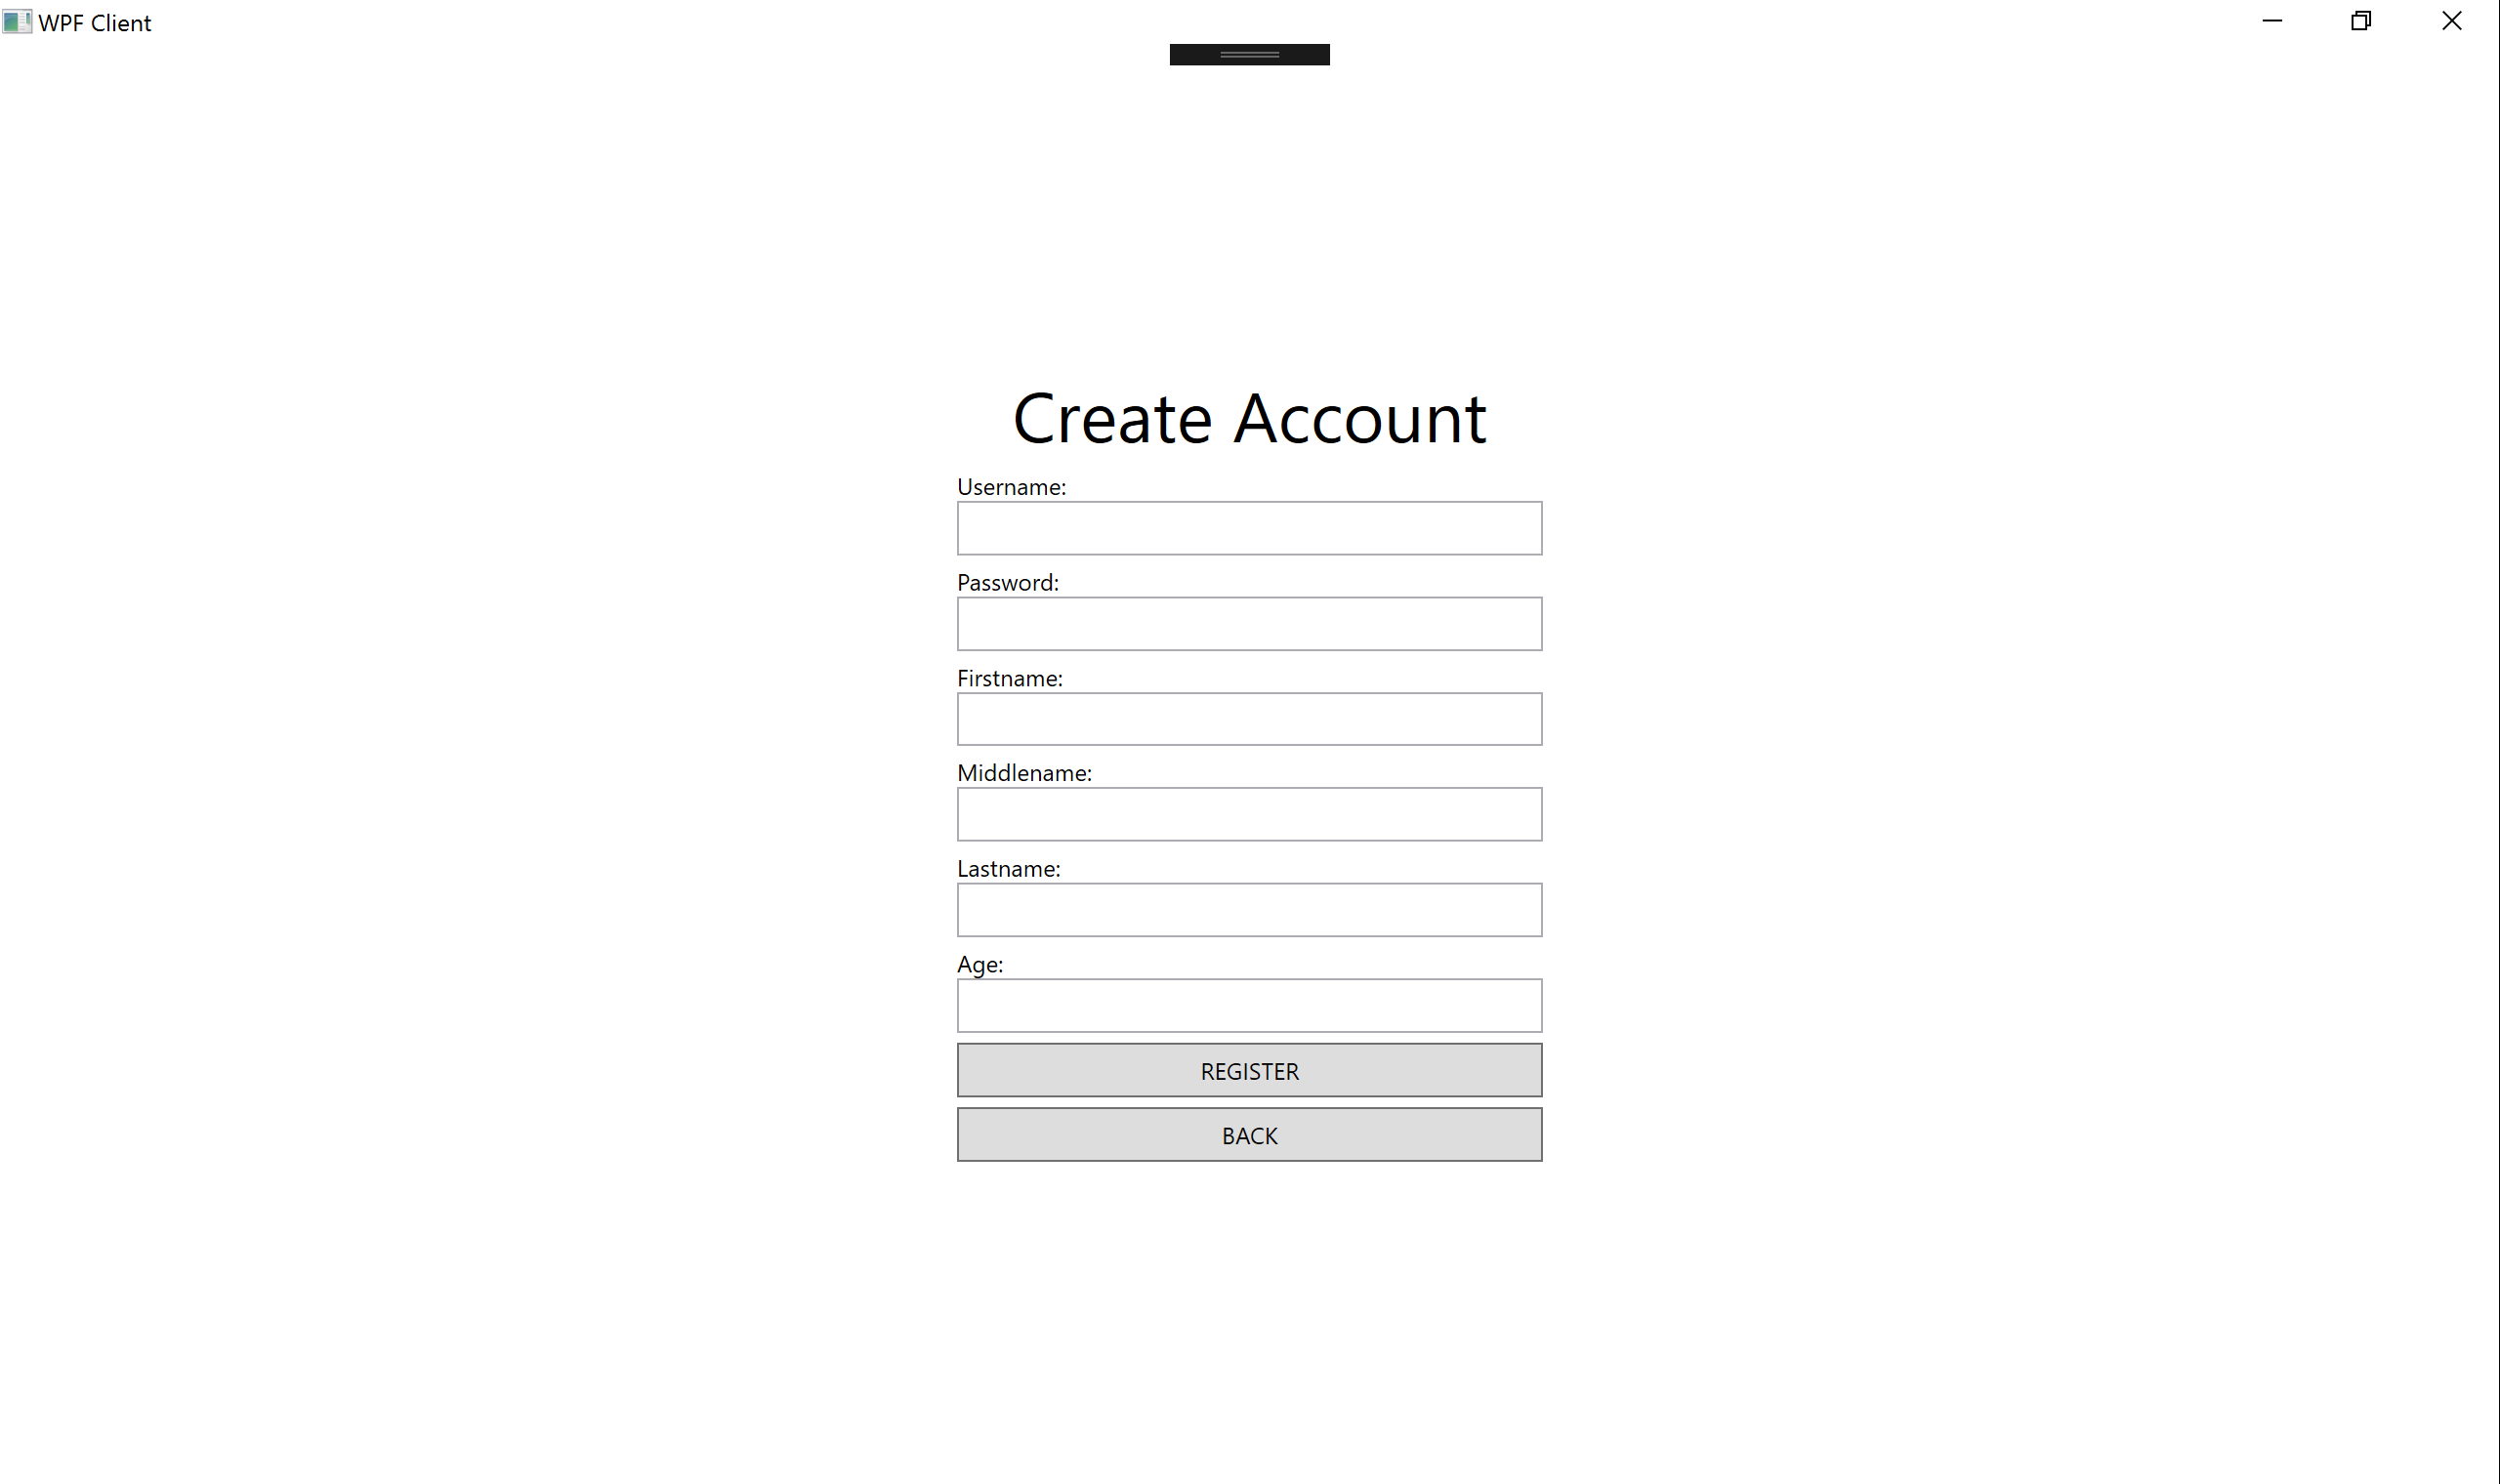
Open up the RegisterPage.xaml and configure it like so:
<Page x:Class="WpfClient.Pages.RegistrationPage"
      xmlns="http://schemas.microsoft.com/winfx/2006/xaml/presentation"
      xmlns:x="http://schemas.microsoft.com/winfx/2006/xaml"
      xmlns:mc="http://schemas.openxmlformats.org/markup-compatibility/2006"
      xmlns:d="http://schemas.microsoft.com/expression/blend/2008"
      xmlns:local="clr-namespace:WpfClient.Pages"
      mc:Ignorable="d"
      d:DesignHeight="300" d:DesignWidth="300"
      Title="RegistrationPage">

    <Grid>
        <StackPanel HorizontalAlignment="Center" Margin="0" VerticalAlignment="Center" Width="300">
            <TextBlock Text="Create Account" HorizontalAlignment="Center" FontSize="36" />
            <TextBlock Text="Username:" Margin="0,5,0,0" />
            <TextBox x:Name="tbxUsername" Padding="5" />
            <TextBlock Text="Password:" Margin="0,5,0,0" />
            <PasswordBox x:Name="pbxPassword" Padding="5" />
            <TextBlock Text="Firstname:" Margin="0,5,0,0" />
            <TextBox x:Name="tbxFirstname" Padding="5" />
            <TextBlock Text="Middlename:" Margin="0,5,0,0" />
            <TextBox x:Name="tbxMiddlename" Padding="5" />
            <TextBlock Text="Lastname:" Margin="0,5,0,0" />
            <TextBox x:Name="tbxLastname" Padding="5" />
            <TextBlock Text="Age:" Margin="0,5,0,0" />
            <TextBox x:Name="tbxAge" Padding="5" />
            <Button x:Name="btnReg" Content="REGISTER" Padding="5" Margin="0,5,0,0" Click="btnReg_Click" />
            <Button x:Name="btnBack" Content="BACK" Padding="5" Margin="0,5,0,0" Click="btnBack_Click" />
        </StackPanel>
    </Grid>
</Page>
We have the UI set up. Great! let's add functionality to these forms and buttons.
Setting Up the Back End
We are using our efficient Csharp-jwt-authentication-sample functional C# Web API backend. Check out the README on how to run it. It can exist in the same top level project directory our desktop app resides but it'll be run as a web app.
Setting Up the Data Model
You might be aware of the MVC/MVVM concept that is popular amongst frameworks. We'll use MVC in our app to allow for clean logic and easy separation of concerns. Here, we need to set up a Data Model for this app. The Model only holds the in-memory state in a structured format.
Create the Models directory and add a User Model to the directory.
User.cs
using System;
using System.Collections.Generic;
using System.Linq;
using System.Text;
using System.Threading.Tasks;

namespace WpfClient.Models
{
    class User
    {
        public int Id { get; set; }
        public string Username { get; set; }
        public string Firstname { get; set; }
        public string Middlename { get; set; }
        public string Lastname { get; set; }
        public int Age { get; set; }
        public string access_token { get; set; }
    }
}
We have the user model with the necessary attributes we need for this app. That's the only model we need.
Setting Up the Operation class
Create an Operations directory and add a new class called ApiOperations. Add the contents below to the class.
ApiOperations.cs
using System;
using System.Collections.Generic;
using System.Linq;
using System.Net;
using System.Text;
using System.Threading.Tasks;

using WpfClient.Models;
using Newtonsoft.Json;

namespace WpfClient.Operations
{
    class ApiOperations
    {
        /**
         * Base Url @string
         */
        private string baseUrl;

        public ApiOperations()
        {
            this.baseUrl = "http://localhost:5000/api";
        }
    }
}
In the constructor, we have added the baseUrl where our web API actually runs. The Newtonsoft.Json is there as a result of a module you'll have to install now. Go to packages.config, add the package name like so and install:
<?xml version="1.0" encoding="utf-8"?>
<packages>
  <package id="Newtonsoft.Json" version="8.0.3" targetFramework="net461" />
</packages>
If the package is not found, it will be downloaded the first time the app is run. Check here for more information on the
Newtonsoft.Jsonnugget.
Let's add the first method to the ApiOperations Class. Add this method below:
/**
 * Authenticate user with Web Api Endpoint
 * @param string username
 * @param string password
 */
public User AuthenticateUser(string username, string password)
{
    string endpoint = this.baseUrl + "/users/login";
    string method = "POST";
    string json = JsonConvert.SerializeObject(new
    {
        username = username,
        password = password
    });

    WebClient wc = new WebClient();
    wc.Headers["Content-Type"] = "application/json";
    try
    {
        string response = wc.UploadString(endpoint, method, json);
        return JsonConvert.DeserializeObject<User>(response);
    }
    catch (Exception)
    {
        return null;
    }
}
In this AuthenticateUser method, we are taking in the username and password arguments. JsonConvert.SerializeObject converts the username and password to a valid JSON. WebClient is an available class that allows for making web requests easily in .NET. We are using its UploadString method in the try and catch to authenticate a user. If the user exists, it returns details about the user, or else it returns null.
Let's add another method to the ApiOperations class. Add this method below:
/**
 * Get User Details from Web Api
 * @param  User Model
 */
public User GetUserDetails(User user)
{
    string endpoint = this.baseUrl + "/users/" + user.Id;
    string access_token = user.access_token;

    WebClient wc = new WebClient();
    wc.Headers["Content-Type"] = "application/json";
    wc.Headers["Authorization"] = access_token;
    try
    {
        string response = wc.DownloadString(endpoint);
        user = JsonConvert.DeserializeObject<User>(response);
        user.access_token = access_token;
        return user;
    }
    catch (Exception)
    {
        return null;
    }
}
This method fetches the user details from the API based on the user id. It takes in the User Model as an argument, then makes a get request using the Webclient DownloadString method.
wc.Headers["Authorization"] = access_token sends the access JSON Web Token as the form of authentication. Without this token, we can't retrieve the user details from the WEB API. Every other protected resource will be accessed this way.
The Authorization header which contains the key is very important.
JWT also provides the ability to do fine-grained access control. You can check here for more information on that.
Let's add yet another method to the ApiOperations Class. Add this method below:
/**
 * Register User
 * @param  string username
 * @param  string password
 * @param  string firstname
 * @param  string lastname
 * @param  string middlename
 * @param  int    age
 */
public User RegisterUser(string username, string password, string firstname,
    string lastname, string middlename, int age)
{
    string endpoint = this.baseUrl + "/users";
    string method = "POST";
    string json = JsonConvert.SerializeObject(new
    {
        username = username,
        password = password,
        firstname = firstname,
        lastname = lastname,
        middlename = middlename,
        age = age
    });

    WebClient wc = new WebClient();
    wc.Headers["Content-Type"] = "application/json";
    try
    {
        string response = wc.UploadString(endpoint, method, json);
        return JsonConvert.DeserializeObject<User>(response);
    }
    catch (Exception)
    {
        return null;
    }
}
The RegisterUser method takes in all the user details, converts them into a valid JSON with the help of JsonConvert and does a POST request with the help of WebClient.UploadString method. Note: The Content-Type has been set to application/json.
With all of that done and out of the way, we'll soon see how everything works together. Let's connect the GUI (WPF) to the Model and
ApiOperationsclass.
Setting Up the Registration Form
Open up the RegistrationPage.xaml.cs file. We'll add functionality to the register and back buttons.
RegistrationPage.xaml.cs
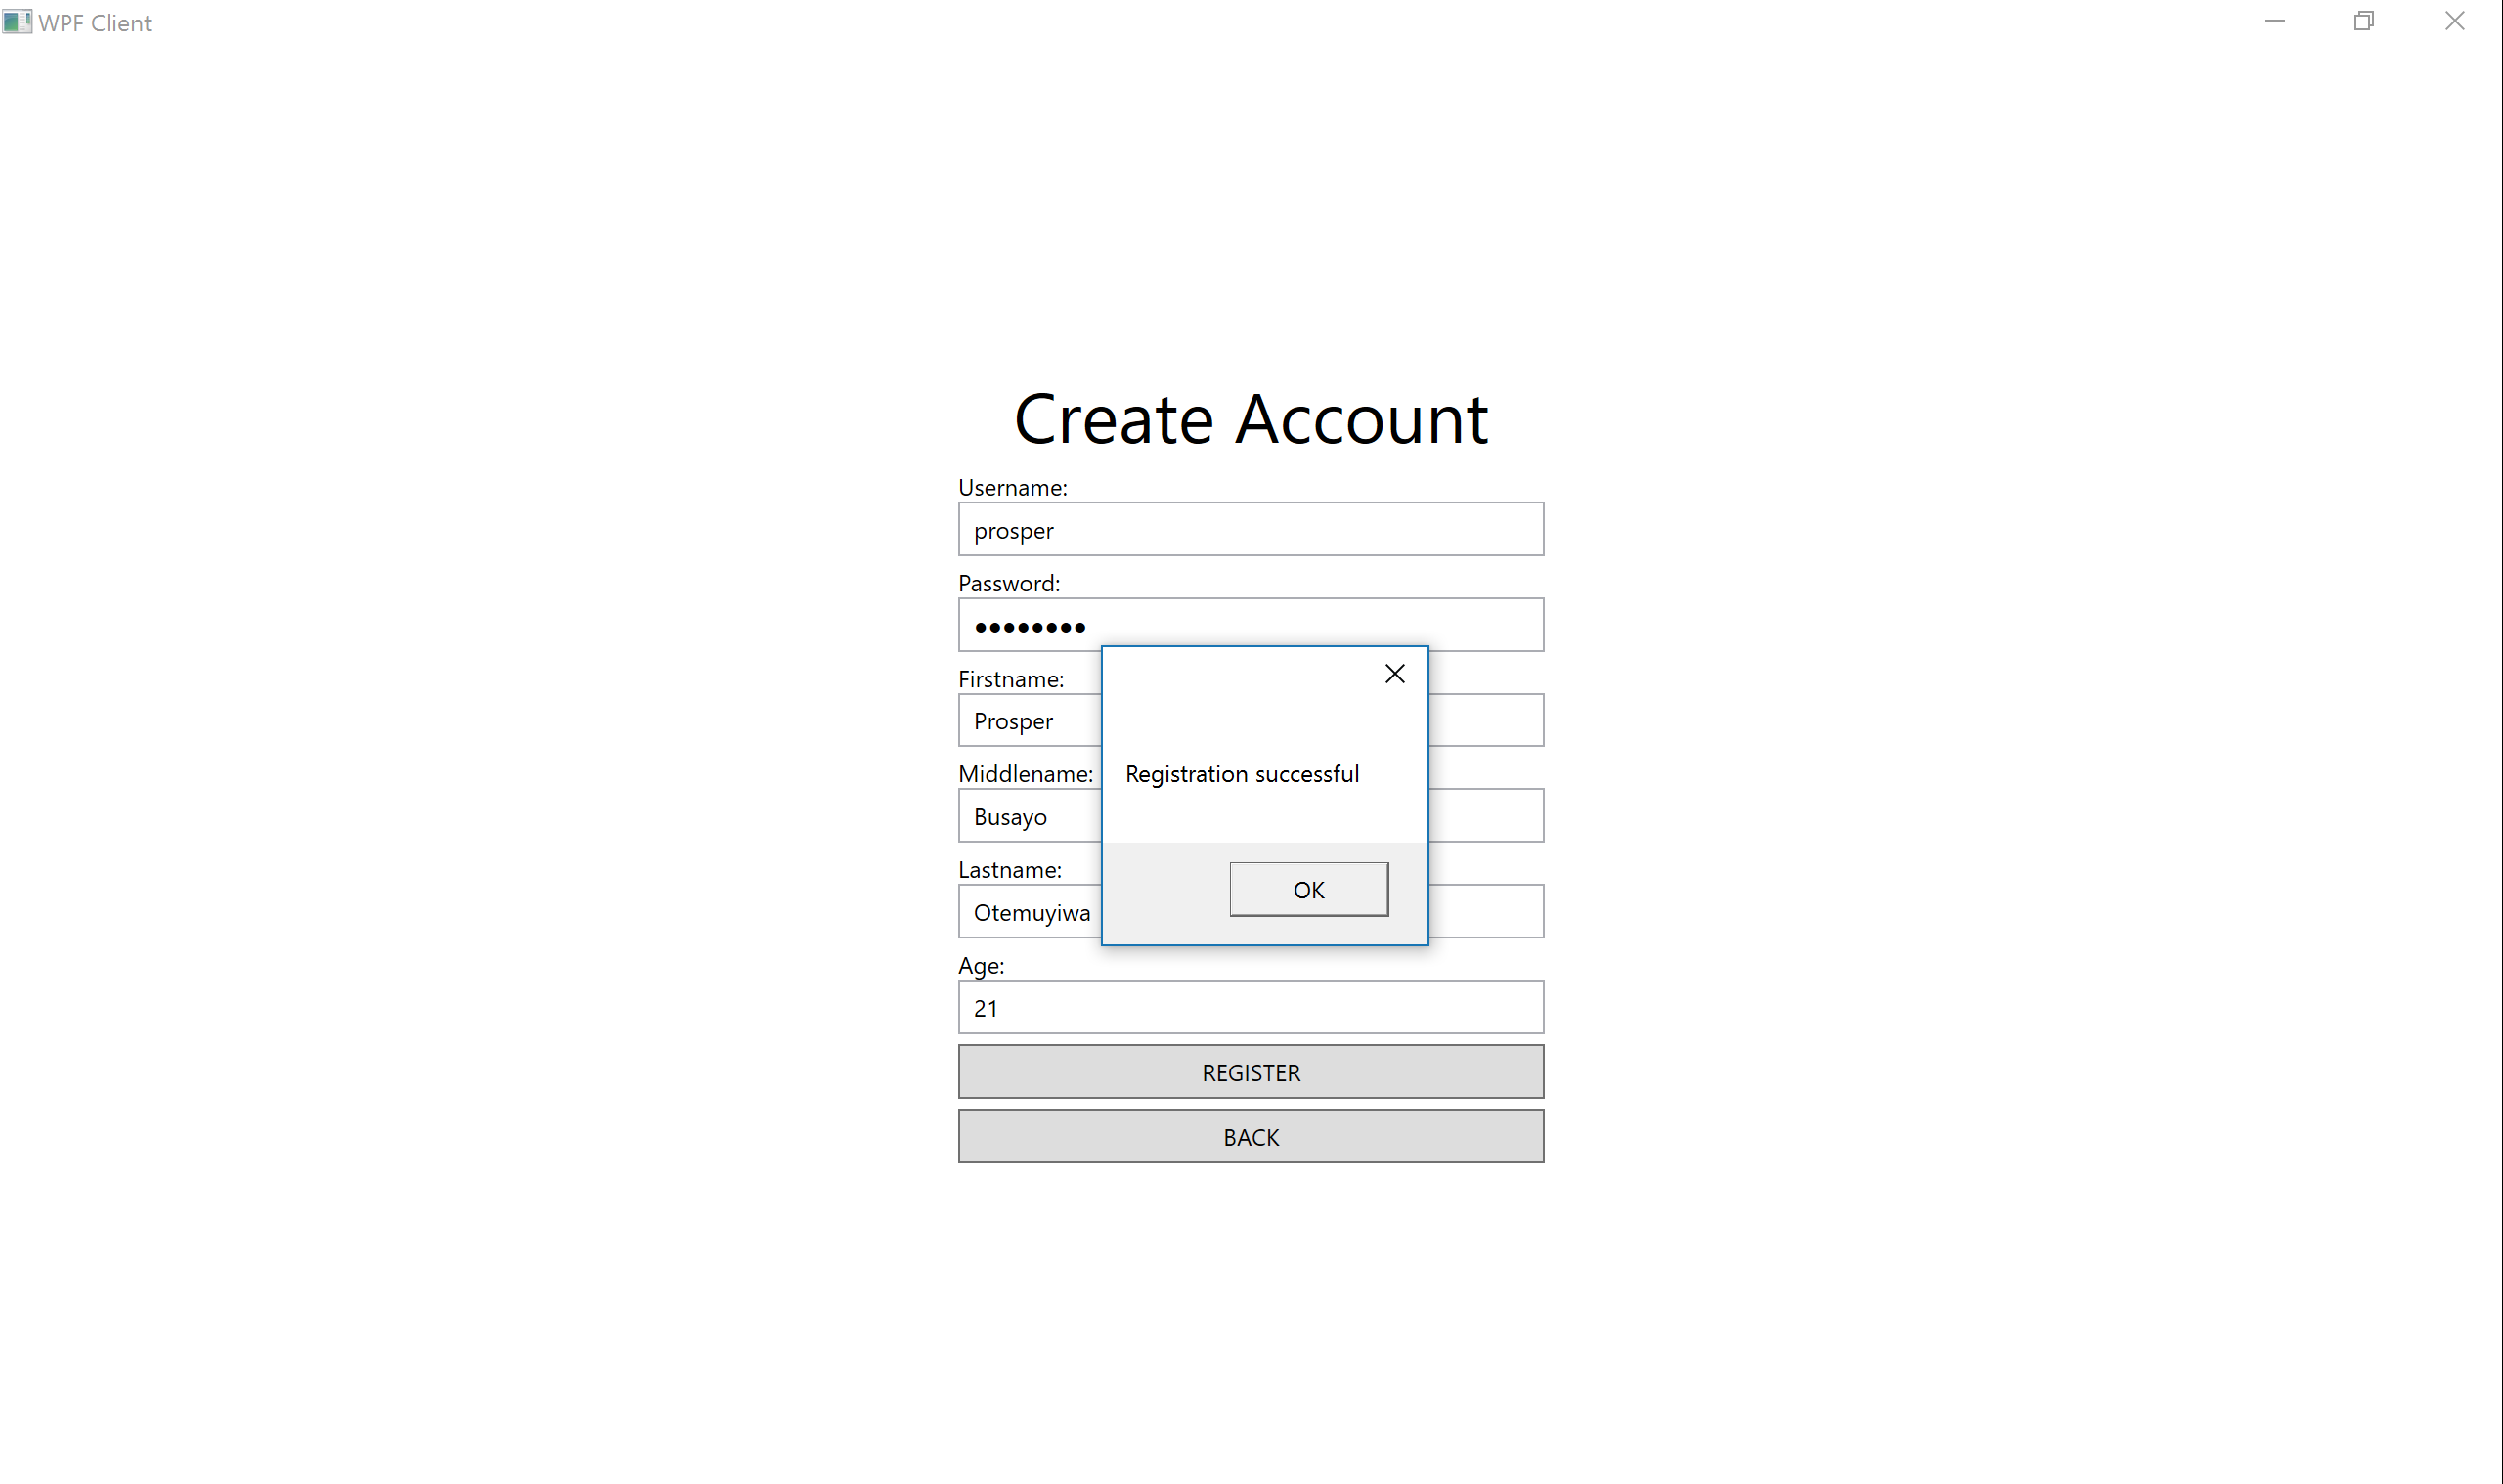
using System;
using System.Collections.Generic;
using System.Linq;
using System.Text;
using System.Threading.Tasks;
using System.Windows;
using System.Windows.Controls;
using System.Windows.Data;
using System.Windows.Documents;
using System.Windows.Input;
using System.Windows.Media;
using System.Windows.Media.Imaging;
using System.Windows.Navigation;
using System.Windows.Shapes;

using WpfClient.Models;
using WpfClient.Operations;

namespace WpfClient.Pages
{
    /// <summary>
    /// Interaction logic for RegistrationPage.xaml
    /// </summary>
    public partial class RegistrationPage : Page
    {
        public RegistrationPage()
        {
            InitializeComponent();
        }

        /**
         * Register method to handle the Register Button
         * @param object sender
         * @param RoutedEventArgs e
         */
        private void btnReg_Click(object sender, RoutedEventArgs e)
        {
            string username = tbxUsername.Text;
            string password = pbxPassword.Password;
            string firstname = tbxFirstname.Text;
            string lastname = tbxLastname.Text;
            string middlename = tbxMiddlename.Text;
            int age = int.Parse(tbxAge.Text);

            ApiOperations ops = new ApiOperations();
            User user = ops.RegisterUser(username, password, firstname, lastname, middlename, age);
            if (user == null)
            {
                MessageBox.Show("Username already exists");
                return;
            }

            Globals.LoggedInUser = user;
            MessageBox.Show("Registration successful");
            NavigationService.Navigate(new DetailsPage());
        }

        /**
         * Method to handle going back to the previous screen
         * @param object  sender
         * @param RoutedEventArgs e
         */
        private void btnBack_Click(object sender, RoutedEventArgs e)
        {
            NavigationService.GoBack();
        }
    }
}
In the btnReg_Click method, we are obtaining the user's information from the form via the name attributes. Remember tbxUsername, pbxPassword, tbxFirstname, tbxLastname, tbxMiddlename and tbxAge are name attributes we gave the form during the UI setup. Then we called the RegisterUser method from the ApiOperations class we defined earlier. If the user already exists, it gives an error message, otherwise it registers the user and navigates to a new page to show the User details. NavigationService does the navigation.
In the btnBack_Click method, the GoBack method of the NavigationService takes the user back to the previous screen.
Setting Up the Login Form
Open up the LoginPage.xaml.cs file. We'll add functionality to the login buttons.
LoginPage.xaml.cs
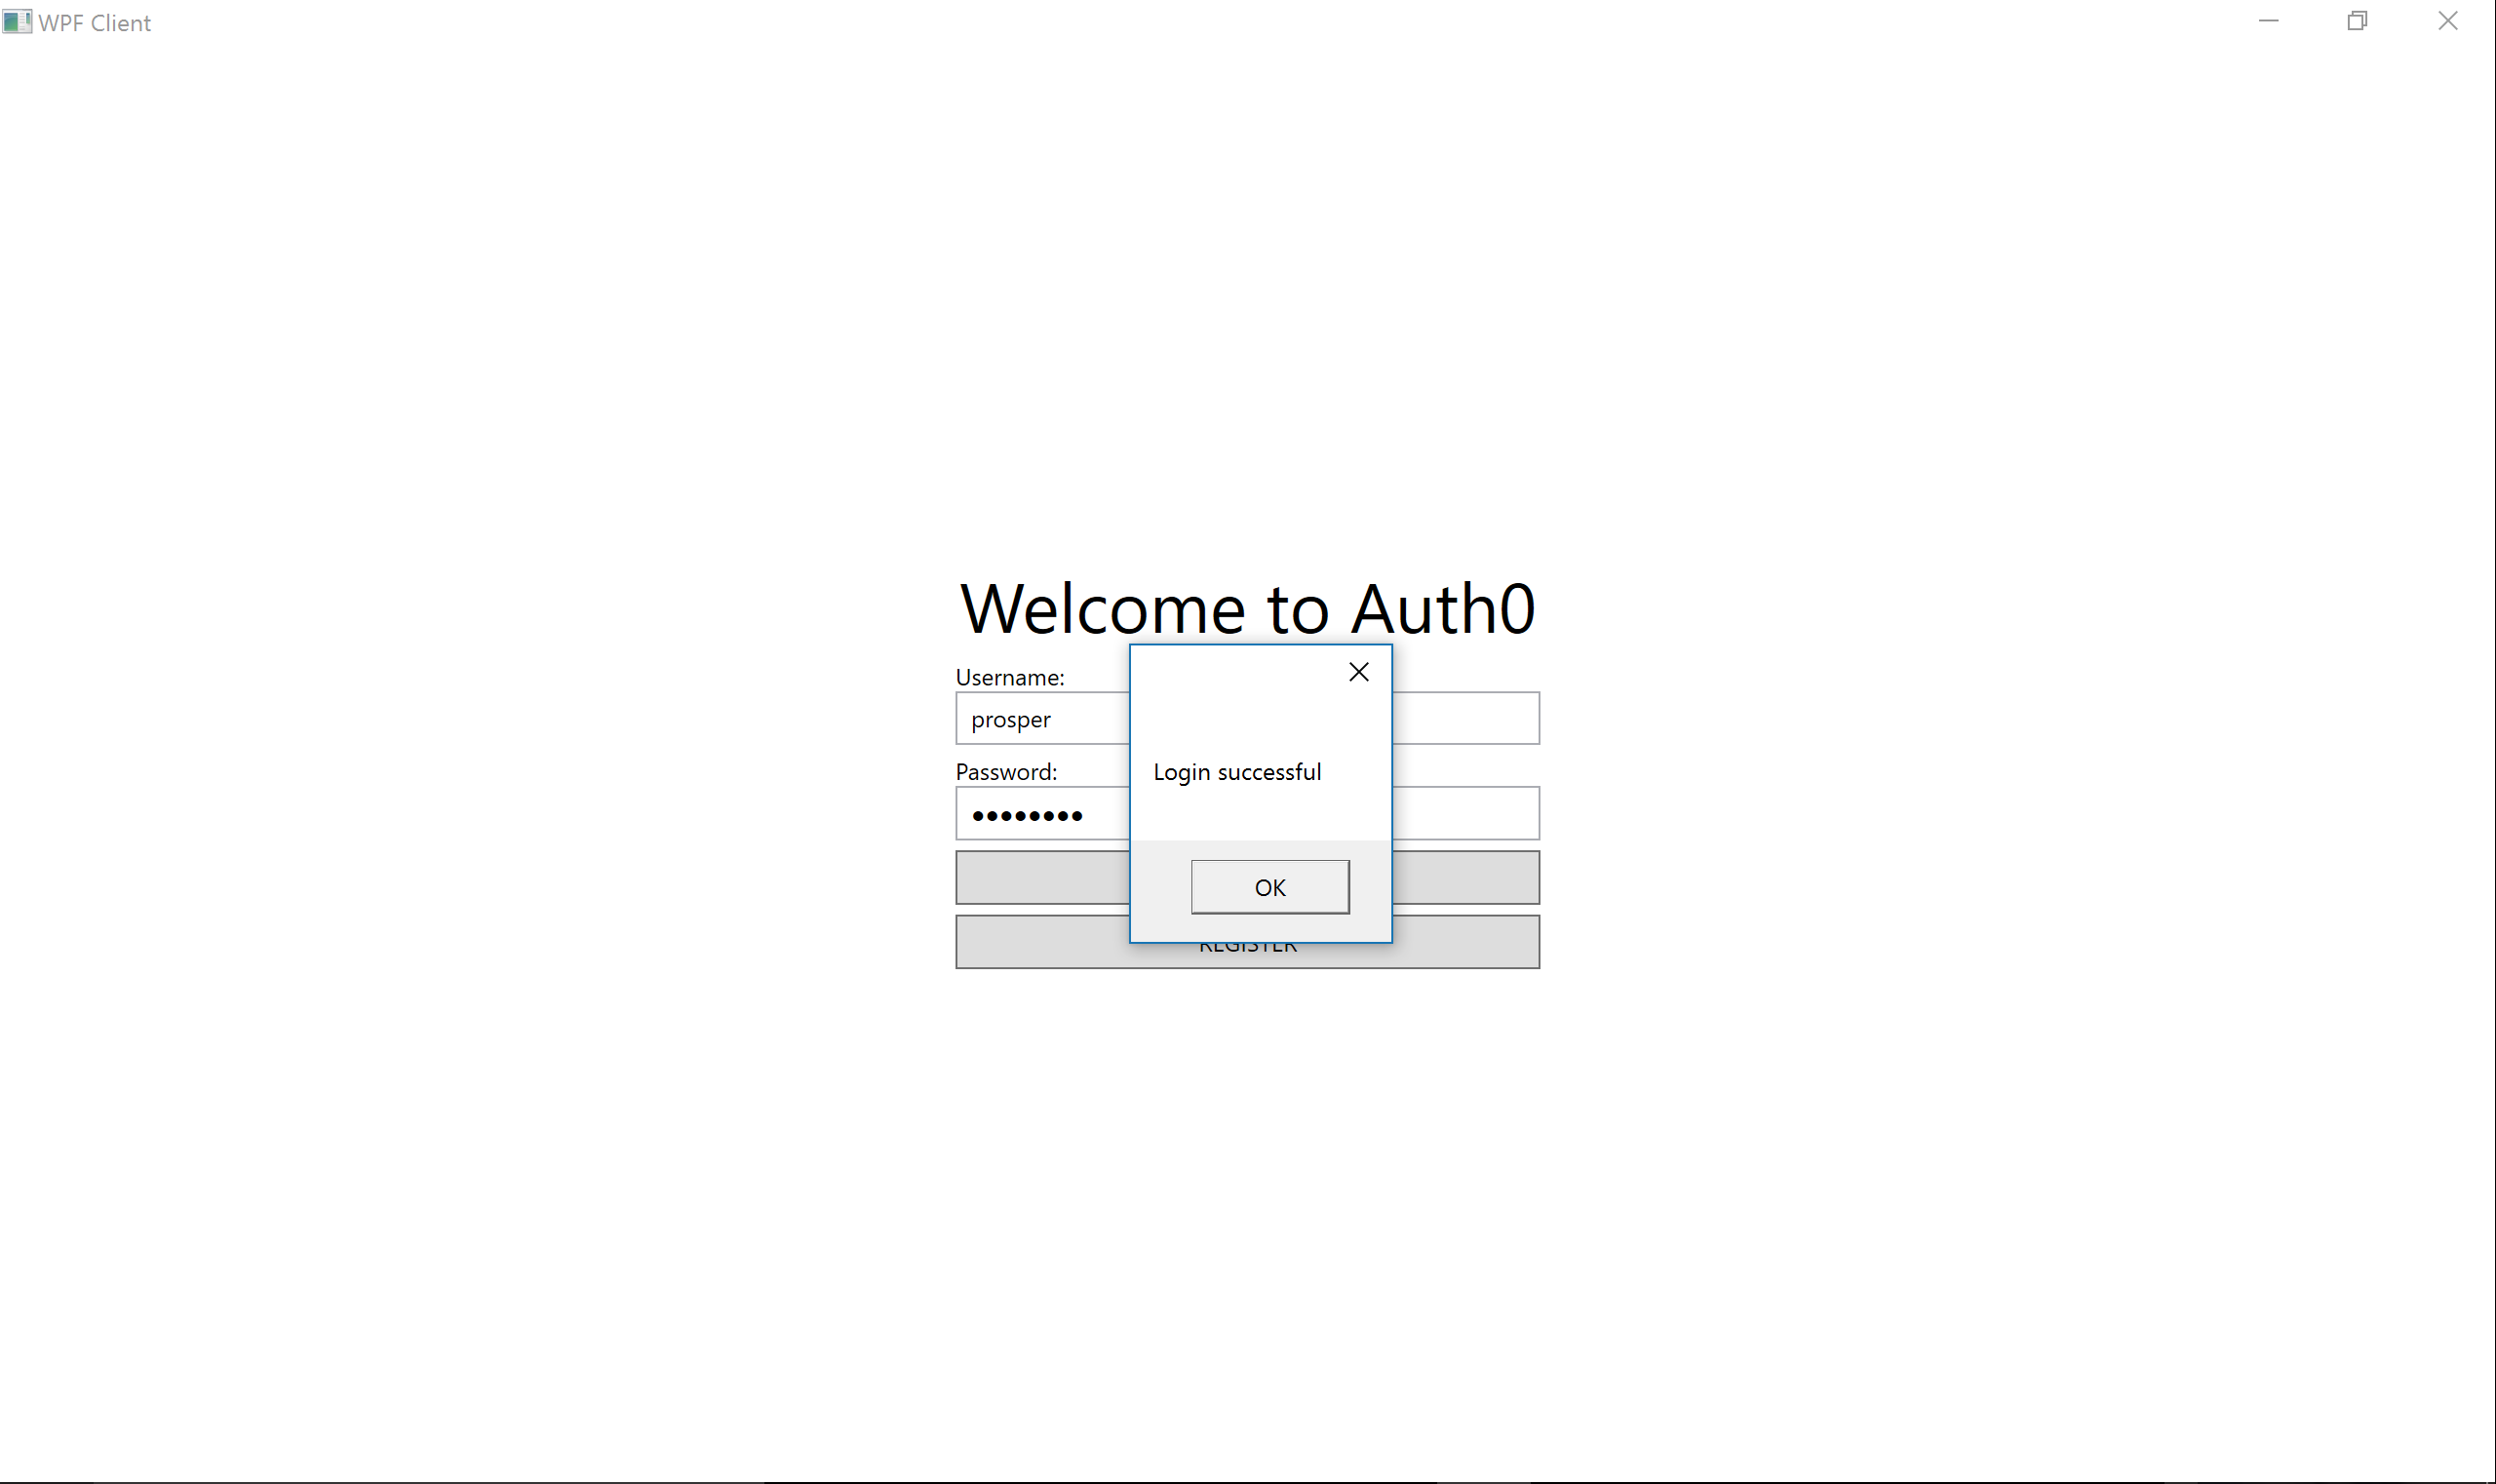
using System;
using System.Collections.Generic;
using System.Linq;
using System.Text;
using System.Threading.Tasks;
using System.Windows;
using System.Windows.Controls;
using System.Windows.Data;
using System.Windows.Documents;
using System.Windows.Input;
using System.Windows.Media;
using System.Windows.Media.Imaging;
using System.Windows.Navigation;
using System.Windows.Shapes;

using WpfClient.Models;
using WpfClient.Operations;

namespace WpfClient.Pages
{
    /// <summary>
    /// Interaction logic for LoginPage.xaml
    /// </summary>
    public partial class LoginPage : Page
    {
        public LoginPage()
        {
            InitializeComponent();
        }

        /**
         * Login Method to handle Login Button
         * @param  object sender
         * @param  RoutedEventArgs e
         */
        private void btnLogin_Click(object sender, RoutedEventArgs e)
        {
            string username = tbxUsername.Text;
            string password = pbxPassword.Password;

            ApiOperations ops = new ApiOperations();
            User user = ops.AuthenticateUser(username, password);
            if (user == null)
            {
                MessageBox.Show("Invalid username or password");
                return;
            }

            Globals.LoggedInUser = user;
            MessageBox.Show("Login successful");
            NavigationService.Navigate(new DetailsPage());
        }

        /**
         * Method to direct user to Register Page
         * @param object sender
         * @param RoutedEventArgs e
         */
        private void btnRegister_Click(object sender, RoutedEventArgs e)
        {
            NavigationService.Navigate(new RegistrationPage());
        }
    }
}
In the btnLogin_Click method, we are obtaining the user's information from the form via the name attributes. Remember tbxUsername, pbxPassword are name attributes we gave the form during the UI setup. Then we call the AuthenticateUser method from the ApiOperations class we defined earlier. If the user doesn't exist, it gives an appropriate Invalid Username or Password message, else logs the user in and navigates to a new page to show the User details. NavigationService does the navigation.
You must be wondering what
Globals.LoggedInUser = user;is doing there in both the Login and Register Classes. I'll explain in a bit.
Setting Up Globals Model
The Globals Model provides the ability to easily store and retrieve the details of a logged-in user in a structured way.
Create a new Model called Globals and add this:
Globals.cs
using System;
using System.Collections.Generic;
using System.Linq;
using System.Text;
using System.Threading.Tasks;

using WpfClient.Models;

namespace WpfClient
{
    class Globals
    {
        public static User LoggedInUser { get; set; }
    }
}

Setting Up the Details Page
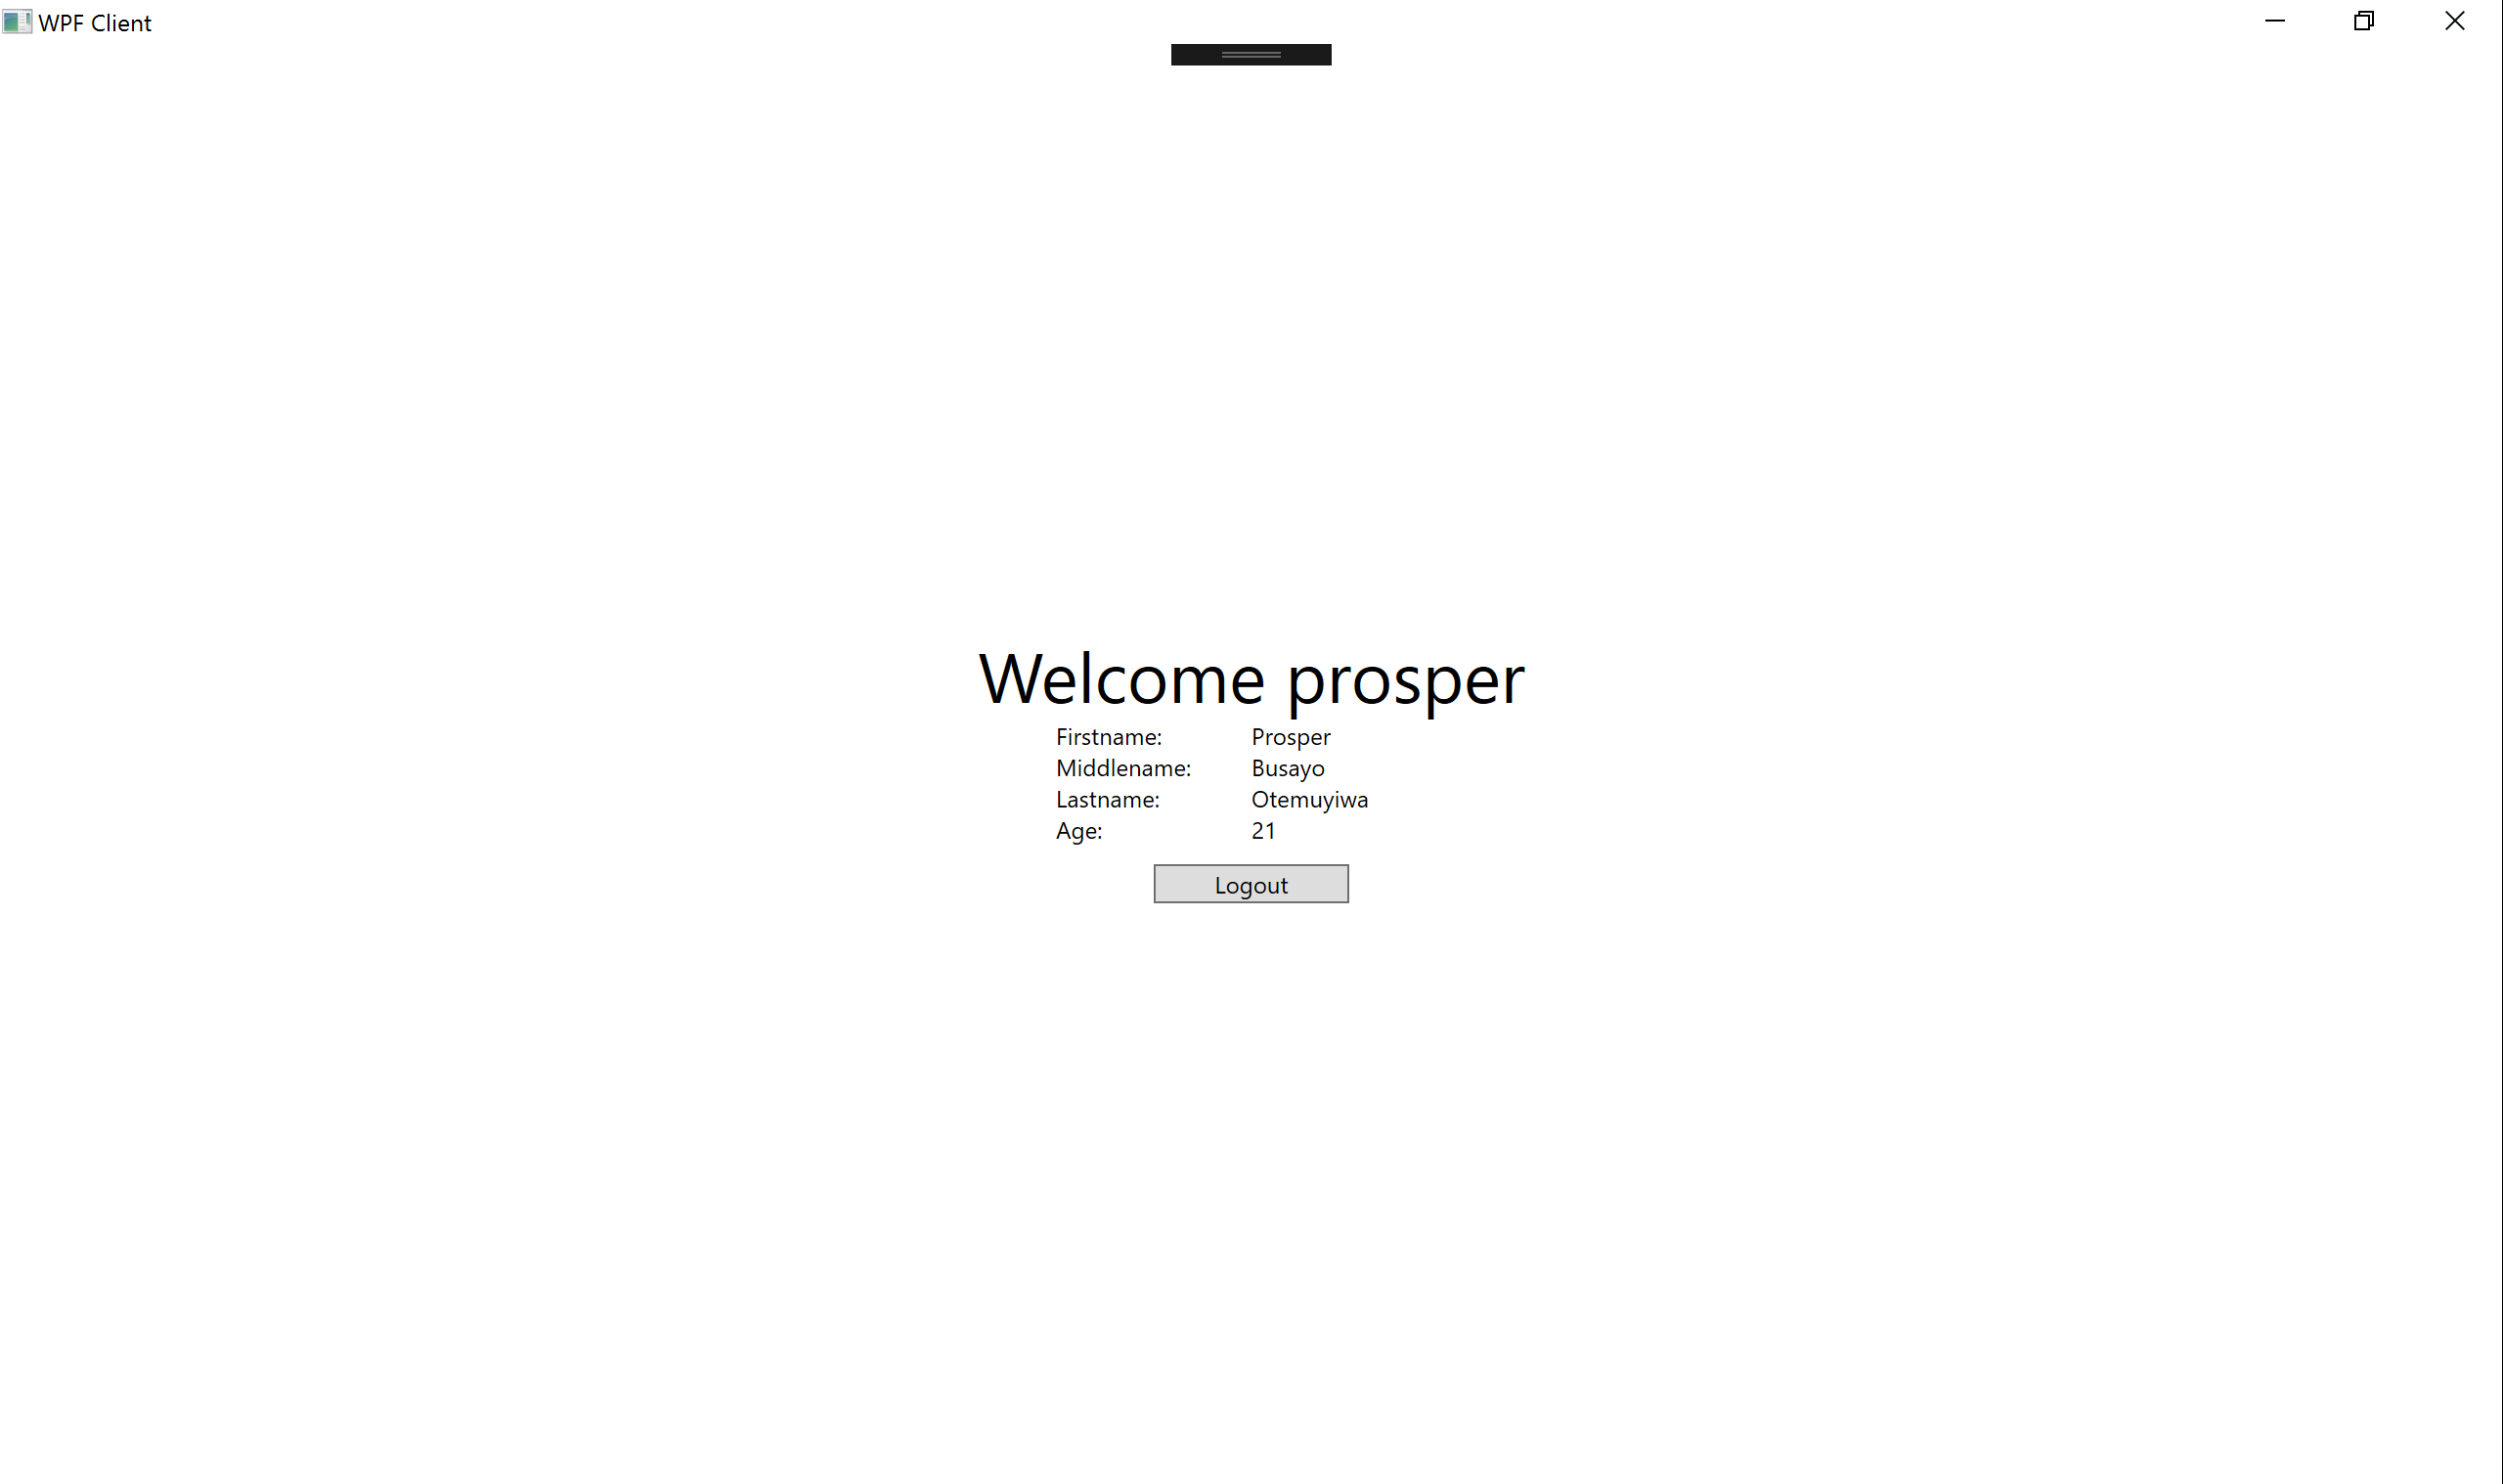
Create a new Page called DetailsPage like you did with the Register page. The DetailsPage.xaml should look like so with eight Textblocks and Grid Rows & Columns:
<Page x:Name="detailsPage" x:Class="WpfClient.Pages.DetailsPage"
      xmlns="http://schemas.microsoft.com/winfx/2006/xaml/presentation"
      xmlns:x="http://schemas.microsoft.com/winfx/2006/xaml"
      xmlns:mc="http://schemas.openxmlformats.org/markup-compatibility/2006"
      xmlns:d="http://schemas.microsoft.com/expression/blend/2008"
      xmlns:local="clr-namespace:WpfClient.Pages"
      mc:Ignorable="d"
      d:DesignHeight="455" d:DesignWidth="640"
      Title="DetailsPage" Loaded="detailsPage_Loaded">

    <Grid>
        <StackPanel Margin="0" VerticalAlignment="Center">
            <TextBlock x:Name="tbkWelcome" Text="Welcome" HorizontalAlignment="Center" FontSize="36" />
            <Grid HorizontalAlignment="Center" Width="200">
                <Grid.RowDefinitions>
                    <RowDefinition Height="Auto" />
                    <RowDefinition Height="Auto" />
                    <RowDefinition Height="Auto" />
                    <RowDefinition Height="Auto" />
                </Grid.RowDefinitions>
                <Grid.ColumnDefinitions>
                    <ColumnDefinition Width="100" />
                    <ColumnDefinition Width="Auto" />
                </Grid.ColumnDefinitions>

                <TextBlock Text="Firstname:" Grid.Row="0" Grid.Column="0" />
                <TextBlock Text="Middlename:" Grid.Row="1" Grid.Column="0" />
                <TextBlock Text="Lastname:" Grid.Row="2" Grid.Column="0" />
                <TextBlock Text="Age:" Grid.Row="3" Grid.Column="0" />

                <TextBlock x:Name="tbkFname" Text="Firstname" Grid.Row="0" Grid.Column="1" />
                <TextBlock x:Name="tbkMname" Text="Middlename" Grid.Row="1" Grid.Column="1" />
                <TextBlock x:Name="tbkLname" Text="Lastname" Grid.Row="2" Grid.Column="1" />
                <TextBlock x:Name="tbkAge" Text="Age" Grid.Row="3" Grid.Column="1" />
            </Grid>
            <Button x:Name="btnLogout" Content="Logout" Width="100" Click="btnLogout_Click" Margin="0,10,0,0" />
        </StackPanel>
    </Grid>
</Page>
Now, Open up the DetailsPage.xaml.cs. It should have the following methods like so:
DetailsPage.xaml.cs
using System;
using System.Collections.Generic;
using System.Linq;
using System.Text;
using System.Threading.Tasks;
using System.Windows;
using System.Windows.Controls;
using System.Windows.Data;
using System.Windows.Documents;
using System.Windows.Input;
using System.Windows.Media;
using System.Windows.Media.Imaging;
using System.Windows.Navigation;
using System.Windows.Shapes;

using WpfClient.Models;
using WpfClient.Operations;

namespace WpfClient.Pages
{
    /// <summary>
    /// Interaction logic for DetailsPage.xaml
    /// </summary>
    public partial class DetailsPage : Page
    {
        public DetailsPage()
        {
            InitializeComponent();
        }

        /**
         * Details Page Loaded
         * @param  object  sender
         * @param  RoutedEventArgs e
         */
        private void detailsPage_Loaded(object sender, RoutedEventArgs e)
        {
            FetchUserDetails();
            ShowUserInfo();
        }

        /**
         * Fetch User Details
         */
        private void FetchUserDetails()
        {
            ApiOperations ops = new ApiOperations();
            User user = ops.GetUserDetails(Globals.LoggedInUser);
            if (user == null)
            {
                MessageBox.Show("Session expired");
                // Navigate back to login page
                NavigationService.Navigate(new LoginPage());
            }

            Globals.LoggedInUser = user;
        }

        /**
         * Show User Info on the Screen
         */
        private void ShowUserInfo()
        {
            tbkWelcome.Text += " " + Globals.LoggedInUser.Username;
            tbkFname.Text = Globals.LoggedInUser.Firstname;
            tbkMname.Text = Globals.LoggedInUser.Middlename;
            tbkLname.Text = Globals.LoggedInUser.Lastname;
            tbkAge.Text = Globals.LoggedInUser.Age.ToString();
        }

        /**
         * Logout Method to be called on the logout Button
         * @param  object sender
         * @param  RoutedEventArgs e
         */
        private void btnLogout_Click(object sender, RoutedEventArgs e)
        {
            Globals.LoggedInUser = null;
            NavigationService.Navigate(new LoginPage());
        }
    }
}
The detailsPage_Loaded method is called once the Page loads up. FetchUserDetails method passes the LoggedInUser model to GetUserDetails method of the ApiOperations class. If it returns null, it means the token has expired else the user info is stored in memory. The token has an expiry date of 1 day.
The ShowUserInfo method simply assigns the details to the text field on Details Page.
The btnLogout_Click method clears the LoggedInUser Global Model of any data and navigates the user to the login page.
Aside: Using Auth0 with WPF
Auth0 issues JSON Web Tokens on every login for your users. This means that you can have a solid identity infrastructure, including single sign-on, user management, support for social identity providers (Facebook, Github, Twitter, etc.), enterprise identity providers (Active Directory, LDAP, SAML, etc.) and your own database of users with just a few lines of code.
We can easily set up authentication in our native desktop C# apps by using the Lock Widget.
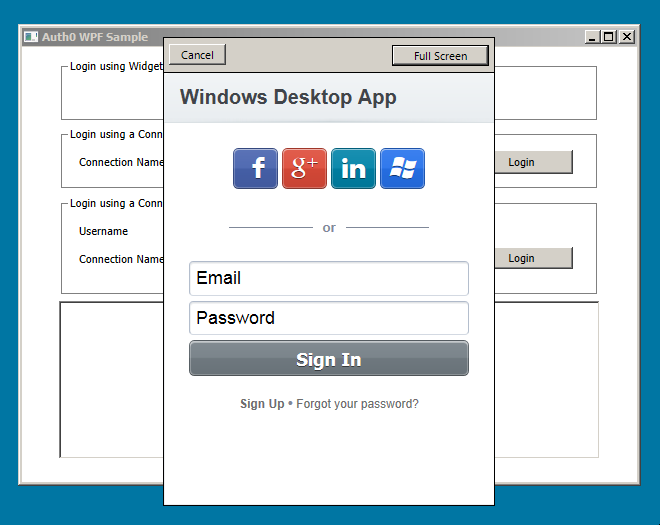
Step 1: Include Auth0's Lock Widget
Use NuGet to install the library like so:
Install-Package Auth0.WinformsOrWPF
Step 2: Instantiate Auth0Client and Use Lock Widget in Login.xaml.cs
...

// Import the Auth0 library
using Auth0.WinFormsOrWPF;

namespace WpfClient.Pages
{
    /// <summary>
    /// Interaction logic for LoginPage.xaml
    /// </summary>
    public partial class LoginPage : Page
    {
        public LoginPage()
        {
            InitializeComponent();
        }

        /**
         * Login Method to handle Login Button
         * @param  object sender
         * @param  RoutedEventArgs e
         */
        private void btnLogin_Click(object sender, RoutedEventArgs e)
        {
           // Instantiate Auth0Client
           var auth0 = new Auth0Client("{YOUR_AUTH0_DOMAIN}","{YOUR_CLIENT_ID}");

           // Trigger Login with Lock Widget and save the user's JWT on a successful login
           auth0.LoginAsync(this).ContinueWith(t =>
           {
             Globals.LoggedInUser = t.Result.Profile
           },
           TaskScheduler.FromCurrentSynchronizationContext());

           MessageBox.Show("Login successful");
           NavigationService.Navigate(new DetailsPage());

        }
    }
}
Did you expect it to be difficult? Sorry to disappoint you! Auth0 Lock Widget is dead simple to use.
Important API Security Note: If you want to use Auth0 authentication to authorize API requests, note that you'll need to use a different flow depending on your use case. Auth0 idToken should only be used on the client-side. Access tokens should be used to authorize APIs. You can read more about making API calls with Auth0 here.
Wrapping Up
Visual Studio is a complete IDE, we have witnessed how easy it was to create pages in our desktop app and just add code behind the controls to make it work. C# is a great language to work. If you are coming from a Java background, then you'll sure have the fun time of your life working with it.
As we saw in this tutorial, we can easily add authentication to our desktop apps using JWTs. Also, the inbuilt WebClient class makes it trivial to send requests with an Authorization header.
“We can easily add authentication to our desktop apps using JWTs.”
Tweet This
Please, let me know if you have any questions or observations in the comment section. 😊
About the author

Prosper Otemuyiwa
Former Auth0 Employee (Auth0 Alumni)