


FastAPI is a relatively new Python framework that enables you to create applications very quickly. This framework allows you to read API request data seamlessly with built-in modules and is a lightweight alternative to Flask.
In this article, we will go over the features of FastAPI, set up a basic API, protect an endpoint using Auth0, and you'll learn how simple it is to get started.
Prerequisites
Before you start building with FastAPI, you need to have Python 3.9.0 at least, and a free Auth0 account; you can sign up here.
For this article, we will use uv. This tool replaces several tools that are commonly used to manage Python projects, such as pipenv and poetry. Implemented in Rust, it is extremely fast. To install it, run the following command (check uv website for other installation methods):
curl -LsSf https://astral.sh/uv/install.sh | sh
With uv, you do not need to download and install Python. It does everything for you. Follow the steps below:
uv init fastapi-example
This will create the fastapi-example folder with the files needed for uv. Now access the created folder and run the command below:
   cd fastapi-example
   uv venv --python 3.12
This command will create a virtual environment with Python 3.12. If this Python version is not available on your machine, uv will download it for you.
This creates a virtual environment, and it separates the dependencies from the rest of your computer libraries. In other words, you don't pollute the global namespace with libraries and dependencies, which might impact other Python projects.
Now, you can install the packages you are going to use: FastAPI, Auth0-FastAPI, Pydantic Settings, for loading configuration, and the Auth0 library to ease OAuth 2.0 connection between FastAPI and Auth0:
uv add fastapi[standard] pydantic-settings auth0-fastapi-api
Get Started with FastAPI
Now that all the libraries are installed, you can create a main.py file inside the application folder; that's where your API code will live. The contents of the main.py will look like this:
"""main.py
Python FastAPI Auth0 integration example
"""

from fastapi import FastAPI

# Creates app instance
app = FastAPI()

@app.get("/api/public")
def public():
   # No access token required to access this route

   result = {
       "status": "success",
       "msg": ("Hello from a public endpoint! You don't need to be "
               "authenticated to see this.")
   }
   return result
Let's break this down:
- To start, you are importing the
FastAPIlibrary; - Then creating your app by instantiating a
FastAPI()object; - After that, you use
@app.getto define a route that handlesGETrequests; - Finally, you have the path operation function called
public(), which is a function that will run each time that route is called and it returns a dictionary with the welcome message.
Now that you've got your first endpoint code, to get the server up and running, run the following command on the root directory of the project:
uv run fastapi dev --entrypoint application.main:app
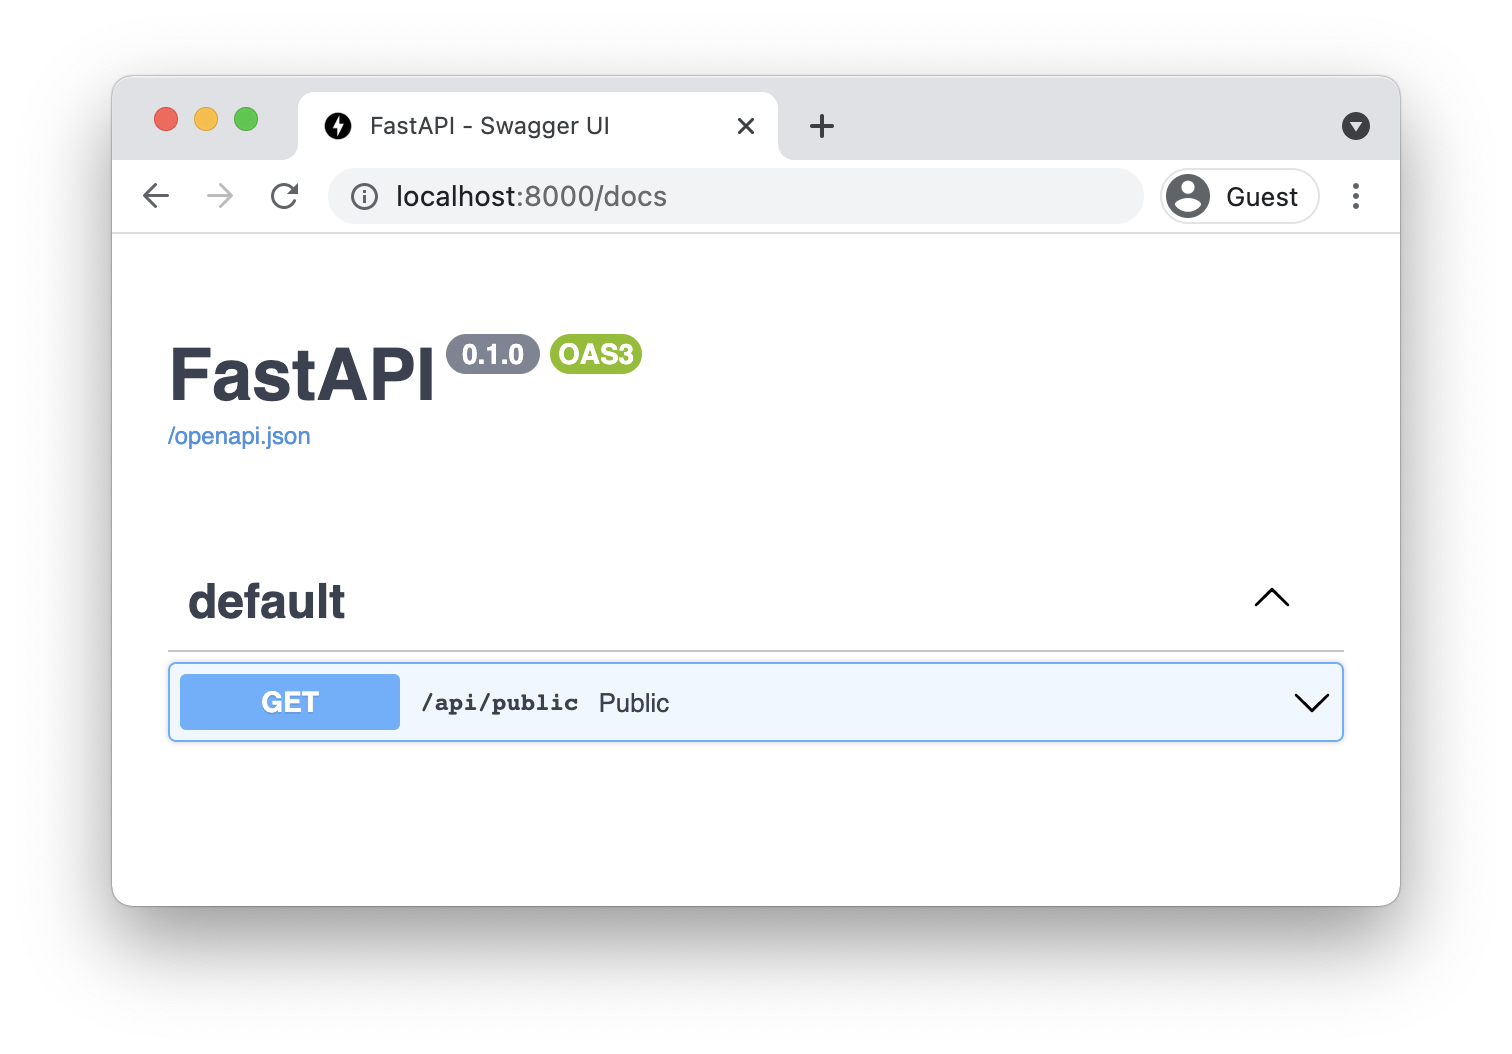
With your server is running, you can go either to http://127.0.0.1:8000/docs to see the automatically generated documentation for the first endpoint like shown in the image below:
Or you can make your first request in a new terminal window by using cURL. Keep in mind that if you are a Windows user on a older version of the operating system, you will have to install curl before running the following command:
curl -X 'GET' \
  --url <http://127.0.0.1:8000/api/public>
And you should see a JSON as a result of the request you just did similar to this:
{
 "status": "success",
 "msg": "Hello from a public endpoint! You don't need to be authenticated to see this."
}
For simplicity's sake, you are going to use the cURL for the rest of this post.
Set Up an Auth0 API
Before you begin protecting endpoints in your API, you’ll need to create an API on the Auth0 Dashboard. If you don’t have an Auth0 account, you can sign up for a free one. Then, go to the APIs section and click on Create API.
This will open a new window for configuring the API. Set the following fields in that window:
- Name, a friendly name or description for the API. Enter Fast API Example for this sample.
- Identifier, which is an identifier that the client application uses to request access tokens for the API. Enter the string
https://fastapiexample.com. This identifier is also known as audience. - Signing Algorithm, leave the default setting,
RS256.
After entering those values, click the Create button.
Settings and Environment Variables
Now that you created your Auth0 API, you need to get back to the code. To effectively protect our endpoints, we need to verify that the token available in the Authorization header is valid, corresponds to our application, and was signed by the right party.
To do that, you’ll need to give to your application some Auth0 configuration values. We’ll use FastAPI settings to retrieve these values either from a .env file or from environment variables.
For our local purposes, let’s start by storing the configuration values on a .env file like the following. Remember to update the values accordingly and to place the .env file in the root folder of your project:
# .env

AUTH0_DOMAIN = your.domain.auth0.com
AUTH0_API_AUDIENCE = https://your.api.audience
This configuration is the first piece of the puzzle of checking for the Auth0 configuration settings in the token validation stage. Another good rule to follow is to never commit your configuration files with environment variables to source code. To prevent this from occurring, you should create a .gitignore file in the project's root and add the .env file as an entry:
# .gitignore
.env
Next, let’s create a module to retrieve the application settings. Start by creating a new file application/config.py with the following contents:
from functools import lru_cache

from pydantic_settings import BaseSettings

class Settings(BaseSettings):
   auth0_domain: str
   auth0_api_audience: str

   class Config:
       env_file = ".env"

@lru_cache()
def get_settings():
   return Settings()
The defined Settings class uses the Pydantic settings module to retrieve the application’s settings directly from either the .env file or from environment variables. It is important that the definition properties match the configs ignoring capitalization.
Configure the Auth0 Library
Auth0 FastAPI API Library handles most of the authentication and authorization logic for you. In your main.py file, you will need to import the Auth0FastAPI class from the auth0_fastapi_api library and instantiate it with the settings you retrieved from the config.py file:
from fastapi_plugin.fast_api_client import Auth0FastAPI
from application.config import get_settings

settings = get_settings()
auth0 = Auth0FastAPI(
   domain=settings.auth0_domain,
   audience=settings.auth0_api_audience
)
Auth0FastAPI will act as the bridge between your app and the Auth0 Management API. The class will interact with Auth0 to retrieve the public keys used to verify the signature of the access tokens. The keys will be cached, and all requests to protected endpoints must have a JSON Web Token (JWT) in the authorization header and this will be the access token for the API. The access token will be validated against the public keys retrieved from the Auth0 API.
Protect Your Endpoints
The final puzzle piece is to make the GET /api/private endpoint use the Auth0 FastAPI library.
Here's what your main.py file should look like with all the necessary changes:
"""Python FastAPI Auth0 integration example
"""

from fastapi import FastAPI, Depends
from fastapi_plugin.fast_api_client import Auth0FastAPI
from application.config import get_settings

# Creates app instance
app = FastAPI()

settings = get_settings()
auth0 = Auth0FastAPI(
   domain=settings.auth0_domain,
   audience=settings.auth0_api_audience
)

@app.get("/api/public")
def public():
   """No access token required to access this route"""

   result = {
       "status": "success",
       "msg": ("Hello from a public endpoint! You don't need to be "
               "authenticated to see this.")
   }
   return result

@app.get("/api/private")
def private(claims: dict = Depends(auth0.require_auth())):
   # A valid access token is required to access this route
   return claims
With this update, you are properly setting up your protected endpoint and doing all the verification steps for the access tokens you need.
Even though you started your server with the dev mode enabled, you need to make sure the configuration is loaded. It is a good time to stop the fastapi process and then restart the server. That will guarantee the proper functionality of your API with the configuration parameters from the .env file or environment variables.
Before you can make requests to the protected endpoint in the FastAPI server, you need the access token from Auth0. You can get it by copying it from the Auth0 dashboard, in the Test tab of your API.
You can also use a curl POST request to Auth0's oauth/token endpoint to get the access token, and you can copy this request from the Test tab of your API in the Auth0 dashboard. The curl request will look like this; remember to fill the values as necessary:
curl -X 'POST' \
--url 'https://<YOUR DOMAIN HERE>/oauth/token' \
--header 'content-type: application/x-www-form-urlencoded' \
--data grant_type=client_credentials \
--data 'client_id=<YOUR CLIENT ID HERE>' \
--data client_secret=<YOUR CLIENT SECRET HERE> \
--data audience=<YOUR AUDIENCE HERE>
In the command line, you should see a response containing your access token, like this one:
{
   "access_token": "<YOUR_ACCESS_TOKEN>",
   "expires_in": 86400,
   "token_type": "Bearer"
}
Now you can use this access token to access the private endpoint:
curl -X 'GET' \
--url '<http://127.0.0.1:8000/api/private>' \
--header  'Authorization: Bearer <YOUR_ACCESS_TOKEN>'
If the request succeeds, the server will send back the payload of the access token:
{
   "iss": "https://<YOUR_DOMAIN>/",
   "sub": "iojadoijawdioWDasdijasoid@clients",
   "aud": "http://<YOUR_AUDIENCE>",
   "iat": 1691399881,
   "exp": 1691486281,
   "azp": "ADKASDawdopjaodjwopdAWDdsd",
   "gty": "client-credentials"
}
Keep in mind that if the validation fails, you should see the details of what went wrong.
And that’s it — you have finished protecting the private endpoint and testing its protection.
Recap
You learned quite a few things in this blog post. To start, you learned the basics of FastAPI by implementing two endpoints — one public, one private. You saw how simple it is to make requests to both of these endpoints. You created a verification class and saw how PyJWT helps you validate an Auth0 access token, and you learned what JWKS is.
You went through the process of creating your API in the Auth0 dashboard. You also learned how to secure one of your endpoints by leveraging the dependency injection system FastAPI provides to help you implement integrations. And you did all of this very quickly.
In short, you’ve learned how easy it is to get up and running with FastAPI, as well as how to use Auth0 for protecting your endpoints.
In this GitHub repo, you’ll find the full code for the sample application you built today. If you have any questions, ask them in the community forum thread for this blog post.
Thanks for reading!