
TL;DR Passwordless authentication allows your users to log in without having to enter a password. Users are authenticated through one-time passcodes delivered via SMS or email. Learn how you can implement passwordless authentication in your application with Facebook Account Kit. Alternatively, learn about Auth0 Passwordless and how you can have greater control over your passwordless integration.
We are going to write a lot of code in this tutorial. If you would like a quick reference, all the code is located in this Github repo.
App developers have to walk a fine line between usability and security. If your authentication system is too complex, you'll lose customers, but if you skimp on security you could lose a lot more. Social login providers like Google, Facebook and Twitter have streamlined the registration process. Two-factor authentication has made it harder to compromise accounts and passwordless authentication is making it easier than ever to provide a seamless user experience.
“App developers have to walk a fine line between usability and security.”
Tweet This
Nobody likes having to remember yet another password. The end user has trouble remembering a unique password for each service so they tend to reuse a single password, the developer has to figure out the best way to hash, salt, store and retrieve the password. Then, there's the password complexity requirements, password reset forms to implement and a whole bunch of other items to check off that will make you ask "isn't there a better way?" There is! Passwordless login!
Passwordless Login and Single Sign On (SSO)
Passwordless or password free authentication allows a user to signup and login to your app without a password. Rather than entering a password, the user is given a one-time code or link delivered via SMS or email, which acts as the verification for the user. Many companies are embracing passwordless authentication including Medium, Slack and Twitter.
Single Sign On (SSO) allows users to login to multiple services with a single account. SSO integrations are commonly found in enterprise environments utilizing many disparate services. Combining passwordless authentication with SSO can greatly enhance the security and usability of such environments.
Introduction to Facebook Account Kit
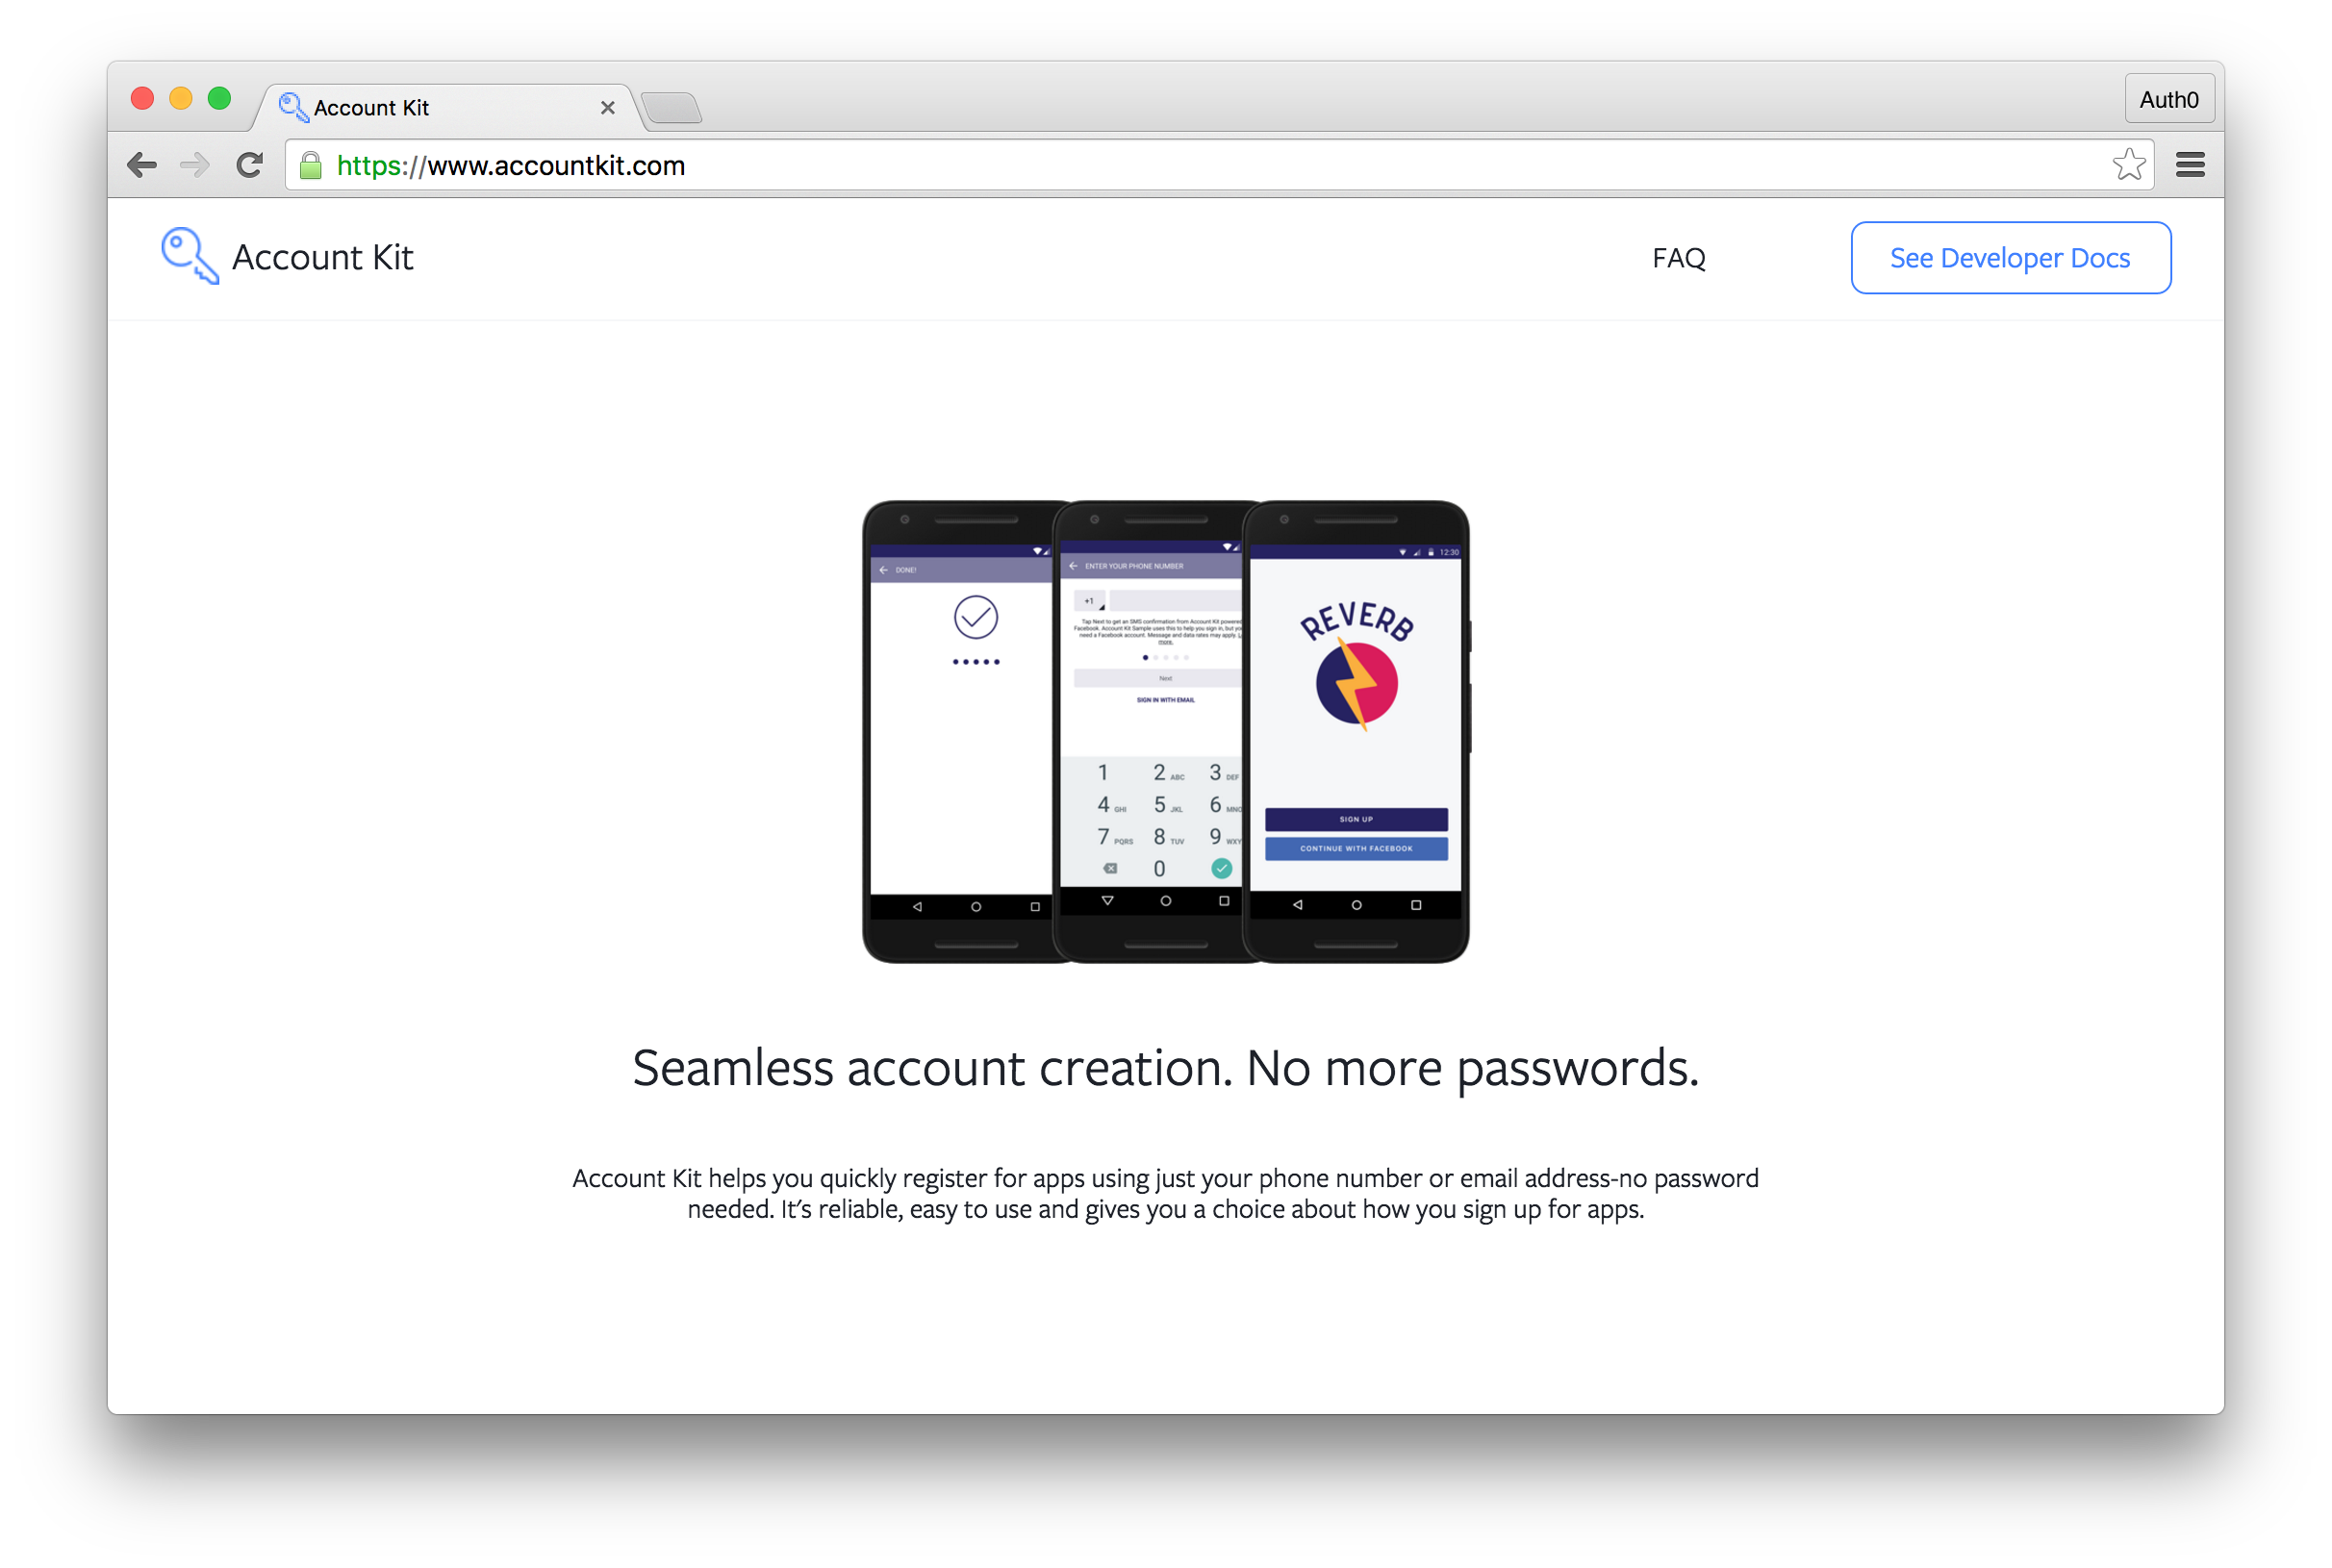
Facebook is embracing passwordless authentication with the release of Facebook Account Kit. Facebook Account Kit allows developers to add passwordless authentication to their applications. Users authenticating through Account Kit do not even have to be registered Facebook users.
Currently, users are able to log in by simply providing a phone number or email address. Account Kit takes care of sending out one-time codes and links and verifying them. Additionally, Account Kit allows for certain customizations such as allowing users to edit the colors of the dialog box, whitelisting and blacklisting by country codes and a few other settings. Facebook Account Kit just launched, so additional configuration and customizations options in the future are expected.
Integrating Passwordless Authentication with Facebook Account Kit
In today's tutorial, we are going to show you how to integrate Facebook Account Kit into your applications. Facebook has released SDKs for Android, iOS and JavaScript. We'll use the JavaScript SDK to build our application. NodeJS will power the backend of our app.
Getting Started
To get started you will need to have a Facebook Developer Account and a Facebook app with Account Kit enabled. To enable Account Kit, simply navigate to the Account Kit tab in your Facebook app and follow the directions. For the backend to process the requests, you'll need your App ID which can be found on the dashboard of your Facebook app and your Account Kit App Secret which is located in the Account Kit tab.

With our credentials in order, let's implement the backend.
// Get our dependencies
const fs = require('fs');
const Guid = require('guid');
const express = require('express');
const bodyParser = require("body-parser");
const Mustache  = require('mustache');
const Request  = require('request');
const Querystring  = require('querystring');

const app = express();

app.use(bodyParser.urlencoded({ extended: false }));
app.use(bodyParser.json());

var csrf_guid = Guid.raw();
// We are using Account Kit which is version 1.0
// Facebook Graph API is version 2.6 and will be displayed in your
// Facebook app dashboard, but setting 2.6 for the api_version will not work here
const api_version = "v1.0";
const app_id = YOUR_FACEBOOK_APP_ID;
const app_secret = YOUR_ACCOUNT_KIT_SECRET_;
const me_endpoint_base_url = 'https://graph.accountkit.com/v1.0/me';
const token_exchange_base_url = 'https://graph.accountkit.com/v1.0/access_token';

function loadLogin() {
  return fs.readFileSync('dist/login.html').toString();
}

app.get('/', function(request, response){
  var view = {
    appId: app_id,
    csrf: csrf_guid,
    version: api_version,
  };

  var html = Mustache.to_html(loadLogin(), view);
  response.send(html);
});

function loadLoginSuccess() {
  return fs.readFileSync('dist/login_success.html').toString();
}

app.post('/sendcode', function(request, response){
  // CSRF check
  if (request.body.csrf_nonce === csrf_guid) {
    var app_access_token = ['AA', app_id, app_secret].join('|');
    var params = {
      grant_type: 'authorization_code',
      code: request.body.code,
      access_token: app_access_token
    };

    // exchange tokens
    var token_exchange_url = token_exchange_base_url + '?' + Querystring.stringify(params);
    Request.get({url: token_exchange_url, json: true}, function(err, resp, respBody) {
      console.log(respBody);
      var view = {
        user_access_token: respBody.access_token,
        expires_at: respBody.expires_at,
        user_id: respBody.id,
      };
      // get account details at /me endpoint
      var me_endpoint_url = me_endpoint_base_url + '?access_token=' + respBody.access_token;
      Request.get({url: me_endpoint_url, json:true }, function(err, resp, respBody) {
        // send login_success.html
        console.log(respBody);
        if (respBody.phone) {
          view.method = "SMS"
          view.identity = respBody.phone.number;
        } else if (respBody.email) {
          view.method = "Email"
          view.identity = respBody.email.address;
        }
        var html = Mustache.to_html(loadLoginSuccess(), view);
        response.send(html);
      });
    });
  }
  else {
    // login failed
    response.writeHead(200, {'Content-Type': 'text/html'});
    response.end("Something went wrong. :( ");
  }
});

app.listen(3000);
The backend handles two routes, / and /sendcode. The / route is our landing page where the login options will be displayed. The /sendcode is a route that we will call programmatically once the user has verified their one-time code.
Building the UI
Our frontend will have two views. A login view and an authenticated view that will show the logged in users information. The login view we'll call login.html and the authenticated view we'll call login_success.html. Let's build the UI for these two views.
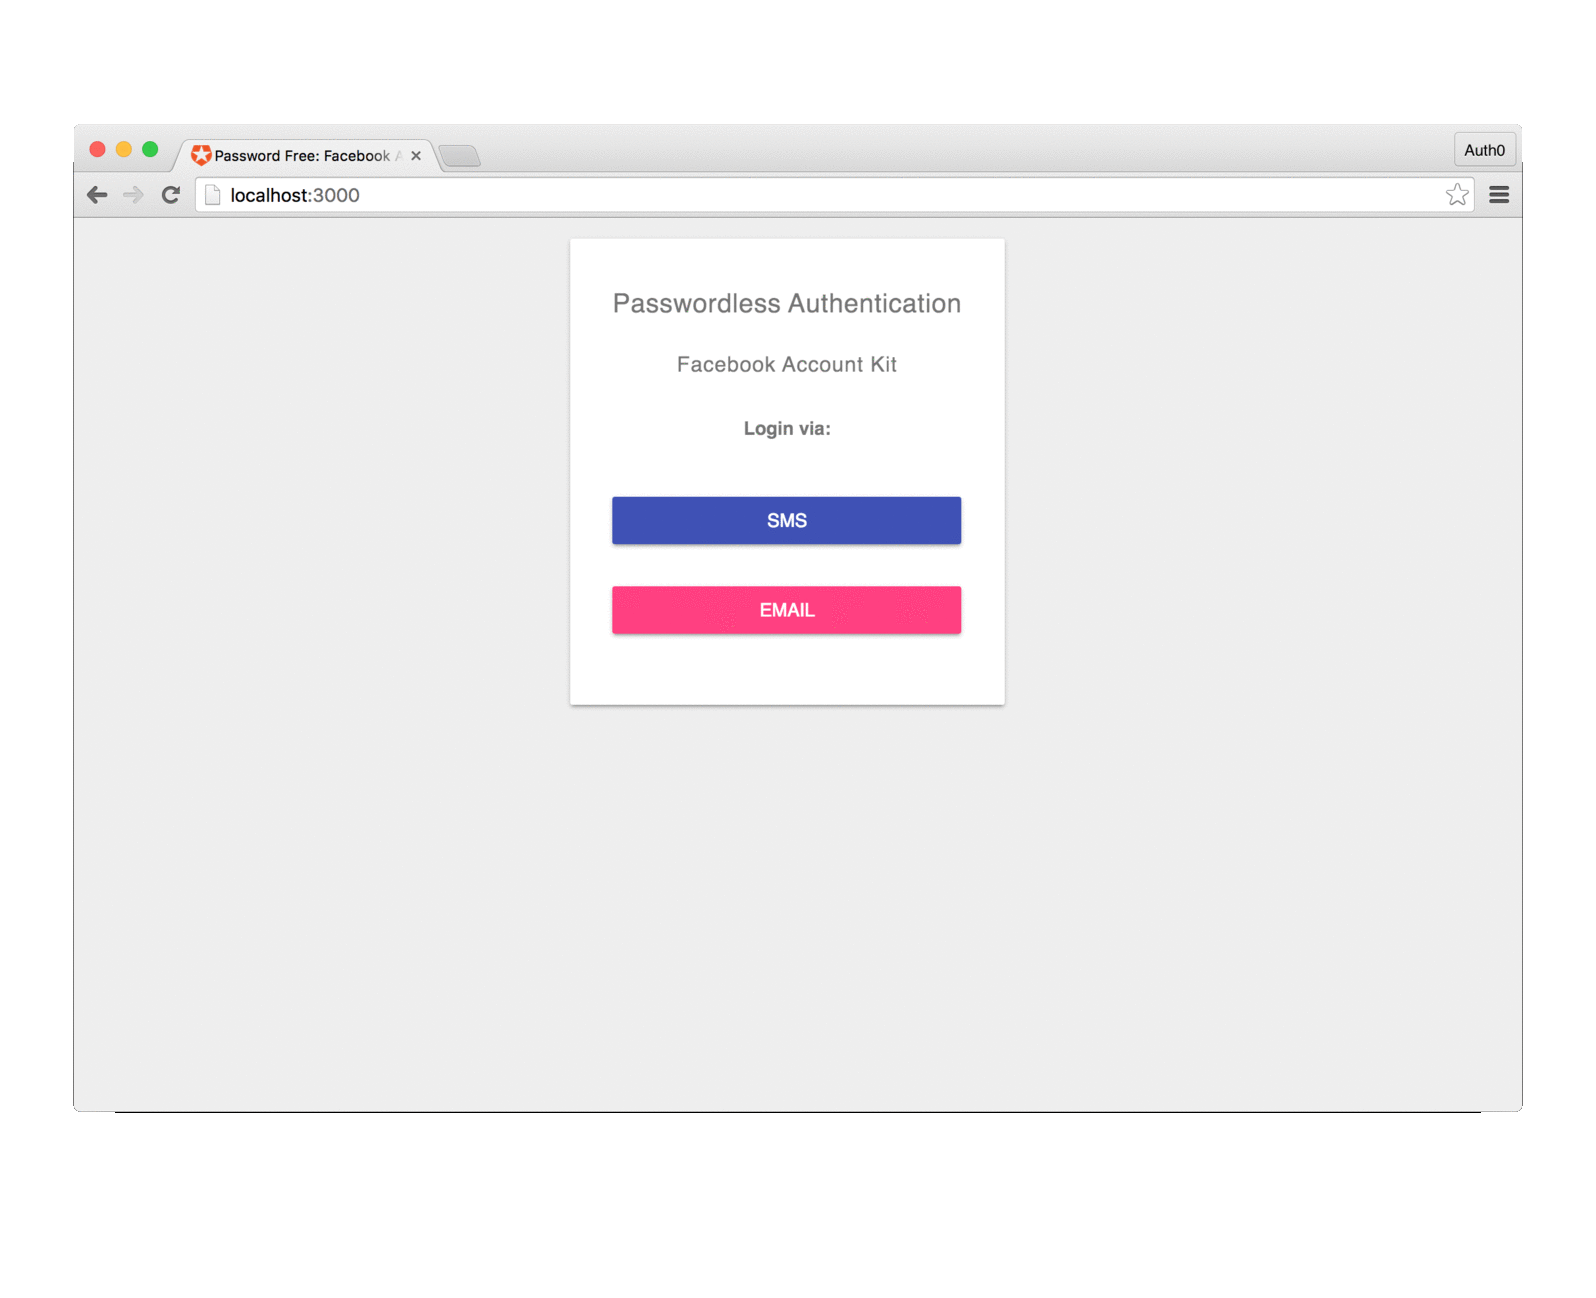
Login View

We have omitted common code that is not relevant for readability. You will find the complete example in the GitHub repo.
<!DOCTYPE html>
<html>
  <head>
    <title>Passwordless Authentication: Facebook Account Kit</title>
    <!-- Include the Account Kit SDK -->
    <script src="https://sdk.accountkit.com/en_US/sdk.js"></script>
  </head>
  <body>
    ...
    <h1>Passwordless Authentication</h1>
    <h2>Facebook Account Kit</h2>
    <p><strong>Login via:</strong></p>
    <ul class="demo-list-icon mdl-list">
      <li class="mdl-list__item">
        <span class="mdl-list__item-primary-content">
          <button onclick="loginWithSMS();">SMS</button>
        </span>
      </li>
      <li class="mdl-list__item">
        <button onclick="loginWithEmail();"> Email</button>
      </li>
    </ul>
    ...
    <script>
      function loginWithSMS(){
        // Login with SMS
      }

      function loginWithEmail(){
        // Login with Email
      }
    </script>
  </body>
</html>
Authenticated View
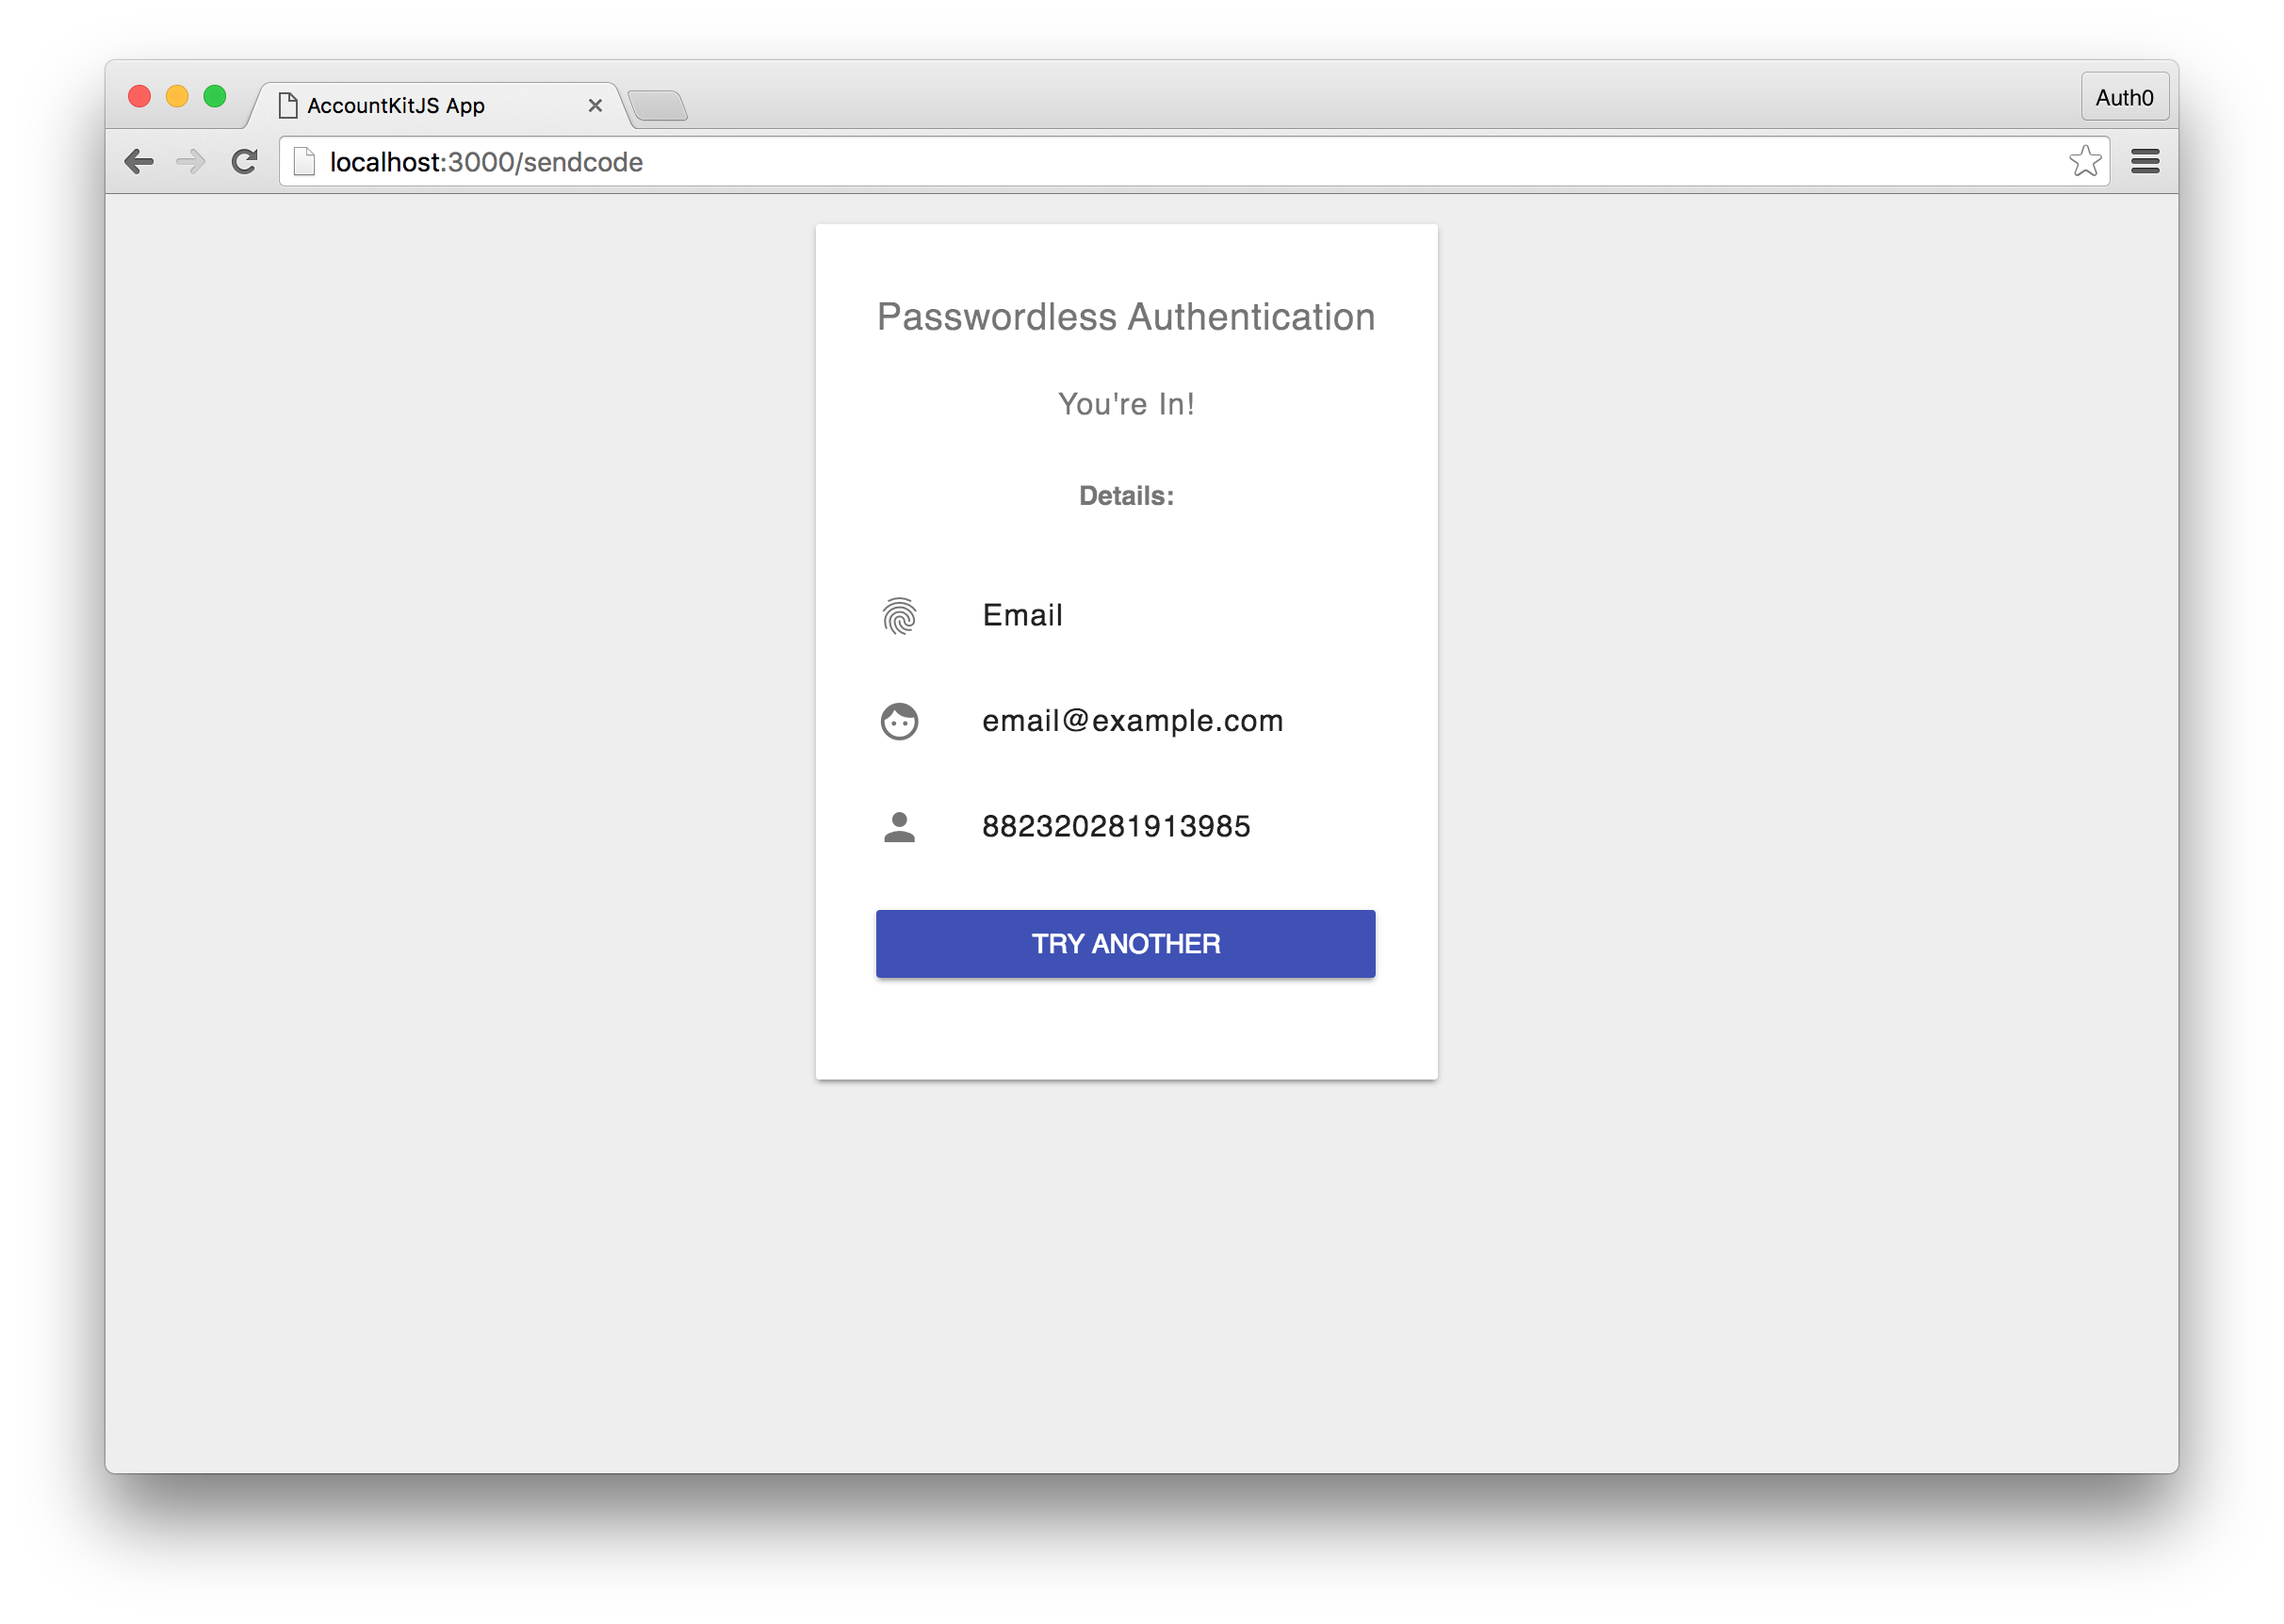
As with the login view, some code was omitted for readability.
<!doctype html>
<html>
  <head>
    <meta charset="utf-8">
    <title>AccountKitJS App</title>
  </head>
  <body>
    ...
    <h1>Passwordless Authentication</h1>
    <h2>You're In!</h2>
    <p><strong>Details:</strong></p>
    <ul class="demo-list-icon mdl-list">
      <li class="mdl-list__item">
        <span class="mdl-list__item-primary-content">
          <i class="material-icons mdl-list__item-icon">fingerprint</i>
          <span id="token">{{method}}</span>
        </span>
      </li>
      <li class="mdl-list__item">
        <span class="mdl-list__item-primary-content">
          <i class="material-icons mdl-list__item-icon">face</i>
          <span id="nickname">{{identity}}</span>
        </span>
      </li>
      <li class="mdl-list__item">
        <span class="mdl-list__item-primary-content">
          <i class="material-icons mdl-list__item-icon">person</i>
          <span id="user_id">{{user_id}}</span>
        </span>
      </li>
      <li class="mdl-list__item">
        <span class="mdl-list__item-primary-content">
          <button onclick="goToLogin()">Try Another</button>
        </span>
      </li>
    </ul>
    ...
    <script>
      function goToLogin(){
        window.location.href = "/";
      }
    </script>
  </body>
</html>
Integrating Facebook Account Kit
With the backend and frontend complete, we are ready to implement Facebook Account Kit. We have already included the SDK in our login.html view, so we can jump straight into the implementation.
  // Initialize Account Kit with csrf protection
  AccountKit_OnInteractive = function(){
    AccountKit.init(
      {
        appId:YOUR_FACEBOOK_APP_ID,
        state:"YOUR_RANDOMLY_GENERATED_CSRF_TOKEN",
        version:"v1.0" // We are using Account Kit which is version 1.0
      }
    );
  };

  function loginWithSMS(){
    // Add Passwordless Authentication via SMS
    AccountKit.login("PHONE",{}, loginCallback);
  }

  function loginWithEmail(){
    // Add Passwordless Authentication via Email
    AccountKit.login("PHONE",{}, loginCallback);
  }

  // Implement the callback which is called after
  // a user has attempted to verify their one-time code
  function loginCallback(response) {
    if (response.status === "PARTIALLY_AUTHENTICATED") {
      // If the token is ok we will send a request to our server
      // to exchange the token for the user info
      document.getElementById("code").value = response.code;
      document.getElementById("csrf_nonce").value = response.state;
      document.getElementById("my_form").submit();
    }
    else if (response.status === "NOT_AUTHENTICATED") {
      // handle authentication failure
    }
    else if (response.status === "BAD_PARAMS") {
      // handle bad parameters
    }
  }
Additionally we'll add a hidden form that will send the authenticated token server-side.
<!doctype html>
<html>
  <body>
    ...
    <form id="my_form" name="my_form" action="/sendcode" method="POST" style="display: none;">
      <input type="text" id="code" name="code">
      <input type="text" id="csrf_nonce" name="csrf_nonce">
      <input type="submit" value="Submit">
    </form>
  ...
  </body>
</html>
We have added functionality to handle both SMS and email authentication. The AccountKit.login method takes three parameters: login method, parameters object and callback function. The login method and callback function are pretty self-explanatory, but the parameters object we've left blank. Depending on the login method used, you can pass parameters such as the telephone number or email address that will be prefilled when the AccountKit dialog is opened. For the full API spec, check out the Facebook doc.
Passwordless Authentication in Action
Let's walk through the steps of how passwordless authentication works with the Facebook Account Kit.
- User clicks on the login with SMS or Email button
- User enters their phone number or email address
- User receives a one-time code to their phone or receives a link to click in their inbox
- User enters code or clicks on the link
- Account Kit verifies that this code is accurate or link valid and if it is, returns a token
- A second request is made to Account Kit to exchange the token with the users information
Note: When using the email option, the Account Kit dialog box needs to remain open. Once the link is clicked, the dialog box will close on it's own. The link does not have to be clicked on the same machine, for example, you can login on your laptop and click the link from your mobile device and it will still work.
Aside: Passwordless Authentication with Auth0
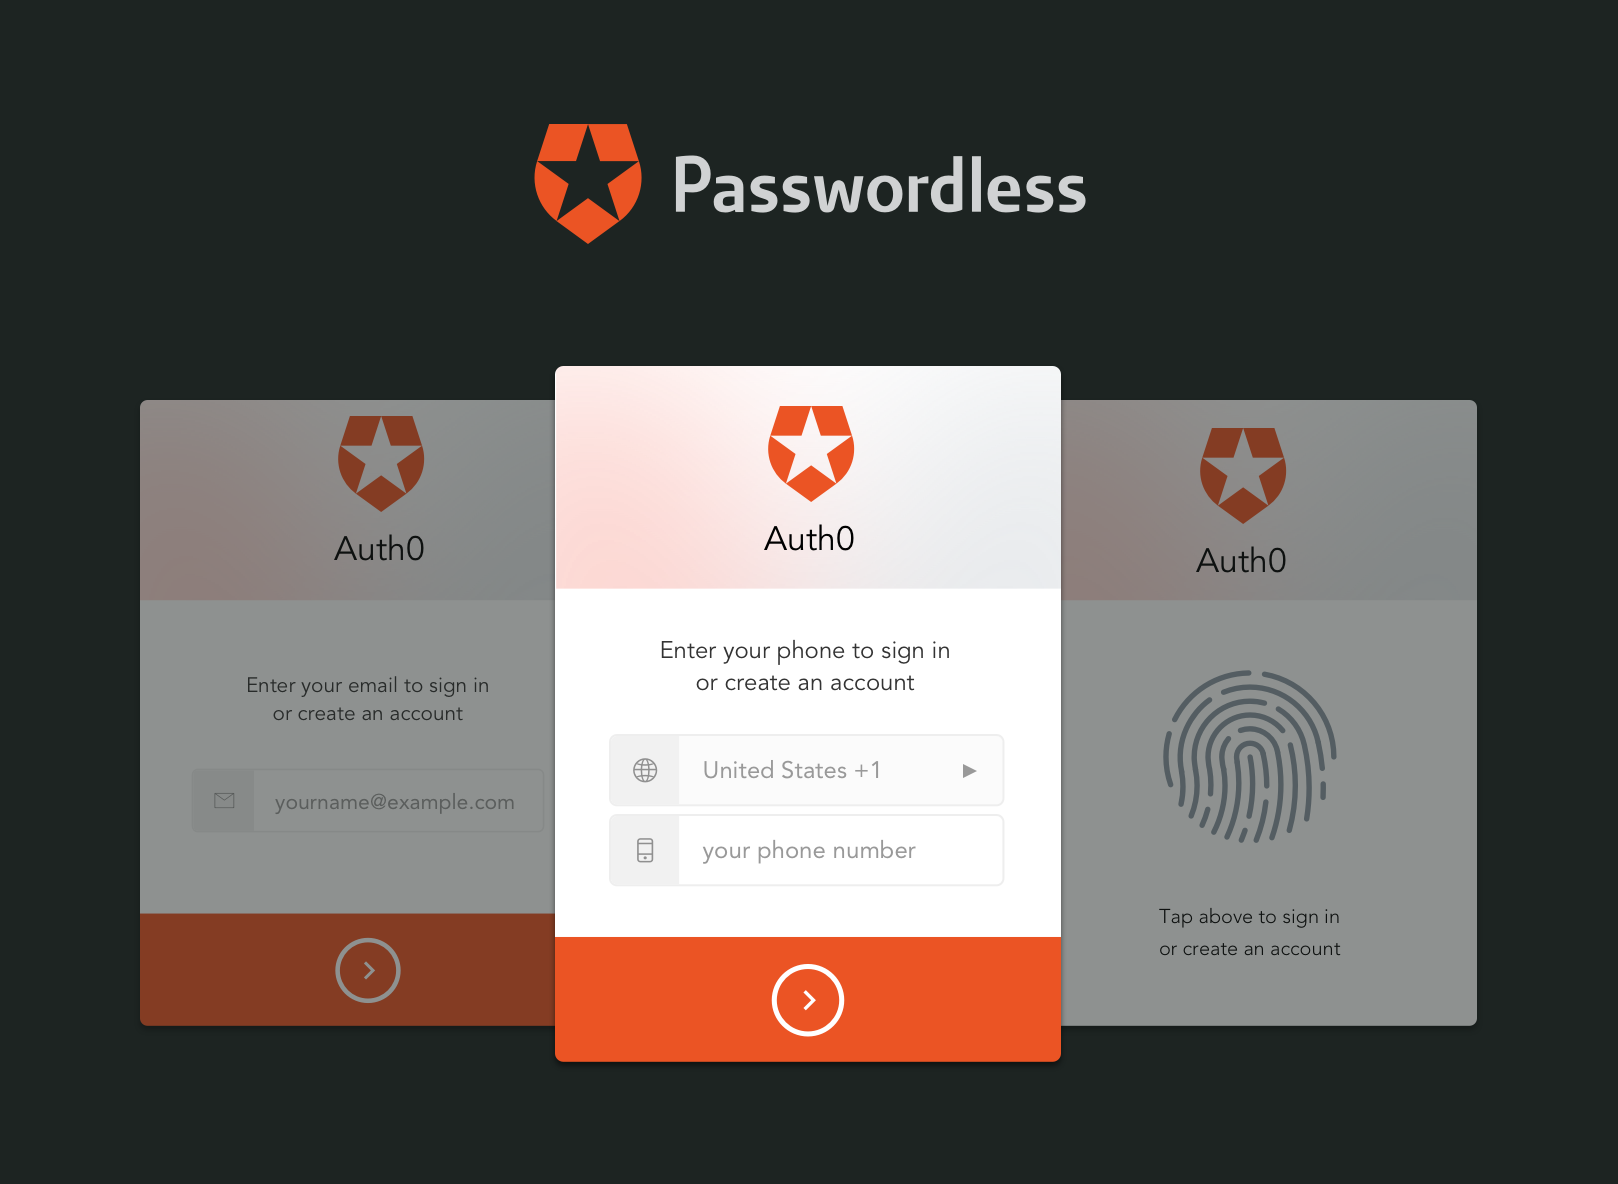
At Auth0, we are huge proponents of making the authentication experience the best it can be. Passwordless authentication is something we believe in and offer in all of our packages. Get a taste for how passwordless authentication works with Auth0 at the Playground. Some of the benefits of integrating passwordless authentication with Auth0 include:
- Email and SMS support
- Integrate with your own SMS gateway and email providers
- Cloud and Self-hosted options
- 20+ Social identity providers including Facebook, Twitter and Google
- Enterprise connections and Single Sign On (SSO) integration
Getting Started
For the best comparison, we'll keep our app as close as possible to the one we built with the Facebook Account Kit. For Auth0 Passwordless, you will need an Auth0 account. If you don't already have one, you can sign up for one free of charge. As we won't be exchanging the token server side, our backend will be much simpler.
// Load in dependencies
const fs = require('fs');
const express = require('express');
const Mustache  = require('mustache');

const app = express();

function loadLogin() {
  return fs.readFileSync('dist/login.html').toString();
}

function loadCallback(){
  return fs.readFileSync('dist/callback.html').toString();
}

app.get('/', function(request, response){
  var view = {};
  var html = Mustache.to_html(loadLogin(), view);
  response.send(html);
});

app.get('/callback', function(request, response){
  var view = {};
  var html = Mustache.to_html(loadCallback(), view);
  response.send(html);
})

app.listen(3000);
Additionally, we'll need to configure passwordless authentication in our Auth0 dashboard. To do this, in the dashboard, navigate to the the Connections then Passwordless tab. As we are building a web app, just flip the switch to on for Email and SMS.
For the SMS integration, we'll need need a Twilio account. You can sign up for a free Twilio trial account here. From our Twilio dashboard, we're going to want to get our SID, AuthToken and the Phone Number that Twilio will give us. We'll add these credentials in the SMS settings in our Auth0 dashboard.
The email integration is much simpler by default. We only need to turn it on and in the settings and select the Auth0 app we'd like the passwordless to work with. By default, the emails will be sent from Auth0, but you can easily configure your own email provider in the email providers section of the management dashboard.
There are a number of configuration settings to play around with on both the SMS and email passwordless integration. You can set how long a code is valid for, customize the message the user receives, disable passwordless signups and more. We'll just stick to defaults in this tutorial, but you should explore and customize these settings to meet your needs.
We will also need to enable the hosted login page for passwordless logins. To do so, head over to Hosted Pages in the Auth0 dashboard and set the Customize Login Page switch to on. Then select the Lock (passwordless) template from the templates dropdown box. We will need to customize the behavior of our login screen according to which type of passwordless login option is selected by the user. To do so, we can add custom code to our hosted login page. Change the code in the editor to look like the one below:
<!DOCTYPE html>
<html>
<head>
  <meta charset="utf-8">
  <meta http-equiv="X-UA-Compatible" content="IE=edge,chrome=1">
  <title>Sign In with Auth0</title>
  <meta name="viewport" content="width=device-width, initial-scale=1.0" />
</head>
<body>

  <!--[if IE 8]>
  <script src="//cdnjs.cloudflare.com/ajax/libs/ie8/0.2.5/ie8.js"></script>
  <![endif]-->

  <!--[if lte IE 9]>
  <script src="https://cdn.auth0.com/js/polyfills/1.0/base64.min.js"></script>
  <script src="https://cdn.auth0.com/js/polyfills/1.0/es5-shim.min.js"></script>
  <![endif]-->

  <script src="//cdn.auth0.com/js/lock-passwordless-2.2.min.js"></script>
  <script>
    // Decode utf8 characters properly
    var config = JSON.parse(decodeURIComponent(escape(window.atob('@@config@@'))));
    config.extraParams = config.extraParams || {};
    var prompt = config.prompt;
    var loginHint = config.extraParams.login_hint;
    var lock = new Auth0LockPasswordless(config.clientID, config.auth0Domain);
    switch(config.extraParams.login_hint) {
      case 'sms':
        lock.sms({
          closable: false,
          callbackURL: config.callbackURL,
          responseType: 'code',
          rememberLastLogin: !prompt,
          authParams: config.internalOptions
        });
        break;
      case 'email-code':
        lock.emailcode({
          closable: false,
          callbackURL: config.callbackURL,
          responseType: 'code',
          rememberLastLogin: !prompt,
          authParams: config.internalOptions
        });
        break;
      case 'social-or-sms':
        lock.socialOrSms({
          connections: ["facebook", "twitter"],
          closable: false,
          callbackURL: config.callbackURL,
          responseType: 'code',
          rememberLastLogin: !prompt,
          authParams: config.internalOptions
        });
      default: // 'email-link'
        lock.magiclink({
          closable: false,
          callbackURL: config.callbackURL,
          responseType: 'code',
          rememberLastLogin: !prompt,
          authParams: config.internalOptions
        });
        break;
    }
  </script>
</body>
</html>
As you can see we have modified the default Lock Passwordless template to look for the login_hint parameter. We will set the parameter to different values according to what the user chooses in our web page for logging-in.
Building the UI
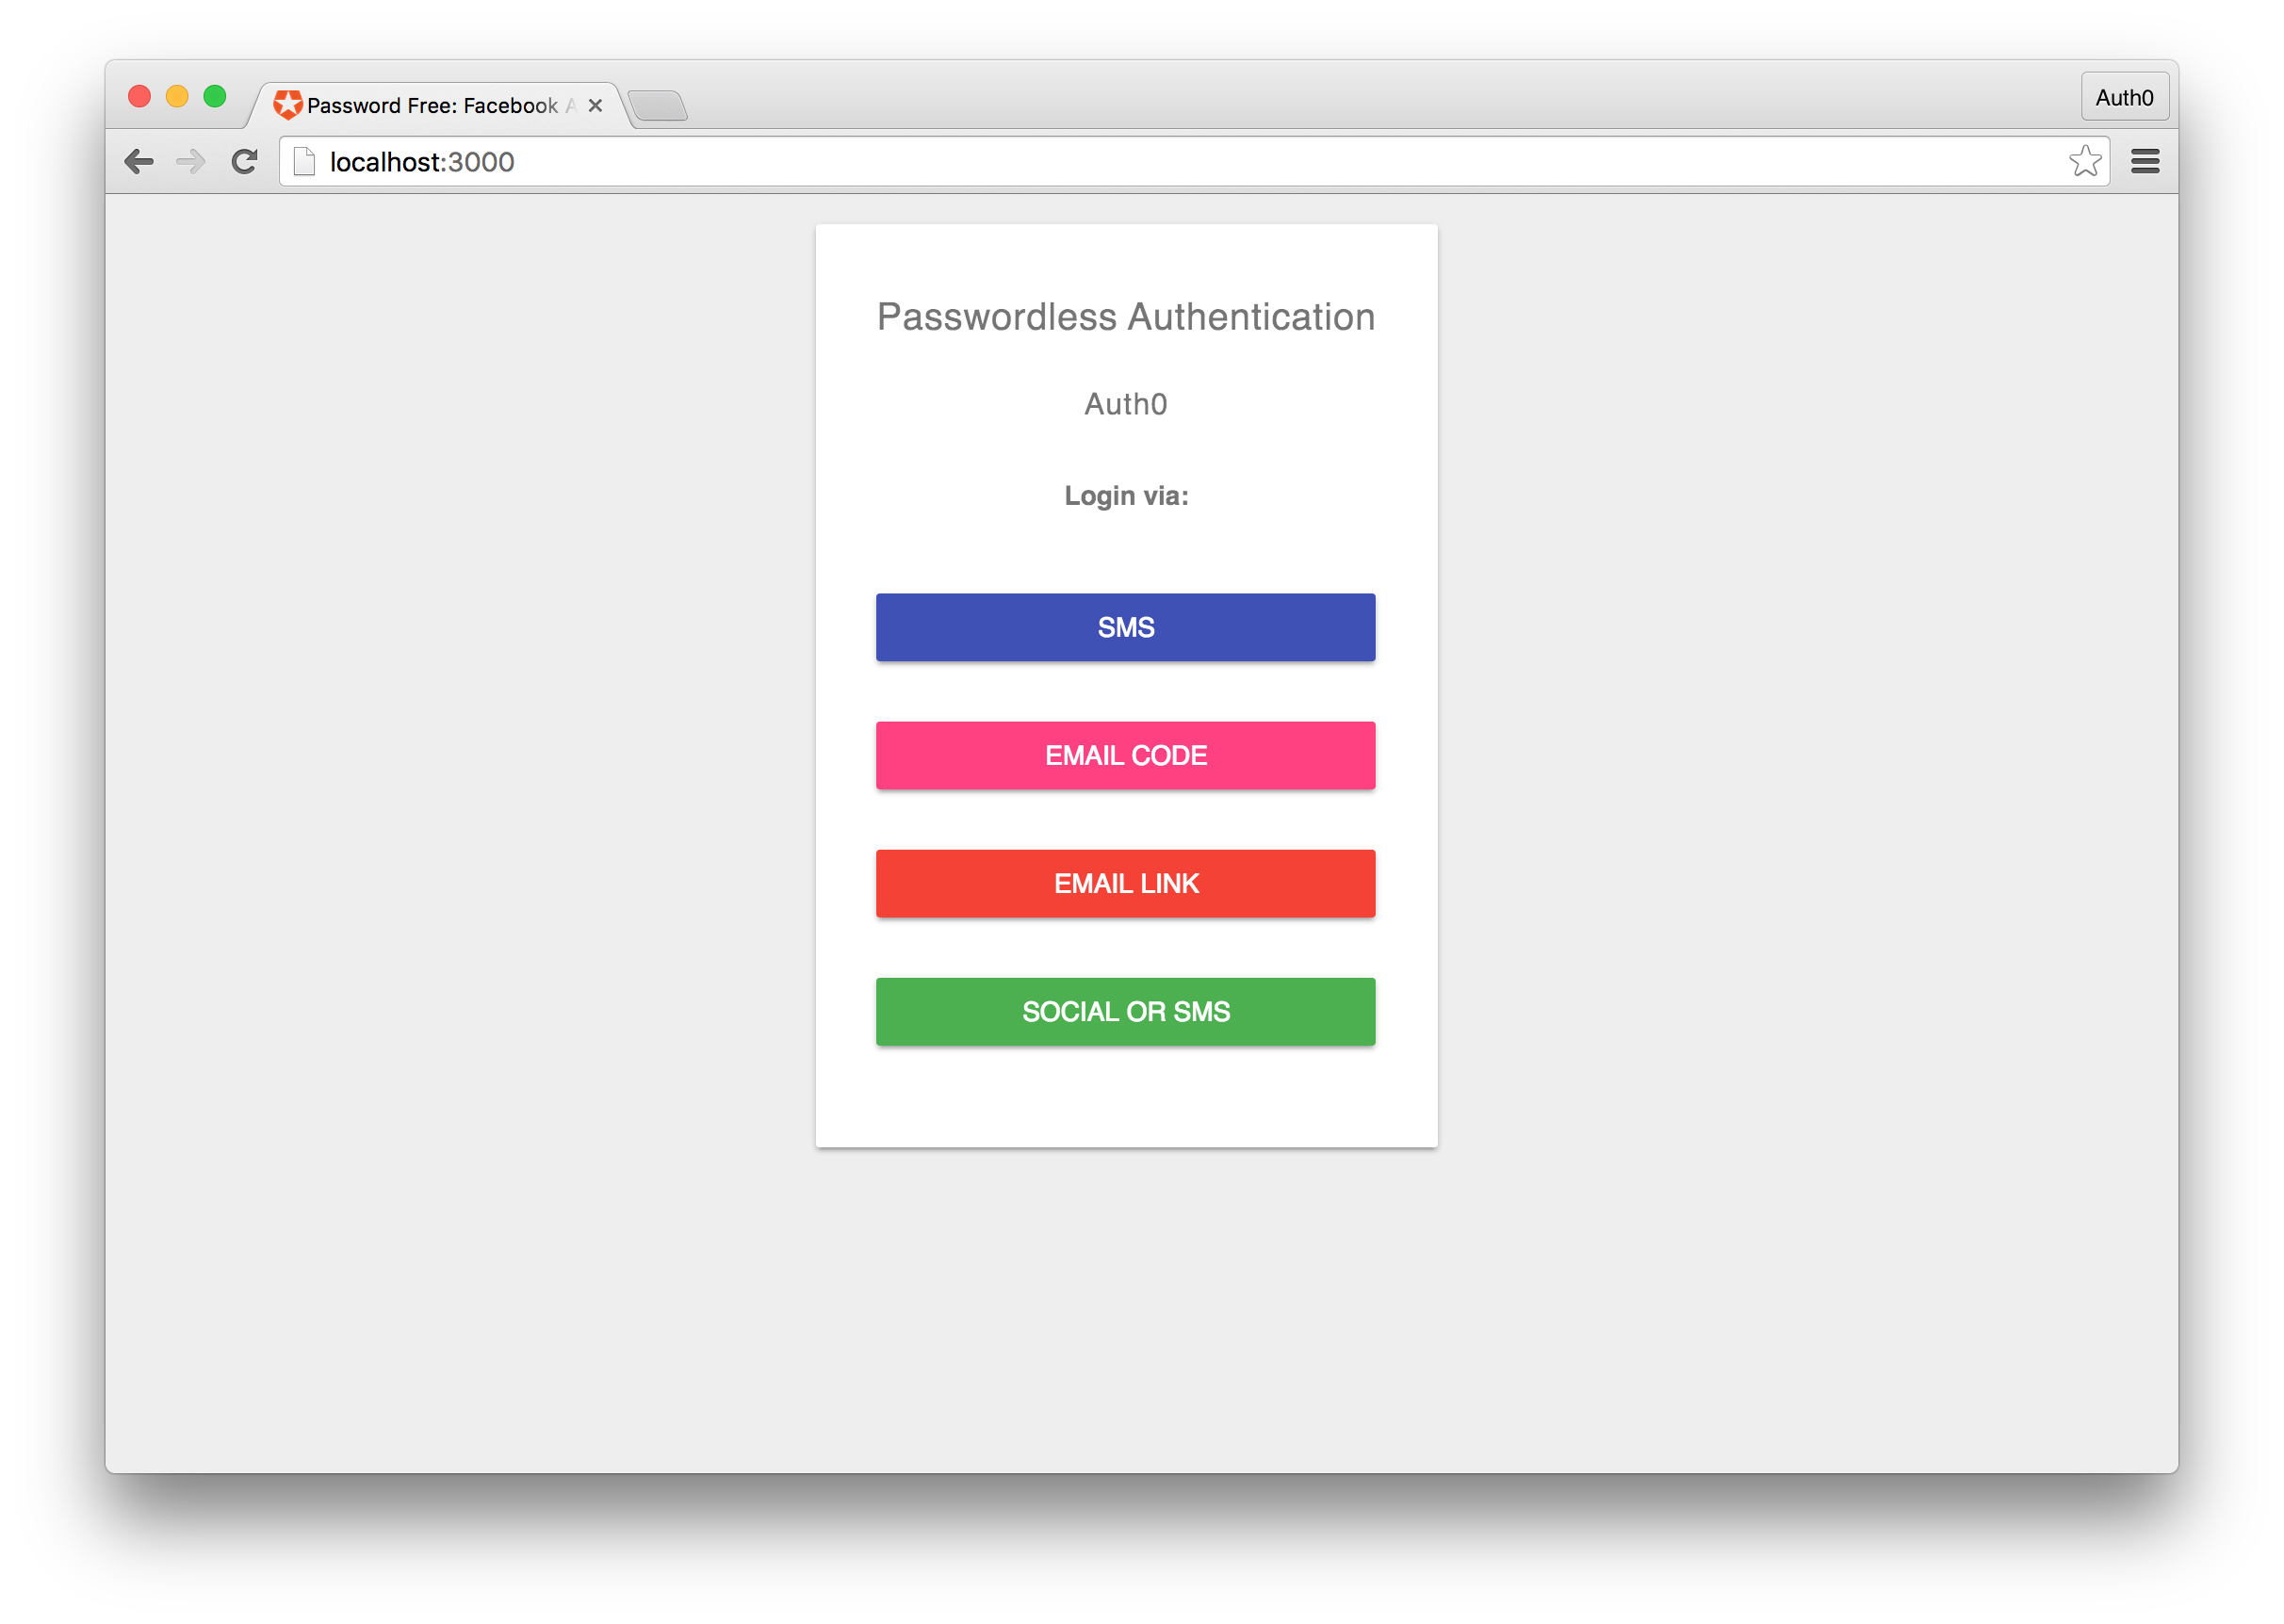
The frontend for our Auth0 Passwordless app will be identical to that of the Account Kit app we built earlier. The only notable difference will be the different authentication options. Auth0 provides various options for passwordless authentication. In addition to SMS code and email link verification options, Auth0 provides the ability to send verification codes to emails as well as combining multiple authentication options within a single workflow. You can see the UI changes in the GitHub repo.
Adding Passwordless Authentication with Auth0
To integrate passwordless authentication we'll use the Auth0.js library SDK. We'll show how to integrate passwordless in four different ways: SMS, Email Code, Email Magiclink and Social or SMS. For additional ways, check out the docs.
You will need to get your Client ID, Domain and Callback URL to proceed. You can get all three of these from the Auth0 management dashboard.
var AUTH0_CLIENT_ID = 'AUTH0_CLIENT_ID';
var AUTH0_DOMAIN = 'AUTH0_DOMAIN';
var AUTH0_CALLBACKURL = 'AUTH0_CALLBACKURL';

function loginWithSMS() {
  var auth0 = new window.auth0.WebAuth({
    domain: AUTH0_DOMAIN,
    clientID: AUTH0_CLIENT_ID,
    redirectUri: AUTH0_CALLBACKURL,
    responseType: 'token'
  });

  auth0.authorize({
    scope: 'openid email profile',
    login_hint: 'sms'
  });
}

function loginWithEmailCode() {
  var auth0 = new window.auth0.WebAuth({
    domain: AUTH0_DOMAIN,
    clientID: AUTH0_CLIENT_ID,
    redirectUri: AUTH0_CALLBACKURL,
    responseType: 'token'
  });

  auth0.authorize({
    scope: 'openid email profile',
    login_hint: 'email-code'
  });
}

function loginWithEmailLink() {
  var auth0 = new window.auth0.WebAuth({
    domain: AUTH0_DOMAIN,
    clientID: AUTH0_CLIENT_ID,
    redirectUri: AUTH0_CALLBACKURL,
    responseType: 'token'
  });

  auth0.authorize({
    scope: 'openid email profile',
    login_hint: 'email-link'
  });
}

function loginWithSocialOrSms() {
  var auth0 = new window.auth0.WebAuth({
    domain: AUTH0_DOMAIN,
    clientID: AUTH0_CLIENT_ID,
    redirectUri: AUTH0_CALLBACKURL,
    responseType: 'token'
  });

  auth0.authorize({
    scope: 'openid email profile',
    login_hint: 'social-or-sms'
  });
}
With this code implemented, let's launch our server and go through the workflow and test our application.
- User clicks on the desired passwordless login option
- User enters their SMS number or email address
- Based on the option chosen, they get either a one-time code or link
- User enters the code or clicks the link
- Auth0 verifies the code or link is valid and if so calls the callback with the JWT
- On the callback page, we use the JWT to get the users information
As you can see both passwordless authentication flows are fairly similar. Both allow the user to authenticate with minimal effort. Auth0 Passwordless is more customizable and allows for a greater range of integrations and use cases.
Conclusion
Passwordless authentication is a great way to provide an alternative login option for your clients that is secure and easy to use. Facebook Account Kit provides a great starting point for implementing passwordless authentication in your applications. If you need greater control and customization though, Auth0 Passwordless may be right for you.
Learn more and get started with Auth0 Passwordless today!
About the author

Ado Kukic
Former Auth0 Employee (Auth0 Alumni)