
TL;DR: Reactive programming is powerful and is becoming increasingly popular with libraries such as RxJS. We can make a stream out of just about anything, including API communication and authentication. Check out the repo for this tutorial to see the code.
Reactive programming has been gaining a lot of popularity in recent years. In the Reactive paradigm, data is handled as streams that can be composed of anything from events to simple variables and everything in between. Much like a stream of flowing water is a continuous phenomenon, a data stream in Reactive programming is also continuous and can be observed. When we observe streams over time, we are most interested in the events emitted from them, which happen asynchronously. In this way, the streams become "observable", and we can subscribe to them to react in whichever ways we specify when the events are emitted.
In this tutorial, we'll see how we can implement Reactive programming by creating a simple app that fetches and displays data. We'll also see how we can handle authentication in our app and have what we'll call "authenticable observables". Our goal throughout this tutorial is to see how we can shift our thinking about app architecture. We'll move away from the simple Promise-based asynchronous models we're used to and see how we can benefit from working with Observables.
“In the Reactive paradigm, data is handled as streams that can be composed of anything from variables to events”
Tweet This
Building Our Reactive App
We'll make use of Auth0's trusty NodeJS backend that serves us both public and private Chuck Norris quotes. The API uses JWT authentication, which is perfect for our case, as we'll want to see how we can use observables to handle JWTs. We'll also be using The Reactive Extensions for JavaScript, otherwise known as RxJS, which is a set of libraries that provide a wealth of tooling for working with observables. To actually retrieve data, we'll use the Fetch API.
In the interest of brevity, we won't deal with error conditions. However, the Fetch API and RxJS both have methods for handling errors, as would be expected. Also, since we want to focus mainly on how to handle observables for our sample application, we'll keep things simple and won't worry too much about any kind of routing or other ways we could polish the app. Instead, we'll provide some simple controls for the user to log in and retrieve public and private quotes.
Setting up the HTML
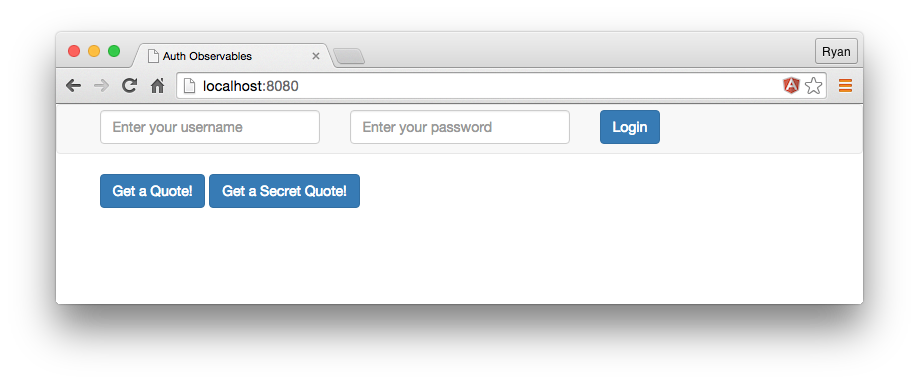
Let's first set up the HTML. We'll include RxJS from the CDN and use Bootstrap for styling as well:
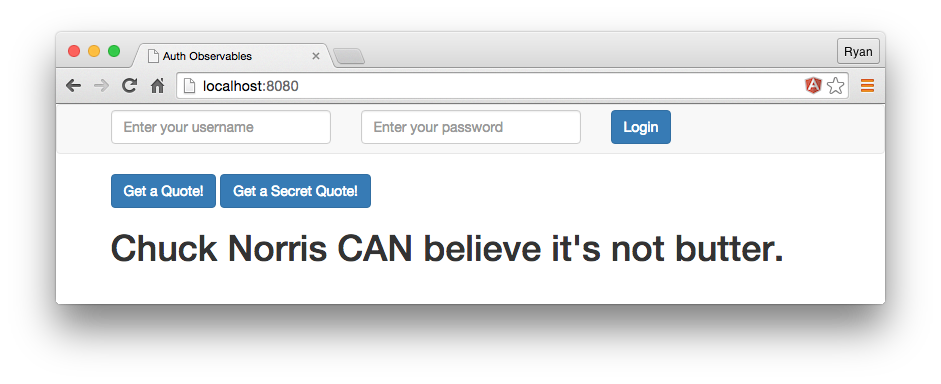
  <!-- index.html -->

  ...

  <nav class="navbar navbar-default">
    <div class="container">
      <div class="row">
        <div class="col-sm-4">
          <input id="username" class="form-control" type="text" placeholder="Enter your username">
        </div>

        <div class="col-sm-4">
          <input id="password" class="form-control" type="password" placeholder="Enter your password">
        </div>

        <div class="col-sm-4">
          <button id="login-button" class="btn btn-primary">Login</button>
        </div>
      </div>
    </div>
  </nav>

  <div class="container">

    <button id="quote-button" class="btn btn-primary">
      Get a Quote!
    </button>
    <button id="secret-quote-button" class="btn btn-primary">
      Get a Secret Quote!
    </button>

    <h1></h1>

  </div>

  </body>

  <script src="https://cdnjs.cloudflare.com/ajax/libs/rxjs/2.3.22/rx.all.js"></script>
  <script src="app.js"></script>

  ...
Creating the Click Streams
RxJS gives us a fromEvent method that allows us to create streams from any kind of event. In our case, we'll need to observe click events on our three buttons. We first need to select the buttons using querySelector and then pass that selection into the fromEvent method as the first argument, along with 'click' as the second argument.
// app.js

...

// Selectors for our buttons
var loginButton = document.querySelector('#login-button');
var quoteButton = document.querySelector('#quote-button');
var secretQuoteButton = document.querySelector("#secret-quote-button");

// We can create streams from click events on our buttons using
// Rx's 'fromEvent' method
var quoteClickStream = Rx.Observable.fromEvent(quoteButton, 'click');
var secretQuoteClickStream = Rx.Observable.fromEvent(secretQuoteButton, 'click');
var loginClickStream = Rx.Observable.fromEvent(loginButton, 'click');

...
With these streams set up, we could at this point subscribe to the events and respond in some simple way when they are observed. However, for our purposes, we'll need to create additional streams out of them first.
Creating New Streams
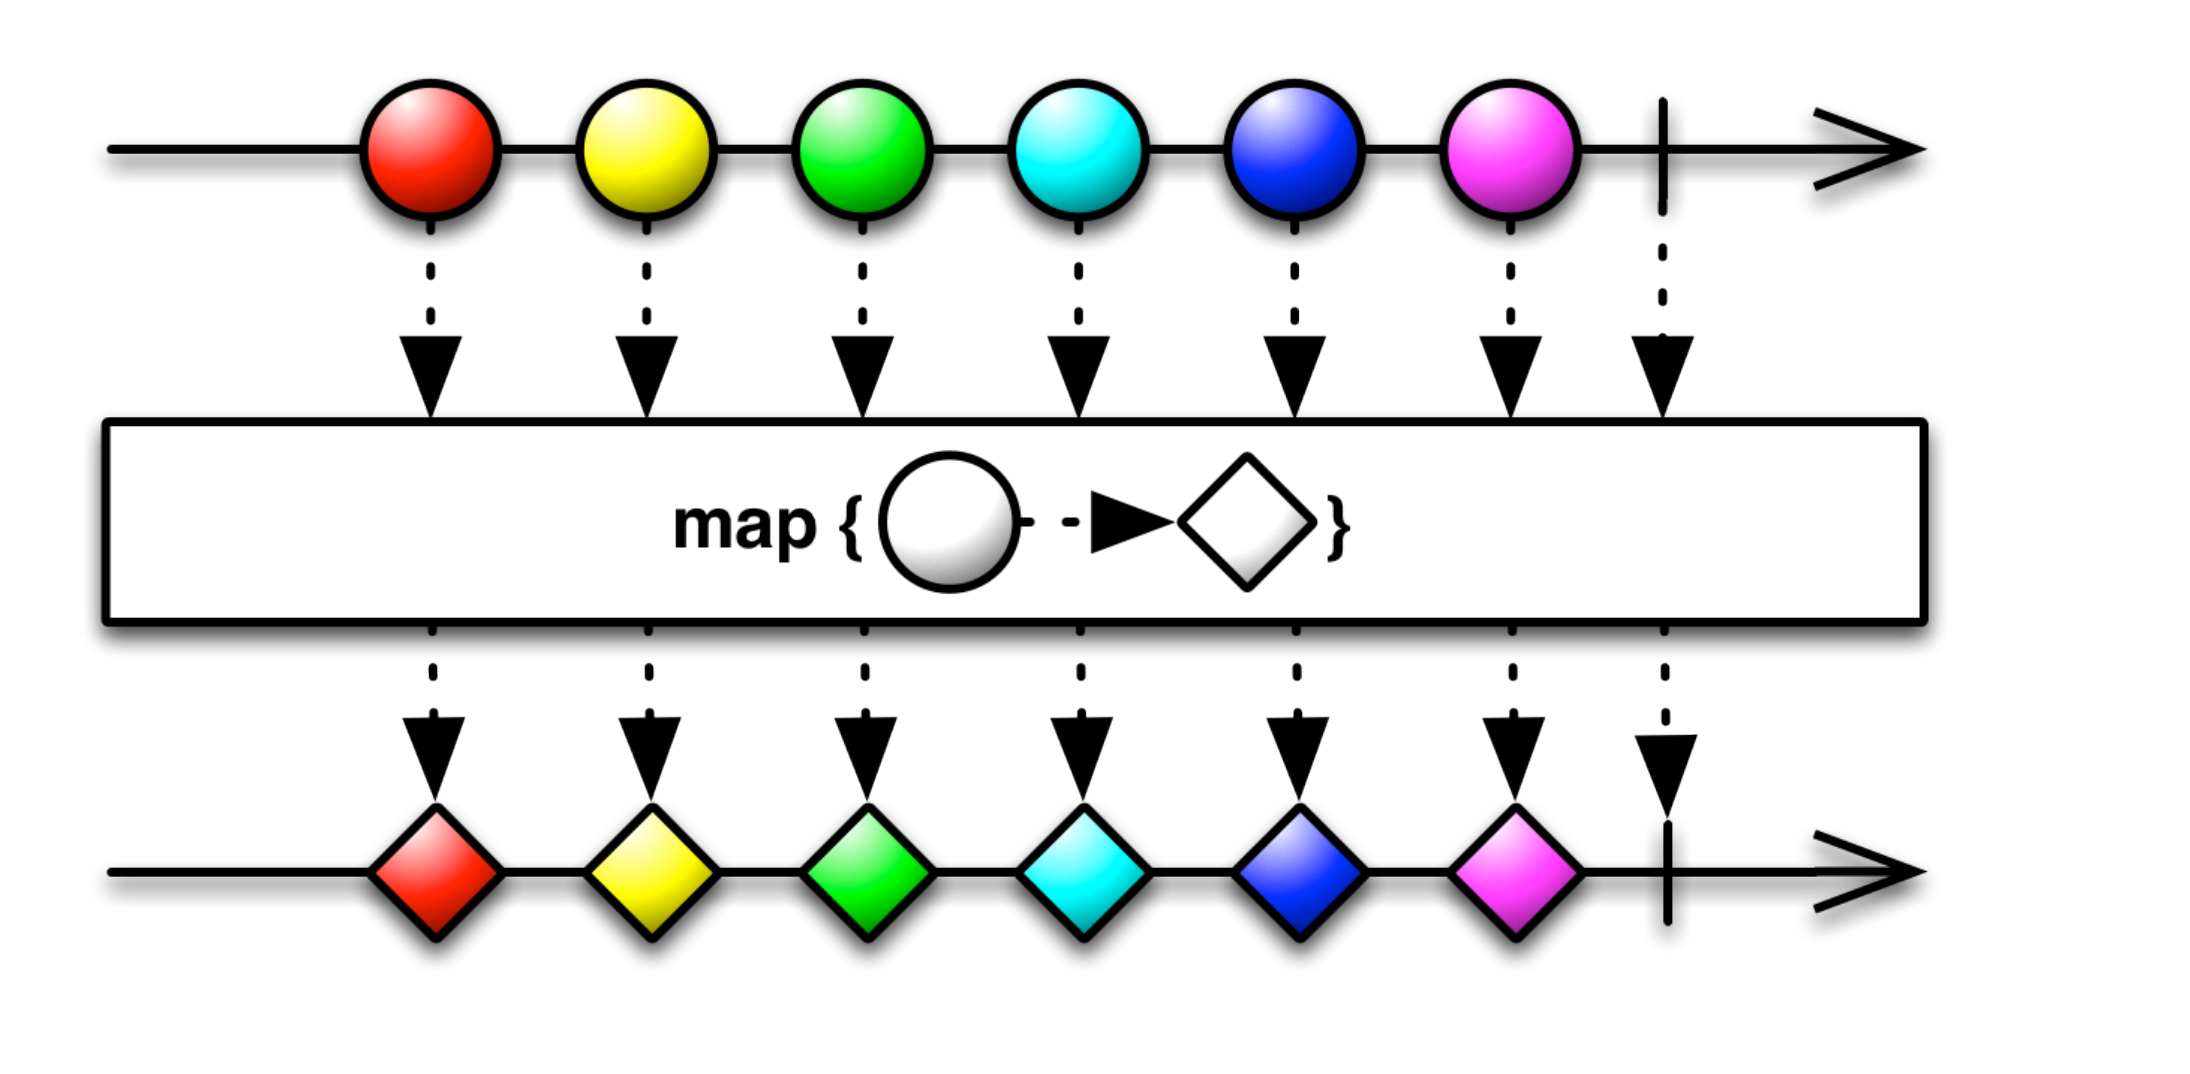
When working with streams, we will often need to combine or create new streams out of existing ones. RxJS gives us many useful ways of doing this, and one of them is map. This method projects a value we pass into it into a new stream that is dependent on an existing stream.
Let's make a new stream called quoteStream that takes care of getting the publicly accessible quotes. We'll need to create a new stream that maps a value (in this case an object with a route key) to the quoteClickStream.
// app.js

...

// Here we want to map the endpoint for where we'll get our public quotes
var quoteStream = quoteClickStream
  .map(function() {
    return {
      route: 'http://localhost:3001/api/random-quote'
    }
  });

...
The map operation transforms the quoteClickStream into a new stream.


Getting Public Quotes
We'll need to create another stream after this that is responsible for calling a function that fetches data from the API. We'll call this one quoteResponseStream because it is responsible for getting responses.
// app.js

...

// We need a response stream that handles the fetch operation
var quoteResponseStream = quoteStream
  // flatMap flattens the new stream such that we can get access
  // to JSON data returned from the fetch operation
  .flatMap(function(request) {
    return fetchQuote(request);
  });

...
The quoteResponseStream relies on the quoteStream, which, as we saw above, maps an object with a url key that can be passed to the fetchQuote method to make the request. Since the values emitted by the map method are themselves streams, we need a way to get access the actual data. In this new stream we are using flatMap which effectively flattens the emitted values and gives us access to the JSON returned by the fetch operation.
We are returning the fetchQuote function with the request URL but we haven't yet set it up.
// app.js

...

function fetchQuote(request) {
  return fetch(request.route).then(function(data) {
    return data.text().then(function(text) {
      return text;
    });
  });
}

...
The fetchQuote function makes a GET request to the route we pass in and returns the data as text.
With this set up, we're now ready to subscribe to the quoteResponseStream and observe events. We can do whatever we want with the returned responses, and in this case we'll simply print them on the page.
// app.js

...

// We subscribe to the quoteResponseStream, listen
// for quotes that get returned, and put them on the page
quoteResponseStream.subscribe(function(text) {
  document.querySelector('.container h1').innerHTML = text;
});

...
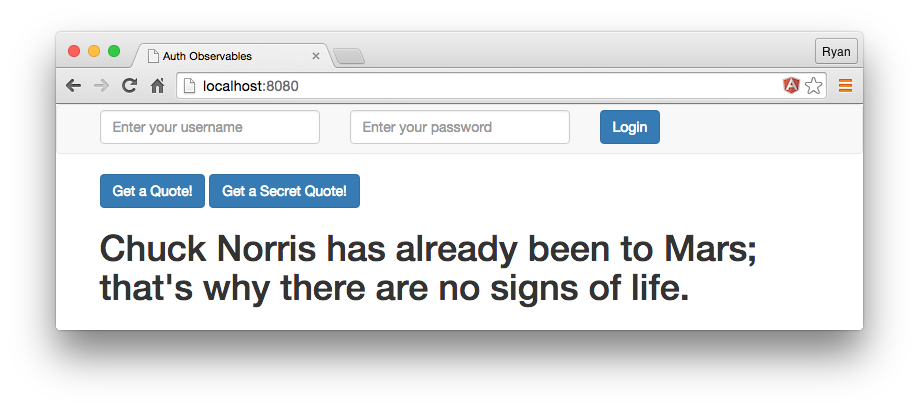
If we now click the "Get a Quote!" button, we get a public quote back.
Setting up the Auth Streams
To authenticate the user and receive a JWT, we could follow the same approach we saw above, in which we would map a route and then call a function to fetch the JWT. However, we can also create a custom RxJS operator to abstract those details away. Let's take the latter approach and create an authenticate operator that will retrieve a JWT for the user and put it in local storage.
First, we'll need to create a new stream called loginStream out of the existing loginClickStream.
// app.js

...

// .map will create a new stream that is dependent on the first
// and will project a value that we pass it. The login stream needs to
// map a string that contains values from the username and password input boxes
var loginStream = loginClickStream
  .map(function() {
    var loginPath = 'http://localhost:3001/sessions/create';
    var username = document.querySelector('#username').value;
    var password = document.querySelector('#password').value;
    var method = 'POST';
    var headers = { 'Content-Type':'application/x-www-form-urlencoded' };
    return {
      loginPath: loginPath,
      username: username,
      password: password,
      method: method,
      headers: headers
    }
  })
  .authenticate(function(config) {
    return config;
  });

...
Here we're setting up some configuration for the authenticate operator, including the path to use for authentication, the username, and the password. After mapping that configuration to the loginClickStream, we use an anonymous function to return it for the authenticate operator to use.
We can define a new operator on Rx.Observable.prototype.
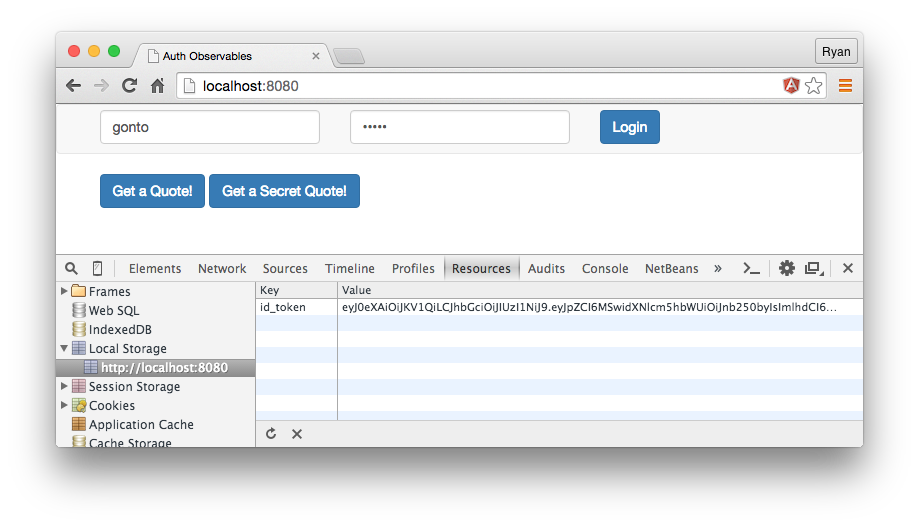
// app.js
...

Rx.Observable.prototype.authenticate = function(config) {

  // We need a function to handle the fetch request for the JWT
  function getJwt(config) {
    var body;

    // Check the content type header and format the request data accordingly
    if(config.headers['Content-Type'] === 'application/x-www-form-urlencoded') {
      body = 'username=' + config.username + '&password=' + config.password;
    }

    // We need some config to specify that this is to be a POST request
    // We set the content type and put the passed-in credentials as the body
    var init = {
      method: config.method,
      headers: config.headers,
      body: body
    }

    return fetch(config.loginPath, init).then(function(data) {
      return data.json().then(function(jwt) {
        localStorage.setItem('id_token', jwt.id_token);
        localStorage.setItem('access_token', jwt.access_token);
      });
    });
  }

  return this.flatMap(function(credentials) {
    return getJwt(credentials);
  });
}

...
Here we are accepting a configuration object and setting up the request type, headers, and body that we want to send to the API. Once the request resolves, we set the returned tokens into local storage.
We can now log in with our credentials. For this simple example, we don't have a way to register users (although the NodeJS example back end allows it), so we'll just use the default username of "gonto" and a password of "gonto".
Retrieving Secret Quotes
Now that we've got our authentication in place and we have an id_token and access_token saved in local storage, let's set up the streams that handle secret quotes. We'll need a way to check whether there is a JWT access_token in local storage before we send the request. Let's once again abstract this task away into a custom operator called authenticated.
// app.js

...

Rx.Observable.prototype.authenticated = function(route) {

  var jwt = localStorage.getItem('id_token');

  // Return the JWT if it exists
  if(jwt != undefined && jwt != null) {
    return this.map(function() {
      return {
        route: route,
        jwt: jwt
      }
    });
  }
  // If there is no JWT, throw an error
  else return Rx.Observable.throw(new Error('No JWT in Local Storage!'));
}
...
The authenticated operator will check for a JWT access_token in local storage, and if there is one, it will return an observable by mapping out an object with the route for our request and the JWT.
Next, we can make use of this operator in our secretQuoteStream by passing in the route we want to make the request to. In this case, it's the route for secret quotes.
// app.js

...

// We need a separate stream for the secret quotes which
// checks authentication
var secretQuoteStream = secretQuoteClickStream
  .authenticated('http://localhost:3001/api/protected/random-quote');

...
The Secret Quote Response
We could set up a separate response stream for our secret quotes that simply mimics the quoteResponseStream, but instead of repeating ourselves, let's use RxJS's merge method to combine the quoteStream and the secretQuoteStream into one single quoteResponseStream. This gives us the benefit of only needing to subscribe to a single stream that will observe events for public and private quotes.
// app.js

...

// We need a response stream that handles the fetch operation
var quoteResponseStream = quoteStream
  .flatMap(function(request) {
    return fetchQuote(request);
  })
  // Instead of setting up a separate stream for the secret quotes, we
  // can simply merge the secretQuoteStream in and apply the same flatMap
  .merge(secretQuoteStream
    .flatMap(function(request) {
      return fetchQuote(request);
    })
  );

...
We just need to modify the fetchQuote function so that it properly handles the JWT that might be present. If the JWT is there, it will be included as an Authorization header and sent to the API.
// app.js

...

// One fetch function will handle getting both the public and private quotes
function fetchQuote(request) {
  // We just need to check whether a JWT was sent in as part of the
  // config object. If it was, we'll include it as an Authorization header
  if(request.jwt) {
    var config = {
      headers: {
        "Authorization": "Bearer " + request.jwt
      }
    }
  }

  return fetch(request.route, config).then(function(data) {
    return data.text().then(function(text) {
      return text;
    });
  });
}

...
Since we merged the secretQuoteStream into the quoteResponseStream, we don't need to modify the subscription at all. Testing this out, we see that we now get secret quotes.
Aside: Using Authenticable Observables with Auth0
Auth0 issues JSON Web Tokens on every login for your users. This means that you can have a solid identity infrastructure, including Single Sign On, User Management, support for Social (Facebook, Github, Twitter, etc.), Enterprise (Active Directory, LDAP, SAML, etc.) and your own database of users with just a few lines of code.
The custom authenticate operator we created above can be extended for use with Auth0's authentication API very easily. Let's see this in action with an example using Auth0's test API.
First, let's add a check to the getJwt method within authenticate to see if Auth0 should be the provider:
// app.js

...

if(config.headers['Content-Type'] === 'application/json') {
  if(config.provider === 'Auth0') {
    body = JSON.stringify({
        client_id: config.client_id,
        username: config.username,
        password: config.password,
        connection: config.connection,
        grant_type: config.grant_type,
        scope: config.scope
      });
  }
}

...
Next, let's adjust the loginStream to map info that is specific to Auth0's test API.
// app.js

...

var loginStream = loginClickStream
  .map(function() {
    var provider = 'Auth0';
    var loginPath = 'https://samples.auth0.com/oauth/ro'
    var client_id = 'BUIJSW9x60sIHBw8Kd9EmCbj8eDIFxDC';
    var username = document.querySelector('#username').value;
    var password = document.querySelector('#password').value;
    var connection = 'Username-Password-Authentication';
    var grant_type = 'password';
    var scope = 'openid';
    var headers = { 'Content-Type':'application/json' };
    var method = 'POST';
    return {
      loginPath: loginPath,
      client_id: client_id,
      connection: connection,
      grant_type: grant_type,
      scope: scope,
      username: username,
      password: password,
      method: method,
      headers: headers
    }
  })
  .authenticate(function(config) {
    return config;
  });

...
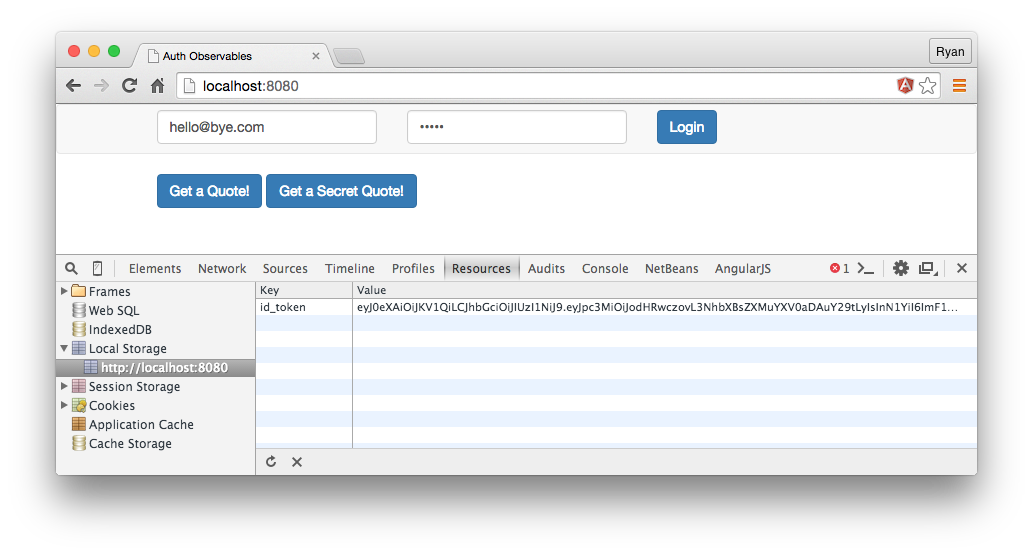
If we enter a username of "hello@bye.com" and password of "hello", we see that we get a JWT back.
Important API Security Note: If you want to use Auth0 authentication to authorize API requests, note that you'll need to use a different flow depending on your use case. Auth0 idToken should only be used on the client-side. Access tokens should be used to authorize APIs. You can read more about making API calls with Auth0 here.
If you'd like to explore Auth0's API further, head over to the docs. For help while working with JWT's you can also check out Auth0's JWT debugger.
Wrapping Up
You might be wondering why we'd bother architecting our applications using observables. It seems like we just used a lot more code than was really necessary and that we could have been more succinct using more-familiar methods. While that might be true, observables offer so much more power and flexibility than Promises that making the switch can be worthwhile. For example, if we wanted to provide better support for network latency or other constraints where a request and response might not go through as expected, we could tap into RxJS's retry method, which would allow us to set the number of times we wanted to retry a request before having it error out.
With this tutorial we've really just skimmed the surface. The possibilities that we have with Reactive programming and supporting libraries such as RxJS are huge. If you like the idea of turning nearly all the parts of your application into data streams, it would certainly be beneficial to explore Reactive programming further.
Big thanks to André Staltz for his article on Reactive programming, which informed many of these examples.
About the author

Ryan Chenkie
Developer
Ryan is a Google Developer Expert, the host of the Entrepreneurial Coder Podcast, the author of Securing Angular Applications, and an all-around fanatic about application security.View profile