Before you can learn about multi-factor authentication, you must understand authentication itself. Authentication, simply put, is the process of verifying that someone is who they say they are.
When you want to sign in to your account on a website, the website must first make sure you're the owner of that account. How do they do that? They ask you for something that only you should know. Typically, this is the username and password that you set up when you created the account. Great! You were the one who set it up, so there's no way anyone else could have your password, right?
It turns out that someone providing the correct username and password to access a resource doesn't necessarily prove that they are who they say they are. User credential breaches have become much more prevalent in recent years, so there's a good chance that some of your username and password combinations have been involved in a breach. This means that relying only on a username and password to identify someone isn't a great practice.
This is where multi-factor authentication comes into play.
What is Multi-factor Authentication
Multi-factor authentication (MFA) provides a method to verify a user's identity by requiring them to provide more than one piece of identifying information.
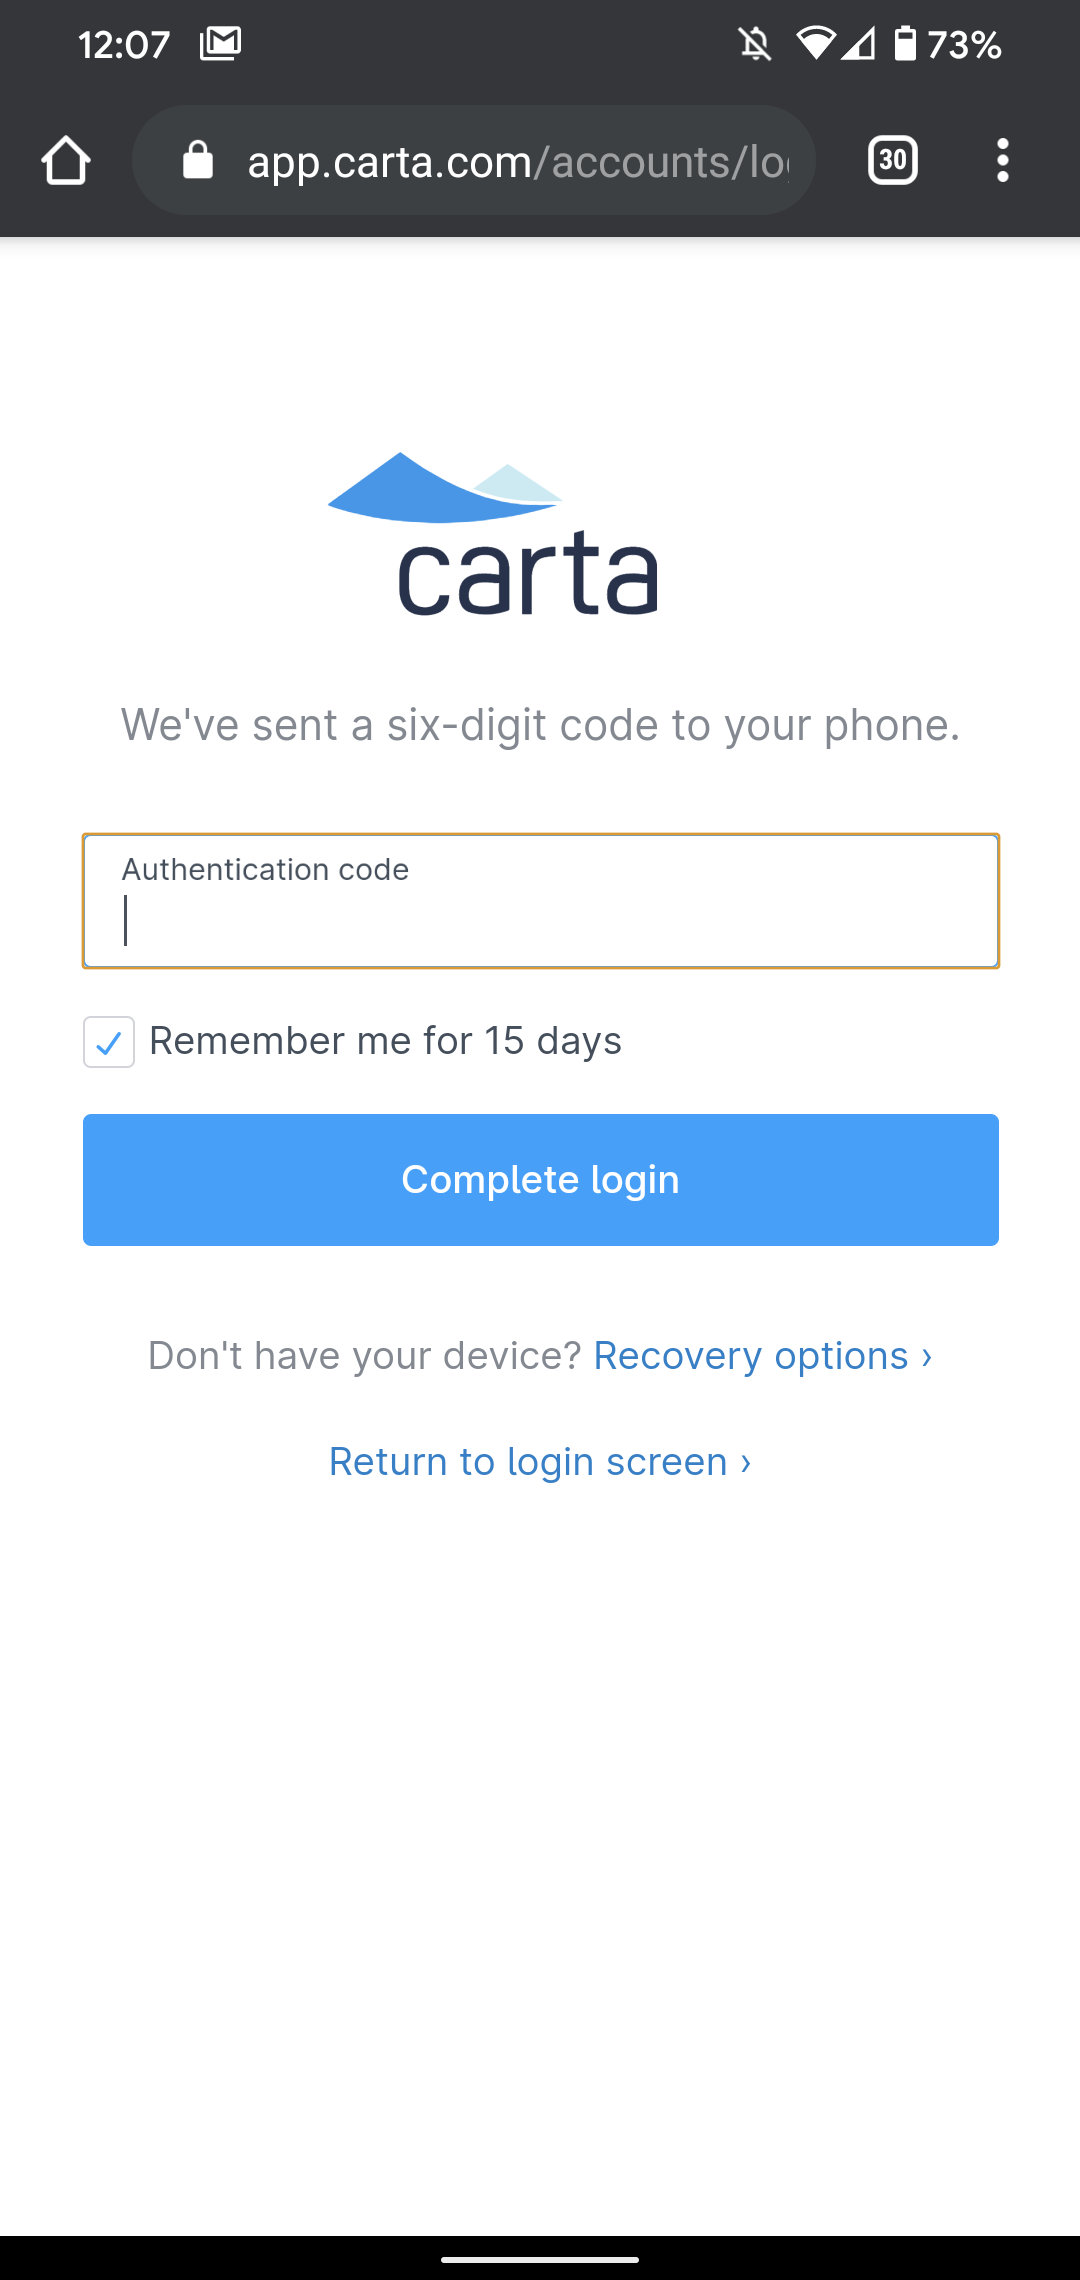
You have most likely encountered multi-factor authentication on some of your favorite websites already. For example, when you sign in to your banking account, you may get a screen requesting that you enter the code that was emailed to you. Once you enter this code, you're then able to access your bank account. This is an example of MFA in action!
Providing a username and password coupled with a code sent to your email is one form of MFA, but there are several other options you have for implementing MFA. Let's look at some of those now.
Types of Multi-factor Authentication
The category that you use to identify a user is called an authentication factor. In general, these identification methods fall into three authentication factor categories:
Something you know — Something you know, such as a password, PIN, personal information like mother's maiden name, etc.
Something you have — A physical item you have, such as a cell phone or a card.
Something you are — Biometric data, such as fingerprint, retina scan, etc.
To implement multi-factor authentication, you need to cover at least two of these categories.
A common scenario would be requiring a user to sign in with their username and password. This covers the "something you know" category. After providing their username and password, they'd receive a text to their cell phone with a short code called a one-time password (OTP). This covers the "something you have" category. They'll be required to type this code into the website, and if correct, then they'll be authenticated.
In this scenario, even if an attacker knows the user's password, it isn't enough. They'll have to also gain access to the user's phone to provide the one-time password.
One-time passwords
In the scenario above, the application sent the user a code known as a one-time password (OTP). This is one of the most commonly used forms of multi-factor authentication. Let's take a closer look at what one-time passwords are.
A one-time password, like its name indicates, is a pseudo-randomly generated password that expires after a short time period and is only valid for one login. They are typically paired with a traditional username and password to make the authentication process more secure. Even if a user has a weak or reused password, the one-time password that is sent to them is a way to indirectly strengthen their credentials.
There are a few different ways to send one-time passwords to users.
SMS
SMS is one of the most user-friendly ways to send one-time passwords. The user signs in to your application with their username and password, and then they receive a text message to their cell phone with their OTP. They're able to easily copy the code from the text message and send it back to the application.
While this may be simple for the user, and it's better than not having MFA at all, it's still not the best way to send or receive one-time passwords.
Believe it or not, delivering an OTP through SMS carries the risk of compromise. Here are some of the ways that an attacker can gain access to your OTP through SMS:
Social Engineering — An attacker that has breached a user's username and password may also have access to their phone number. Attackers have been known to obtain SMS-delivered one-time passwords by sending a text to the user telling them that they used to have the same phone number as them, and they are locked out of one of their accounts because they forgot to update the phone number listed on the account. They politely ask for the code that was just sent to the user's cell phone, so they can get back into their account. Many people want to help the person on the other end, so they text them the code without thinking much of it.
SIM Swap — SIM swapping (also known as simjacking) is when an attacker gains access to your cell phone number. One interesting (and terrifying) way this can happen is by an attacker calling your cell phone provider and convincing them that they lost their phone and need a new SIM card activated. The SIM card that gets activated is one that the attacker owns. If the cell phone provider obliges, then the attacker now has access to any text messages, phone calls, etc. that come through. So, if they already have your username and password, all they have to do is type in the OTP that is texted to your phone number (which they now have access to), and they're in! This Hacking Challenge at Defcon video has an excellent demonstration of this in action.
Another option for receiving OTPs is through email. While this does provide another step to access your account, which is great, it still has some downfalls:
Because password reuse is so prevalent, there's a chance that a user's email password is the same as the account that's requesting the OTP. Assuming the attacker already has this password, then the extra step of the OTP is useless.
One of the requirements for MFA is that the implemented factors come from at least two of the MFA categories: something you know, something you have, and something you are. The username and password fulfill something you know, and OTP is meant to fulfill something you have. Ideally, something you have would be a physical item, such as your cell phone. Having access to an email account doesn't necessarily mean that the cell phone is in your possession, as you could access your email from any device.
Authenticator apps
Another common way to manage OTPs is with authenticator apps. Once you install the app up on your cell phone, you can set up any accounts that work with the authenticator app to send your one-time passwords to that app. The OTPs will typically regenerate every 30 seconds, so instead of waiting for an email or a text message, you simply open up the app, and you'll always find a valid OTP there.
There are a lot of authenticator app options. Some of the most popular ones are Duo, Authy, and Google Authenticator.
An authenticator app is an excellent choice for receiving one-time passwords. Unlike SMS, an attacker can't access your authenticator app simply by having access to your text messages or phone number. Your one-time passwords also can't be stolen if someone gains access to your email account.
There are, however, still downsides to authenticator apps. Some users may find it too much of a hassle to download a new app and set up all of their accounts on it to receive one-time passwords, especially when it's so much easier to just enter their phone number instead.
Another issue is that if you lose your cell phone, accessing those accounts that have MFA enabled can quickly become a nightmare. Most popular authenticator apps now have safeguards, such as key backups, built-in. To enable backups, you have to create a strong password that's used to encrypt your OTPs. Then, if you ever lose your phone, you can install the authenticator app on your new phone and type in your password to decrypt your keys.
Step-up Authentication
You may have noticed a common theme amongst the downsides to some of the OTP options: user experience.
One of the biggest obstacles to mass adoption of MFA is the slight hit that user experience takes. Generally, the more steps you require to sign in to your application, the fewer people will want to use it.
To manage the balance between user experience and security, some people find it best not to require MFA on every login, but instead, require it when accessing more sensitive data.
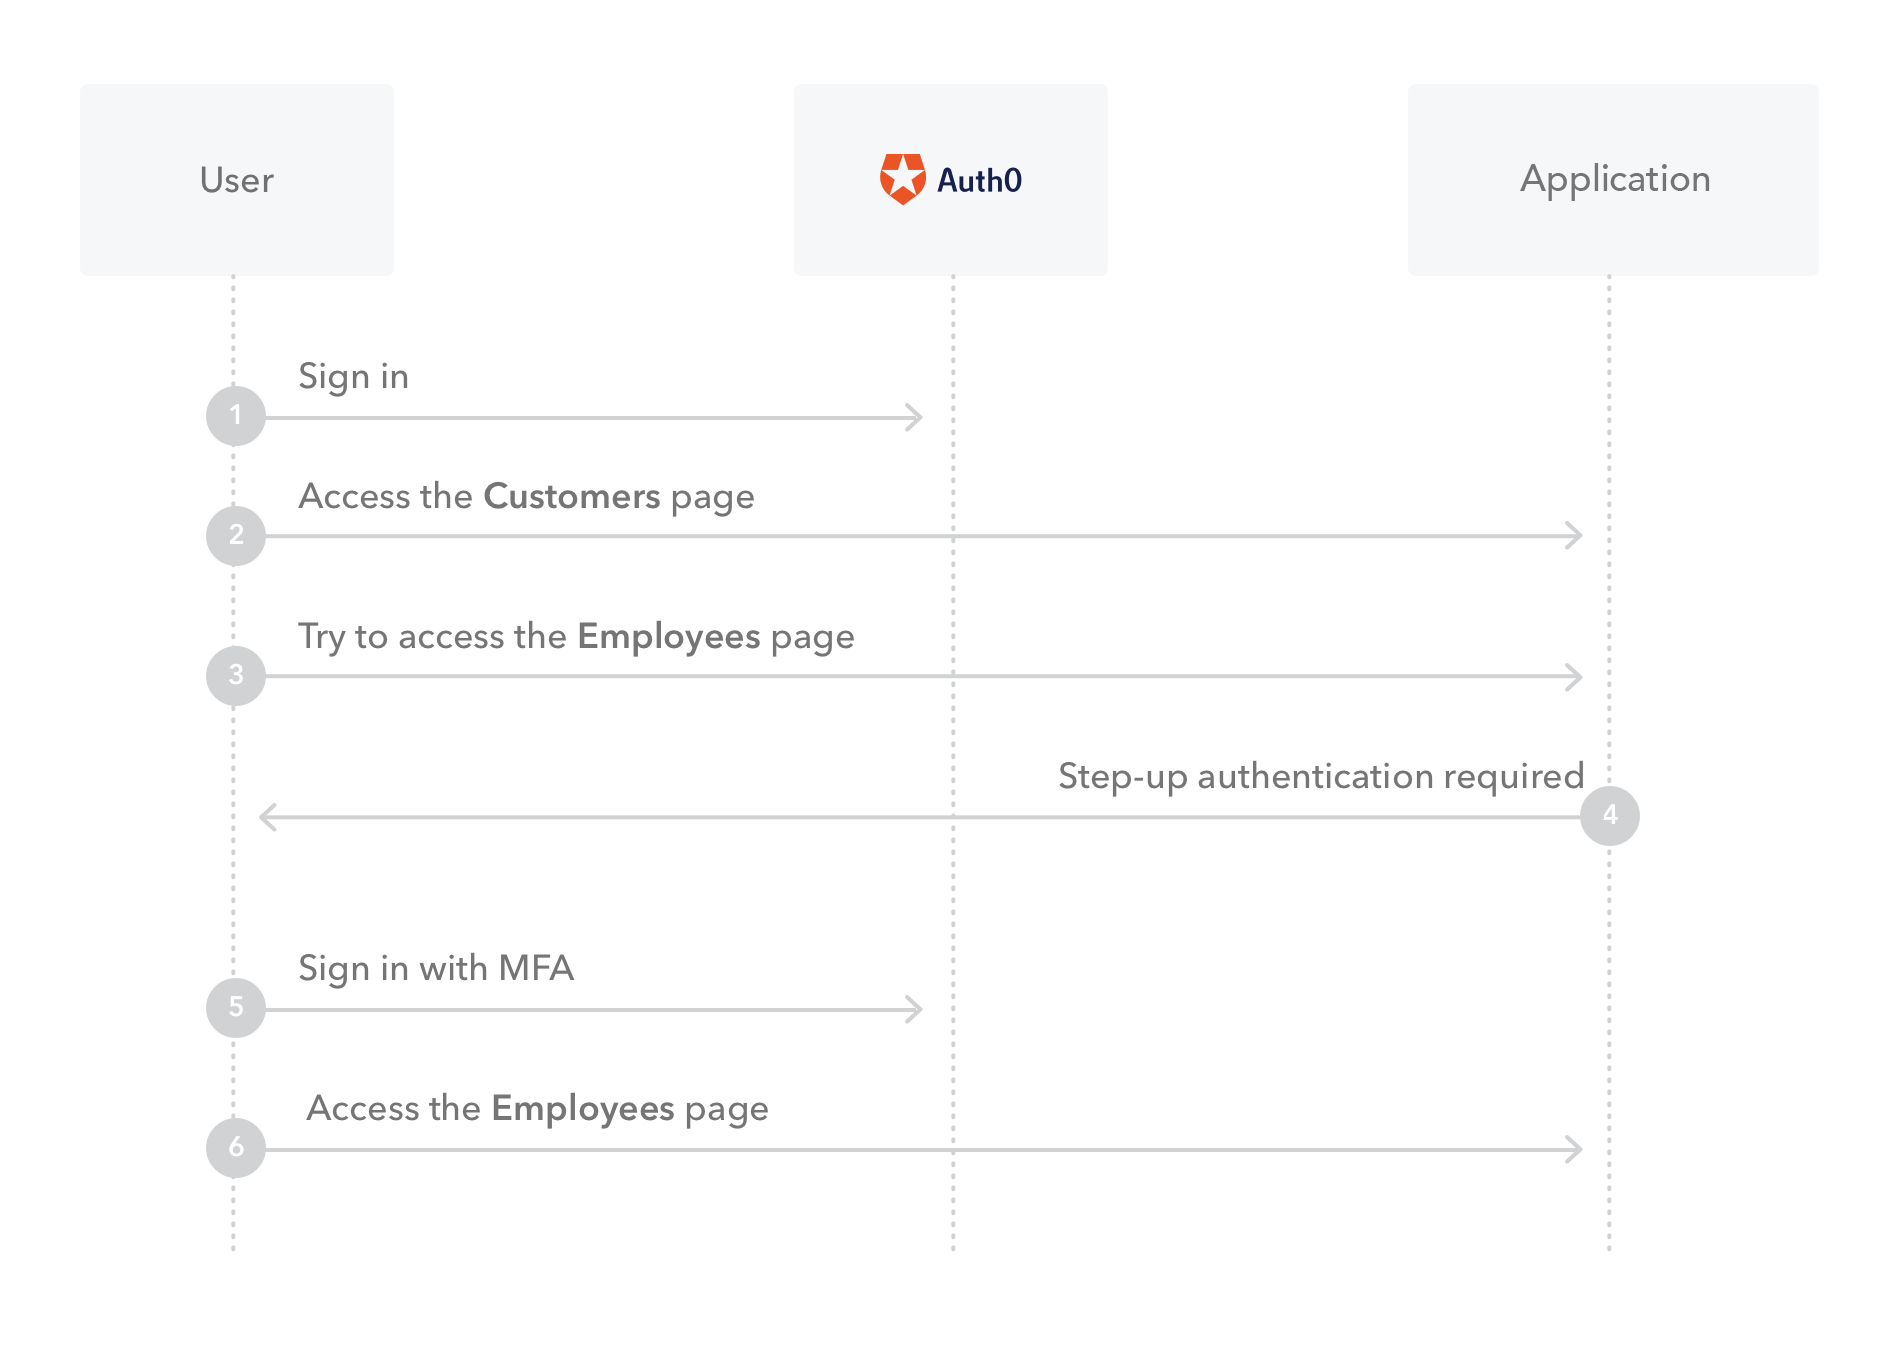
With step-up authentication, applications that allow access to different types of resources can require users to authenticate with a stronger authentication mechanism to access sensitive resources.
For example, say you have an application that requires users to sign in with their email and password to access customer data. However, when a user wants to see employee data, an extra authentication factor is required.
Step-up authentication is an excellent option to bridge the gap between user experience and security.
Implementing Multi-factor Authentication with Auth0
Now that you've seen why multi-factor authentication is important, you're probably wondering how you can implement it into your own apps. Let's go through how you can get MFA up and running in just minutes using Auth0.
To start, sign up for a free Auth0 account. Once you go through setup, leave the tab open, as you'll be returning to it soon.
Next, you're going to clone this sample React application that has already been set up to use Auth0 for authentication.
If you'd like to know more about how this application was built, check out The Complete Guide to React User Authentication.
In your terminal, run the following:
git clone git@github.com:auth0-blog/auth0-react-sample.git
cd auth0-react-sample
npm install
Next, create the .env file in your auth0-react-sample root directory:
touch .env
This is where you'll store your Auth0 variables so that you can connect your React application to Auth0. Paste the following into .env:
REACT_APP_AUTH0_DOMAIN=
REACT_APP_AUTH0_CLIENT_ID=
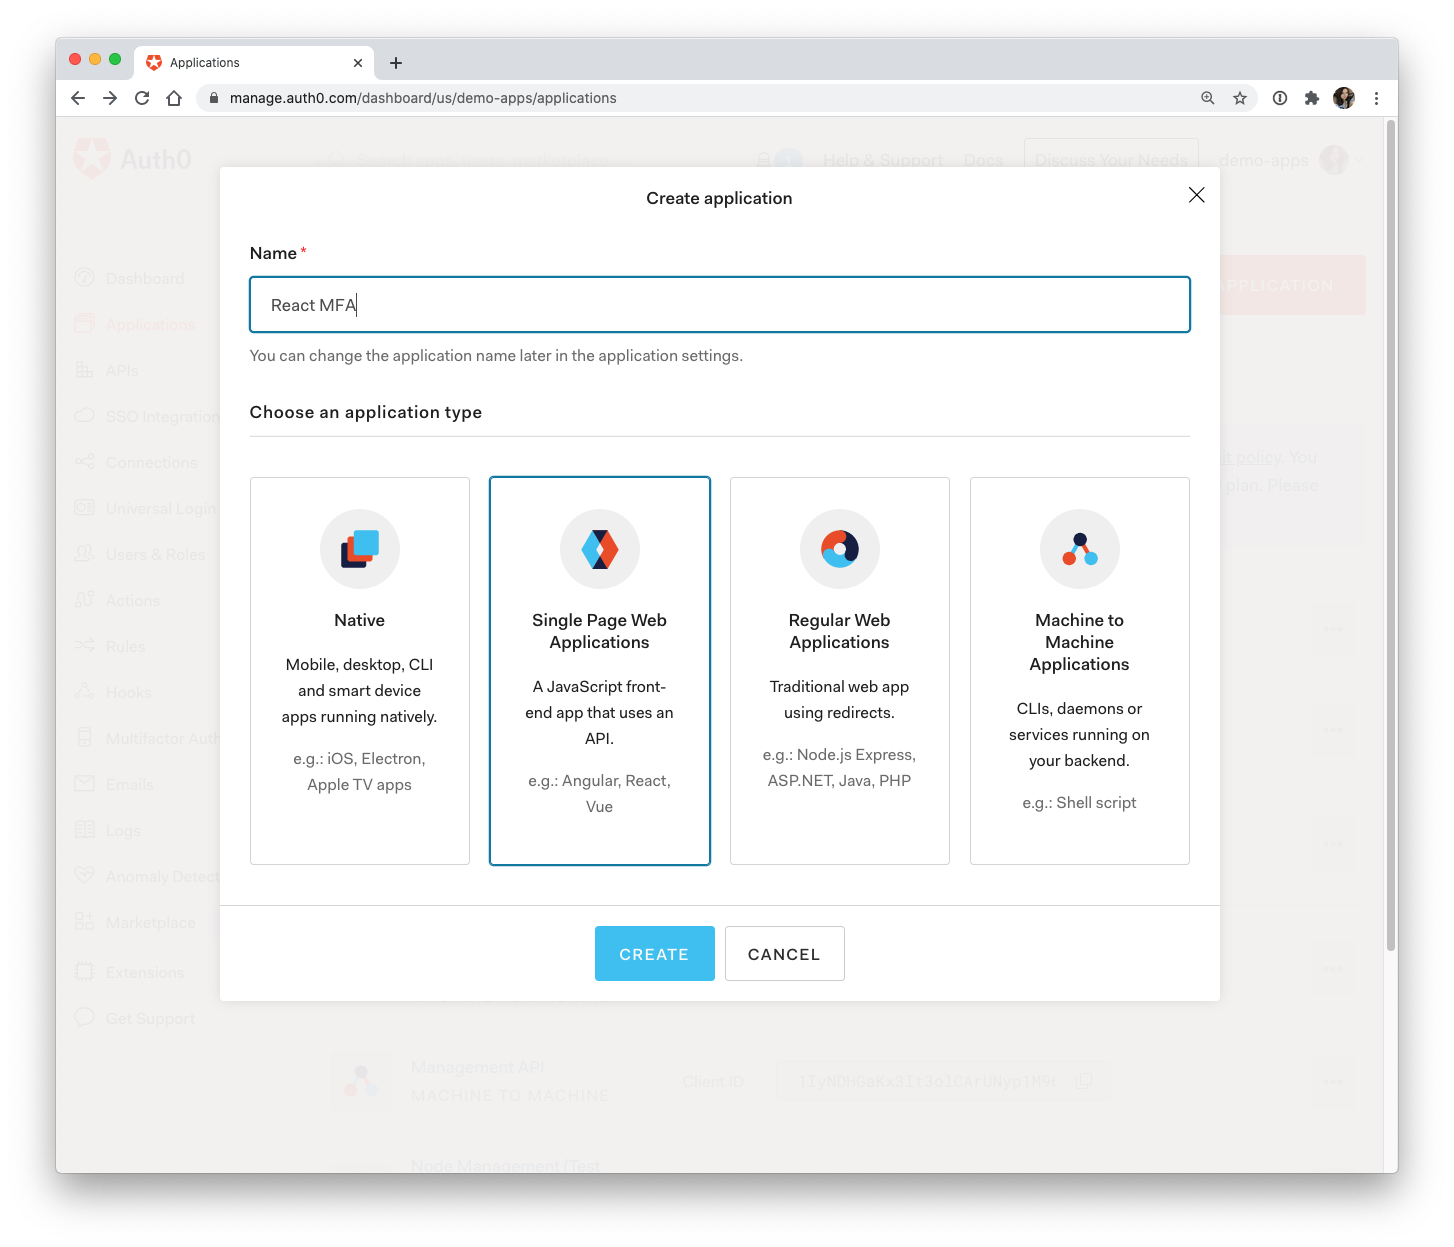
Back in the Auth0 dashboard, click on "Applications" and then on the "Create Application" button.
Name your application anything you'd like, click on "Single Page Web Applications", and then click "Create".
Click on the "Settings" tab. Paste the development URL for your React application (http://localhost:4040) into the text area under "Allowed Callback URLs", "Allowed Logout URLs", and "Allowed Web Origins".
Allowed Callback URLs: http://localhost:4040
Allowed Logout URLs: http://localhost:4040
Allowed Web Origins: http://localhost:4040
❗ Make sure you scroll down to the bottom and click "Save changes".
Next, you'll need to paste some of these values from the Settings page into your React application's .env file so that the Auth0 authentication server recognizes your React application.
Back in your code editor, open your .env file. Set REACT_APP_AUTH0_DOMAIN to the value for "Domain" from the Auth0 Settings page and REACT_APP_AUTH0_CLIENT_ID to the value of "Client ID".
REACT_APP_AUTH0_DOMAIN=your-domain.auth0.com
REACT_APP_AUTH0_CLIENT_ID=yourclientidstring
Save this and then start your React application by running the following in your terminal:
npm start
Head to http://localhost:4040/ in your browser to see your application live.
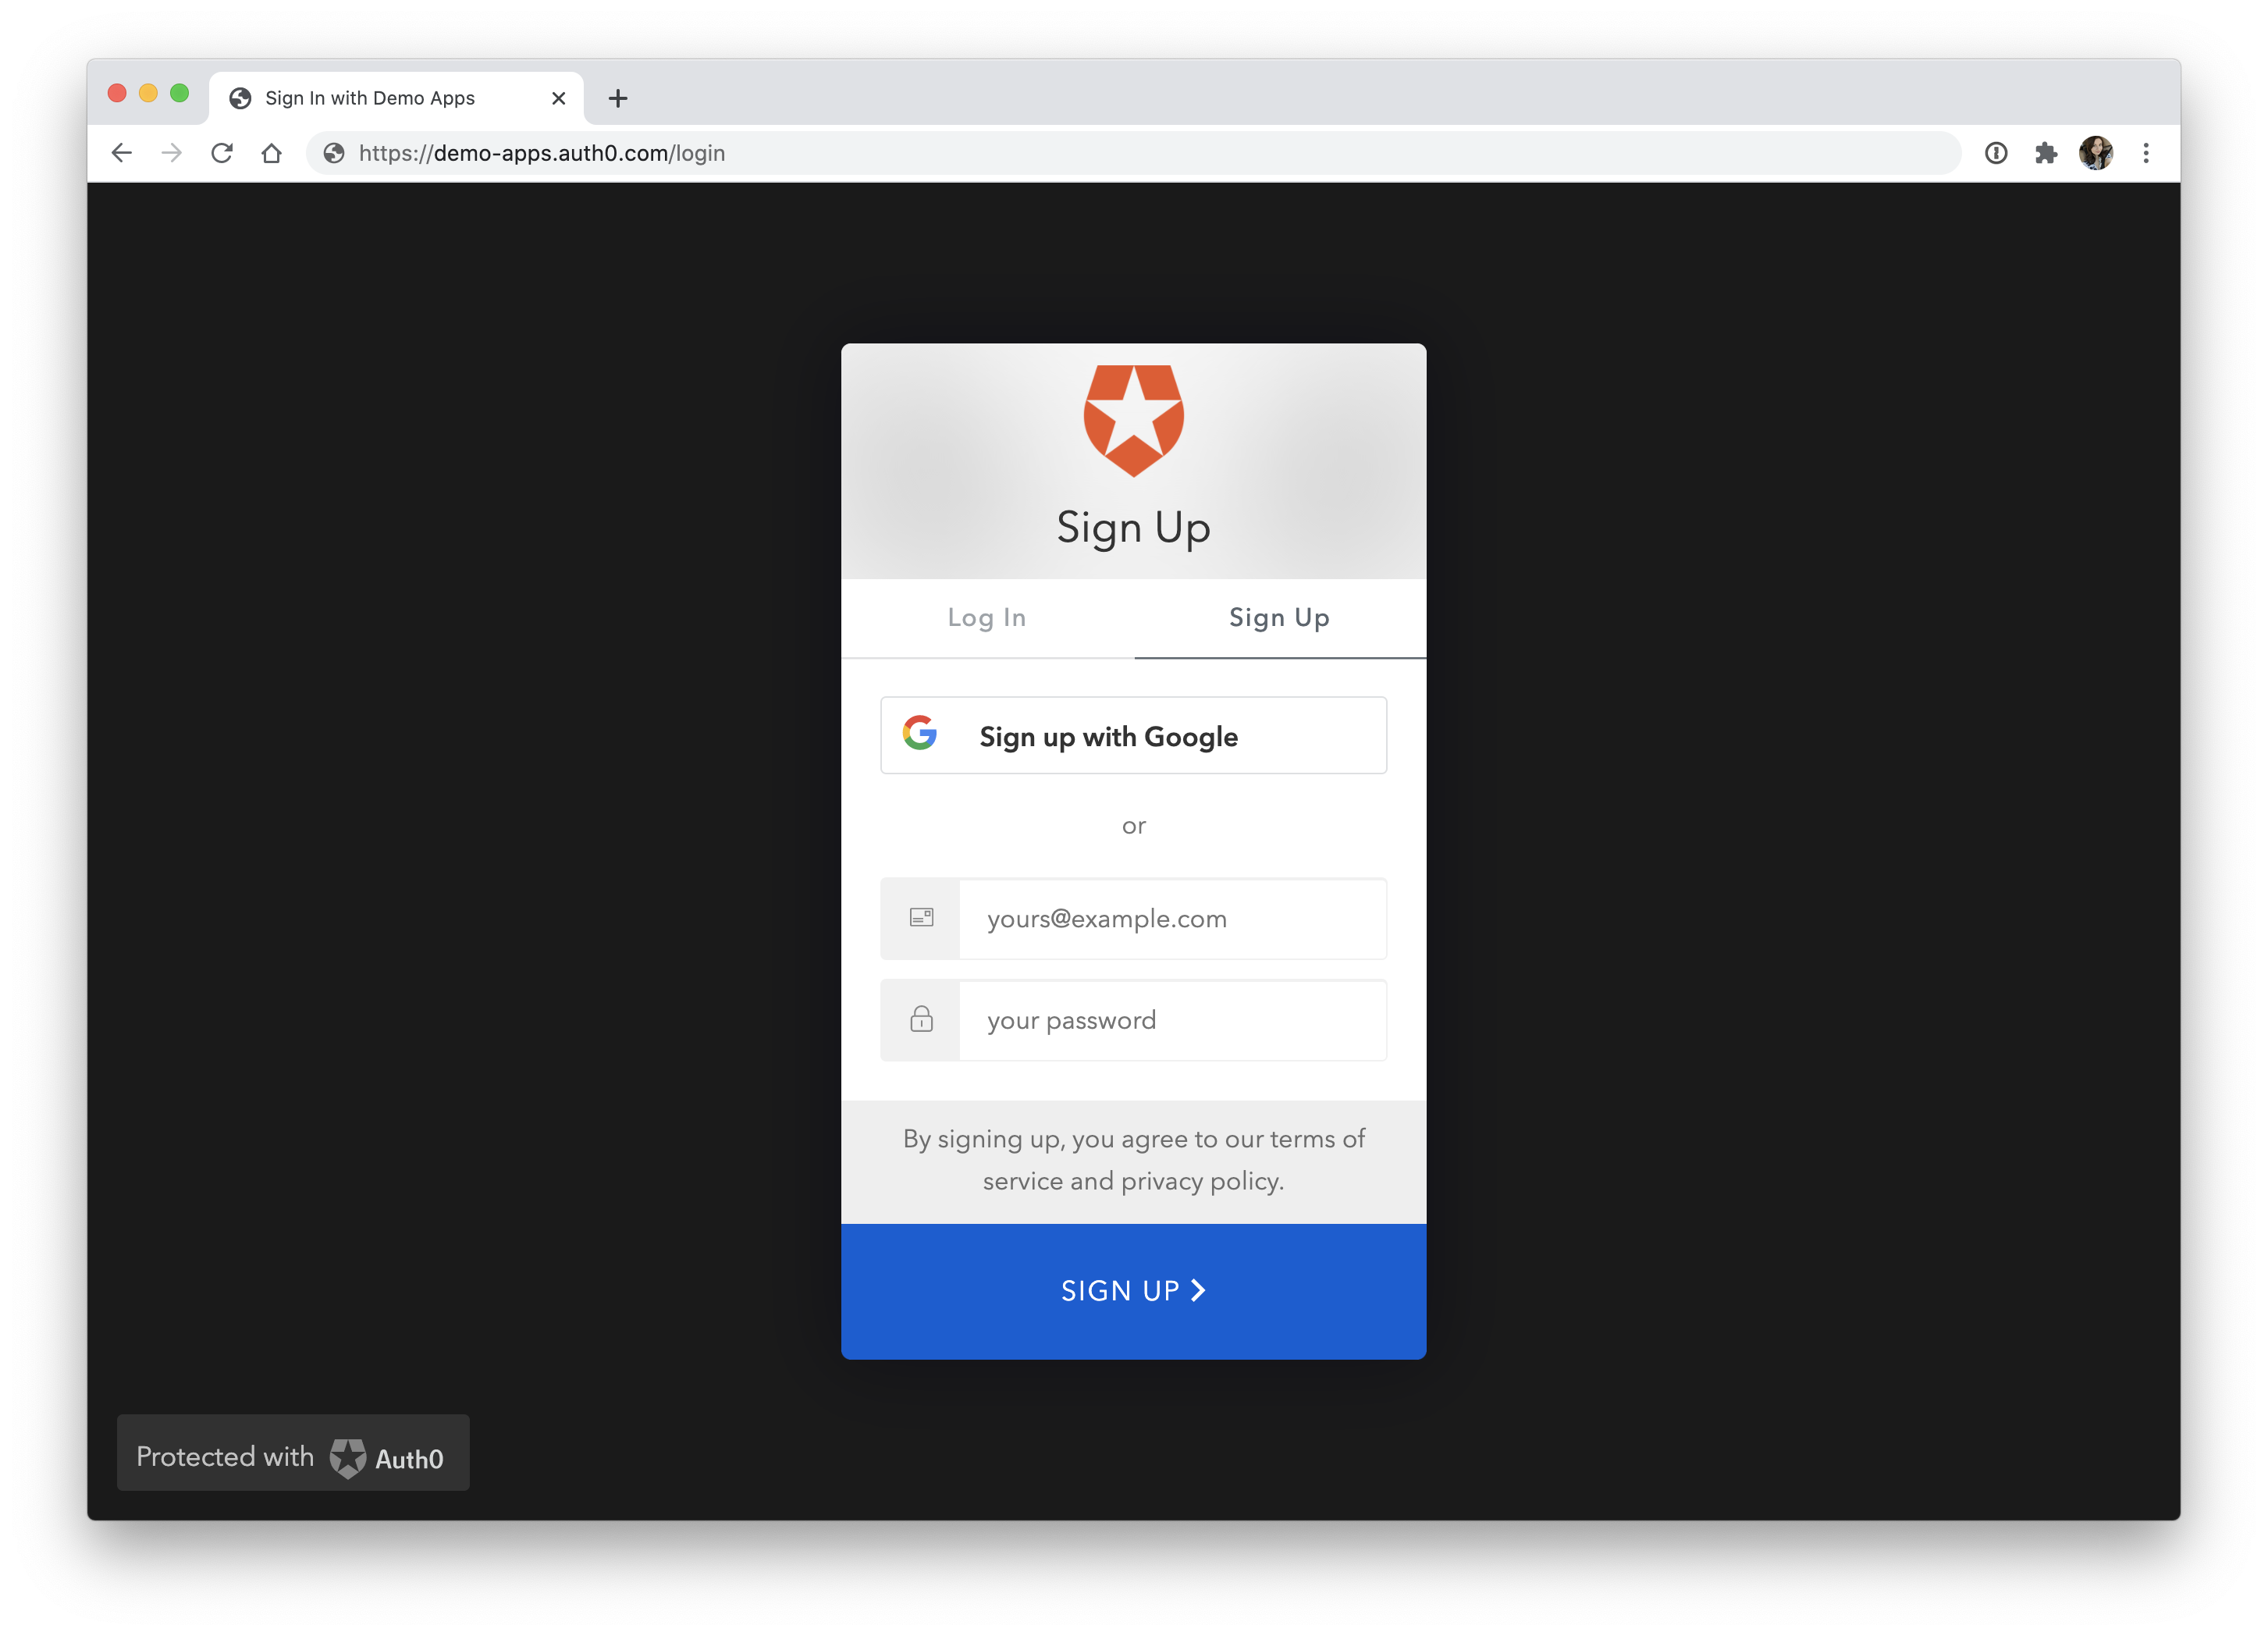
To test it out, click on the "Log In" button. You'll be redirected to the Auth0 Universal Login page (https://your-domain.auth0.com/login), where you can sign up as a new user.
And just like that, you've successfully set up authentication on your demo React application! However, as you know from learning about MFA, this username and password approach leaves a little to be desired. Let's see how you can step up your application's security a notch by turning on multi-factor authentication.
Enabling MFA with Auth0
Head back to the Auth0 dashboard and click on Multifactor Auth in the sidebar.
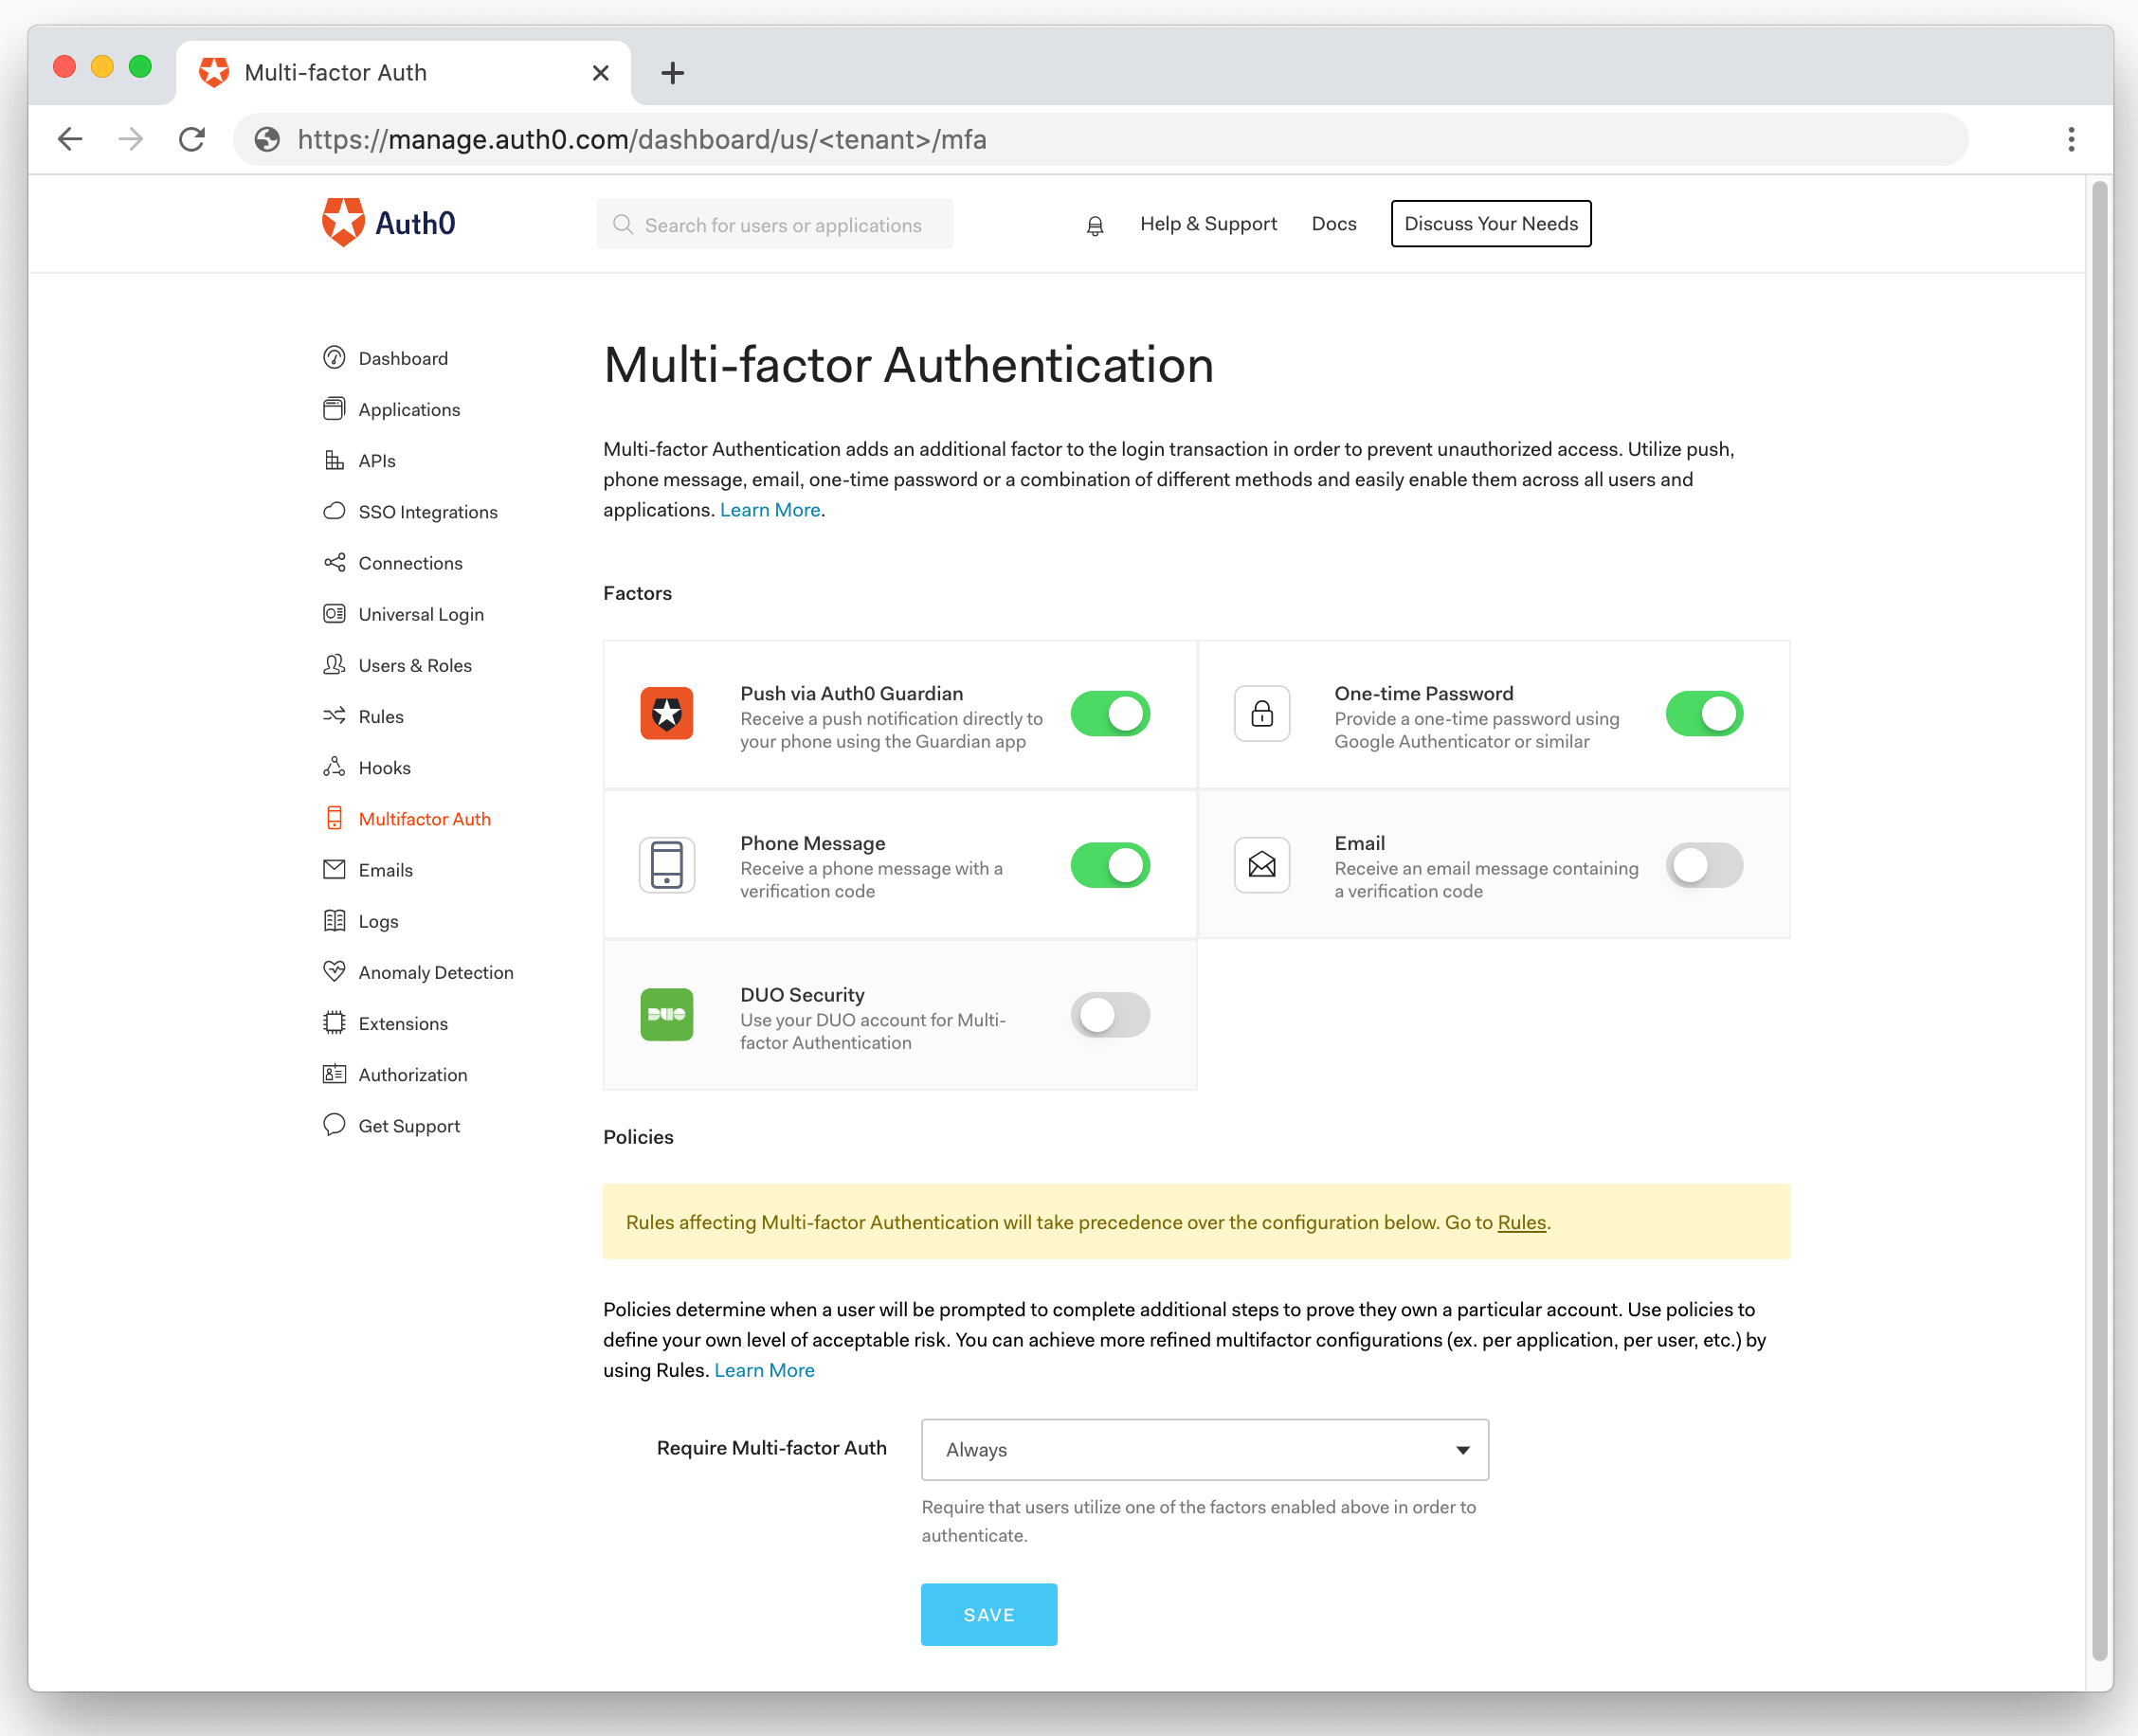
There are a few options here that you can choose. To quickly see MFA in action, select "Phone Message". Scroll down a little and select "Always" from the "Require Multi-factor Auth " dropdown, and then press "Save".
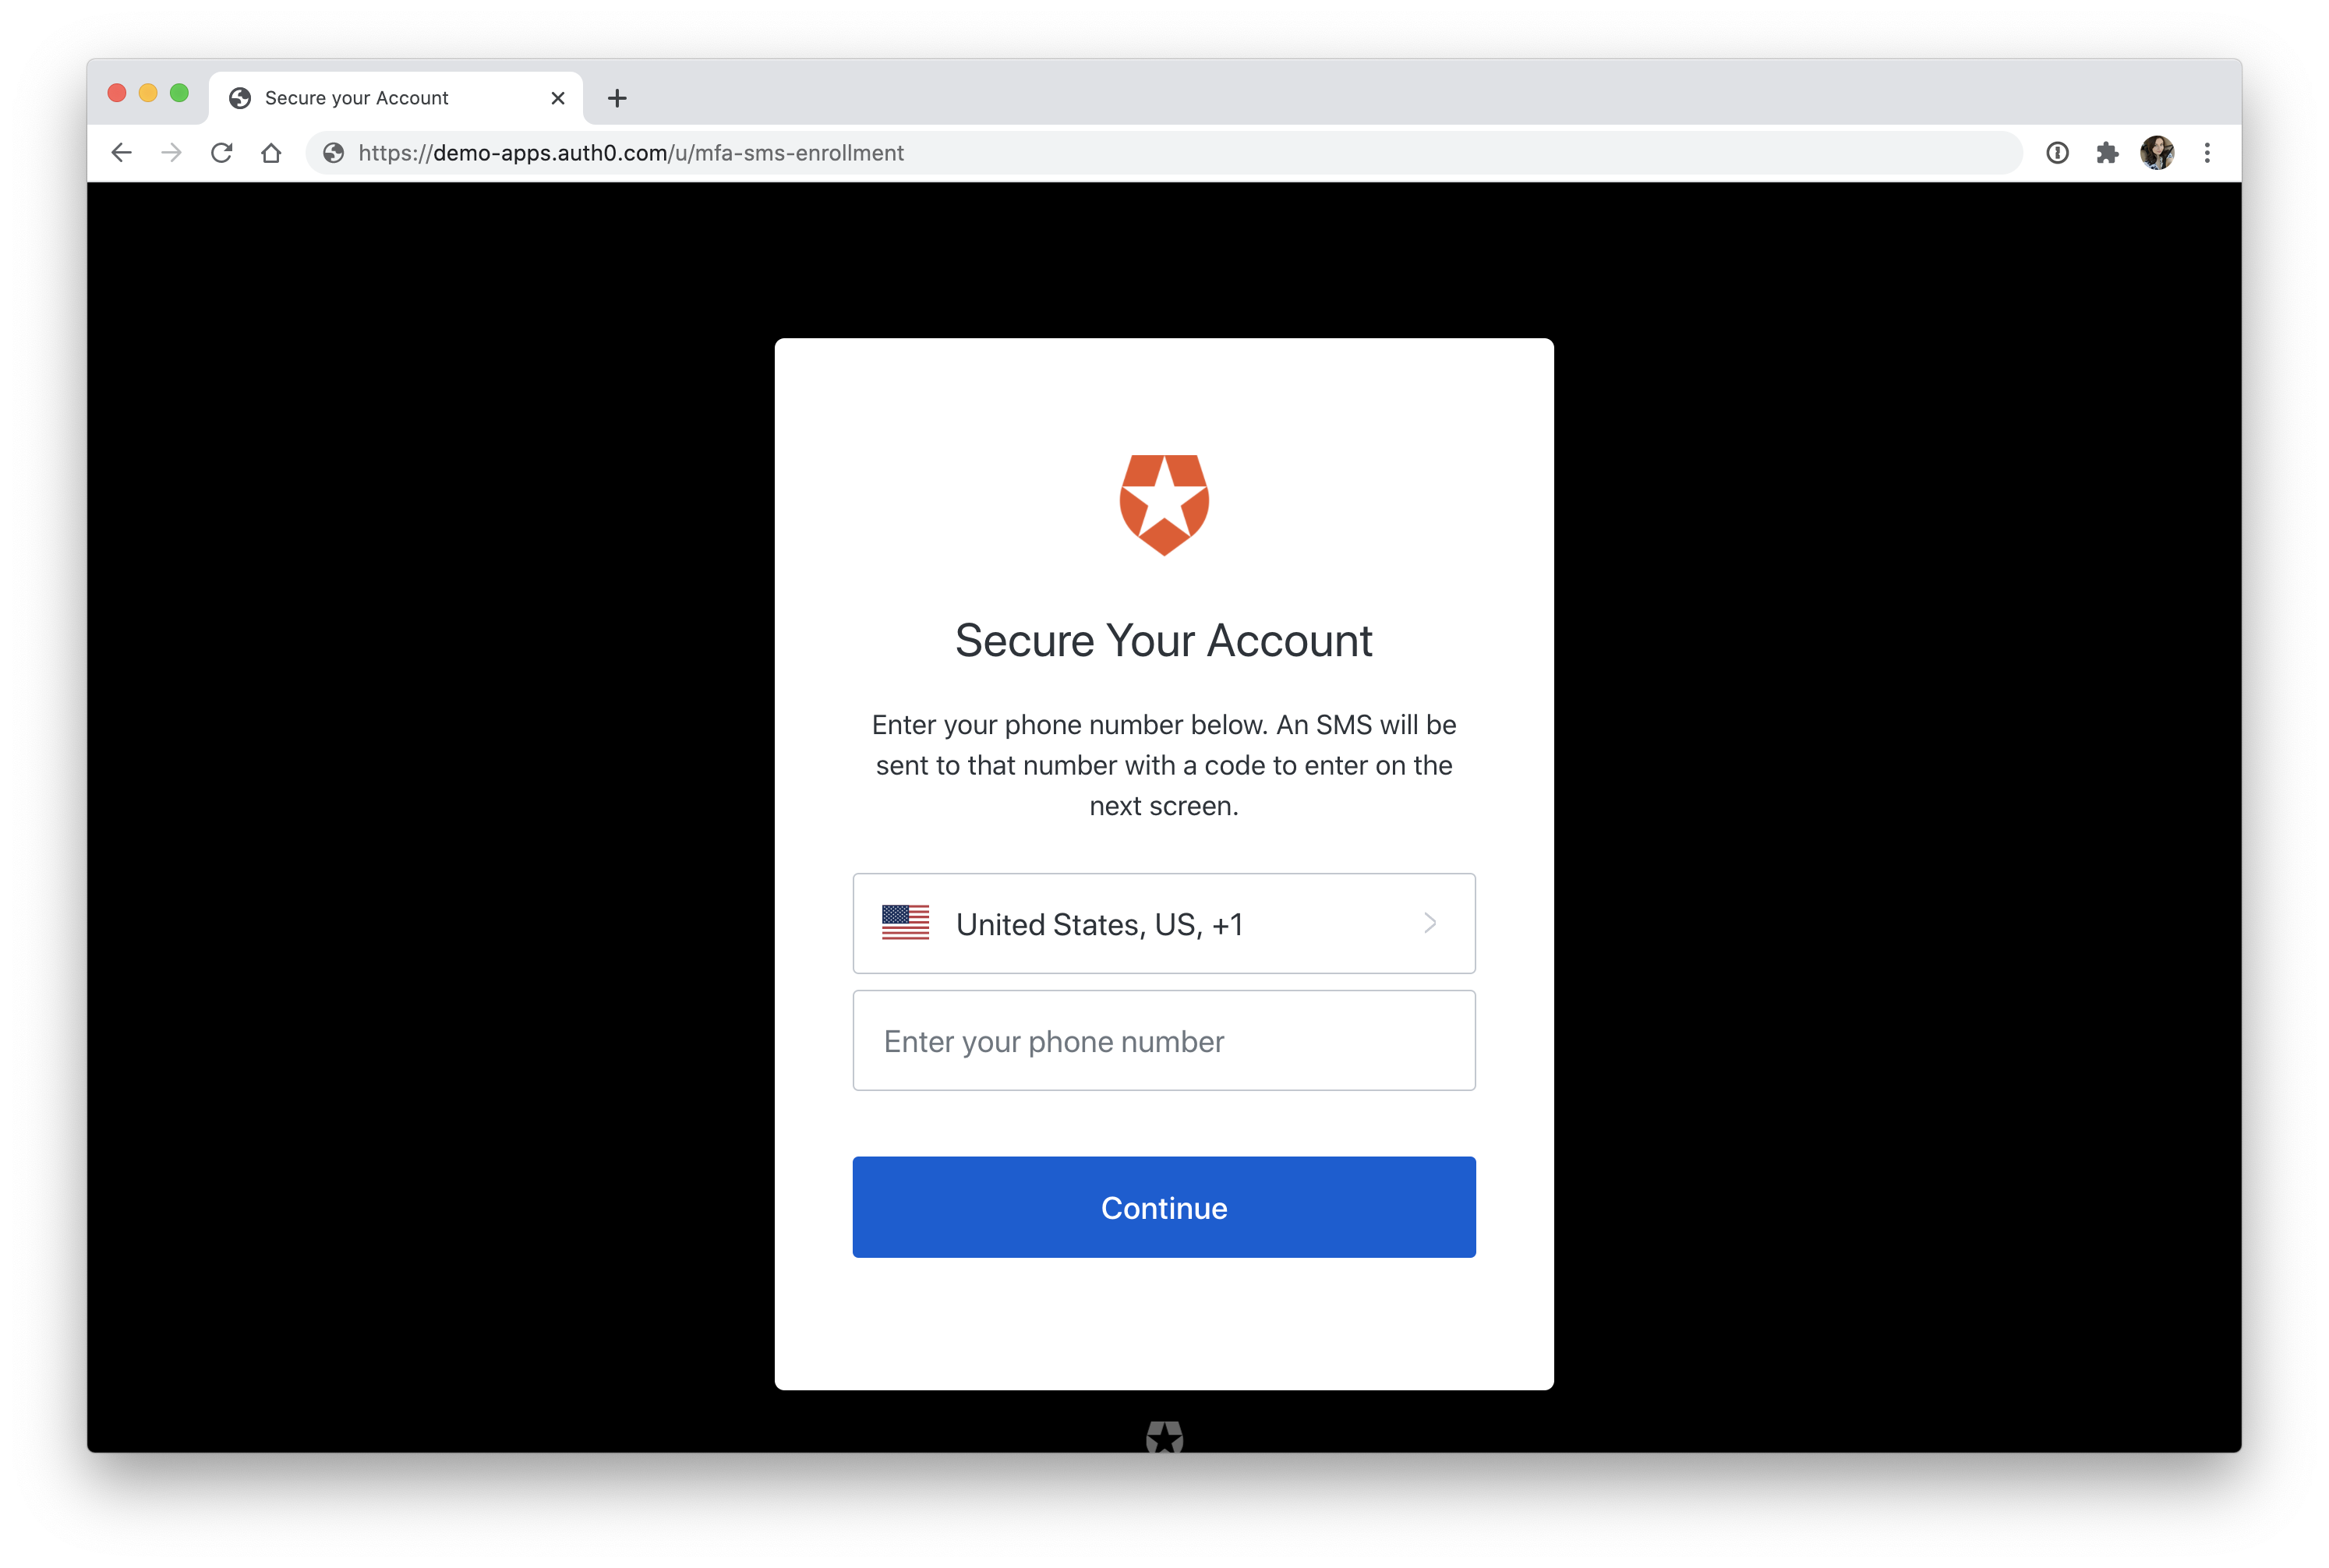
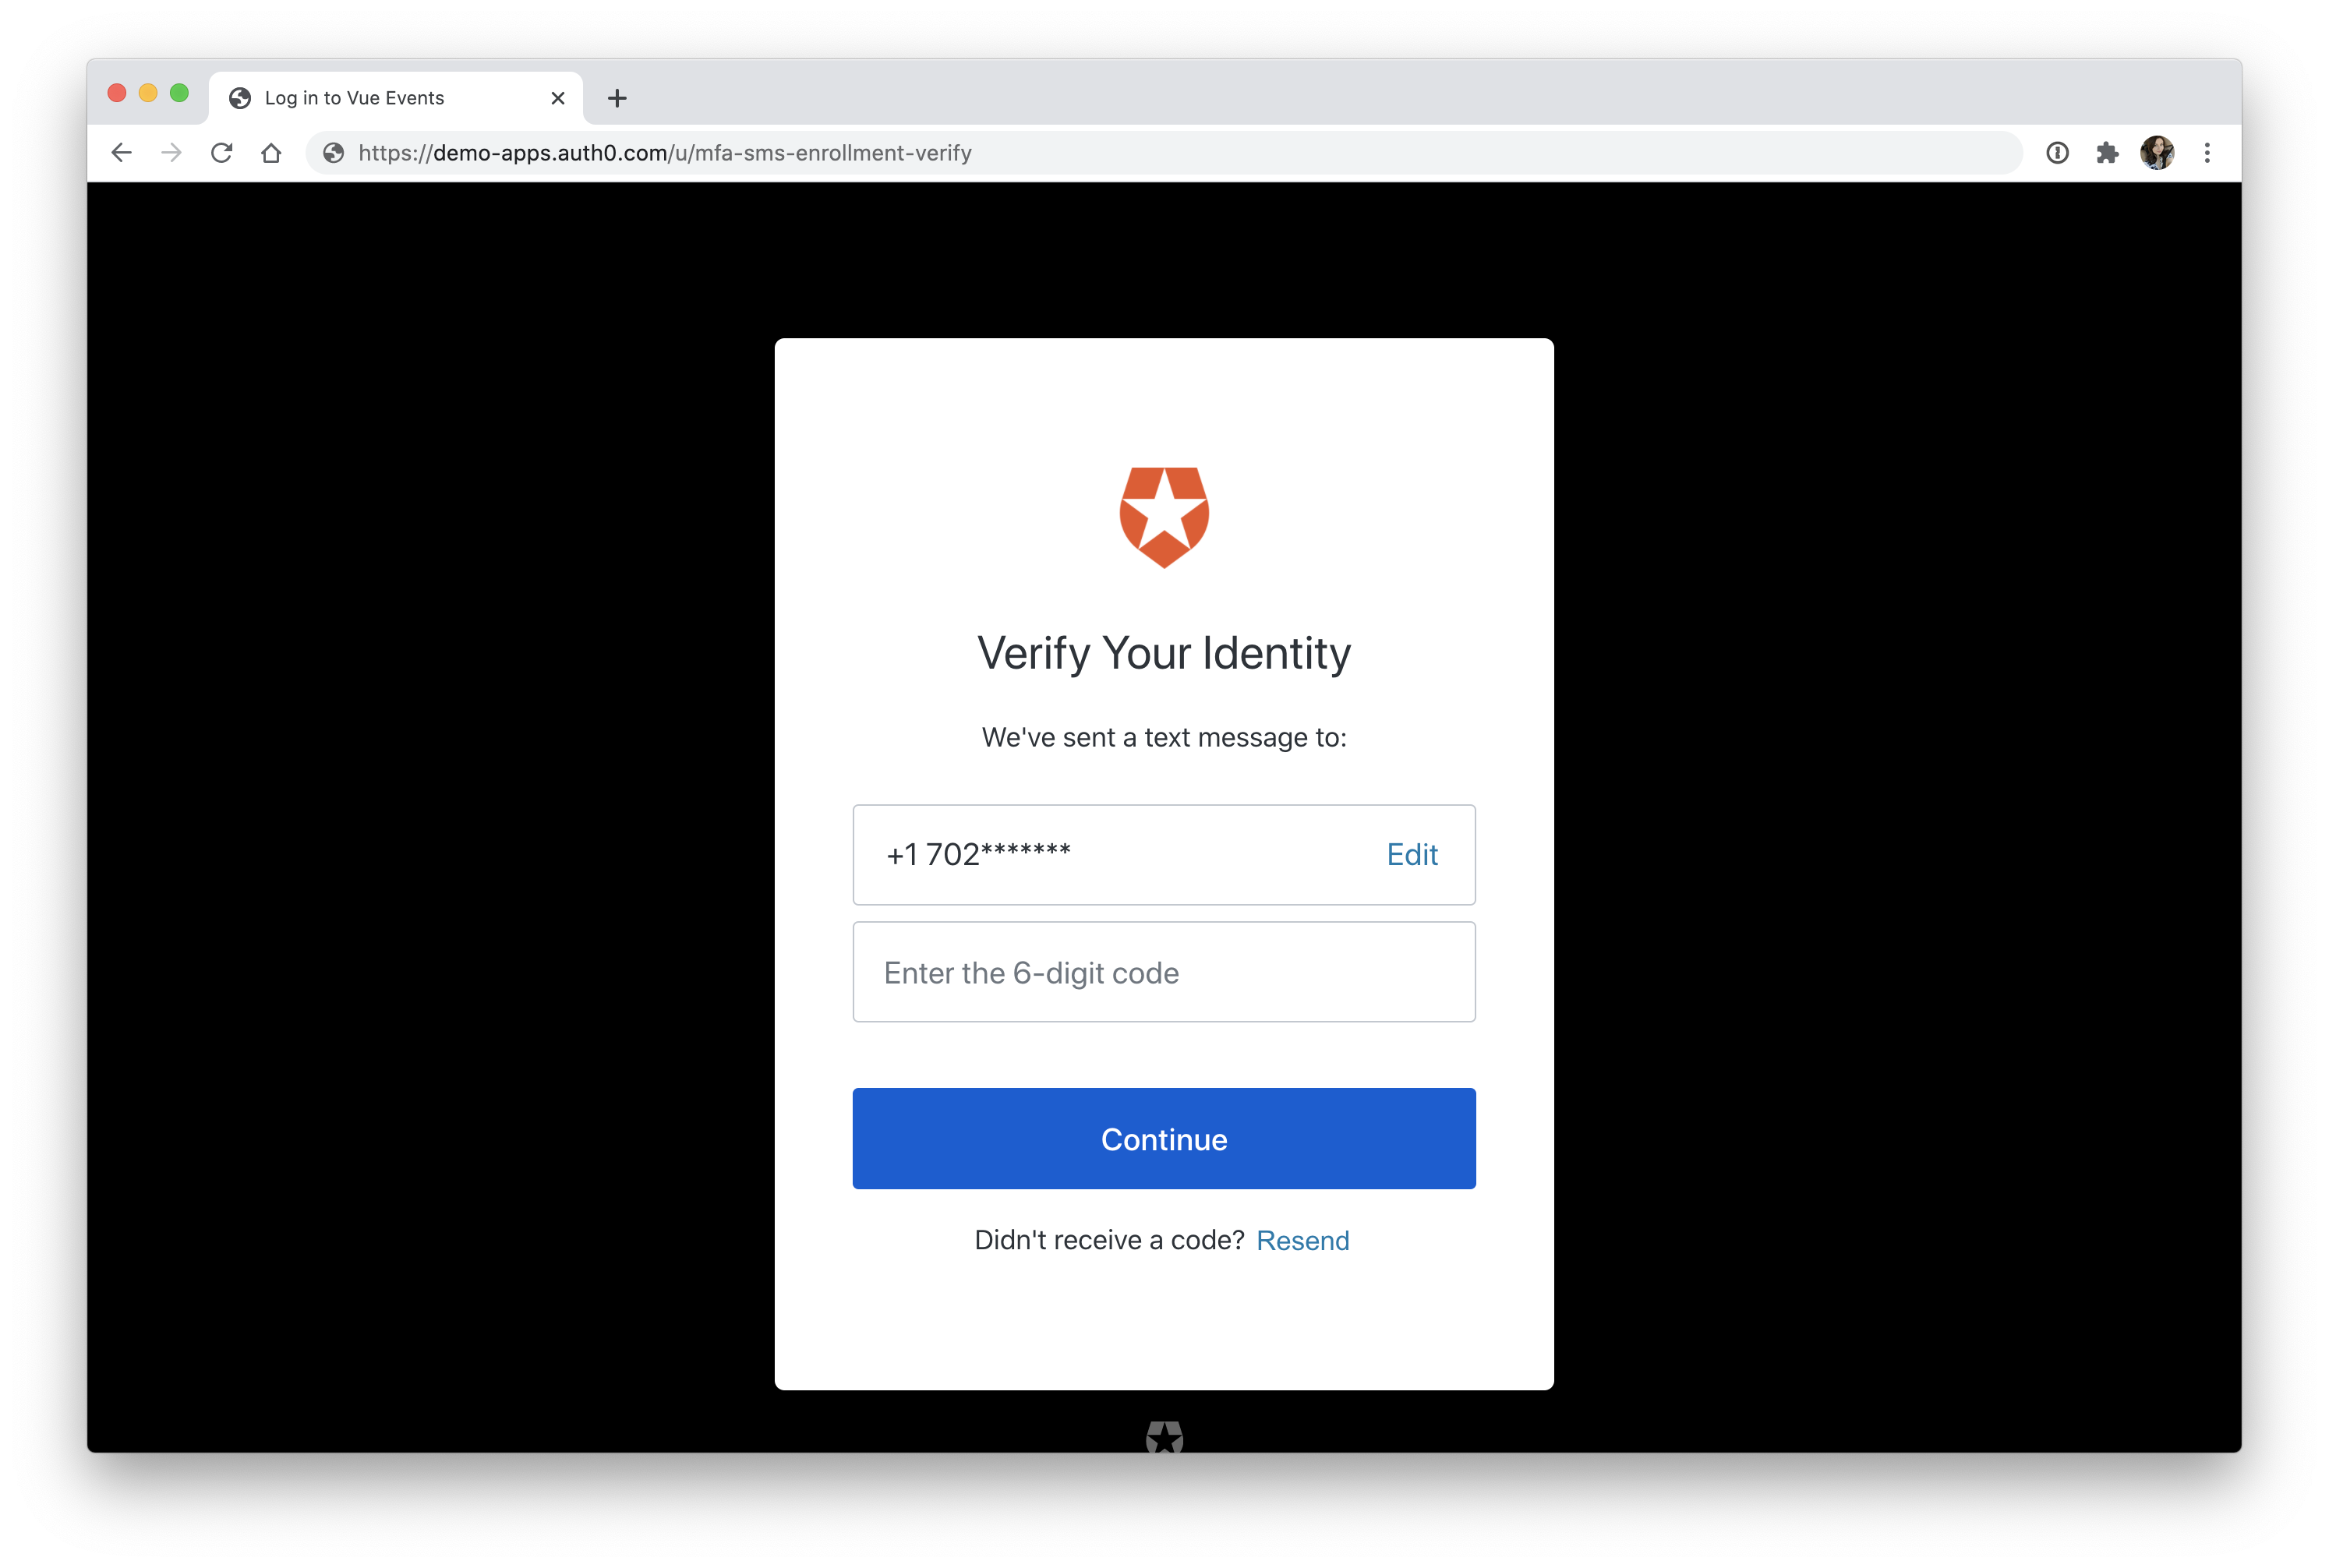
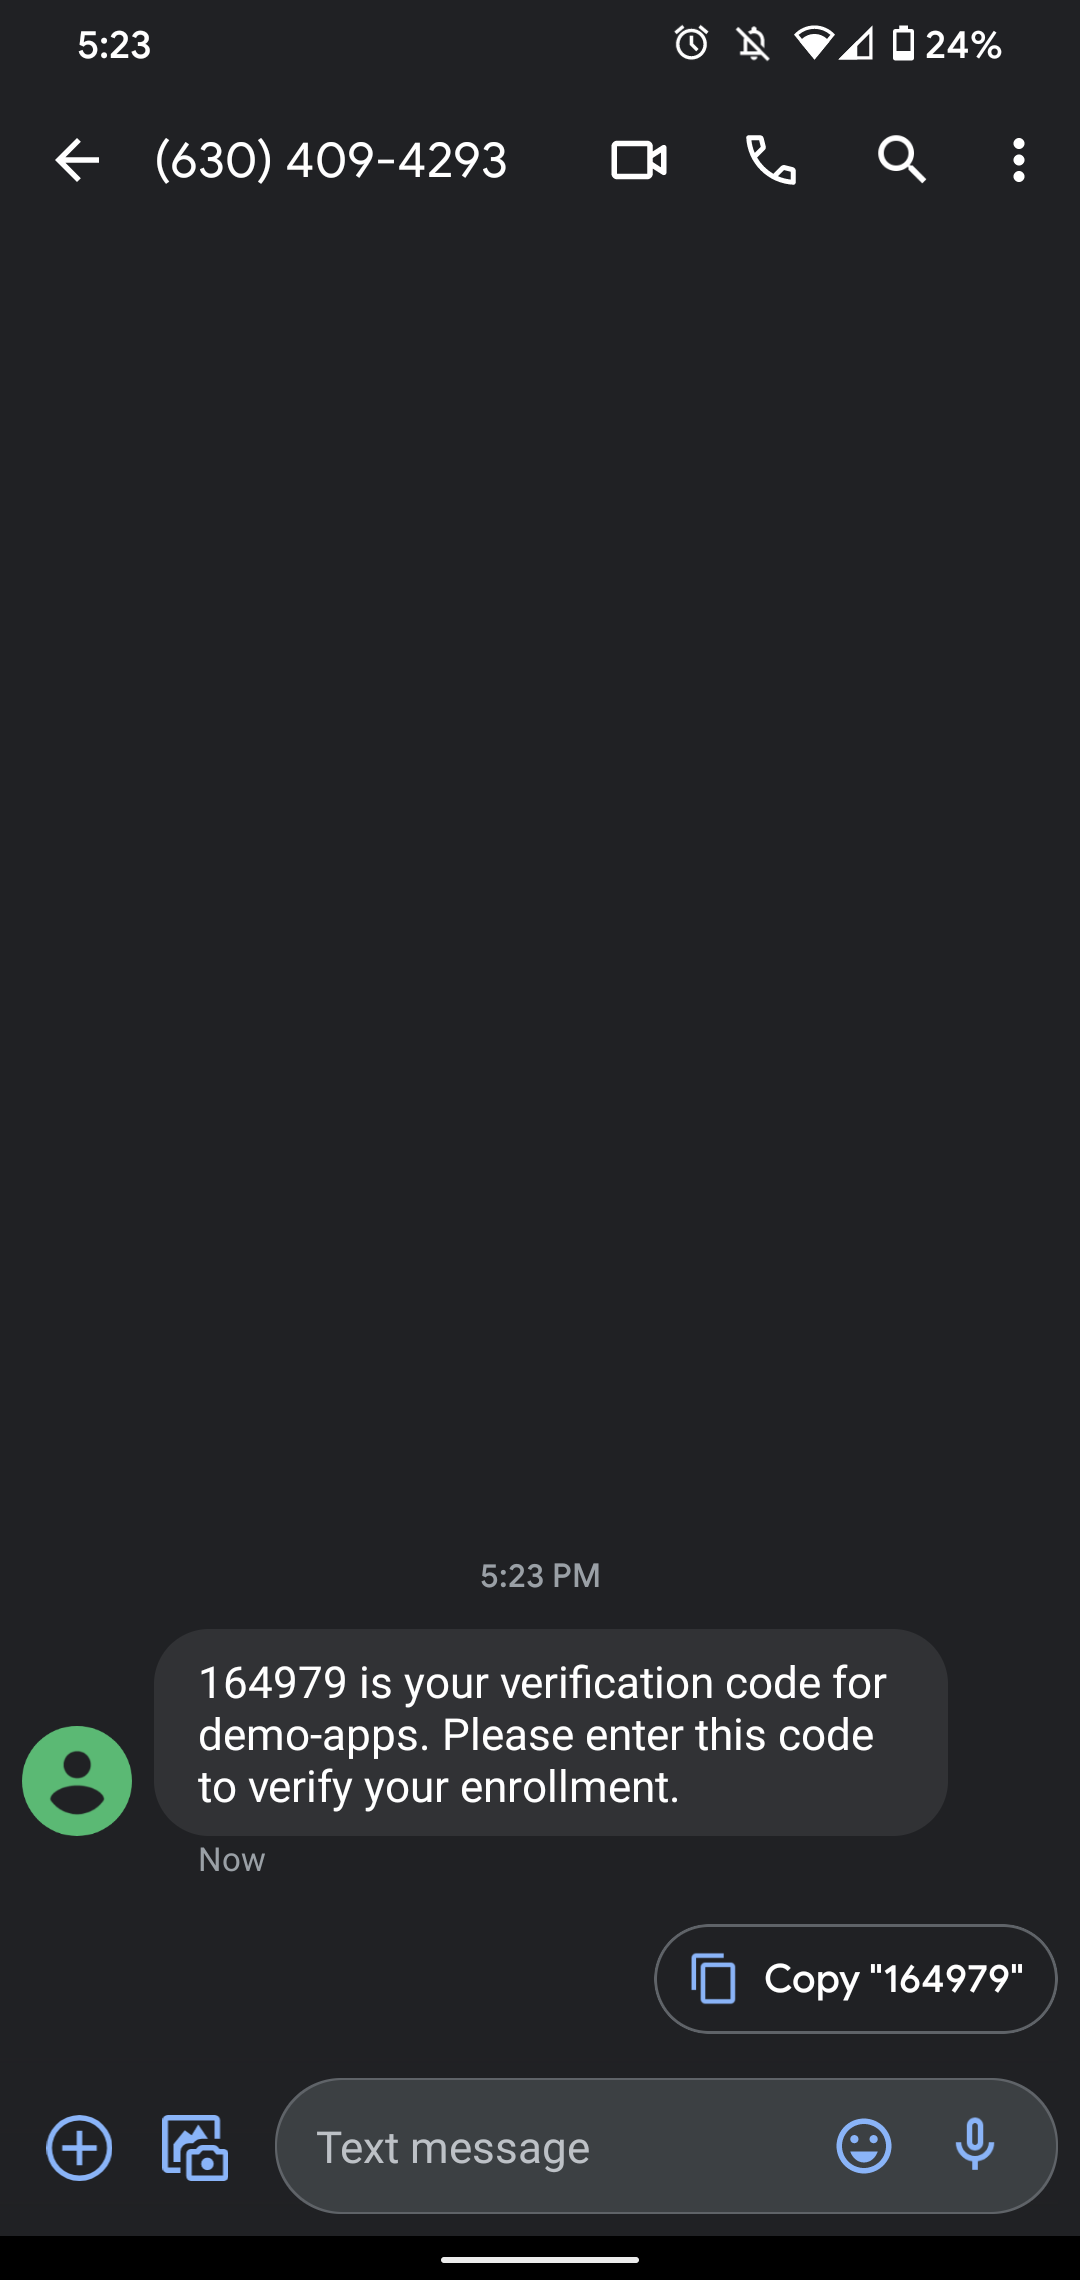
Head back to your React application, sign out, and then sign back in. After entering your email and password, you'll be prompted to enter your phone number. Once you do, you'll be asked to enter the 6-digit code that was texted to you.
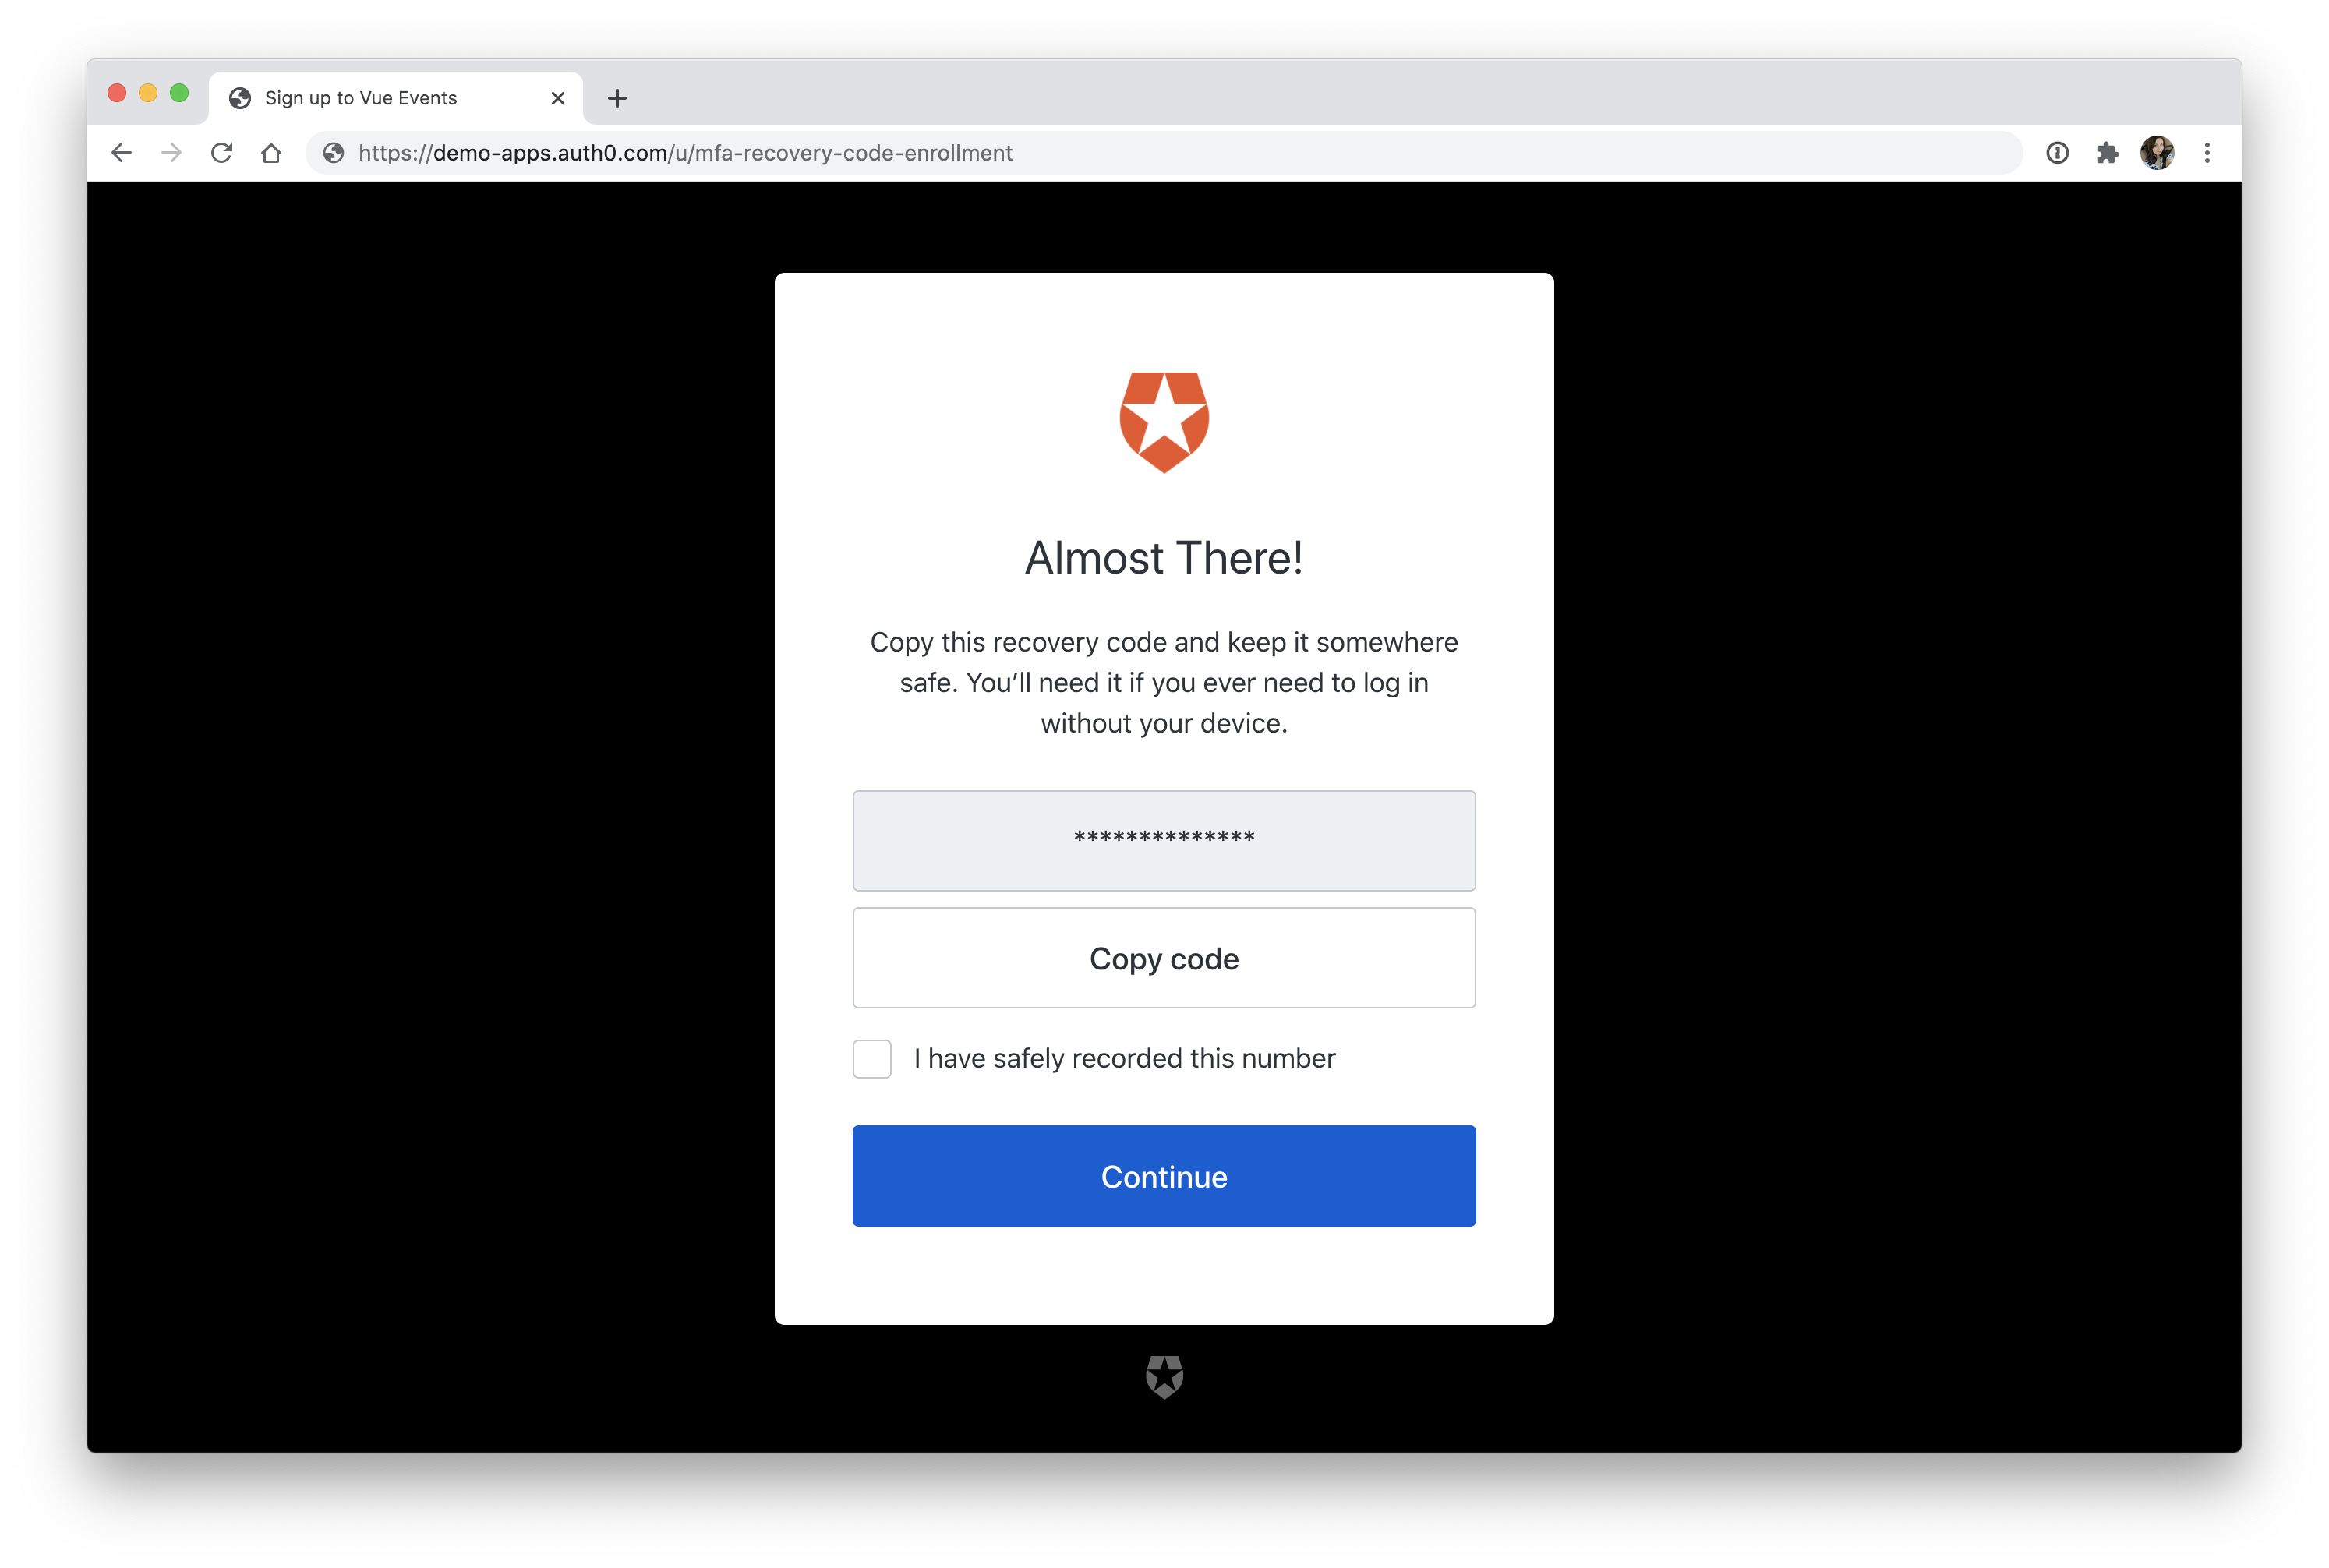
Type in the code that you received to your cell phone, and then click "Continue". You'll then be asked to copy a recovery code. This is one of the safeguards that we covered back in the Authenticator Apps section that will allow you to recover your account if you ever lose your phone.
Once you've copied it and pressed "Continue", you'll be redirected back to the React application, and you're now signed in!
🎉 You just enabled MFA on your application in a matter of minutes!
Auth0 offers several different options for MFA. This demo showed how to set up an SMS one-time password for the sake of simplicity, but if you'd prefer an even better option, you can choose from some of the authenticator apps that are offered. Feel free to experiment in the dashboard and see what works best for you!
Wrap Up
If you need any more convincing about the need for multi-factor authentication, have a look at the popular website haveibeenpwned.com. The website collects data on password breaches. You can type in your email address to see if it has been involved in any publicly known data breaches. As of writing this, there are over 10 billion accounts listed. So, even if you have a strong password, you're trusting the websites you use to keep that password safe, which unfortunately doesn't always happen.
While it's on your mind, take this time to go review your important accounts to make sure you have MFA enabled. Nobody wants to deal with the fallout of canceling their credit cards, dealing with stolen funds, and resetting all of their passwords because their bank account was breached due to weak credentials. Make sure you're always on the offensive by securing your accounts as much as possible! And if you run a website, take care of your users by giving them the means to secure their accounts on your application.
Be sure to reach out in the comments below or find me on Twitter if you have any questions. Thanks for reading!
About the author

Holly Guevara
Former Developer Content Manager (Auth0 Alumni)
