

Imagine a situation where your company hires more and more people and uses a lot of external services. The number of available assets you need to track is always growing. It's hard to keep up with all the services that employees at your company use on a day-to-day basis. Are you sure that you have appropriate security checks in place?
Proactive protection
Monitoring your assets can be a manual or an automated job. If you implement the right solution, it could give you almost an instant notification when there's a problem. It's often a missing feature on the service provider side to notify you when someone disables MFA protection for one of your organization's accounts.
If you go the manual route, that just creates more routine work. More routine at work (and sometimes in life) doesn't lead to good things. Also, with shifting priorities everyday, it's easy to skip a manual process or even forget about them. Automation is a better solution.
By being more proactive and productive, we mean automation and an appropriate solution to the problem. At Auth0, we want to automate as many things as we can and decrease the number of alerts we receive to get only the real threats and not noise. It gives us the best overview of our infrastructure's security status.
The MFA Monitoring tool
The MFA monitor uses an API to fetch information about the MFA status for every user under your organization, checks the previous state of MFA, and alerts you when that status changed (enabled or disabled state).

Possibilities for implementing additional monitors or notifiers which will receive your alerts are endless as long as there's an API on the provider side. For now, we have implemented checks for GitHub and Amazon Web Services (AWS), we added Slack as a notification provider. If you use Hipchat or Twitter for notifications, you can quickly add them as an additional module. Feel free to send pull requests!
Implementation
The MFA Monitor was implemented in JavaScript with Node.JS as a target platform. The toolkit consists of two main parts - notification and monitor modules.
Monitors
The monitor module was implemented to provide the possibility to inspect the status of MFA settings of different services. You can quickly add new controls as far as the service you want to monitor allows you to fetch MFA status over an API or another channel. What monitor module requires is to receive the status of protection from the external service.
As an example, the GitHub monitor was implemented using publicly available API to fetch information about users assigned to your organization. Requirements could be different for every service as GitHub requires an API token with access to the list of members of your organization. Always remember to choose privileges for access tokens wisely.
The important part of the monitor module is the callback that returns information about all user logins with MFA disabled:
  client.orgs.getMembers({
    org: ctx.secrets.ORGANIZATION,
    per_page: 100,
    filter: '2fa_disabled'
  }, (err, res) => {
    if (err) return cb(err);
    if (!res) return cb(new Error('Empty response received from Github API!'));

    cb(null, res.map(data => data.login));
  });
Notifier
Notifiers are modules that were created to notify users about the security event that occurred on the 3rd party service - it could be information about enabled or disabled MFA on the particular account.
The first module we implemented was Slack, but it doesn't mean you can only use chat applications. It's able to send notifications directly to a URL, Twitter, or even TCP socket; it depends on what you need and want to implement.
To implement notifier modules and secure required tokens you can use secrets that could be stored by the Webtask platform. After that you can call them using ctx.secrets prefix.
  const slack = require('slack-notify')(ctx.secrets.SLACK_WEBHOOK_URL);
  const mfaStatus = !!ctx.body.mfaStatus;
  slack.onError = (err) => cb(err);

  ctx.body.data.forEach(service => {
    let accounts = service.accounts.map(account => `*${account}*`).join(', ');
    let message  = getMessage(service.name, accounts, mfaStatus);

    slack.send({
      channel: ctx.secrets.SLACK_CHANNEL_NAME,
      username: 'MFA Agent',
      text: message
    });
  });
Storage
An early version of this tool was using MongoDB as a storage. It generated many additional steps to setup this database. As for the latest release, it's using built-in storage into the Webtask service. In short it means that you don't need to use any external database and worry about the security of your data, now it's safe, encrypted, and stored locally.
db.init(ctx.storage);
Using the Webtask storage is easy, to write or read data you need to call methods on the ctx.storage object. Below is the implementation of the storage wrapper which helps to handle storing and receiving data using Promises.
'use strict';

const Promise = require('bluebird').Promise;
let db;

module.exports = {
  init: (storage) =>
    db = storage,

  getStoredData: () =>
    new Promise((resolve, reject) =>
      db.get((err, data) => {
        if (err) return reject(err);
        resolve(data || []);
      })
  ),

  storeData: (data) =>
    new Promise((resolve, reject) =>
      db.set(data, {force: 1}, err => {
        if (err) return reject(err);
        resolve();
      })
  )
};
You can easily implement additional storage modules if needed. We wanted to keep it as simple as possible, that's why we decided to use built-in storage which is also the best way to work with the Webtask platform.
Installation
Setting up the MFA monitoring in place requires creating the Webtask account for free (https://webtask.io). It's a server-less environment, and it means that you don't need any additional infrastructure to monitor your assets. Fewer assets means less work for you.
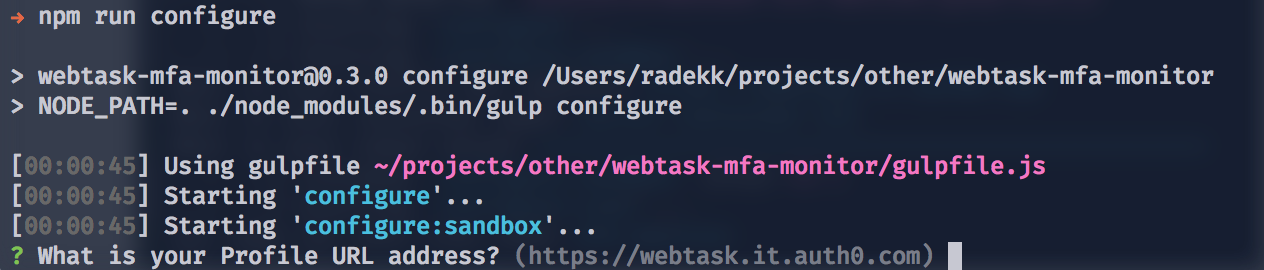
After creating the Webtask account you need to clone the MFA monitor repository from GitHub, install required npm packages (npm install) and you're ready to go. The configuration process is rather straightforward, and it asks you for all necessary data like GitHub token, Slack token, etc.
By default, it installs GitHub monitoring and sends alerts to Slack. In case if you want to modify it, you need to write additional monitors or notifiers. You can find more details on the official repository README file.
Usage
Once installed MFA monitor shouldn't require any maintenance steps. It's working as a Webtask cron job which means that it runs periodically to pull out the data from your services and checks the status of MFA setting.
You can periodically check the log stream to verify that MFA monitor is working or verify if the status is monitored.
Awareness
Keep in mind that monitoring the MFA status will not protect you against other malicious activities that could occur. The purpose of this particular tool is to alert you every time your users forget to enable MFA.
“The MFA monitoring tool will alert you every time your users forget to enable MFA.”
Tweet This
This tool works well for us; it fits into our methodology of being a proactive team. Setup your monitors and start protecting your accounts now.