
Modern applications often require more sophisticated authorization logic than simple Role-Based Access Control (RBAC) can offer. Consider a collaborative application like Google Drive: a user's ability to view, edit, or delete a file isn't determined by a static role like editor but by their specific relationship to that individual file. Are they the owner? Have they been granted editing access? This is the domain of Fine-Grained Authorization (FGA).
This article will guide you through enhancing a standard ASP.NET Core minimal API for file and folder management with a powerful Fine-Grained Authorization system, Auth0 FGA. We will start with a basic API that uses standard JWT-based authorization and evolve it to enforce relationship-based permissions. By the end, you will learn how to model your authorization rules and use the OpenFGA SDK to check permissions, ensuring that only users with the correct relationship—like being the owner—can modify or delete a resource.
Prerequisites
This article will focus on using Auth0 FGA with ASP.NET Core, so make sure you have:
.NET 8 SDK or later installed on your machine.
- An IDE like Visual Studio 2022 or VS Code, otherwise, if you are brave enough, you can simply use the .NET CLI and your favorite editor.
A running Auth0 FGA instance. You can follow the Auth0 FGA getting started guide to set an online instance or use a Docker local instance of OpenFGA, the open source engine of Auth0 FGA. In this article, we will focus on Auth0 FGA, but the concepts are easily adaptable to a local OpenFGA instance.
- A tool for making API requests, such as Postman or the
curlcommand-line tool. - Familiarity with ASP.NET Core minimal APIs and basic authorization concepts.
Curious about the differences between Auth0 FGA and OpenFGA? Check out this document.
A new Auth0-powered .NET app in less than a minute? Try out our templates
Install the NuGet package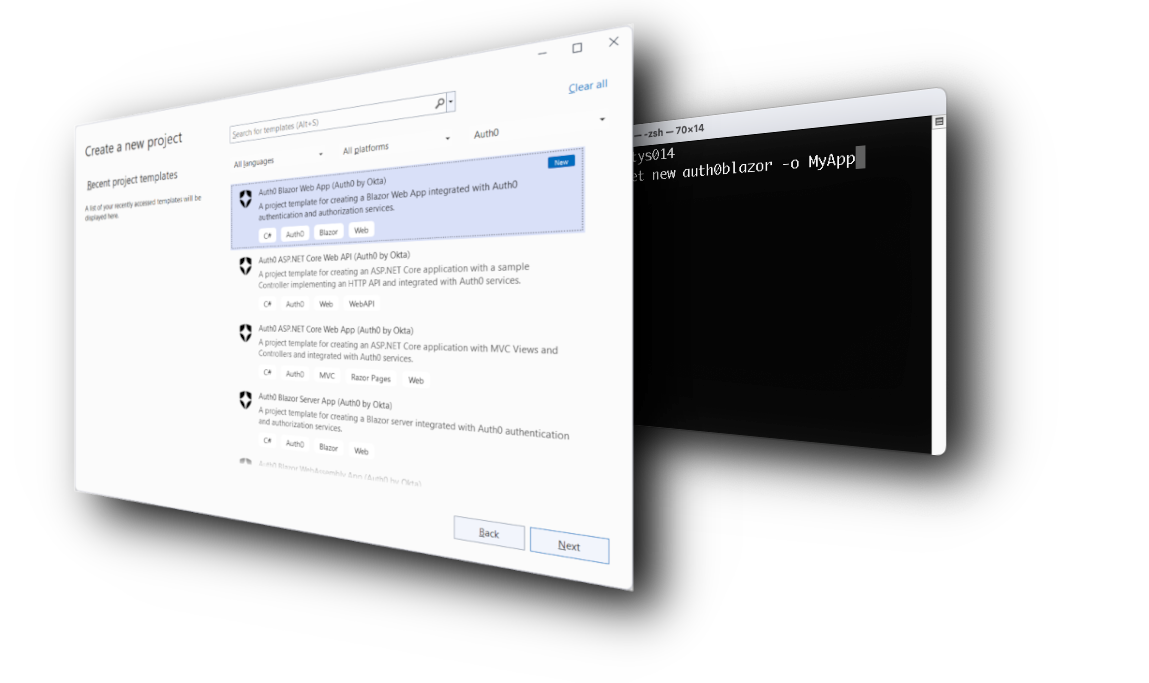
A Simple File Management API
The sample project you will be working on is a simple file and folder management API implemented with ASP.NET Core minimal API. This API manages two types of resources: folders and files. It exposes basic CRUD endpoints and protects them using a very simple authorization policy that just requires an authenticated user.
The behavior of the application is all defined within the Program.cs file, whose relevant parts you can see in the following code block:
using System.Security.Claims;

var builder = WebApplication.CreateBuilder(args);

// --- In-memory data stores for simplicity ---
var folders = new Dictionary<string, Folder>();
var files = new Dictionary<string, File>();

builder.Services.AddAuthentication().AddJwtBearer();
builder.Services.AddAuthorization();

var app = builder.Build();

var documentsApi = app.MapGroup("/documents").RequireAuthorization();

// --- Folder Endpoints ---
documentsApi.MapPost("/folders", (CreateFolderRequest req, HttpContext context) =>
{
  var newFolder = new Folder(Guid.NewGuid().ToString(), req.Name, GetUserId(context));
  folders[newFolder.Id] = newFolder;
  return Results.Created($"/documents/folders/{newFolder.Id}", newFolder);
});

documentsApi.MapGet("/folders/{id}", (string id) =>
    folders.TryGetValue(id, out var folder) ? Results.Ok(folder) : Results.NotFound());

documentsApi.MapPut("/folders/{id}", (string id, UpdateFolderRequest req, HttpContext context) =>
{
  if (!folders.ContainsKey(id)) return Results.NotFound();

  var updatedFolder = folders[id] with { Name = req.Name };
  folders[id] = updatedFolder;
  return Results.Ok(updatedFolder);
});

documentsApi.MapDelete("/folders/{id}", (string id) =>
{
  return folders.Remove(id) ? Results.NoContent() : Results.NotFound();
});

// --- File Endpoints (similar structure) ---
documentsApi.MapPost("/files", (CreateFileRequest req, HttpContext context) =>
{
  var newFile = new File(Guid.NewGuid().ToString(), req.Name, GetUserId(context));
  files[newFile.Id] = newFile;
  return Results.Created($"/documents/files/{newFile.Id}", newFile);
});

documentsApi.MapGet("/files/{id}", (string id) =>
    files.TryGetValue(id, out var file) ? Results.Ok(file) : Results.NotFound());

// ... Other file endpoints (PUT, DELETE) with the same authorization issue

app.Run();

// --- Helper and Record Definitions ---
string GetUserId(HttpContext context) =>
    context.User.FindFirstValue(ClaimTypes.NameIdentifier) ?? "unknown";

internal record Folder(string Id, string Name, string OwnerId);
internal record File(string Id, string Name, string OwnerId);
internal record CreateFolderRequest(string Name);
internal record UpdateFolderRequest(string Name);
internal record CreateFileRequest(string Name);
As you can see, folders and files are stored in memory for simplicity. All the endpoints are protected by the basic RequireAuthorization() policy, which simply requires that all the HTTP requests have a valid access token.
When a file or folder is created, the user ID is extracted from the access token via the GetUserId() function and is attached to that file or folder.
The configuration settings that instruct the API how to connect with Auth0 to validate the received access token are located in the appsettings.json file:
{
  "Logging": {
    "LogLevel": {
      "Default": "Information",
      "Microsoft.AspNetCore": "Warning"
    }
  },
  "AllowedHosts": "*",
  "Authentication": {
    "Schemes": {
      "Bearer": {
        "Authority": "https://<YOUR_AUTH0_DOMAIN>",
        "ValidAudiences": [ "<YOUR_AUDIENCE>" ],
        "ValidIssuer": "<YOUR_AUTH0_DOMAIN>"
      }
    }
  }
}
Replace the placeholders <YOUR_AUTH0_DOMAIN> and <YOUR_AUDIENCE> with the respective values coming from the registration of the API in your Auth0 dashboard.
The Authorization Challenge
This API works, but it has a significant flaw: any authenticated user can update or delete any folder or file. The default policy enforced by RequireAuthorization() only checks for a valid token.
Of course, this solution is not the best one from the authorization standpoint for several reasons.
First, it does not apply the principle of least privilege. The current authorization policy allows any user to do anything on any resource. The only requirement is to be authenticated and have a valid access token. This scenario is rarely applicable in a real-world context. If a user doesn't need to delete a file, they should not have that permission. You should restrict what users can do based on their permissions and apply the principle of least privilege.
But even if you verify what a user can do based on the permission carried by the access token, you can still be exposed to security risks such as Broken Object Level Authorization if this verification is not done correctly. The likelihood of running into such a risk increases even more when a scenario becomes complex and dynamic. In a typical file and folder management system, users who create resources have full permissions, but other users only have the permissions they're granted, often unevenly. In these scenarios, simply analyzing the permissions included in the access token isn't enough. This is where fine-grained authorization comes in.
In our specific case, we want to enforce a simple but powerful rule: only the creator (the owner) of a folder or file can update or delete it. This is a classic relationship-based authorization problem that standard Role-Based Access Control struggles to solve efficiently. Roles tell you what permissions a user has, but not on what specific resource. The editor role would allow a user to update and delete files and folders, unless you define a more specific role, such as fileEditor and folderEditor. But even in this case, you don’t have the granularity of controlling what specific file the user can update or not. And creating even more specific roles bound to specific files makes no sense. You need a system that can understand and check relationships like user:anne is the owner of folder:project-alpha.
This is where Auth0 FGA comes in.
Introducing Auth0 FGA
Auth0 FGA is a fine-grained authorization service based on the ReBAC model and inspired by Google's Zanzibar paper. You will use this service to address the authorization issues we highlighted earlier. You will integrate Auth0 FGA in your application following these three steps:
- Define an Authorization Model: Using a simple, human-readable language, you define the types of objects in your system (e.g.,
user,folder), the possible relationships between them (owner,viewer), and the rules for who can do what (e.g., "a user can edit a folder if they are an owner of that folder"). - Store Relationship Data (Tuples): You tell Auth0 FGA about the specific relationships that exist in your application, such as
user:anneis theowneroffolder:project-alpha. These are called "tuples." Check Permissions: At runtime, your application queries Auth0 FGA with a simple question: "Can
user:annedeletefolder:project-alpha?" Auth0 FGA provides a fast yes/no answer based on your model and stored tuples.
Modeling Your Authorization Logic in Auth0 FGA
First, you need to create an authorization model that describes our kind of file system. Based on the Google Drive use case documentation, our model will define user, folder, and file types and the relations between them.
Using your Auth0 FGA dashboard, add the following authorization model to your Auth0 FGA store:
model
  schema 1.1

type user

type file
  relations
    define owner: [user]
    define can_view: owner
    define can_edit: owner
    define can_delete: owner

type folder
  relations
    define owner: [user]
    define parent: [folder]
    define can_view: owner or can_view from parent
    define can_edit: owner or can_edit from parent
    define can_delete: owner
Let's break this down:
type user: A simple type representing your users.type file: Represents a file. It has one direct relationship, owner, which must be a user. The permissionscan_view,can_edit, andcan_deleteare all defined as being equivalent to theowner.type folder: Represents a folder.owner: [user]: A folder has an owner, who is a user.parent:[folder]: A folder can be inside another folder.can_view: owner or can_view from parent: This is a powerful rule! It means a user can view a folder if they are its direct owner OR if they havecan_viewpermission on its parent folder (permission inheritance).can_delete: owner: Deleting a folder is restricted to its direct owner.
In summary, for simplicity, we have defined an authorization model where a file or folder can only be managed by its owner, who is then the creator of the file or folder. You can modify this model to address more complex scenarios, as you can see in the Google Drive use case documentation.
Integrating Auth0 FGA into the ASP.NET Core API
Now, let's modify our C# code to use this authorization model. The steps we are going to implement are:
- Add and configure the OpenFGA SDK. While you can directly call the Auth0 FGA API, using an SDK simplifies your development experience.
- Populate your store with relationship data. When a file or folder is created, write a tuple to Auth0 FGA to store the ownership relationship.
- Check permissions. Before updating or deleting a resource, check the permission with Auth0 FGA.
Once these three steps are done, your application will use the power of Auth0 FGA to perform its authorization checks.
Set Up the OpenFGA SDK
First, add the OpenFGA .NET SDK to your project by running the following command:
dotnet add package OpenFga.Sdk
Now, go to the Settings section of your Auth0 FGA dashboard and create a client by following the instructions described here. You will be asked for a name for the client and the permissions you want to assign to it. For our purpose, select Write and delete tuples and Read and query permissions.
Once the client has been successfully created, a window with the client’s credentials will appear. Take note of the values of store ID, client ID, and client secret. Also, based on the location chosen for your Auth0 FGA instance, you will need the API URL, API audience, and API token issuer.
Add a new section named Auth0Fga to the appsettings.json file and store these values as shown below:
{
  //...existing sections...

  "Auth0Fga": {
    "ApiUrl": "<YOUR_API_URL>",
    "StoreId": "<YOUR_STORE_ID>",
    "ApiTokenIssuer": "<YOURAPI_TOKEN_ISSUER>",
    "ApiAudience": "<YOUR_API_AUDIENCE>",
    "ClientId": "<YOUR_CLIENT_ID>",
    "ClientSecret": "<YOUR_CLIENT_SECRET>"
  }
}
Next, configure the OpenFgaClient in Program.cs. This client will handle all communication with your Auth0 FGA instance:
//...existing using clauses...
using OpenFga.Sdk.Client;
using OpenFga.Sdk.Client.Model;
using OpenFga.Sdk.Configuration;

//...existing code...

//👇 new code

builder.Services.AddSingleton(sp =>
{
  var configuration = new ClientConfiguration()
  {
    ApiUrl = builder.Configuration["Auth0Fga:ApiUrl"],
    StoreId = builder.Configuration["Auth0Fga:StoreId"],
    Credentials = new Credentials()
    {
      Method = CredentialsMethod.ClientCredentials,
      Config = new CredentialsConfig()
      {
        ApiTokenIssuer = builder.Configuration["Auth0Fga:ApiTokenIssuer"],
        ApiAudience = builder.Configuration["Auth0Fga:ApiAudience"],
        ClientId = builder.Configuration["Auth0Fga:ClientId"],
        ClientSecret = builder.Configuration["Auth0Fga:ClientSecret"],
      }
    }
  };
  return new OpenFgaClient(configuration);
});

//👆 new code

var app = builder.Build();

//...existing code...
The client is configured as a singleton using the settings coming from the appsettings.json file.
Write Tuples on Resource Creation
When a user creates a folder, we need to tell Auth0 FGA that this user is the owner of the new folder. We'll do this by writing a "tuple." A tuple is a single piece of relationship data with the structure (User, Relation, Object).
Let's modify the MapPost() handler on the /documents/folders endpoint as follows:
documentsApi.MapPost("/folders",
    async (CreateFolderRequest req, HttpContext context, OpenFgaClient fgaClient) =>
    {
      //👇 changed code
      var userId = GetUserId(context);
      var newFolder = new Folder(Guid.NewGuid().ToString(), req.Name, userId);
      //👆 changed code
      folders[newFolder.Id] = newFolder;

      //👇 new code
      var tuple = new ClientTupleKey
      {
        User = $"user:{userId}",
        Relation = "owner",
        Object = $"folder:{newFolder.Id}"
      };

      await fgaClient.WriteTuples(new List<ClientTupleKey> { tuple });
      //👆 new code

      return Results.Created($"/documents/folders/{newFolder.Id}", newFolder);
    });
You've done a few things here:
- Injected the
OpenFgaClientinto your endpoint handler. - Assigned the user ID to the
userIdvariable so that it’s accessible to the rest of the handler. - After creating the folder in your local database, you created a
ClientTupleKeythat represents the statement “the current user is the owner of the newly created folder”. - Then you sent this tuple to Auth0 FGA using the
fgaClient.WriteTuples()method.
The same logic applies to creating a file.
Check Permissions Before Modifying Resources
Now for the most important part: enforcing the authorization rules. Let's focus on the MapPut() handler of the endpoint for folders. Before we allow the update, we will ask Auth0 FGA if the current user can_edit the folder.
You could add the code directly to the endpoint handler, but that would require duplicating the code for each endpoint and complicating the handler code itself. Instead, you can leverage ASP.NET Core support for defining authorization policies. This allows for better separation of concerns and improves the readability of your endpoint's handler code.
Let’s start by defining an authorization requirement class:
public class ItemPermissionRequirement : IAuthorizationRequirement
{
  public string Relation { get; }
  public string ResourceType { get; }
  public ItemPermissionRequirement(string relation, string resourceType)
  {
    Relation = relation;
    ResourceType = resourceType;
  }
}
This class just describes the permission that the current user must have. In our case, it defines the relationship (Relation property) between the current user and the resource type (ResourceType property) they want to access.
Then, you need to define an authorization handler, the component responsible for actually verifying the user’s permissions. Here is the code for it:
public class ItemPermissionHandler : AuthorizationHandler<ItemPermissionRequirement>
{
  private readonly OpenFgaClient _fgaClient;
  private readonly IHttpContextAccessor _httpContextAccessor;

  public ItemPermissionHandler(OpenFgaClient fgaClient, IHttpContextAccessor httpContextAccessor)
  {
    _fgaClient = fgaClient;
    _httpContextAccessor = httpContextAccessor;
  }

  protected override async Task HandleRequirementAsync(AuthorizationHandlerContext context, ItemPermissionRequirement requirement)
  {
    var httpContext = _httpContextAccessor.HttpContext;
    var userId = httpContext?.User.FindFirstValue(ClaimTypes.NameIdentifier);

    var routeValues = httpContext?.Request.RouteValues;
    if (routeValues == null || !routeValues.TryGetValue("id", out var idObj))
    {
      context.Fail();
      return;
    }
    var id = idObj?.ToString();

    var checkRequest = new ClientCheckRequest
    {
      User = $"user:{userId}",
      Relation = requirement.Relation,
      Object = $"{requirement.ResourceType}:{id}"
    };

    var response = await _fgaClient.Check(checkRequest);

    if (response.Allowed == true)
      context.Succeed(requirement);
    else
      context.Fail();
  }
}
Here's a summary of what the authorization handler does:
- In the constructor, it takes the OpenFGA client instance and the current HTTP context.
- In the
HandleRequirementAsync()method, it takes the authorization requirement as input. - It then retrieves the current user ID from the HTTP context and the resource ID from the endpoint’s
idparameter. - It then composes an instance of the
ClientCheckRequestclass representing the tuple to be verified and sends it to Auth0 FGA for evaluation. - The outcome of the verification on Auth0 FGA determines the authorization handler's result.
Now that you have the authorization requirement and handler classes, use them to enable the actual authorization check.
Go to your Program.cs file and replace the line builder.Services.AddAuthorization(); with the following code:
//...existing code...

builder.Services.AddAuthentication().AddJwtBearer();

//👇 new code
builder.Services.AddHttpContextAccessor();

builder.Services.AddSingleton<IAuthorizationHandler, ItemPermissionHandler>();

builder.Services.AddAuthorization(options =>
{
  options.AddPolicy("CanEditFolder", policy =>
      policy.Requirements.Add(new ItemPermissionRequirement("can_edit", "folder")));
  options.AddPolicy("CanDeleteFolder", policy =>
      policy.Requirements.Add(new ItemPermissionRequirement("owner", "folder")));
  options.AddPolicy("CanEditFile", policy =>
      policy.Requirements.Add(new ItemPermissionRequirement("can_edit", "file")));
  options.AddPolicy("CanDeleteFile", policy =>
      policy.Requirements.Add(new ItemPermissionRequirement("owner", "file")));
});
//👆 new code

//...existing code...
The new code registers the service to allow the authorization handler to access the HTTP context, registers the authorization handler as a singleton, and configures the authorization service with four policies corresponding to the permissions to modify and delete files and folders.
Finally, apply the appropriate policies to the endpoints by using RequireAuthorization(), as in the following:
//...existing code...

documentsApi.MapPut("/folders/{id}",
    async (string id, UpdateFolderRequest req) =>
    {
      if (!folders.ContainsKey(id)) return Results.NotFound();

      var updatedFolder = folders[id] with { Name = req.Name };
      folders[id] = updatedFolder;
      return Results.Ok(updatedFolder);
    })
    .RequireAuthorization("CanEditFolder"); //👈 new code

documentsApi.MapDelete("/folders/{id}", (string id) =>
{
  return folders.Remove(id) ? Results.NoContent() : Results.NotFound();
})
.RequireAuthorization("CanDeleteFolder"); //👈 new code

//...existing code...
Leverage Auth0's authentication and authorization services in your .NET applications.
DOWNLOAD THE FREE EBOOK
Conclusion
You have successfully transformed your ASP.NET Core API from a coarse-grained authorization system to one with a fine-grained authorization. By integrating Auth0 FGA, you offloaded the complex authorization logic from your application code to a dedicated, powerful service.
This approach offers several key advantages:
- Decoupling: Your authorization logic lives separately from your application code, making it easier to manage and update.
- Clarity: The Auth0 FGA modeling language provides a clear, auditable definition of your authorization rules.
- Flexibility: You can easily change your model to support new features like sharing files, creating teams, or inheriting permissions without significant changes to your API code. You just update the model and the tuples you write.
You now have a solid foundation for building sophisticated, relationship-based authorization into any ASP.NET Core application. Check out the Auth0 FGA documentation and give it a try now!
About the author

Andrea Chiarelli
Principal Developer Advocate
I have over 20 years of experience as a software engineer and technical author. Throughout my career, I've used several programming languages and technologies for the projects I was involved in, ranging from C# to JavaScript, ASP.NET to Node.js, Angular to React, SOAP to REST APIs, etc.
In the last few years, I've been focusing on simplifying the developer experience with Identity and related topics, especially in the .NET ecosystem.