In this tutorial, you’ll learn how to integrate LangChain into your existing stack even if your endpoints require authenticated users with specific roles.
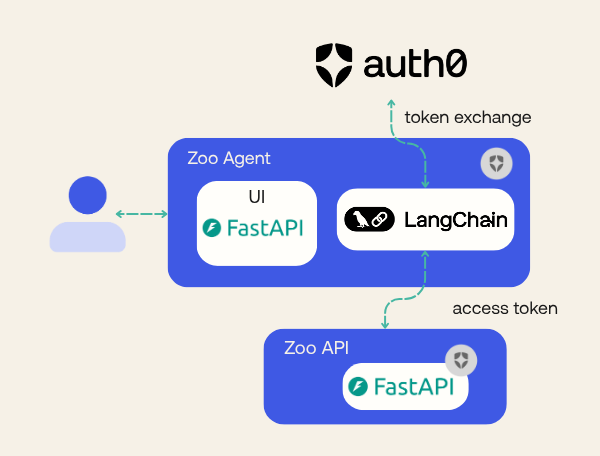
By the end of this post, you’ll have two running projects built with FastAPI: an API, protected with Auth0 as the application backend, and a small frontend, that will use LangChain for tool calling and will be used by users. The frontend will send user prompts to be processed by LangChain that in turn will invoke the protected API.
The code is available in this repository for you to follow along. The code already has most of the system implemented, with placeholder sections designed to guide you through implementing authentication via LangChain. The repository will have two branches to help your study: one to begin with and another with the end result, to compare to what you have done.
If you are getting started with tool calling, I recommend you read the blog post linked below before continuing to better understand tool calling in AI agents and how security is currently handled.
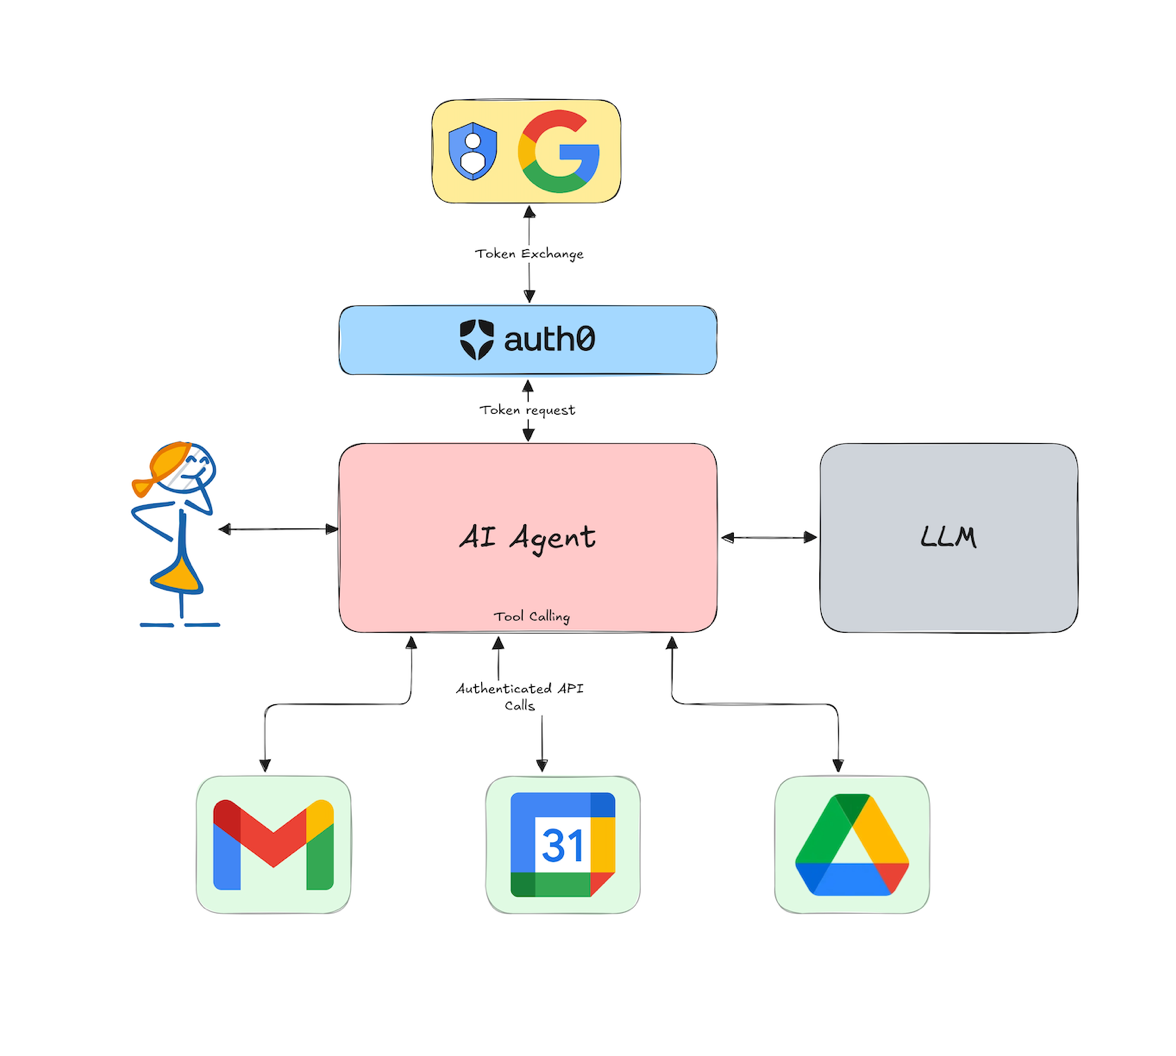
Discover how AI agents are taking center stage by seamlessly integrating with multiple digital tools like Gmail, Calendar, Slack, and Google Drive to be more efficient. Learn why it is important to secure them and how to do it.
Zoo AI: Our Demo Application
For this tutorial, we created a system solely for demonstration purposes. Zoo AI is a fictional zoo management platform that helps staff manage daily operations and respond to various situations. The platform has four main roles:
- Veterinarians - Handle animal health and medical care.
- Coordinators - Oversee operations and can trigger emergency protocols.
- Janitors - Maintain cleanliness and hygiene.
- Zookeepers - Provide daily care and feed the animals.
Any staff member can interact with our AI to report when something is happening or when some staff may need to take actions. Also, anything that happens to the animals needs to be logged.
Prerequisites
You will need the following tools and services to build this application:
- Python 3.11 or later
- Poetry for dependency management. Check how to install.
- An Auth0 for AI Agents account. Create one.
- An OpenAI account and API key. Create one or use any other LLM provider supported by LangChain.
- Our git repository, cloned
Zoo AI Technological Stack
The Zoo AI management platform consists of two projects: API and Agent. Both projects have a similar stack to make the platform as simple as possible for demonstration purposes.
Both projects will also use the same Poetry environment to simplify set up. Poetry is completely optional but makes dependency management easier. You can check the Poetry website for more details.
API Project (auth0-zoo-ai/api) Stack
- FastAPI: Web framework for building the REST API
- Auth0-fastapi-api: Authentication and authorization backend with the Auth0 FastAPI SDK
- TinyDB: Local NoSQL database for persistence
- Pydantic: For data validation and serialization
Once you setup Auth0 following the steps on this blog post the API will work without requiring updates to the code so you can focus on what really matters: the agent we are building.
Agent Project (auth0-zoo-ai/agent) Stack
- LangChain: Framework for building the AI agent
- OpenAI: Language model integration
- FastAPI: Web framework for exposing agent endpoints
- Requests: Library for HTTP requests
- Auth0-fastapi: Authentication and authorization for Web Applications
This provides the base structure for the Agent and you are going to make some modifications to it in order to securely perform tool calls, continue reading to learn how.
Getting Started
Clone the repository and install the dependencies. All dependencies needed are already
set in pyproject.toml.
git clone https://github.com/auth0-samples/auth0-zoo-ai
cd auth0-zoo-ai
git switch step1-firstparty-toolcalling
poetry install
Using branch step1-firstparty-toolcalling you’ll have both projects configured with all dependencies. To test it, we need to set up authentication and a few environment variables.
Setting Up Auth0 Authentication for the FastAPI API
Before moving forward, we need to set up a few things in the Auth0 for AI Agents account you created in the prerequisites section.
Note: Since Auth0 for AI Agents is in Developer Preview, you need to use this link and sign up for a new tenant as it will have enabled all the features you’ll need.
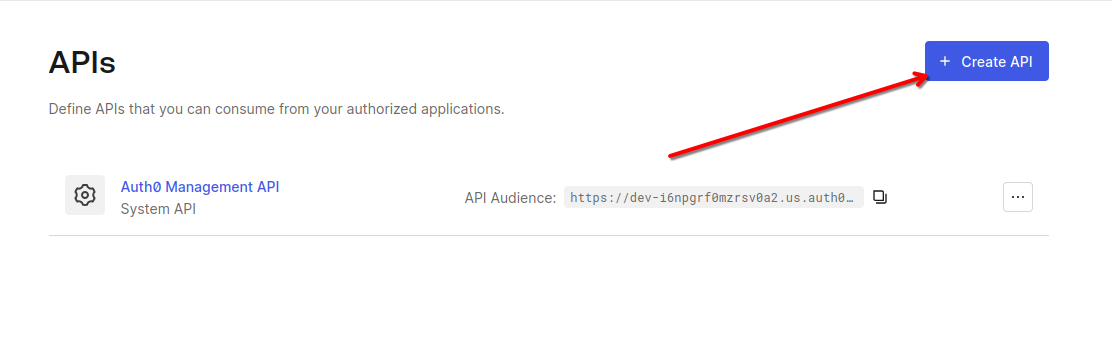
We need to create a new API. The Agent will use this API to obtain an access token to perform actions on behalf of the user. Go to the API section in Applications and click on Create API.
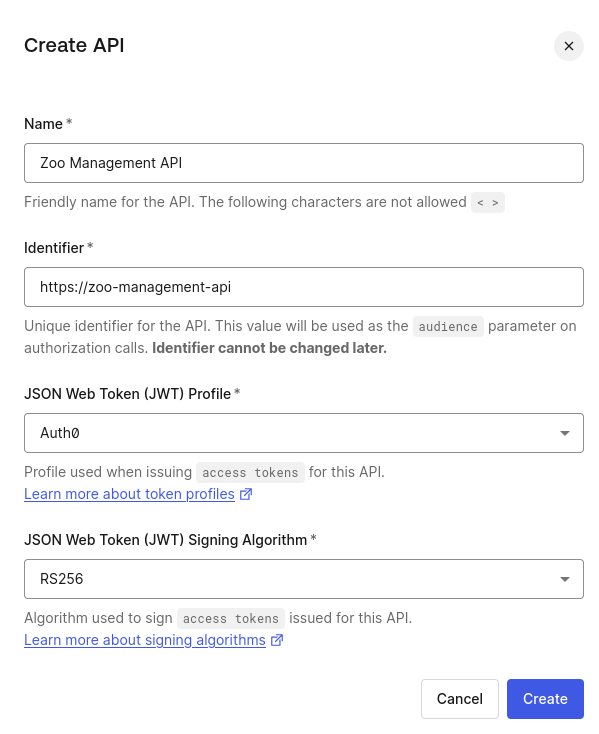
We need to set the name and the identifier. The identifier is the audience of the token. We will use it to set the audience of the token in the Agent project. Although the identifier is similar to a URL, it doesn’t have to be. It is just a string that will be used to identify the API.
- Name: Zoo Management API
- Identifier: https://zoo-management-api
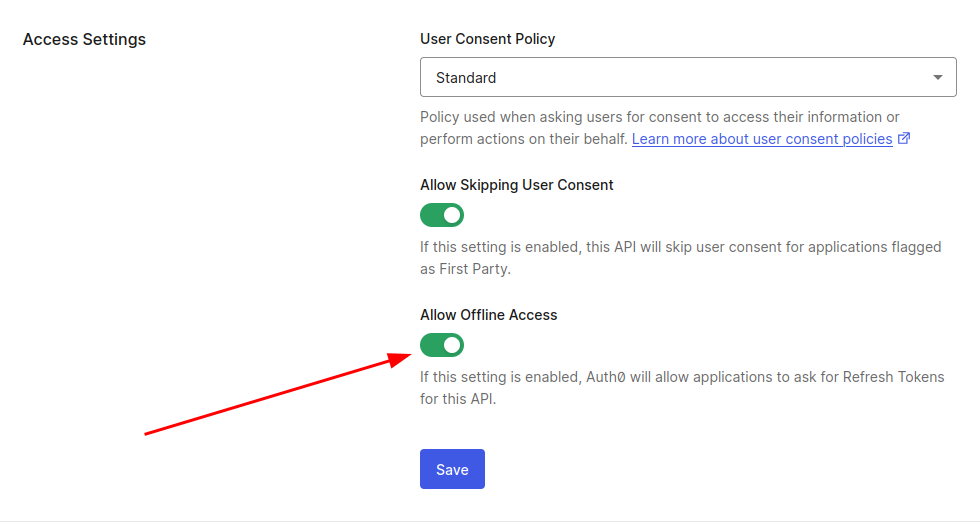
After clicking Create you’ll be taken to the API page. Navigate to the Settings tab check Allow Offline Access so we can generate Refresh Tokens for this API.
Now we have to set up roles and inject them into our application access token.
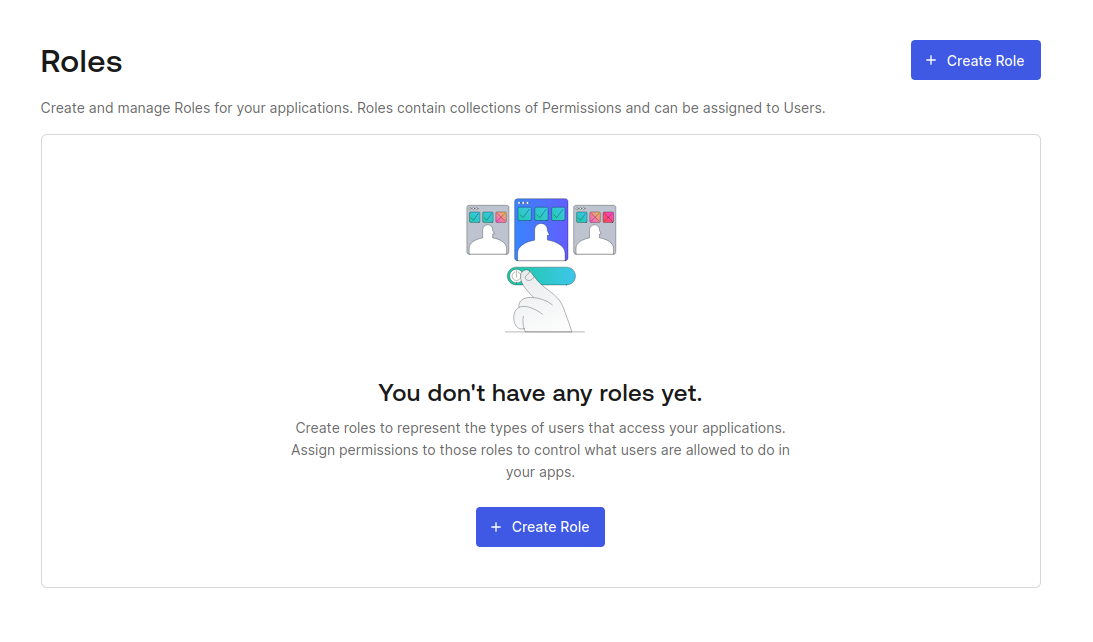
In the Auth0 Dashboard, go to the User Management section and click in Roles.
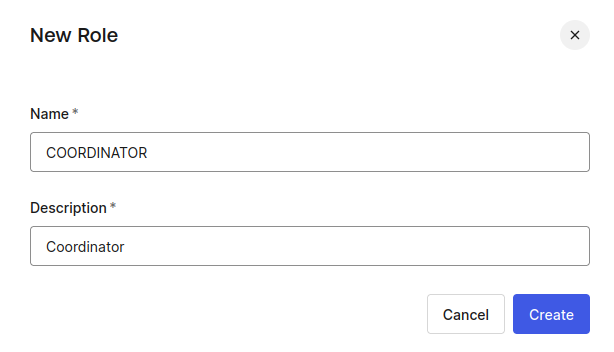
Now, click on Create Role and set the name COORDINATOR.
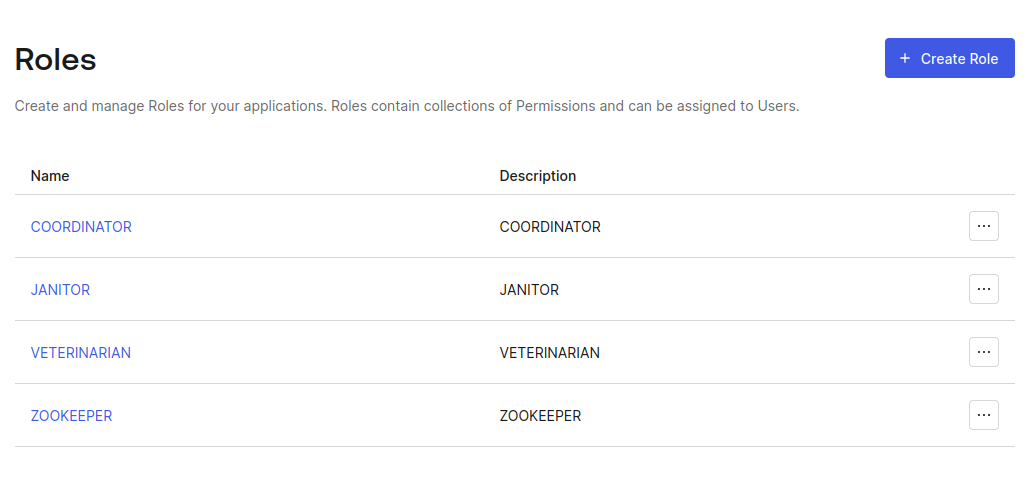
Do the same for all remaining roles: janitor, veterinarian, zookeeper. Keep the same name for both as they will be identified by it.
To finish, we need Auth0 to add the role as a custom claim in the ID and access tokens.
Learn how to create a new custom action that will add a custom claim to your Auth0-issued ID Token
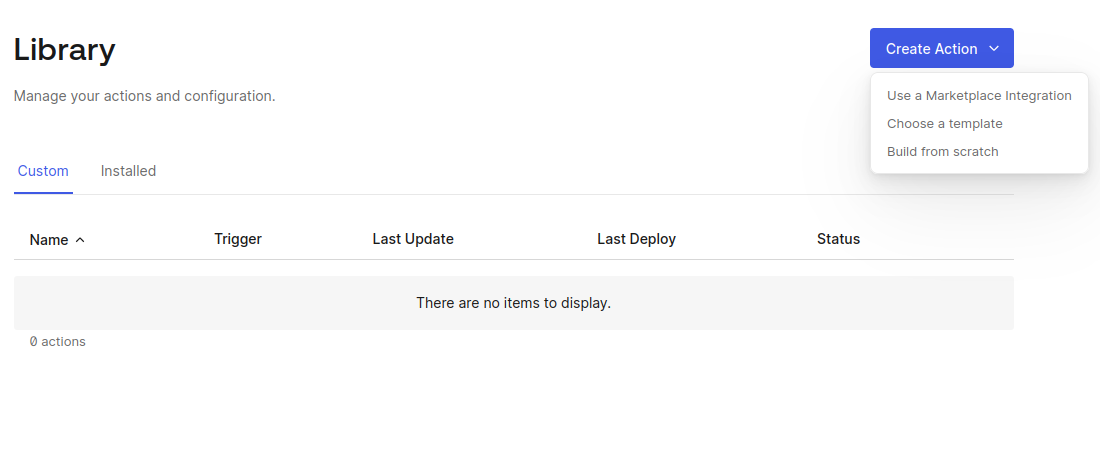
Go to Actions > Library section. In the Create Action button, select Build from scratch.
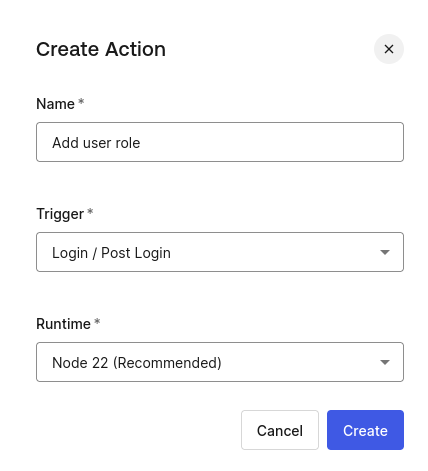
Give the action a name (e.g. Add user role) and select the Trigger Login / Post Login
You will be prompted to a code editor screen. Add the following code:
exports.onExecutePostLogin = async (event, api) => {
  const namespace = 'https://zooai/roles';
  if (event.authorization) {
    api.accessToken.setCustomClaim(namespace, event.authorization.roles);
    api.idToken.setCustomClaim(namespace, event.authorization.roles);
  }
};
Click on Deploy and the code will be ready to be used.
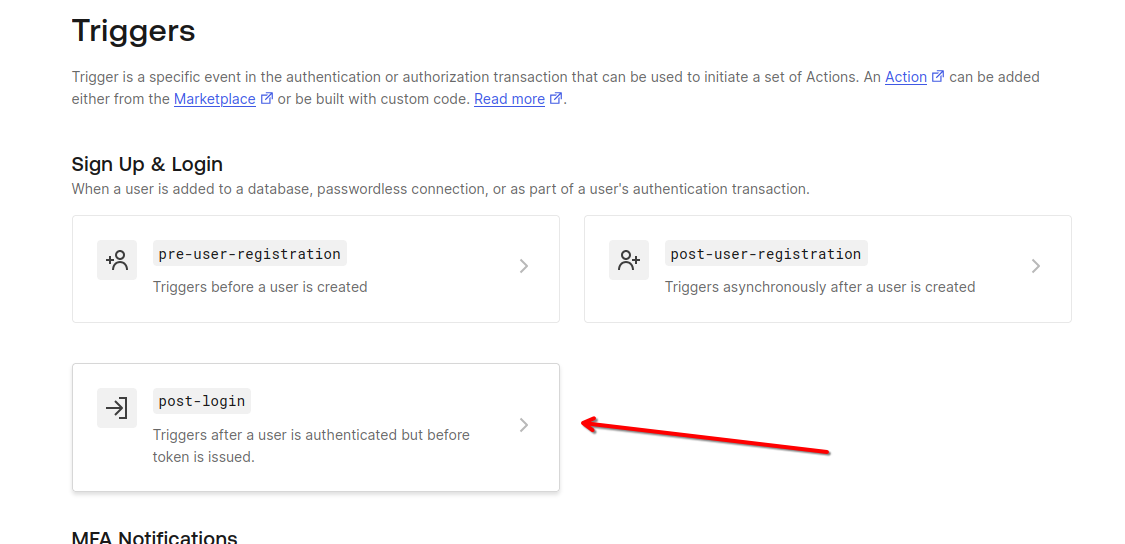
To actually use the Auth0 Action you just created, we need to set up a Trigger for it. Go to Actions > Triggers and click on the post-login trigger.
Now, just drag and drop the custom action Add user role to the authentication flow and hit Apply.
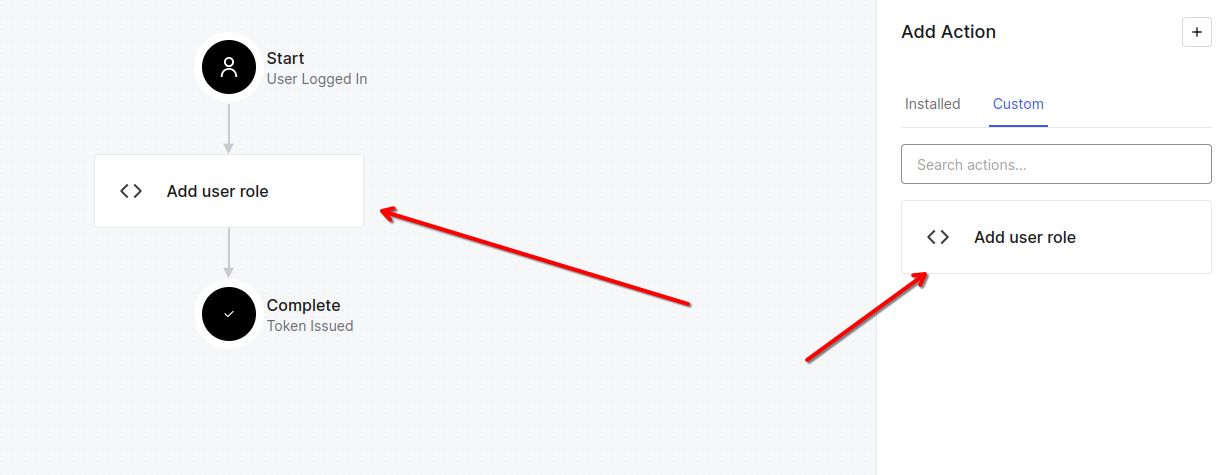
The action code will then be executed every time a token is generated and will add the claim https://zooai/roles to the access and ID tokens. You should always use a namespace (e.g. https://zooai/) to avoid conflicts with other claims.
Auth0 is configured. Now we need to test our code before making changes to it.
Setting up API Project
Create a .env file in the api/ folder with the following content:
AUTH0_DOMAIN=YOUR_AUTH0_TENANT_DOMAIN
API_AUDIENCE=https://zoo-management-api
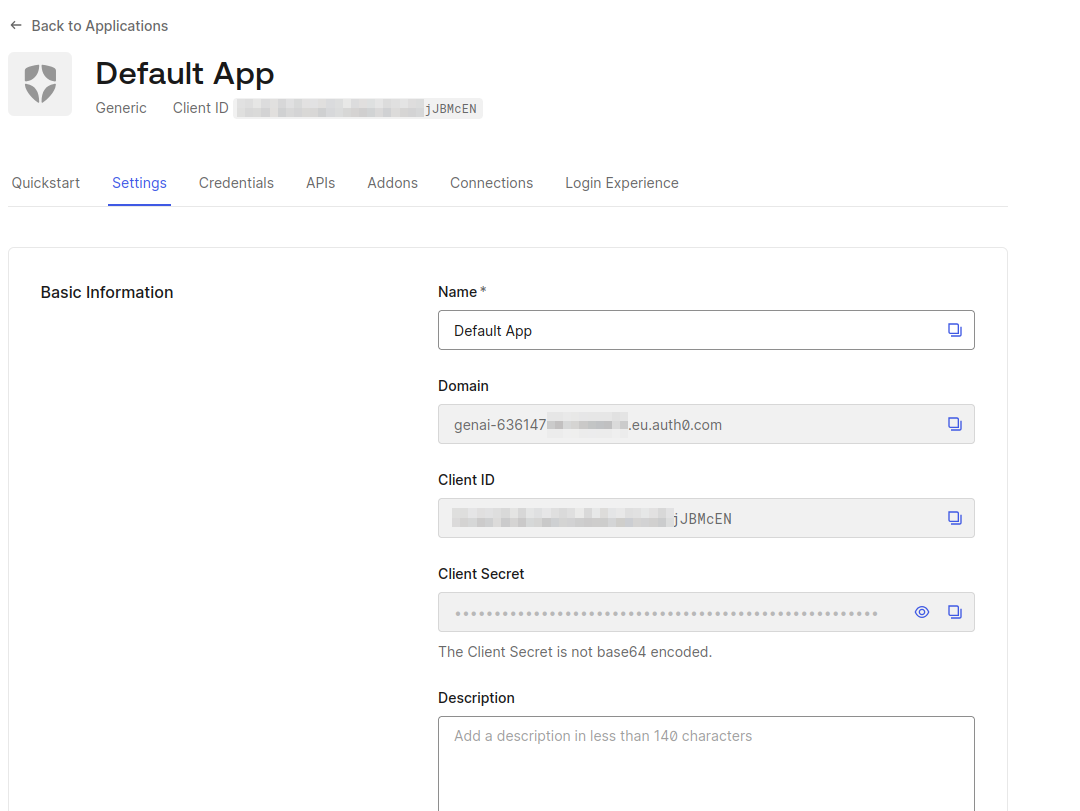
To get AUTH0_DOMAIN you can access any Application, access Settings menu and copy the Domain value.
Now run the API by typing the following instructions at the terminal:
cd api
poetry run uvicorn main:app
Setting up Agent Project
Create the .env file in the agent folder:
touch agent/.env
And add the following content to it:
# Auth0
AUTH0_DOMAIN="YOUR_AUTH0_DOMAIN"
AUTH0_CLIENT_ID="YOUR_AUTH0_CLIENT_ID"
AUTH0_CLIENT_SECRET="YOUR_AUTH0_CLIENT_SECRET"
APP_BASE_URL="http://localhost:3000"
APP_SECRET_KEY="use [openssl rand -hex 32] to generate a 32 bytes value"
# OpenAI
OPENAI_API_KEY="YOUR_OPEN_AI_KEY"
API_AUDIENCE="https://zoo-management-api"
API_BASE_URL="http://localhost:8000"
Now, run the Agent service. The API project should still be running as both will communicate with each other:
cd agent
poetry run uvicorn main:app --reload --port 3000
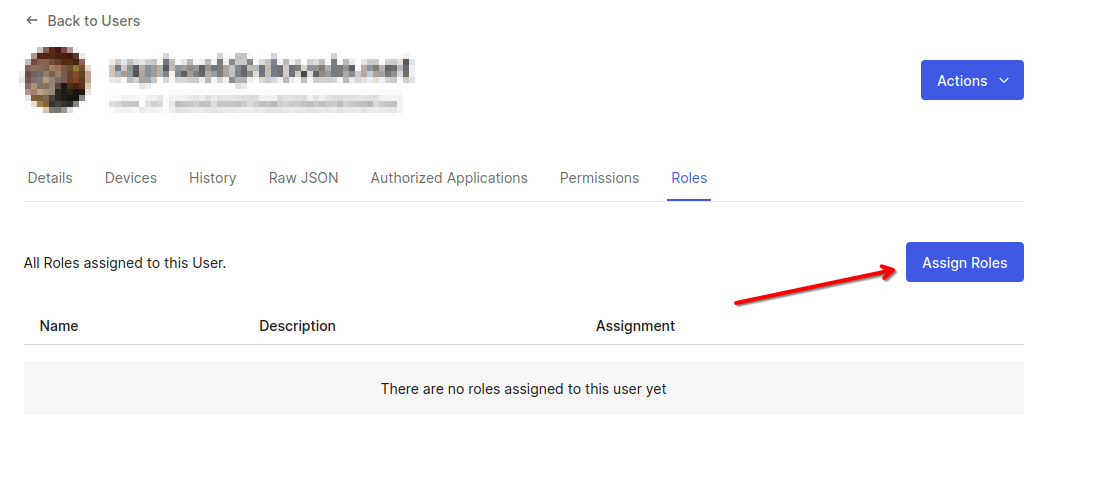
Before using the application, we need to create some users in Auth0, each one with the roles you need. Go to User Management > Users and create as many users as you want. In the user page, go to the Roles tab and assign the role you desired. The project only supports one single role per user:
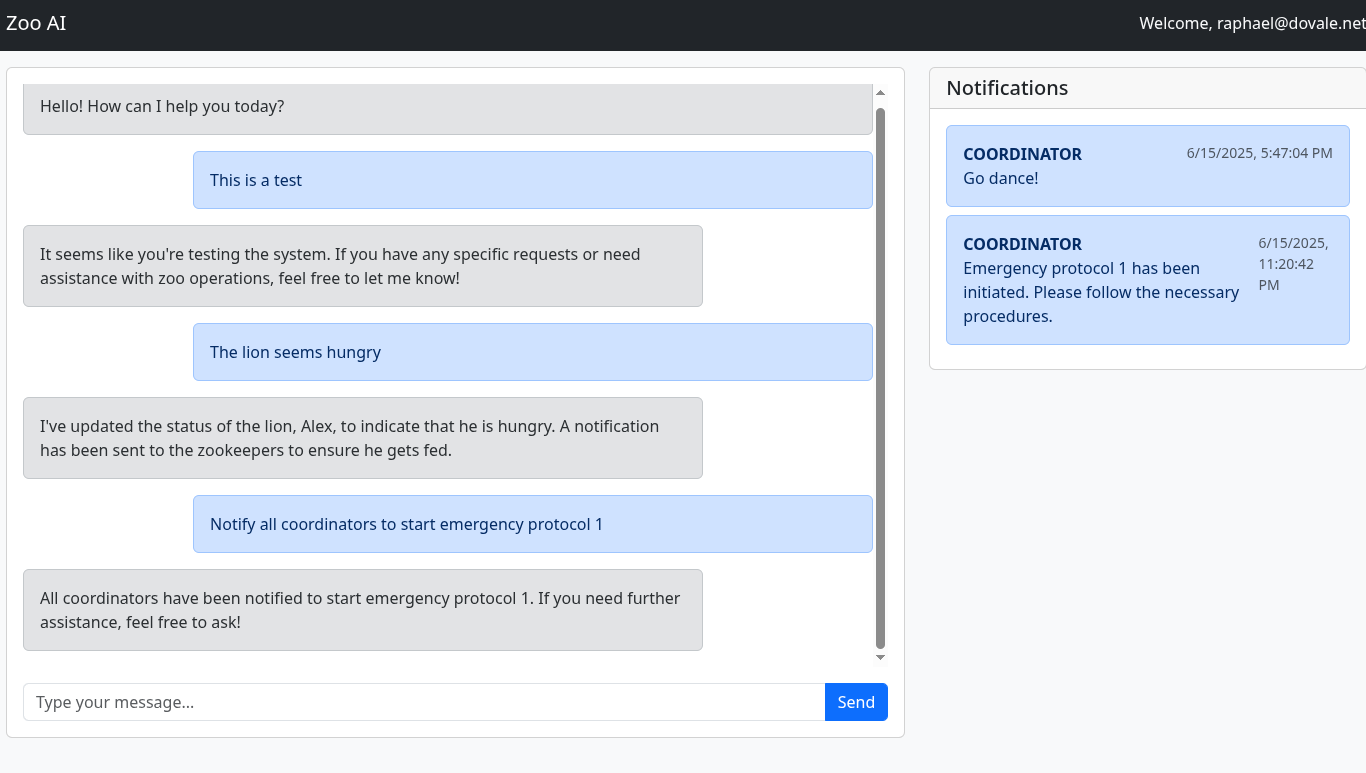
Now, go to the browser and open the URL http://localhost:3000/. You should see the application running. On the first time, you will be redirected to the Auth0 login page. After login, you will be redirected to the application and you should see the notifications for the user role. Go play with it and see how it reacts to many different queries. However, the LLM will only be able to talk with you without any access to our API. For that, we need to implement tools.
Implementing Secure LangChain Tool Calling in Python
In our agent project, we need to create the zoo_tools.py file. This file will have all the tools that will call our API. Most importantly, these tools will be able to get the access token of the current user and forward it to the API.
Put the following code inside this file:
import logging
import os

import requests
from dotenv import load_dotenv
from langchain_core.runnables import RunnableConfig
from langchain_core.tools import tool
from pydantic import BaseModel, Field

load_dotenv()

logger = logging.getLogger(__name__)

API_BASE_URL = os.getenv("API_BASE_URL")


def _get_headers(config: RunnableConfig) -> dict:
    access_token = config.get("configurable", {}).get("api_access_token")
    return {"Authorization": f"Bearer {access_token}"}
The section above contains the imports and the environment variable we are going to use to set the API base URL. We also defined the get_headers function, which is responsible for retrieving the user access token and creating a header for the API. We are going to explain how this access token is passed later. Now, we must define the tools that translate the API endpoints into LangChain tools.
@tool
def list_animals(event: str, config: RunnableConfig) -> list[dict]:
    """Get the list of all animals and their IDs."""
    try:
            logger.info("list animals %s", event)
           response = requests.get(f"{API_BASE_URL}/animal",    headers=_get_headers(config))
            response.raise_for_status()
            return response.json()
    except Exception as e:
             logger.exception("error")
            raise e
The LangChain Tool is a decorator that indicates that this function can be used by GenAI. You should always add docstrings so the agent can understand what the function does, that’s how the LLM will pick between one tool or the other.
class UpdateAnimalStatusArgs(BaseModel):
    animal_id: str = Field(..., description="ID of the animal to update")
    event_description: str = Field(
        ..., description="Clear and concise description of the event"
    )


@tool(args_schema=UpdateAnimalStatusArgs)
def update_animal_status(
    animal_id: str, event_description: str, config: RunnableConfig
) -> str:
    """Add an event to an animal."""
    logger.info("add animal event %s", event_description)
    response = requests.post(
        f"{API_BASE_URL}/animal/{animal_id}/status",
        headers=_get_headers(config),
        json={"status": event_description},
    )
    response.raise_for_status()
    return "event added"


class NotifyStaffArgs(BaseModel):
    event: str = Field(..., description="Event to notify staff about")
    staff_role: str = Field(
        ...,
        description="Role of the staff to notify. Can be COORDINATOR, VETERINARIAN, JANITOR or ZOOKEEPER",
    )


@tool(args_schema=NotifyStaffArgs)
def notify_staff(event: str, staff_role: str, config: RunnableConfig) -> str:
    """Notify a staff group about an event at the zoo."""
    logger.info("notify staff %s", event)
    response = requests.post(
        f"{API_BASE_URL}/staff/notification/{staff_role}",
        headers=_get_headers(config),
        json={"description": event},
    )
    response.raise_for_status()
    return "notification sent"
We need to define the arguments that will be passed to the update_animal_status tool. We use Pydantic to define the arguments and the tool decorator to indicate that this function can be used by the LLM. LangChain will automatically parse the arguments and pass them to the function and the configured GenAI will be able to understand each argument. The notify_staff tool is similar to the update_animal_status tool. Since we need the exact name values for the role, we instruct the LLM which values are allowed.
Now, let's take a look at the agent.py file. This file will have all configuration of our LangChain with features like memory and graph (from LangGraph) definition. We need to make two changes to it.
First, we need to register our tools into the tools list. You can change the following code:
tools = [
    ## ADD YOUR TOOLS HERE
]
To this:
from zoo_tools import list_animals, notify_staff, update_animal_status

tools = [
    list_animals,
    update_animal_status,
    notify_staff,
]
Moreover, we need to pass the access token to the Configuration used by LangChain to pass and receive context between the graph.
Change this:
config = {
        "configurable": {
            "thread_id": user_id,
        }
}
To this:
config = {
        "configurable": {
            "thread_id": user_id,
"api_access_token": token,
        }
}
The token variable is already passed as an argument to our function, you can check in main.py file how we obtain it using Auth0 libraries.
Now you can test the agent again by running the command below:
poetry run uvicorn main:app --reload --port 3000
Your application should be ready to be used. You can login with the user you created in Auth0 and you should see the notifications of the user role. Go play with it and see how it reacts to many different queries!
Note: All the code is on branch step2-firstparty-toolcalling of our repository.
Recap
In this blog post you learned how to create a FastAPI API with the use of Dependency Injection and Role-Based Access Control (RBAC) with OAuth and Auth0. To use this API, you learned how to set up and deploy a LangChain application integrated with OpenAI and Auth0. This application enabled the LLM to securely connect to your API with context.
If you are building with GenAI you should check out our brand new product Auth0 for AI Agents, to enable AI agents to securely access tools, workflows, and data with fine-grained control and just a few lines of code.
You can take a look at the code that was used in these demos on GitHub to try it out for yourself and stay tuned because we will have more content on tool calling in Python in future blog posts.
About the author