AI agents and Operators are still taking over software development. In a previous post, we learned how to build a personal assistant that can use different types of tools. This post continues our journey, adding more tools to the assistant and making it production-ready.
Update - December 2025: This post has been updated to work with the general availability release of Auth0 for AI Agents. The code samples and instructions have been revised accordingly.
Recap
Previous posts in this series:
- Tool Calling in AI Agents: Empowering Intelligent Automation Securely
- Build an AI Assistant with LangGraph, Vercel, and Next.js: Use Gmail as a Tool Securely
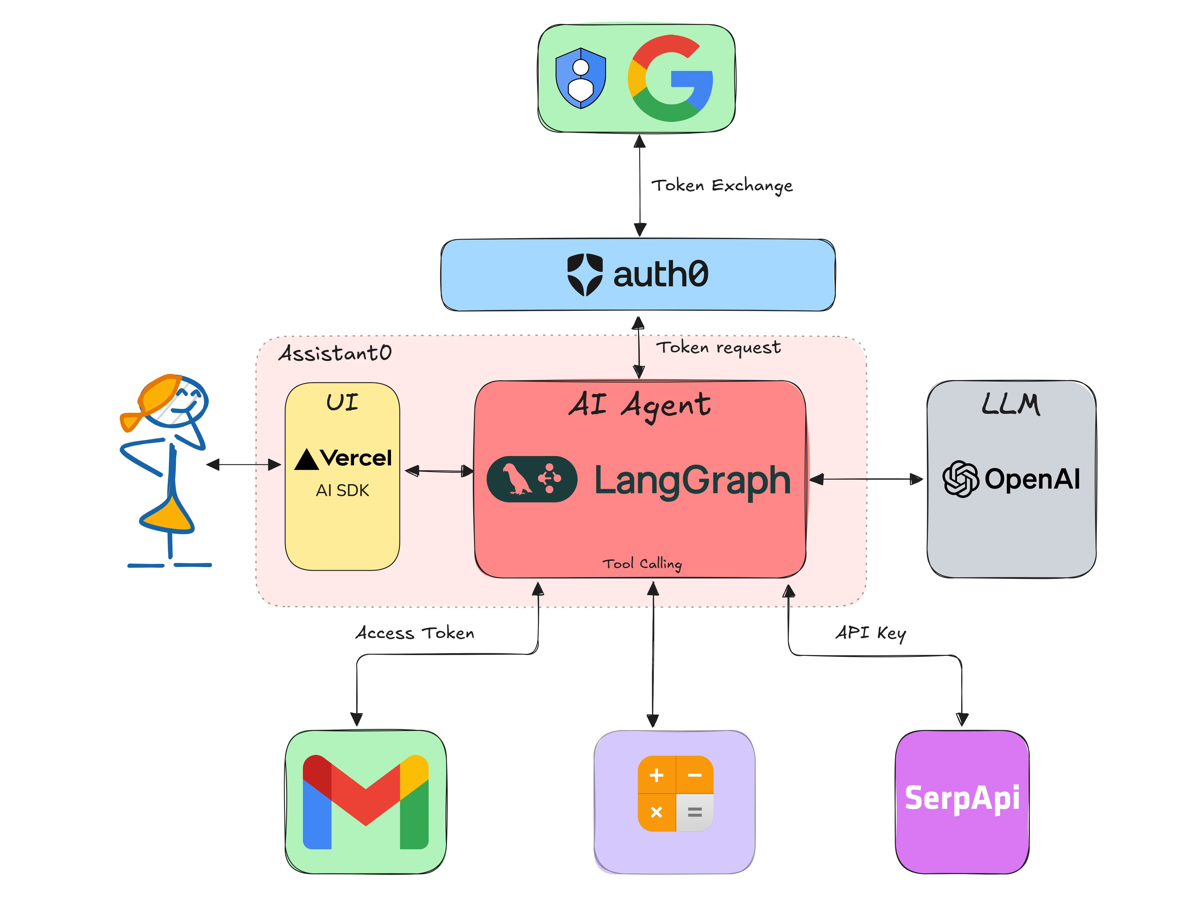
In the previous post, we learned how to build a tool-calling AI agent using LangGraph, Vercel AI SDK, and Next.js. We used a simple calculator tool, a web search tool, and a Gmail search and draft tool. We also learned how to secure the tools using Auth0 Token Vault.
What we will learn in this post
Today, we will learn the following:
- Use LangGraph Server to host the AI agent
- Handle authorization interrupts and step-up authentication using Auth0
- Add a Google Calendar tool
- Add a custom tool that can access your own APIs
If you haven't read the previous posts, I recommend you do so before continuing to better understand tool calling in AI agents and how security is currently handled.
To keep this post focused on tool calling, we will only focus on the AI agent part and not the UI. Each step of the tutorial, including building the UI, can be found as a distinct commit in the GitHub repository.
Technology stack
We will use a Next.js application called Assistant 0 as the base, and we will continue from where we left off in the previous post. We will no longer need Vercel's AI SDK, as we will be using LangGraph's React SDK to stream response tokens to the client.
Prerequisites
You will need the following tools and services to build this application:
- Bun v1.2 or NodeJS v20
- An Auth0 for AI Agents account. Create one.
- An OpenAI account and API key. Create one or use any other LLM provider supported by LangChain.
- A Google account for Gmail and Calendar. Preferably a new one for testing.
Getting started
First clone the repository and install the dependencies:
git clone https://github.com/auth0-samples/auth0-assistant0.git
cd auth0-assistant0

git switch step-4 # so that we skip to the point where we left off in the previous post

bun install # or npm install
If you haven't already, you'll need to set up environment variables in your repo's .env.local file. Copy the .env.example file to .env.local. To start, you'll need to add your OpenAI API key and Auth0 credentials as described in the previous post.
Switch to LangGraph Server
First, let's switch to a LangGraph Server so that the application is more production-ready.
Why LangGraph Server?
LangGraph recommends using a LangGraph Server to host the StateGraph acting as the AI agent. For local development, this can be an in-memory server created using the LangGraph CLI. For production, you can use a self-hosted LangGraph Server or LangGraph Cloud. This setup also provides LangGraph Studio for debugging and monitoring the agent.
Why this change?
The previous architecture had limitations:
- ❌ All agent logic mixed with API routing code
- ❌ Difficult to test independently
- ❌ No built-in conversation persistence
- ❌ Limited debugging capabilities
The new architecture provides:
- ✅ Separation of concerns (agent logic vs API routing)
- ✅ Built-in conversation memory with checkpointers
- ✅ LangGraph Studio for visual debugging
- ✅ Production-ready deployment options
New architecture
The application will be structured as below:
src/app: Contains the Next.js application routes, layout, and pages.src/app/api/chat/[..._path]/route.ts: API route that forwards the chat requests to the LangGraph Server.src/lib: Services and configurations. This is where custom tools will be defined.src/lib/agent.ts: The LangGraph AI agent is defined here.src/lib/auth0.ts: The Auth0 client is defined here.src/lib/auth0-ai.ts: The Auth0 AI SDK instance is defined here.src/components: UI components used in the application.src/utils: Utility functions
Our new architecture is as follows:

Let's install some new dependencies. We will talk about them later on.
bun add langgraph-nextjs-api-passthrough nuqs react-device-detect
bun add npm-run-all -d
Update the Auth0 configuration
Update the src/lib/auth0.ts file with the following code.
// src/lib/auth0.ts
import { Auth0Client } from '@auth0/nextjs-auth0/server';

export const auth0 = new Auth0Client({
  authorizationParameters: {
    // In v4, the AUTH0_SCOPE and AUTH0_AUDIENCE environment variables are no longer automatically picked up by the SDK.
    // Instead, we need to provide the values explicitly.
    scope: process.env.AUTH0_SCOPE,
    audience: process.env.AUTH0_AUDIENCE,
  },
  // required for Token Vault
  enableConnectAccountEndpoint: true,
});

// Get the Access token from Auth0 session
export const getAccessToken = async () => {
  const tokenResult = await auth0.getAccessToken();

  if (!tokenResult || !tokenResult.token) {
    throw new Error('No access token found in Auth0 session');
  }

  return tokenResult.token;
};
Update the src/lib/auth0-ai.ts file with the following code.
// src/lib/auth0-ai.ts
import { Auth0AI, getAccessTokenFromTokenVault } from '@auth0/ai-langchain';
import { SUBJECT_TOKEN_TYPES } from '@auth0/ai';

// Get the access token for a connection via Auth0
export const getAccessToken = async () => getAccessTokenFromTokenVault();

// Note: we use the Custom API Client when using Token Vault connections that access third party services
const auth0AICustomAPI = new Auth0AI({
  auth0: {
    domain: process.env.AUTH0_DOMAIN!,
    // For token exchange with Token Vault, we want to provide the Custom API Client credentials
    clientId: process.env.AUTH0_CUSTOM_API_CLIENT_ID!, // Custom API Client ID for token exchange
    clientSecret: process.env.AUTH0_CUSTOM_API_CLIENT_SECRET!, // Custom API Client secret
  },
});

// Connection for services
export const withConnection = (connection: string, scopes: string[]) =>
  auth0AICustomAPI.withTokenVault({
    connection,
    scopes,
    accessToken: async (_, config) => {
      return config.configurable?.langgraph_auth_user?.getRawAccessToken();
    },
    subjectTokenType: SUBJECT_TOKEN_TYPES.SUBJECT_TYPE_ACCESS_TOKEN,
  });

export const withGmailRead = withConnection('google-oauth2', [
  'openid',
  'https://www.googleapis.com/auth/gmail.readonly',
]);

export const withGmailWrite = withConnection('google-oauth2', [
  'openid',
  'https://www.googleapis.com/auth/gmail.compose',
]);
Use the LangGraph Server
First, add a langgraph.json file to the project's root. This file will be used to configure the LangGraph Server.
{
  "node_version": "20",
  "graphs": {
    "agent": "./src/lib/agent.ts:agent"
  },
  "auth": {
    "path": "./src/lib/auth.ts:authHandler"
  },
  "env": ".env.local",
  "dependencies": ["."]
}
The repo contains the src/lib/auth.ts file that contains the authentication handler for the LangGraph Server. This handler verifies the access token sent from the client and makes it available to the LangChain tools.
Add .langgraph_api folder to the .gitignore file.
Update the .env.local file to add the below environment variables.
AUTH0_AUDIENCE="https://your.domain.us.langgraph.app"
AUTH0_SCOPE="openid profile email offline_access"
AUTH0_CUSTOM_API_CLIENT_ID="{yourCustomApiClientId}"
AUTH0_CUSTOM_API_CLIENT_SECRET="{yourCustomApiClientSecret}"

# LANGGRAPH
LANGGRAPH_API_URL=http://localhost:54367
Add the following script entries to the package.json file.
"scripts": {
    // ... existing scripts
    "all:dev": "run-p langgraph:dev dev",
    "all:start": "run-p langgraph:start start",
    "langgraph:dev": "npx @langchain/langgraph-cli dev --port 54367",
    "langgraph:start": "npx @langchain/langgraph-cli up"
}
Now, let's update the src/lib/agent.ts file (which should already exist from the previous chapter's step-4 branch). Replace its contents with the following code. It's almost the same as before, with some important changes to save chat messages and handle interrupts.
// src/lib/agent.ts
import { createReactAgent, ToolNode } from '@langchain/langgraph/prebuilt';
import { ChatOpenAI } from '@langchain/openai';
import { InMemoryStore, MemorySaver } from '@langchain/langgraph';
import { Calculator } from '@langchain/community/tools/calculator';
import { SerpAPI } from '@langchain/community/tools/serpapi';
import { GmailCreateDraft, GmailSearch } from '@langchain/community/tools/gmail';

import { getAccessToken, withGmailRead, withGmailWrite } from './auth0-ai';

const date = new Date().toISOString();

const AGENT_SYSTEM_TEMPLATE = `You are a personal assistant named Assistant0. You are a helpful assistant that can answer questions and help with tasks. You have access to a set of tools, use the tools as needed to answer the user's question. Render the email body as a markdown block, do not wrap it in code blocks. The current date and time is ${date}.`;

const llm = new ChatOpenAI({
  model: 'gpt-4o-mini',
  temperature: 0,
});

// Provide the access token to the Gmail tools
const gmailParams = {
  credentials: {
    accessToken: getAccessToken,
  },
};

const tools = [
  new Calculator(),
  withGmailRead(new GmailSearch(gmailParams)),
  withGmailWrite(new GmailCreateDraft(gmailParams)),
];
// Requires process.env.SERPAPI_API_KEY to be set: https://serpapi.com/
if (process.env.SERPAPI_API_KEY) {
  tools.push(new SerpAPI());
}

const checkpointer = new MemorySaver();
const store = new InMemoryStore();

/**
 * Use a prebuilt LangGraph agent.
 */
export const agent = createReactAgent({
  llm,
  tools: new ToolNode(tools, {
    // Error handler must be disabled in order to trigger interruptions from within tools.
    handleToolErrors: false,
  }),
  // Modify the stock prompt in the prebuilt agent.
  prompt: AGENT_SYSTEM_TEMPLATE,
  store,
  checkpointer,
});
Now let's update our route file. Rename src/app/api/chat/route.ts to src/app/api/chat/[..._path]/route.ts. The [..._path] format is a Next.js catch-all dynamic route that captures any path after /api/chat/. Update the code to the following. This will forward all requests to the LangGraph Server. We are also passing the access token to the LangGraph Server so that it can be used for authentication from the LangChain tools.
// src/app/api/chat/[..._path]/route.ts
import { initApiPassthrough } from 'langgraph-nextjs-api-passthrough';
import { getAccessToken } from '@/lib/auth0';

export const { GET, POST, PUT, PATCH, DELETE, OPTIONS, runtime } = initApiPassthrough({
  apiUrl: process.env.LANGGRAPH_API_URL,
  baseRoute: 'chat/',
  headers: async () => {
    const accessToken = await getAccessToken();
    return {
      Authorization: `Bearer ${accessToken}`,
    };
  },
  disableWarningLog: true,
});
We have now switched to a more realistic LangGraph architecture.
Implement step-up authorization
Until now, we relied on users consenting to all required scopes during login to get access tokens for Google API calls. However, in realistic scenarios, this approach doesn't scale and isn't the most secure way to handle authorizations. We want the user to be able to use the assistant without having to consent to all scopes upfront. When the user requires a tool that requires a scope, we will interrupt the agent and ask the user to consent to the scope. This is called step-up authorization. Let us implement this.
Add step-up authorization using Auth0 AI Components
Now, let's add the necessary components to handle interrupts in the UI for step-up authorization. We will use the prebuilt Auth0 AI Components to handle interrupts in the UI.
Install Auth0 AI Components for Next.js to get the required UI components.
npx @auth0/ai-components add TokenVault
Create a new file, src/components/TokenVaultInterruptHandler.tsx and add the following code:
// src/components/TokenVaultInterruptHandler.tsx
import { TokenVaultInterrupt } from '@auth0/ai/interrupts';
import type { Interrupt } from '@langchain/langgraph-sdk';

import { TokenVaultConsent } from '@/components/auth0-ai/TokenVault';

interface TokenVaultInterruptHandlerProps {
  interrupt: Interrupt | undefined | null;
  onFinish: () => void;
}

export function TokenVaultInterruptHandler({ interrupt, onFinish }: TokenVaultInterruptHandlerProps) {
  if (!interrupt || !TokenVaultInterrupt.isInterrupt(interrupt.value)) {
    return null;
  }

  return (
    <div key={interrupt.ns?.join('')} className="whitespace-pre-wrap">
      <TokenVaultConsent
        mode="popup"
        interrupt={interrupt.value}
        onFinish={onFinish}
        connectWidget={{
          title: 'Authorization Required.',
          description: interrupt.value.message,
          action: { label: 'Authorize' },
        }}
      />
    </div>
  );
}
Now, add a close page for the authorization pop-up. Create a new file src/app/close/page.tsx and add the following code:
// src/app/close/page.tsx
'use client';

import { useEffect, useState, useCallback } from 'react';

import { Button } from '@/components/ui/button';

export default function PopupClosePage() {
  const [isClosing, setIsClosing] = useState(true);

  const handleClose = useCallback(() => {
    if (typeof window !== 'undefined') {
      try {
        window.close();
      } catch (err) {
        console.error(err);
        setIsClosing(false);
      }
    }
  }, []);

  useEffect(() => {
    // Attempt to close the window on load
    handleClose();
  }, [handleClose]);

  return isClosing ? (
    <></>
  ) : (
    <div className="flex items-center justify-center min-h-screen bg-gray-100">
      <div className="text-center">
        <p className="mb-4 text-lg">You can now close this window.</p>
        <Button onClick={handleClose}>Close</Button>
      </div>
    </div>
  );
}
Update the UI to handle the chat stream
So far, we have been streaming the chat messages using the Vercel AI SDK. Now, we will use the LangGraph SDK. This means the UI needs to be updated to handle the new chat stream structure.
Update the src/components/chat-window.tsx file to include the TokenVaultInterruptHandler component and handle the new chat stream:
//...
// remove: import { type Message } from 'ai';
// remove: import { useChat } from '@ai-sdk/react';
import { useQueryState } from 'nuqs';
import { useStream } from '@langchain/langgraph-sdk/react';
import { type Message } from '@langchain/langgraph-sdk';

import { TokenVaultInterruptHandler } from '@/components/TokenVaultInterruptHandler';

//... existing code
export function ChatWindow(props: {
  endpoint: string;
  emptyStateComponent: ReactNode;
  placeholder?: string;
  emoji?: string;
}) {
  const [threadId, setThreadId] = useQueryState('threadId');
  const [input, setInput] = useState('');
  const chat = useStream({
    apiUrl: props.endpoint,
    assistantId: 'agent',
    threadId,
    onThreadId: setThreadId,
    onError: (e: any) => {
      console.error('Error: ', e);
      toast.error(`Error while processing your request`, { description: e.message });
    },
  });

  function isChatLoading(): boolean {
    return chat.isLoading;
  }

  async function sendMessage(e: FormEvent<HTMLFormElement>) {
    e.preventDefault();
    if (isChatLoading()) return;
    chat.submit(
      { messages: [{ type: 'human', content: input }] },
      {
        optimisticValues: (prev) => ({
          messages: [...((prev?.messages as []) ?? []), { type: 'human', content: input, id: 'temp' }],
        }),
      },
    );
    setInput('');
  }

  return (
    <StickToBottom>
      <StickyToBottomContent
        className="absolute inset-0"
        contentClassName="py-8 px-2"
        content={
          chat.messages.length === 0 ? (
            <div>{props.emptyStateComponent}</div>
          ) : (
            <>
              <ChatMessages
                aiEmoji={props.emoji}
                messages={chat.messages}
                emptyStateComponent={props.emptyStateComponent}
              />
              <div className="flex flex-col max-w-[768px] mx-auto pb-12 w-full">
                <TokenVaultInterruptHandler interrupt={chat.interrupt} onFinish={() => chat.submit(null)} />
              </div>
            </>
          )
        }
        footer={
          <div className="sticky bottom-8 px-2">
            <ScrollToBottom className="absolute bottom-full left-1/2 -translate-x-1/2 mb-4" />
            <ChatInput
              value={input}
              onChange={(e) => setInput(e.target.value)}
              onSubmit={sendMessage}
              loading={isChatLoading()}
              placeholder={props.placeholder ?? 'What can I help you with?'}
            ></ChatInput>
          </div>
        }
      ></StickyToBottomContent>
    </StickToBottom>
  );
}
Next, update the src/components/chat-message-bubble.tsx file to work with the new chat stream:
// src/components/chat-message-bubble.tsx
import { type Message, type AIMessage } from '@langchain/langgraph-sdk';
import { Loader2, CheckCircle } from 'lucide-react';

import { cn } from '@/utils/cn';
import { MemoizedMarkdown } from './memoized-markdown';

// ... Component to display tool call information skipped for clarity

export function ChatMessageBubble(props: { message: Message; aiEmoji?: string; allMessages?: Message[] }) {
  const toolCalls = props.message.type === 'ai' ? props.message.tool_calls || [] : [];

  // Get message content as string
  const getMessageContent = (message: Message): string => {
    if (typeof message.content === 'string') {
      return message.content;
    }
    if (Array.isArray(message.content)) {
      return message.content
        .map(part => {
          if (typeof part === 'string') return part;
          if (typeof part === 'object' && 'text' in part) return part.text;
          return '';
        })
        .join('');
    }
    return '';
  };

  const content = getMessageContent(props.message);
  const hasContent = content.length > 0;

  // .. Tool call display related logic skipped for clarity

  if (!(['human', 'ai'].includes(props.message.type) && (hasContent || shouldShowToolCalls))) {
    return null;
  }

  return (
    <div
      className={cn(
        `rounded-[24px] max-w-[80%] mb-8 flex`,
        props.message.type === 'human' ? 'bg-secondary text-secondary-foreground px-4 py-2' : null,
        props.message.type === 'human' ? 'ml-auto' : 'mr-auto',
      )}
    >
      {props.message.type === 'ai' && (
        <div className="mr-4 mt-1 border bg-secondary -mt-2 rounded-full w-10 h-10 flex-shrink-0 flex items-center justify-center">
          {props.aiEmoji}
        </div>
      )}
      <div className="chat-message-bubble whitespace-pre-wrap flex flex-col prose dark:prose-invert max-w-none">
        { /* Tool call display related logic skipped for clarity */ }
        {hasContent && (
          <MemoizedMarkdown content={content} id={props.message.id ?? ''} />
        )}
      </div>
    </div>
  );
}
Other UI updates
Next, update src/app/page.tsx to pass the full URL:
// src/app/page.tsx

//... existing code
export default async function Home() {
  //... existing code
  return (
    <ChatWindow
      endpoint={`${process.env.APP_BASE_URL}/api/chat`}
      {/*... existing code */}
    />
  );
}
Update src/app/layout.tsx to use NuQS for the thread ID:
// src/app/layout.tsx

//... existing code
import { NuqsAdapter } from 'nuqs/adapters/next/app';

export default async function RootLayout({ children }: { children: React.ReactNode }) {
  const session = await auth0.getSession();

  return (
    <html lang="en" suppressHydrationWarning>
      {/* existing code */}
      <body className={publicSans.className}>
        <NuqsAdapter>
          <div className="bg-secondary grid grid-rows-[auto,1fr] h-[100dvh]">
            {/* existing code */}
          </div>
          <Toaster />
        </NuqsAdapter>
      </body>
    </html>
  );
}
Test the application
If you followed the previous post, you should have set up the application to use Auth0 and Auth0 Token Vault along with the Google Connection for Auth0. If not, please follow the prerequisites in our LangGraph quickstart guide to configure this.
Now, start the development server:
bun all:dev # or npm run all:dev
Open http://localhost:3000 with your browser and ask the agent something. You should see a streamed response.
You can find the full changelog for the above steps in this commit.
Checkpoint
At this point, you should be able to:
- ✓ Start both the Next.js and LangGraph servers
- ✓ See the assistant respond to queries
- ✓ Experience the new streaming architecture
- ✓ View conversation history persisted across reloads
Add tools to the assistant
Now that the migrated application is running, let's add more tools to the assistant.
Add Google Calendar tools
First, we need to get an access token for the Google Calendar API. We can get this using the Auth0 Token Vault feature.
First, update src/lib/auth0-ai.ts with the required scopes for Google Calendar.
// src/lib/auth0-ai.ts

// ... existing code
export const withCalendar = withConnection('google-oauth2', [
  'openid',
  'https://www.googleapis.com/auth/calendar.events',
]);
Next, create a new file src/lib/tools/google-calendar.ts and add the following code to create a custom tool that fetches calendar events for a given date.
// src/lib/tools/google-calendar.ts
import { tool } from '@langchain/core/tools';
import { endOfDay, formatISO, startOfDay } from 'date-fns';
import { GaxiosError } from 'gaxios';
import { google } from 'googleapis';
import { z } from 'zod';
import { TokenVaultError } from '@auth0/ai/interrupts';

import { getAccessToken } from '../auth0-ai';

export const getCalendarEventsTool = tool(
  async ({ date }) => {
    // Get the access token from Auth0 AI
    const accessToken = await getAccessToken();

    // Google SDK
    try {
      const calendar = google.calendar('v3');
      const auth = new google.auth.OAuth2();

      auth.setCredentials({
        access_token: accessToken,
      });

      // Get events for the entire day
      const response = await calendar.events.list({
        auth,
        calendarId: 'primary',
        timeMin: formatISO(startOfDay(date)),
        timeMax: formatISO(endOfDay(date)),
        singleEvents: true,
        orderBy: 'startTime',
        maxResults: 50,
      });

      const events = response.data.items || [];

      return {
        date: formatISO(date, { representation: 'date' }),
        eventsCount: events.length,
        events: events.map((event) => ({
          id: event.id,
          summary: event.summary || 'No title',
          description: event.description,
          startTime: event.start?.dateTime || event.start?.date,
          endTime: event.end?.dateTime || event.end?.date,
          location: event.location,
          attendees:
            event.attendees?.map((attendee) => ({
              email: attendee.email,
              name: attendee.displayName,
              responseStatus: attendee.responseStatus,
            })) || [],
          status: event.status,
          htmlLink: event.htmlLink,
        })),
      };
    } catch (error) {
      if (error instanceof GaxiosError) {
        if (error.status === 401) {
          throw new TokenVaultError(`Authorization required to access the Token Vault connection.`);
        }
      }

      throw error;
    }
  },
  {
    name: 'get_calendar_events',
    description: `Get calendar events for a given date from the user's Google Calendar`,
    schema: z.object({
      date: z.coerce.date(),
    }),
  },
);
Now, import the tool in src/lib/agent.ts.
// src/lib/agent.ts
import {
  // ... existing code
  withCalendar,
} from './auth0-ai';
import { getCalendarEventsTool } from './tools/google-calendar';

// ... existing code

const tools = [
  // ... existing code
  withCalendar(getCalendarEventsTool),
];
// ... existing code
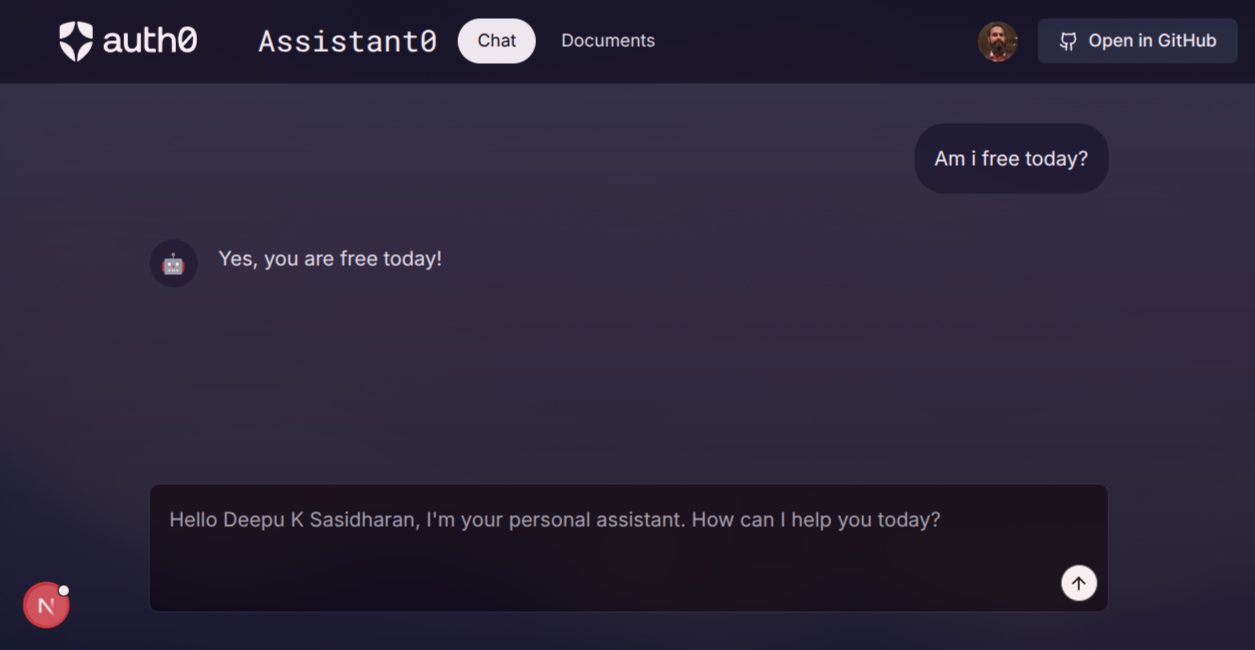
We are all set! Now, try asking the assistant to check for events on your calendar. For example, What is my schedule today?. You should see the response in the UI.
Checkpoint
At this point, you should be able to:
- ✓ Ask about your calendar schedule
- ✓ See step-up authorization prompts if not yet connected
- ✓ Grant Google Calendar permissions on-demand
- ✓ Receive calendar event information
Add user info tool
Finally, let’s see how you can use a tool that calls your own APIs (APIs that you can authenticate using Auth0 credentials). This can be any API you've configured in Auth0, including the management APIs provided by Auth0. For demo purposes, we will use Auth0's /userinfo endpoint, as it's already available in your Auth0 tenant.
First, create a new file src/lib/tools/user-info.ts and add the following code. The tool returns the user profile of the currently logged-in user by calling the /userinfo endpoint.
// src/lib/tools/user-info.ts
import { tool } from '@langchain/core/tools';

export const getUserInfoTool = tool(
  async (_input, config?) => {
    // Access credentials from config
    const accessToken = config?.configurable?.langgraph_auth_user?.getRawAccessToken();
    if (!accessToken) {
      return 'There is no user logged in.';
    }

    const response = await fetch(`https://${process.env.AUTH0_DOMAIN}/userinfo`, {
      headers: {
        Authorization: `Bearer ${accessToken}`,
      },
    });

    if (response.ok) {
      return { result: await response.json() };
    }

    return "I couldn't verify your identity";
  },
  {
    name: 'get_user_info',
    description: 'Get information about the current logged in user.',
  },
);
Note: If you are calling another API with a different audience and scope, you can get an access token for that audience using the auth0.getAccessToken function and pass it as another header param to LangGraph in the src/app/api/chat/[..._path]/route.ts file. Then you can verify and make that token available to tools in the src/lib/auth.ts file.
const { token } = await auth0.getAccessToken({
  audience: 'your-api-audience',
  scope: 'required_scopes_seperated_by_space',
});
Update the /src/lib/agent.ts file to add the tool to the agent.
// src/lib/agent.ts
//...
import { getUserInfoTool } from './tools/user-info';

//... existing code

const tools = [
  //... existing tools
  getUserInfoTool,
];

//... existing code
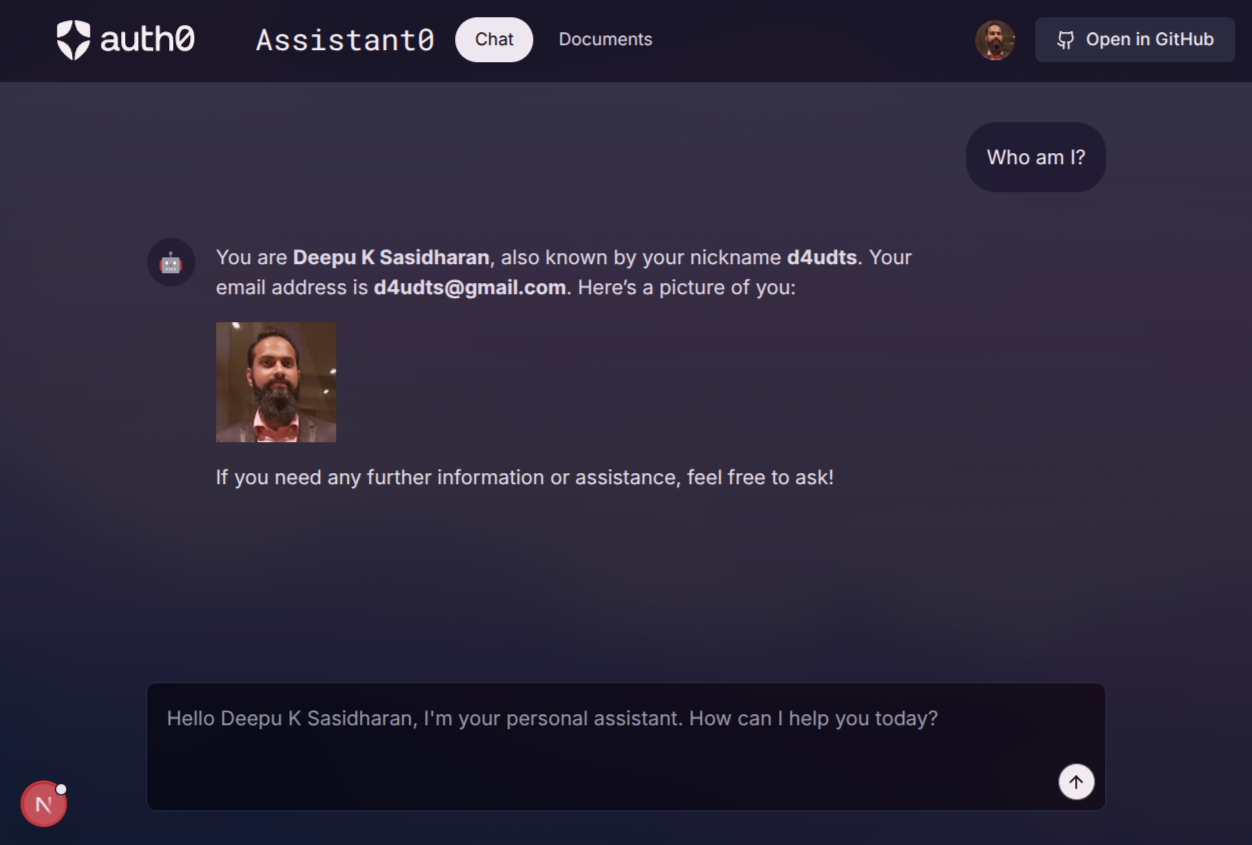
Now, you can ask questions like "who am I?" to trigger the tool call and test whether it successfully retrieves information about the logged-in user.
Checkpoint
At this point, you should be able to:
- ✓ Ask the agent about your identity
- ✓ See your Auth0 profile information
- ✓ Understand how to call your own APIs from tools
You can find the full changelog for the above steps in this commit.
What You've Accomplished
Excellent work! You've successfully built a production-ready AI personal assistant that:
- ✅ Uses LangGraph Server for scalable architecture
- ✅ Implements step-up authorization for better UX
- ✅ Searches the web and manages Gmail
- ✅ Integrates with Google Calendar
- ✅ Calls your own APIs securely
- ✅ Persists conversation history
Looking ahead
While this tutorial is complete, you can extend the assistant further by adding:
- Google Drive integration for document management
- Slack integration for team communication
- GitHub integration for repository management
- Custom business logic specific to your use case
Check the GitHub repository for additional examples and updates.
Learn More
This tutorial is part of a series on tool-calling agents with Auth0 for AI Agents.
Sign up for the Auth0 for AI Agents.
We're working on more content and sample apps in collaboration with amazing GenAI frameworks like LlamaIndex, LangChain, CrewAI, Vercel AI, and GenKit.
About the author

Deepu K Sasidharan
Principal Developer Advocate