

The goal of this tutorial is to show you how to secure an Electron application with OpenID Connect and OAuth 2.0. You will learn how to authenticate users and make API requests to protected endpoints from your Electron app. For this purpose, you'll use a Node.js Express API with a single endpoint to test the validity of your user authentication and authorization system.
You don't need to be an OpenID Connect and OAuth expert to follow this tutorial along because the instructions will guide you through the whole process. In fact, securing your application is easier when you use an Identity-as-a-Service (IDaaS) platform that adheres to those standards, such as Auth0.
However, if you want to learn in-depth about OpenID Connect, check out the free ebook!
Learn about the de facto standard for handling authentication in the modern world.
Download the free ebook
Register an Electron Application with Auth0
To use Auth0 with Electron, you need to register your Electron application with Auth0 and set up a communication bridge between them. If you don't have an Auth0 account yet, you can sign up for a free one right now.
To start, open the Applications section of the Auth0 Dashboard and click on Create Application.
On the dialog shown:
- Provide a name for your application, such as "Auth0 Electron Demo".
- Choose Native as the application type.
- Click on the Create button.
Once done, the Auth0 application page loads up. From there, click on the Settings tab to configure Auth0 to communicate with your Electron application.
Search for the Allowed Callback URLs field and put the following URL as its value:
http://localhost/callback
You are probably wondering what this URL is and why you need it. When using Auth0 for user authentication, you don't need to build login or sign-up forms. When your users click a login button in your user interface, your Electron app will redirect them to the Auth0 Universal Login page, where Auth0 will carry out the authentication process.
Once done, Auth0 will invoke your allowed callback URL to take your users back to your application and inform it about the outcome: was authentication successful or not? For security reasons, Auth0 will only call URLs registered in the Allowed Callback URLs field. Despite the URL structure, you don't need to have an actual server listening to it; you just need to have your Electron application listening to it, as you will learn later on.
That's all the configuration you need to register your Electron application. Click the Save Changes button at the bottom of the "Settings" page to complete the process. Leave this page open as you will need to copy a few values from it soon to integrate Auth0 into your app.
Start an Electron Project
Now that you have configured Auth0, you can focus on learning how to secure an Electron application. You will build a simple Electron app that uses an Authorization Server (Auth0) to authenticate users and authorize the app to access protected data from a Resource Server (an external API).
So, open a new terminal window and execute the following commands to create a directory to host the Electron app and initialize an npm project within it:
# create a directory for your Electron app
mkdir electron-openid-oauth

# move into it
cd electron-openid-oauth

# init npm with default properties
npm init -y
After that, open the package.json file and replace its content with the following:
{
  "name": "electron-openid-oauth-2",
  "version": "1.0.0",
  "description": "",
  "main": "main.js",
  "scripts": {
    "start": "electron ./"
  },
  "keywords": [],
  "author": "",
  "license": "ISC"
}
Install Dependencies
Your app will have only three dependencies:
axios: a promise-based HTTP client for the browser and Node.js.electron: the Electron framework itself so you can run your application.jwt-decode: a library that enables your application to decode a JSON Web Token (JWT).
To install these dependencies, issue the following commands:
# you need electron as a dev dependency
npm i -D electron

# and the other two as normal dependencies
npm i axios jwt-decode
You will use these libraries in the next sections to build your Electron app.
Note that Electron is installed as a development dependency. This is the preferred method to install Electron as you don't need the package as a dependency, but only for development and building of the application.
Manage Different Environments in Electron
In this tutorial, you won't make your application run in other environments. However, it is always a good idea to avoid hard-coding configuration variables so you don't end up pushing them to your version control system, which can expose some credentials or make the lives of contributors harder.
So, to define your environment variables, create a file called env-variables.json under the root project directory and add the following object to it:
{
  "auth0Domain": "<YOUR_AUTH0_DOMAIN>",
  "clientId": "<YOUR_AUTH0_CLIENT_ID>",
  "apiIdentifier": "<API_IDENTIFIER>"
}
auth0Domain and clientId correspond to the Domain and Client ID values present in the "Settings" of the Auth0 Application that you created to register your Electron app.
You will also use apiIdentifier to access data from an API protected by Auth0. You will define this variable later on.
Remember to exclude this file from your versioning system. For example, if you are using Git, add the name env-variables.json into .gitignore.
Persist Data in Electron
As the outcome of successful user authentication, Auth0 can send three types of tokens to your Electron app: an access token, an ID token, and a refresh token. Then, when your users close your app and reopen it (or when the access token or the ID token expires), your app can use the refresh token to get new versions of the other two without asking your users to log in again.
As such, you need to provide your Electron app a way to securely store or persist the refresh tokens on disk; otherwise, your app won't have access to them when your users close and reopen it. To store data in Electron, you can use the keytar Node.js module. As described by the official documentation, keytar is:
"A native Node module to get, add, replace, and delete passwords in system's Keychain. On macOS, the passwords are managed by the Keychain, on Linux, they are managed by the Secret Service API/libsecret, and on Windows, they are managed by Credential Vault." — https://github.com/atom/node-keytar
To install keytar, issue the following command on the terminal:
npm i keytar
You will see soon how it will be used.
“Learn how to secure your @electronjs applications with @openid Connect and OAuth 2.0”
Tweet This
Authenticate Users in Electron
Your next step is to create a service that will be responsible for the authentication process. Mainly, this authentication service will provide the following functions:
getAuthenticationURL: returns the complete URL of the Authorization Server that users have to visit to authenticate.refreshTokens: verifies if there is a Refresh Token available to the current user and, if so, exchange it for a new access token.loadTokens: parses the URL called back after the authentication process completes to get thecodequery parameter that you can use to fetch different tokens (an access token, the refresh token, and an ID token).
So, create a directory called services under the root project directory and populate it with a file called auth-service.js that has the following code:
// services/auth-service.js

const jwtDecode = require('jwt-decode');
const axios = require('axios');
const url = require('url');
const envVariables = require('../env-variables');
const keytar = require('keytar');
const os = require('os');

const {apiIdentifier, auth0Domain, clientId} = envVariables;

const redirectUri = 'http://localhost/callback';

const keytarService = 'electron-openid-oauth';
const keytarAccount = os.userInfo().username;

let accessToken = null;
let profile = null;
let refreshToken = null;

function getAccessToken() {
  return accessToken;
}

function getProfile() {
  return profile;
}

function getAuthenticationURL() {
  return (
    "https://" +
    auth0Domain +
    "/authorize?" +
    "scope=openid profile offline_access&" +
    "response_type=code&" +
    "client_id=" +
    clientId +
    "&" +
    "redirect_uri=" +
    redirectUri
  );
}

async function refreshTokens() {
  const refreshToken = await keytar.getPassword(keytarService, keytarAccount);

  if (refreshToken) {
    const refreshOptions = {
      method: 'POST',
      url: `https://${auth0Domain}/oauth/token`,
      headers: {'content-type': 'application/json'},
      data: {
        grant_type: 'refresh_token',
        client_id: clientId,
        refresh_token: refreshToken,
      }
    };

    try {
      const response = await axios(refreshOptions);

      accessToken = response.data.access_token;
      profile = jwtDecode(response.data.id_token);
    } catch (error) {
      await logout();

      throw error;
    }
  } else {
    throw new Error("No available refresh token.");
  }
}

async function loadTokens(callbackURL) {
  const urlParts = url.parse(callbackURL, true);
  const query = urlParts.query;

  const exchangeOptions = {
    'grant_type': 'authorization_code',
    'client_id': clientId,
    'code': query.code,
    'redirect_uri': redirectUri,
  };

  const options = {
    method: 'POST',
    url: `https://${auth0Domain}/oauth/token`,
    headers: {
      'content-type': 'application/json'
    },
    data: JSON.stringify(exchangeOptions),
  };

  try {
    const response = await axios(options);

    accessToken = response.data.access_token;
    profile = jwtDecode(response.data.id_token);
    refreshToken = response.data.refresh_token;

    if (refreshToken) {
      await keytar.setPassword(keytarService, keytarAccount, refreshToken);
    }
  } catch (error) {
    await logout();

    throw error;
  }
}

async function logout() {
  await keytar.deletePassword(keytarService, keytarAccount);
  accessToken = null;
  profile = null;
  refreshToken = null;
}

function getLogOutUrl() {
  return `https://${auth0Domain}/v2/logout`;
}

module.exports = {
  getAccessToken,
  getAuthenticationURL,
  getLogOutUrl,
  getProfile,
  loadTokens,
  logout,
  refreshTokens,
};
At the beginning of this file, you find the definition of the following constants:
- The authentication service uses
apiIdentifier,auth0Domain, andclientIdto interact with the Auth0 Authorization Server. redirectUridefines what URL Auth0 will call after finishing the authentication process.keytarServiceandkeytarAccountdefine whatkeytaruses to persist the refresh token on the disk or to retrieve it.
Among the functions mentioned earlier, you have these other functions in this service:
getAccessToken()returns the currentaccessToken.getLogOutUrl()returns the URL of the/v2/logoutendpoint from your Auth0 tenant, which you can use to clear user sessions in the Auth0 layer.getProfile()returns an object with the user profile, which this service extracts from the ID Token sent by Auth0.logout()clears the local session by removing the refresh token from the disk and nullifying theaccessToken,profile, andrefreshTokenvariables.
Now, as your users will need an interface to log in or sign up to your application, you need to create an instance of BrowserWindow in the Electron main process. This window will render the Auth0 Universal Login page for your users.
Remember that Electron has two types of processes: the main process and the renderer process. The main process is unique to each application and is the only process that can call the native Electron API. The renderer process is responsible for running each web page in the application.
To manage this window, create a new directory called main under the root project directory, and add a file called auth-process.js to it with the following code:
// main/auth-process.js

const { BrowserWindow } = require('electron');
const authService = require('../services/auth-service');
const createAppWindow = require('../main/app-process');

let win = null;

function createAuthWindow() {
  destroyAuthWin();

  win = new BrowserWindow({
    width: 1000,
    height: 600,
    webPreferences: {
      nodeIntegration: false,
      enableRemoteModule: false
    }
  });

  win.loadURL(authService.getAuthenticationURL());

  const {session: {webRequest}} = win.webContents;

  const filter = {
    urls: [
      'http://localhost/callback*'
    ]
  };

  webRequest.onBeforeRequest(filter, async ({url}) => {
    await authService.loadTokens(url);
    createAppWindow();
    return destroyAuthWin();
  });

  win.on('authenticated', () => {
    destroyAuthWin();
  });

  win.on('closed', () => {
    win = null;
  });
}

function destroyAuthWin() {
  if (!win) return;
  win.close();
  win = null;
}

function createLogoutWindow() {
  const logoutWindow = new BrowserWindow({
    show: false,
  });

  logoutWindow.loadURL(authService.getLogOutUrl());

  logoutWindow.on('ready-to-show', async () => {
    await authService.logout();
    logoutWindow.close();
  });
}

module.exports = {
  createAuthWindow,
  createLogoutWindow,
};
The functionality that this module exposes is quite simple. First, it defines and exposes a function called createAuthWindow to create an instance of BrowserWindow that loads the login page using the authorization server URL. Second, it defines a function called destroyAuthWin that your app can use to close the authentication window instance when it's no longer needed.
You pass the BrowserWindow constructor a few parameters to define the size and level of integration of the window. The webPreferences key specifies that the process associated with the window doesn't require access to local resources (nodeIntegration: false), nor does it need to communicate with the Main process (enableRemoteModule: false). These two settings reduce your risk of loading remote content that could create security issues in your Electron application.
Go over the Electron Checklist: Security Recommendations for a deep dive into how to improve the security of your applications.
Finally, it is important to notice that Auth0 will call the http://localhost/callback URL right after it authenticates your users. As such, you are defining a listener using the onBeforeRequest() function that Electron will trigger when Auth0 calls the callback URL. The goal of this listener is to load users' tokens (authService.loadTokens(url)) to then create the main window of your app (createAppWindow()) and destroy the current one (destroyAuthWin()).
Create the Electron App Main Process
You now need to create a module that renders the base window of your Electron application. This module will handle the Electron renderer process, which is responsible for showing a web page with your app.
To start, create a file called app-process.js under the main directory and add the following code to it:
// main/app-process.js

const { BrowserWindow } = require("electron");
const path = require("path");

function createAppWindow() {
  let win = new BrowserWindow({
    width: 1000,
    height: 600,
    webPreferences: {
      preload: path.join(__dirname, "preload.js"),
    }
  });

  win.loadFile('./renderers/home.html');

  win.on('closed', () => {
    win = null;
  });
}

module.exports = createAppWindow;
As you can see, this module loads an HTML template, ./renderers/home.html, that you'll create soon. The app window is what your authenticated users will see when Auth0 brings them back to your application.
New projects with Electron will enable Context Isolation by default. With this feature enabled, you ensure a clear separation between the renderer and the main process.
Any logic triggered by the renderer process that requires interacting with the main process will make use of the contextBridge API and the preload script.
For this particular application you will define three cross-process functions, and in order to do that, create a new file preload.js with the following content:
// main/preload.js

const { contextBridge, ipcRenderer } = require("electron");

// API Definition
const electronAPI = {
  getProfile: () => ipcRenderer.invoke('auth:get-profile'),
  logOut: () => ipcRenderer.send('auth:log-out'),
  getPrivateData: () => ipcRenderer.invoke('api:get-private-data'),
};

// Register the API with the contextBridge
process.once("loaded", () => {
  contextBridge.exposeInMainWorld('electronAPI', electronAPI);
});
There are two parts to our preload script: in the first, you defined an API, electronAPI, that allows getting information about the user, logging out, and calling the private API endpoint.
The code is simple and makes use of IPC (inter-process communication) to trigger events that will be captured and executed by our main process.
Our example makes use of two types of communications:
ipcRenderer.invoke: sends a message to the channel and expects a promise which is then returned to the originalinvokecall (two-way communication).ipcRenderer.send: submits a message to the channel, and it is unaware of whether the execution completes and its result (one-way communication).
The second part registers the API to the context bridge, which is available in the renderer process as window.electronAPI.
You'll see these three integrations in action after you create a JavaScript module, home.js, to support the rendering of the home.html template and connect the user events to their corresponding actions.
Before you complete the main process by creating the main window and events management, it is necessary to create a new module to handle all the APIs calls, in this case, the call to the private endpoint.
Create an api-service.js file in the services folder with the following content:
// services/api-service.js

const axios = require('axios');
const authService = require('./auth-service');

async function getPrivateData() {
  const result = await axios.get('http://localhost:3000/private', {
    headers: {
      'Authorization': `Bearer ${authService.getAccessToken()}`,
    },
  });
  return result.data;
}

module.exports = {
  getPrivateData,
}
For now, the API service is quite simple, containing only one method which triggers an HTTP call to the API and passes the Bearer token in the headers to perform the authentication.
Lastly, you need a module that orchestrates the communication between the main and the renderer processes. To define this module, create a file called main.js under the root project directory and add the following code to it:
// main.js

const { app, ipcMain, BrowserWindow } = require('electron');

const { createAuthWindow, createLogoutWindow } = require('./main/auth-process');
const createAppWindow = require('./main/app-process');
const authService = require('./services/auth-service');
const apiService = require('./services/api-service');

async function showWindow() {
  try {
    await authService.refreshTokens();
    createAppWindow();
  } catch (err) {
    createAuthWindow();
  }
}

// This method will be called when Electron has finished
// initialization and is ready to create browser windows.
// Some APIs can only be used after this event occurs.
app.on('ready', () => {
  // Handle IPC messages from the renderer process.
  ipcMain.handle('auth:get-profile', authService.getProfile);
  ipcMain.handle('api:get-private-data', apiService.getPrivateData);
  ipcMain.on('auth:log-out', () => {
    BrowserWindow.getAllWindows().forEach(window => window.close());
    createLogoutWindow();
  });

  showWindow();
});

// Quit when all windows are closed.
app.on('window-all-closed', () => {
  app.quit();
});
There are three key tasks that this module performs:
It defines a
showWindow()function to get new tokens from the authentication server using a refresh token, if present. Upon success, the function loads the Electron app (createAppWindow). Otherwise, it loads the login page (createAuthWindow).You define an event handler for the
readyevent that Electron emits after finishing its initialization process. When the event takes place, you execute theshowWindow()function to display the proper window depending on the user's authentication status.It captures and handles the different channel events, in our case, related to the three API functions defined in
electronAPI.
That's all the code you need to carry out Electron's main and renderer process.
Create the Electron App Renderer Process
To complete your Electron application, you need to define the home page for your app.
First, create a directory called renderers under the root project directory and create a home.html file inside it with the following code:
<!-- renderers/home.html -->
<!DOCTYPE html>
<html lang="en">
  <head>
    <meta charset="UTF-8" />
    <meta name="viewport" content="width=device-width, initial-scale=1.0" />
    <meta http-equiv="X-UA-Compatible" content="ie=edge" />
    <meta http-equiv="Content-Security-Policy" content="script-src 'self'" />
    <title>Electron App</title>
    <link
      rel="stylesheet"
      href="https://stackpath.bootstrapcdn.com/bootstrap/4.1.3/css/bootstrap.min.css"
      integrity="sha384-MCw98/SFnGE8fJT3GXwEOngsV7Zt27NXFoaoApmYm81iuXoPkFOJwJ8ERdknLPMO"
      crossorigin="anonymous"
    />
    <link rel="stylesheet" href="home.css" />
  </head>

  <body>
    <nav class="navbar fixed-top navbar-expand-lg navbar-dark bg-dark">
      <div class="profile">
        <div><a class="navbar-brand" href="#">Electron App</a></div>
        <img id="picture" />
        <span id="name"></span>
        <button id="logout" class="btn">Logout</button>
      </div>
    </nav>
    <div class="container-fluid">
      <div class="row">
        <div class="col-sm">
          <h1>Electron App</h1>
          <p>
            This Electron application is secured with OpenID Connect and OAuth
            2.0.
          </p>
        </div>
      </div>
      <div class="row">
        <div class="col-sm">
          <div id="success" class="alert alert-success"></div>
          <div id="message" class="jumbotron"></div>
          <button id="secured-request" class="btn btn-primary">
            Get Private Message
          </button>
        </div>
      </div>
    </div>
  </body>

  <script src="home.js"></script>
</html>
This web page defines a simple user interface that you style using Bootstrap. The UI includes:
A navigation bar (the
nav.navbarelement) that shows the name and profile picture of the user along with a logout button.A page title (
h1) that displays Electron App.A paragraph that mentions that this app is secured with OpenID Connect and OAuth 2.0.
A block styled with the
alert-successclass that shows up if the user is successfully authenticated.A block styled with the
jumbotronclass that shows data fetched from an external API and a button styled with thebtn-primaryclass to trigger that API call.A
scripttag that loads ahome.jsfile to add interactivity to the page.
Create the home.js file inside the renderers directory and add the following code to it:
// renderers/home.js

addEventListener('load',async  () =>{
  const profile = await window.electronAPI.getProfile();
  document.getElementById('picture').src = profile.picture;
  document.getElementById('name').innerText = profile.name;
  document.getElementById('success').innerText = 'You successfully used OpenID Connect and OAuth 2.0 to authenticate.';
});

document.getElementById('logout').onclick = () => {
  window.electronAPI.logOut();
};

document.getElementById('secured-request').onclick = async () => {
  try {
    const response = await window.electronAPI.getPrivateData();
    const messageJumbotron = document.getElementById('message');
    messageJumbotron.innerText = response;
    messageJumbotron.style.display = 'block';
  } catch(error) {
    console.error('Error connecting to te API: ' + error);
  }
};
This JavaScript module is responsible for loading the logged-in user profile when the page loads, as well as registering handlers for the onclick events of the logout and secured-request buttons.
While working on the renderer process you have direct access to the electronAPI defined earlier. It is exposed under the window object.
So to retrieve the user information simply do:
window.electronAPI.getProfile()
Similarly, for logging out:
window.electronAPI.logOut()
and finally, to call our private endpoint (http://localhost:3000/private):
window.electronAPI.getPrivateData()
In a nutshell, the API is protected using Auth0, and access to its /private endpoint requires an access token. As such, the request you are making with axios must contain the access token retrieved in the authentication process. Otherwise, you will get an HTTP 401 Unauthorized response.
But how exactly does it all happens? Take a look at the following diagram:
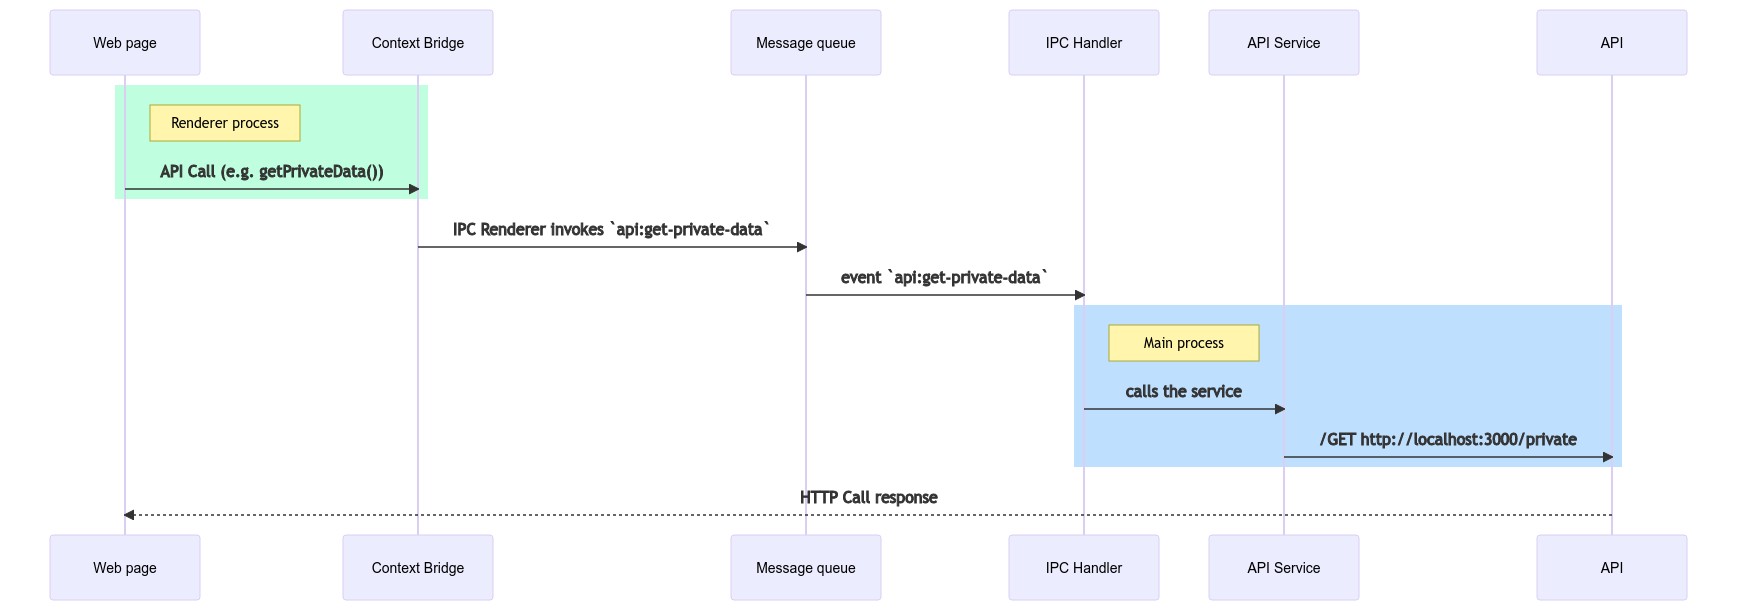
When the user presses the "Get Private Message" button the renderer process uses the exposed electronAPI to fire a two-way IPC call api:get-private-data.
The main process on the other side is listening to IPC events, and when it detects an event for the channel api:get-private-data it will make the API call and awaits its response.
In a one-way communication that would be the end of it. Since we established a two-way communication, the response from the API is queued back to the renderer process and captured automatically by the event bridge. Then it is returned to the app where the result is visually presented to the user.
Note: You can always use the comments area down below to ask questions when something is not clear.
Before moving on to set up the demo API, create a home.css file under the renderers directory to style the home window. Add the following CSS code to it:
/* renderers/home.css */

body {
  padding-top: 70px;
  padding-bottom: 30px;
}

div.profile {
  display: grid;
  grid-template-columns: 1fr auto auto auto;
  align-items: start;
  width: 100%;
}

div.profile span {
  display: inline-block;
  align-self: center;
  color: #ccc;
  margin-left: 10px;
  margin-right: 25px;
}

div.profile img {
  width: 30px;
  border-radius: 50%;
  align-self: center;
}

div#message {
  display: none;
}
Done! You can now run your Electron application to test its enterprise-grade user authentication. Execute the following command:
npm start
If you run into an error saying "Error: Module did not self-register", you will have to install electron-rebuild to rebuild native Node.js modules against the version of Node.js that your Electron project is using.
If that's the case, start by installing the package:
npm install --save-dev electron-rebuild
Once the package is installed, run it like so:
$(npm bin)/electron-rebuild
If you are using Windows, you need to run electron-rebuild like this:
.\node_modules.bin\electron-rebuild.cmd
From now on, whenever you install a new npm package, you need to re-run electron-rebuild.
As this is the first time you are running your application, you will see the Auth0 Universal Login page:
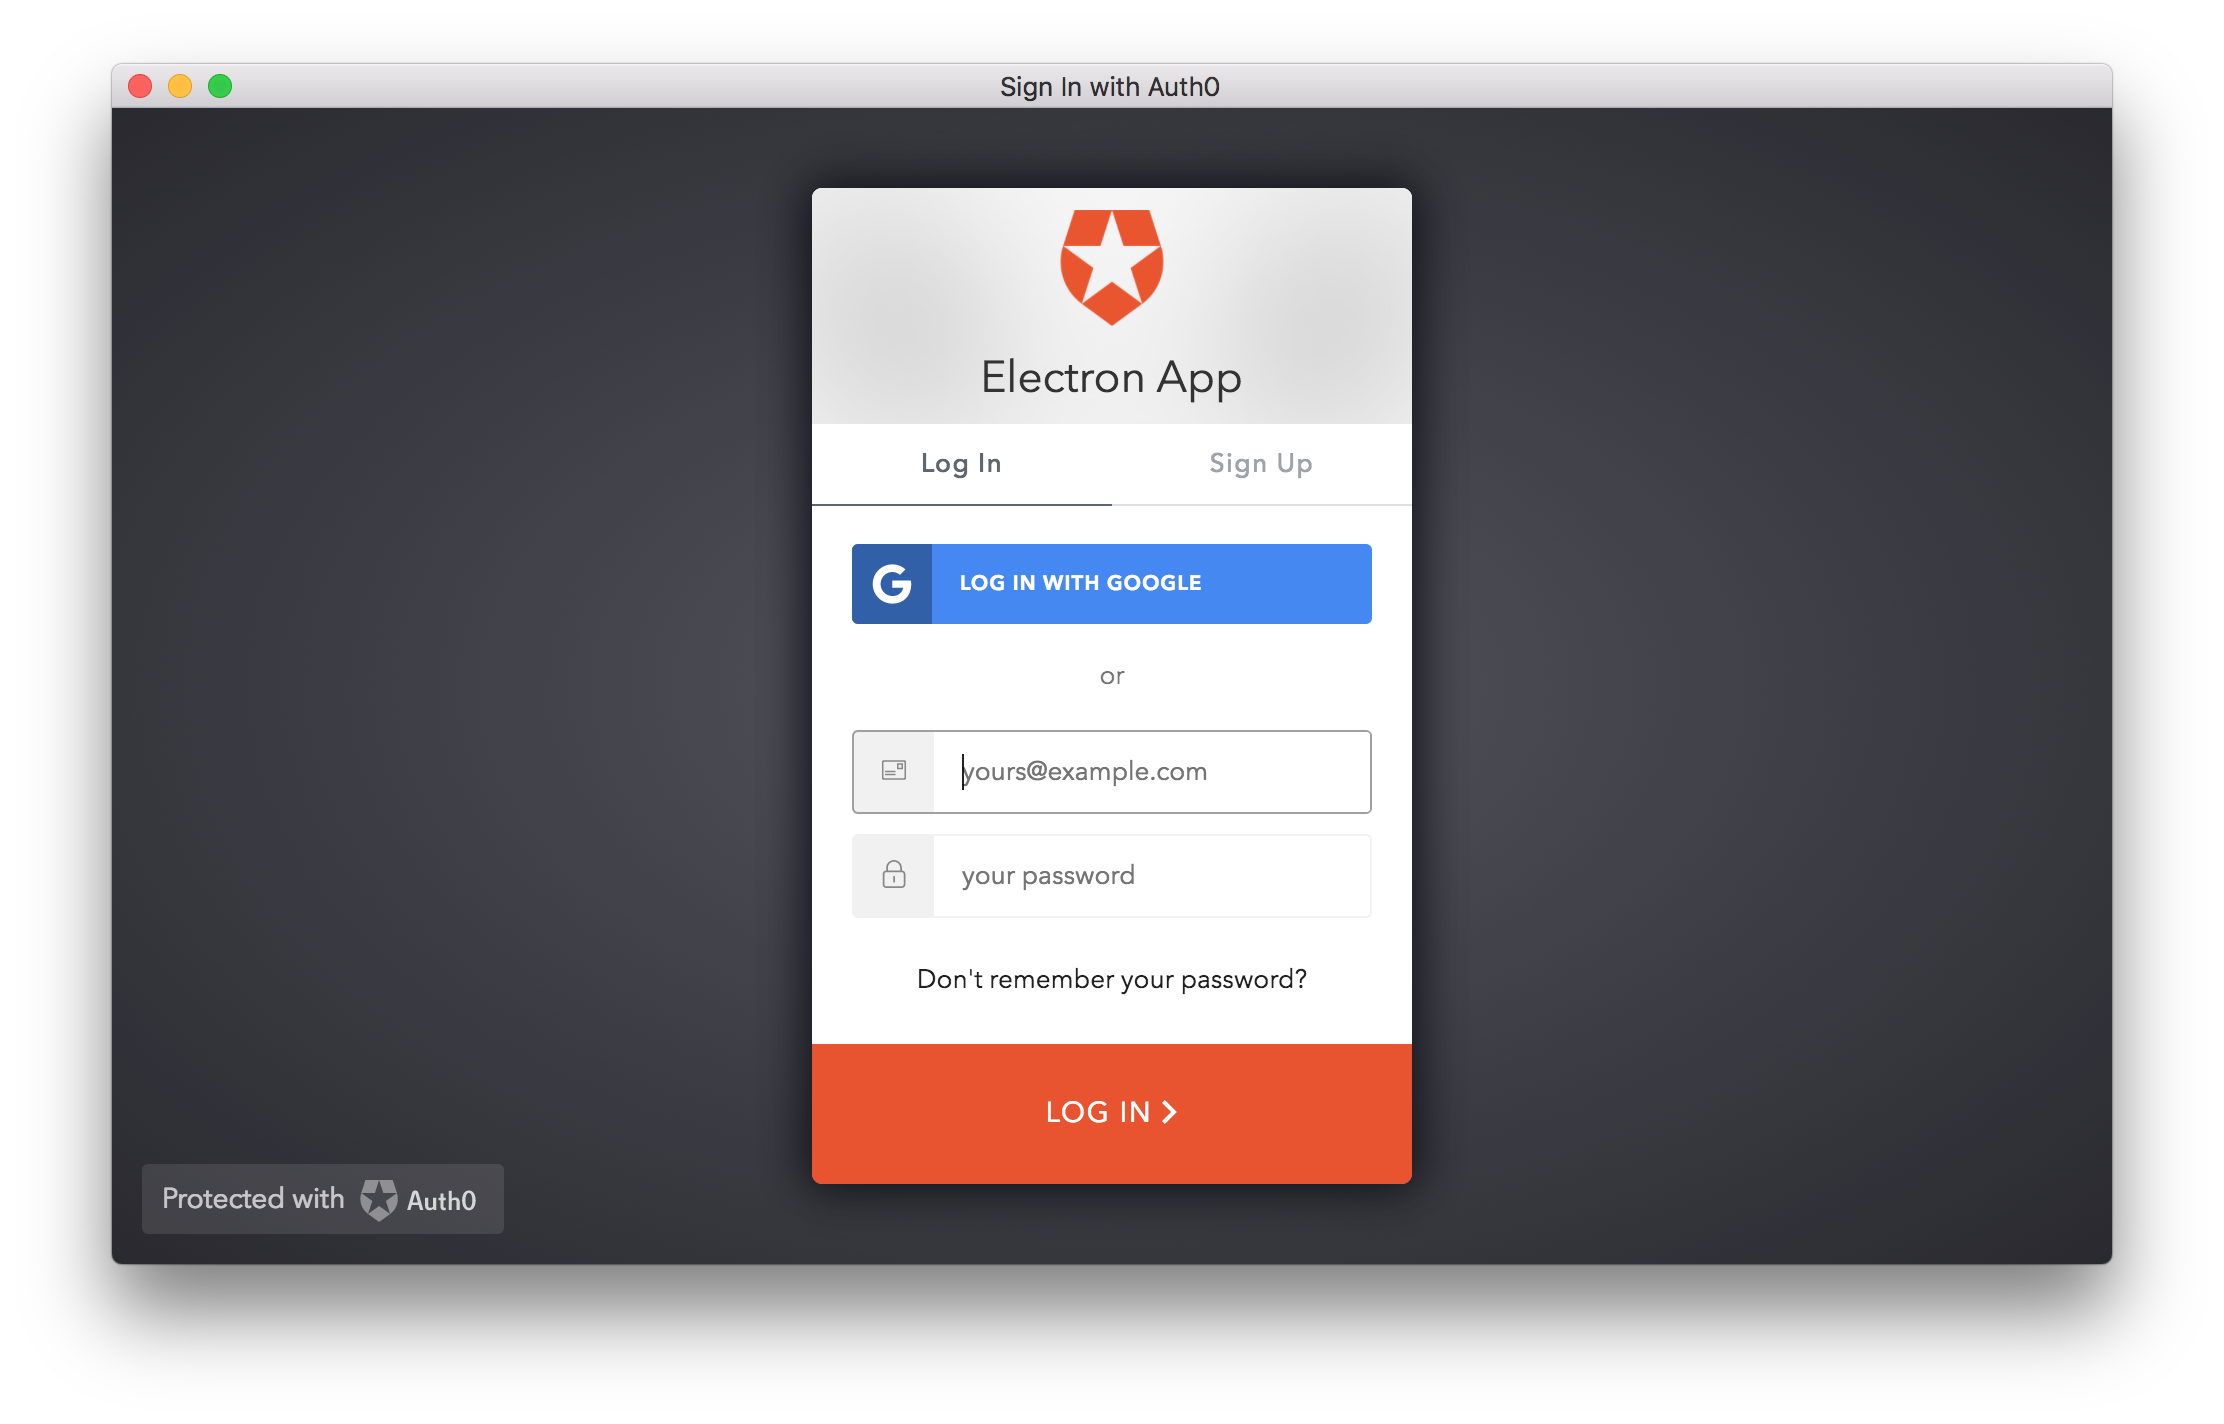
So, authenticate by using the method of your choice and authorize the app to access your profile data in the Consent dialog that will pop up immediately afterward. The Consent dialog will appear only the first time you access your app.
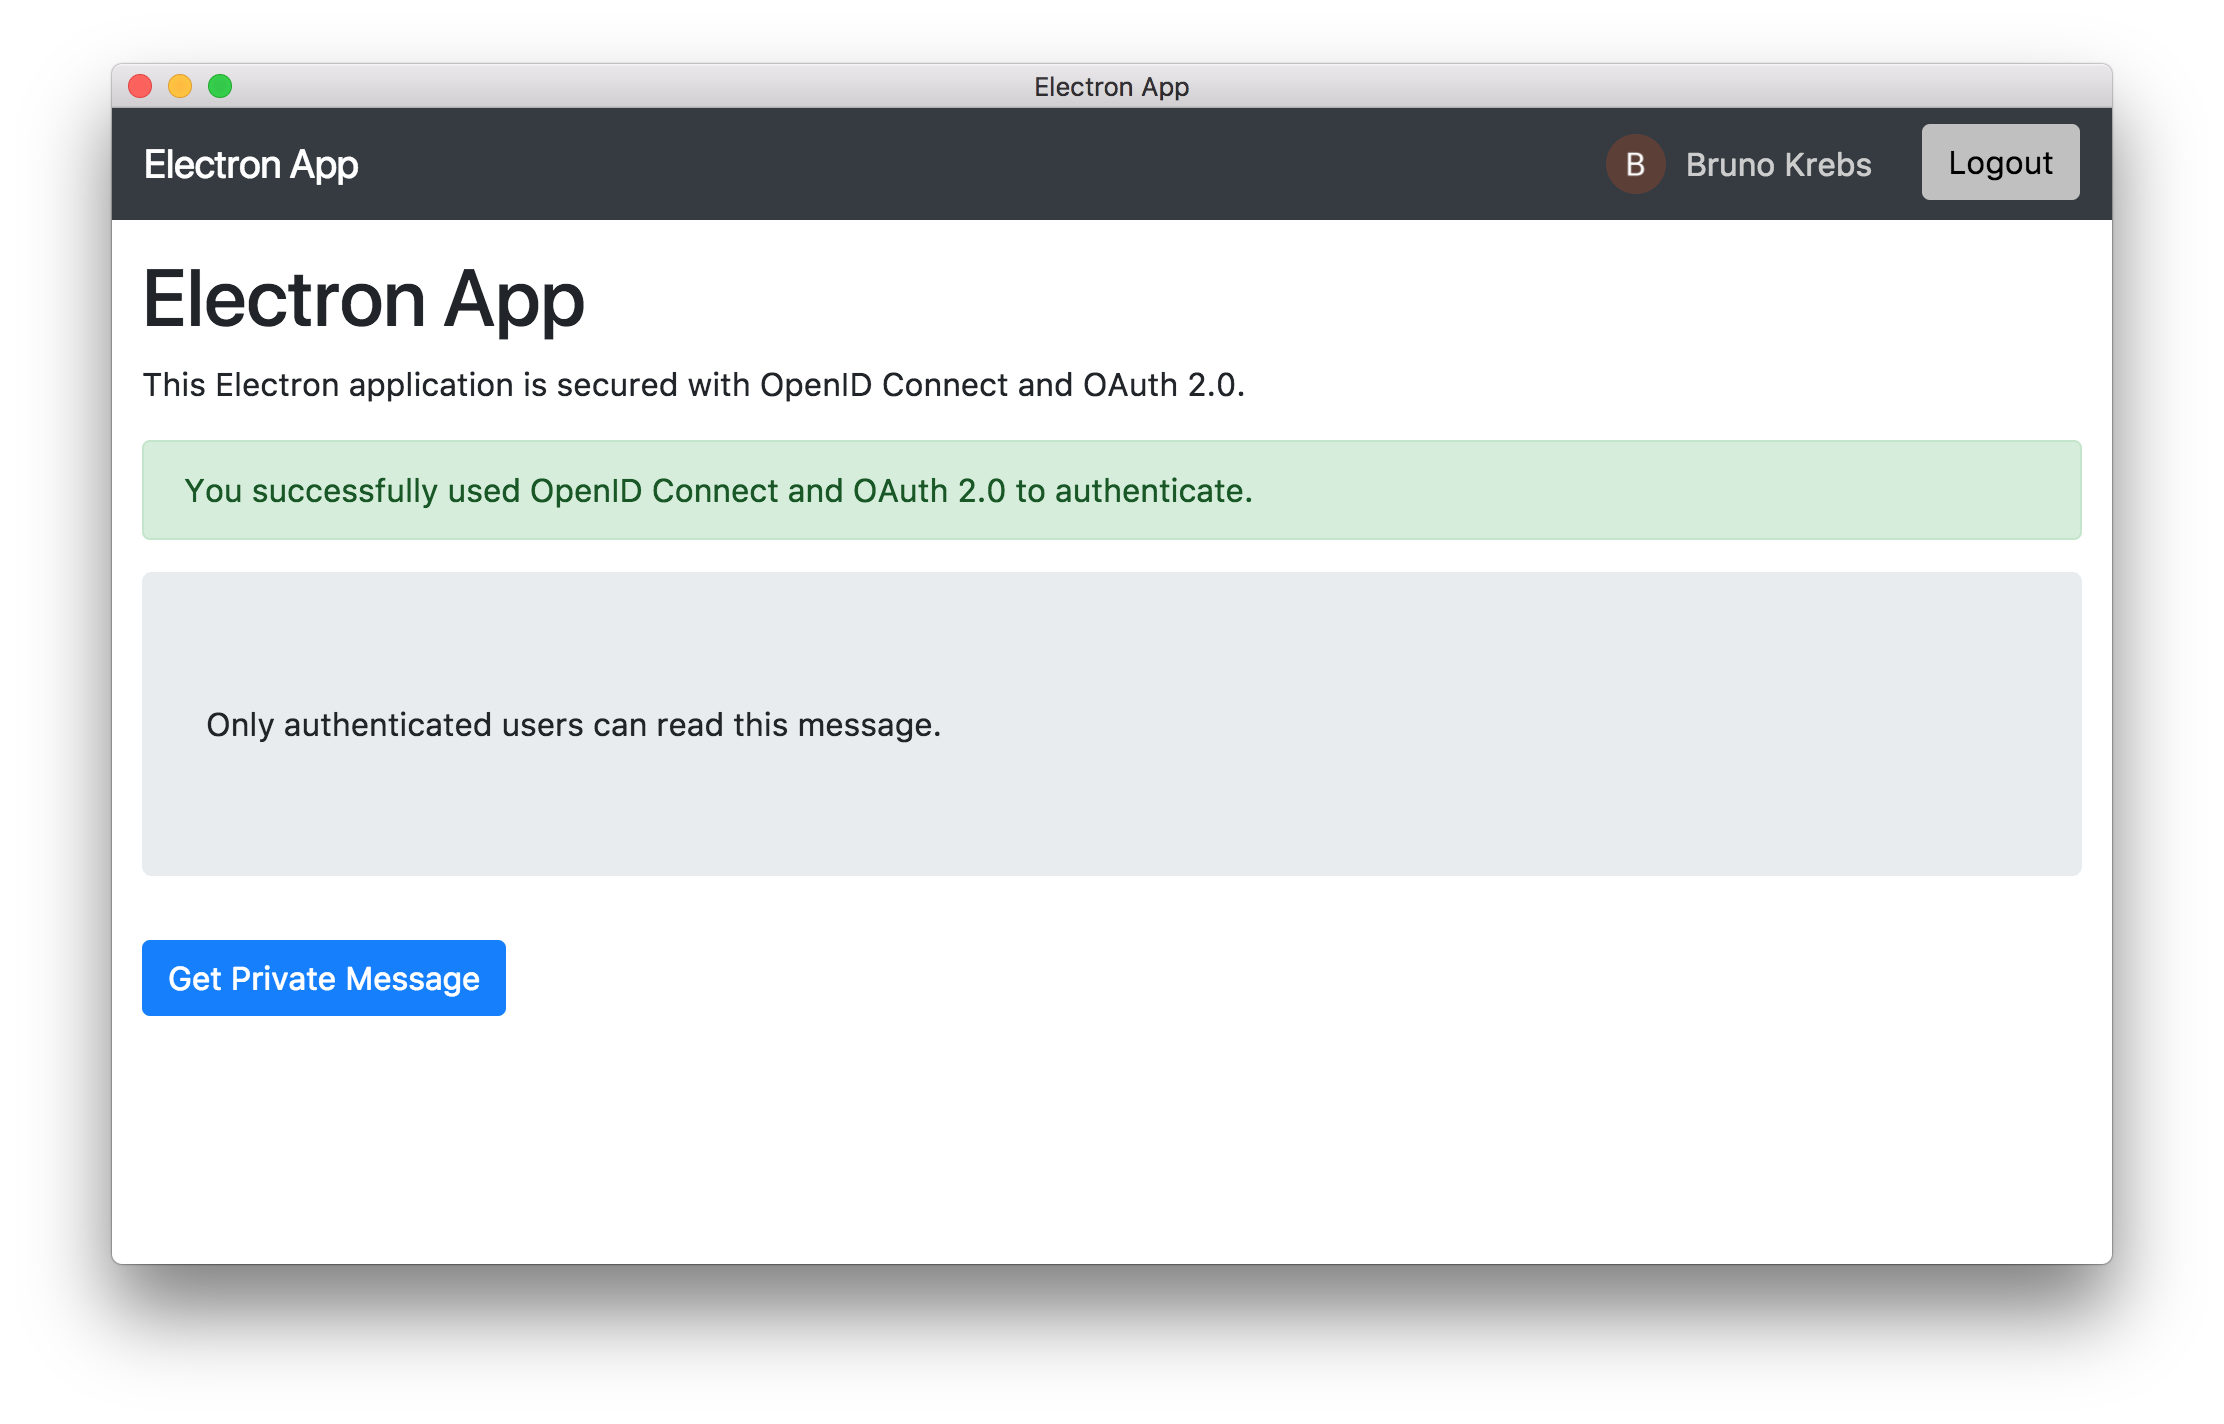
After authenticating, your Electron application shows you the home window, as seen below:
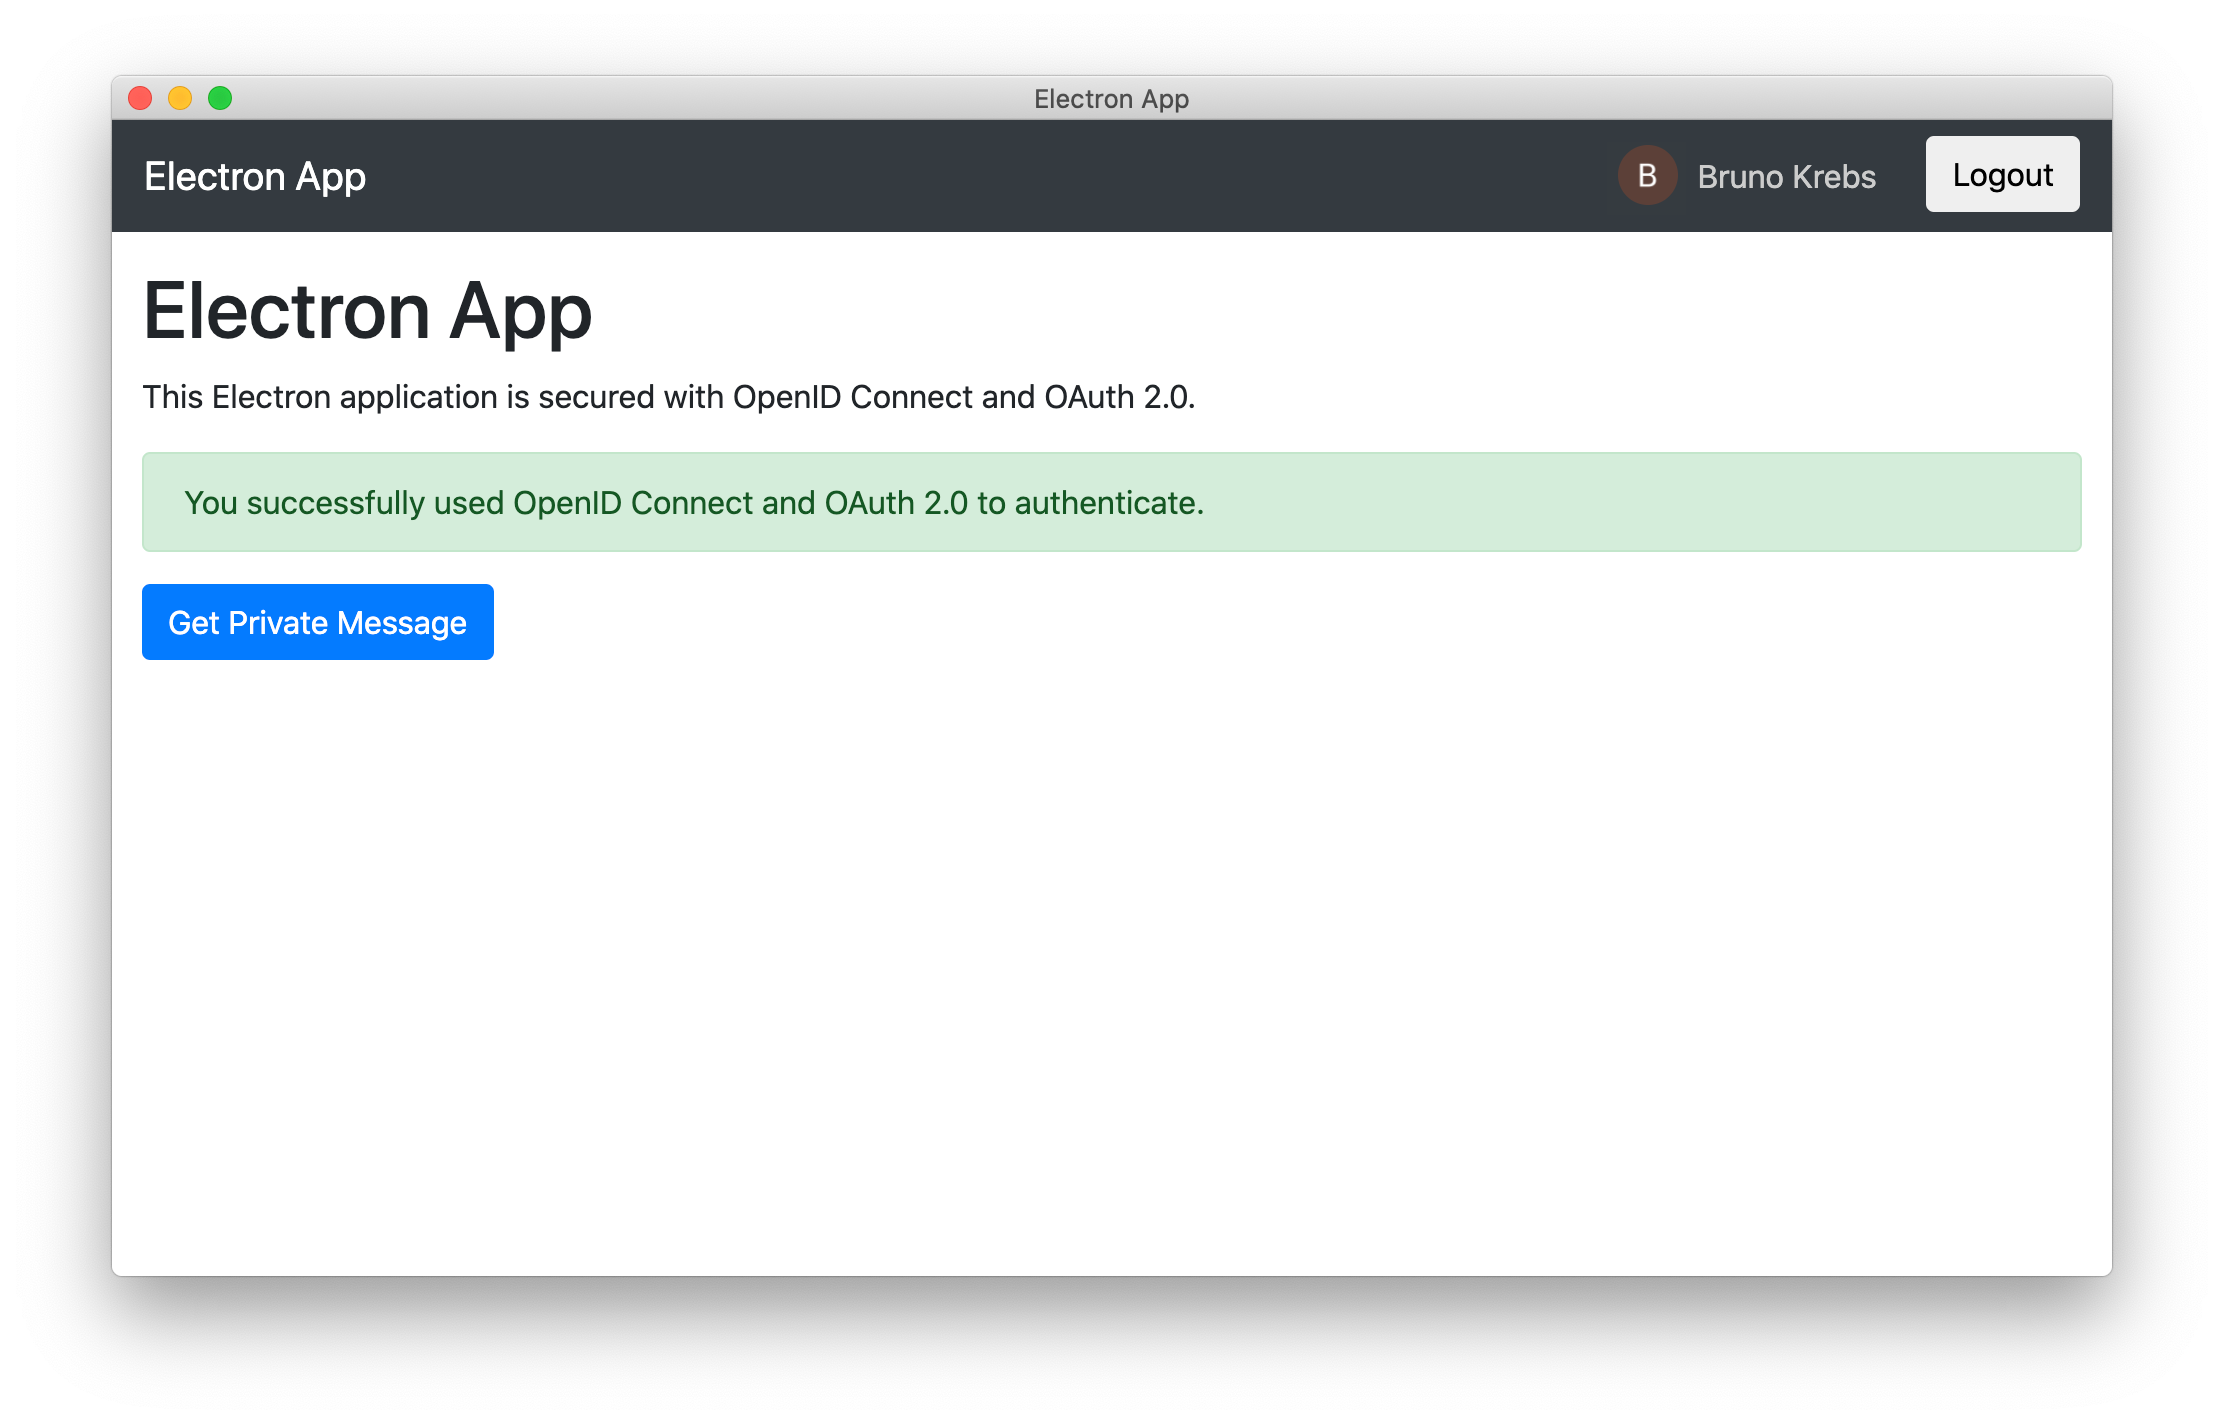
In this window, you can see a button to fetch a secured message from an external API that still requires some configuration you'll set up in the next section.
“I just built an @electronjs application that is secured with @openid Connect and OAuth 2.0”
Tweet This
Call a Secure API within Electron
In this section, you will quickly set up a backend API that will play the Resource Server role for your Electron application.
Start by cloning the demo API repository anywhere in your system:
git clone -b backend --single-branch https://github.com/auth0-blog/electron-openid-oauth electron-backend
Make the cloned project your current active directory:
cd electron-backend
Next, install the project dependencies:
npm install
This Express API is simple and only has these dependencies:
express: the most popular web application framework for Node.js.express-jwt: a module to validate JWTs (access tokens, in this case) that sets thereq.userproperty with some attributes related to the current user.jwks-rsa: a library to retrieve RSA public keys from a JWKS (JSON Web Key Set) endpoint to validate access tokens.
Next, under the API project directory, rename the env-variables.json.template file into env-variables.json. Its content looks as follows:
{
  "apiIdentifier": "<API_IDENTIFIER>",
  "auth0Domain": "<YOUR_AUTH0_DOMAIN>"
}
You already know the value of <YOUR_AUTH0_DOMAIN>: it is the same value of auth0Domain present in the env-variables.json of your Electron project. To get an API identifier, you need to register this demo API with Auth0.
Register an API with Auth0
What you are doing here will enable you to secure access to your APIs by obtaining an access token for them.
Go to the APIs section of the Auth0 dashboard to register your demo API (the Resource Server).
Once there, click on Create API to open a dialog with three fields. Fill it out as follows:
Name: Enter a name to represent your API in your Auth0 tenant. For example: "My Resource Server".
Identifier: Enter a logical identifier for your API. For example:
https://my-resource-server.Signing Algorithm: For this field, you can leave the default option (RS256).
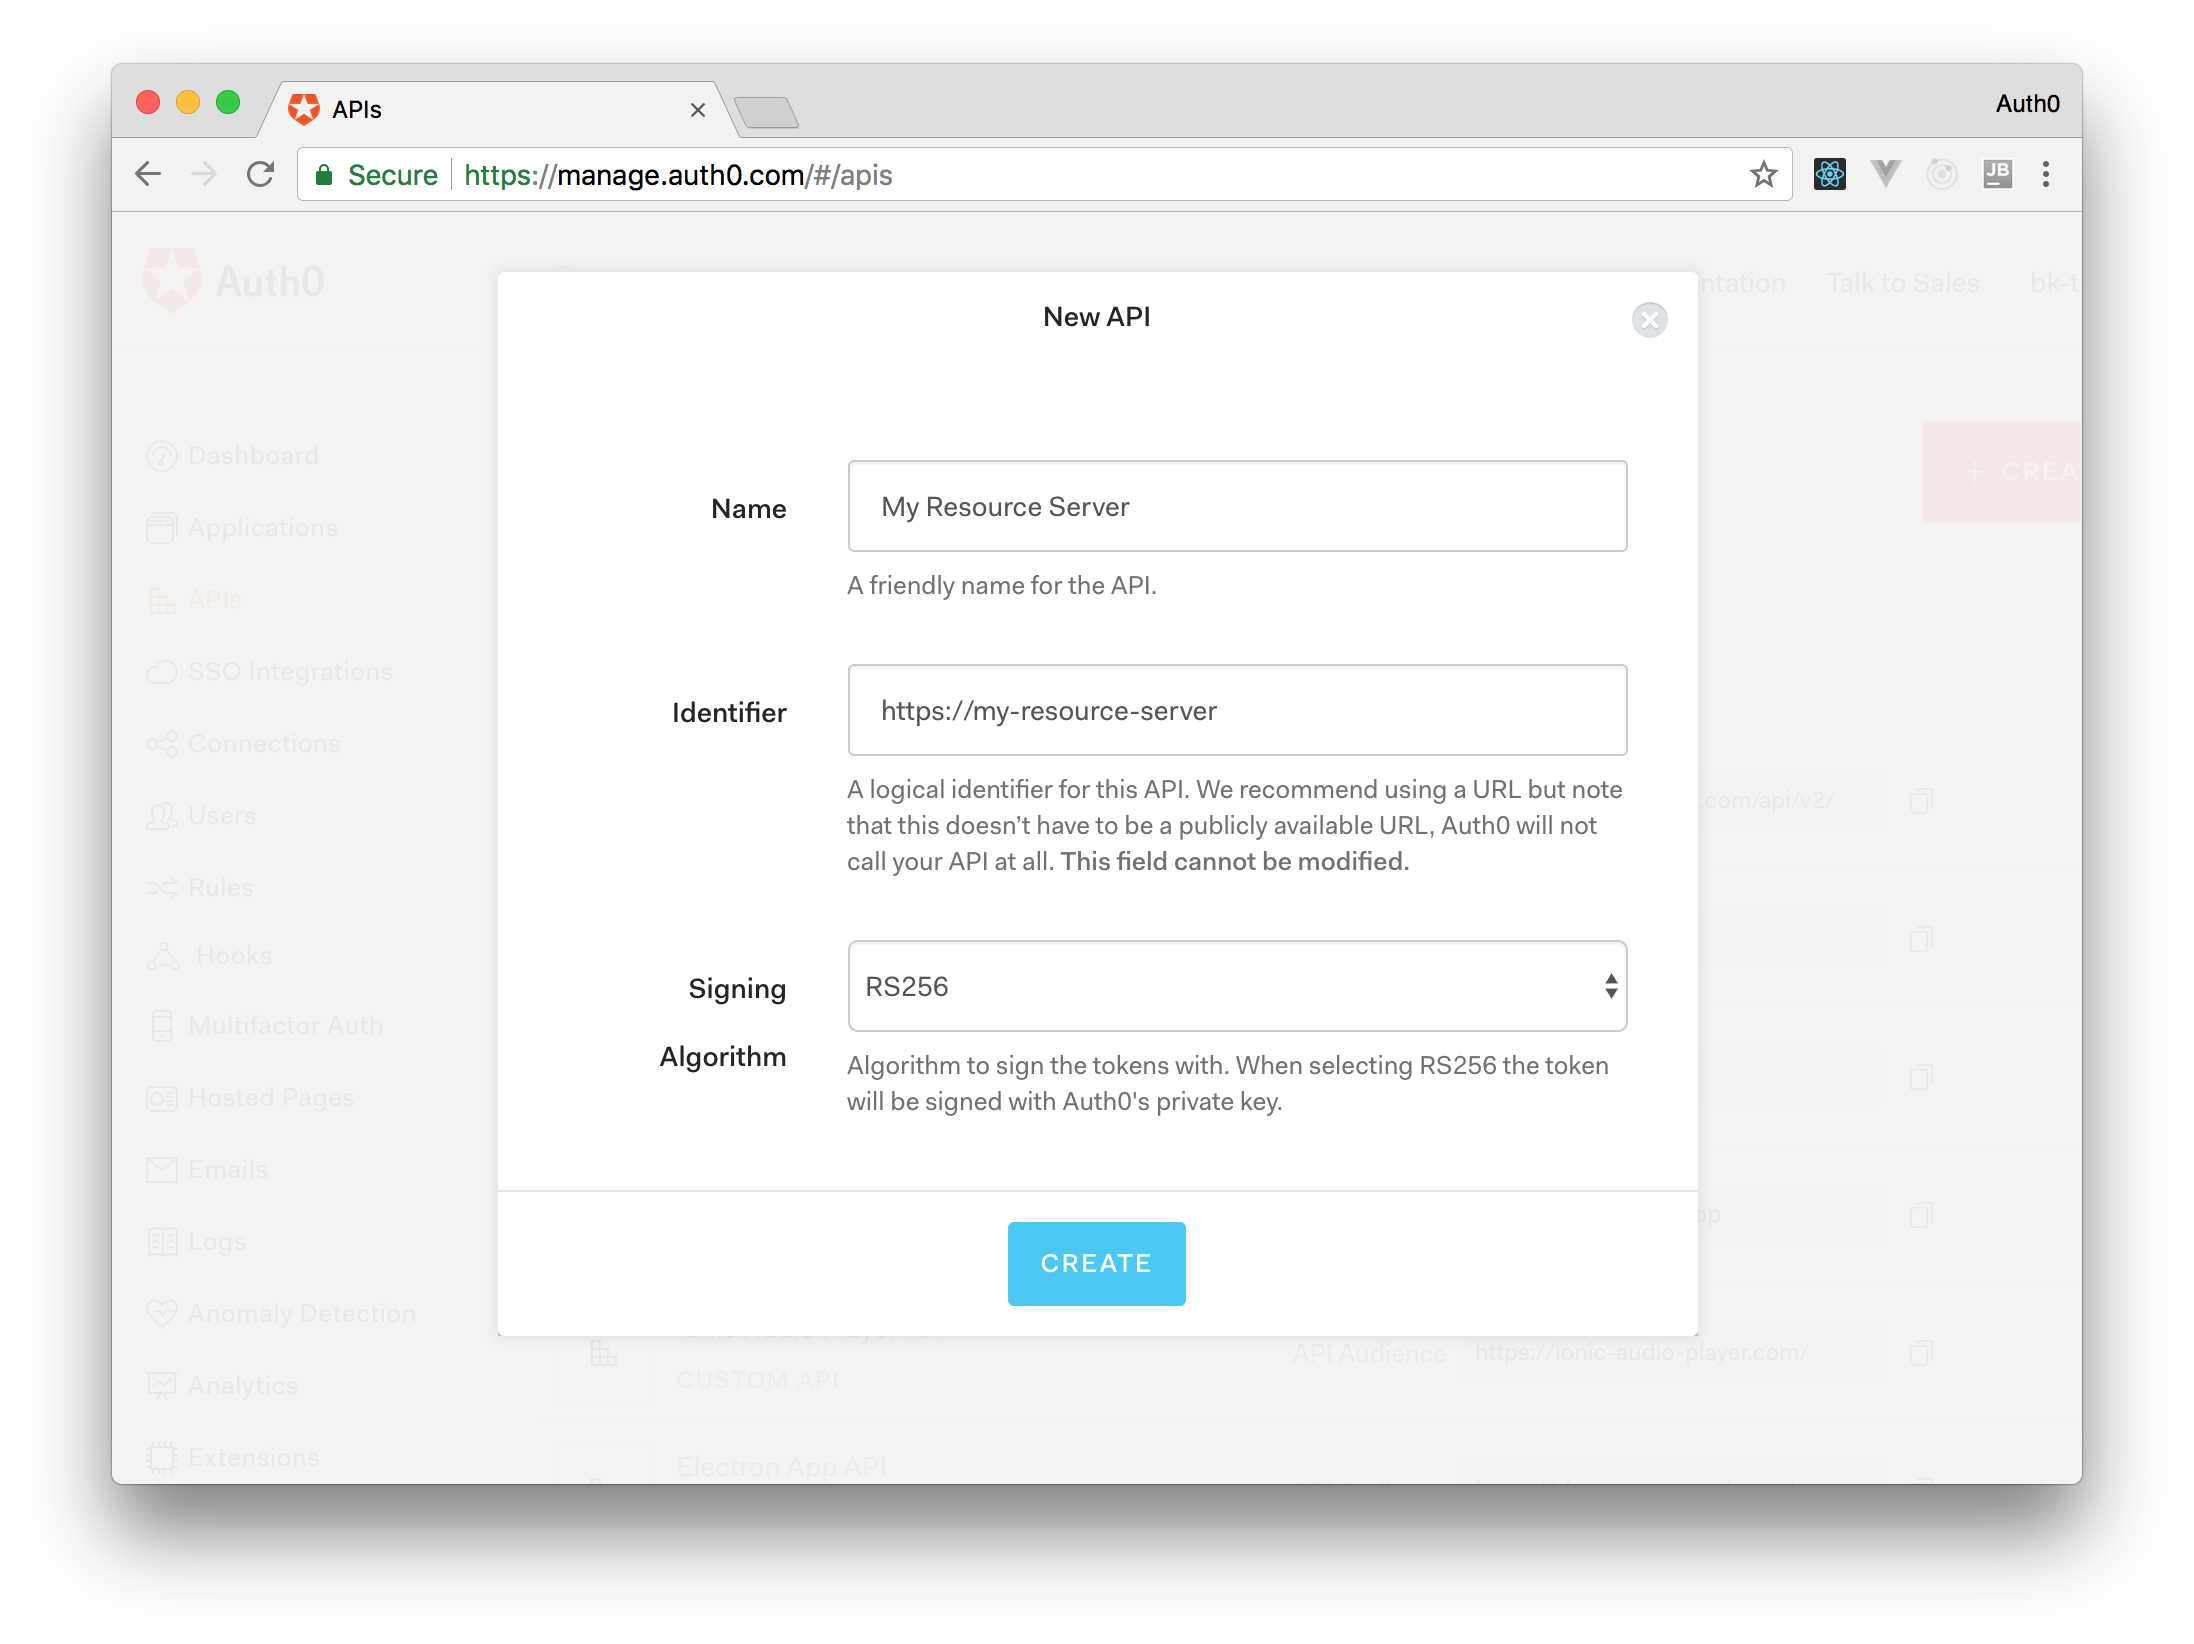
Once the form is filled out, click on Create to complete the process. Auth0 will redirect you to the Quick Start section of your new API.
From there, click on the Settings tab and switch on the Allow Offline Access option, which configures Auth0 to allow applications to request refresh tokens for this API.
Now, click on the Save button to confirm the data just inserted.
Recall that a refresh token is a special kind of token that contains the information required to obtain a new access token or ID token. Using refresh tokens in your Electron app lets it automatically sign in users when they close and open your application again — as long as they don't log out.
The Identifier value from the Settings of the API is the value that you need to use for audience. Head back to the env-variables.json file in your API project and paste it as the value of apiIdentifier.
You now also need to set up this audience value in your Electron project. But first, run the API server as follows:
npm start
Configure Electron to make secure API calls
Head to your Electron project, open env-variables.json, and add an apiIdentifier property to the existing object. The value of apiIdentifier is the same value you used for apiIdentifier in the Express project. Your final file should look like this:
{
  "auth0Domain": "your-auth0-tenant-name.auth0.com",
  "clientId": "your-electron-app-client-id-from-auth0",
  "apiIdentifier": "https://my-resource-server"
}
Now, you need to pass an audience query parameter in the authentication URL that you have defined in the authentication service.
Open services/auth-service.js, locate the getAuthenticationURL() function, and replace it with the following:
function getAuthenticationURL() {
  return 'https://' + auth0Domain + '/authorize?' +
    'audience=' + apiIdentifier + '&' +
    'scope=openid profile offline_access&' +
    'response_type=code&' +
    'client_id=' + clientId + '&' +
    'redirect_uri=' + redirectUri;
}
That's it for updating the service.
If your Electron application is running, click the log out button. If not, run it, and, if you are not asked to log in, click the log out button. You need to log in again for the authentication server to send back to your Electron app an access token that accounts for the audience parameter. If you were to use the existing access token, the API would deem it invalid as it will lack an aud claim.
After you run your Electron app and log in again, click the "Get Private Message" button. If the request is successful, a message should display within a gray box as follows:
Conclusion
In this tutorial, you learned how to secure an Electron app using Auth0 to enable user authentication and access to protected resources from a secured API. You also saw in action the different processes that power the Electron framework: the main and the renderer processes.
You also got a glimpse of what setting up a Node.js Express API looks like with Auth0. If you want to learn in more detail how to develop secured RESTful APIs with Node.js, Express, and Auth0, check out the Node.js and Express Tutorial: Building and Securing RESTful APIs blog post.
You can download the full code of the Electron application and the API from this GitHub repository.