

Today's video is about how easy it is to make the switch from social identity providers like Google to more complex providers, like those using SAML, using Auth0. We'll cover how in minutes, with no change to client or server code, you can easily allow users from SAML systems to log in to your Auth0 application. We've included the video, as well as a short written summary, below:
Today we'll talk about how easy it is to integrate SAML authentication with Auth0.
So let's start with a hypothetical: you're building a SaaS product, and some of your enterprise customers want their employees to be able to access your product through Single Sign-On (SSO)...and their Identity Provider (IdP) happens to use SAML for authentication.
SAML is a complex standard, and so implementing Federation yourself, even with already existing libraries can be quite a nightmare, and require lots of code and maintenance.
Luckily, Auth0 supports SAML authentication (you can even use Lock) with just a few lines of code and some configuration.
“Auth0 supports SAML authentication with just a few lines of code and some configuration.”
Tweet This
So what we're going to go over today is how to get that started and how easy it is to switch over to SAML authentication from a social login provider like Google.
First, we have an Express implementation (you can read more about this in our quickstart guide for Express) of Auth0 logins. All I needed to do is include passport.js and the Auth0 strategy. I then use these tools in my route to check that the user has logged in once Lock has redirected the app, and logged out once Lock's logout function has redirected me:
var express = require('express');
var router = express.Router();
var passport = require('passport');

/* GET users listing. */
router.get('/', function(req, res, next) {
  res.send(req.user);
});

router.get('/authenticate',
  passport.authenticate('auth0', { failureRedirect: '/error' }),
  function(req, res) {
    if (!req.user) {
      throw new Error('user null');
    }
    res.redirect("/");
  });

router.get('/logout', function(req, res){
    req.logout();
    res.redirect("/");
})

module.exports = router;
So on the client side, once you've required the Lock.js library, we just need to call lock.show() and lock.logout() to allow users to log in and out, respectively:
$(function(){
    var lock = new Auth0Lock('FIluNL0AWyBE3hYs3exbawhJD9rZNdh3', 'kperch.auth0.com');

    $('.js-login').on('click', function(event){
        event.preventDefault();
        lock.show({
            callbackURL: 'http://localhost:3000/users/authenticate',
            rememberLastLogin: false,
            // connections: ['google-oauth2', 'auth0']
        });
    });

    $('.js-logout').on('click', function(event){
        event.preventDefault();
        lock.logout({
            returnTo: 'http://localhost:3000/users/logout'
        });
    });
})
So let's enable Google logins and see how this works. First, go to the dashboard, and select 'Connections', then 'Social' from the menu on the left. Click 'Google' to open the configuration menu:

We're going to leave the 'Client ID' and 'Client Secret' blank in order to test using Auth0's API keys. So, simply hit 'Save' at the bottom of the window. You can now use Google accounts to log in to your app.
Next, we'll take a look at how to configure SAML authentication without changing any of the code we've already written.
First, you'll need some information from your SAML IdP. We have documentation on many common third-party IdPs in our docs, including a list of the information you'll need for this tutorial:
- SSO Sign In URL
- SSO Sign Out URL
- X509 Signing Certificate
First, I turn off my Google provider. Then, click 'Enterprise' under 'Connections' in the left menu. Click 'SAMLP Identity Provider' to enter the connection management menu. Click 'Create new Connection'.
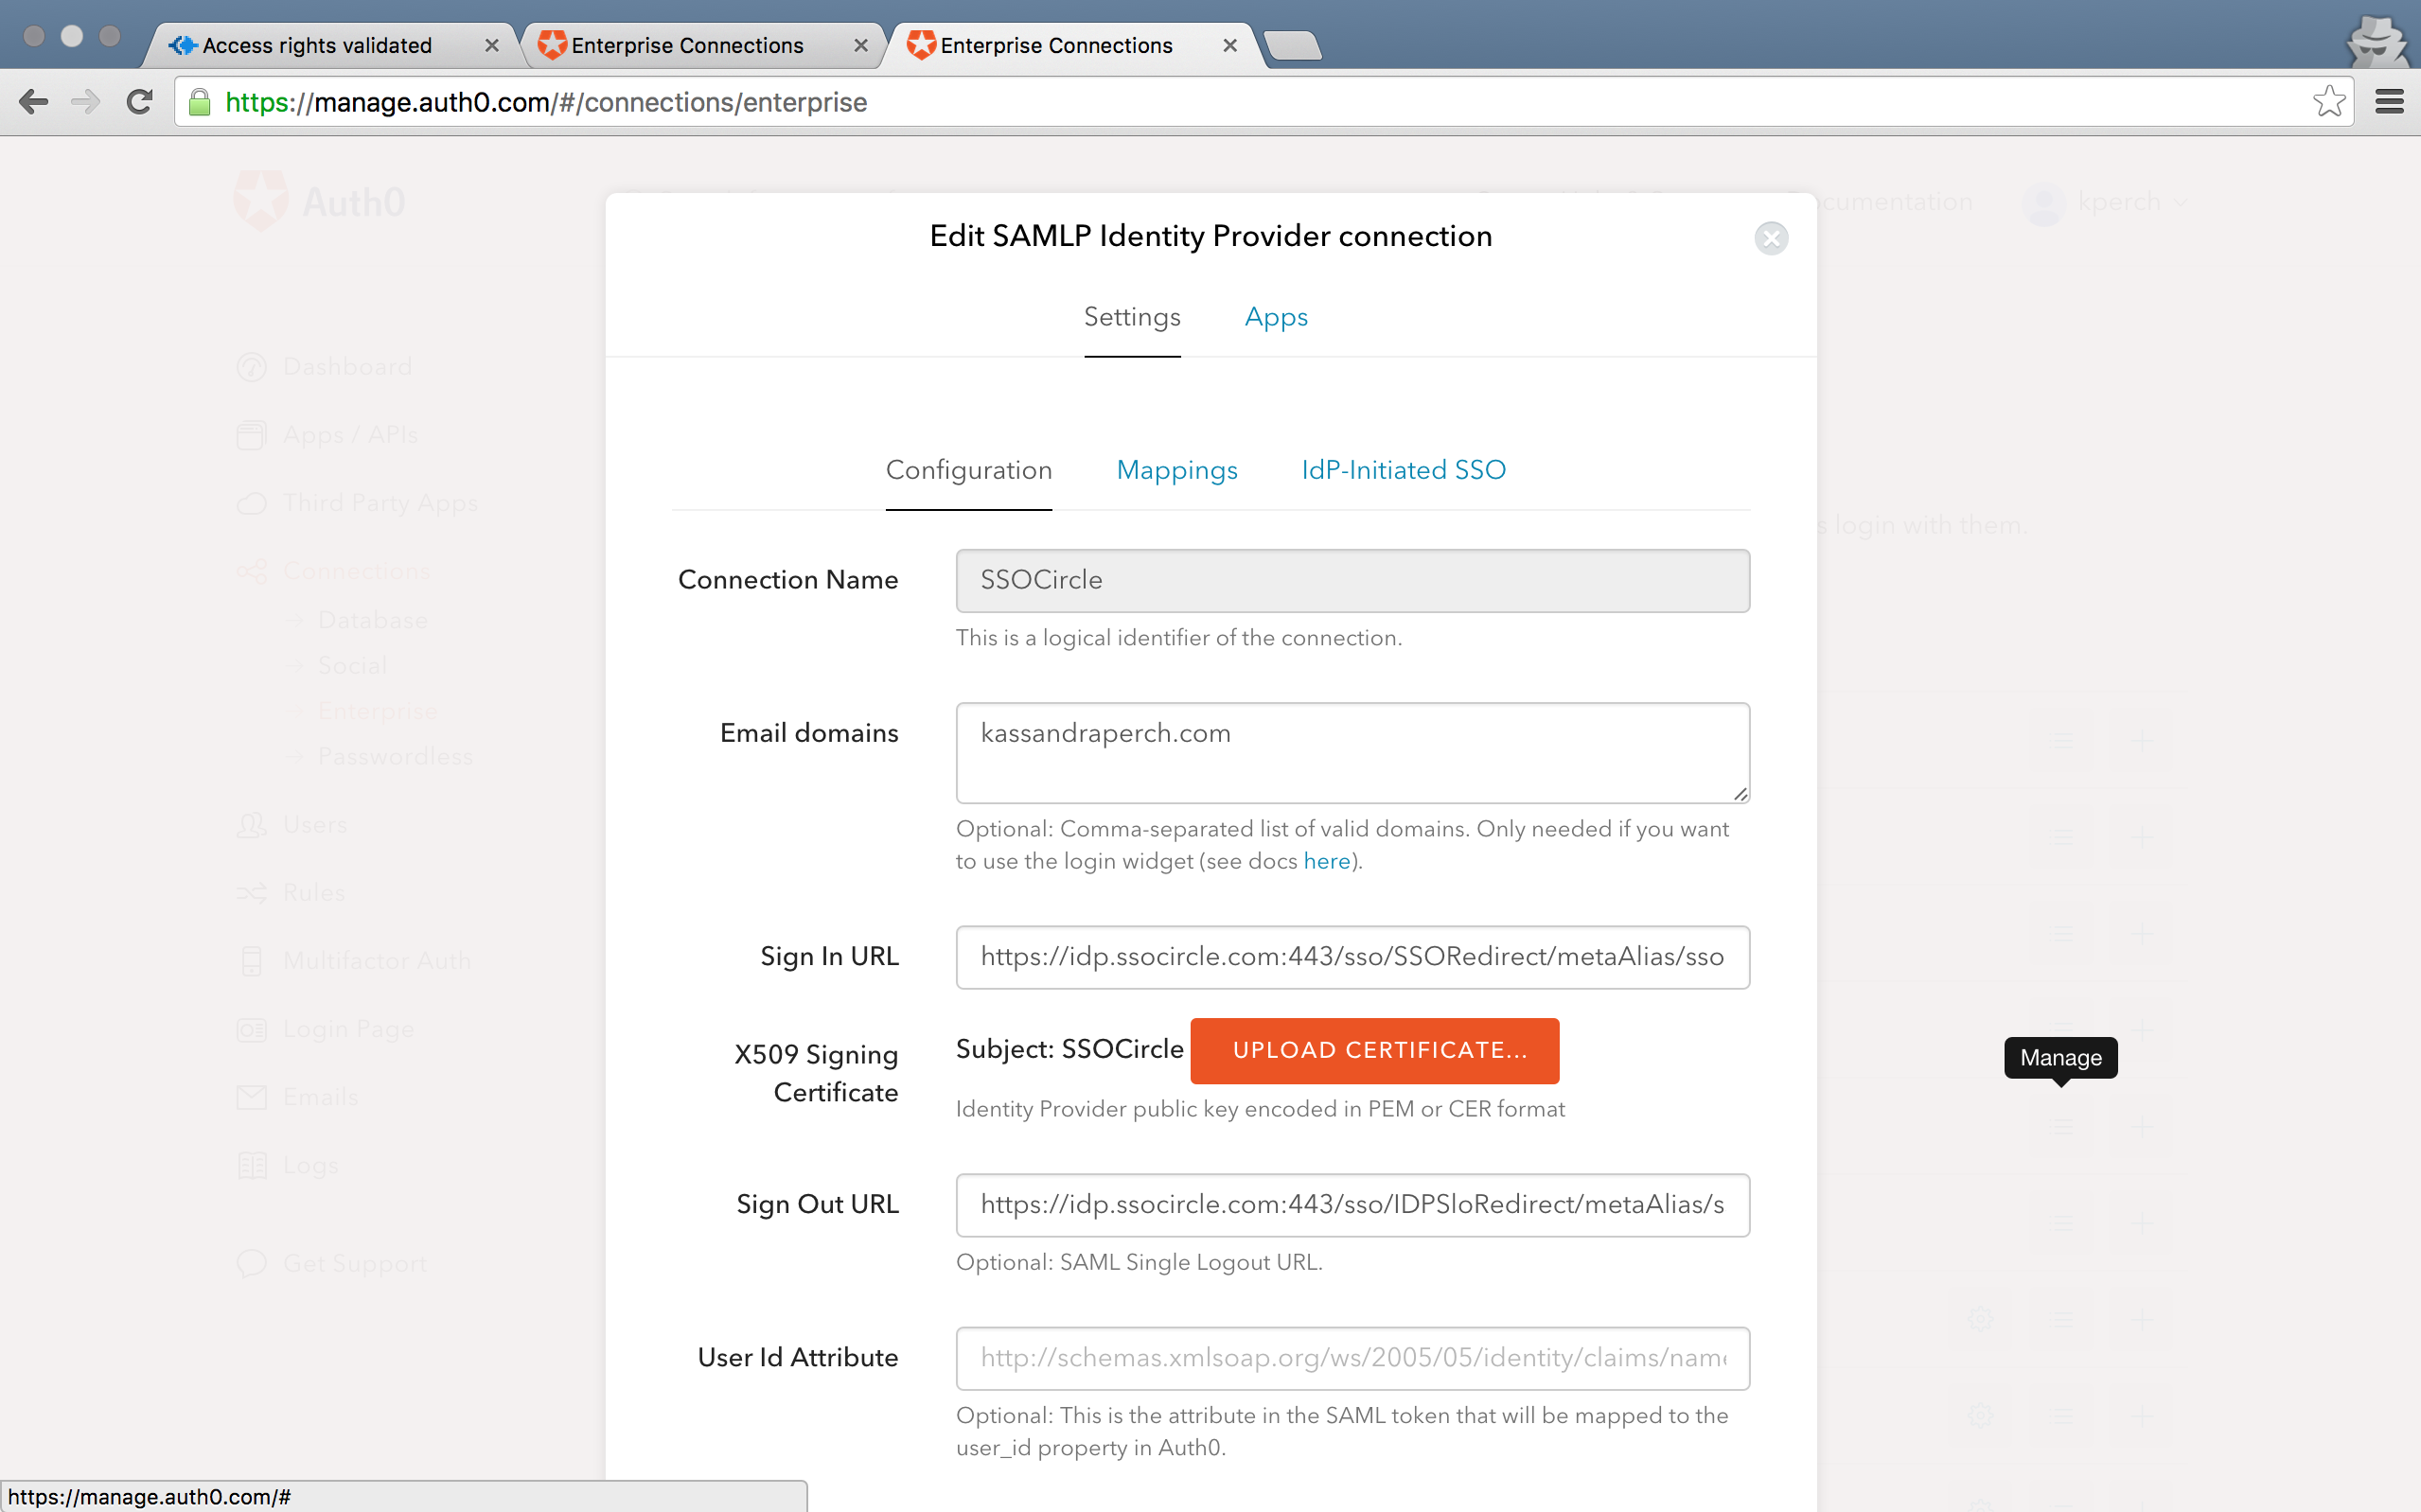
Enter a name in 'Connection Name'. Then, place your SSO Sign In and Sign Out URLs in the fields labeled 'Sign In URL' and 'Sign Out URL', respectively. Finally, upload the X509 Signing Certificate by clicking the orange 'Upload Certificate' button.
You can enter domains under 'Email Domains' in order to tell Lock which user emails should be filtered through to this SSO connection.
That's it for SAML authentication configuration! Click 'Save' and 'Continue'. You will see a list of instructions-- you will need to provide these instructions to your IdP in order to complete the process (if you are using a third-party, like we do in this tutorial with SSOCircle, check our docs to see if your next steps are up to you).
Once you have done this, you can test your new SAML connection in the Dashboard. Go to 'Connections' > 'Enterprise', then select 'SAMLP Identity Provider'. Next to your connection name, you should see a play icon. Click it to try your SAML login from the dashboard. If this works, you are ready to log in using SAML authentication in your Auth0 app!
With just a few minutes and no code changes, we have incorporated a SAML SSO into our Auth0 app! Want to learn more? try our free plan, and you can checkout the 30+ social IdPs and the enterprise IdPs that we support.
I'm Kassandra from Auth0, and thanks for reading!
Want to learn more about Single Sign-On? Get The Definitive Guide on SSO (74-page free eBook) here.