
Testing your React application is important to ensure your code works as intended. But what if you're using Auth0 to protect your application?
In this blog post, you'll learn to follow TDD (Test-Driven Development) to protect a React application with Auth0. We'll go over what you need to do to set up your tests and provide some tips on how to get the most out of them.
So if you're ready to learn how to unit test your Auth0-protected React app, read on!
Why Should You Use Auth0 to Protect Your React Application?
Auth0 is an identity and access management service that helps you protect your application by providing user authentication, authorization, and security.
Auth0 eliminates needing to be an expert on identity protocols such as OAuth 2.0 or OpenID Connect and helps you secure your web application stack. With Auth0, integrating authentication and authorization with your app is a breeze - users are redirected to a customizable login page when they want to log in. Once successful authentication occurs, JWTs containing user information is sent back for verification.
Since Auth0 handles all of the authentication and authorization processes on the back end, you don't have to worry about coding your own login system. This makes it much easier to unit test your protected application as well.
Bootstrap a React Application
Before the actual testing, you'll need to bootstrap a React application. To do this, you'll use Create React App. This tool is great for quickly getting a React development environment up and running.
To get started, open a terminal window and run:
npx create-react-app react-auth0-tdd
While NPM does its thing, you can start with the next step.
Connect React with Auth0
The best part of using Auth0 is the ease of use. All you have to do to secure your application is follow these steps:
Sign up and create an Auth0 application
If you haven't already, sign up for a free Auth0 account.
A free account offers you the following:
- 7,000 free active users and unlimited logins.
- Auth0 Universal Login for Web, iOS & Android.
- Up to 2 social identity providers like Google, GitHub, and Twitter.
- Unlimited Serverless Rules to customize and extend Auth0's capabilities.
During the sign-up process, you create something called an Auth0 Tenant, an isolated environment representing the product or service to which you are adding authentication.
After that, you need to create an Auth0 application.
Go to the Applications tab in your Auth0 Management Dashboard and click the "Create Application" button. Select "Single Page Web Applications" as the type of application you want to create.
Configure your application
Once you create the application, go to its Settings tab. You'll need to configure three URLs in there:
- Allowed Callback URLs: The URL of your React app that users will be sent after they authenticate. This is typically
http://localhost:3000/for local development. - Allowed Logout URLs: The URL where users will be redirected after they log out. This is usually
http://localhost:3000for local development. - Allowed Web Origins: If you don't register your application URL in this field, your application will be unable to silently refresh the authentication tokens, and your users will be logged out the next time they visit the application or refresh the page. For development, you'd typically add
http://localhost:3000
Once you save these settings, you can move on to the next step.
Install the Auth0 React SDK
Now, we're ready to install the Auth0 React SDK. To do this, open a terminal window, navigate to your project directory, and run:
npm install @auth0/auth0-react
Now you're all set to start writing your application's code and tests.
Using TDD to Build Your Application
Test-driven development (TDD) is a powerful and popular methodology for building software. It's based on the idea that you should write tests first, then write code to ensure those tests pass. This process helps developers create better code by designing test cases up front and streamlining the coding process.
In this section, you'll use TDD to build a simple application that uses Auth0 to authenticate and display information about a user.
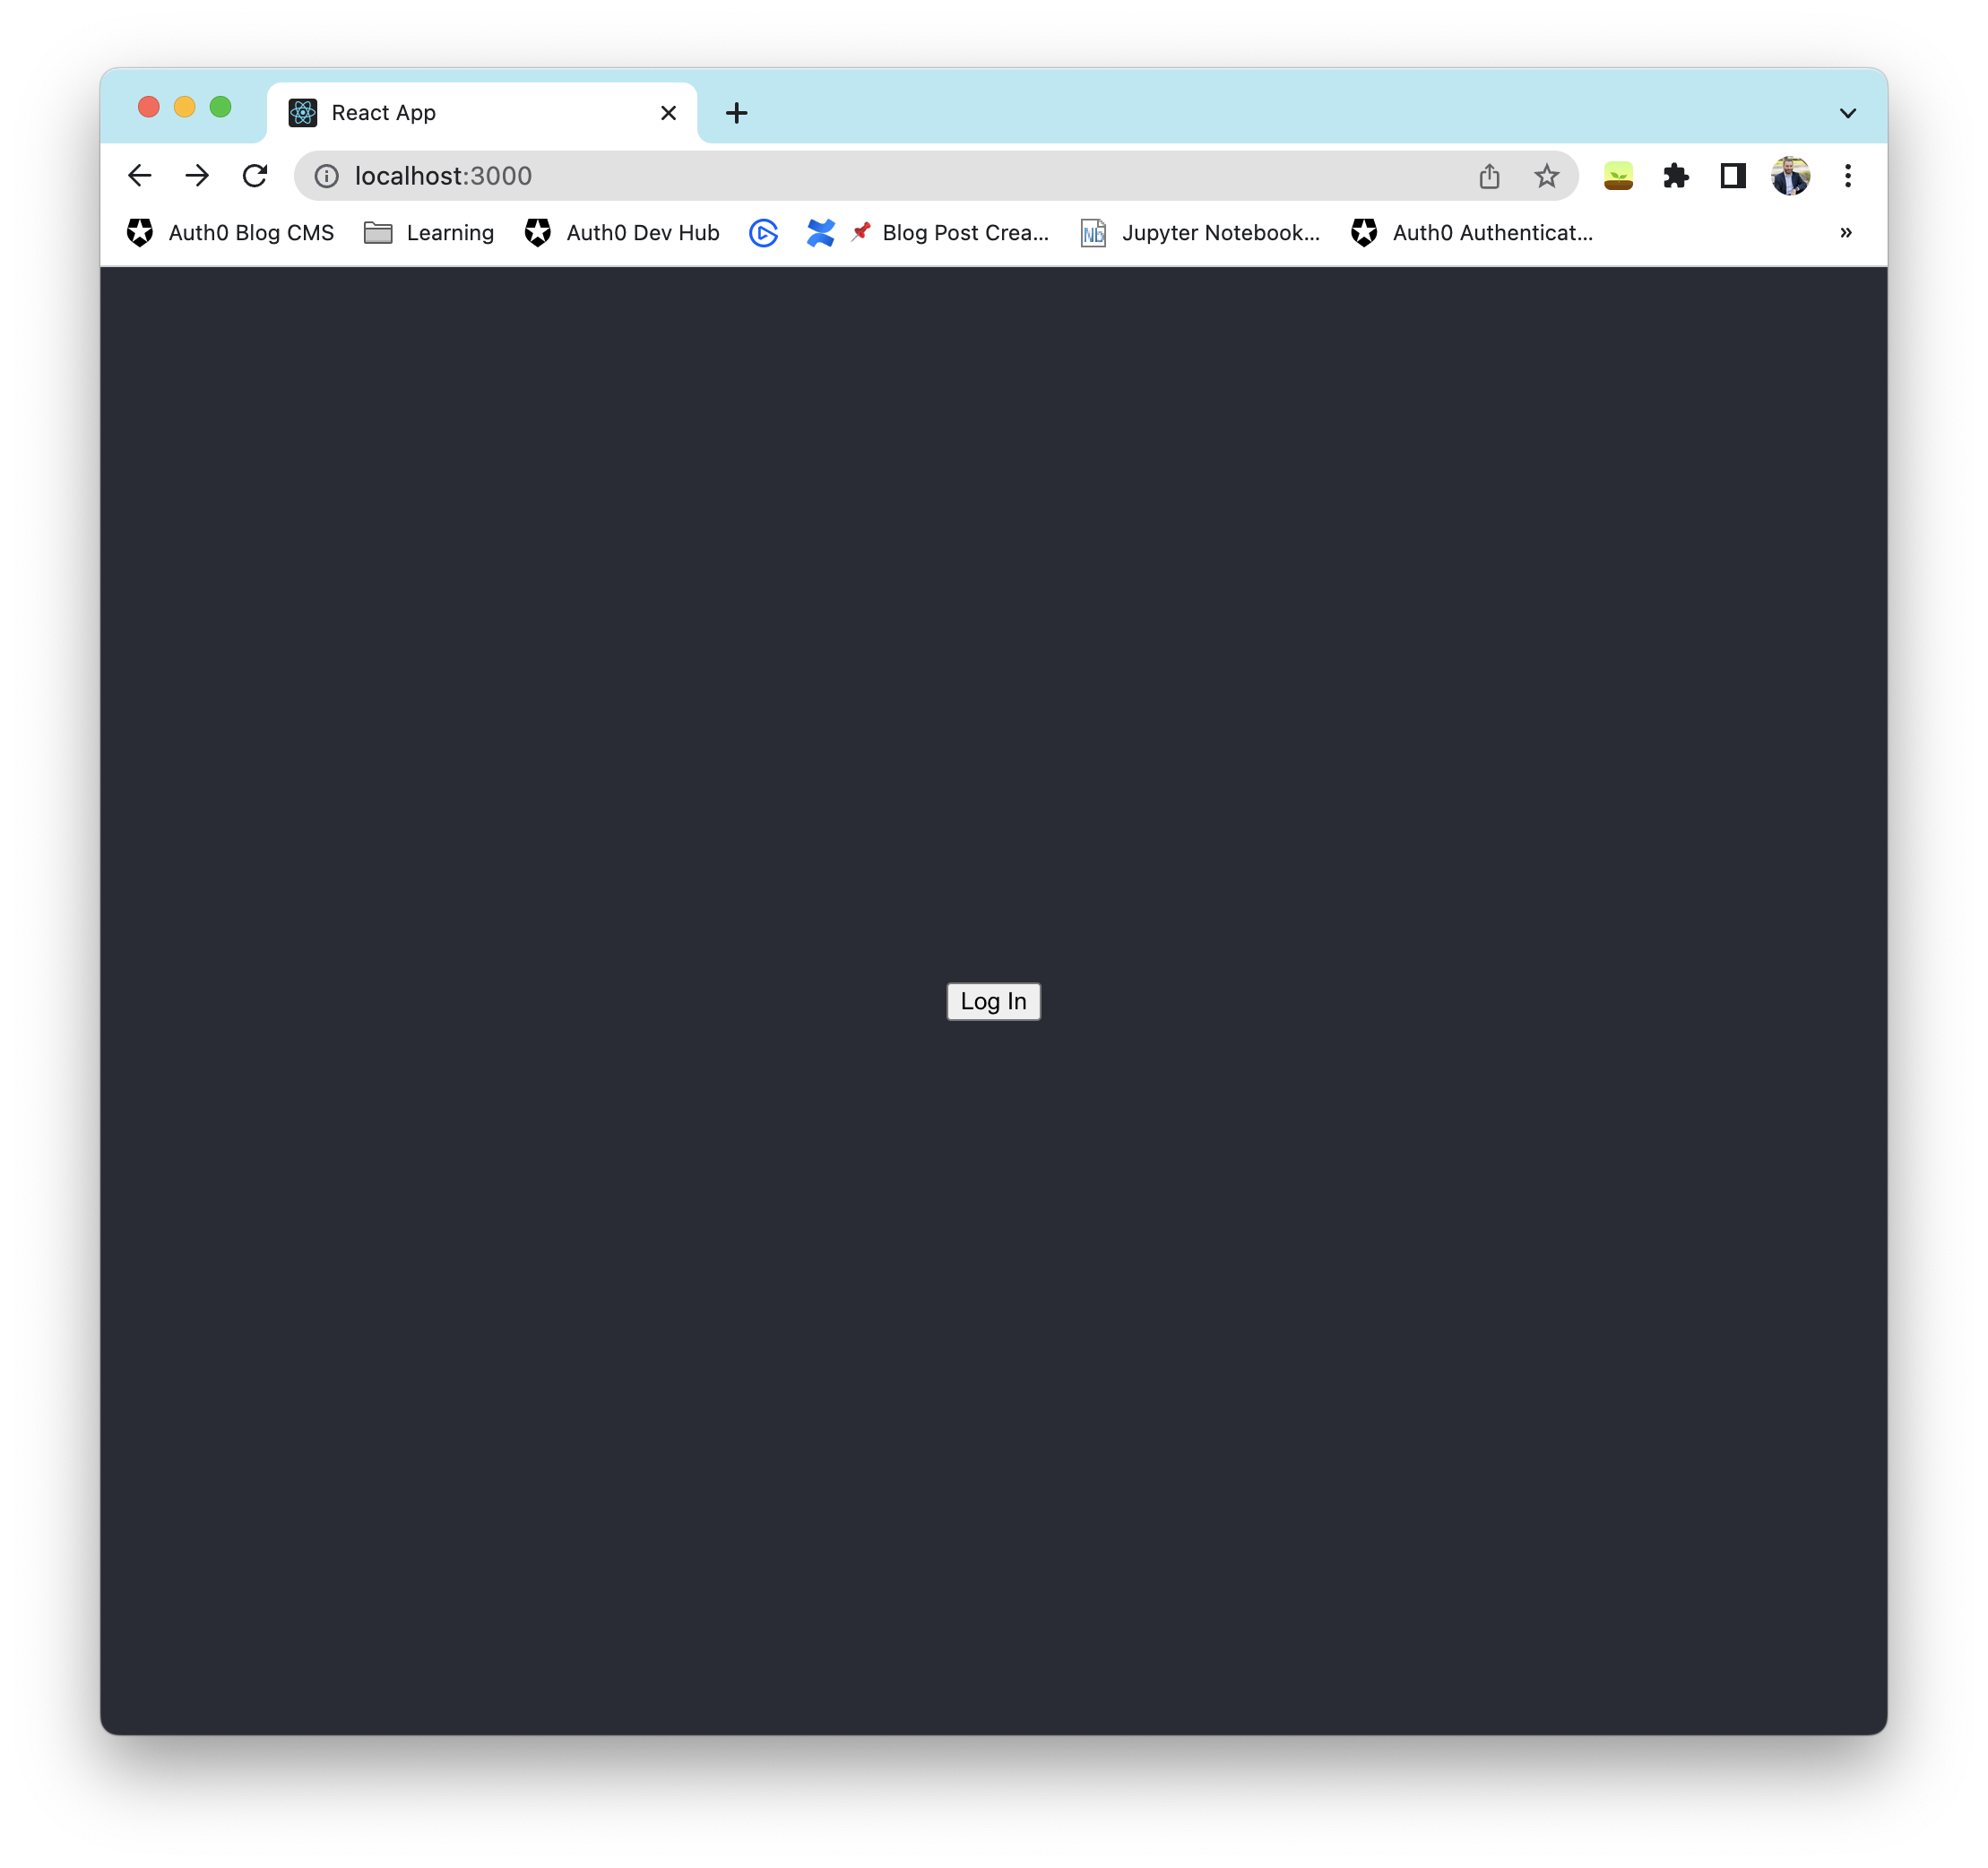
You'll start by checking the UI renders a "Log In" button, so head to your App.test.js file and replace it with the following code:
// src/App.test.js

import { render, screen } from '@testing-library/react';
import App from './App';

test('When the app starts it renders a log in button', () => {
  render(<App />);
  const loginElement = screen.getByText("Log In");
  expect(loginElement).toBeInTheDocument();
});
Next, you'll run the tests using the following command:
npm run test
And it should be no surprise if the test fails; after all, you haven't implemented the "Log In" button yet. But no worries, you'll do that next.
Replace the file App.js with the following content:
// src/App.js

import './App.css';

function App() {
  return (
    <div className="App">
      <header className="App-header">
        <button>
          Log In
        </button>
      </header>
    </div>
  );
}

export default App;
With the button implemented, you can re-run the tests. This time the result should be 1 passed, 1 total.
But the "Log In" button isn't doing anything yet. Let's make sure it works by using Auth0.
Head back to your App.test.js and replace the file with the new contents:
// src/App.test.js

import { render, screen, waitFor } from "@testing-library/react";
import App from './App';

import { useAuth0 } from "@auth0/auth0-react";

jest.mock("@auth0/auth0-react");

describe("The Application Component in logged out state", () => {

  beforeEach(() => {
    useAuth0.mockReturnValue({
      loginWithRedirect: jest.fn(),
    });
  });

  afterEach(() => {
    jest.clearAllMocks();
  });

  test('When the app starts it renders a log in button', () => {
    render(<App />);
    const loginElement = screen.getByText("Log In");
    expect(loginElement).toBeInTheDocument();
  });

  test('It redirects the user to the Auth0 Universal Login page when the Log In button is pressed', async () => {
    const { loginWithRedirect } = useAuth0();

    render(<App />);
    const loginElement = screen.getByText("Log In");
    loginElement.click();

    // Expect that if we click the "Log In" button, the loginWithRedirect function gets called
    await waitFor(() => expect(loginWithRedirect).toHaveBeenCalledTimes(1));
  });
});
This time we added a new test "It redirects the user to the Auth0 Universal Login page when the Log In button is pressed", which validates that the function loginWithRedirect from the Auth0 React SDK is called at least one time after pressing the "Log In" button.
In this code snippet, we introduced a few new concepts; I recommend the following read if you want to familiarize yourself with jest and mocking functions.
As it is required by jest, we had to first mock the Auth0 API using mockReturnValue at the beginning of each test suite.
Now if you run the test, you'll receive:
The Application Component in logged out state
    ✓ When the app starts, it renders a log-in button (15 ms)
    ✕ It redirects the user to the Auth0 Universal Login page when the Log In button is pressed (1015 ms)

  ● The Application Component in logged out state › It redirects the user to the Auth0 Universal Login page when the Log In button is pressed

    expect(jest.fn()).toHaveBeenCalledTimes(expected)

    Expected number of calls: 1
    Received number of calls: 0
Which is exactly what we expected. Next, you'll make that "Log In" button work.
Implementing Login with Auth0
Under the hood, the Auth0 React SDK uses React Context to manage the authentication state of your users. One way to integrate Auth0 with your React app is to wrap your root component with an Auth0Provider that you can import from the SDK.
Head to your index.js file and update its content as the following:
// src/index.js

import React from 'react';
import ReactDOM from 'react-dom/client';
import './index.css';
import App from './App';
import reportWebVitals from './reportWebVitals';
import { Auth0Provider } from "@auth0/auth0-react"; // 👈 New code

const root = ReactDOM.createRoot(document.getElementById('root'));
root.render(
  <React.StrictMode>
    {/* 👇 New code */}
    <Auth0Provider
      domain="{auth0-domain}"
      clientId="{auth0-clientid}"
      authorizationParams={{
        redirect_uri: window.location.origin
      }}
    >
    {/* 👆 New code */}
      <App />
    {/* 👇 New code */}
    </Auth0Provider>
    {/* 👆 New code */}
  </React.StrictMode>
);

// If you want to start measuring performance in your app, pass a function
// to log results (for example reportWebVitals(console.log))
// or send to an analytics endpoint. Learn more: https://bit.ly/CRA-vitals
reportWebVitals();
The Auth0Provider requires you to provide the domain for your Auth0 tenant and the clientId for your Auth0 application. Both values are present in your Auth0 Application's Dashboard, as shown below:

After setting those two values in the code, all we have to do is to change the "Log In" button to enable the onClick event.
// src/App.js

// 👇 New code
import { useAuth0 } from "@auth0/auth0-react";
// 👆 New code
import './App.css';

function App() {
  // 👇 New code
  const { loginWithRedirect } = useAuth0();
  // 👆 New code

  return (
    <div className="App">
      <header className="App-header">
        {/* 👇 Updated code */}
        <button onClick={() => loginWithRedirect()}>
        {/* 👆 Updated code */}
          Log In
        </button>
      </header>
    </div>
  );
}

export default App;
Now if you run your tests once more, you'll see both of them passing.
 PASS  src/App.test.js
  The Application Component in logged out state
    ✓ When the app starts, it renders a log in button (11 ms)
    ✓ It redirects the user to the Auth0 Universal Login page when the Log In button is pressed (4 ms)

Test Suites: 1 passed, 1 total
Tests:       2 passed, 2 total
Displaying the User’s Profile
So far, we have been able to test the application while in a logged-out state, but how would we go about testing the application after the user signs in, for example, to test if the user name is displayed correctly on the screen?
The simple answer is to continue mocking the useAuth0 hook, altering the different properties we need for our test.
Let's start by writing a new test to validate if the "Log Out" button is present after the user signs in. Change the content of your App.test.js file by adding the following code:
// src/App.test.js

...
// 👇 New code
describe("The Application Component in logged in state", () => {
  beforeEach(() => {
    useAuth0.mockReturnValue({
      isAuthenticated: true,
    });
  });

  afterEach(() => {
    jest.clearAllMocks();
  });

  test('When the app starts it renders a log out button', () => {
    render(<App />);
    const logoutElement = screen.getByText("Log Out");
    expect(logoutElement).toBeInTheDocument();
  });
});
// 👆 New code
Running the tests will now fail until we add the new "Log Out" button to the screen.
// src/App.js

import { useAuth0 } from "@auth0/auth0-react";
import './App.css';

function App() {
  const { loginWithRedirect, logout, isAuthenticated } = useAuth0(); // 👈 Updated code

  return (
    <div className="App">
      <header className="App-header">
        {/* 👇 Updated code */}
        {isAuthenticated ? (
          <button onClick={() => logout()}>
            Log Out
          </button>
        ) : (
          <button onClick={() => loginWithRedirect()}>
            Log In
          </button>
        )}
        {/* 👆 Updated code */}
      </header>
    </div>
  );
}

export default App;
And when you check the tests again, all of them are passing.
 PASS  src/App.test.js
  The Application Component in logged out state
    ✓ When the app starts, it renders a log in button (11 ms)
    ✓ It redirects the user to the Auth0 Universal Login page when the Log In button is pressed (4 ms)
  The Application Component is logged in the state
    ✓ When the app starts, it renders a log-out button (1 ms)

Test Suites: 1 passed, 1 total
Tests:       3 passed, 3 total
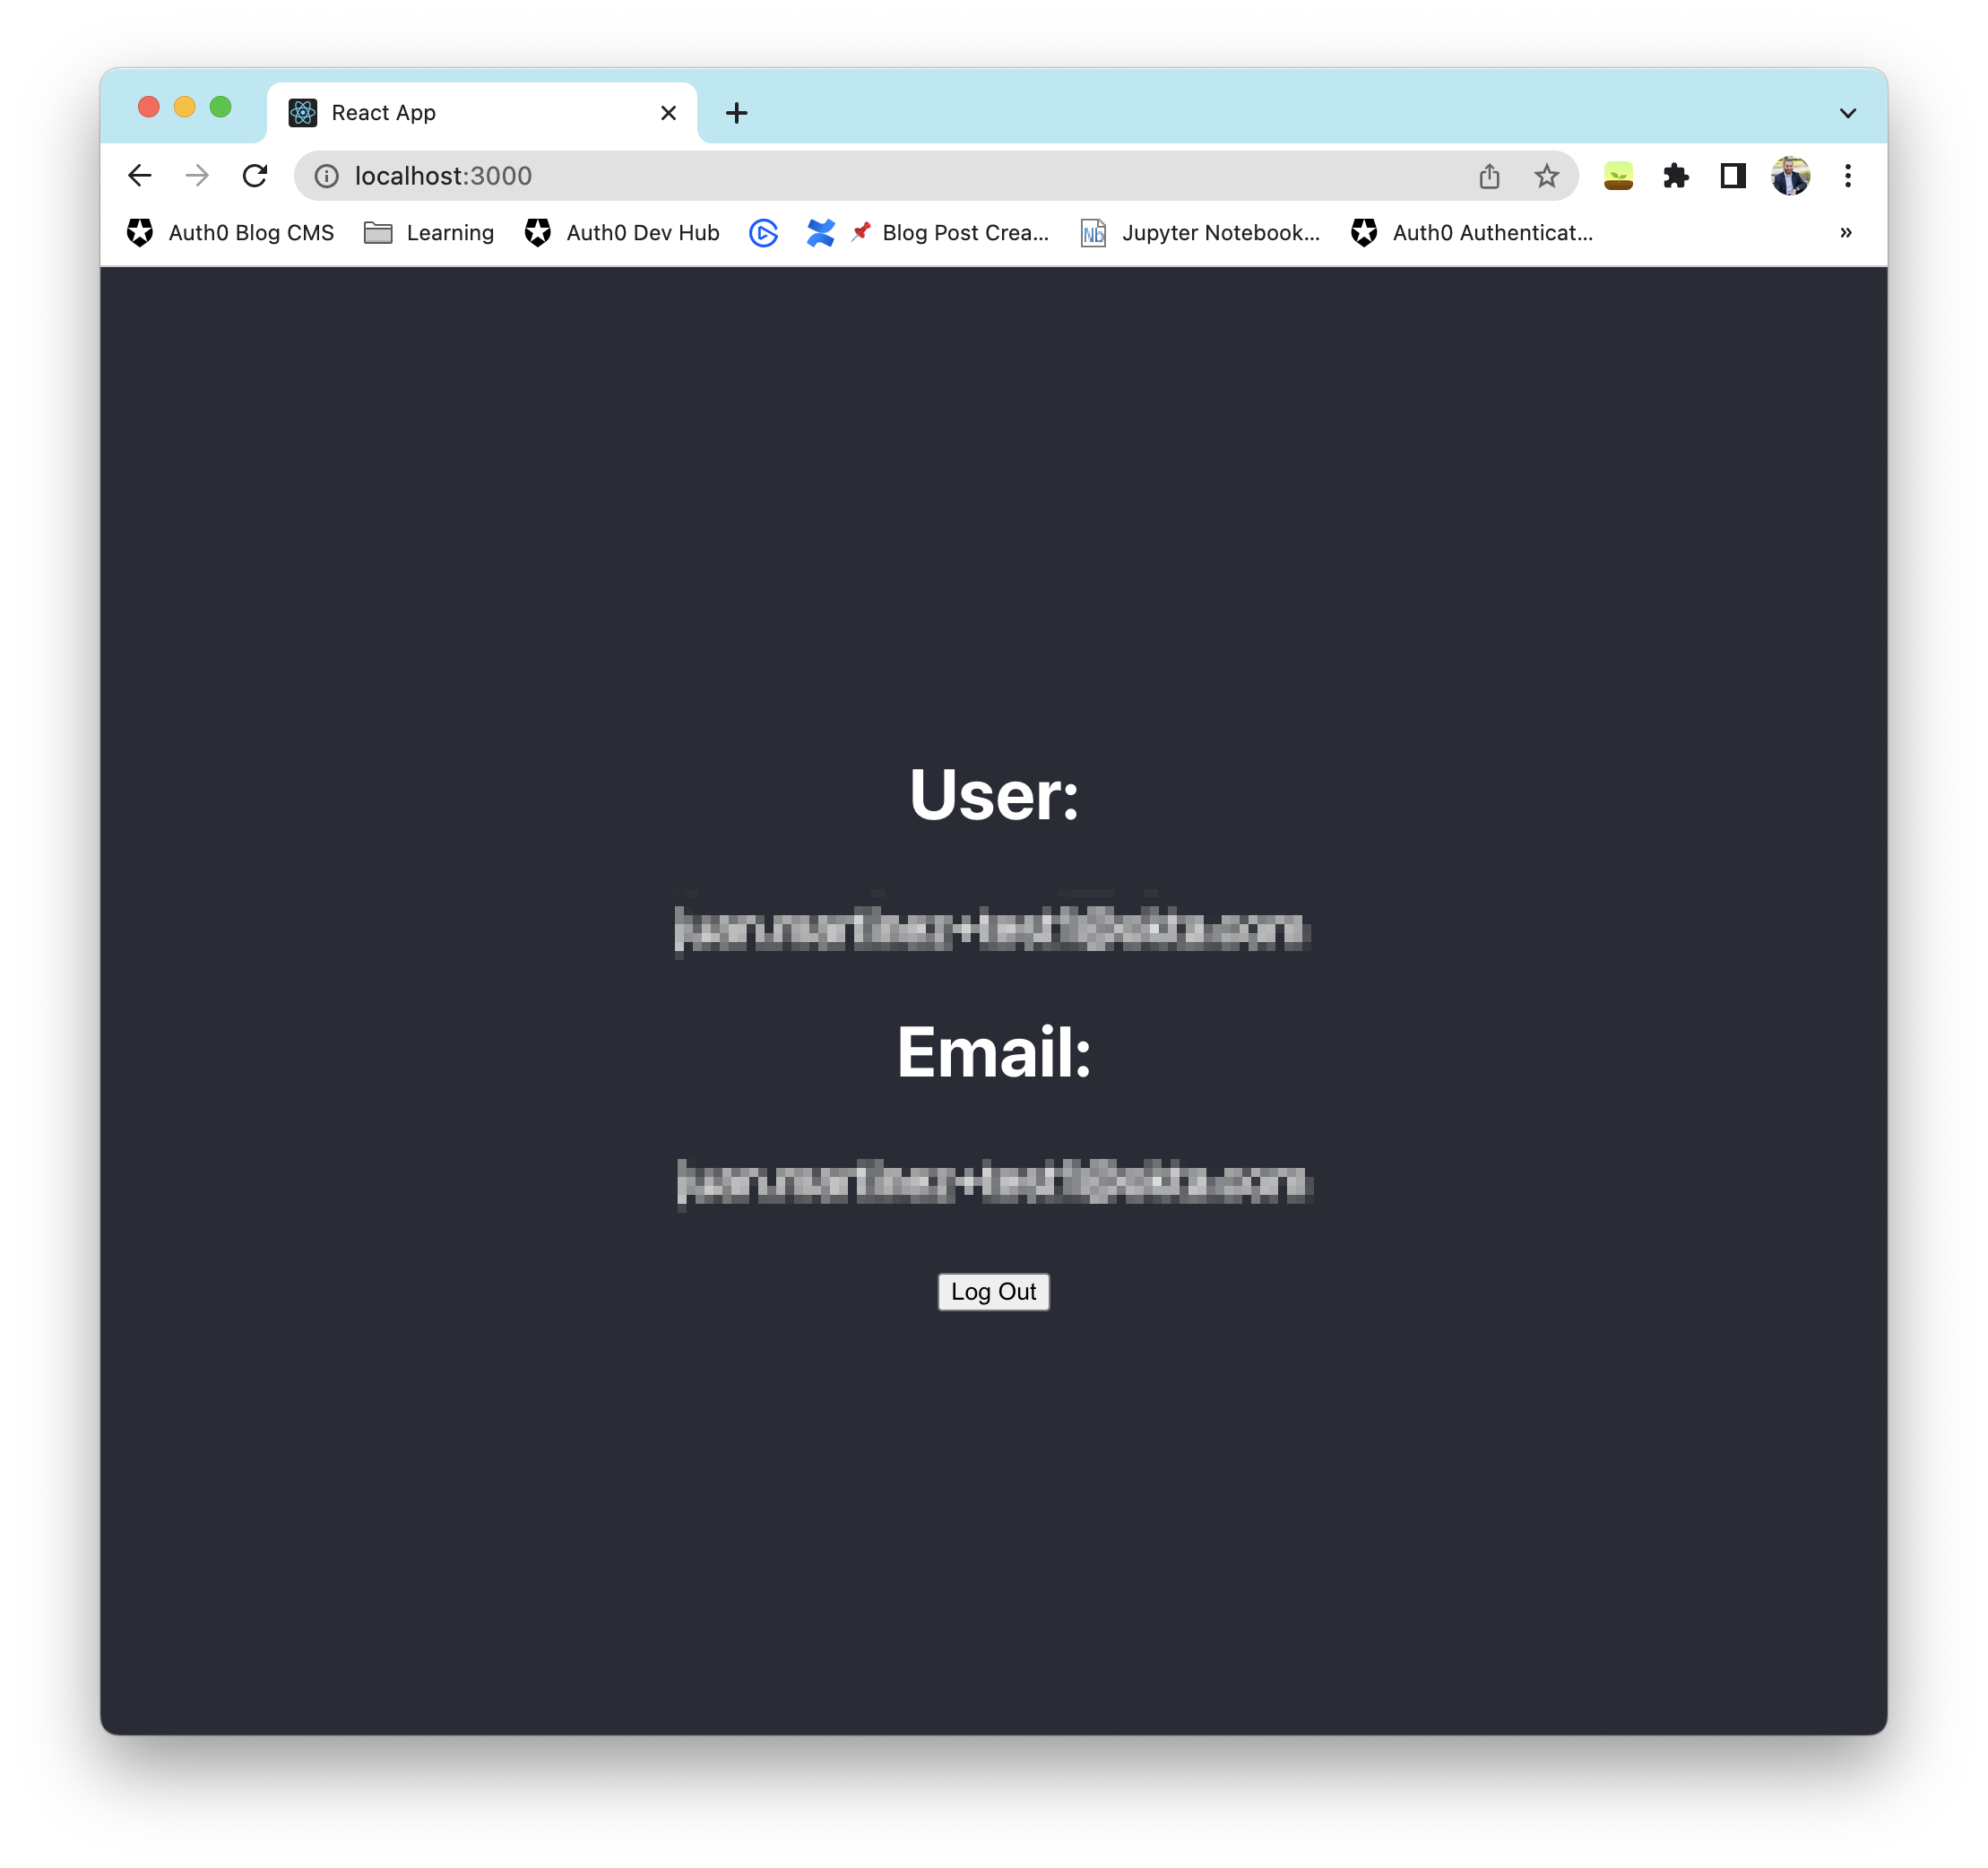
Finally, we'll validate that the user's name and email address are shown on the screen.
// src/App.test.js

...
  beforeEach(() => {
    useAuth0.mockReturnValue({
      isAuthenticated: true,
      // 👇 New code
      user: {
        name: "Juan",
        email: "jc@example.com",
        picture: "https://avatar.com",
      },
      // 👆 New code
    });
  });

  ...

  test('When the app starts it renders a log out button', () => {
    render(<App />);
    const logoutElement = screen.getByText("Log Out");
    expect(logoutElement).toBeInTheDocument();
  });

  // 👇 New code
  test('It renders the user name and email address', () => {
    render(<App />);
    const userNameElement = screen.getByTestId("user-name");
    expect(userNameElement).toHaveTextContent('Juan');

    const userEmailElement = screen.getByTestId("user-email");
    expect(userEmailElement).toHaveTextContent('jc@example.com');
  });
  // 👆 New code
});
For the logged-in state, not only do we need to mock the authentication status with the isAuthenticated flag, but we also need to set the user information.
Once that's done, we can fix the UI to display such values and get the test passing.
// src/App.js

import { useAuth0 } from "@auth0/auth0-react";
import './App.css';

function App() {
  const { loginWithRedirect, logout, isAuthenticated, user } = useAuth0(); // 👈 Updated Code

  return (
    <div className="App">
      <header className="App-header">
        {isAuthenticated ? (
          // 👇 Updated code
          <div>
            <h2>User:</h2>
            <p data-testid="user-name">{user.name}</p>
            <h2>Email:</h2>
            <p data-testid="user-email">{user.email}</p>
            <button onClick={() => logout()}>
              Log Out
            </button>
          </div>
          // 👆 Updated code
        ) : (
          <button onClick={() => loginWithRedirect()}>
            Log In
          </button>
        )}
      </header>
    </div>
  );
}

export default App;
Now the application displays the user name and email as well as the logged-out button.
Let's run the tests and see the final results.
 PASS  src/App.test.js
  The Application Component in logged out state
    ✓ When the app starts, it renders a log in button (12 ms)
    ✓ It redirects the user to the Auth0 Universal Login page when the Log In button is pressed (4 ms)
  The Application Component is logged in the state
    ✓ It renders a log-out button (2 ms)
    ✓ It renders the user name and email address (3 ms)

Test Suites: 1 passed, 1 total
Tests:       4 passed, 4 total
Congrats! But before you leave this tutorial, there's another more thing you'll have to do, and that is user testing.
So far, all tests you run on the application are unit tests. Even though they are great for validating functionality, they don't verify that the integrations are working or set up correctly. For example, we mocked the Auth0 API to return the data we would expect if everything was fine. Still, we don't validate if the given Auth0 Domain or Client ID is correct or if the configuration on the Auth0 dashboard is appropriately set.
For that, you can write integration tests or perform manual tests by running the application on the browser.
To test your application manually, go to your terminal and start the app by running the following:
npm run start
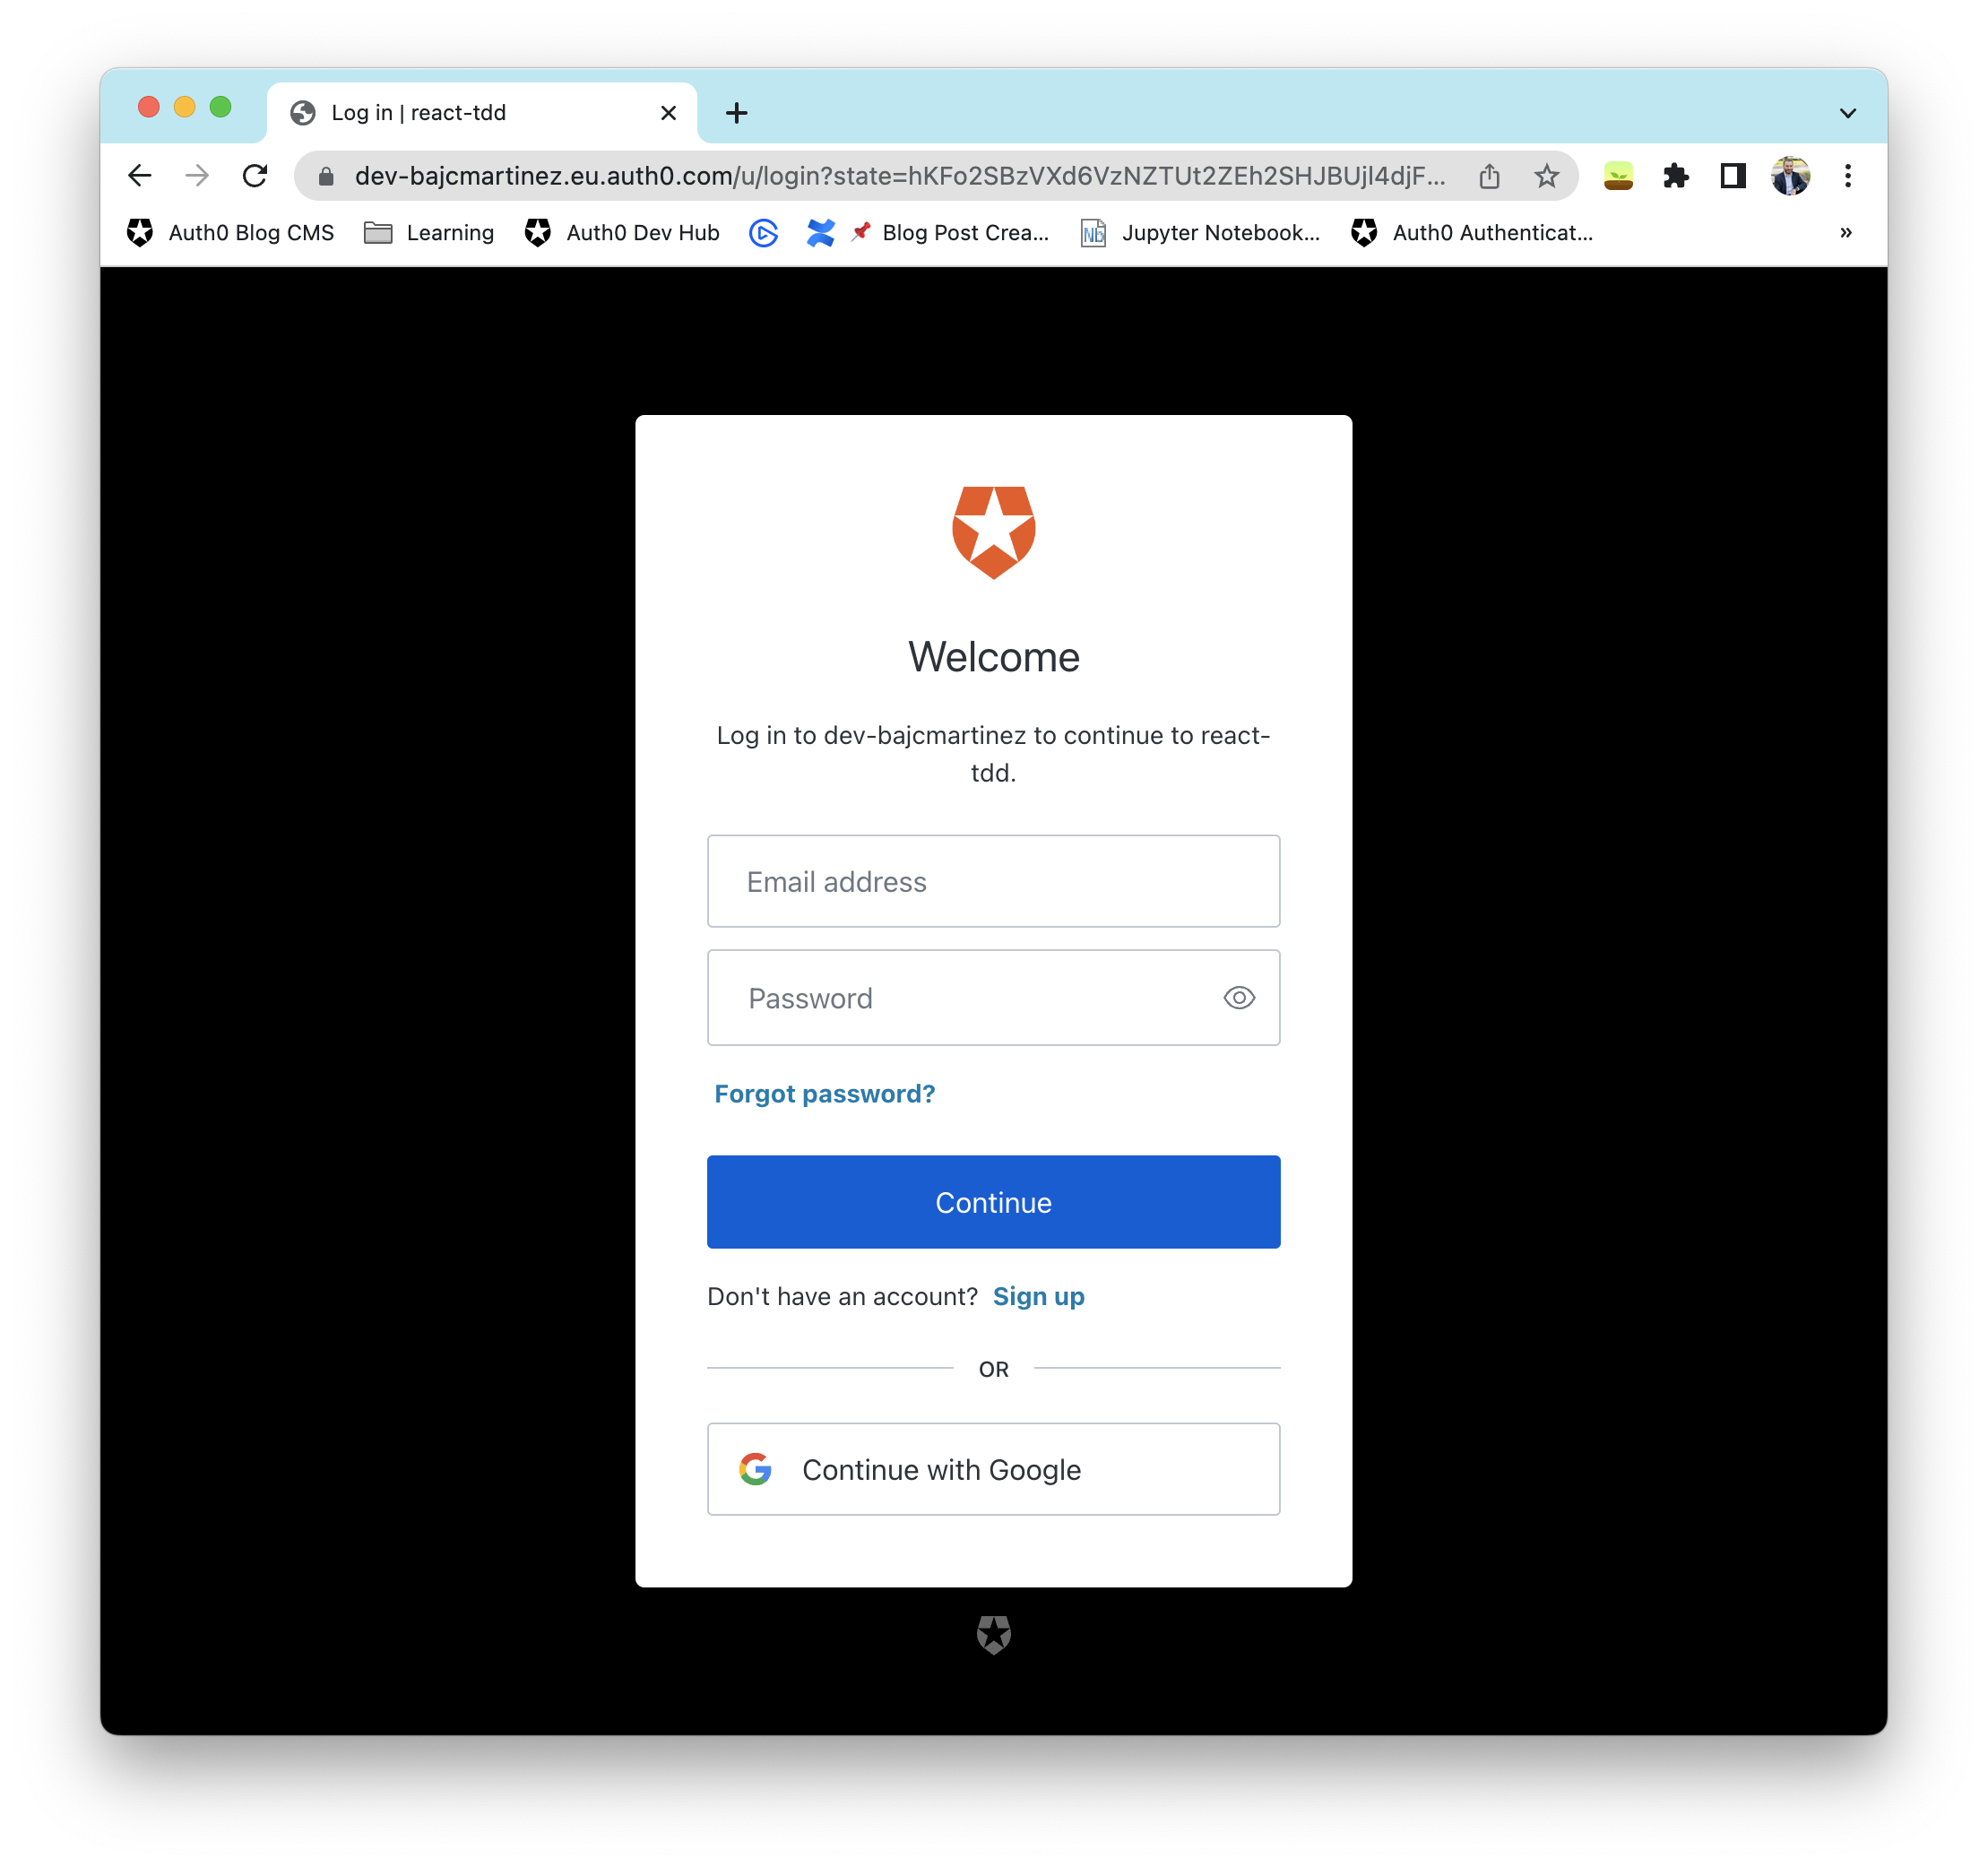
Visit http://localhost:3000, click the login button, and sign up for a new test user if you don't have one. After you're done, you'll be redirected back to the application where your name is displayed.
|  |
| |
|  |
|
Conclusion
In this tutorial, you have implemented user authentication to identify your users and get user profile information in React following the TDD process to ensure that our code is well-tested.
This tutorial covered the most common authentication use case for a React application, and to keep it simple, we took some shortcuts, like working off a single component.
If you want to learn more about the possibilities of Auth0 with React, please check the React Authentication by Example Guide.
Let me know in the comments below what you think of this tutorial.
Thanks for reading!
About the author

Juan Cruz Martinez
Staff Developer Advocate