This guide will walk you through how to create and deploy your first Action using the . When you finish, you should understand the basic functionality that you will use with all Actions and you will be familiar with the programming model. What you will learn constitutes the foundation of writing any Action, regardless of its purpose or the flow.Documentation Index
Fetch the complete documentation index at: https://auth0.com/llms.txt
Use this file to discover all available pages before exploring further.
The goal: notify Slack on user login
You are creating an Action that sends a message to a Slack channel when a user logs in. While this tutorial will use the Post Login trigger, the information provided here is useful for triggers of any type. To accomplish this task, you will do the following:- Create an Action
- Add a Secret
- Add a dependency
- Save the Draft
- Add custom logic
- Test an Action
- Deploy an Action
- Attach an Action to a Flow
- See the results of an Action in Tenant Logs
Prerequisites
Because this Action will be sending messages to a Slack channel, you need to create an Incoming Webhook for a Slack Workspace. Once you have a Slack Webhook URL, you may continue with this guide.Create an Action
To get an Action working in a specific flow, you need to create the Action and then add it to a flow.- Navigate to Auth0 Dashboard > Actions > Library, then select Create Action > Build from scratch.
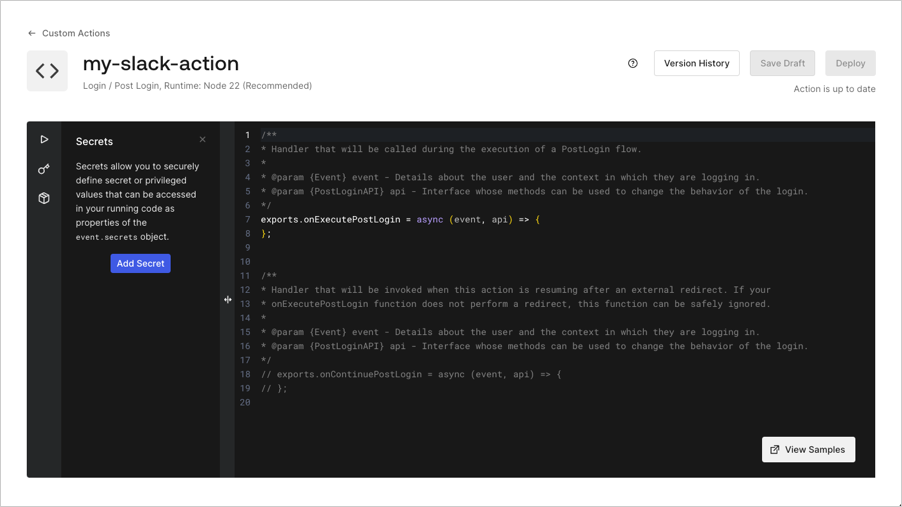
- Enter a Name and select the Login / Post Login trigger since you’ll be adding an Action to the Login flow, then select Create.
Create an Action from a Template
The Actions Template gallery offers a variety of starter templates on their way to creating an Action. To create an Action from a Template:- Navigate to Auth0 Dashboard > Actions > Library, then select Create Action.
- Select Choose from template.
- Select the template that you would like to use for building an Action.
- You should now see a read-only preview of the code within the template. To proceed, select Use this template.
- Enter a name, and select Create.
Add a Secret
Each Action can contain Secret values, which are suitable for holding sensitive information, such as and API Keys. Let’s store the Slack Webhook URL as a Secret.- Select the Key Icon from the code editor’s left sidebar
- Select Add Secret.
- Give the Secret the following name:
SLACK_WEBHOOK_URL. - Paste in the Webhook URL provided by Slack and select Create.
event.secrets.
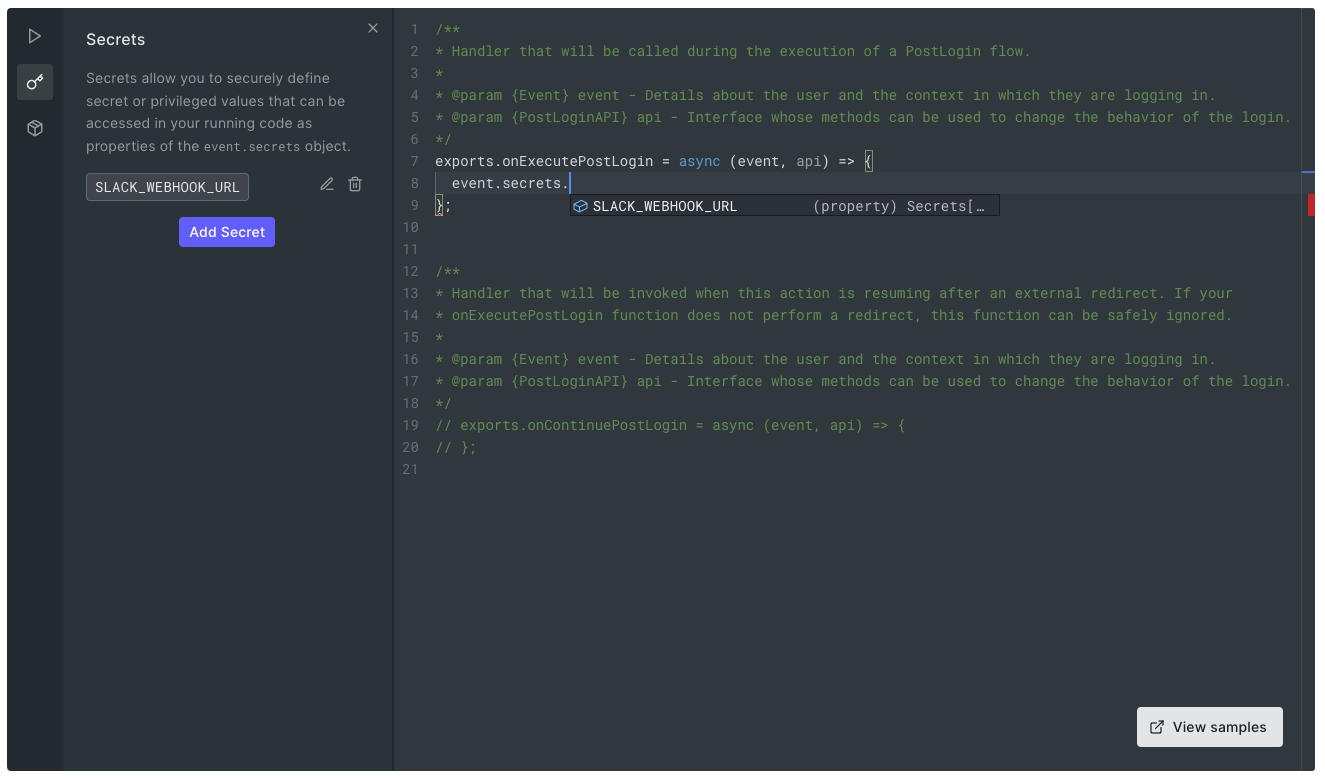
Once a Secret has been created, its value will never be revealed. Auth0 encrypts all Secrets and stores them securely.
Add a dependency
You’ll be using the@slack/webhook npm package to make it easy to send a message to Slack. You can use nearly any public npm package in an Action as long as it can be installed without relying on native add-ons.
To add the dependency:
- Select the Dependency icon (cube icon) in the sidebar.
-
For Name, enter
@slack/webhook. By default, your Action will use the latest version of the dependency at the time the dependency was added. -
Select Create, and the Dependency should be added to the Action:
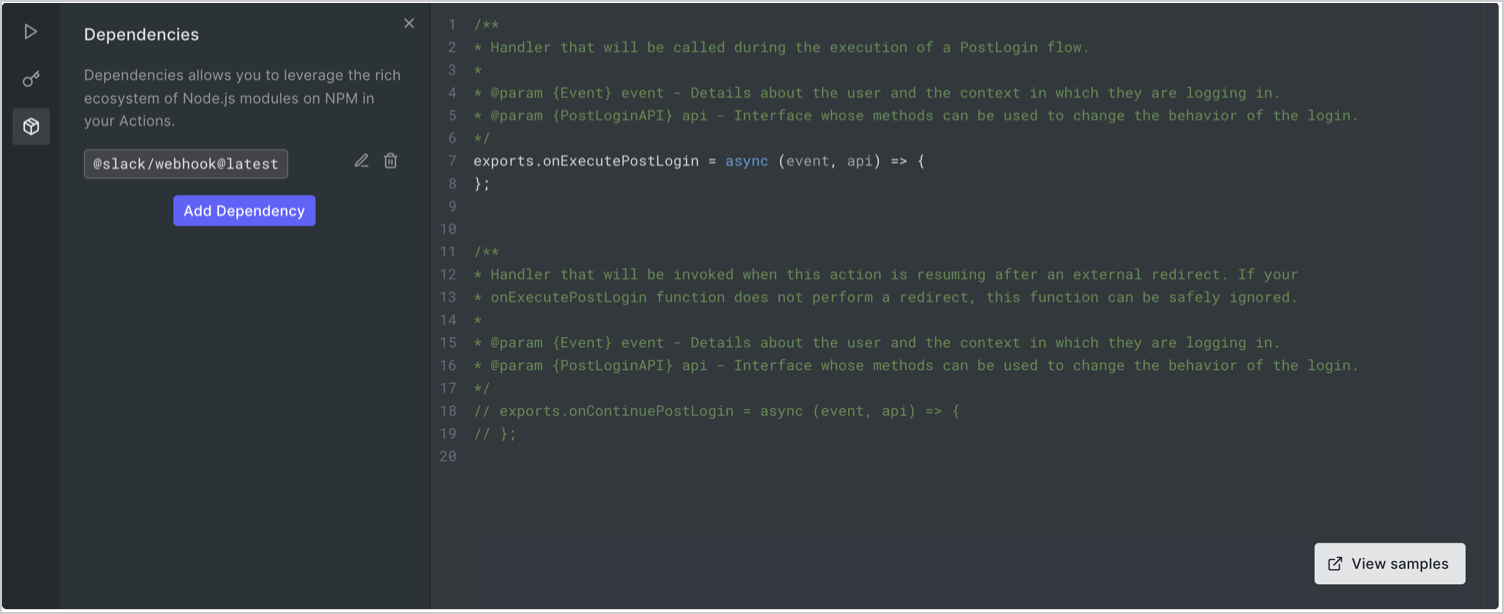
When you save this Action, the latest version of your dependency will be resolved and replaced with a specific version number to keep future updates to the package from breaking your Action.
Save the Draft
Select Save Draft. Your Action is saved, but it won’t be executed as part of any user flows yet. With Actions, you have the opportunity to create, edit, and test Actions before they affect any traffic in your Auth0 tenant. Once you’re happy with the behavior of the Action, you’ll deploy the Action and add it to a Flow later.Add custom logic
Now that the Action has been configured with a Secret and a dependency, let’s write some code! Every Action has an event object that contains read-only, contextual information relevant to the associated trigger. If you start typingevent. in the Editor, you should be presented with all the available properties of the event. To learn more about which information is available on each trigger, read Explore Flows and Triggers.
Let’s use our Action to notify Slack. Add this code to your action:
Test the Action
Before you run this Action in your tenant with real user traffic, test it to ensure it behaves as expected.-
Select the Test (triangle) icon in the sidebar. In the Payload section, you’ll see editable JSON data relevant to the trigger that you selected when you created the Action.
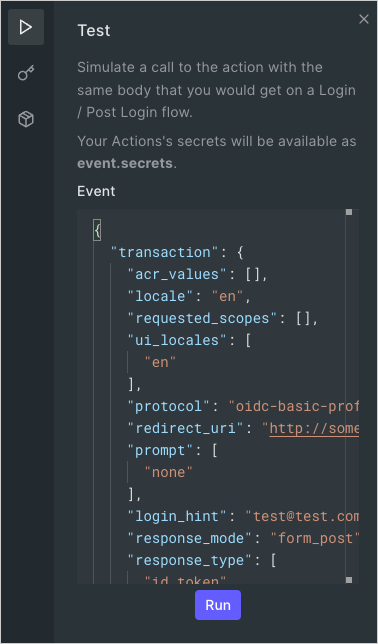
- Select the Run button, and you should see a message appear in your Slack channel.
Deploy the Action
Now that we’re satisfied that the Action is working as expected, it’s time to deploy it. Select Deploy. Deploying an Action takes a snapshot of the Action at that time and records it as an Action Version. Select Version History, and you should see the Action recorded as Version 1: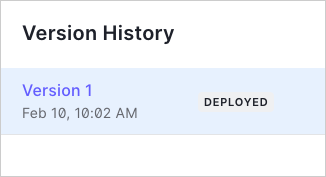
Attach the Action to a Flow
The final step in configuring a new Action so that it’s executed as part of your tenant’s traffic is to attach it to a Flow.- Navigate to Auth0 Dashboard > Actions > Flows to see a list of the available Flows:
-
Select the Login flow and drag
my-slack-actioninto the flow.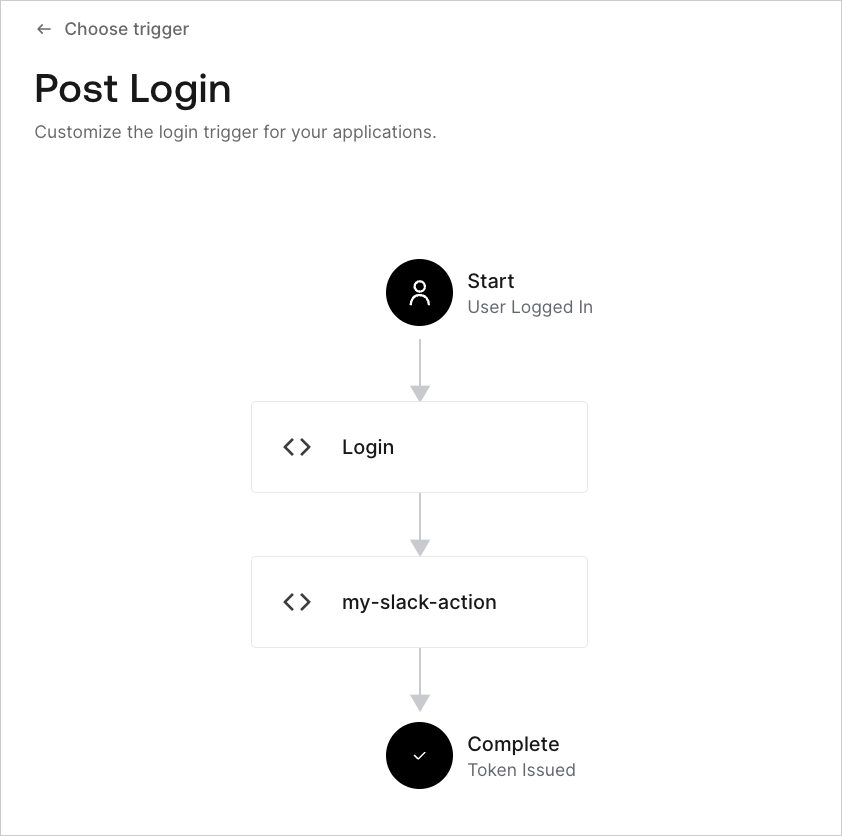
- Select Apply.
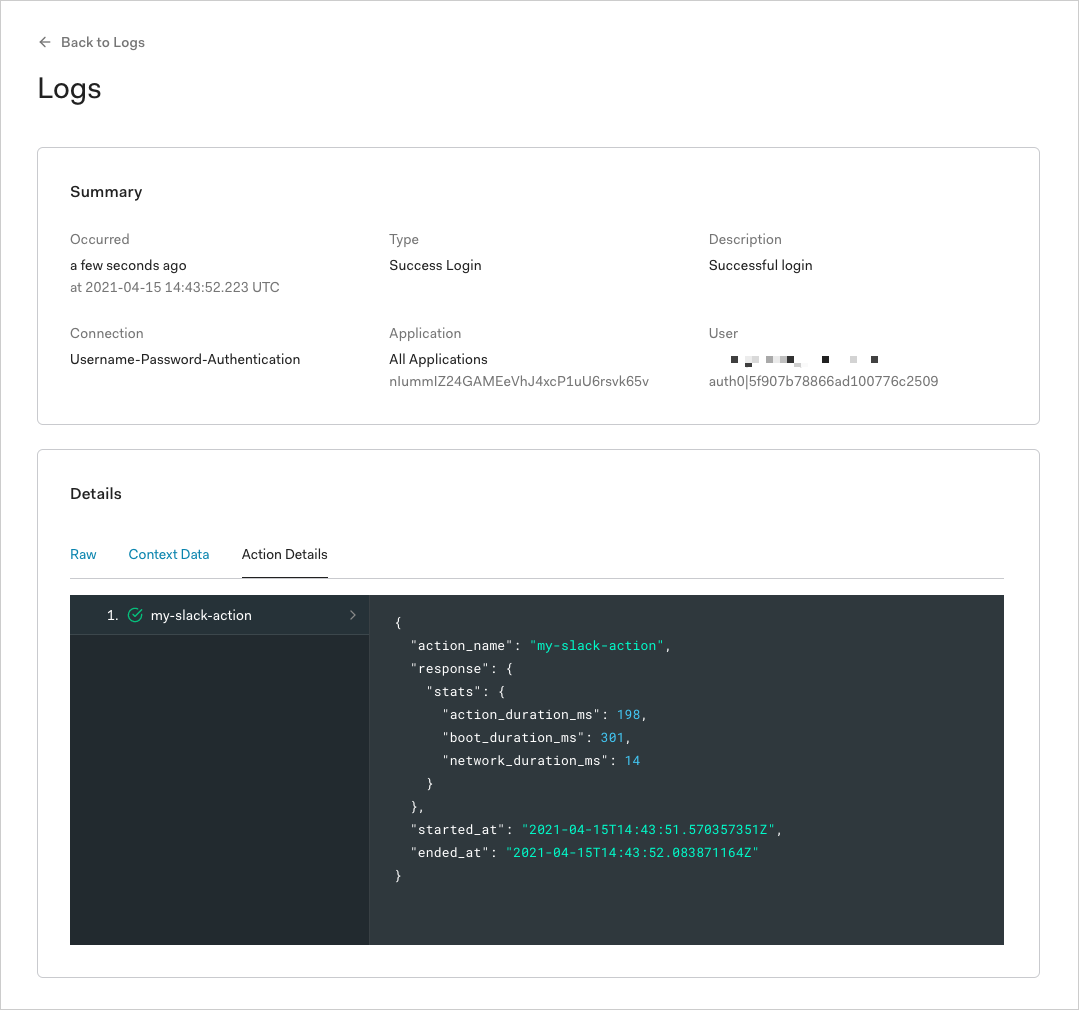
Observe Actions in Tenant Logs
Now that your Action is running as part of the Login flow, Auth0 captures information about each Action execution in the tenant logs. To view this, navigate to Auth0 Dashboard > Monitoring > Logs, and select a Successful Login event. You should see an Action Details view that contains information about any Actions that were executed as part of that flow.