Before you start
Ensure your Auth0 tenant is connected to Azure AD using the Microsoft Azure AD connection type.This integration will require two applications to be registered in Azure AD: the OpenID Connect integration and the SCIM integration. To streamline this setup process for your customers, consider publishing your app in the Azure Active Directory app gallery.
sub), read Older Connections.
Configure SCIM settings in Auth0
- Launch the Auth0 Dashboard, go to Authentication > Enterprise > Microsoft Azure AD > [your-connection] > Settings.
- Ensure that User ID Attribute Type is set to User Object Identifier (oid) and Use Common Endpoint toggle is Disabled.
- Select the Provisioning tab and disable Sync user profile attributes at each login unless you want to sync additional attributes at login.
- In the same section, enable Sync user profiles using SCIM.
- Under the Mapping tab, ensure the SCIM attribute containing the User ID setting is set to externalId.
- Review the Additional Mappings to ensure the extended SCIM attributes are mapped to your preferred Auth0 attributes. See attribute mapping for details.
Retrieve SCIM endpoint URL and token
This section uses the , but these steps can also be managed with the . See the Deployment Guidelines section for best practices.- In the Auth0 dashboard, browse to the SCIM Setup tab, then copy the SCIM Endpoint URL and paste it somewhere safe.
- Generate SCIM token by clicking Generate New Token and set an expiration date for the token if you wish.
- Select the scopes you want to allow. The default scopes required by Azure AD are
get:users,post:users,patch:users, anddelete:users. You may optionally selectget:groups,post:groups,patch:groups, anddelete:groupsto provision groups.
Configure SCIM in Azure AD for OIDC Apps
- Confirm that an OpenID Connect application has already been registered to handle user authentication in the Microsoft Entra ID > App registrations section of the Azure portal.
- Confirm that your OpenID Connect application has Assignment Required set to Yes in the Microsoft Entra ID > Enterprise applications > [your-oidc-app] > Manage > Properties section, and has users assigned in the Users and Groups tab.
- Next, register a new Non-gallery application in the Azure portal by browsing to Microsoft Entra ID > Enterprise applications > New application > Create your own application, entering an application name, and selecting Create.
- Go to the Users and Groups tab and assign the same Azure AD users and groups that are assigned to the registered OpenID Connect app.
- Select the Provisioning tab, select Get started, and choose Automatic as the Provisioning Mode.
- Select Admin Credentials, then enter the SCIM Endpoint URL value you saved earlier as the Tenant URL. At the end of the URL, add
?aadOptscim062020query parameter to fix known Azure AD issues described here. - Paste the token value into the Secret Token field and select Save.
- Go to Mappings.
- To optionally provision groups, confirm that Provision Entra ID Groups is set to Enabled. Otherwise set this to Disabled.
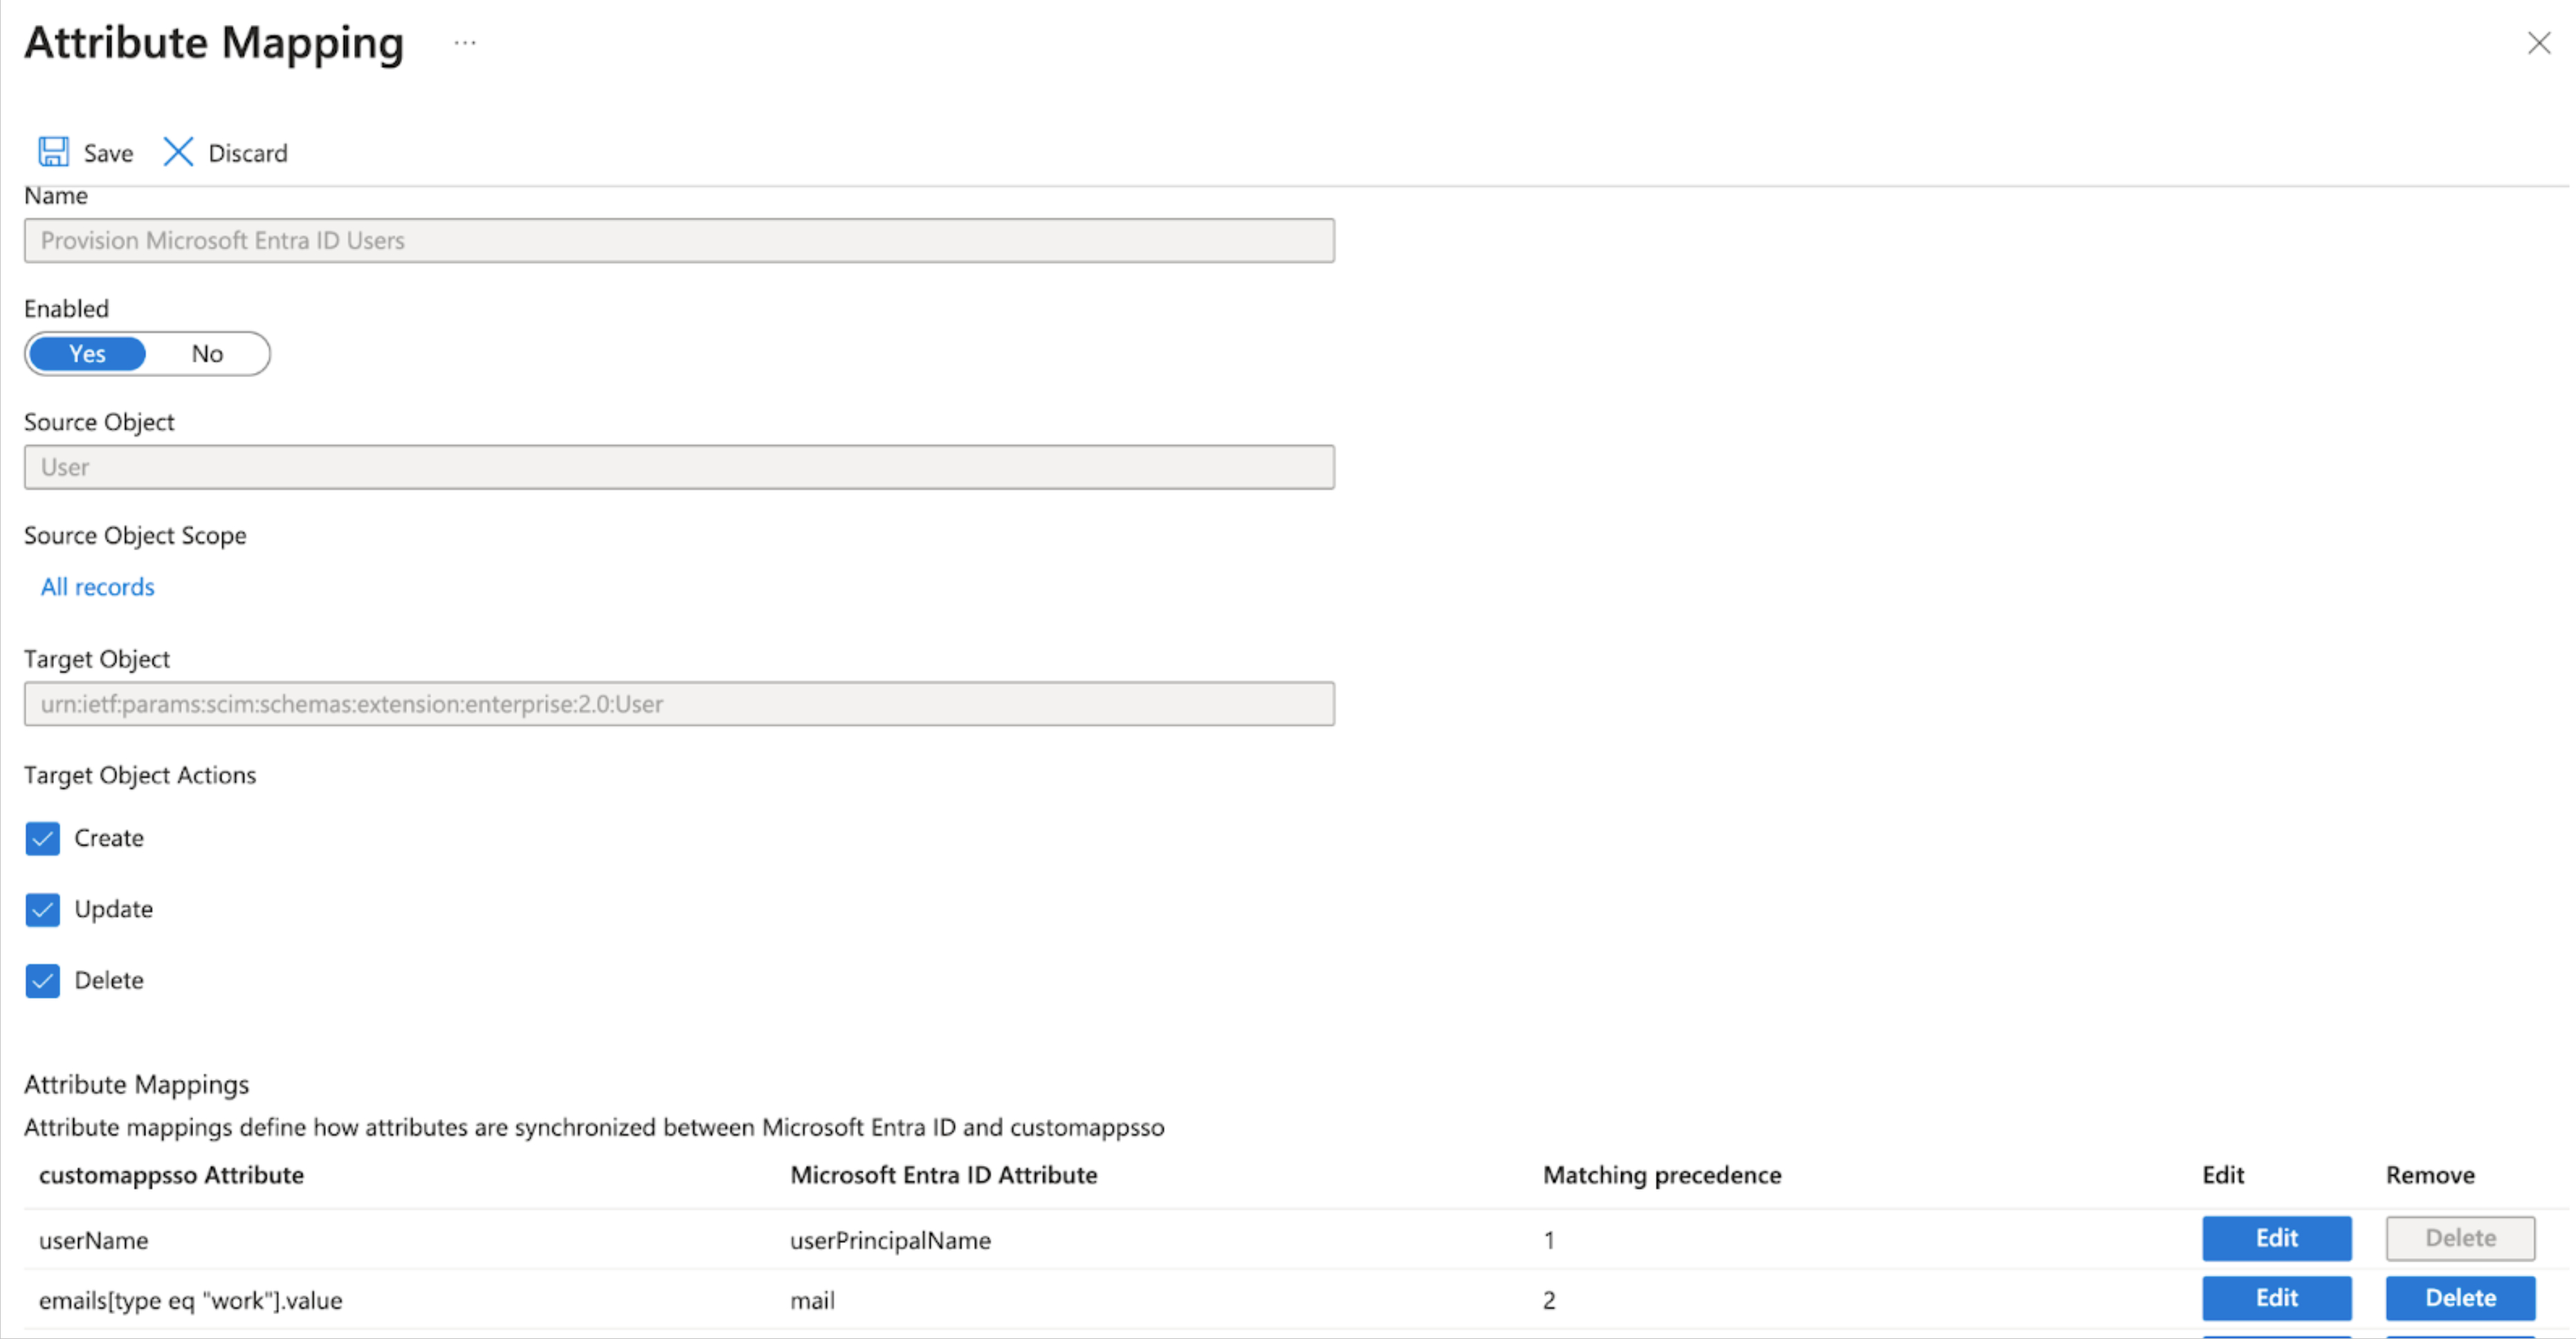
- Select Provision Microsoft Entra ID Users, then go to Attribute Mappings and edit the attributes of the line containing
externalIdandmailNickname. - In the Edit Attribute screen, change Source attribute to objectId, then choose OK.
- Go back to Attribute Mappings and select the line containing
emails[type eq "work"].value and mail. - In the Edit Attribute screen, change Match objects using this attribute to Yes,thenset Matching precedence to 2 and choose OK. The attribute mapping screen looks like this as you continue to use the Attribute Mappings section to configure additional SCIM attributes:
Testing
- On the Enterprise application overview screen, go to Manage > Provisioning > Provision on Demand to test the SCIM connection.
- Go to Select a user or group and enter the name of a user or group that you assigned to the application, then select the item and choose Provision. This creates the user or group in the Auth0 tenant.
- Set the Provisioning Status to On in order to provision all assigned users and groups.