Auth0 provides two ways to implement role-based access control (RBAC), which you can use in place of or in combination with your API’s own internal access control system:The Authorization Core feature set matches the functionality of the Authorization Extension, improves performance and scalability, and provides a more flexible RBAC system than the Authorization Extension.Currently, both implement the key features of RBAC and allow you to restrict the custom scopes defined for an API to those that have been assigned to the user as permissions.
-
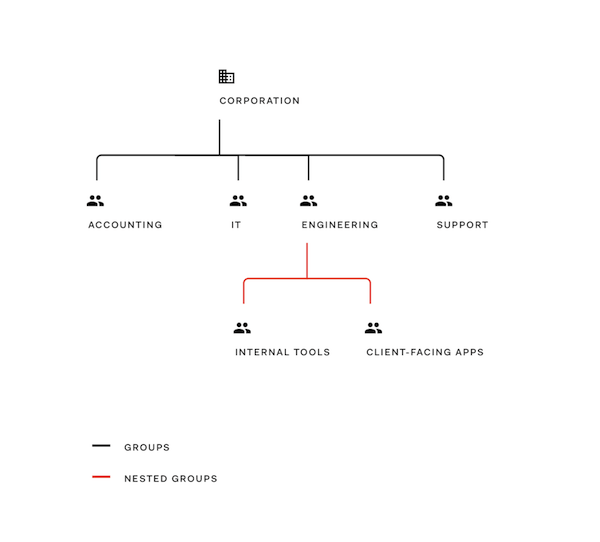
Corporation
- Accounting
- Information Technology
-
Engineering
- Internal Tools
- Client-Facing Applications
- Support
- Approve requests for travel
- Approve travel expenses
Users
The Users section lists all the current users of your applications. Here you can find a specific user, see their profile, change their group affiliations, and change their roles.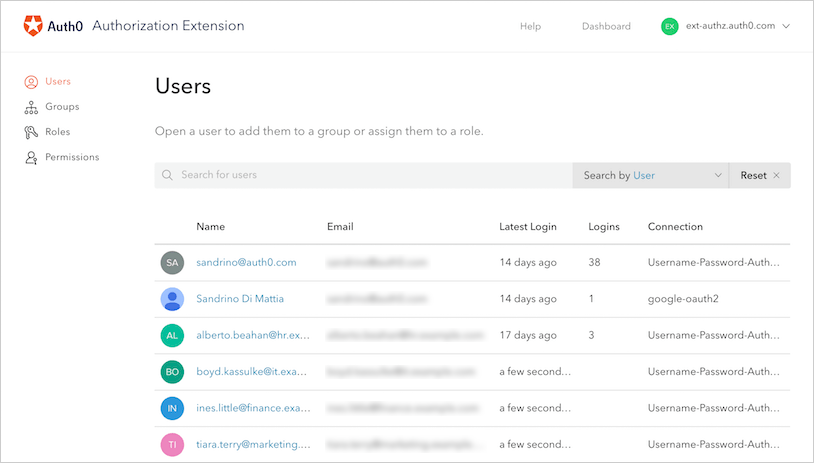
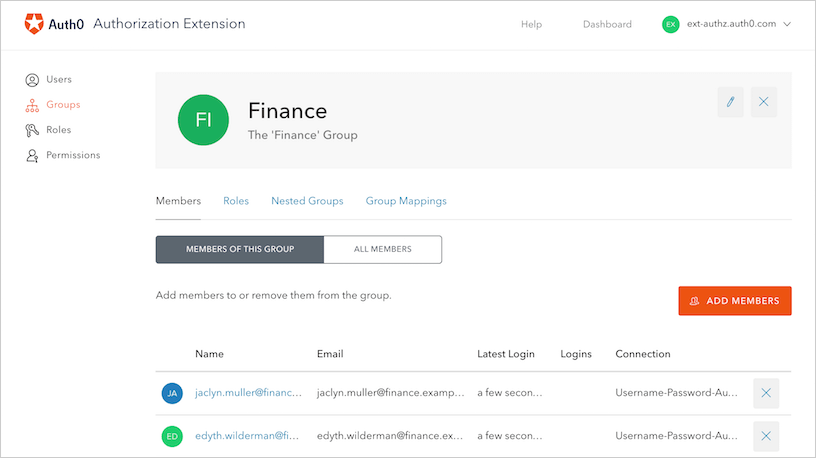
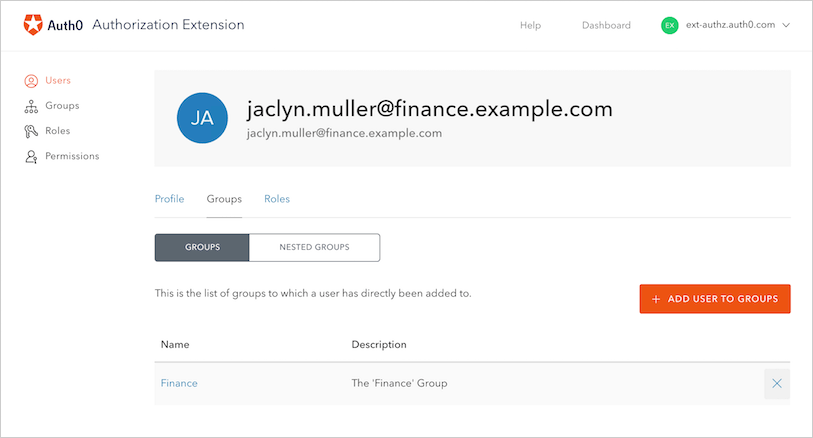
Groups
To create and manage the groups with which you’ll manage users’ settings, click Groups in the Authorization Dashboard. Click Create Group to create a new group for your users. You’ll be asked to provide a name for the group, as well as a description for that group. You can manage your users and their group affiliations in one of two ways:-
Opening the group and managing the group’s users
-
Opening the user and managing the user’s group membership(s)
-
Example Company
-
Accounting
- External Accountants
- Human Resources
-
Finance
- Finance IT Support
- Management
-
Accounting
- Open up the top-level Group (in the example above, this would be the Example Company Group)
- Click on the Nested Groups tab
- Click on the ADD NESTED GROUP button. You will be presented with a list of Groups that can be added to the primary Group. To select a particular Group, click on the checkbox to the left of the name. After each selection, you will be returned to the primary group page. Continue this process until you have included all the Groups you need.
Group mappings
Group Mappings allow you to dynamically add users to different Groups based on the users’ Connections. Essentially, using the Connection and the groups information provided by the , you can dynamically make the user a member of the group in which you’ve created the appropriate mapping. For example, suppose your users are logging in using their Active Directory (AD) credentials. As part of their identity, AD allows users to have group information associated (such as “Administrative” and “Marketing”). You can then configure group mappings to look at a user’s profile if they’re connecting with the Active Directory connection. When the extension sees that the person is a part of the “Administrative” group, it will automatically make the user a member of your company’s Admin group.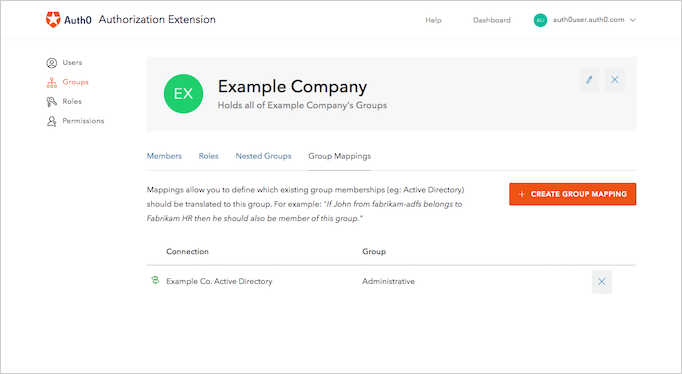
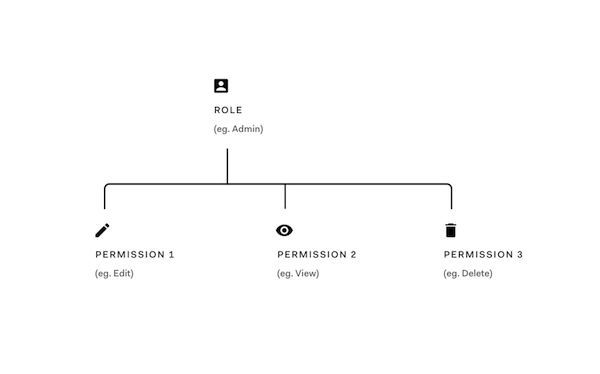
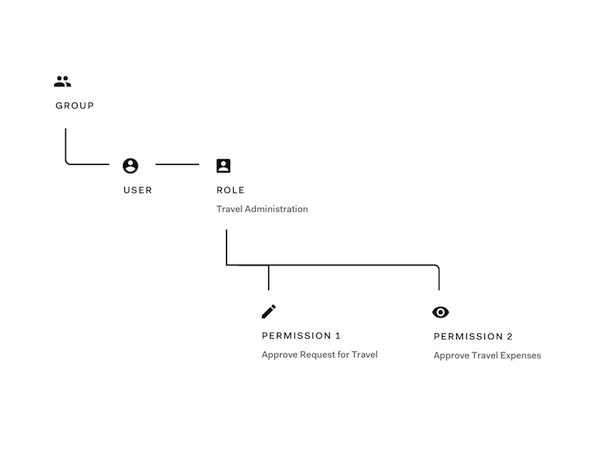
Roles
The roles that you will create will depend on the access to certain permissions in your application. For example, let’s say that you have an application that allows employees to enter in company expenses. You want all employees to be able to submit expenses, but want certain Finance users to have more admin type of actions such as being able to approve or delete expenses. These actions can be mapped to Permissions and then assigned to a certain Role. You can create different types of Roles such as: Expense Admins, Expense Manager, and Expense User for your Expense Management Tool.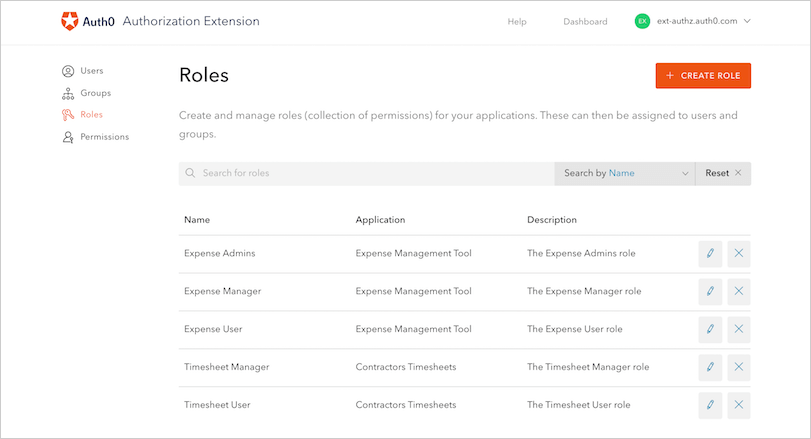
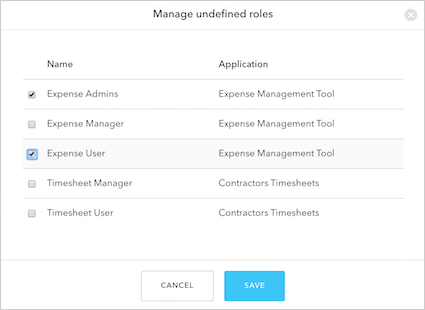
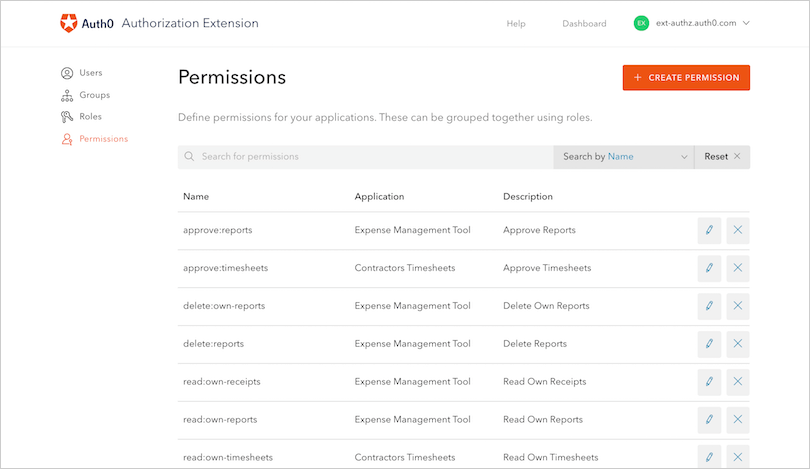
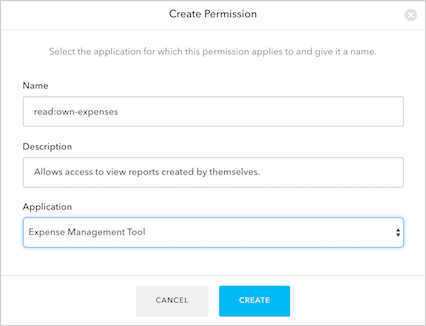
Permissions
Permissions are the actions or functions that can be added to Roles. Using the previous example of an Expense application, let’s look at possible roles and how they can be associated with certain permissions:-
Role: Expense User
-
Permissions:
- View their own expenses
- Add a new expense
-
Permissions:
-
Role: Expense Admin
-
Permissions:
- Approve expenses
- View all user expenses
- Delete expenses
- Add a new expense
-
Permissions: