The bad news: If your users deploy everything on Vercel, chances are they already have Vercel accounts, teams, and permissions set up. Making them create yet another account for your app is not exactly a delightful onboarding experience.
The good news: Vercel now ships Sign in with Vercel, a standard OAuth 2.0/OpenID Connect provider that lets people use their Vercel identity to log in to third‑party apps.
In this post, we will plug Sign in with Vercel into Auth0 using a custom OAuth2 social connection plus a tiny helper script. When we are done, your Universal Login page will have a shiny “Continue with Vercel button, and you will have Vercel access tokens you can use to call the Vercel API on behalf of your users.
Prerequisites
You will need:
- An Auth0 tenant and an Application (SPA, web app, native, etc.) already configured, if you do not have one you can sign up for one for free.
- A Vercel account with access to Sign in with Vercel.
Step 1: Set Up Sign in with Vercel in the Vercel Dashboard
We will follow the structure of Vercel’s official Getting started with Sign in with Vercel guide, but instead of pointing the callback back into a Next.js route, we will point it at Auth0.
Create an App
On the Team Settings page:
- Click on Apps -> Create.
- Give your app a:
- Name: what users will see on the consent page.
- Description: short explanation of why your app wants access.
- logo (optional): shown alongside the name.
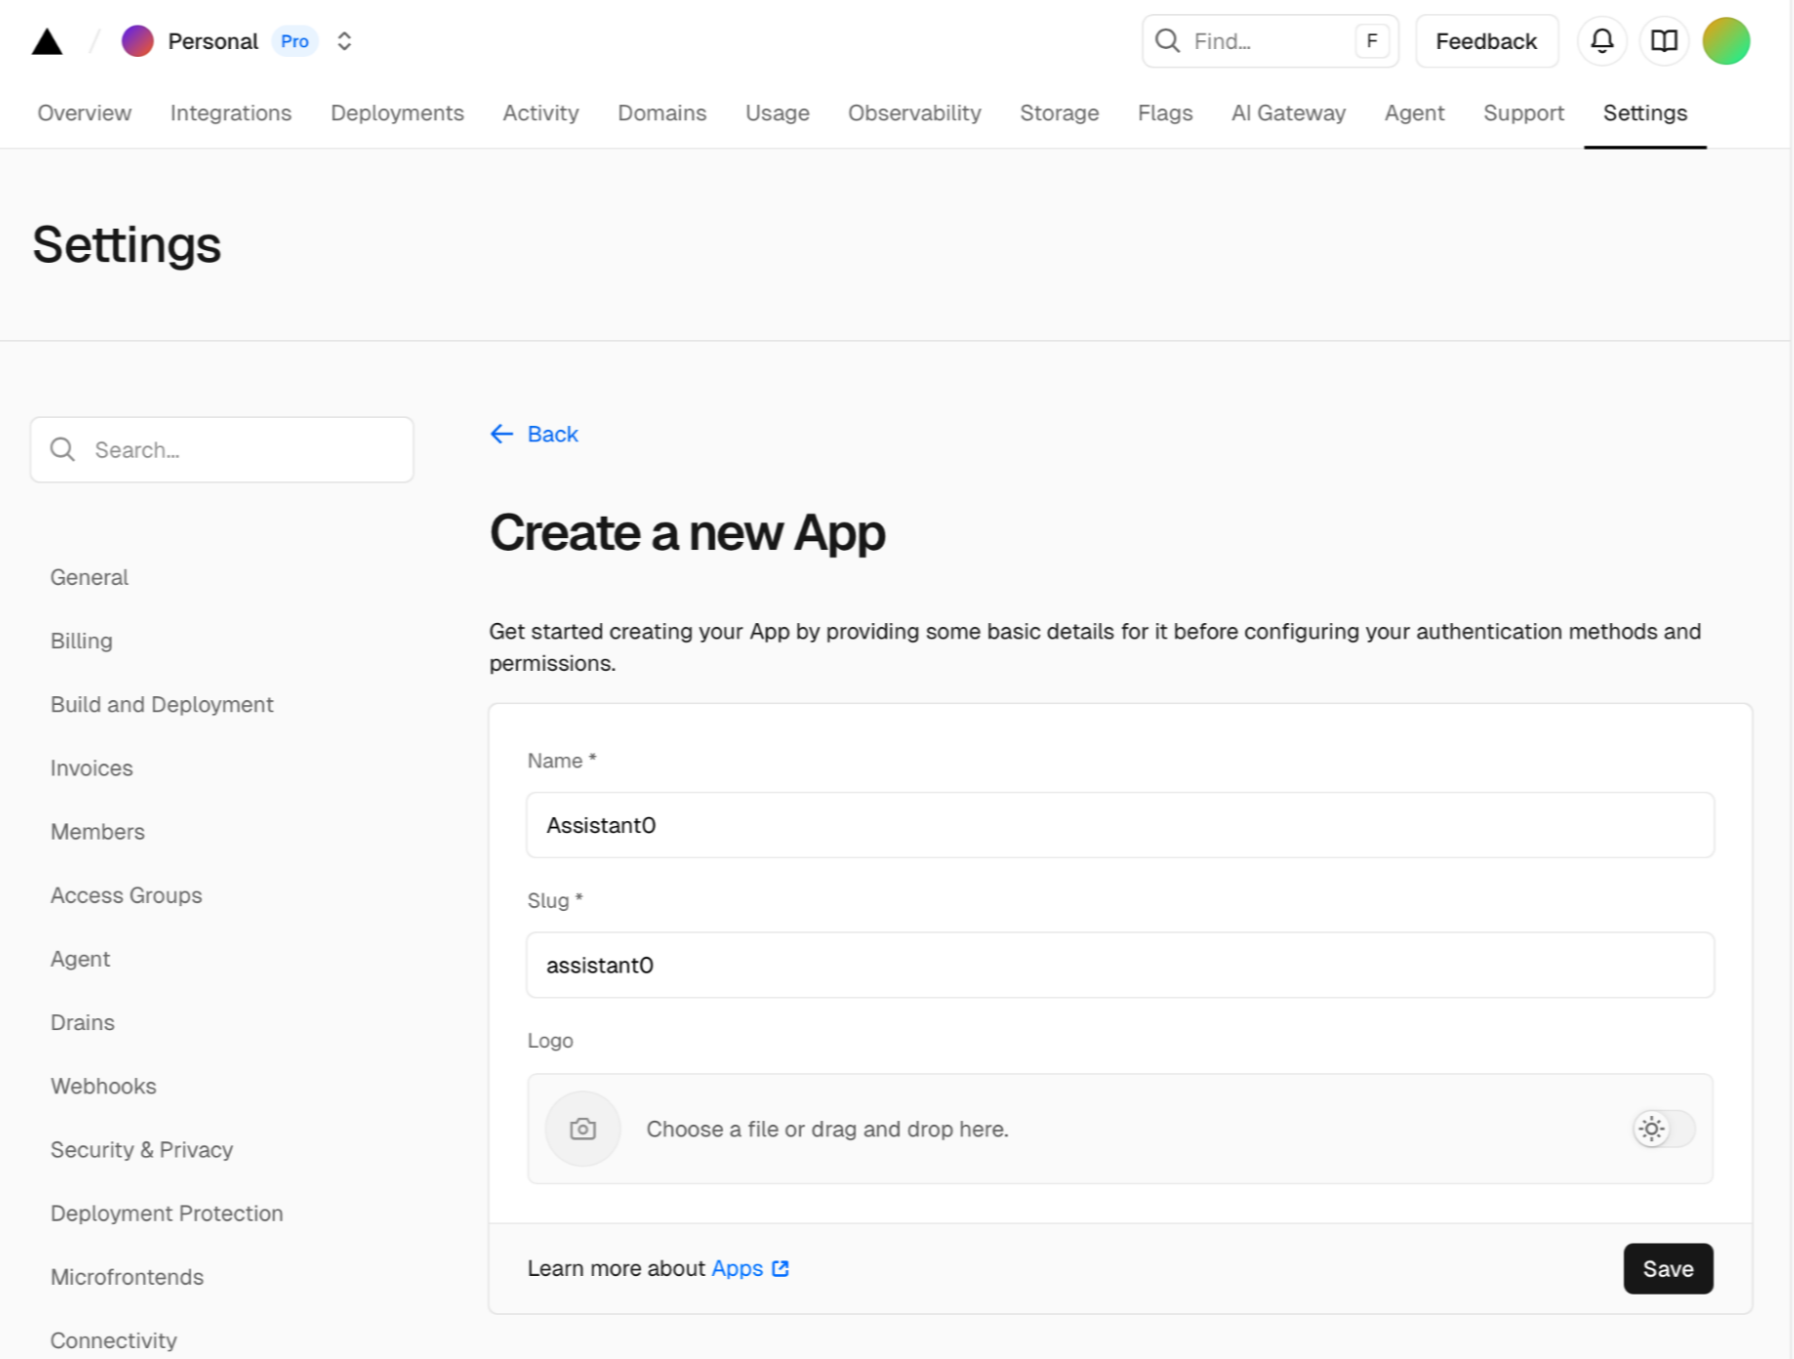
When you save, Vercel creates an app and automatically assigns it a Client ID.
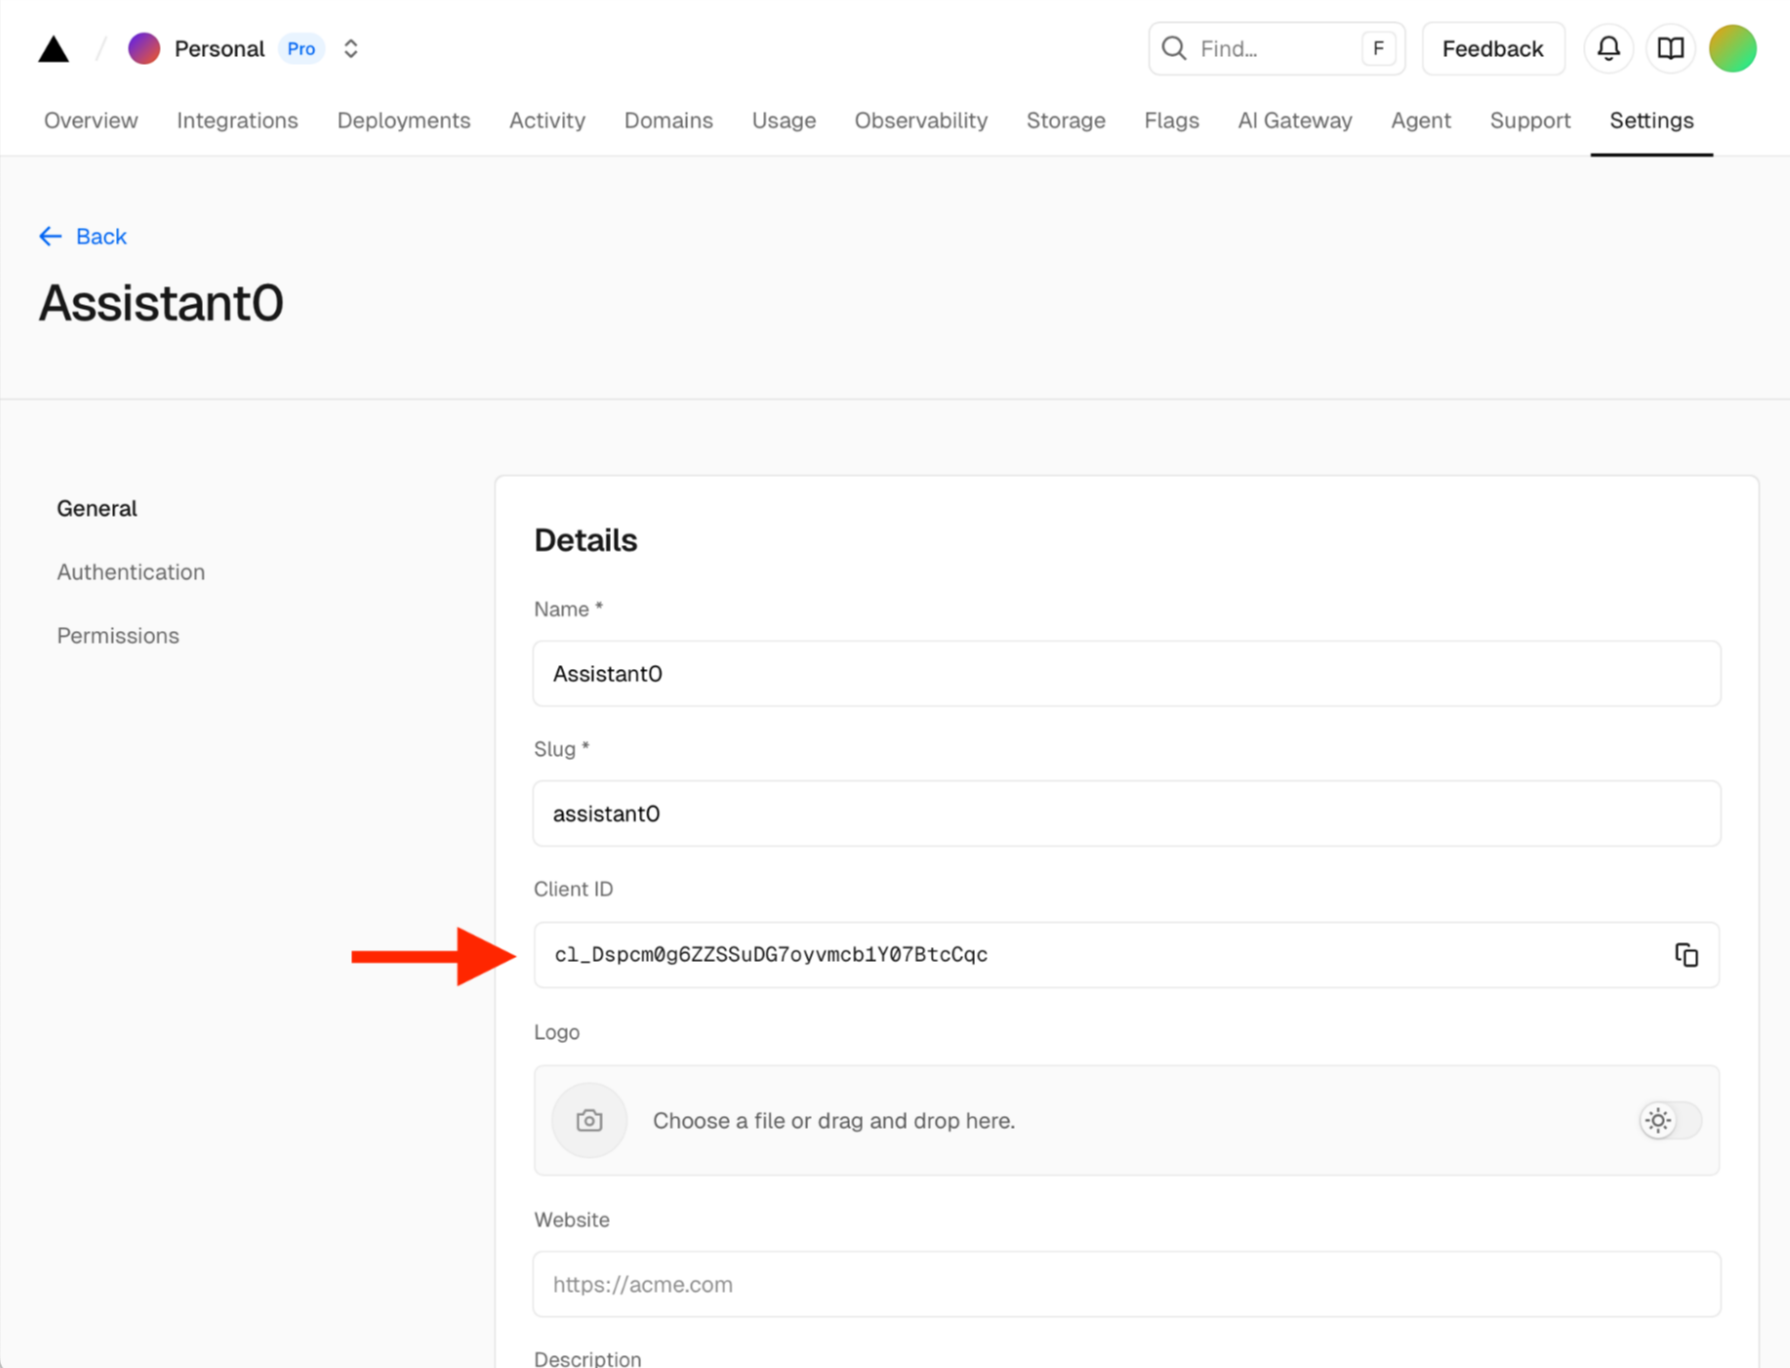
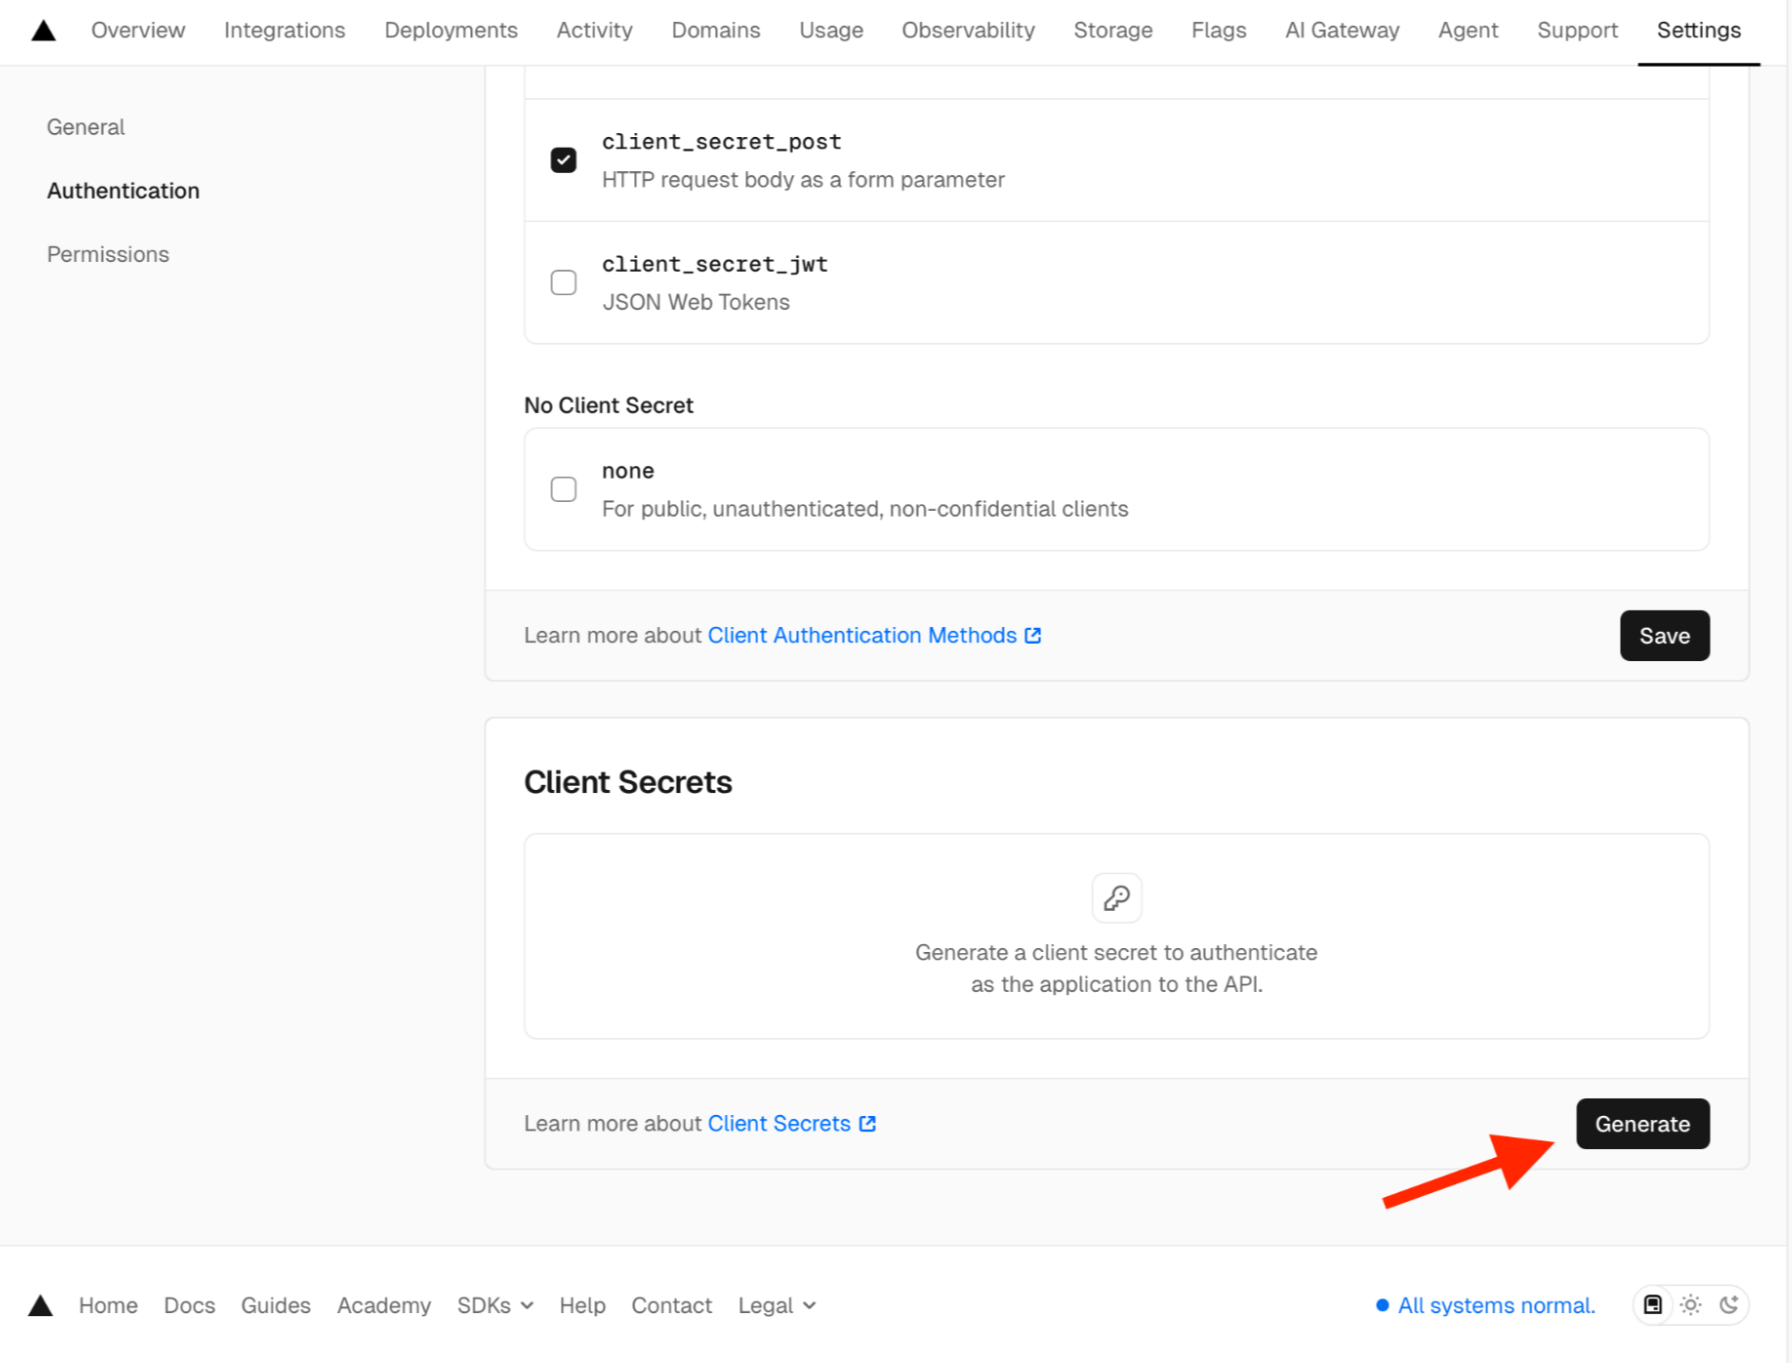
To connect the Vercel app with an Auth0 connection, you will also need a client secret, which you can get from the Authentication tab in your Vercel app.
If you do not already have one, generate a new client secret using the Generate button. Do not forget to copy the value on the screen. You cannot retrieve it later; you will have to generate a new one if you lose it.
Set Auth0 as the Client: Configure authorization callback URLs
Next, we need to set up the authorization callback URLs in the Vercel app. Since we will be using Auth0 as the central hub for identity, we need to set up the callbacks from Vercel to Auth0, rather than from Vercel to the app as stated on Vercel’s official documentation.
To set this up, navigate to your app settings and find the Authorization callback URLs section. Then, add the following value to the settings https://YOUR_AUTH0_DOMAIN/login/callback, do not forget to replace the URL with your Auth0 domain, and to save your changes.
Choose scopes and permissions for Vercel identity tokens
Next, decide what you want from Vercel. The Sign in with Vercel docs describe three main token types and the typical identity scopes.
Add at least these scopes to your App:
openid: to enable OpenID Connect and ID tokensemailProfile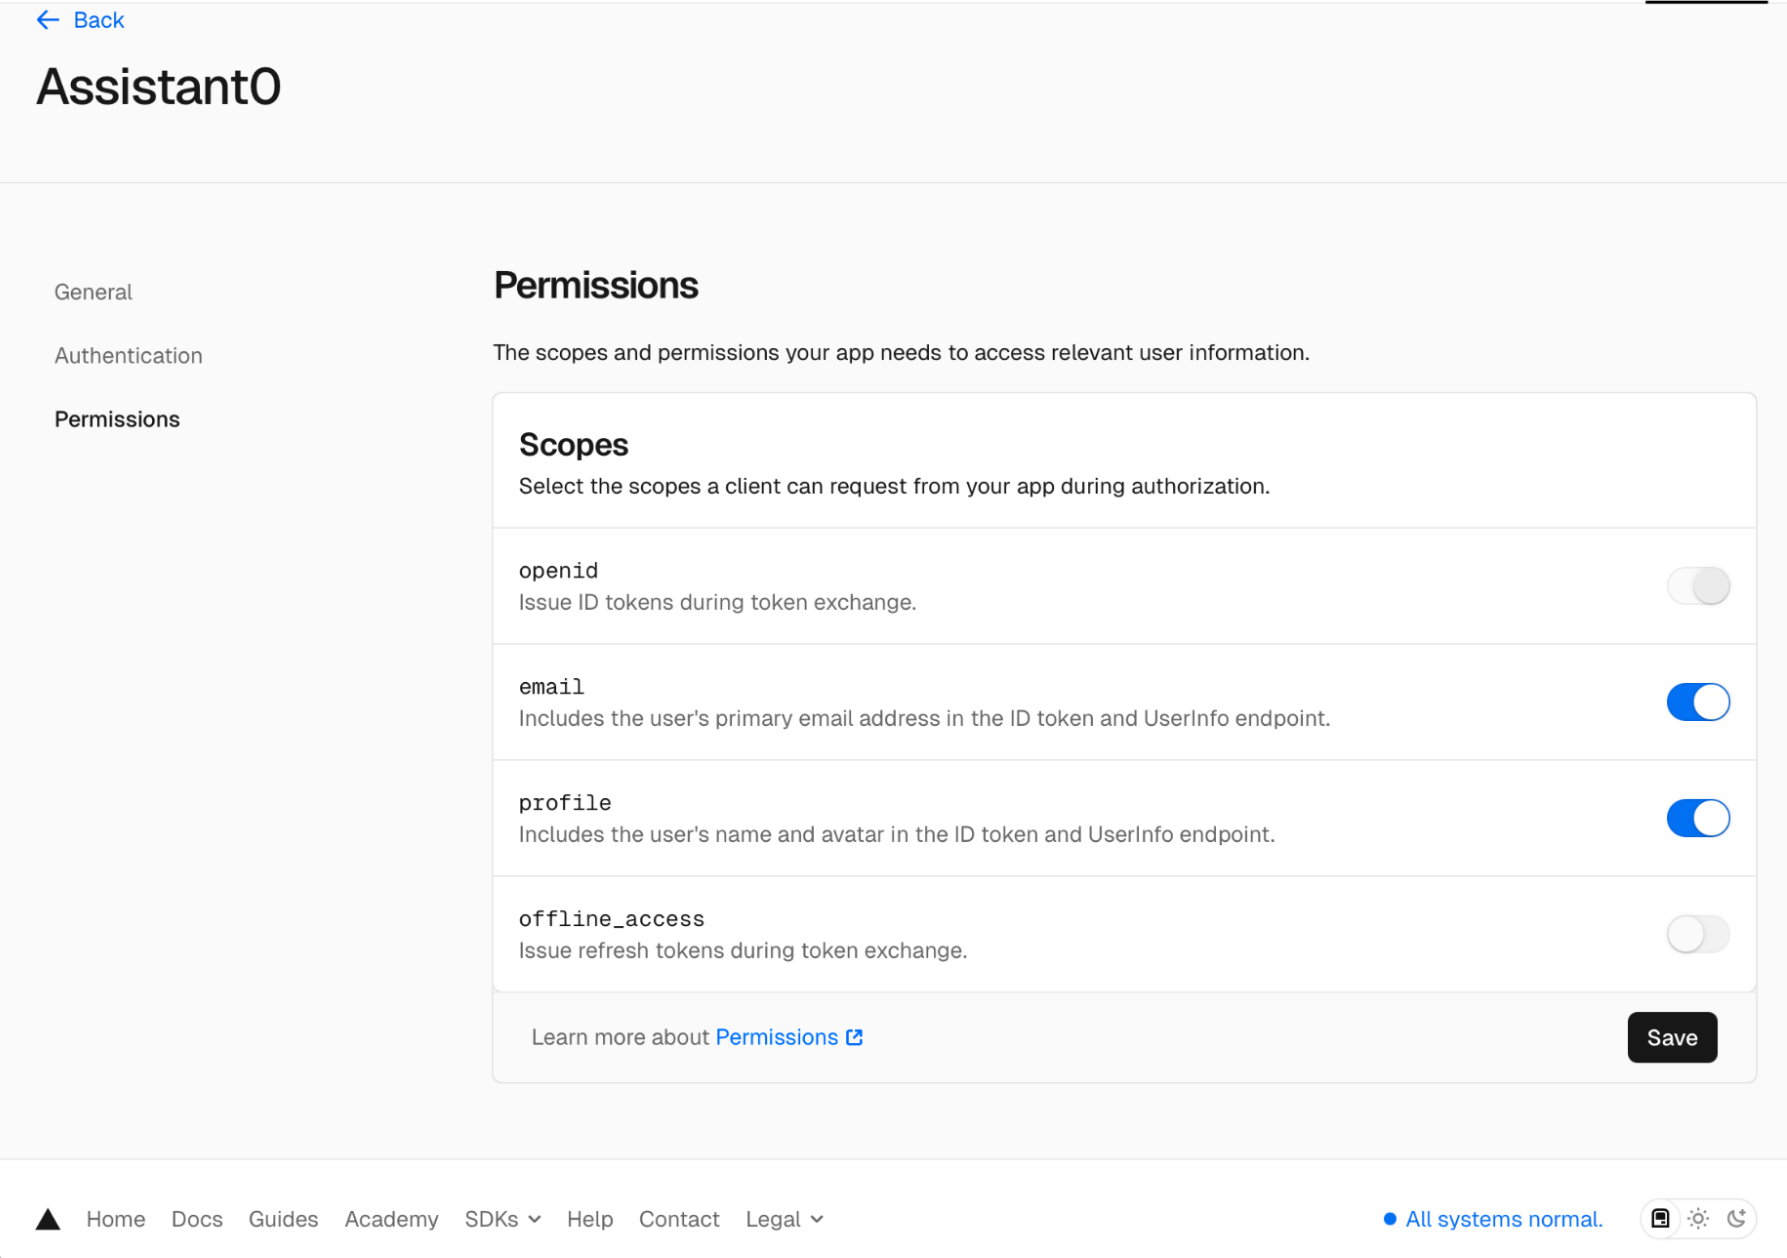
offline_access: to receive refresh tokens
Save your changes. At this point, you have a working Vercel OAuth app that:
- Shows a consent screen.
- Issues ID, access, and (optionally) refresh tokens for your users.
Next, we will connect the Vercel OAuth to Auth0.
Step 2: Create a Custom OAuth2 Connection in Auth0
Now that Vercel can issue tokens for your App, we need to teach Auth0 how to talk to it.
At a high level, we will create an OAuth2 social connection in Auth0 that knows:
- Where to send users for Vercel login:
https://vercel.com/oauth/authorize - Where to exchange the
codefor tokens:https://api.vercel.com/login/oauth/token - Where to fetch the user’s profile:
https://api.vercel.com/login/oauth/userinfo
We will cover how to do this using a script that will automatically configure the Custom Social Connection and automatically assign the social connection to the Auth0 Application, but the same steps can be set up using automations through Terraform.
1. Download the configuration script from GitHub.
2. There are five variables you will have to configure in the script. We will go through each of them.
#!/bin/bash

# 1. CONFIGURATION
# Auth0 config and token
AUTH0_DOMAIN="YOUR_AUTH0_DOMAIN"
ENABLED_CLIENT_ID="AUTH0_ENABLED_CLIENT_ID"
MGMT_API_TOKEN="YOUR_AUTH0_MGMT_API_TOKEN"

# OAuth Credentials for Vercel app
CLIENT_ID="YOUR_VERCEL_CLIENT_ID"
CLIENT_SECRET="YOUR_VERCEL_CLIENT_SECRET"
3. The variable AUTH0_DOMAIN can be obtained from your Auth0 Dashboard settings.
4. The variable ENABLED_CLIENT_ID refers to the Auth0 application you’d like to set up the new connection. To retrieve the client Id for an Application, visit the Applications page, select the Application you want, and copy the Client Id value.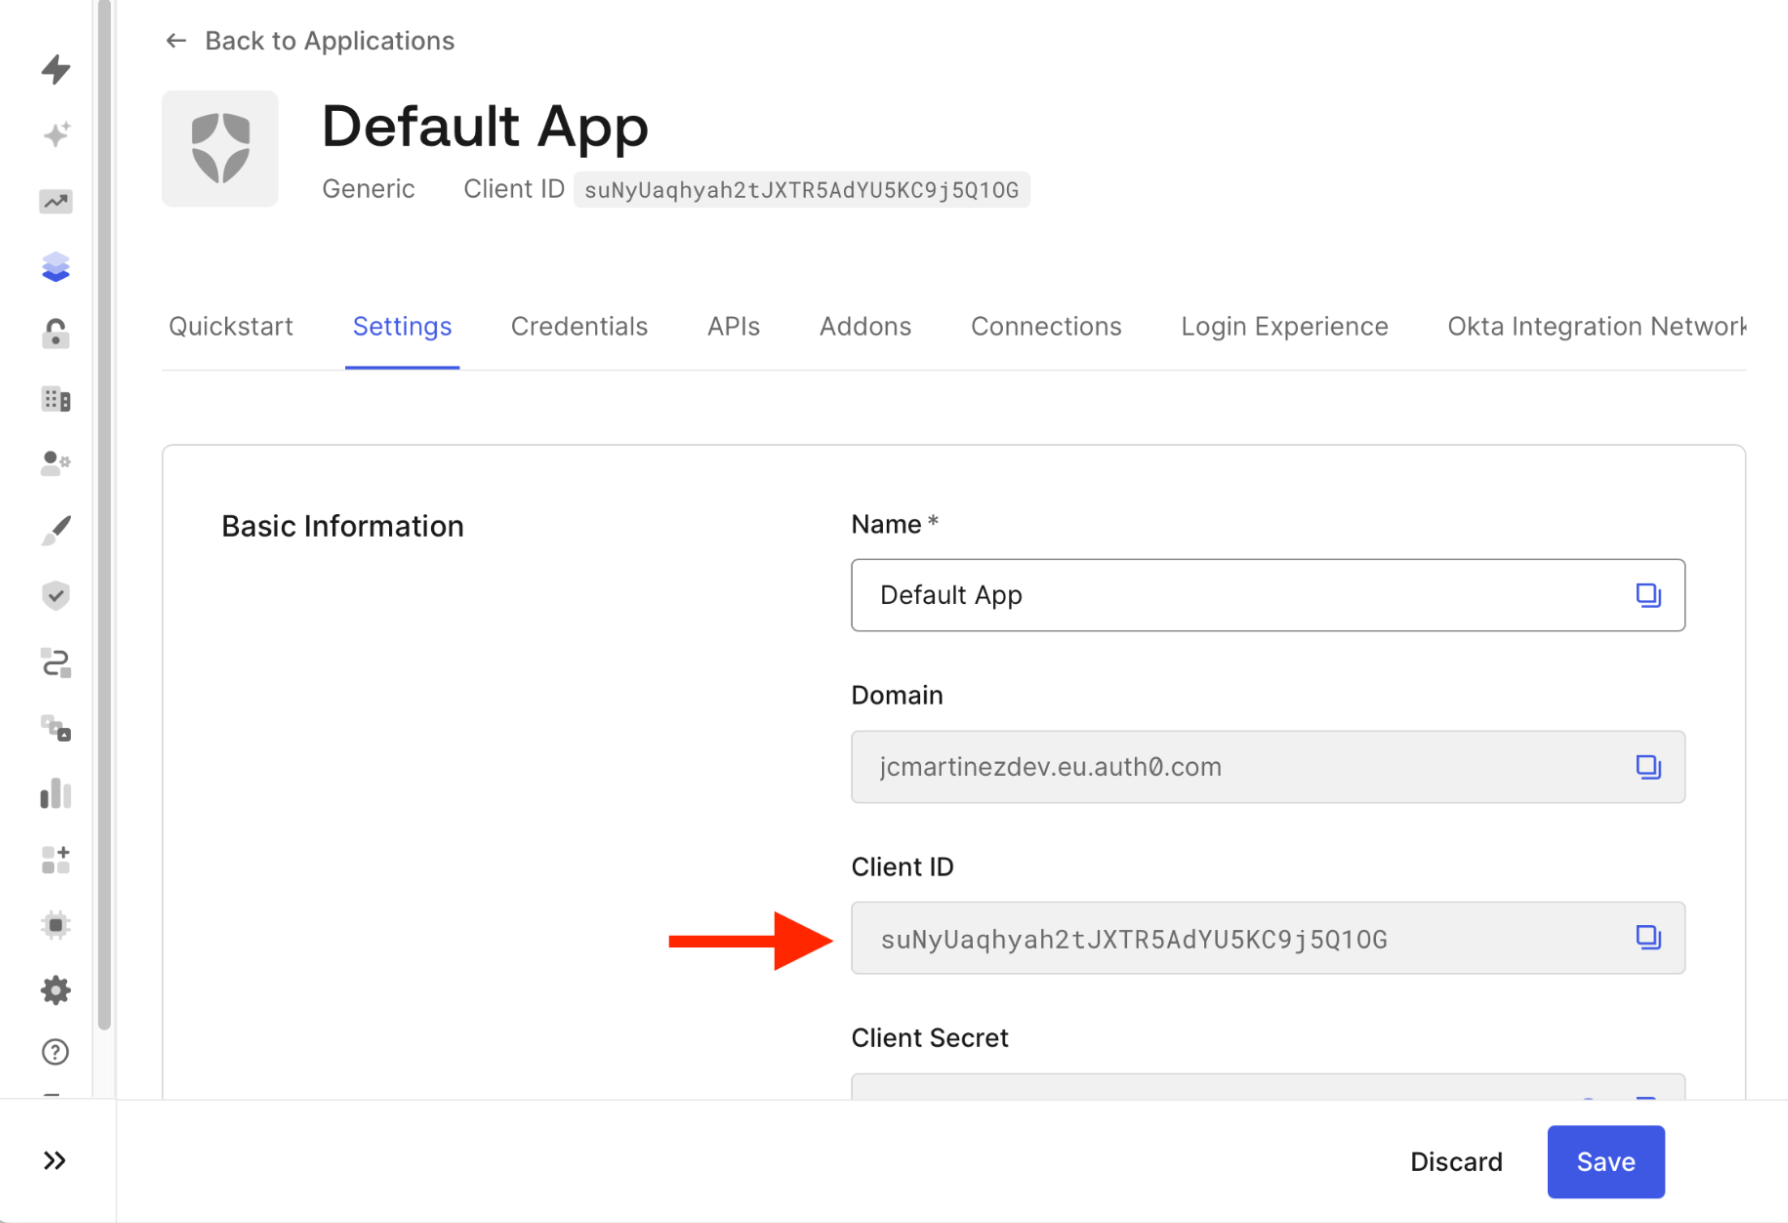
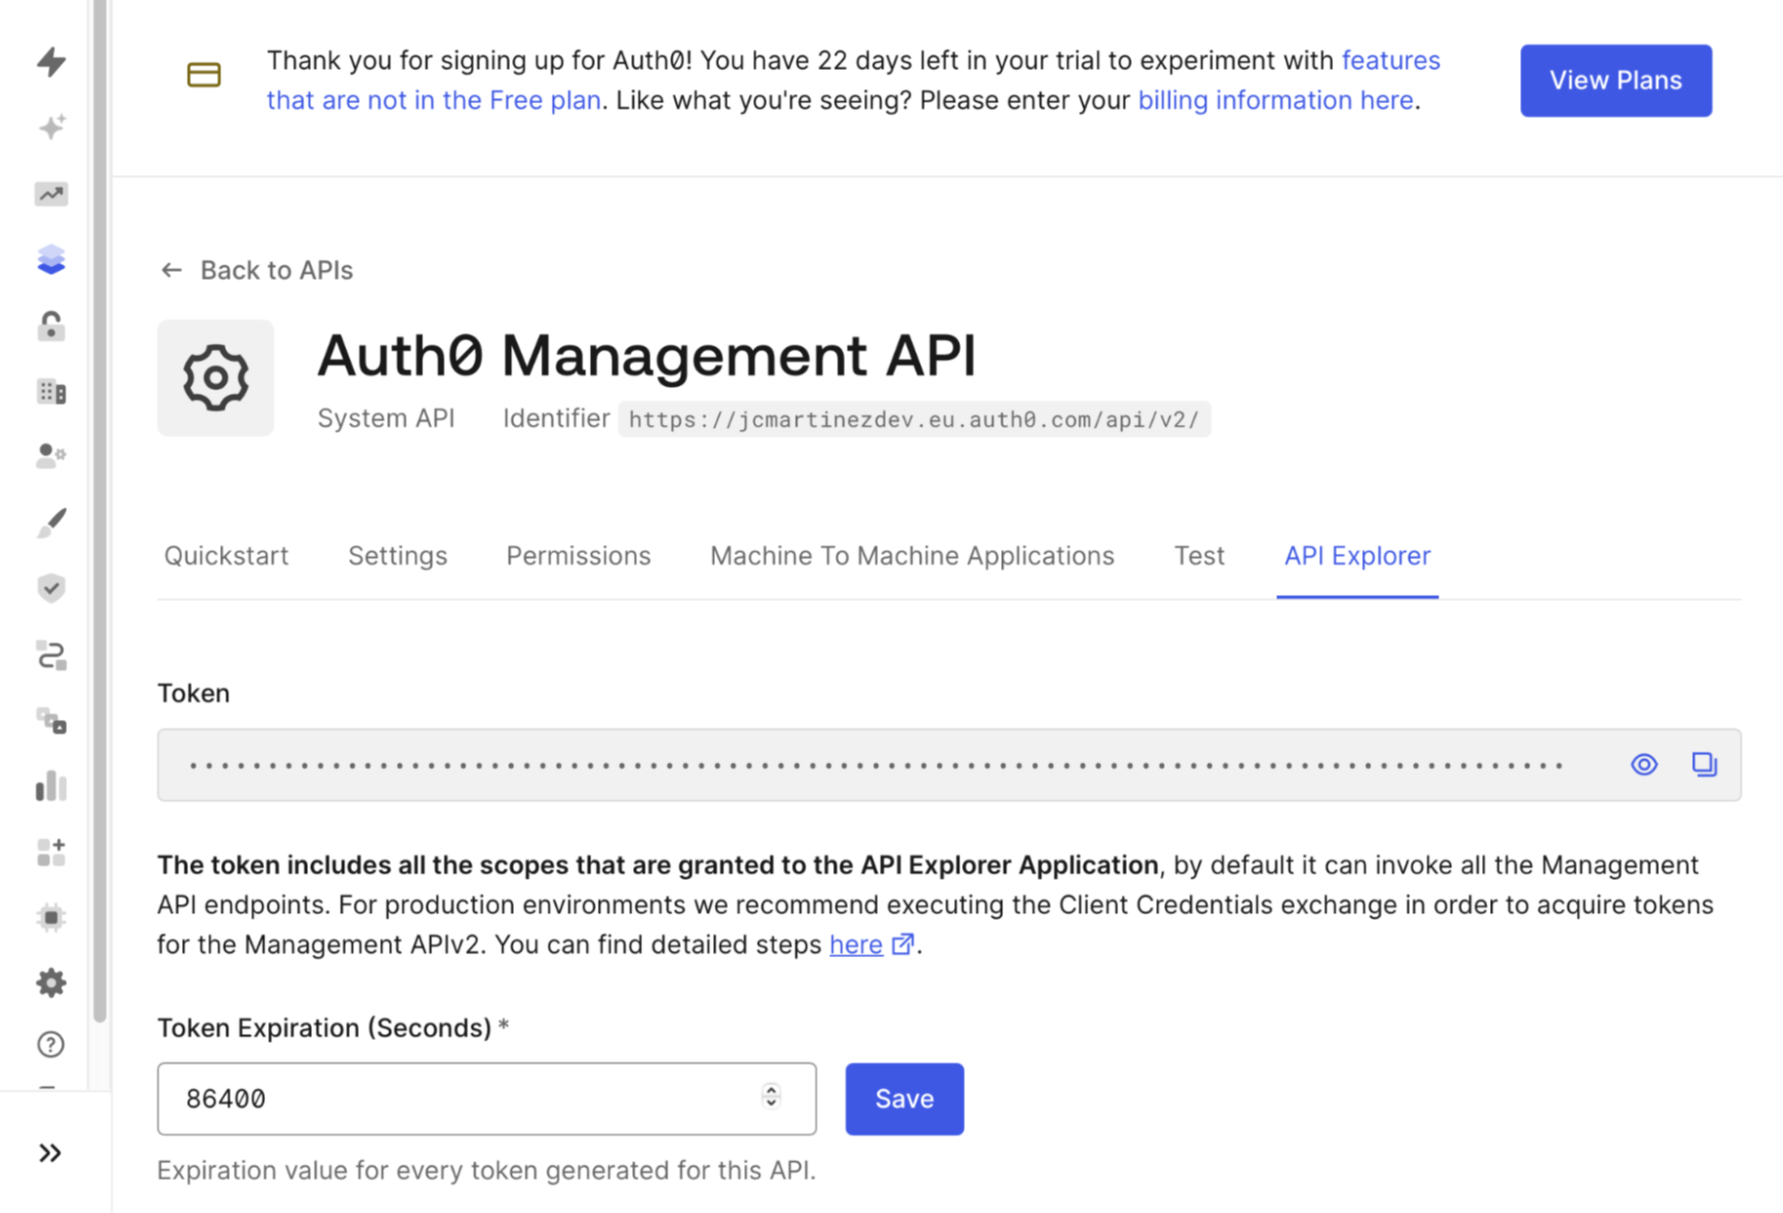
MGMT_API_TOKEN corresponds to an Auth0 Management API token, which can be obtained from the APIs page.
- Once in the API’s page, select the
Auth0 Management APIfrom the listing.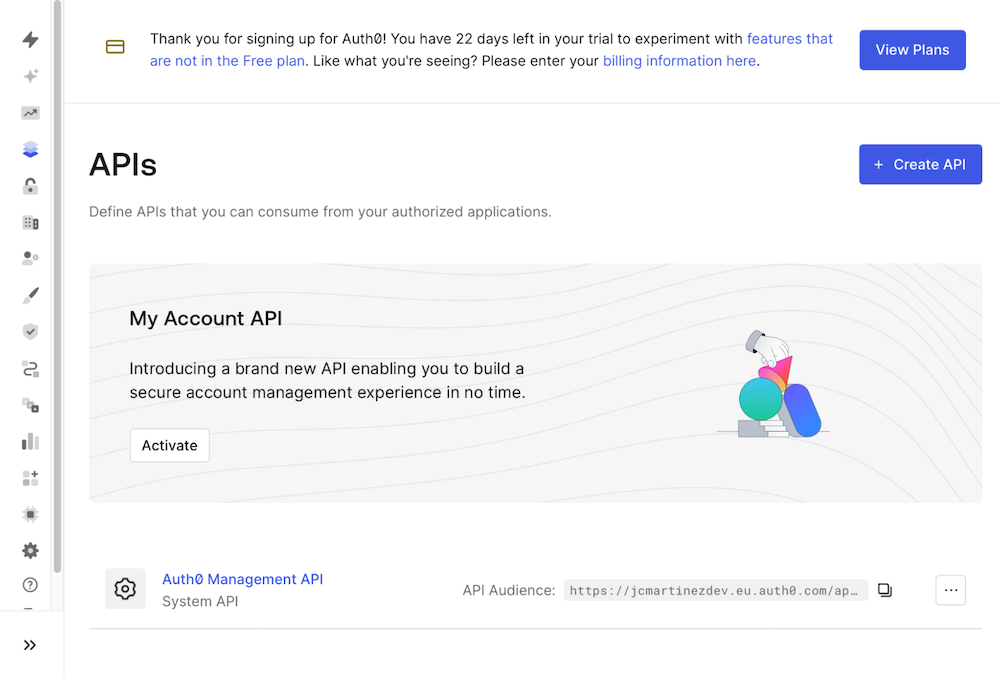
- Click on the
API Explorertab, and, if you have not done so already, click on Create and Authorize Test Application.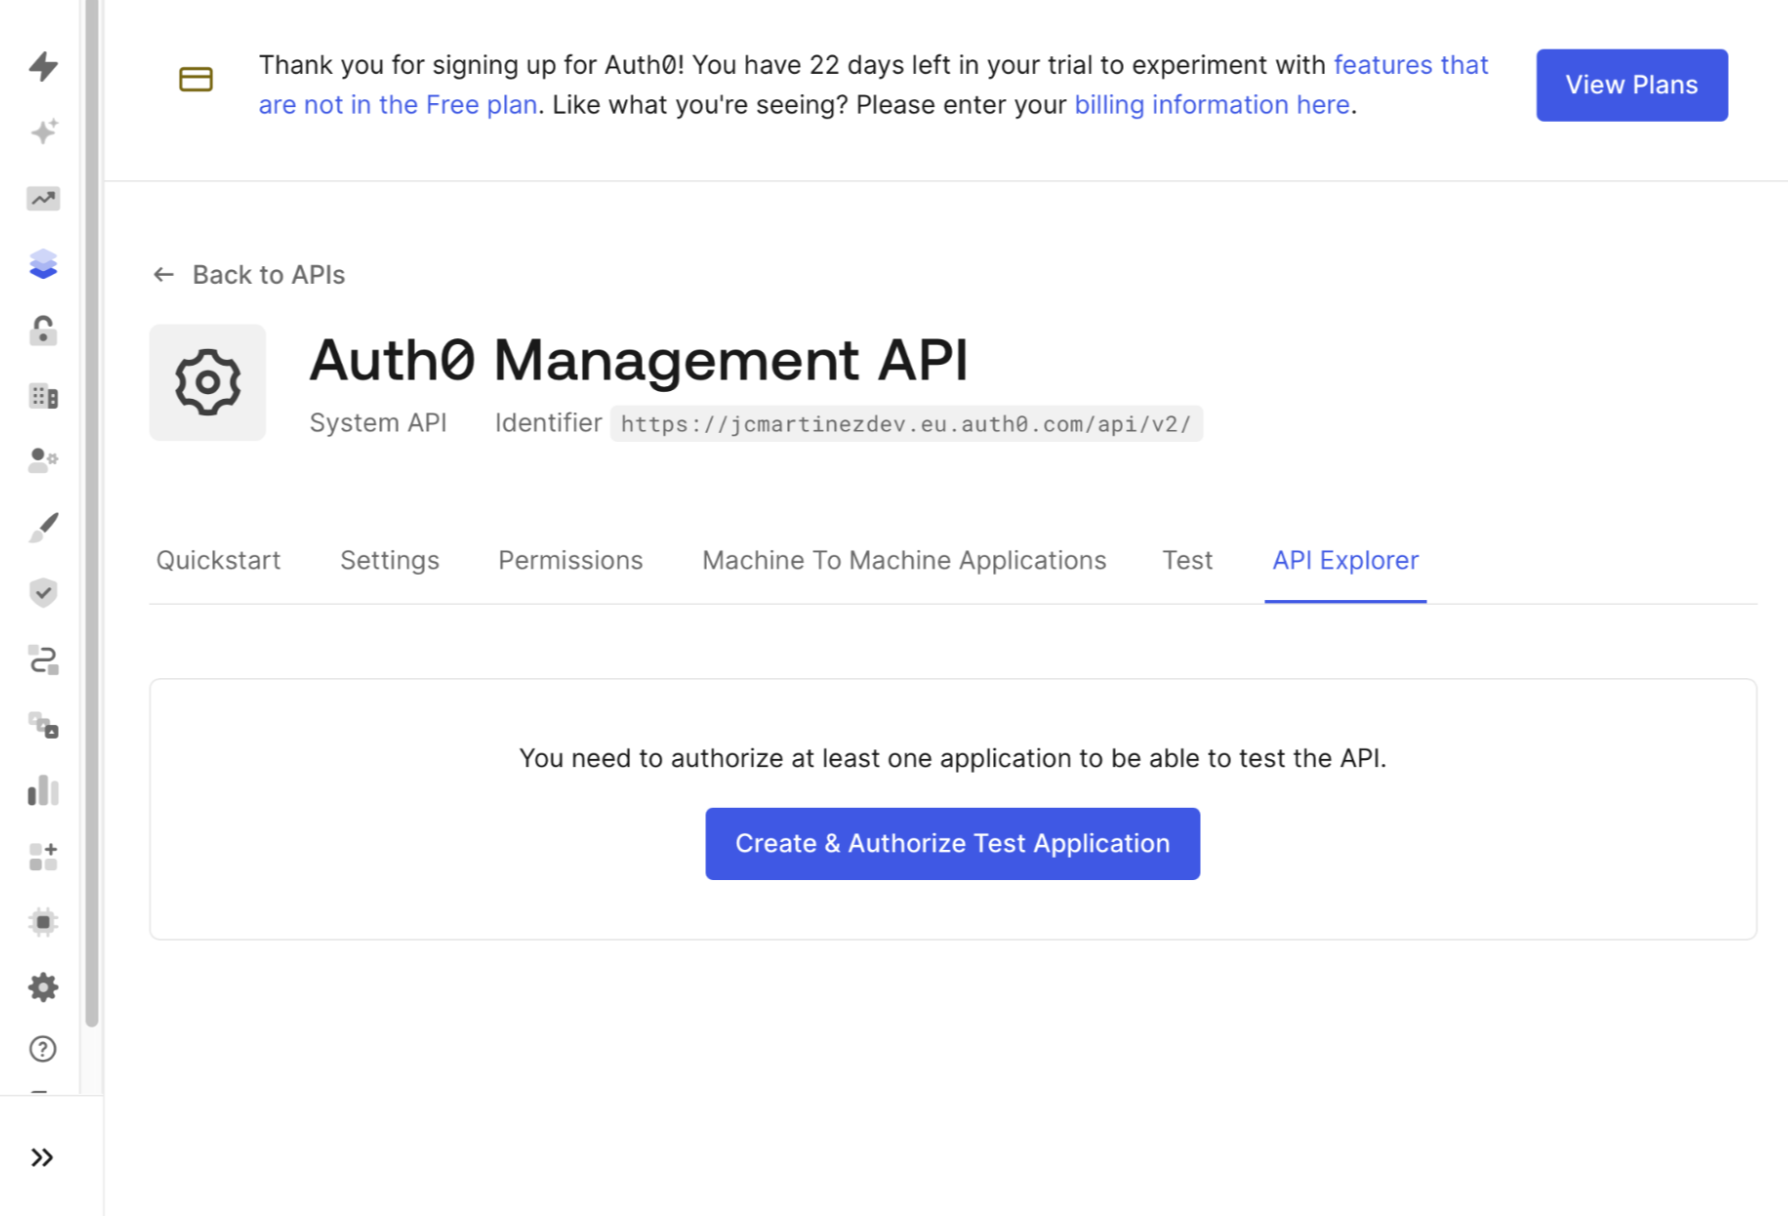
- Finally, copy the token.
CLIENT_IDandCLIENT_SECRETvariables using the values you obtained when creating the Vercel App.
7. Run the script, if all goes well, you should see the following:
➜  sign-in-with-vercel ./setup_auth0_vercel.sh
1. Creating connection on domain: your-domain.auth0.com...
   Success! Connection ID: con_kLhACTz6AGdk70A7
2. Enabling client (suNyUaqhyah2tJXTR5AdYU5KC9j5Q1OG)...
   Success! Client enabled.
At this point, Auth0 knows everything it needs to:
- Redirect users to Vercel.
- Exchange the
codefor tokens. - Fetch and normalize the user profile into Auth0.
Step 3: Test the Continue with Vercel Option
Now we are ready to test the new Vercel integration. If you already have an application set up and running, try to log into your application and you will automatically see the new “Continue with Vercel” option. If you have not done so, you can test it within the Auth0 Dashboard.
Here are the steps to test your new connection in the Auth0 Dashboard:
- Navigate to your Auth0 Dashboard home page.
- Scroll to the Next Steps section, and click on Try It Out on the Login Box
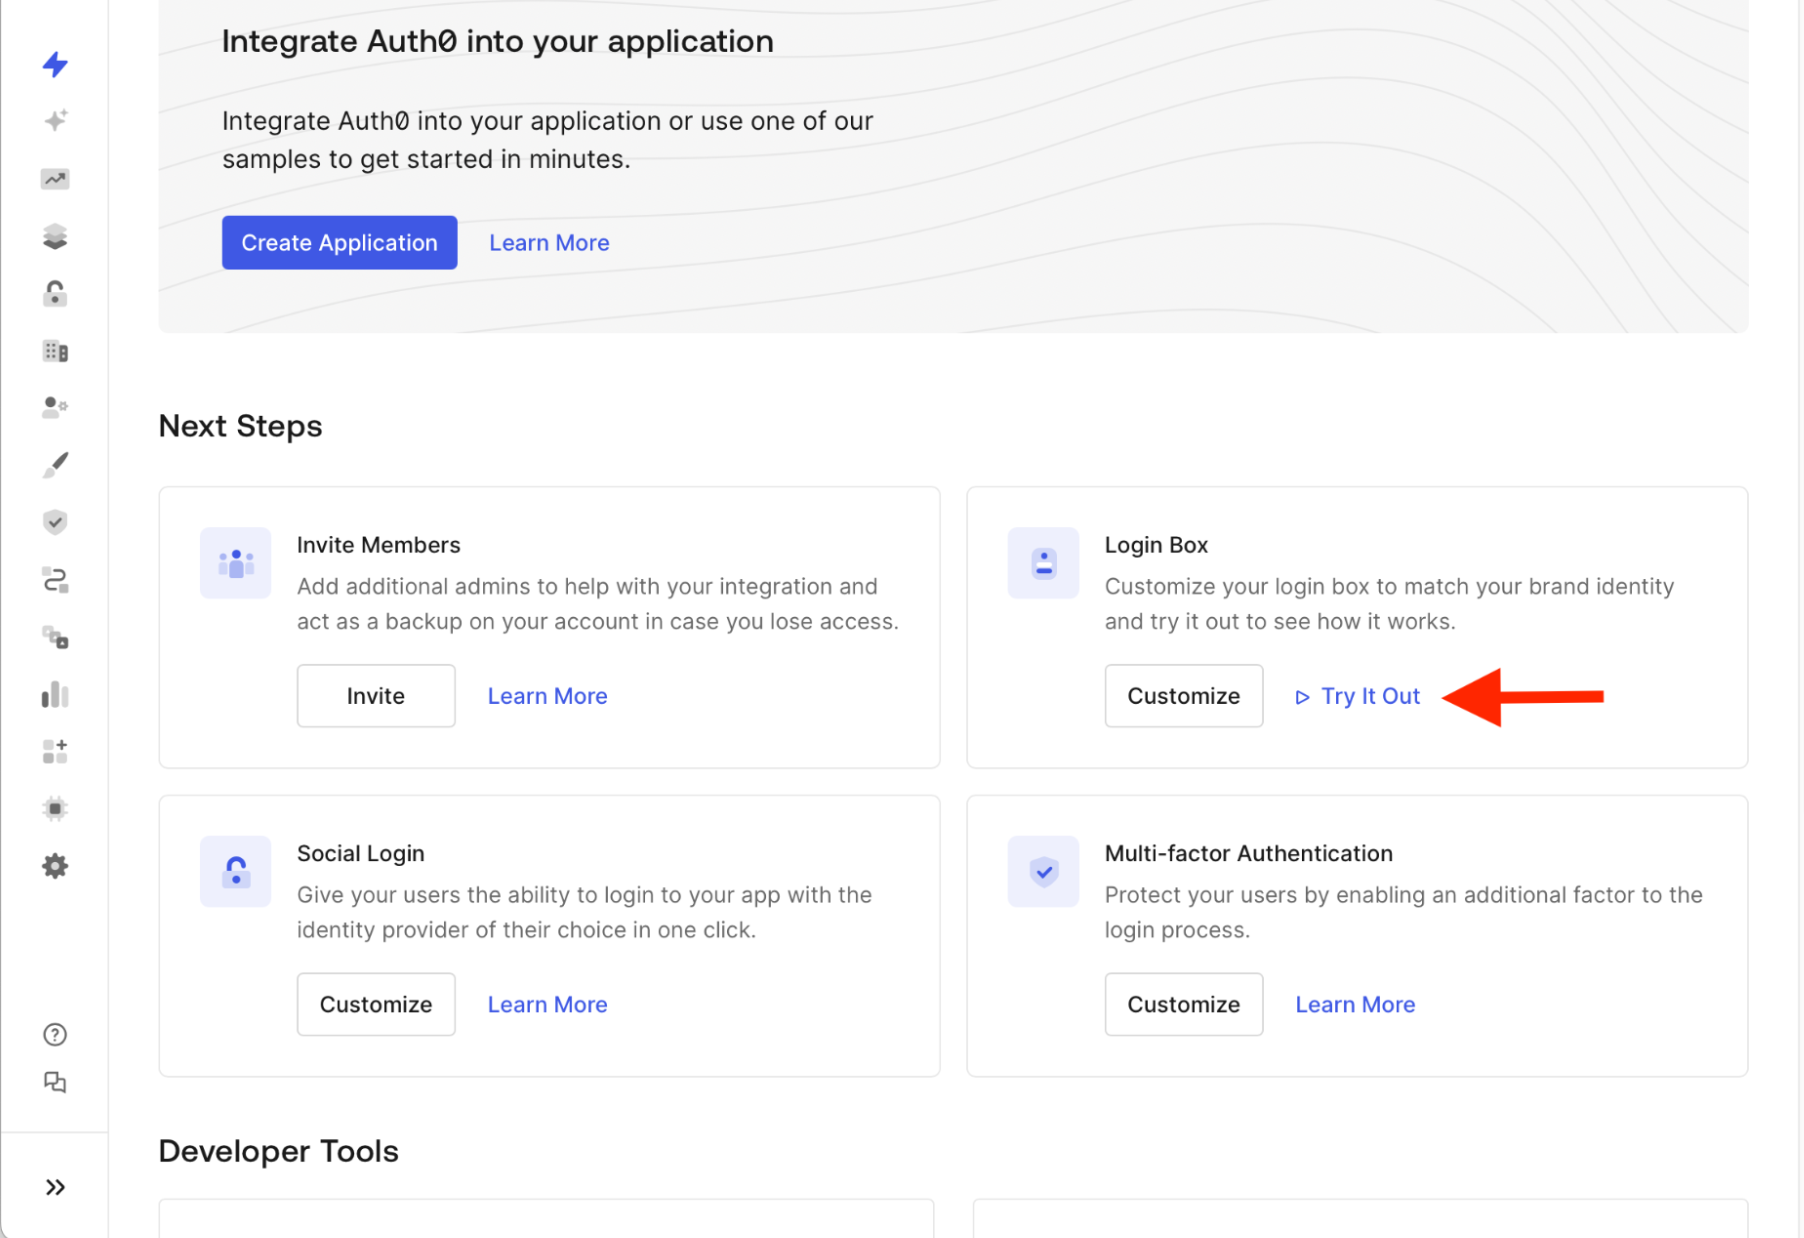
- If you completed all the steps correctly, you will see the Auth0 Universal Login box with Vercel enabled:
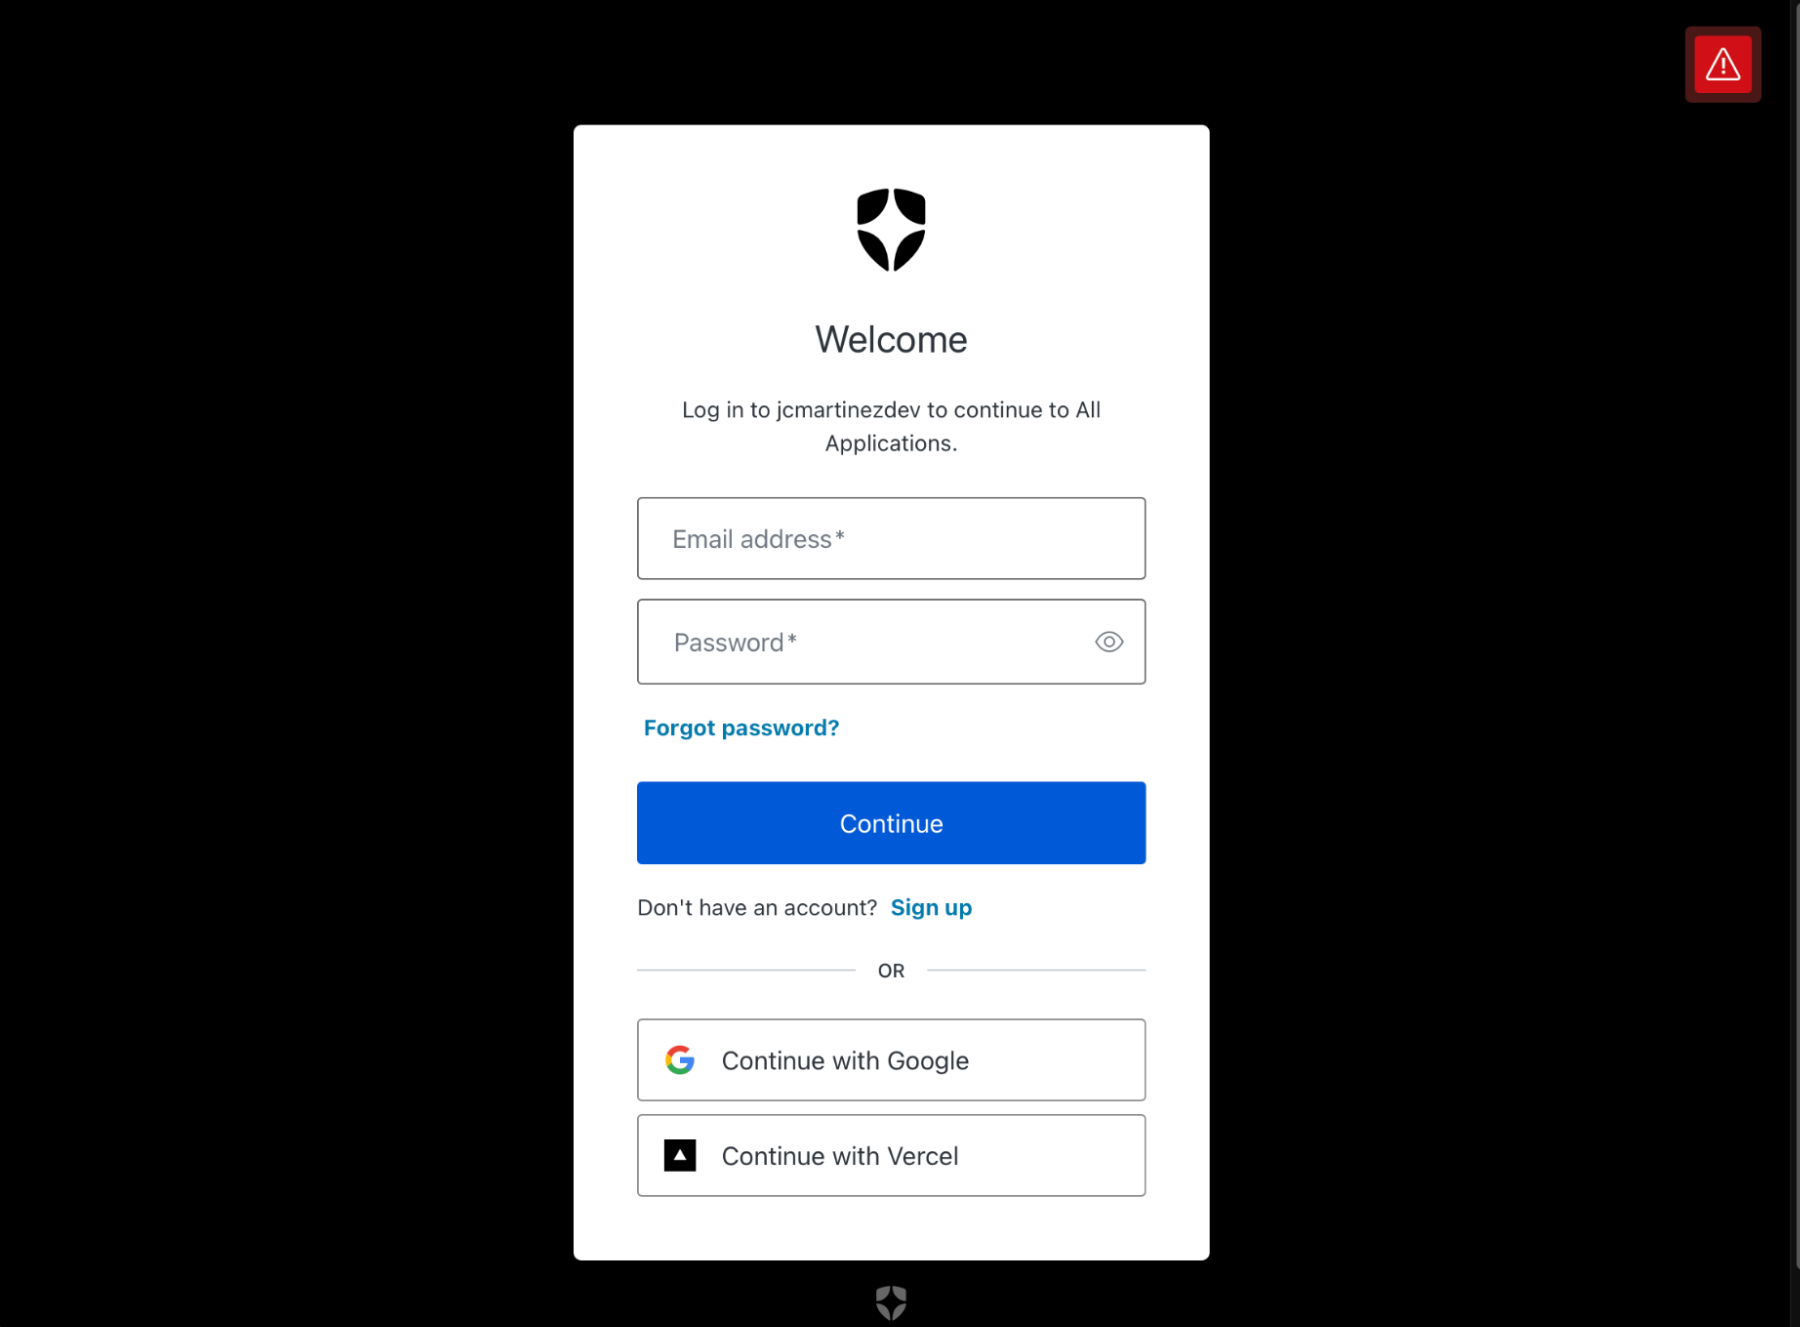
- After clicking on Continue with Vercel, you will be redirected to Vercel to complete the process.
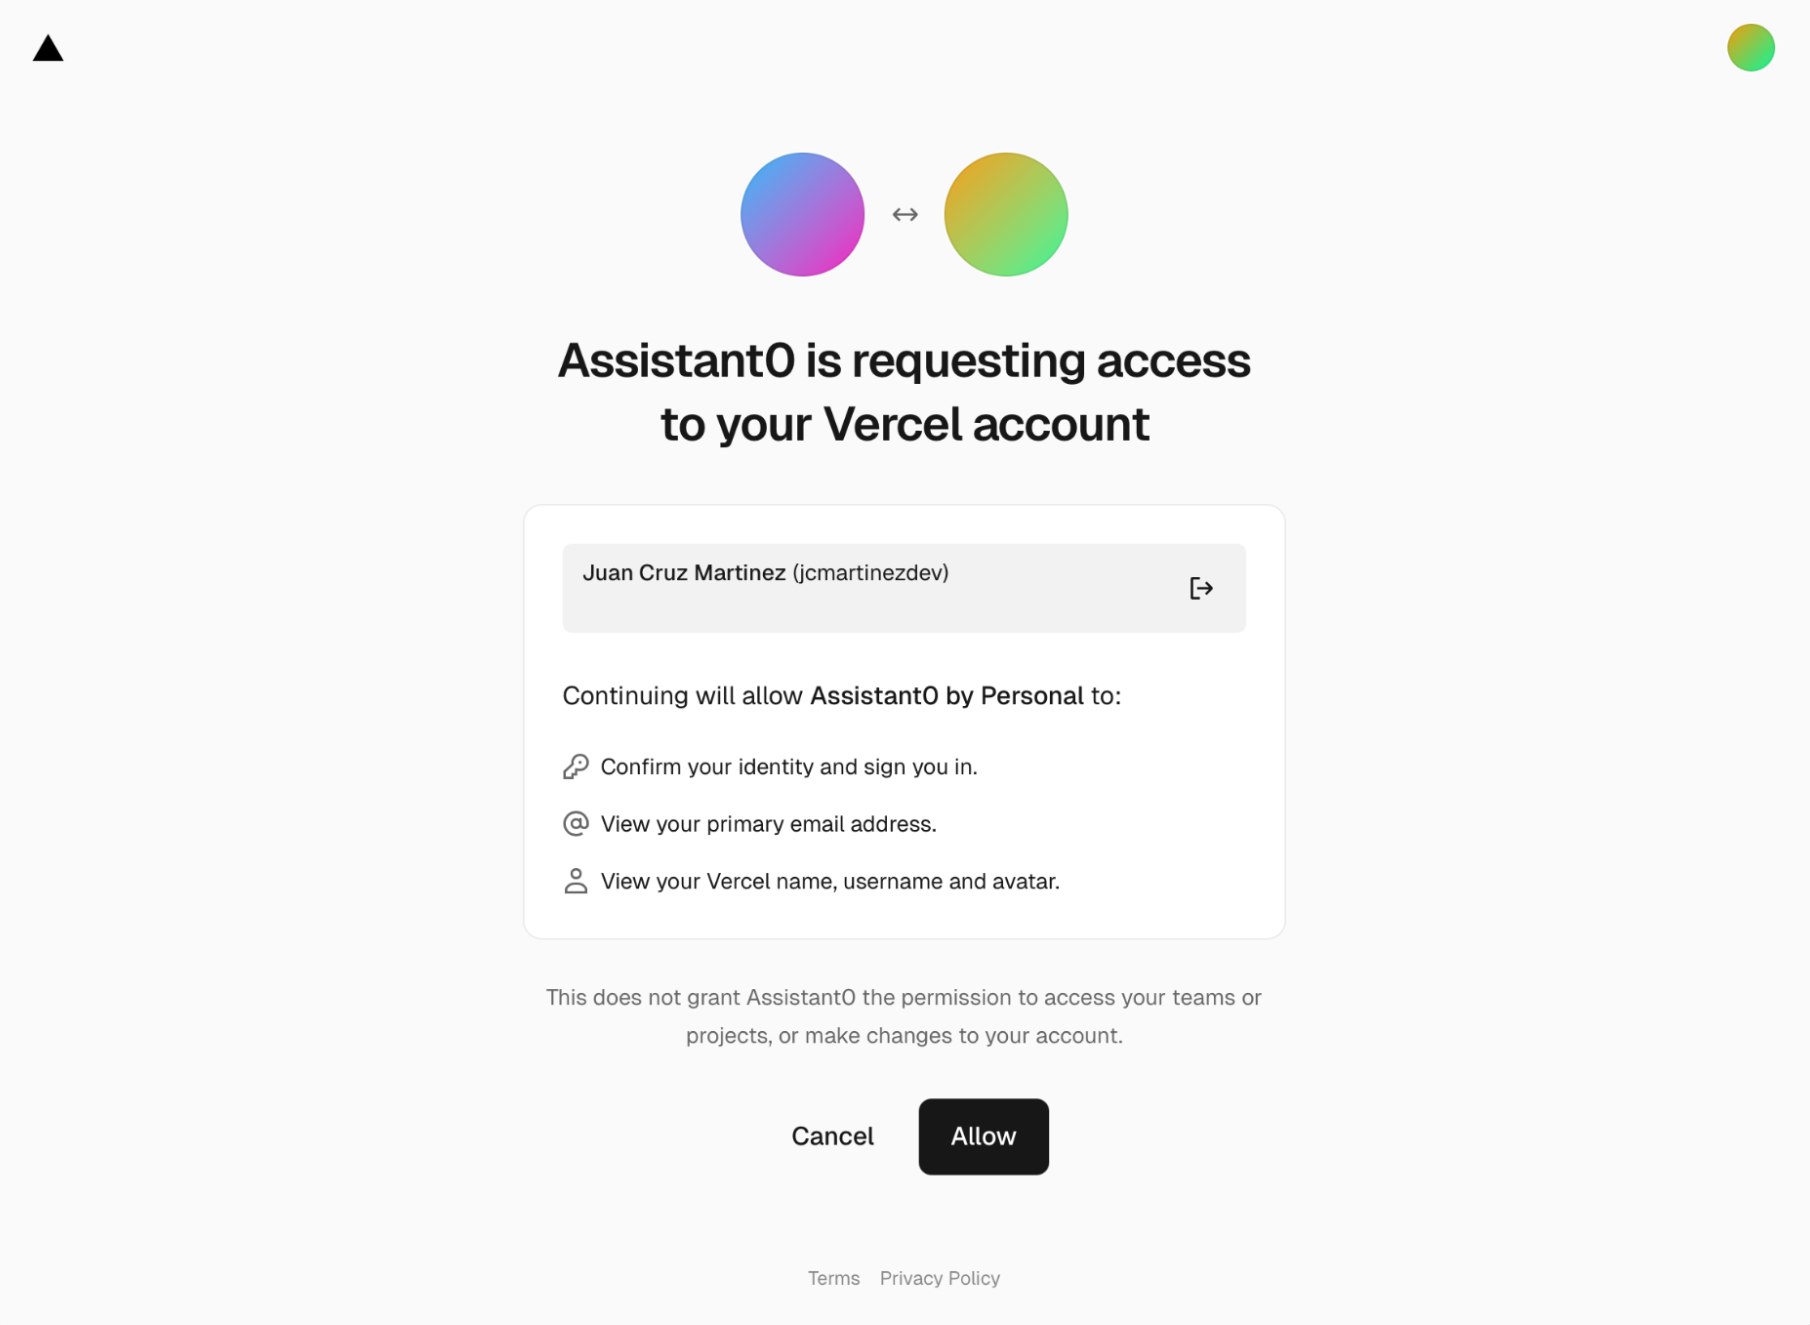
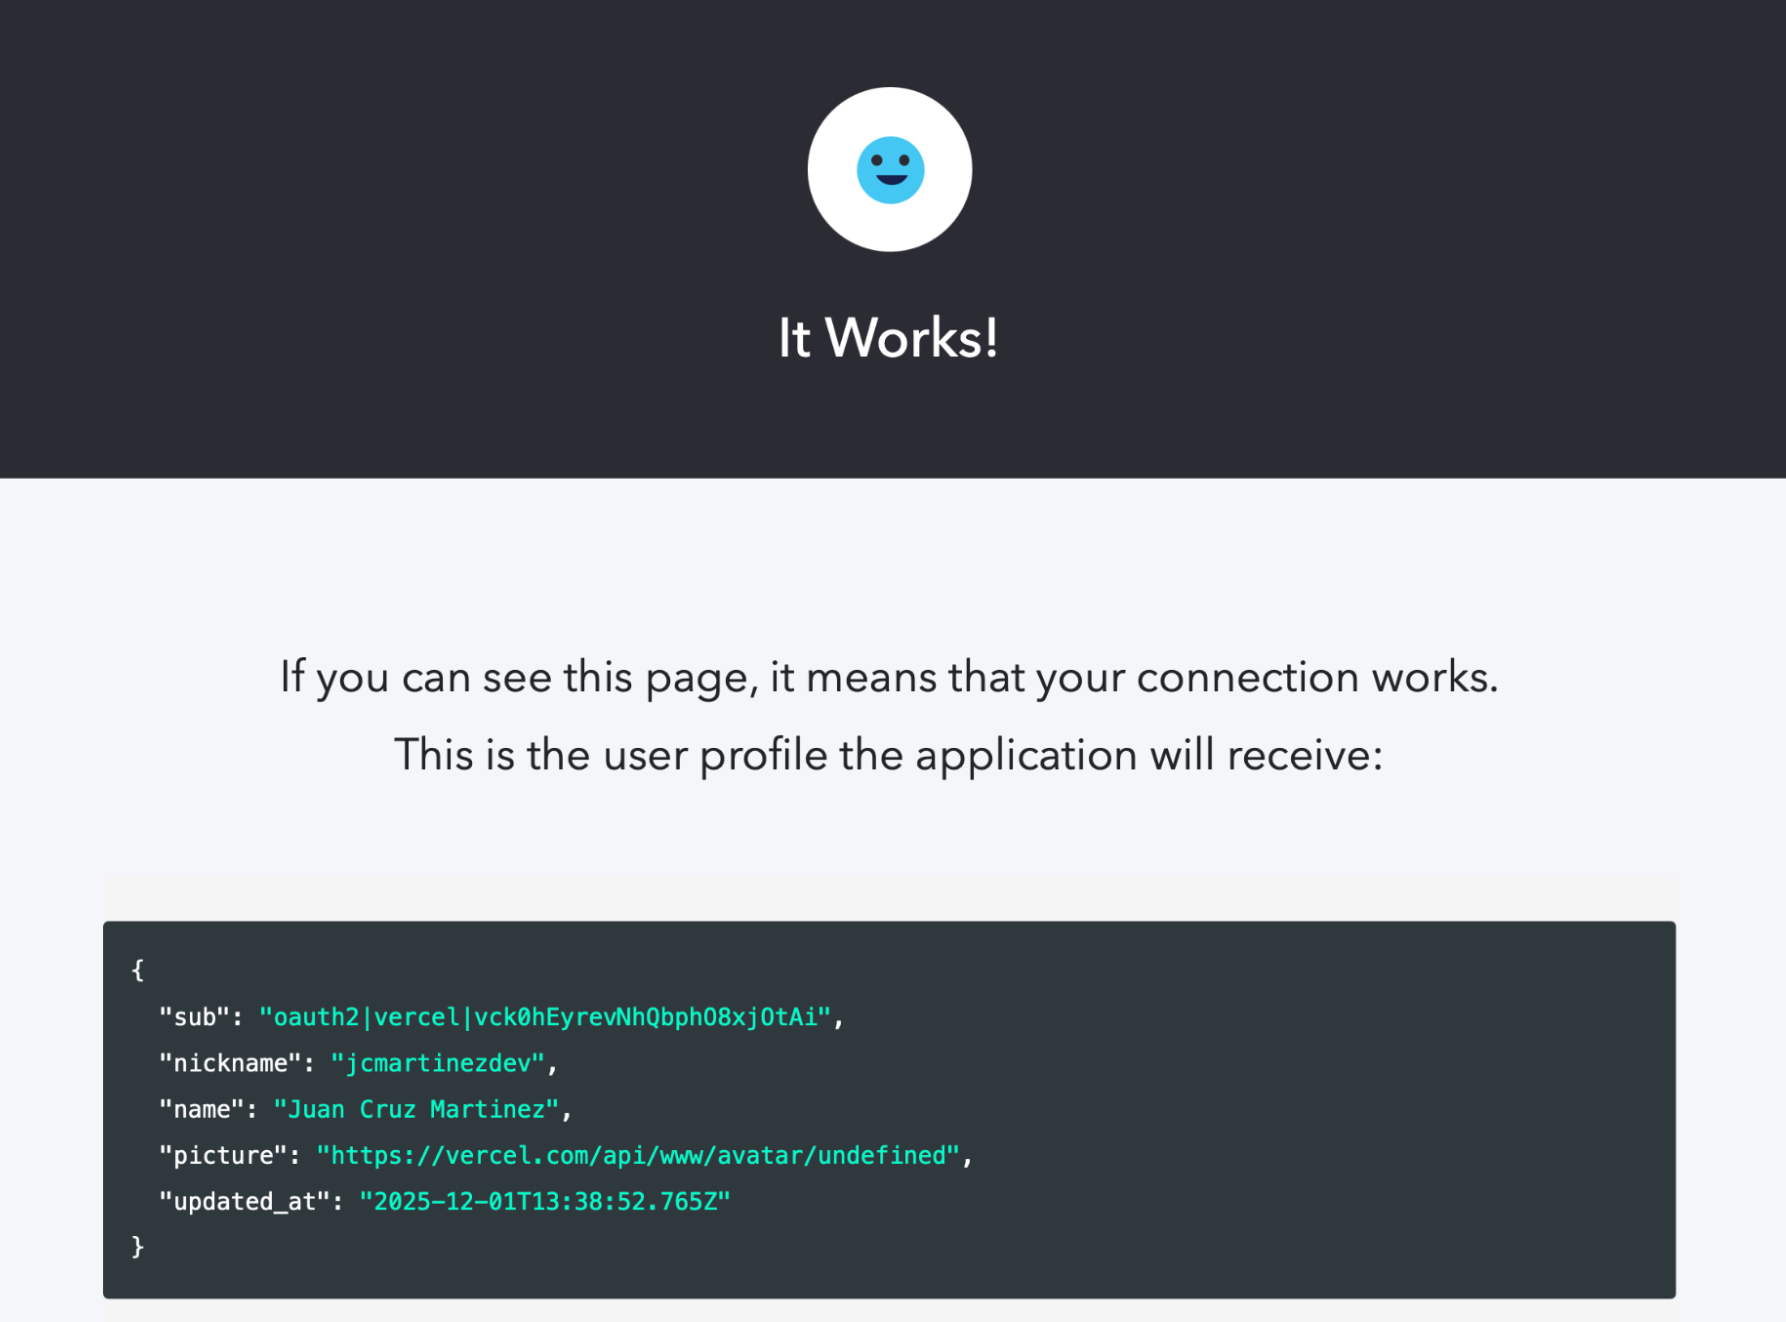
- After you Allow, you will be redirected back to your App, or in this case, to the Auth0 test confirmation page which will display your profile information.
Bring Your Vercel Identity to Auth0
By combining Vercel’s new OAuth provider with Auth0’s extensibility, you have removed a major friction point for your users. They can now bring their existing Vercel identity, and your app gets instant, secure access to the Vercel API to build powerful integrations.
Happy coding!
About the author

Juan Cruz Martinez
Staff Developer Advocate