
TL;DR: The JavaScript ecosystem has a plethora of libraries and frameworks for front-end development. ReactJS is one of the young and shiny new libraries on the block. Even though it's only a few years old, it has gained lots of traction from JavaScript developers around the world. One of ReactJS's selling points is the ability to easily build reusable components. Another salient point is that not only does it perform on the client side, it can also be rendered on the server side.
Why React?
ReactJS was built by Facebook to solve one problem: building large applications with data that changes over time. It utilizes the concept of the Virtual DOM that selectively renders subtrees of nodes based upon state changes. The component based architecture that ReactJs emulates makes it incredible to work with. Components in ReactJS are self-contained views that get their data from triggered events or as inherited property from other components. There are essentially two main ways of writing components, using React.createClass and extending React.Component. Props and States in ReactJs also makes it fun to work with. Learn more about the basic concepts of React here.
Using React.createClass Syntax
var HelloComponent = React.createClass({
  render: function() {
    return (
      <div className="hello">
        Hello, world!
      </div>
    );
  }
});
ES6 Way
class HelloComponent extends React.Component {
  render() {
    return (
      <div className="hello">
        Hello, world!
      </div>
    );
  }
}
ReactJS supports the use of ECMAScript 6 features. With Babel, you can write ReactJS the ES6 way, making use of classes, arrow functions and a host of other ES6 features.
// CommonJS way
var React = require('react');
var ReactDOM = require('react-dom');

// ES6 Way
Import React from 'react';
Import ReactDom from 'react-dom';

// ES5 way
var Main = React.createClass({
  render: function() {
    return (
      <div>
        Hello there!
      </div>
    );
  }
});

// ES6 way
export default class Main extends React.Component {
  render() {
    return (
      <div>
        Howdy!
      </div>
    );
  }
}
Let's Get Started
Bootstrapping a ReactJS project involves setting up lots of tools, and it can really be a daunting task. Thankfully there are several tools provided for developers by the community to aid in setting up your project without breaking a sweat. In this post, we'll cover tools that you should be aware of in bootstrapping your next ReactJS project.
Building a React App
The first step is to set up a development environment for your ReactJS project. Webpack, a bundler utility and Babel are key tools here. Babel lets us write code that uses new ES6 features, and then transpiles that code into standard ES5 code that can actually run in the browser. When setting up a new project:
- I assume Node.js and NPM is installed, run this command:
npm initto create apackage.jsonfile - Run this command in your terminal:
npm install react react-dom babel-core babel-loader babel-preset-es2015 babel-preset-react webpack webpack-dev-server --save - Create a
webpack.config.jsfile. This file handles bundling all our assets, converting JSX to JS files and launching the development server. Bundling refers to combining, compiling and minimizing multiple files into just one file to be served to the client.
Note: JSX is a JavaScript syntax extension that looks similar to XML. You can write concise HTML/XML-like structures in the same file as you write JavaScript code. With Babel, JSX files can be transpiled into actual javascript code.
A sample webpack.config.js is shown below:
var debug = process.env.NODE_ENV !== "production";
var webpack = require('webpack');
var path = require('path');

module.exports = {
  context: path.join(__dirname, "src"),
  devtool: debug ? "inline-sourcemap" : null,
  entry: "./js/App.js",
  devServer: {
    inline: true,
    port: 3333
  },
  module: {
    loaders: [
      {
        test: /.jsx?$/,
        exclude: /(node_modules|bower_components)/,
        loader: 'babel-loader',
        query: {
          presets: ['react', 'es2015'],
          plugins: ['react-html-attrs', 'transform-class-properties', 'transform-decorators-legacy'],
        }
      }
    ]
  },
  output: {
    path: __dirname + "/src/",
    filename: "bundle.min.js"
  },
  plugins: debug ? [] : [
    new webpack.optimize.DedupePlugin(),
    new webpack.optimize.OccurenceOrderPlugin(),
    new webpack.optimize.UglifyJsPlugin({ mangle: false, sourcemap: false }),
  ],
};
The application's entry point is set at the entry. The file specified at the entry is the first component that the Web page loads. Webpack will bundle all the JS and JSX files into the file that's specified in the output object. Webpack dev server is set to inline which allows a kind of reload on the fly and the application will be served at port 3333. In the module object, we specify the babel loader to use react and es2015 presets for converting ES6 and React code into code that the browser understands. The webpack plugins add the ability to use class properties and decorators.
Note: Babel presets are basically plugins that have been configured to do a particular task.
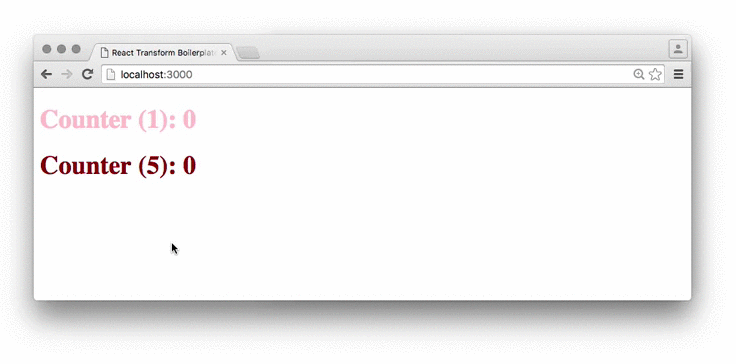
Hot reloading
The idea behind hot reloading is to keep the app running and to inject new versions of the files that you edited at runtime. This way, you don't lose any of your state which is especially useful if you are tweaking the UI.
(Source: Medium)
You can install hot module replacement like so:
npm install --save-dev babel-preset-react-hmre
Now, you can add it to the list of presets in the webpack.config.js file like so:
....
query: {
  presets: ['react', 'es2015', 'react-hmre'],
  plugins: ['react-html-attrs', 'transform-class-properties', 'transform-decorators-legacy'],
}
Another option is to install react-hot-loader and add react-hot to the loader in the webpack.config.js file like so:
...
loader: ['babel-loader', 'react-hot']
...
To make things really easy, add a start option to the scripts object in package.json file like so:
{
  "scripts": {
    "start": "node_modules/.bin/webpack-dev-server --progress --inline --hot",
  }
}
The code above shows we have added the --hot option. This enables the hot reloading once you start your app by running npm run start.
Routing
Routing is an essential part of any application. The most popular choice for doing this in a ReactJS application is React Router. In fact, a lot of developers consider it the official routing system for ReactJS. When you want to deal with routing, you have to install the React Router module in your project as shown below:
npm install --save react-router
A sample implementation will look like this:
import React from 'react';
import { render } from 'react-dom';
import { browserHistory, Router, Route, IndexRoute } from 'react-router'

import App from '../components/App'
import Home from '../components/Home'
import About from '../components/About'
import Features from '../components/Features'

render(
  <Router history={browserHistory}>
    <Route path='/' component={App}>
      <IndexRoute component={Home} />
      <Route path='about' component={About} />
      <Route path='features' component={Features} />
    </Route>
  </Router>,
  document.getElementById('app')
)
You actually might not need React Router. More info here
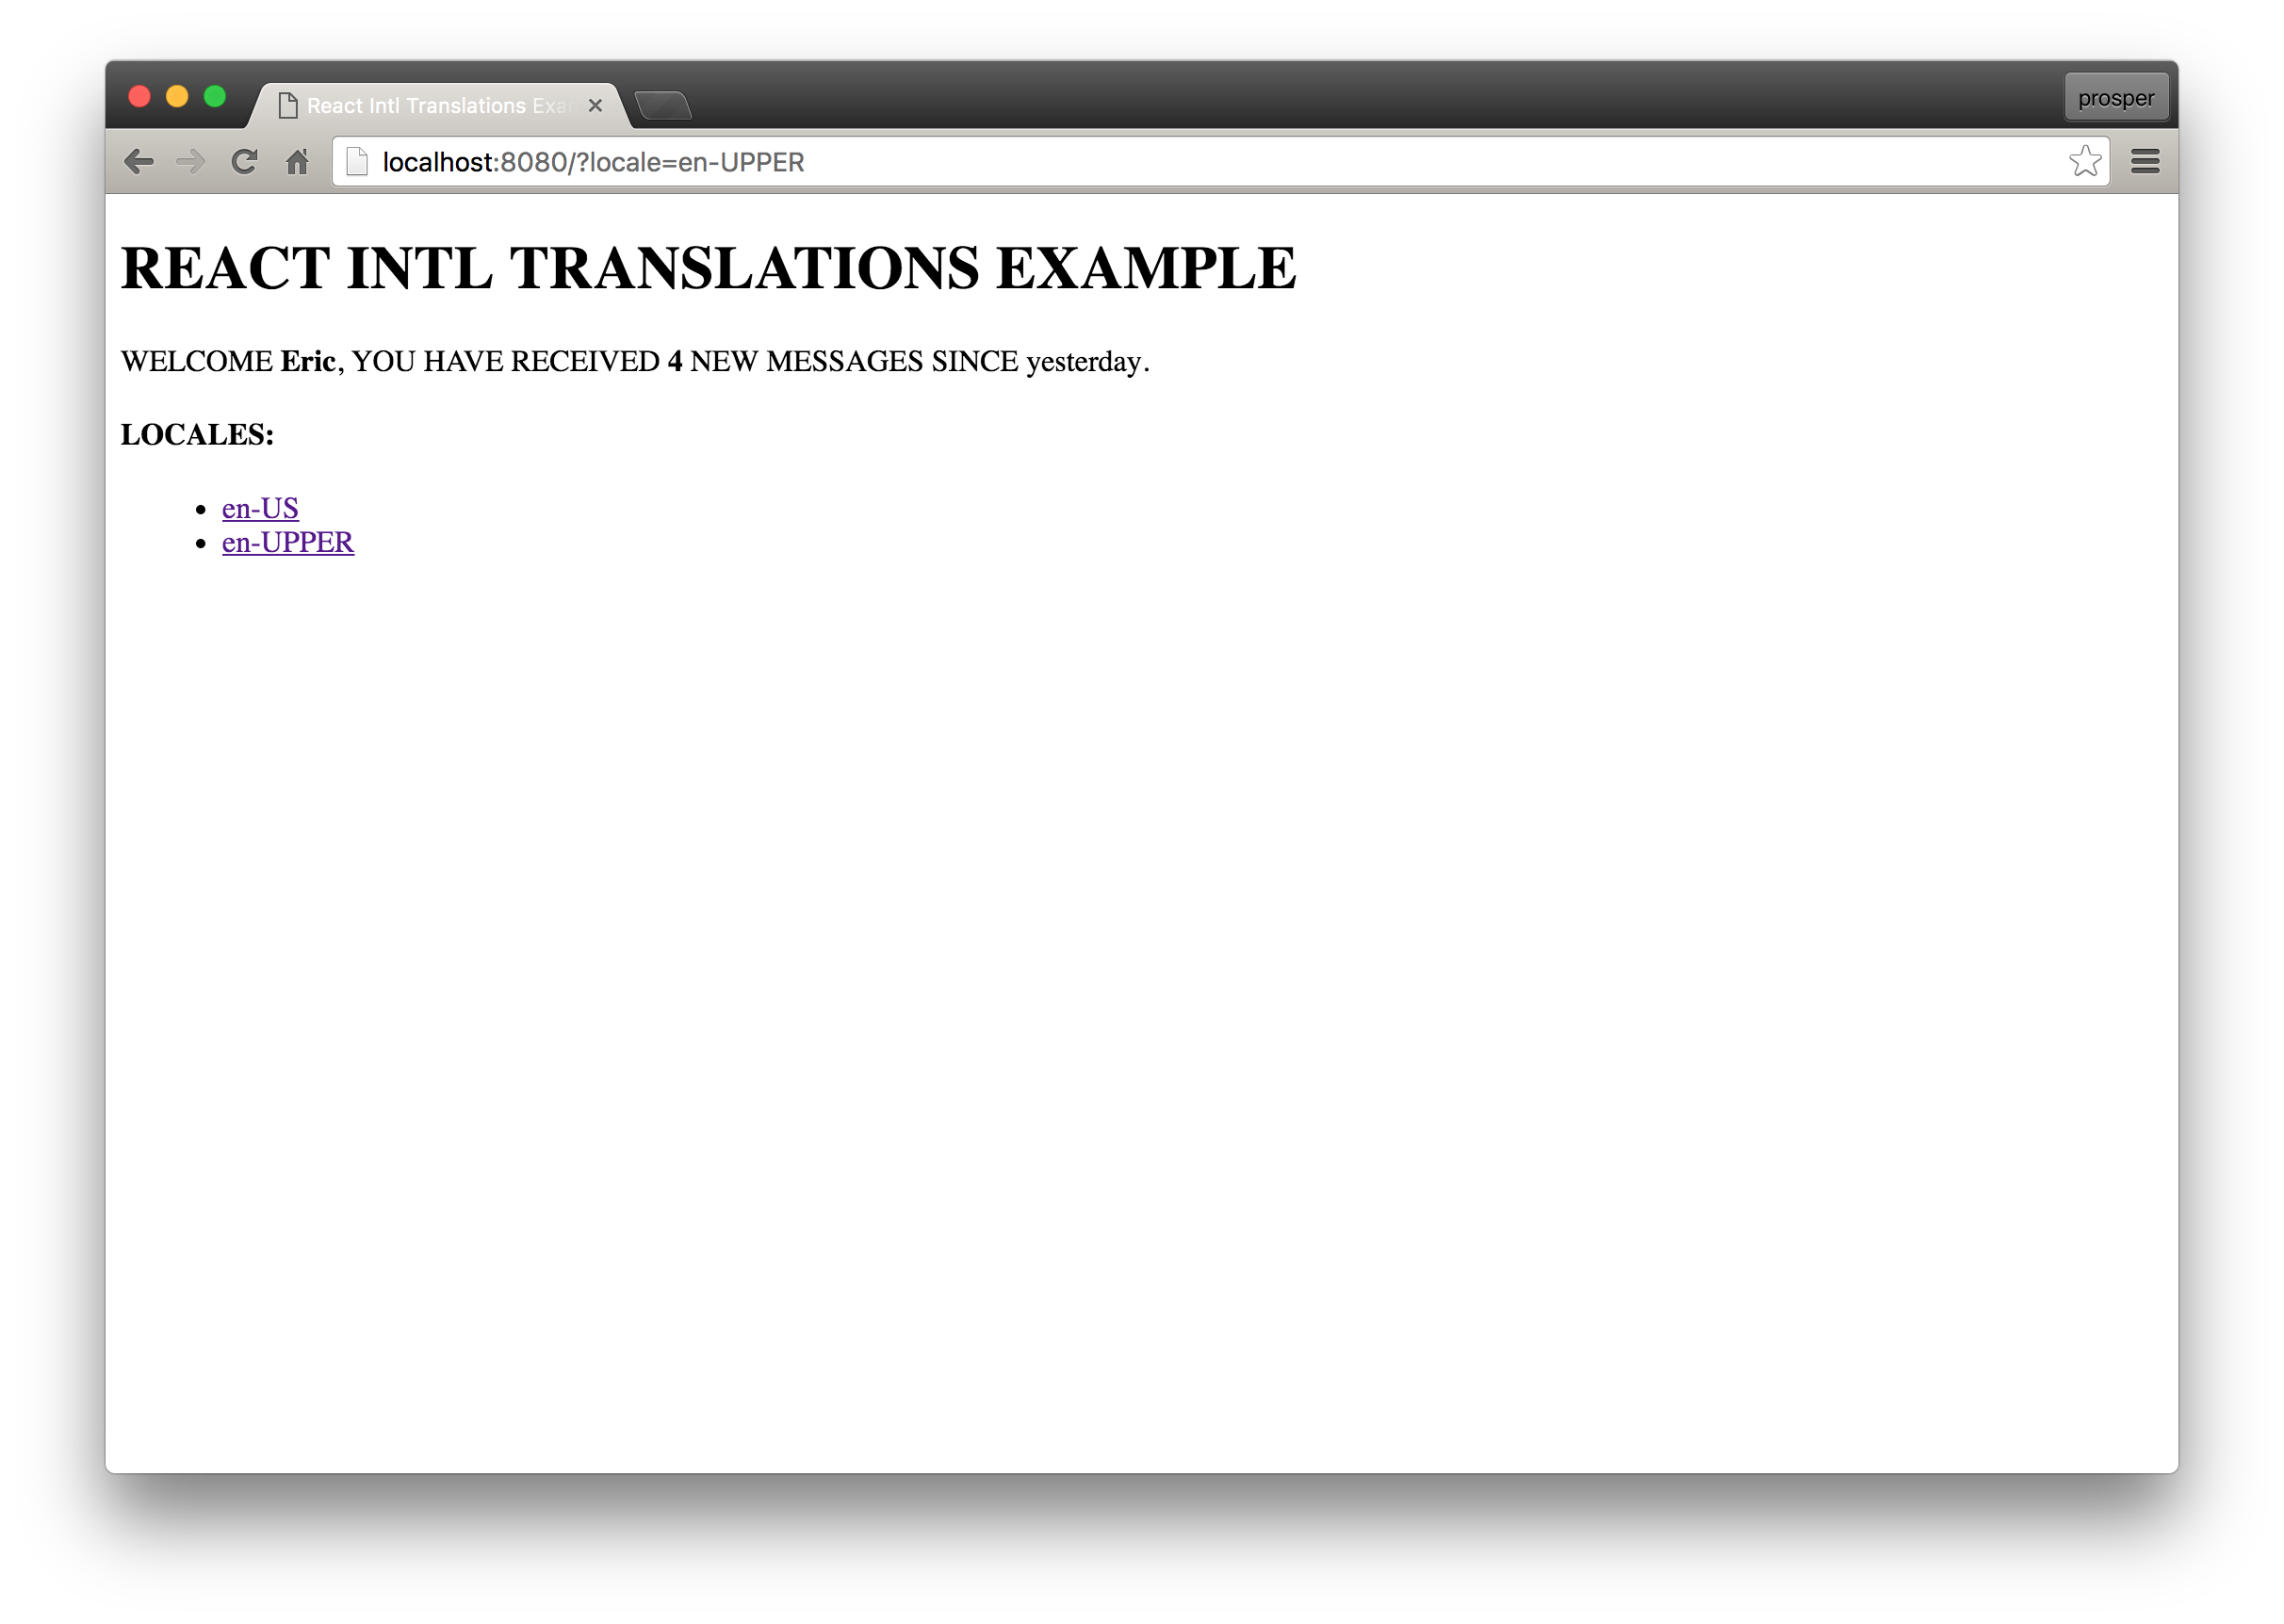
Internationalization (I18N)
There are over 7 billion people in the world. These people speak different languages. One way of making your app available to billions of people around the world is providing support for native languages in your app. In a ReactJS project, you can easily achieve that with a very good and well tested library react-intl. By default, react-intl ships with the locale data for English built-in to the library's runtime. This library provides React components and an API to format dates, numbers, and strings, including pluralization and handling translations. Oh, it supports over 150 languages!
UI Styling
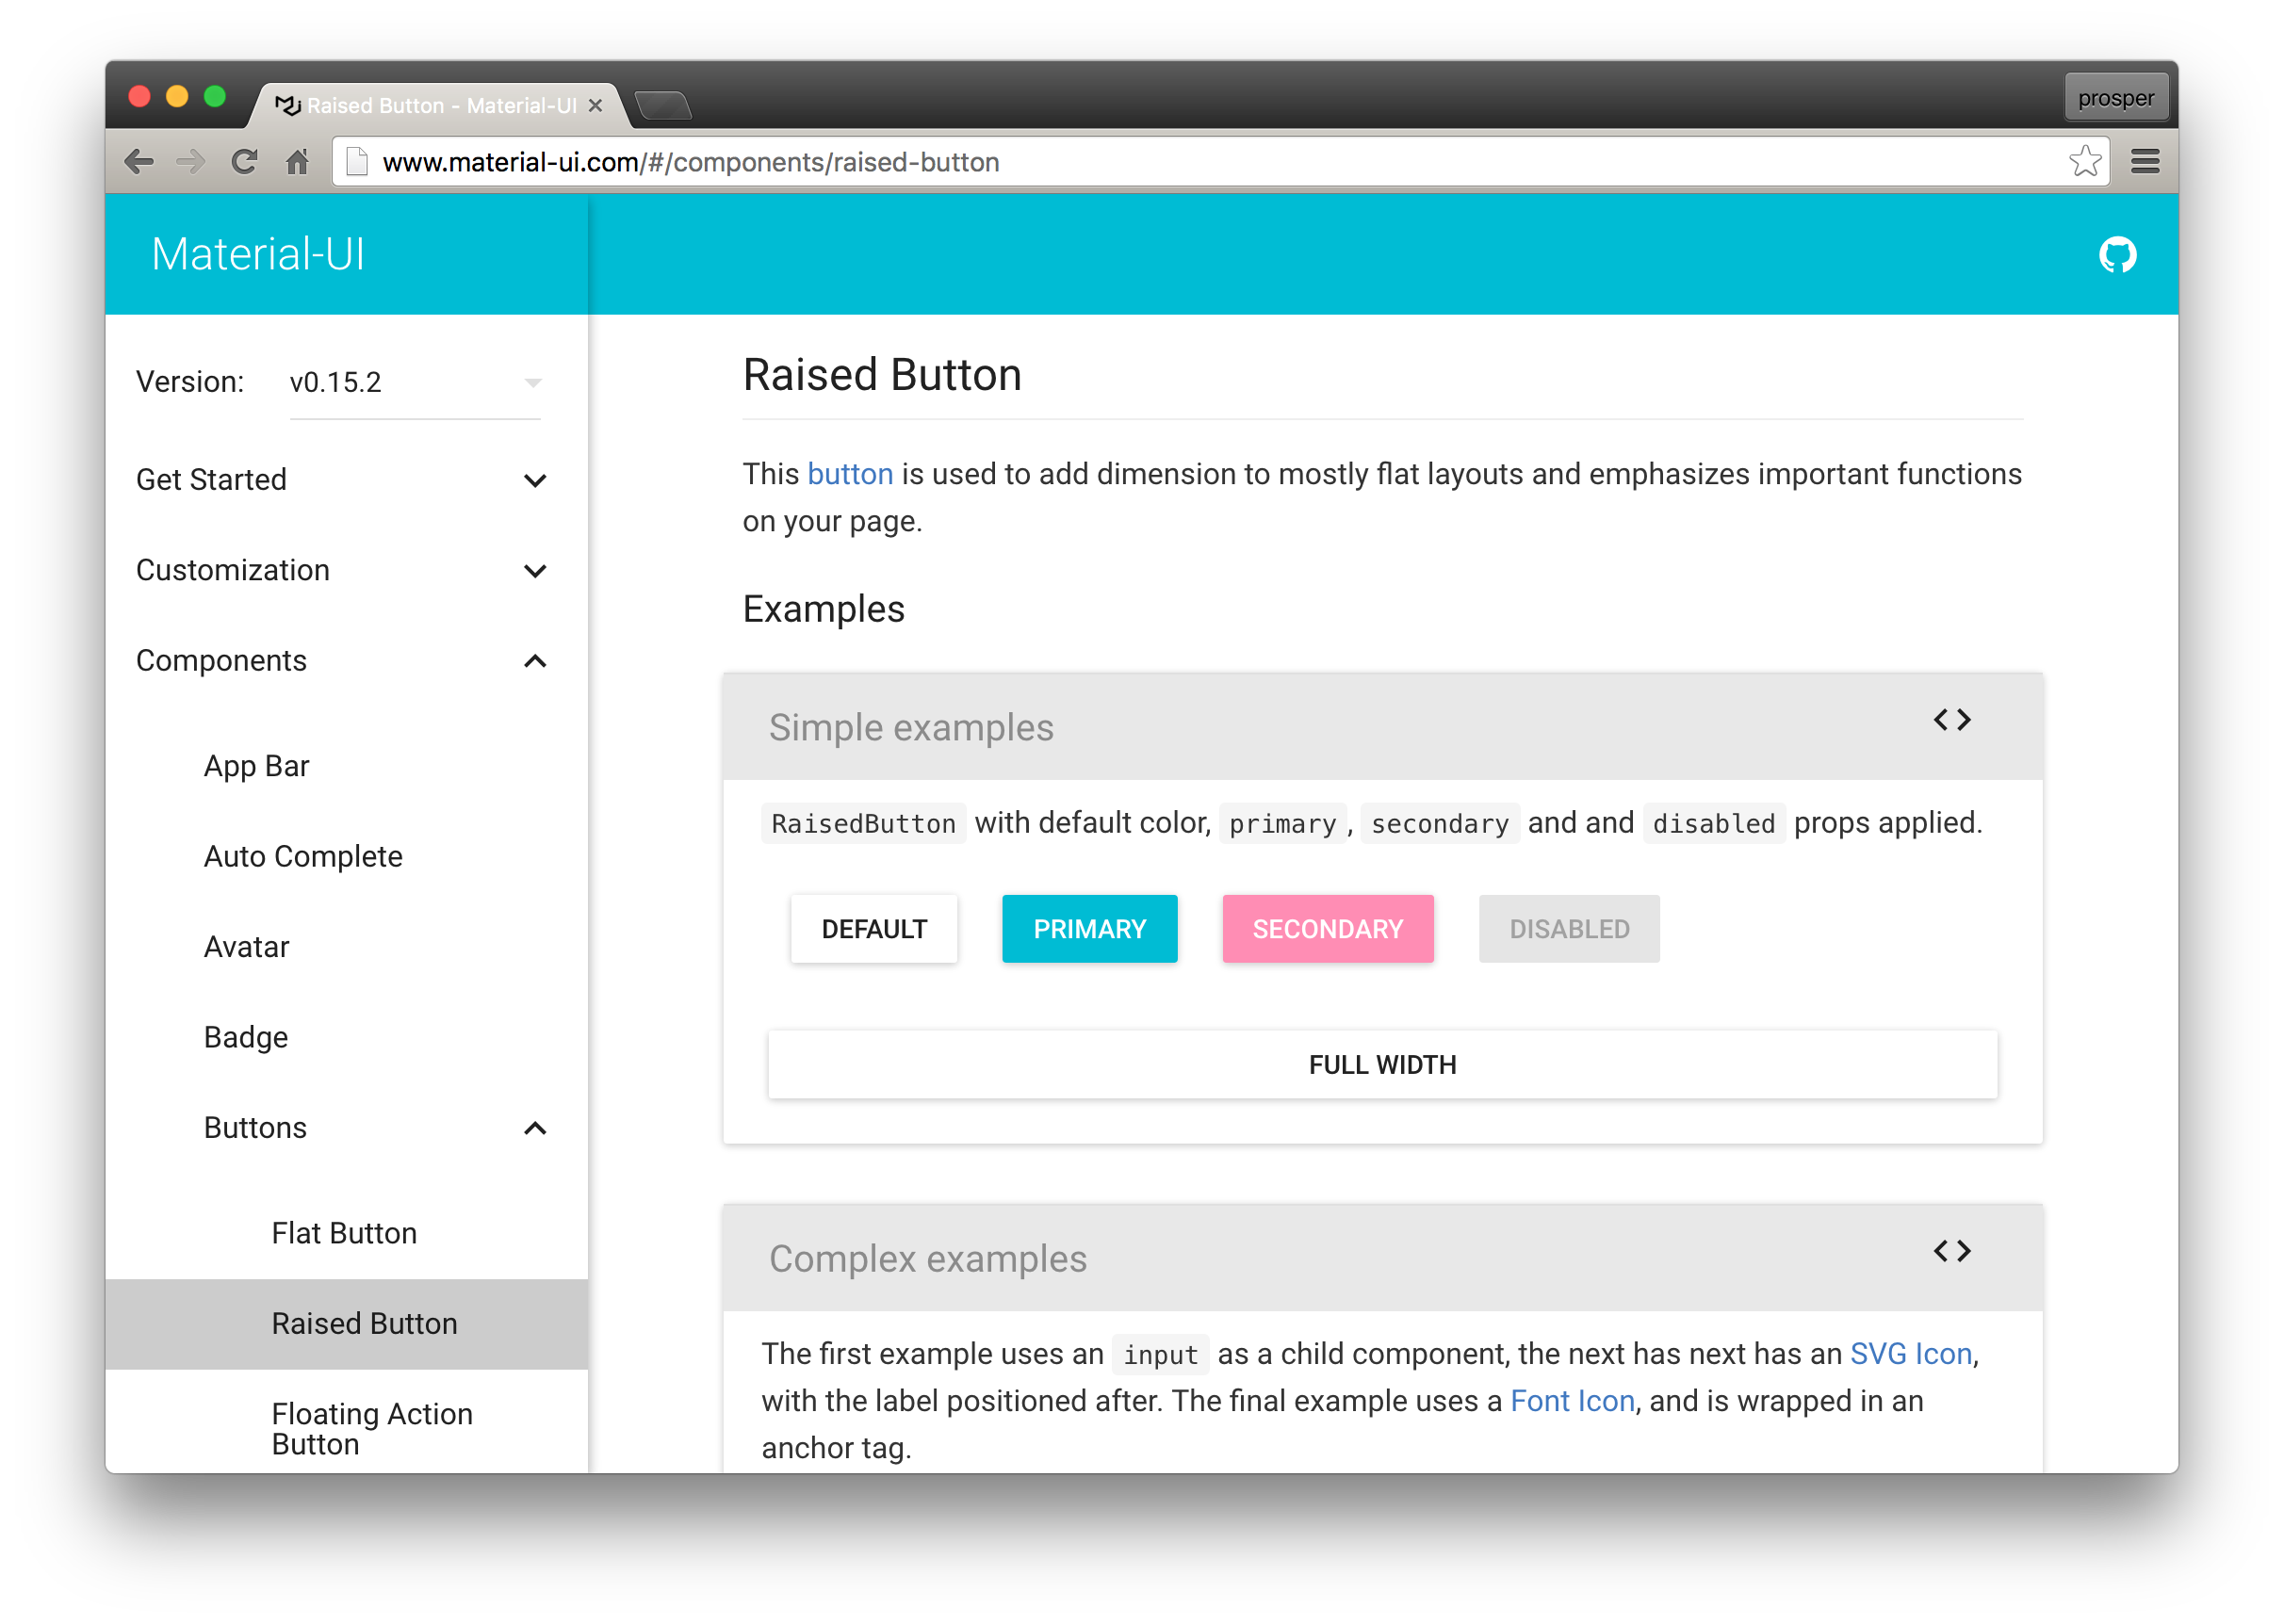
In ReactJS projects, you can create custom stylesheets and UI Components. A developer that's looking to rapidly build an application might not have time to create UI components from scratch. The community has blessed us with two popular libraries that possess ready-made UI components for use in your application. React-Bootstrap has all of the bootstrap features written purely as reusable React Components. Material-UI is a set of React Components that implement Google's Material Design.
Material UI
React Bootstrap

Material UI Code Example
import React from 'react';
import RaisedButton from 'material-ui/RaisedButton';

const MyAwesomeReactComponent = () => (
  <RaisedButton label="Default" />
);

export default MyAwesomeReactComponent;
import React from 'react';
import ReactDOM from 'react-dom';
import MuiThemeProvider from 'material-ui/styles/MuiThemeProvider';
import MyAwesomeReactComponent from './MyAwesomeReactComponent';

const App = () => (
  <MuiThemeProvider>
    <MyAwesomeReactComponent />
  </MuiThemeProvider>
);

ReactDOM.render(
  <App />,
  document.getElementById('app')
);
One effective way of bootstrapping your ReactJS project is to start by designing your UI components and then glue them together, that way you can split up the initial setup effort into several small parts along the project lifecycle. Pure UI explains this in detail. I also recommend these tools: Carte-blanche, React Storybook, uiharness.com. They will help a lot!
Network Requests
In a situation where you have to fetch data from an external API e.g calling the Github API in your ReactJS application, there are several tools you can use. I highly recommend axios and superagent.
HTTP Request Example With Axios
import axios from 'axios';

function getRepos(username){
  return axios.get('https://api.github.com/users/${username}/repos');
}

function getUserInfo(username){
  return axios.get('https://api.github.com/users/${username}');
}

const helpers = {
  getGithubInfo(username) {
    return axios.all([getRepos(username), getUserInfo(username)])
      .then(arr => ({
      repos: arr[0].data,
      bio: arr[1].data
    }))
  }
};

export default helpers;
This is a helper utility that you can now call and render out in different ReactJS components within your app.
Flux Pattern - State Management
Flux is an application architecture for React that utilizes a unidirectional flow for building client-side web applications. With Flux, when a user interacts with a React view, the view propagates an action through a central dispatcher, to the various stores that hold the application's data and business logic, which updates all of the views that are affected. When choosing a dispatcher for your app, Facebook's dispatcher library should come in handy. It's easy to instantiate and use. Alongside this library, you will need any good Javascript event library. NodeJS EventEmmiter module is a good option. You can install flux from npm, the dispatcher will be immediately available via var Dispatcher = require('flux').Dispatcher;. More details about the Flux pattern can be found here.
 (Source: Facebook)
Redux
Redux evolves the idea of Flux. It's a state management library with a minimal API but completely predictable behavior, so it is possible to implement logging, hot reloading, time travel, universal apps, record and replay, without any buy-in from the developer. You can also install it via NPM like so: npm install redux redux-devtools --save. Redux attempts to make state mutations predictable by imposing certain restrictions on how and when updates can happen. Redux has three fundamental principles:
- Single source of truth
- State is read-only
- Changes are made with pure functions
Read more about Redux here. Here is also an awesome list of Redux examples and middlewares. Another alternative for state management within your ReactJS application is Alt. More information about Alt here.
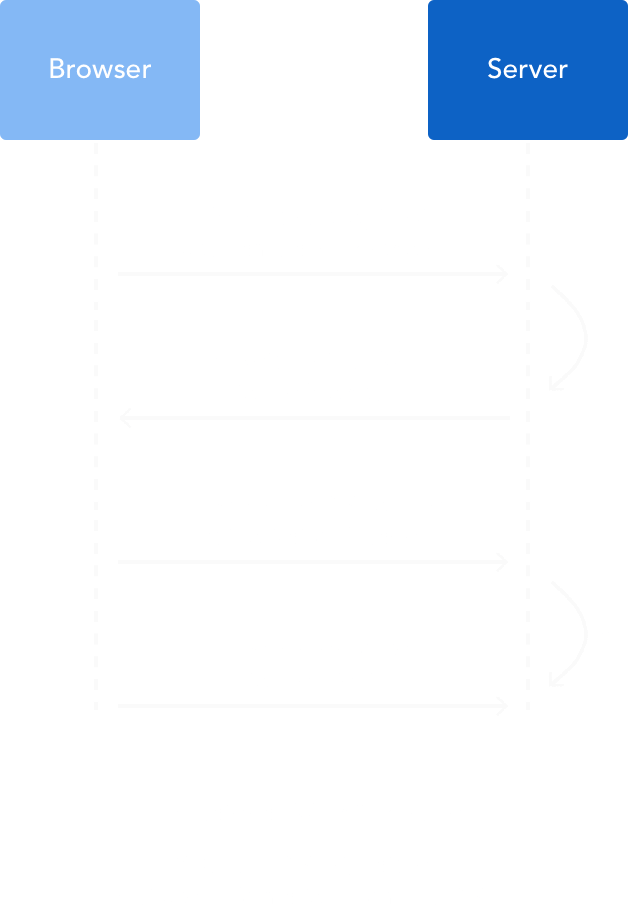
Authentication
Authentication is an important part of any application. The best way to do user authentication for single page apps is via JSON Web Tokens (JWT). A typical authentication flow is this:
- A user signs up/logs in, generates JWT
id_tokenandaccess_tokenand returns them to the client - Store the JWT tokens on the client and send the
access_tokento the backend via headers/query parameters for future requests.
Authentication flow
A comprehensive example of adding authentication to a ReactJS app is here. Using Redux? Here is a good example of setting up authentication in your ReactJS application.
Data Persistence
Without a backend, you can persist data in your Single Page App by using Firebase. In a Reactjs app, all you simply need is ReactFire. It is a ReactJS mixin for easy Firebase integration. With ReactFire, it only takes a few lines of JavaScript to integrate Firebase data into React apps via the ReactFireMixin.
npm install reactfire react firebase --save
TodoList Example
import React from 'react';

class TodoList extends React.Component {
  render() {
    var _this = this;
    var createItem = (item, index) => {
      return (
        <li key={ index }>
          { item.text }
          <span onClick={ _this.props.removeItem.bind(null, item['.key']) }
                style={{ color: 'red', marginLeft: '10px', cursor: 'pointer' }}>
            X
          </span>
        </li>
      );
    };

    return <ul>{ this.props.items.map(createItem) }</ul>;
  }
}

class TodoApp extends React.Component {
  constructor(props, context) {
    super(props, context);
    this.state = {
      items: [],
      text: ''
    };
  }

  componentWillMount() {
    this.firebaseRef = firebase.database().ref('todoApp/items');
    this.firebaseRef.limitToLast(25).on('value', function(dataSnapshot) {
      var items = [];
      dataSnapshot.forEach(childSnapshot => {
        const item = childSnapshot.val();
        item['.key'] = childSnapshot.key;
        items.push(item);
      });

      this.setState({
        items: items
      });
    }.bind(this));
  }

  componentWillUnmount() {
    this.firebaseRef.off();
  }

  onChange(e) {
    this.setState({text: e.target.value});
  }

  removeItem(key) {
    var firebaseRef = firebase.database().ref('todoApp/items');;
    firebaseRef.child(key).remove();
  }

  handleSubmit(e) {
    e.preventDefault();
    if (this.state.text && this.state.text.trim().length !== 0) {
      this.firebaseRef.push({
        text: this.state.text
      });
      this.setState({
        text: ''
      });
    }
  }

  render() {
    return (
      <div>
        <TodoList items={ this.state.items } removeItem={ this.removeItem } />
        <form onSubmit={ this.handleSubmit }>
          <input onChange={ this.onChange } value={ this.state.text } />
          <button>{ 'Add #' + (this.state.items.length + 1) }</button>
        </form>
      </div>
    );
  }
}

ReactDOM.render(<TodoApp />, document.getElementById('todoApp'));
More information about persisting your data using ReactFire here.
Testing
Most projects become a mountain of spaghetti code at some point during development due to lack of solid tests or no tests at all. ReactJS apps are no different, but this can be avoided if you know some core principles. When writing tests for ReactJS code, it is helpful to pull out any functionality that doesn't have to do with any UI components into separate modules, so that they can be tested separately. Tools for unit testing those functionalities are mocha, expect, chai, jasmine.
Testing becomes tricky in a ReactJS application when you have to deal with components. How do you test stateless components? How do you test components with state? Now, ReactJS provides a nice set of test utilities that allow us to inspect and examine the components we build. A particular concept worthy of mention is Shallow Rendering. Instead of rendering into a DOM the idea of shallow rendering is to instantiate a component and get the result of its render method. You can also check its props and children and verify they work as expected. More information here.
Facebook uses Jest to test React applications. AirBnB uses Enzyme. When bootstrapping your ReactJS application, you can set up any of these awesome tools to implement testing.
Generators and Boilerplates
A lot of tools have been mentioned in this post in relation to setting up different parts of a ReactJS app. If you don't intend writing your app from scratch, there are lots of generators and boilerplates that tie all these tools together to give you a great starting point for your app. One fantastic example is React Starter Kit. It has a Yeoman generator. It's an isomorphic web app boilerplate that contains almost everything you need to build a ReactJS app. Another boilerplate is React Static boilerplate, it helps you build a web app that can be hosted directly from CDNs like Firebase and Github Pages. Other alternatives are React redux starter kit and React webpack generator. Recently, a nice and effective tool called create-react-app was released by the folks at Facebook. It's a CLI tool that helps create React apps with no build configuration!
Aside: Securing React Apps with Auth0
As you will learn in this section, you can easily secure your React applications with Auth0, a global leader in Identity-as-a-Service (IDaaS) that provides thousands of enterprise customers with modern identity solutions. Alongside with the classic username and password authentication process, Auth0 allows you to add features like Social Login, Multifactor Authentication, Passwordless Login, and much more with just a few clicks.
To follow along the instruction describe here, you will need an Auth0 account. If you don't have one yet, now is a good time to sign up for a free Auth0 account.
Also, if you want to follow this section in a clean environment, you can easily create a new React application with just one command:
npx create-react-app react-auth0
Then, you can move into your new React app (which was created inside a new directory called react-auth0 by the create-react-app tool), and start working as explained in the following subsections.
Setting Up an Auth0 Application
To represent your React application in your Auth0 account, you will need to create an Auth0 Application. So, head to the Applications section on your Auth0 dashboard and proceed as follows:
- click on the Create Application button;
- then define a Name to your new application (e.g., "React Demo");
- then select Single Page Web Applications as its type.
- and hit the Create button to end the process.
After creating your application, Auth0 will redirect you to its Quick Start tab. From there, you will have to click on the Settings tab to whitelist some URLs that Auth0 can call after the authentication process. This is a security measure implemented by Auth0 to avoid the leaking of sensitive data (like ID Tokens).
So, when you arrive at the Settings tab, search for the Allowed Callback URLs field and add http://localhost:3000/callback into it. For this tutorial, this single URL will suffice.
That's it! From the Auth0 perspective, you are good to go and can start securing your React application.
Dependencies and Setup
To secure your React application with Auth0, there are only three dependencies that you will need to install:
auth0.js: This is the default library to integrate web applications with Auth0.react-router: This is the de-facto library when it comes to routing management in React.react-router-dom: This is the extension to the previous library to web applications.
To install these dependencies, move into your project root and issue the following command:
npm install --save auth0-js react-router react-router-dom
Note: As you want the best security available, you are going to rely on the Auth0 login page. This method consists of redirecting users to a login page hosted by Auth0 that is easily customizable right from your Auth0 dashboard. If you want to learn why this is the best approach, check the Universal vs. Embedded Login article.
After installing all three libraries, you can create a service to handle the authentication process. You can call this service Auth and create it in the src/Auth/ directory with the following code:
// src/Auth/Auth.js
import auth0 from 'auth0-js';

export default class Auth {
  constructor() {
    this.auth0 = new auth0.WebAuth({
      // the following three lines MUST be updated
      domain: '<AUTH0_DOMAIN>',
      audience: 'https://<AUTH0_DOMAIN>/userinfo',
      clientID: '<AUTH0_CLIENT_ID>',
      redirectUri: 'http://localhost:3000/callback',
      responseType: 'token id_token',
      scope: 'openid profile',
    });

    this.getProfile = this.getProfile.bind(this);
    this.handleAuthentication = this.handleAuthentication.bind(this);
    this.isAuthenticated = this.isAuthenticated.bind(this);
    this.login = this.login.bind(this);
    this.logout = this.logout.bind(this);
    this.setSession = this.setSession.bind(this);
  }

  getProfile() {
    return this.profile;
  }

  handleAuthentication() {
    return new Promise((resolve, reject) => {
      this.auth0.parseHash((err, authResult) => {
        if (err) return reject(err);
        console.log(authResult);
        if (!authResult || !authResult.idToken) {
          return reject(err);
        }
        this.setSession(authResult);
        resolve();
      });
    });
  }

  isAuthenticated() {
    return new Date().getTime() < this.expiresAt;
  }

  login() {
    this.auth0.authorize();
  }

  logout() {
    // clear id token and expiration
    this.idToken = null;
    this.expiresAt = null;
  }

  setSession(authResult) {
    this.idToken = authResult.idToken;
    this.profile = authResult.idTokenPayload;
    // set the time that the id token will expire at
    this.expiresAt = authResult.expiresIn * 1000 + new Date().getTime();
  }
}
The Auth service that you just created contains functions to deal with different steps of the sign in/sign up process. The following list briefly summarizes these functions and what they do:
getProfile: This function returns the profile of the logged-in user.handleAuthentication: This function looks for the result of the authentication process in the URL hash. Then, the function processes the result with theparseHashmethod fromauth0-js.isAuthenticated: This function checks whether the expiry time for the user's ID token has passed.login: This function initiates the login process, redirecting users to the login page.logout: This function removes the user's tokens and expiry time.setSession: This function sets the user's ID token, profile, and expiry time.
Besides these functions, the class contains a field called auth0 that is initialized with values extracted from your Auth0 application. It is important to keep in mind that you have to replace the <AUTH0_DOMAIN> and <AUTH0_CLIENT_ID> placeholders that you are passing to the auth0 field.
Note: For the
<AUTH0_DOMAIN>placeholders, you will have to replace them with something similar toyour-subdomain.auth0.com, whereyour-subdomainis the subdomain you chose while creating your Auth0 account (or your Auth0 tenant). For the<AUTH0_CLIENT_ID>, you will have to replace it with the random string copied from the Client ID field of the Auth0 Application you created previously.
Since you are using the Auth0 login page, your users are taken away from the application. However, after they authenticate, users automatically return to the callback URL that you set up previously (i.e., http://localhost:3000/callback). This means that you need to create a component responsible for this route.
So, create a new file called Callback.js inside src/Callback (i.e., you will need to create the Callback directory) and insert the following code into it:
// src/Callback/Callback.js
import React from 'react';
import { withRouter } from 'react-router';

function Callback(props) {
  props.auth.handleAuthentication().then(() => {
    props.history.push('/');
  });

  return <div>Loading user profile.</div>;
}

export default withRouter(Callback);
This component, as you can see, is responsible for triggering the handleAuthentication process and, when the process ends, for pushing users to your home page. While this component processes the authentication result, it simply shows a message saying that it is loading the user profile.
After creating the Auth service and the Callback component, you can refactor your App component to integrate everything together:
// src/App.js

import React from 'react';
import { withRouter } from 'react-router';
import { Route } from 'react-router-dom';
import Callback from './Callback/Callback';
import './App.css';

function HomePage(props) {
  const { authenticated } = props;

  const logout = () => {
    props.auth.logout();
    props.history.push('/');
  };

  if (authenticated) {
    const { name } = props.auth.getProfile();
    return (
      <div>
        <h1>Howdy! Glad to see you back, {name}.</h1>
        <button onClick={logout}>Log out</button>
      </div>
    );
  }

  return (
    <div>
      <h1>I don't know you. Please, log in.</h1>
      <button onClick={props.auth.login}>Log in</button>
    </div>
  );
}

function App(props) {
  const authenticated = props.auth.isAuthenticated();

  return (
    <div className="App">
      <Route
        exact
        path="/callback"
        render={() => <Callback auth={props.auth} />}
      />
      <Route
        exact
        path="/"
        render={() => (
          <HomePage
            authenticated={authenticated}
            auth={props.auth}
            history={props.history}
          />
        )}
      />
    </div>
  );
}

export default withRouter(App);
In this case, you are actually defining two components inside the same file (just for the sake of simplicity). You are defining a HomePage component that shows a message with the name of the logged-in user (that is, when the user is logged in, of course), and a message telling unauthenticated users to log in.
Also, this file is making the App component responsible for deciding what component it must render. If the user is requesting the home page (i.e., the / route), the HomePage component is shown. If the user is requesting the callback page (i.e., /callback), then the Callback component is shown.
Note that you are using the Auth service in all your components (App, HomePage, and Callback) and also inside the Auth service. As such, you need to have a global instance for this service, and you have to include it in your App component.
So, to create this global Auth instance and to wrap things up, you will need to update your index.js file as shown here:
// src/index.js

import React from 'react';
import ReactDOM from 'react-dom';
import { BrowserRouter } from 'react-router-dom';
import Auth from './Auth/Auth';
import './index.css';
import App from './App';
import registerServiceWorker from './registerServiceWorker';

const auth = new Auth();

ReactDOM.render(
  <BrowserRouter>
    <App auth={auth} />
  </BrowserRouter>,
  document.getElementById('root'),
);
registerServiceWorker();
After that, you are done! You just finished securing your React application with Auth0. If you take your app for a spin now (npm start), you will be able to authenticate yourself with the help of Auth0, and you will be able to see your React app show your name (that is, if your identity provider does provide a name).
If you are interested in learning more, please, refer to the official React Quick Start guide to see, step by step, how to properly secure a React application. Besides the steps shown in this section, the guide also shows:
Conclusion
There are several tools that will help bootstrap your React app, we looked at a couple that we consider quite good and will have your application up and running in no time. But feel free to search for your own tools, and if you think that we are missing something, let us know in the comments. Setting up a React project should be painless!
“Setting up a React project should be painless!”
Tweet This
About the author

Prosper Otemuyiwa
Former Auth0 Employee (Auth0 Alumni)