TL;DR: Ionic is an open source mobile framework that allows web developers use their skills to build cross platform mobile apps. It leverages Cordova to allow you build mobile apps with JavaScript. In this article, I'll show you how to create a mobile app with the Ionic Framework and add authentication to it using Auth0. Check out the repo to go straight to the code.
The Ionic Framework has built a vibrant community around it. Ionic has consistently delivered on its promise to create hybrid and progressive apps with ease. At the time of this writing, Ionic framework is the top open source framework for building hybrid mobile apps. With one codebase, you can have three apps running on Android, iOS and Windows.
The team behind the Ionic framework have released several products over time to simplify the process of building, deploying and testing Ionic apps. These products include:
- Ionic Creator: This is a drag and drop tool for rapidly prototyping your idea. It makes building your mobile apps dead-simple. With Ionic creator, you can drag and drop Ionic components, add your own code, use one-click addons for services like Google Maps and Analytics, preview, share across your team and export.
- Ionic Enterprise: This provides full support for your development team. Every Ionic enterprise subscription comes with a dedicated Account manager. You'll also have access to Ionic's full suite of products and services.
- Ionic View: This product allows you share your apps easily with the world. With Ionic View, you can share your Ionic apps with your organization and testers around the world without complications around provisioning.
Let's Get Started
Without much ado, let's get started with building our first mobile app with the Ionic framework.
First, ensure you have Node.js installed. Then go ahead and install cordova and ionic like so:
npm install -g cordova ionic
Note: Cordova is a tool that wraps your HTML/JavaScript code into a native container and provides access to native plugins and functionalities. Ionic and Cordova works hand-in-hand to ensure we can use web languages to create native mobile apps.
Next, create a starter project via the CLI. Thankfully, Ionic CLI ships with several project templates. These templates are:
- tabs: A three tab layout starter app
- sidemenu: A swipable side menu layout starter app
- blank: A starter app with a single blank page
- super:A starter app with over 14 ready to use page designs
- tutorial: A guided starter app
In this tutorial, we'll make use of the sidemenu layout.
Note: There is no specific reason for using the sidemenu layout. I simply just prefer using this particular layout.
Run the command below in your terminal:
ionic start MyApp sidemenu
A question - Would you like to integrate your new app with Cordova to target native iOS and Android? will pop up in your terminal when you run this command. Reply with Yes.
This command sets up a new Ionic app for us. Next, cd into the MyApp folder and run the command below:
ionic serve --lab
This command will launch our application from the browser like this:

As you can see from the top right panel in the diagram above, any of the three major mobile platforms can be selected to show how your app looks like on the devices that run on these operating systems.
The App to build
The mobile application we'll build is simple. A Game of Thrones app. This app will list the Houses of Westeros along with the details of at least a member of each house. In addition, we'll secure this app to ensure that only registered users can view the details of the House of Westeros members.
Ionic 2, which is what we are making use of in this app uses Angular 2+ and Typescript.
Note: There is an excellent series that can help you get familiar with Angular 2 and TypeScript.
Creating the House Page
The home and list pages are present in our mobile app. They shipped with the template we invoked from the command line. Check out the list page. Open src/pages/list. There is a template, scss and typescript file.
The template file is for the presentation, the scss file is for styling, and the typescript file is for adding logic to the page.
Go ahead and delete the list folder. Next, create a house folder in src/pages directory. Now, create these files, house.html, house.scss and house.ts inside the house folder.
Add code to the typescipt file, house.ts.
src/pages/house/house.ts
import { Component } from '@angular/core';
import { NavController, NavParams } from 'ionic-angular';

@Component({
  selector: 'page-list',
  templateUrl: 'house.html'
})

export class HousePage {
  selectedItem: any;
  icons: string[];
  items: Array<{title: string, member: string, avatar: string}>;

  constructor(public navCtrl: NavController, public navParams: NavParams) {
    // If we navigated to this page, we will have an item available as a nav param
    this.selectedItem = navParams.get('item');

    this.items = [
      {
        title: 'House Stark - The North',
        member: 'Sansa Stark',
        avatar: 'https://res.cloudinary.com/unicodeveloper/image/upload/v1501828956/sansastark.jpg'
      },
      {
        title: 'House Lannister - The Westerlands',
        member: 'Tyrion Lannister',
        avatar: 'https://res.cloudinary.com/unicodeveloper/image/upload/v1501828923/tyrionlannister.jpg'
      },
      {
        title: 'House Baratheon - The Stormlands',
        member: 'Stannis Baratheon',
        avatar: 'https://res.cloudinary.com/unicodeveloper/image/upload/v1501828950/stannisbaratheon.png'
      },
      {
        title: 'House Greyjoy - The Iron Islands',
        member: 'Balon Greyjoy',
        avatar: 'https://res.cloudinary.com/unicodeveloper/image/upload/v1501828911/balongreyjoy.jpg'
      },
      {
        title: 'House Targaryen - The Crownlands',
        member: 'Daenerys Targaryen',
        avatar: 'https://res.cloudinary.com/unicodeveloper/image/upload/v1501828803/danerystargaryen.jpg'
      },
      {
        title: 'House Tyrell - The Reach',
        member: 'Mace Tyrell',
        avatar: 'https://res.cloudinary.com/unicodeveloper/image/upload/v1501828797/macetyrrell.jpg'
      },
      {
        title: 'House Martell - The Dorne',
        member: 'Doran Martell',
        avatar: 'https://res.cloudinary.com/unicodeveloper/image/upload/v1501828795/doranmartell.jpg'
      }
    ];
  }
}
In the code above, we have the HousePage class that has an array of items. This array contains details of the different houses and a member of each house.
Let's add code to the template file, house.html.
src/pages/house/house.html
<ion-header>
  <ion-navbar>
    <button ion-button menuToggle>
      <ion-icon name="menu"></ion-icon>
    </button>
    <ion-title>House of Westeros</ion-title>
  </ion-navbar>
</ion-header>

<ion-content>
  <ion-list>
    <ion-item *ngFor="let item of items">
      <ion-card>

        <img src="{{ item.avatar }}"/>
        <ion-card-content>
          <ion-card-title class="card-title">
            {{ item.title }}
          </ion-card-title>
          <p>
            <ion-badge> {{ item.member }} </ion-badge>
          </p>

        </ion-card-content>
      </ion-card>
    </ion-item>
  </ion-list>
</ion-content>
In the template file, we are simply looping through the array of items defined in the house.ts file.
Bootstrapping the application
The root component of Ionic 2+ apps is the app/app.component.ts file. We need to modify the file to reflect our new House Page.
First, replace import { ListPage } from '../pages/list/list'; with import { HousePage } from '../pages/house/house';.
Second, replace { title: 'List', component: ListPage } with { title: 'Westeros', component: HousePage }.
Open up app/app.module.ts and modify it like so:
First, replace import { ListPage } from '../pages/list/list'; with import { HousePage } from '../pages/house/house';.
Second, in the declarations and entryComponents array, replace ListPage with HousePage. The @NgModule decorator should look like this:
@NgModule({
  declarations: [
    MyApp,
    HomePage,
    HousePage
  ],
  imports: [
    BrowserModule,
    IonicModule.forRoot(MyApp),
  ],
  bootstrap: [IonicApp],
  entryComponents: [
    MyApp,
    HomePage,
    HousePage
  ],
  providers: [
    StatusBar,
    SplashScreen,
    {provide: ErrorHandler, useClass: IonicErrorHandler}
  ]
})
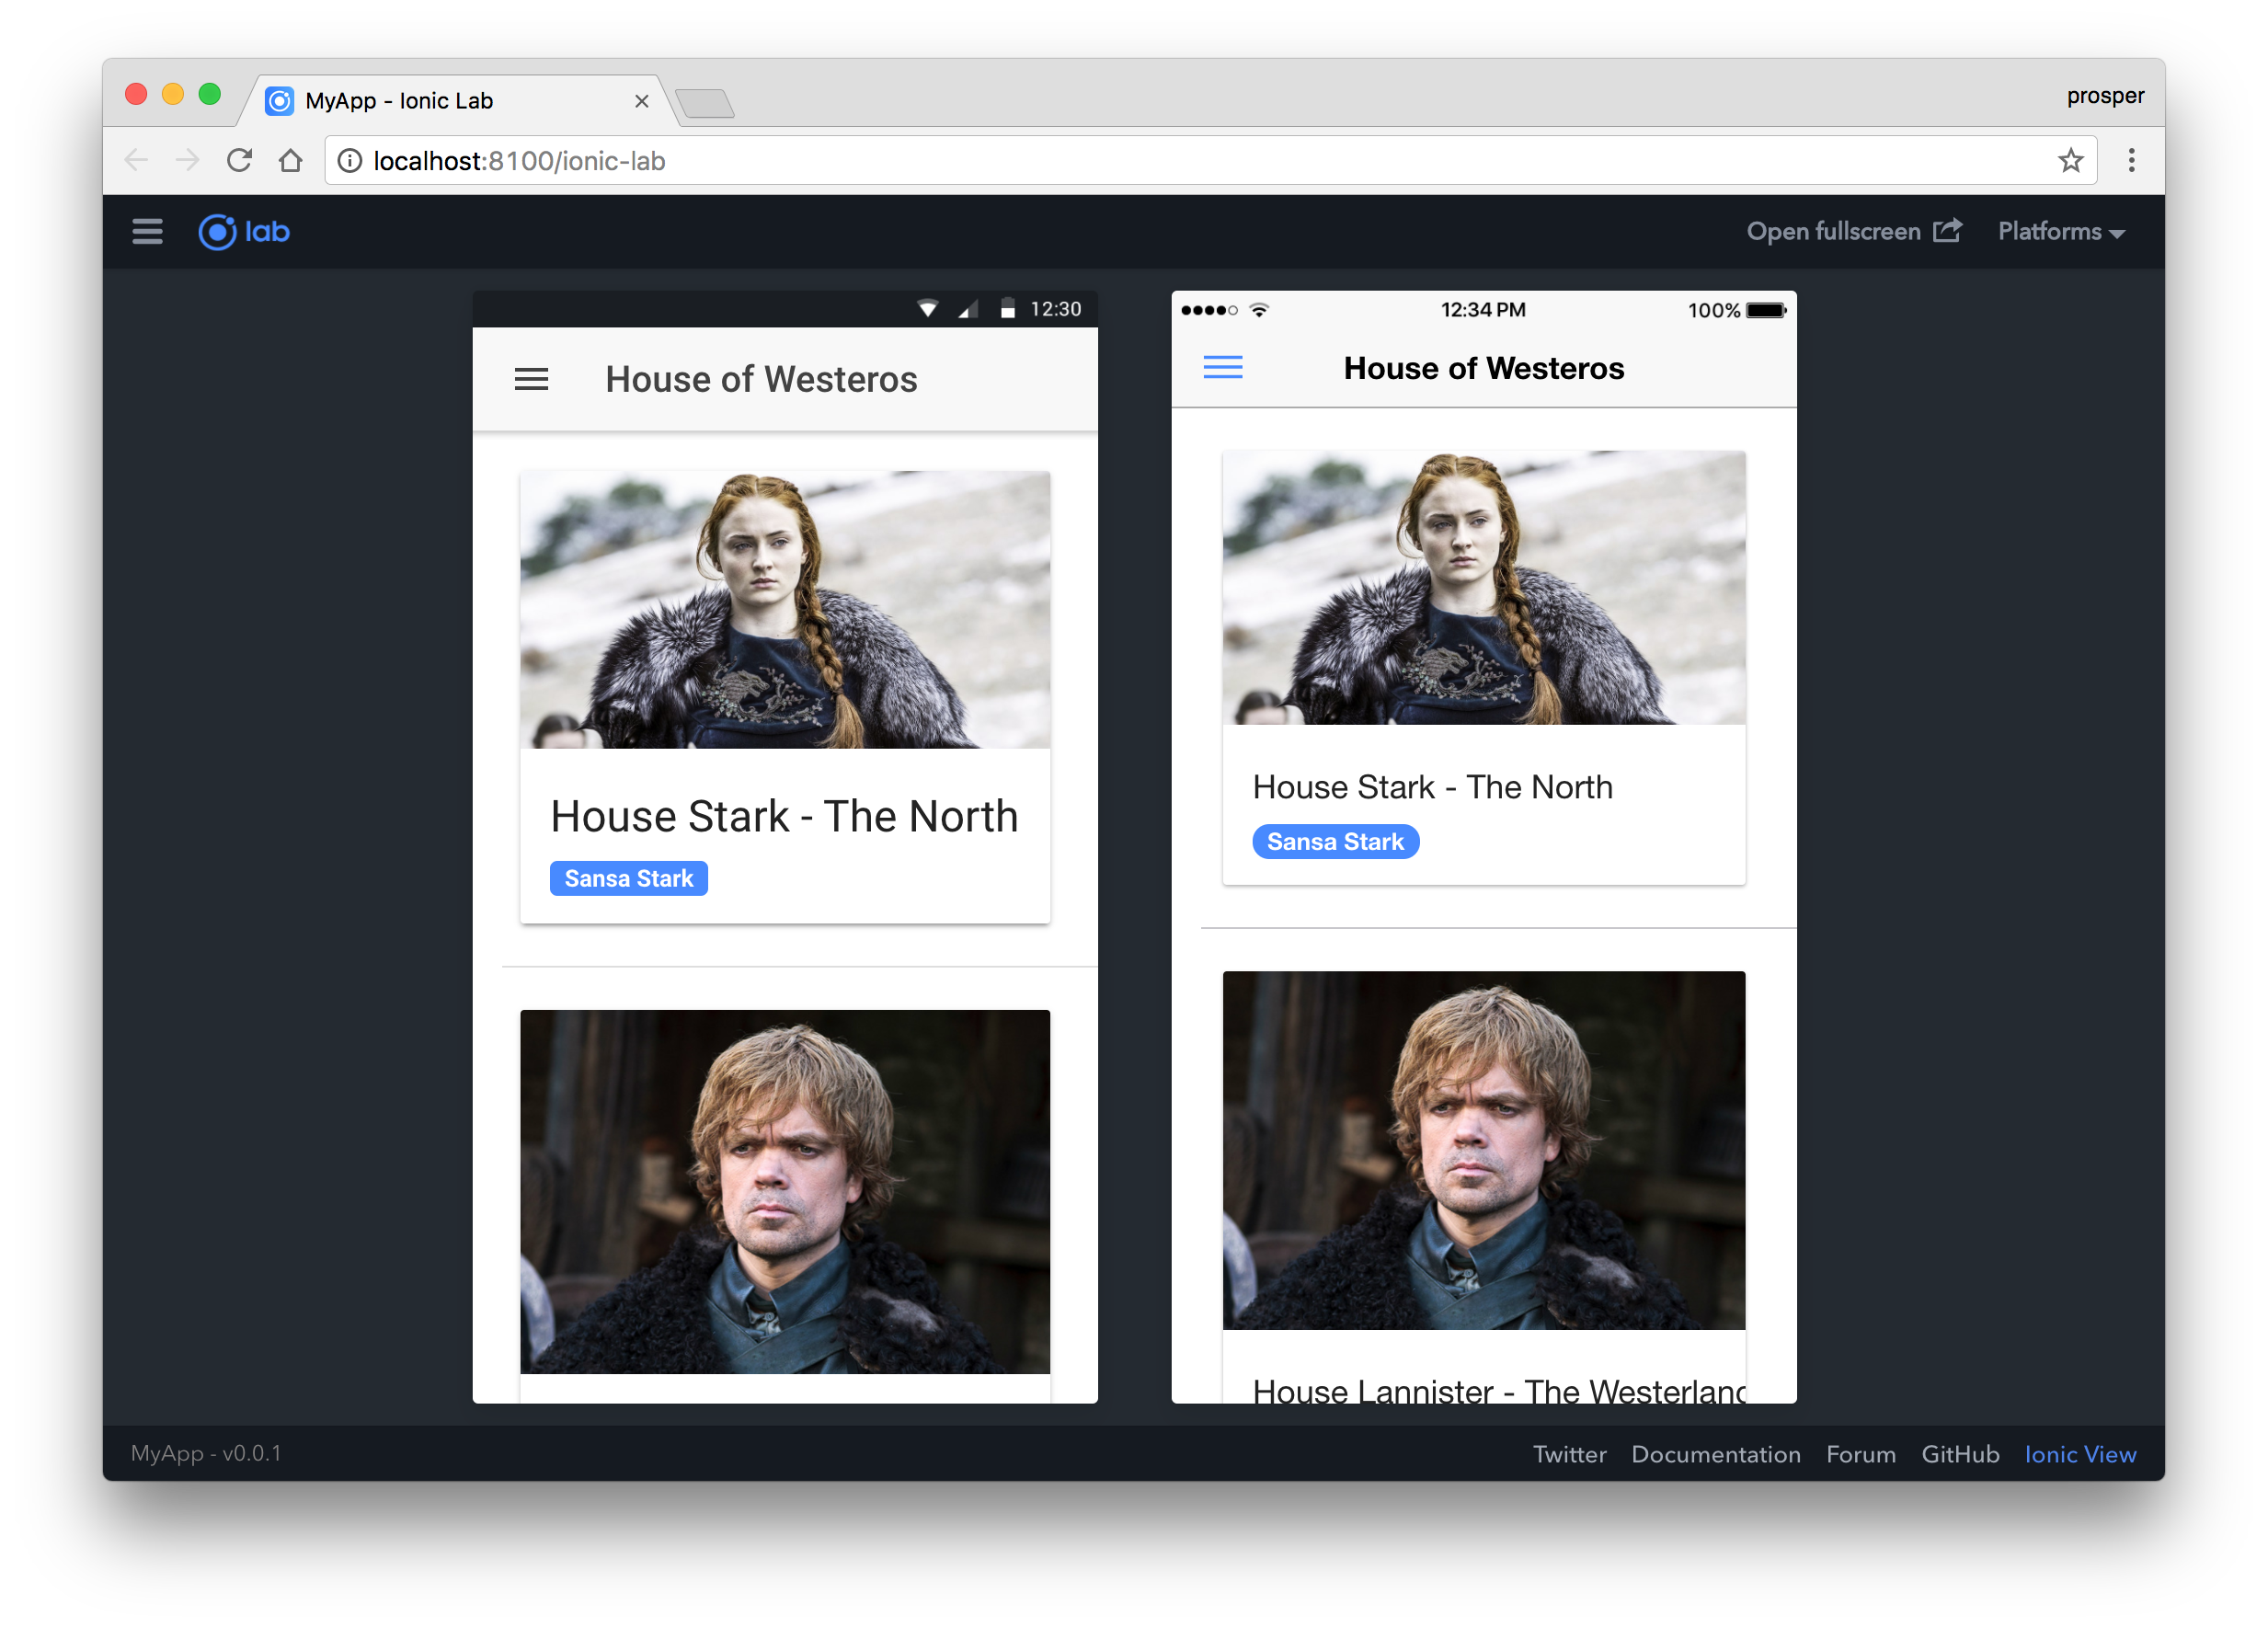
Now, check out your app in the browser. It should look like this:
Our House page is done!
Note: The side menu name to enter this page is
Westeros.
Enhance the Home Page
The home page is pretty boring right now.
Open src/pages/home/home.html and replace the code there with the one below:
<ion-header>
  <ion-navbar>
    <button ion-button menuToggle>
      <ion-icon name="menu"></ion-icon>
    </button>
    <ion-title>Game of Thrones</ion-title>
  </ion-navbar>
</ion-header>

<ion-content class="card-background-page">

  <ion-card>
    <img src="https://images.ctfassets.net/23aumh6u8s0i/7sI5RtSQ81AuPQCIfvw5Hz/ebf7e0415745e743f4baca139a7d113a/card-saopaolo"/>
    <div class="card-title">The Crownlands</div>
    <div class="card-subtitle">Fire and Blood</div>
  </ion-card>

  <ion-card>
    <img src="https://images.ctfassets.net/23aumh6u8s0i/539bIt1slPmfnmNKcNFw86/a3222771617d65dc34b1b979b0a2fe4e/card-amsterdam"/>
    <div class="card-title">The North</div>
    <div class="card-subtitle">Winter is Coming</div>
  </ion-card>

  <ion-card>
    <img src="https://images.ctfassets.net/23aumh6u8s0i/1HJwtOwYdxv30sk8H22AcH/4e55f949297ab01bb89e88d3d90648dc/card-sf"/>
    <div class="card-title">The Westerlands</div>
    <div class="card-subtitle">Hear me Roar!</div>
  </ion-card>

  <ion-card>
    <img src="https://images.ctfassets.net/23aumh6u8s0i/hH3OEnPwHWtudUPw6PpTd/eff22c3ea7ce179c6ddc4d797cc1a973/card-madison"/>
    <div class="card-title">The Stormlands</div>
    <div class="card-subtitle">Ours is the Fury</div>
  </ion-card>

</ion-content>
Add the css code below to src/pages/home/home.scss
.card-background-page {

  ion-card {
    position: relative;
    text-align: center;
  }

  .card-title {
    position: absolute;
    top: 36%;
    font-size: 2.0em;
    width: 100%;
    font-weight: bold;
    color: #fff;
  }

  .card-subtitle {
    font-size: 1.0em;
    position: absolute;
    top: 52%;
    width: 100%;
    color: #fff;
  }

}
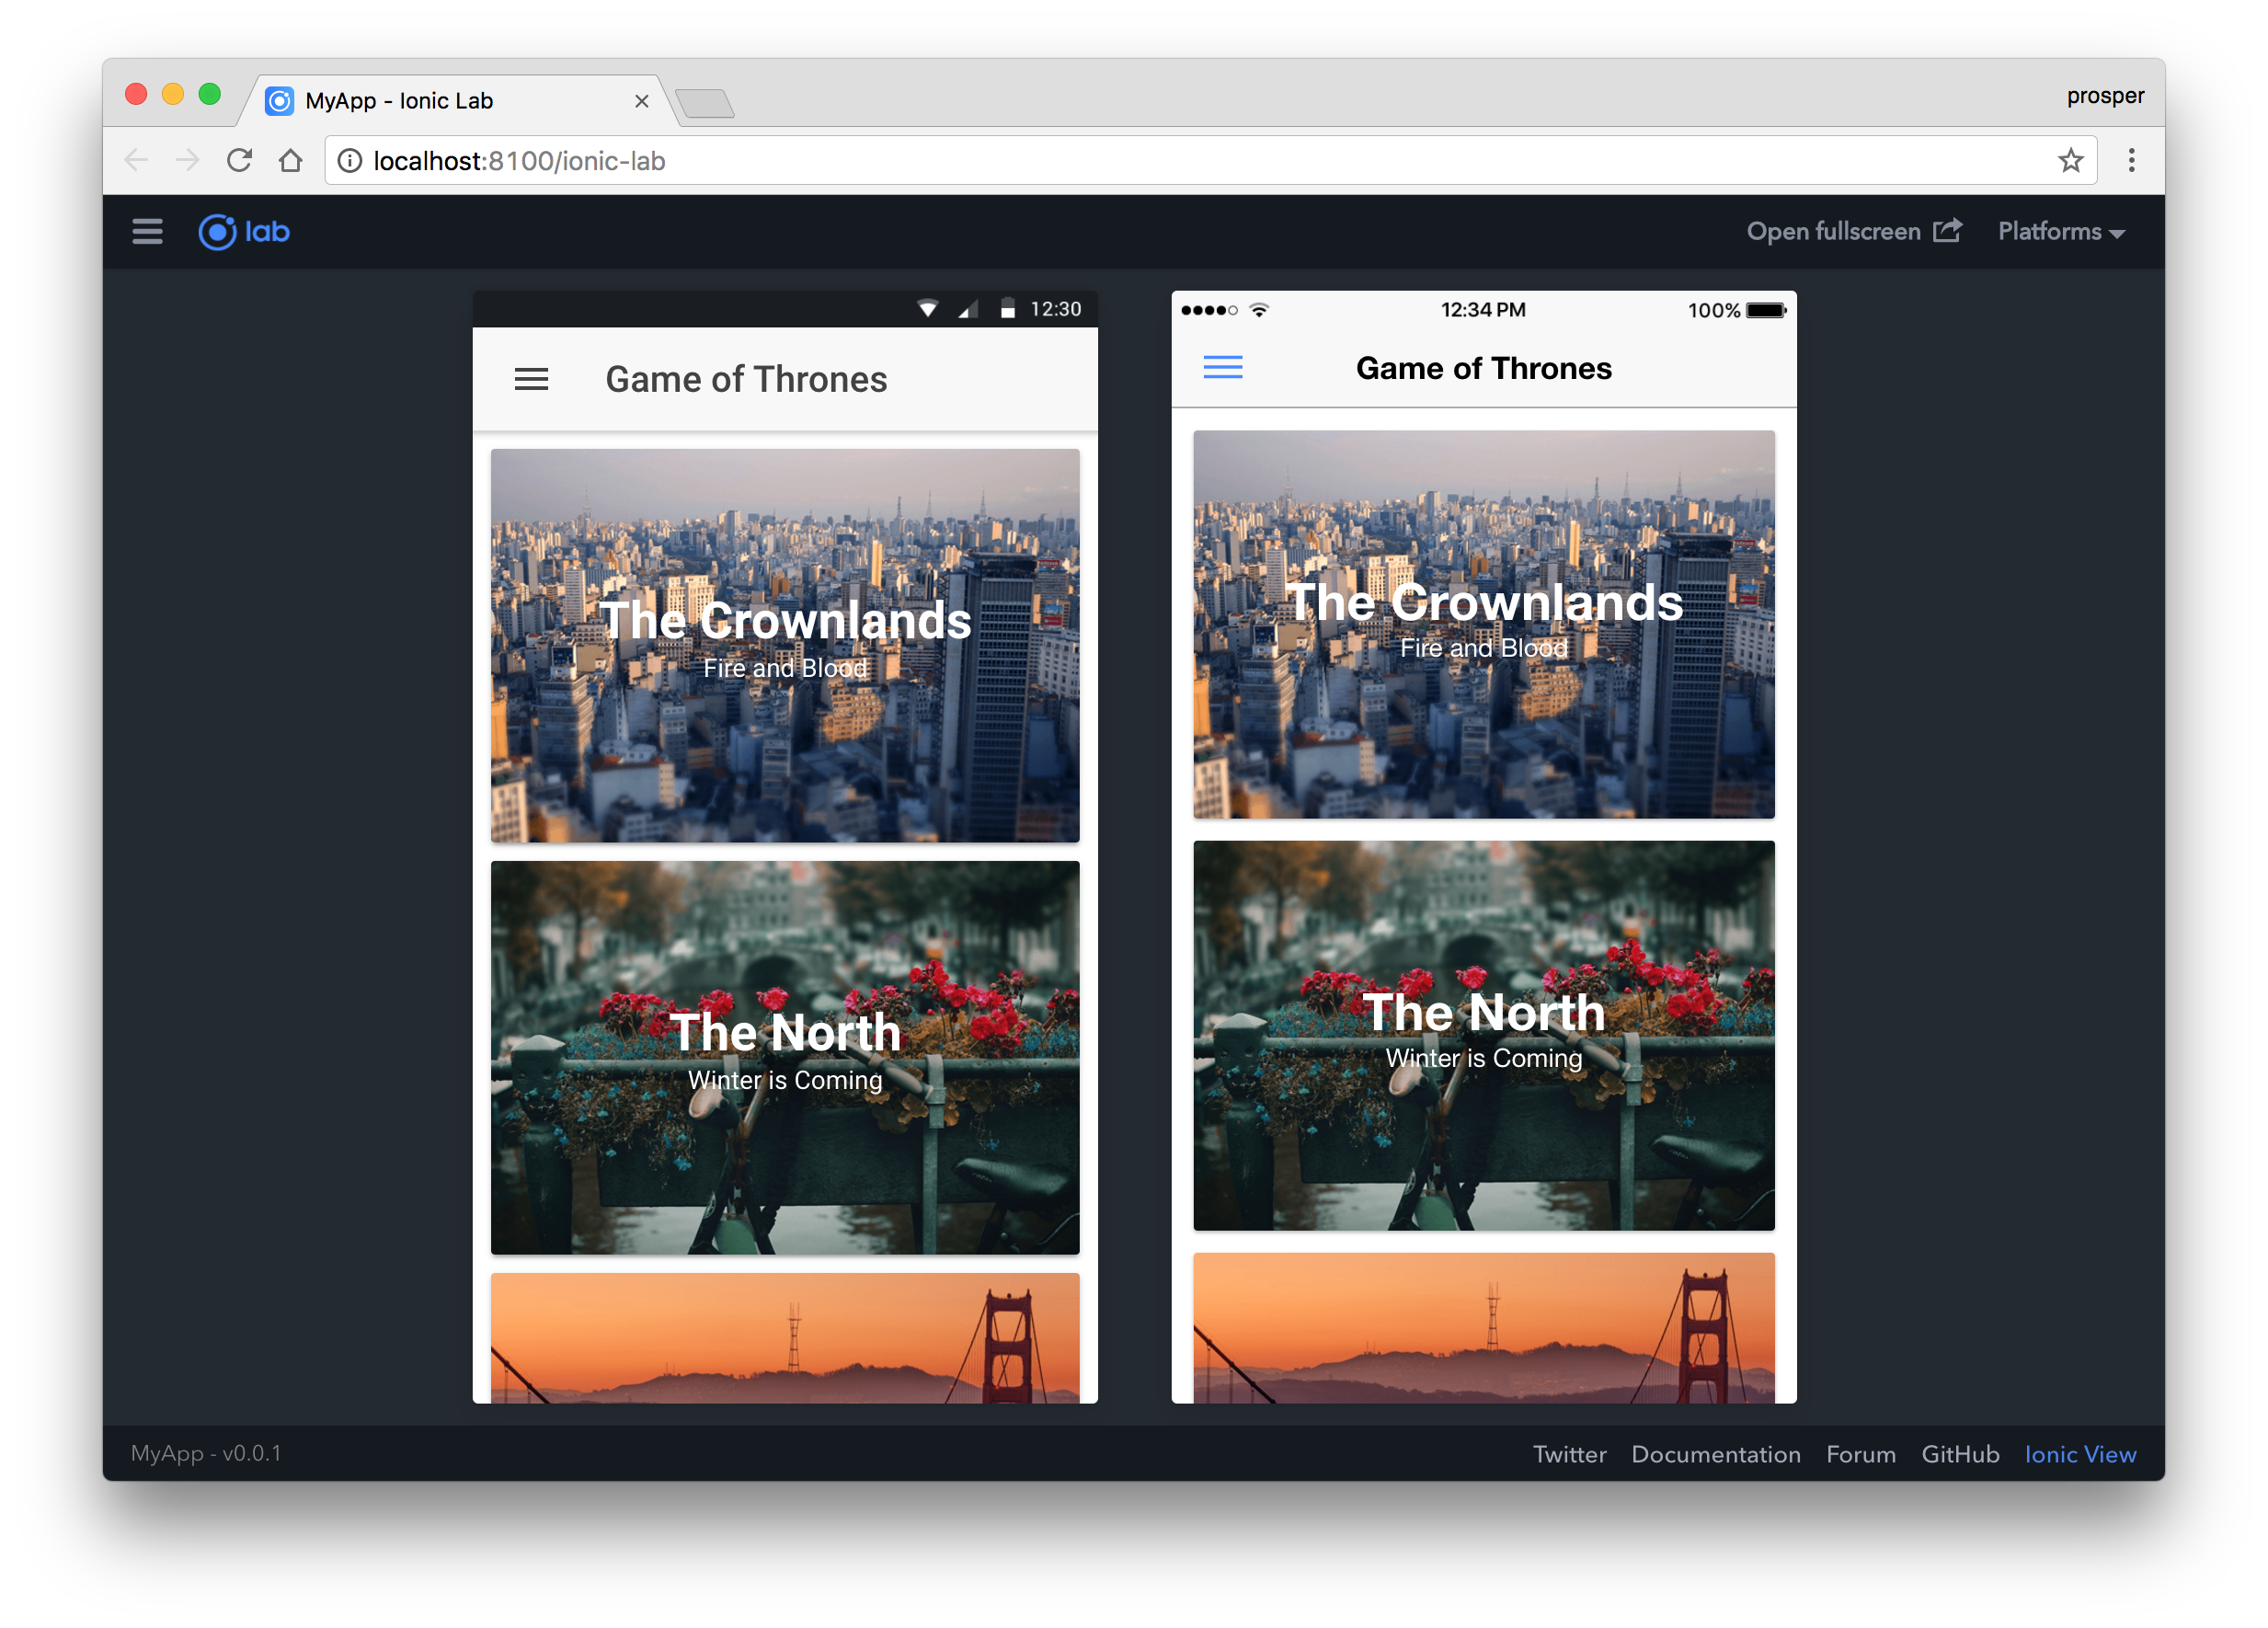
Now, check out the home page again. It should look as beautiful as this:
Next, let's add authentication to the app.
Adding Authentication to Our App
Ionic developers choose Auth0 as one of the top 3 technologies to manager user authenticationin their apps due to its easy implementation. Let me show you how it's done!
Auth0 allows us to issue JSON Web Tokens (JWTs). If you don't already have an Auth0 account, sign up for a free one now.
Once you are done creating the new account, you will be prompted to create a new client, so create one and name it anything you want. Make sure you select the type of app as Native during the creation of the client. Take note of your client details in the settings tab.
Configure Callback URLs and CORS
Go to the Application Settings section in your Auth0 dashboard and set your Callback URL in the Allowed Callback URLs box.
YOUR_PACKAGE_ID://YOUR_AUTH0_DOMAIN/cordova/YOUR_PACKAGE_ID/callback
Where:
- YOURPACKAGEID is the app identifier e.g
com.unicodeveloper.got - YOURAUTH0DOMAIN is your Auth0 tenant name e.g
<tenant>.auth0.com
Note: Your app identifier is the id of the widget in your
config.xmlfile
Add file as an allowed origin to the Allowed Origins (CORS) box.
file://*
Install Authentication Dependencies
We need a few libraries to be installed for our authentication to work. Go ahead and install the following:
npm install auth0-js @auth0/cordova --save
Now, we'll use Auth0's hosted login page, so we need to install the SafariViewController plugin from Cordova.
ionic cordova plugin add cordova-plugin-safariviewcontroller
The CustomURLScheme plugin from Cordova is also required to handle redirects properly.
ionic cordova plugin add cordova-plugin-customurlscheme --variable URL_SCHEME={YOUR_PACKAGE_ID} --variable ANDROID_SCHEME={YOUR_PACKAGE_ID} --variable ANDROID_HOST=YOUR_AUTH0_DOMAIN --variable ANDROID_PATHPREFIX=/cordova/{YOUR_PACKAGE_ID}/callback
Replace YOUR_PACKAGE_ID and YOUR_AUTH0_DOMAIN with your app identifier and Auth0 tenant URL respectively.
Modify config.xml
Add <preference name="AndroidLaunchMode" value="singleTask" /> to your config.xml. This will allow the Auth0 dialog to properly redirect back to your app.
Set Up URL Redirects
Use the onRedirectUri method from auth0-cordova when your app loads to properly handle redirects after authentication.
Open up app/app.component.ts file and add the function below inside the constructor of the class.
...
...
constructor(public platform: Platform, public statusBar: StatusBar, public splashScreen: SplashScreen) {
    this.initializeApp();

    // used for an example of ngFor and navigation
    this.pages = [
      { title: 'Home', component: HomePage },
      { title: 'Westeros', component: HousePage }
    ];

  }

  initializeApp() {
    this.platform.ready().then(() => {
      // Okay, so the platform is ready and our plugins are available.
      // Here you can do any higher level native things you might need.
      this.statusBar.styleDefault();
      this.splashScreen.hide();

      // Add this function
      (<any>window).handleOpenURL = (url) => {
        Auth0Cordova.onRedirectUri(url);
      };
    });
  }
...
...
Don't forget to import Auth0Cordova at the top of the file.
Creating the Authentication Service
We need a service for logging users in and out and checking their authentication state. Create a src/services/auth.service.ts file and add the code below to it:
import { Injectable, NgZone } from '@angular/core';
import { Observable, Subscription } from 'rxjs';

import Auth0Cordova from '@auth0/cordova';
import Auth0 from 'auth0-js';

const auth0Config = {
  // needed for auth0
  clientID: 'YOUR_CLIENT_ID',

  // needed for auth0cordova
  clientId: 'YOUR_CLIENT_ID',
  domain: 'YOUR_AUTH0_DOMAIN',
  callbackURL: location.href,
  packageIdentifier: 'YOUR_PACKAGE_ID'
};

@Injectable()
export class AuthService {
  auth0 = new Auth0.WebAuth(auth0Config);
  accessToken: string;
  idToken: string;
  user: any;

  constructor(public zone: NgZone) {
    this.user = this.getStorageVariable('profile');
    this.idToken = this.getStorageVariable('id_token');
  }

  private getStorageVariable(name) {
    return JSON.parse(window.localStorage.getItem(name));
  }

  private setStorageVariable(name, data) {
    window.localStorage.setItem(name, JSON.stringify(data));
  }

  private setIdToken(token) {
    this.idToken = token;
    this.setStorageVariable('id_token', token);
  }

  private setAccessToken(token) {
    this.accessToken = token;
    this.setStorageVariable('access_token', token);
  }

  public isAuthenticated() {
    const expiresAt = JSON.parse(localStorage.getItem('expires_at'));
    return Date.now() < expiresAt;
  }

  public login() {
    const client = new Auth0Cordova(auth0Config);

    const options = {
      scope: 'openid profile offline_access'
    };

    client.authorize(options, (err, authResult) => {
      if(err) {
        throw err;
      }

      this.setIdToken(authResult.idToken);
      this.setAccessToken(authResult.accessToken);

      const expiresAt = JSON.stringify((authResult.expiresIn * 1000) + new Date().getTime());
      this.setStorageVariable('expires_at', expiresAt);

      this.auth0.client.userInfo(this.accessToken, (err, profile) => {
        if(err) {
          throw err;
        }

        profile.user_metadata = profile.user_metadata || {};
        this.setStorageVariable('profile', profile);
        this.zone.run(() => {
          this.user = profile;
        });
      });
    });
  }

  public logout() {
    window.localStorage.removeItem('profile');
    window.localStorage.removeItem('access_token');
    window.localStorage.removeItem('id_token');
    window.localStorage.removeItem('expires_at');

    this.idToken = null;
    this.accessToken = null;
    this.user = null;
  }

}
In the code above, we are invoking auth0-js on login, and storing the id_token and access_token returned from Auth0. The isAuthenticated method checks if the id_token is still present and valid. The access_token is used to grab the details of the logged-in user and stored in localStorage. And the logout method simply deletes all the tokens and profile details.
Replace YOUR_CLIENT_ID, YOUR_AUTH0_DOMAIN and YOUR_PACKAGE_ID with the valid credentials respectively.
Add Login and Logout Buttons to House Page
The first step is to import the AuthService into the house.ts file.
...
import { AuthService } from '../../services/auth.service';
...
Note: Add the
AuthServiceas a provider in the@Componentdecorator.
...
@Component({
  ...
  providers: [AuthService]
})
...
Furthermore, add the auth parameter in the constructor of the class so that the methods of the AuthService can be available for use in the template file.
...
constructor(public navCtrl: NavController, public navParams: NavParams, public auth: AuthService)
...
The next step is to add a login button somewhere in the house.html file.
<ion-header>
  <ion-navbar>
    <button ion-button menuToggle>
      <ion-icon name="menu"></ion-icon>
    </button>
    <ion-title>House of Westeros</ion-title>
  </ion-navbar>
</ion-header>

<ion-content>
  <div *ngIf="!auth.isAuthenticated()">
    <button ion-button block color="primary" (click)="auth.login()"> Log In </button>
  </div>


    <div *ngIf="auth.isAuthenticated()">
      <button ion-button block color="primary" (click)="auth.logout()">Logout, {{ auth.user.nickname }}</button>
      <ion-list>
        <ion-item *ngFor="let item of items">
          <ion-card>
            <img src="{{ item.avatar }}"/>
            <ion-card-content>
              <ion-card-title class="card-title">
                {{ item.title }}
              </ion-card-title>
              <p>
                <ion-badge> {{ item.member }} </ion-badge>
              </p>
            </ion-card-content>
          </ion-card>
        </ion-item>
      </ion-list>
    </div>

</ion-content>
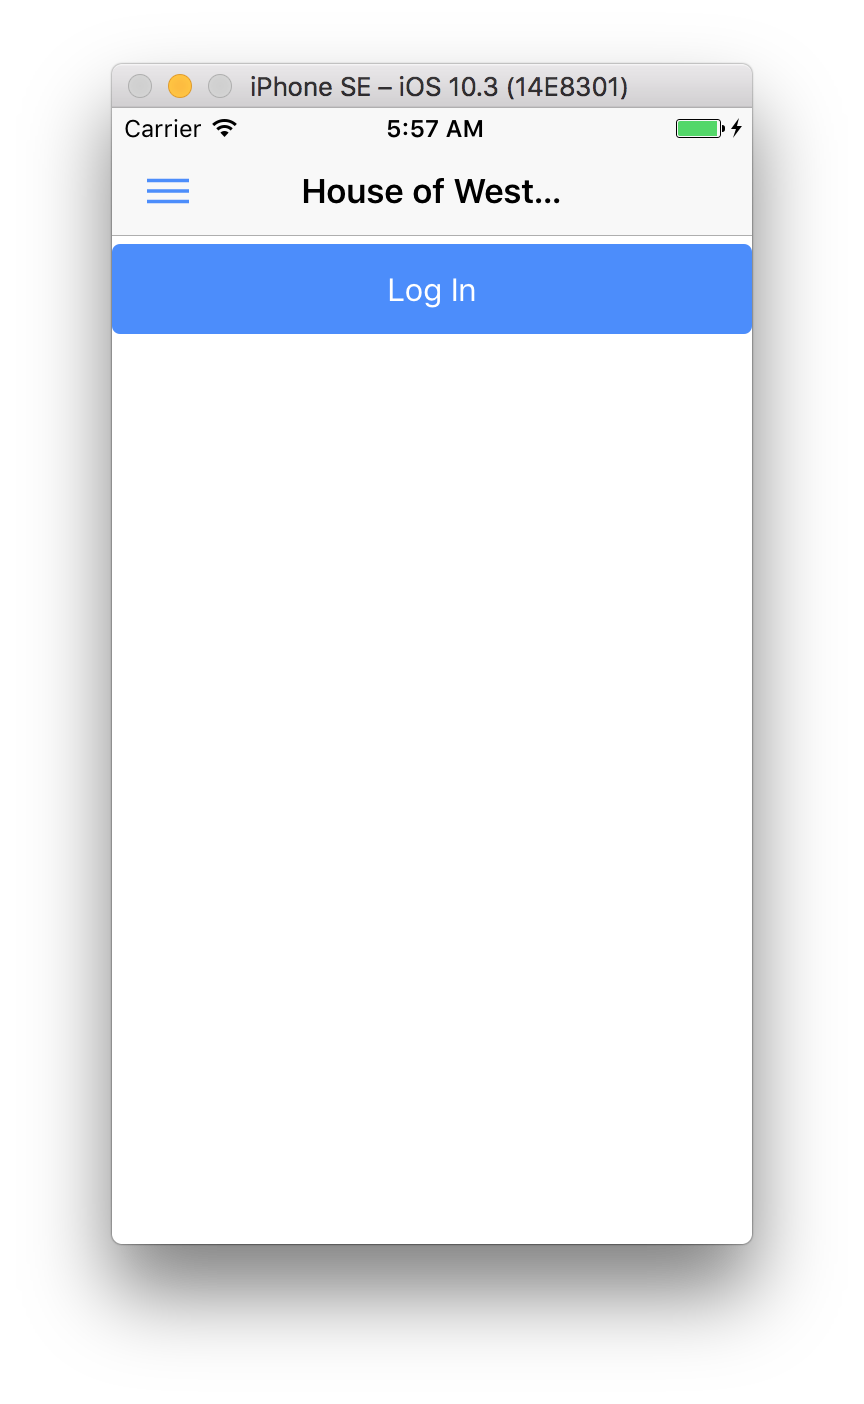
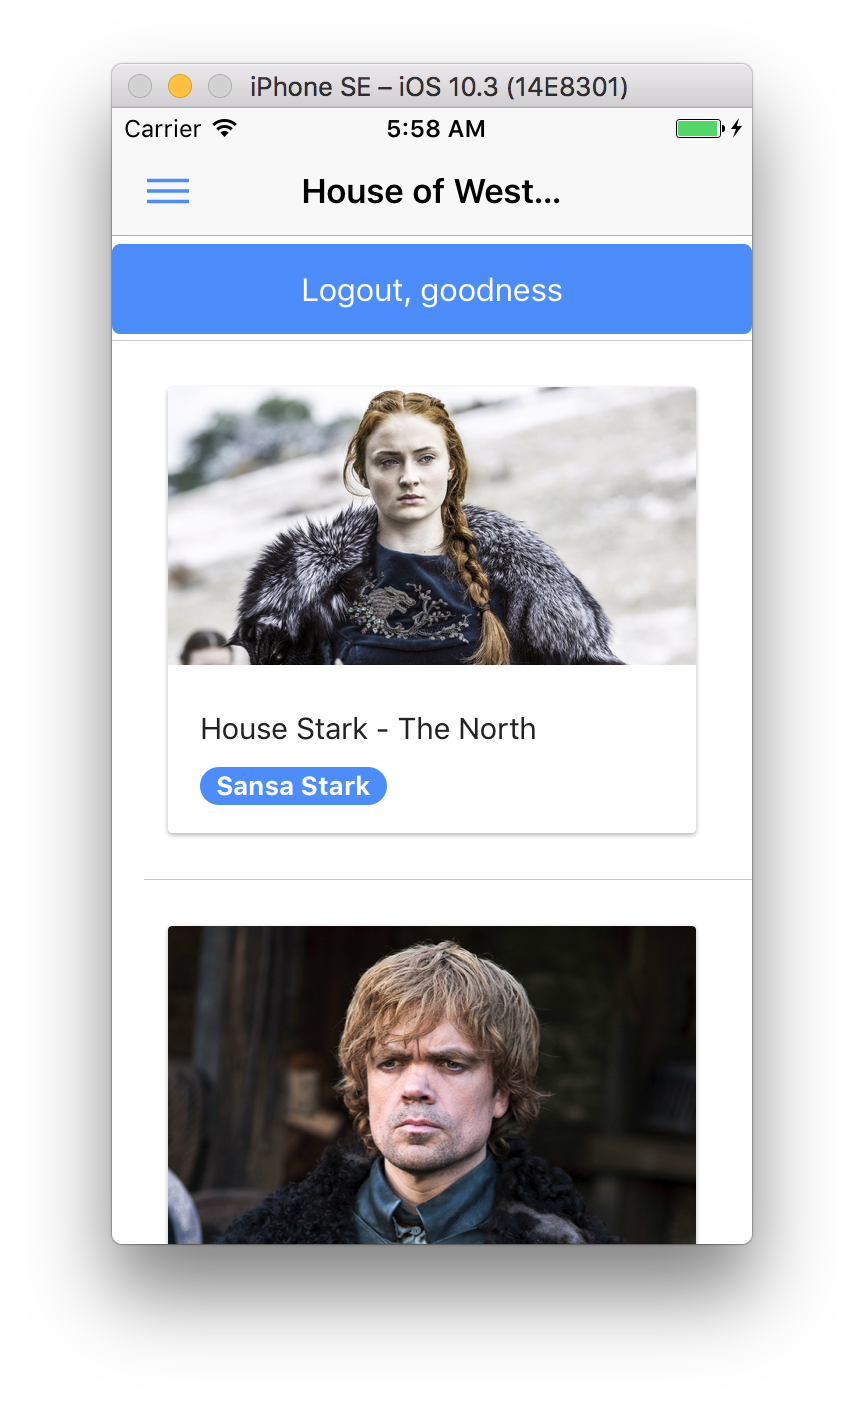
In the code above, we added the login and logout buttons with conditionals. If the user is not authenticated, show the login button else show the logout button.
Now, you need to run this app on a real device or an emulator. Testing the authentication part of this app won't work on a browser.
Important Notice: Make sure you have the Android SDK and XCode installed properly. Follow the Android and iOS platform guides to install required tools for development.
It's easy to get the emulator up and running. Simply add the platform you need like so:
ionic cordova platform add <platform>
Note: The platform can be
iosorandroid
Next, go ahead and run the following command:
ionic cordova emulate <platform>
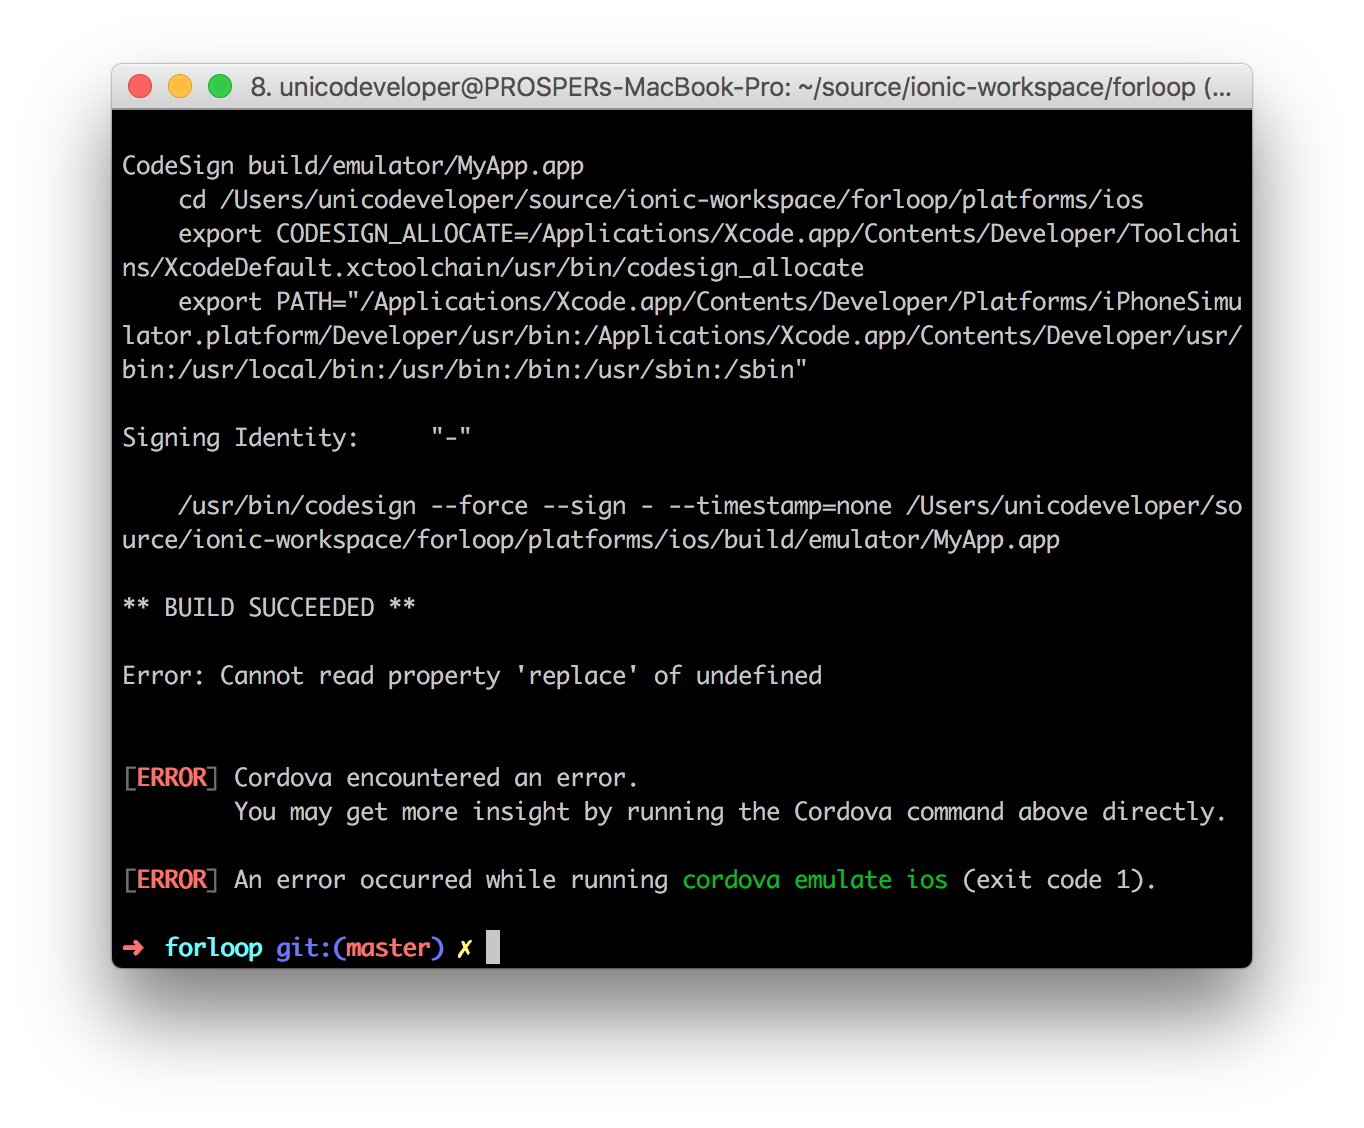
If you are running the iOs emulator, you are most likely to run into this error:
How to fix it: In your project folder root, do cd platforms/ios/cordova && npm install ios-sim.
Testing the app
Run the emulate command again. You should be able to login and logout of your app successfully.

That's it!
Conclusion
Getting started with the Ionic framework is not a hassle. As long as the right tools are installed, Ionic quickly turns you into a mobile app developer with your JavaScript and Angular skills.
Furthermore, Auth0 can help secure your B2C, B2B and B2E organization with more than just username-password authentication. It provides features like multifactor auth, anomaly detection, enterprise federation, Single Sign On (SSO), and more. Sign up today so you can focus on what really matters: growing your business.
About the author

Prosper Otemuyiwa
Former Auth0 Employee (Auth0 Alumni)


