
TL;DR: Angular 8 is here! Learn all about one of its coolest new features: differential loading. Differential loading lets you serve up different bundles to different browsers and make your application even faster!
Angular 8 has only been out for about a week at the time I’m writing this, but there’s already been 17,000 “What’s New” articles published. Rather than throw my own take on the pile, I’ll refer you to the official Angular release announcement but here are the high points:
- No, Ivy isn’t ready yet (it’s an opt-in preview).
- No, Bazel isn’t ready yet (it’s an opt-in preview).
- Builders allow you to extend and customize the CLI. For example, you’re now able to deploy to Firebase and other providers from the CLI.
- There’s improved support for web workers, such as the ability to generate them from the CLI and use them in your application.
- Rather than using the “magic string” syntax specific to Angular to do lazy loading, you’ll be able to use the standard
import()syntax. You can even perform this automatically for your app with theangular-lazy-routes-fixtool. - The new unified location service improves migration from the AngularJS
$locationservice. - The Angular team has created a simplified Getting Started Guide.
- There’s a new Deprecation Guide to assist users with updating Angular.
- Differential loading is turned on in the CLI by default.
In this article, I want to dive into that last one: differential loading. What is that? Why does it matter? What do I need to do about it (if anything)?
“Angular 8 is here! It features differential loading, better support for web workers, and much more.”
Tweet This
What is Differential Loading?
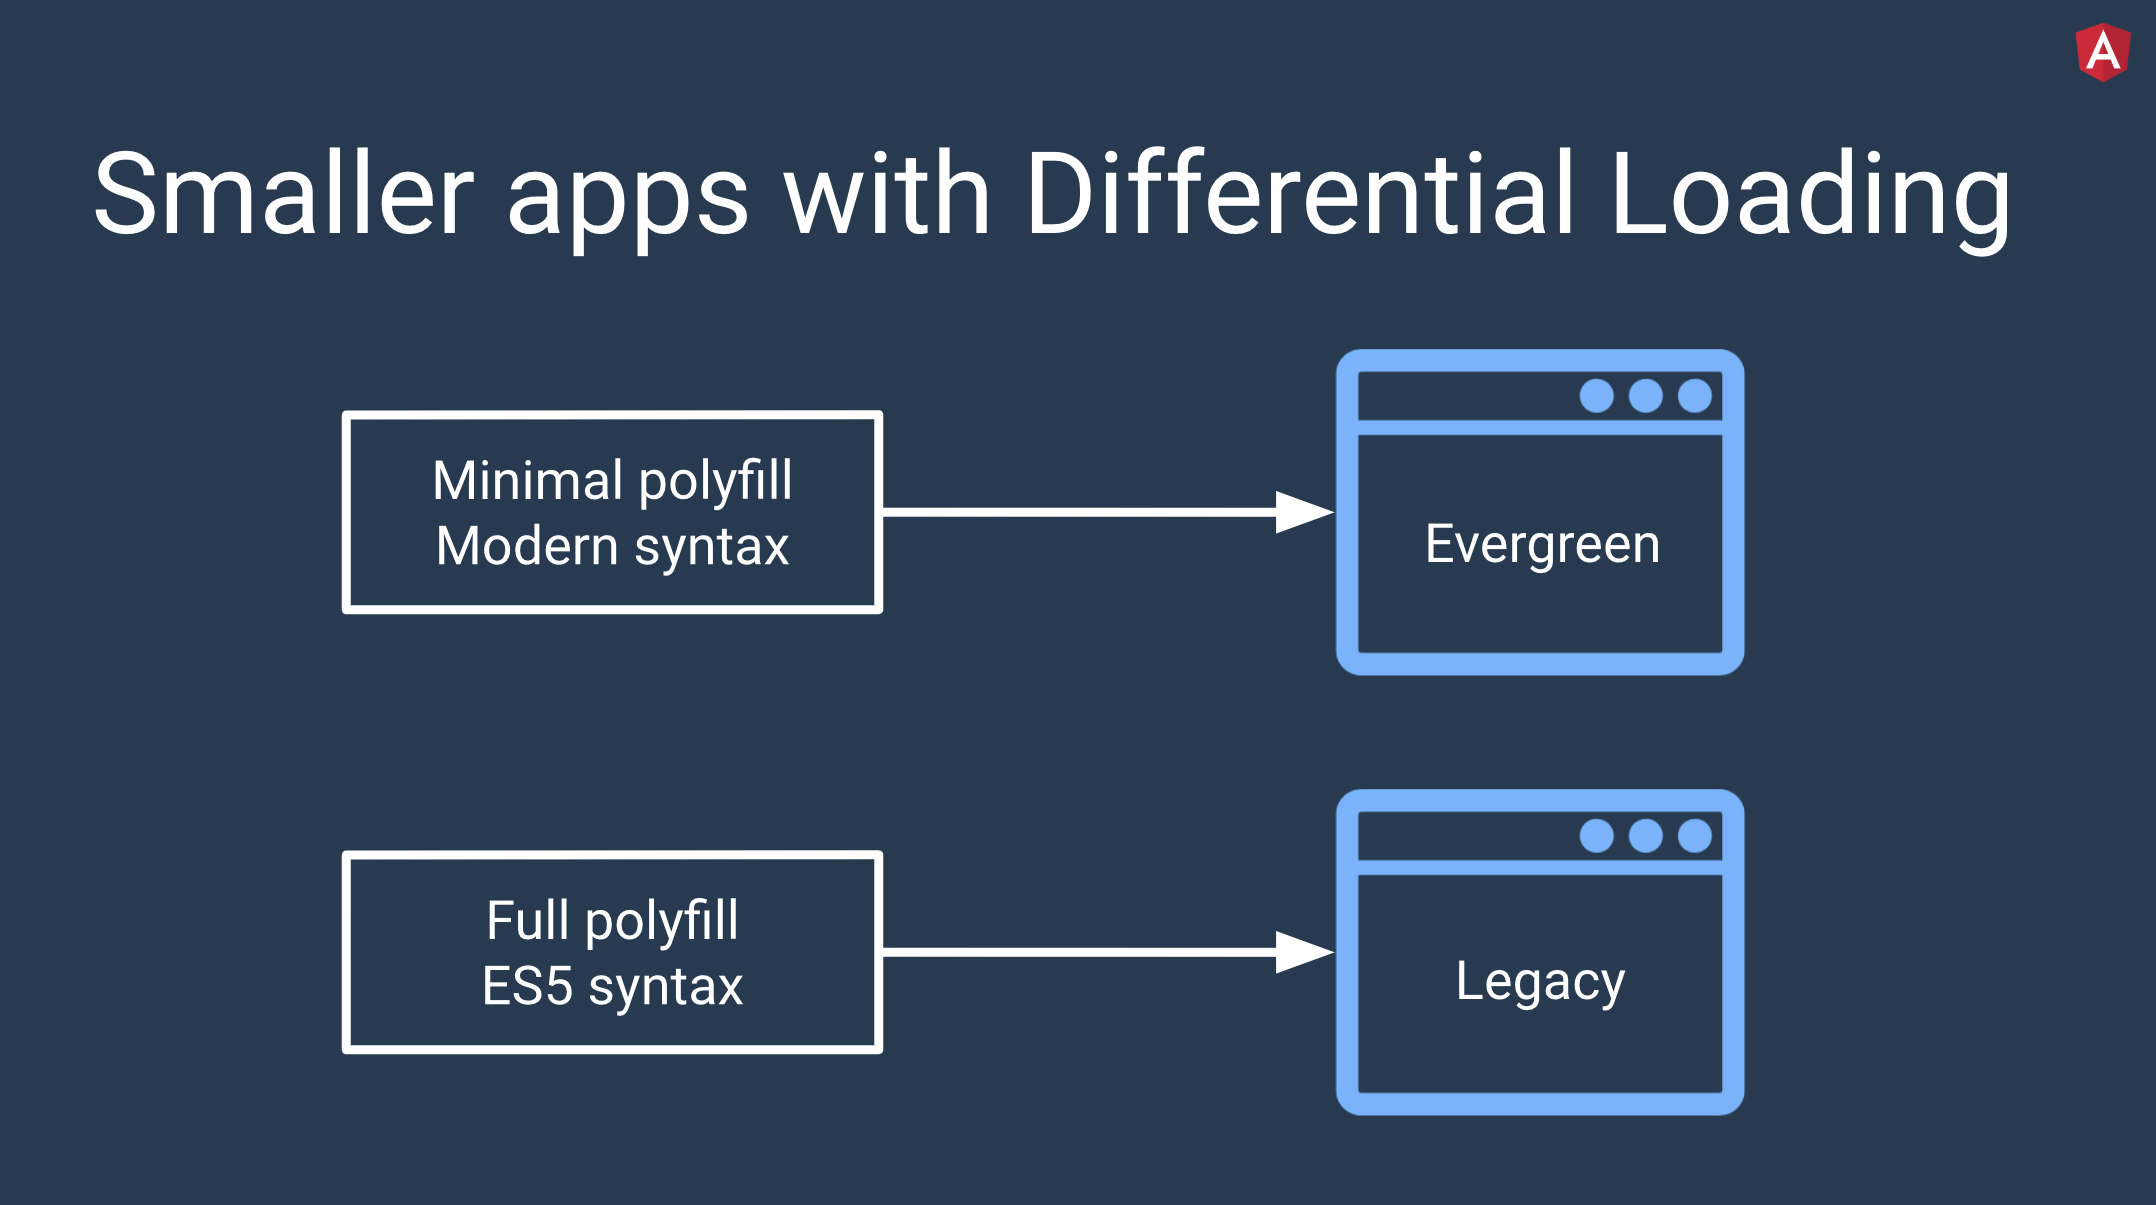
Like most buzzwords in tech, the term “differential loading” is completely opaque about what it actually means. In a nutshell, differential loading means to send newer, flashier code to newer browsers and stable legacy code to legacy browsers. This generally translates into two things: modern syntax and polyfills. On a newer browser that supports recent syntax changes in JavaScript (such as arrow functions in ES2015 or async functions in ES2017), it’d be great to ship to code as-is with as few polyfills as possible to keep download time low. On legacy browsers, we’ll need both transpiled code and more polyfills to make things work. This way, newer browsers aren’t punished for legacy browsers by having to load a massive bundle, but legacy browsers aren't left in the dust.
Sounds cool, right? How does this work? Modern browsers have the ability to interpret a module type in the script HTML tag and to ignore a nomodule attribute. It looks like this:
<script src="fancyModernBundle.js" type="module"></script>
<script src="legacyBundle.js" nomodule></script>
When a modern browser (like a new version of Chrome) runs across this, it will know to only load fancyModernBundle. Likewise, when an older browser sees this, it won’t recognize the module type and only load legacyBundle.
How You Normally Set Up Differential Loading
You’ve probably surmised by now that, in order to take advantage of differential loading, you’ll need to divide up your JavaScript code based on browser support. “Easy,” you think, “I’ll just plug the transpiled code into the nomodule tag and the original into the module tag.” Well, it’s not quite that simple. Unfortunately, not all browsers support all the same features of JavaScript. Beyond that, your users may not use the same browser you do. In fact, if your users are around the world, they may not even use browsers you’ve heard of — Opera Mini has over 100 million users in Africa!
It turns out that splitting up your bundle for differential loading is a combination of art and science. To pull this off, your bundler (like Webpack) and your transpiler or compiler (like Babel or TypeScript) must work together to divide up your code and add the correct polyfills in the right places. Luckily, there’s a configuration tool called browserslist that does nearly all of the heavy lifting for you.
Browserslist works with tools like Babel and is essentially a configuration tool that accepts query strings, which it runs against Can I Use data. Tools use Browserslist through either an entry in package.json:
// package.json
"browserslist": [
  "last 1 version",
  "> 1%",
  "maintained node versions",
  "not dead"
]
Or in a separate config file called .browserslistrc:
// .browserslistrc
# Browsers that we support

last 1 version
> 1%
maintained node versions
not dead
Both of these formats contain the same query:
last one version: the last version for each browser>1%: browsers versions selected by global usage statisticsmaintained node versions: all Node.js versions, which are still maintained by Node.js Foundationnot dead: excludes "dead" browsers, which are the same as those from alast 2 versionsquery, but with less than 0.5% in global usage statistics and without official support or updates for 24 months
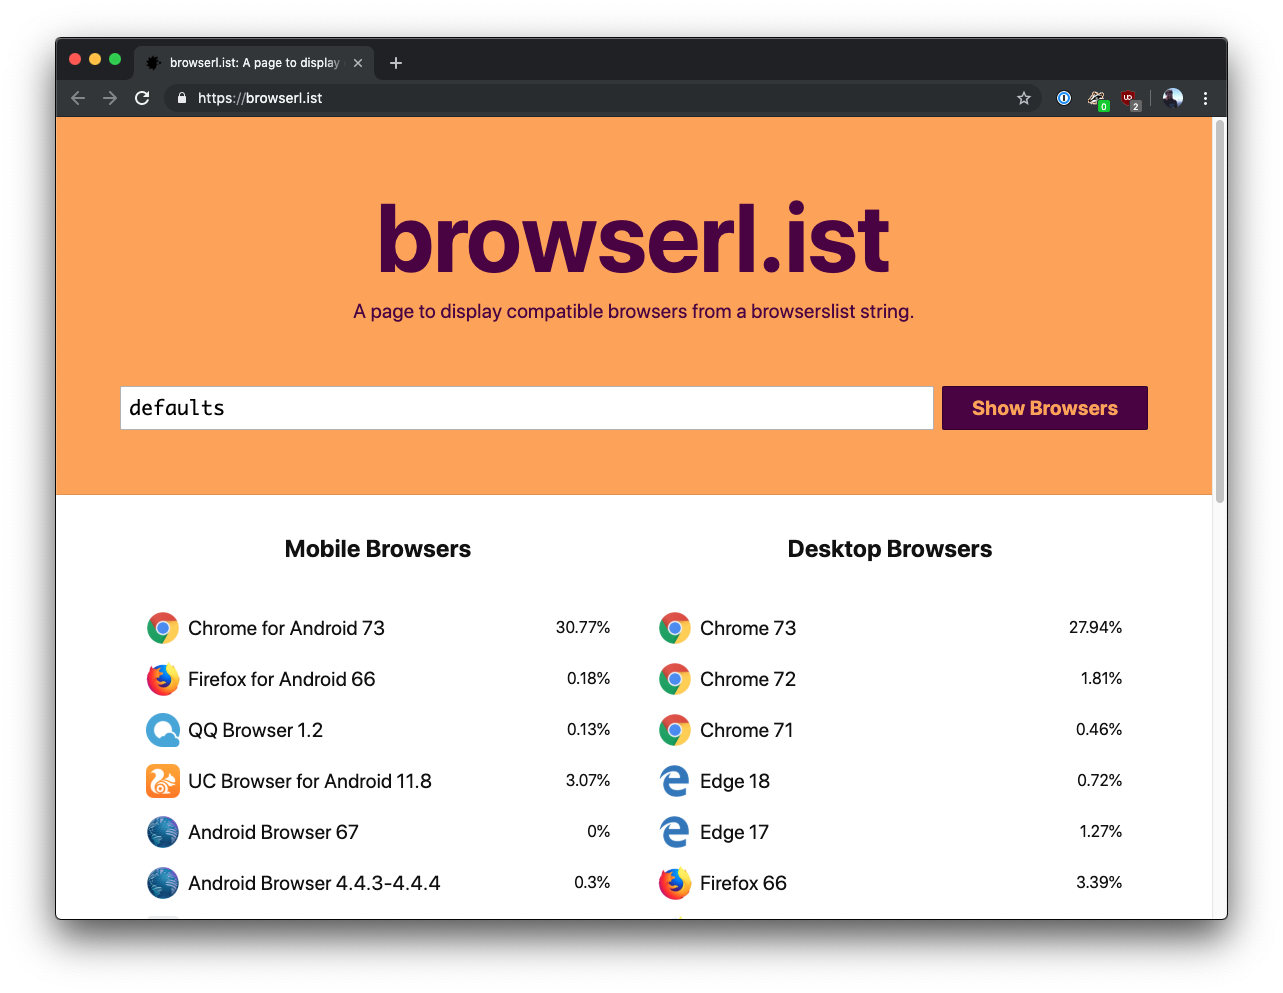
Browserslist also has a defaults query that works for many people. They’ve got great explanations of the queries on their GitHub repo and there’s even a site called browserl.ist that lets you plug in a query and see a visual list of supported browsers.
Differential Loading in Angular 8
Ordinarily, you’d need to configure your bundler and Babel or TypeScript to use browserslist to split up your code into the correct bundles. With version 8 of the Angular CLI, you actually get this set up right out of the gate with nothing for you to do! This is awesome because differential loading saves on average 7-20% in bundle size for Angular applications in modern browsers. In fact, angular.io saved over 40kB of its initial bundle size for modern browsers when the team enabled differential loading.
Want to check this out for yourself? It’s really easy!
“In Angular 8, differential loading saves on average 7-20% in bundle size in modern browsers!”
Tweet This
Updating to Angular 8
First, make sure you have the latest version of the Angular CLI installed:
npm install -g @angular/cli
If you’d like to try this on an existing project, you can update it to Angular 8 by running:
ng update @angular/cli @angular/core
Check out the Angular Update Guide if your app requires more heavy lifting to update, like if it’s currently in version 6 or lower.
Otherwise, you can create a new application:
ng new diff-loading
Follow the prompts about routing and styling and then you’re good to go!
Configuration and building
If you open the new project in your favorite editor, you’ll notice a new file called browserslist. It contains the following by default:
// browserslist
> 0.5%
last 2 versions
Firefox ESR
not dead
not IE 9-11 # For IE 9-11 support, remove 'not'.
You can adjust this list to match better with your own user demographics.
One very important note about this: See that
not IE 9-11part? If you need to support those browsers, you can remove thenot, but it comes at a price. Those versions of Internet Explorer can’t take advantage of differential loading, so it will be disabled.
If you open tsconfig.json, you’ll see a particularly big change in the target property: it’s set to es2015 by default instead of es5.
Now that you’ve seen where the configuration lives, build the application with this command:
ng build --prod
After it’s done, open up dist/index.html and notice the script tags:
<script src=“runtime-es2015.858f8dd898b75fe86926.js” type=“module”></script>
<script src=“polyfills-es2015.e954256595c973372414.js” type=“module”></script>
<script src=“runtime-es5.741402d1d47331ce975c.js” nomodule></script>
<script src=“polyfills-es5.405730e5ac8f727bd7d7.js” nomodule></script>
<script src=“main-es2015.63808232910db02f6170.js” type=“module”></script>
<script src=“main-es5.2cc74ace5dd8b3ac2622.js” nomodule></script>
See all those module and nomodule instances? The Angular CLI did all that for you!
Differential Loading in Angular, in action
Now you just need to see it in action. Install a simple server like http-server:
npm install -g http-server
Then, within your project folder, serve up the project inside the dist folder:
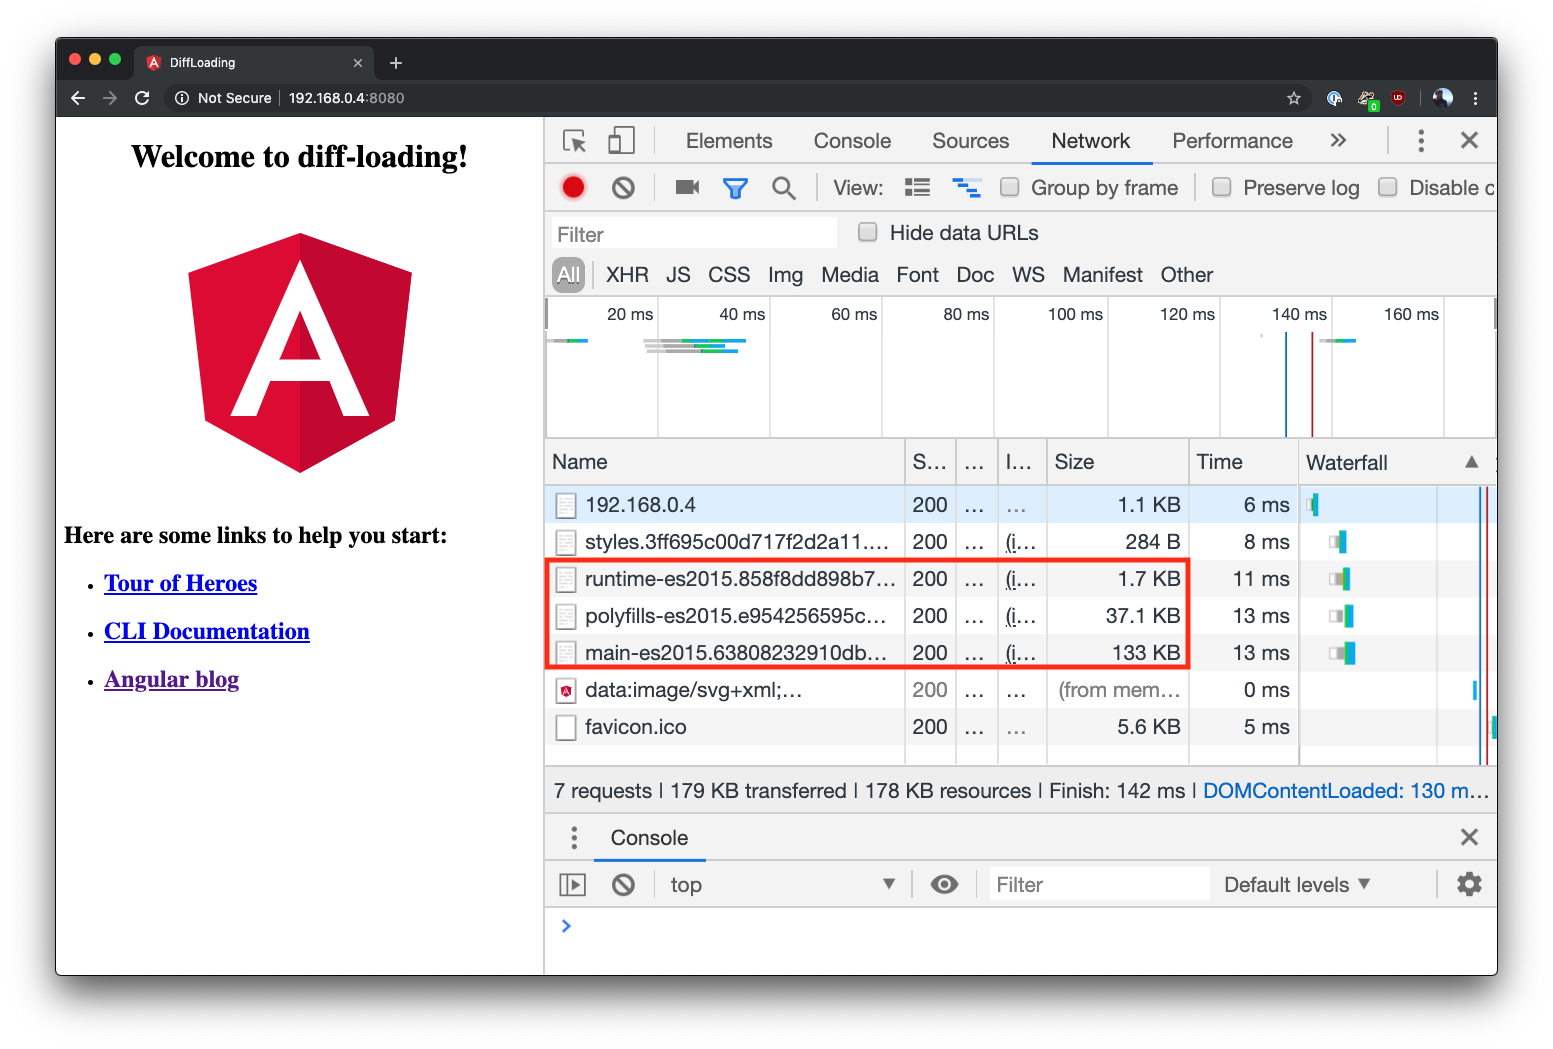
http-server dist/diff-loading/
Open Chrome or another modern browser and head to the address of the server (on my machine it’s http://192.168.0.4:8080 but it may be different for you). Open up the network tab of the developer tools and refresh the page. You should see only the scripts that include es2015 in the name!
Other settings
One quick note before I end this tutorial. If you change the different configurations, there are four different scenarios you could end up with:
- A single ES5 build (differential loading disabled,
targetises5) - Single ES5 build with conditional polyfills (differential loading enabled,
targetises5) - Single ES2015 build (differential loading disabled,
targetises2015) - Two builds with conditional polyfills (differential loading enabled,
targetises2015)
To read more, check out the official documentation.
Conclusion
Angular 8 brings lots of great new stuff to Angular, including differential loading. I hope you’ve enjoyed this look into what differential loading is, how it works, and how to use it in Angular 8. See you next time!
Aside: Authenticate an Angular App with Auth0
By integrating Auth0 in your Angular application, you will be able to manage user identities, including password resets, creating, provisioning, blocking, and deleting users. It requires just a few steps.
Set up an Auth0 application
First, sign up for a free account here. Then, set up an Auth0 application with the following steps:
- Go to your Applications section of the Auth0 Dashboard and click the "Create Application" button.
- Name your new app and select "Single Page Web Applications" as the application type.
- In the Settings for your new Auth0 app, add
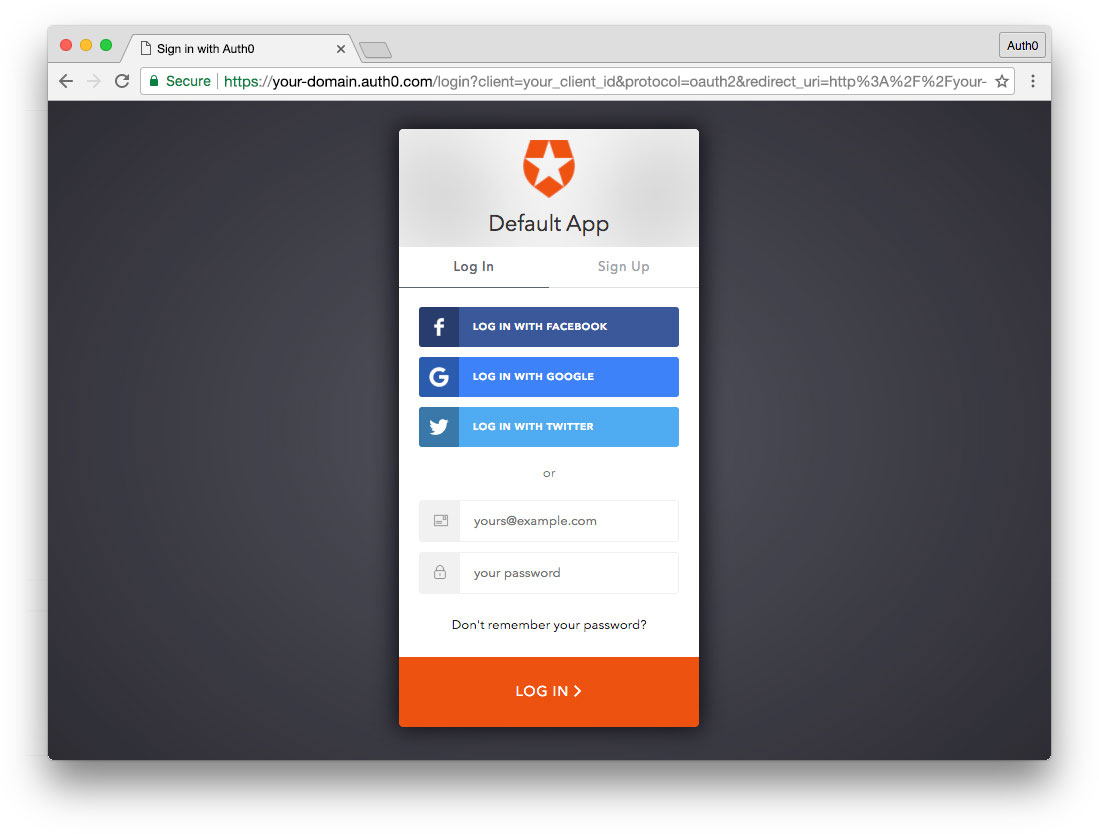
http://localhost:4200to the Allowed Callback URLs, Allowed Web Origins, and Allowed Logout URLs. Click the "Save Changes" button. - If you'd like, you can set up some social connections. You can then enable them for your app in the Application options under the Connections tab. The example shown in the screenshot above uses username/password database, Facebook, Google, and Twitter.
Note: Set up your own social keys and do not leave social connections set to use Auth0 dev keys, or you will encounter issues with token renewal.
Add dependencies and configure
In the root folder of your Angular project, install the auth0-spa-js library by typing the following command in a terminal window:
npm install @auth0/auth0-spa-js
Then, edit the environment.ts file in the src/environments folder and add the CLIENT_DOMAIN and CLIENT_ID keys as follows:
// src/environments/environment.ts

export const environment = {
  production: false,
  auth: {
    CLIENT_DOMAIN: 'YOUR_DOMAIN',
    CLIENT_ID: 'YOUR_CLIENT_ID',
  },
};

export const config = {};
Replace the
YOUR_DOMAINandYOUR_CLIENT_IDplaceholders with the actual values for the domain and client id you found in your Auth0 Dashboard.
Add the authentication service
Authentication logic in your Angular application is handled with an AuthService authentication service. So, use Angular CLI to generate this new service by running the following command:
ng generate service auth
Now, open the src/app/auth.service.ts file and replace its content with the following:
//src/app/auth.service.ts

import { Injectable } from '@angular/core';
import createAuth0Client from '@auth0/auth0-spa-js';
import Auth0Client from '@auth0/auth0-spa-js/dist/typings/Auth0Client';
import {
  from,
  of,
  Observable,
  BehaviorSubject,
  combineLatest,
  throwError,
} from 'rxjs';
import { tap, catchError, concatMap, shareReplay } from 'rxjs/operators';
import { Router } from '@angular/router';
import { environment } from './../environments/environment';

@Injectable({
  providedIn: 'root',
})
export class AuthService {
  // Create an observable of Auth0 instance of client
  auth0Client$ = (from(
    createAuth0Client({
      domain: environment.auth.CLIENT_DOMAIN,
      client_id: environment.auth.CLIENT_ID,
      redirect_uri: `${window.location.origin}`,
    }),
  ) as Observable<Auth0Client>).pipe(
    shareReplay(1), // Every subscription receives the same shared value
    catchError((err) => throwError(err)),
  );
  // Define observables for SDK methods that return promises by default
  // For each Auth0 SDK method, first ensure the client instance is ready
  // concatMap: Using the client instance, call SDK method; SDK returns a promise
  // from: Convert that resulting promise into an observable
  isAuthenticated$ = this.auth0Client$.pipe(
    concatMap((client: Auth0Client) => from(client.isAuthenticated())),
    tap((res) => (this.loggedIn = res)),
  );
  handleRedirectCallback$ = this.auth0Client$.pipe(
    concatMap((client: Auth0Client) => from(client.handleRedirectCallback())),
  );
  // Create subject and public observable of user profile data
  private userProfileSubject$ = new BehaviorSubject<any>(null);
  userProfile$ = this.userProfileSubject$.asObservable();
  // Create a local property for login status
  loggedIn: boolean = null;

  constructor(private router: Router) {
    // On initial load, check authentication state with authorization server
    // Set up local auth streams if user is already authenticated
    this.localAuthSetup();
    // Handle redirect from Auth0 login
    this.handleAuthCallback();
  }

  // When calling, options can be passed if desired
  // https://auth0.github.io/auth0-spa-js/classes/auth0client.html#getuser
  getUser$(options?): Observable<any> {
    return this.auth0Client$.pipe(
      concatMap((client: Auth0Client) => from(client.getUser(options))),
      tap((user) => this.userProfileSubject$.next(user)),
    );
  }

  private localAuthSetup() {
    // This should only be called on app initialization
    // Set up local authentication streams
    const checkAuth$ = this.isAuthenticated$.pipe(
      concatMap((loggedIn: boolean) => {
        if (loggedIn) {
          // If authenticated, get user and set in app
          // NOTE: you could pass options here if needed
          return this.getUser$();
        }
        // If not authenticated, return stream that emits 'false'
        return of(loggedIn);
      }),
    );
    checkAuth$.subscribe();
  }

  login(redirectPath: string = '/') {
    // A desired redirect path can be passed to login method
    // (e.g., from a route guard)
    // Ensure Auth0 client instance exists
    this.auth0Client$.subscribe((client: Auth0Client) => {
      // Call method to log in
      client.loginWithRedirect({
        redirect_uri: `${window.location.origin}`,
        appState: { target: redirectPath },
      });
    });
  }

  private handleAuthCallback() {
    // Call when app reloads after user logs in with Auth0
    const params = window.location.search;
    if (params.includes('code=') && params.includes('state=')) {
      let targetRoute: string; // Path to redirect to after login processed
      const authComplete$ = this.handleRedirectCallback$.pipe(
        // Have client, now call method to handle auth callback redirect
        tap((cbRes) => {
          // Get and set target redirect route from callback results
          targetRoute =
            cbRes.appState && cbRes.appState.target
              ? cbRes.appState.target
              : '/';
        }),
        concatMap(() => {
          // Redirect callback complete; get user and login status
          return combineLatest([this.getUser$(), this.isAuthenticated$]);
        }),
      );
      // Subscribe to authentication completion observable
      // Response will be an array of user and login status
      authComplete$.subscribe(([user, loggedIn]) => {
        // Redirect to target route after callback processing
        this.router.navigate([targetRoute]);
      });
    }
  }

  logout() {
    // Ensure Auth0 client instance exists
    this.auth0Client$.subscribe((client: Auth0Client) => {
      // Call method to log out
      client.logout({
        client_id: environment.auth.CLIENT_ID,
        returnTo: `${window.location.origin}`,
      });
    });
  }
}
This service provides the properties and methods necessary to manage authentication across your Angular application.
Add the login and logout buttons
To add a new component that allows you to authenticate with Auth0, run the following command in a terminal window:
ng generate component login-button
Open the src/app/login-button/login-button.component.ts file and replace its content with the following:
//src/app/login-button/login-button.component.ts

import { Component, OnInit } from '@angular/core';
import { AuthService } from '../auth.service';

@Component({
  selector: 'app-login-button',
  templateUrl: './login-button.component.html',
  styleUrls: ['./login-button.component.css'],
})
export class LoginButtonComponent implements OnInit {
  constructor(public auth: AuthService) {}

  ngOnInit() {}
}
Next, define the component's UI by replacing the content of the src/app/login-button/login-button.component.html with the following markup:
<!-- src/app/login-button/login-button.component.html -->
<div>
  <button (click)="auth.login()" *ngIf="!auth.loggedIn">Log In</button>
  <button (click)="auth.logout()" *ngIf="auth.loggedIn">Log Out</button>
</div>
Finally, put the <app-login-button></app-login-button> tag within the src/app/app.component.html file, wherever you want the component to appear.
Your Angular application is ready to authenticate with Auth0!
Check out the Angular Quickstart to learn more about integrating Auth0 with Angular applications.
About the author

Sam Julien
Director of Developer Relations