

Components enable us to display content on our website. The Angular compiler parses component templates and displays them according to the given state. The business logic inside the components can be tested with traditional unit tests just like services. But what happens with the displayed HTML from the template and the interaction with other components? In this tutorial I'll show you how to test the rendered components, starting from isolated unit tests to fully integrated ones.
This article is the third part of a series in which I share my experiences testing different building blocks of an Angular application. It relies heavily on Dependency Injection based testing and it is recommended that you read the first part if you are not familiar with the concepts.
- Services
- HTTP Services
- Components (this article)
- Pipes
- Routing
The component we'll test
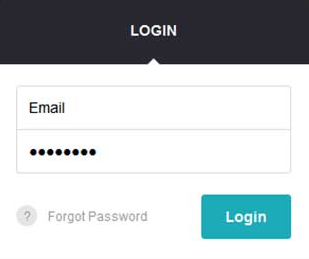
The component we will test is a login form. It doesn't directly access the Authentication service,
instead it just informs the parent component about the submission through an Output property.
The form consists of two fields: an email and a password field.
The email address can be preloaded through an Input property
if it is passed down from the wrapping parent component.
The two fields are handled by a reactive form created in the component. With reactive forms, we can add validation to the fields and access their values without touching the DOM. I've chosen reactive forms because they are more flexible and easier to test than template-driven forms. Template-driven forms can only be tested through the DOM, making test writing harder.
If you are not familiar with reactive forms, it is recommended to read this part from the official documentation.
The FormBuilder
is created inside the constructor and adds validation to the input fields.
When the email input changes, the ngOnChanges
lifecycle hook passes it down to the field.
Setting the value on one of the forms control also updates its value in the HTML input element.
import { Component, EventEmitter, Input, Output } from '@angular/core';
import { FormBuilder, FormGroup, Validators } from '@angular/forms';

@Component({
  selector: 'login-form',
  templateUrl: './login-form.template.html'
})
export class LoginFormComponent {

  private loginForm: FormGroup;

  constructor(private formBuilder: FormBuilder) {
    this.loginForm = this.formBuilder.group({
      email: ['', [Validators.required, Validators.email]],
      password: ['', Validators.required]
    });
  }

  @Input()
  email: string;

  @Output()
  submitted = new EventEmitter();

  ngOnChanges(change) {
    if (change.email) {
      this.loginForm.controls['email'].setValue(change.email.currentValue);
    }
  }

  onSubmit({ email, password }) {
    this.submitted.emit({ email, password });
  }
}
The template only includes tags that are necessary for the form to function.
The value of the formControlName property will be the reference name
when we access our inputs inside the form controls.
With the [formGroup] property, we fire up the form handling with the components FormGroup and
listen to form submissions with (ngSubmit).
When we click on the submit button, Angular will catch the event and pass it to the onSubmit handler function.
<form (ngSubmit)="onSubmit(loginForm.value)" [formGroup]="loginForm">
    <input type="text" formControlName="email" id="login-email">

    <input type="password" formControlName="password" id="login-password">

    <button type="submit">Log In</button>
</form>
Isolated tests
If we just want to focus on the business logic, we can treat and test the component as a service.
The Component decorator extends the Injectable decorator, which means it can be created as a service.
We just have to pass the component to the providers array in the module dependencies.
When testing in isolation, the template never gets compiled.
It only gets the required dependencies through the constructor.
import { LoginFormComponent } from './login-form.component';
import { FormsModule, ReactiveFormsModule } from '@angular/forms';
import { TestBed, inject, async } from '@angular/core/testing';
import { Component } from '@angular/core';

describe('Isolated', () => {
  let subject: LoginFormComponent;

  beforeEach(() => {
    TestBed.configureTestingModule({
      providers: [LoginFormComponent],
      imports: [FormsModule, ReactiveFormsModule]
    });
  });

  beforeEach(inject([LoginFormComponent], (loginForm: LoginFormComponent) => {
    subject = loginForm;
  }));

  it('should send credentials on submit', () => {
    subject.submitted.subscribe(({ email, password }) => {
      expect(email).toEqual(expectedEmail);
      expect(password).toEqual(expectedPassword);
    });

    subject.onSubmit({ email: expectedEmail, password: expectedPassword });
  });
});
The test focuses on the method that is called when the form is submitted.
It only passes the given email and password to the EventEmitter after destructuring the input object.
We don't have to pass Jasmine's asynchronous done callback to the testcase
because the EventEmitter acts synchronously.
Isolated tests are good when you want to focus on the component's logic. These tests are also much faster than any other solution. The only downsides are that it won't detect errors in the template nor check the interactions with other components.
Shallow tests
If we also want to detect errors inside the template, but still focus on a single component, shallow tests are the way to go. The key difference compared to isolated tests is that here the component is compiled.
Inside the beforeEach block, the component class moves to the declarations property instead of providers.
Before we can create an instance of the component, it has to be compiled.
The compileComponents method does the task asynchronously. It can't be synchronous,
because templates and styles can be referenced with relative urls
and the fetching of these resources is asynchronous by nature.
We have to wait for these tasks to complete. We can do the waiting with the async helper function.
In the background, async creates a new zone
and waits until every asynchronous operation is finished within that zone.
This way, we don't have to fiddle with Jasmine's done callback.
describe('Shallow', () => {
  beforeEach(async(() => {
    TestBed.configureTestingModule({
      declarations: [LoginFormComponent],
      imports: [FormsModule, ReactiveFormsModule]
    });
    TestBed.compileComponents();
  }));

  it('should send credentials on submit', () => {
    let fixture = TestBed.createComponent(LoginFormComponent);
    let component: LoginFormComponent = fixture.componentInstance;
    let element = fixture.nativeElement;

    fixture.detectChanges();

    element.querySelector('#login-email').value = expectedEmail;
    element.querySelector('#login-email').dispatchEvent(new Event('input'));
    element.querySelector('#login-password').value = expectedPassword;
    element.querySelector('#login-password').dispatchEvent(new Event('input'));

    fixture.detectChanges();

    component.submitted.subscribe(({ email, password }) => {
      expect(email).toEqual(expectedEmail);
      expect(password).toEqual(expectedPassword);
    });

    element.querySelector('button[type="submit"]').click();
  });
});
With the createComponent method, we will have access to the component instance(componentInstance)
and the generated HTML fragment (nativeElement). We test the same thing as before:
what is emitted on the output at form submission.
The big difference is that we fill the inputs and click the submit button.
Filling the inputs with valid data is necessary
because the form validation leaves the submit button disabled as long as the inputs contain invalid data.
To make the component work, we have to call the detectChanges method after every change.
The detectChanges method does the synchronization of the component instance and the generated HTML.
Otherwise the component won't know that the input's value has changed.
When we modify an input, triggering the input event manually is also necessary
because this is the event that Angular listens for.
Also before doing anything inside the nativeElement, we have to call detectChanges first.
Calling the method does the first round of property checks on the component and fills out the template based on it.
Finally, we can use the native DOM methods and selectors on the nativeElement property.
With shallow tests, we gain the ability to test the templates, but it comes with a price. These tests run much slower by including the compilation step.
Integration tests
The next step is to test the component through its interactions with other components. With integration tests, not only the template, but inputs and outputs will also be tested.
The setup is very similar to shallow tests. We have to set up and compile components. The difference is that we have one more component that uses the login form component inside its template. The wrapper component passes down the predefined email address and listens for the submit event.
describe('Integration', () => {
  @Component({
    selector: 'site',
    template: `<login-form [email]="email" (submitted)="onFormSubmit($event)"></login-form>`
  })
  class SiteComponent {
    email = expectedEmail;

    storedEmail: string;

    storedPassword: string;

    onFormSubmit({ email, password }) {
      this.storedEmail = email;
      this.storedPassword = password;
    }
  }

  beforeEach(async(() => {
    TestBed.configureTestingModule({
      declarations: [LoginFormComponent, SiteComponent],
      imports: [FormsModule, ReactiveFormsModule]
    });
    TestBed.compileComponents();
  }));

  it('should send credentials on submit', () => {
    let fixture = TestBed.createComponent(SiteComponent);
    let component: SiteComponent = fixture.componentInstance;
    let element = fixture.nativeElement;

    fixture.detectChanges();

    expect(element.querySelector('#login-email').value).toEqual(expectedEmail);

    element.querySelector('#login-password').value = expectedPassword;
    element.querySelector('#login-password').dispatchEvent(new Event('input'));

    fixture.detectChanges();

    element.querySelector('button[type="submit"]').click();

    expect(component.storedEmail).toEqual(expectedEmail);
    expect(component.storedPassword).toEqual(expectedPassword);
  });
});
The modification of the input fields is the same, but the assertions are different. This time we don't write assertions for the login form, but write them for the wrapper component instead. This way, we ensure the bindings are correct.
There is no considerable slowdown compared to shallow tests. Integration tests need a bit more setup upfront, but we can test the interactions between the components.
Aside: Authenticate an Angular App with Auth0
By integrating Auth0 in your Angular application, you will be able to manage user identities, including password resets, creating, provisioning, blocking, and deleting users. It requires just a few steps.
Set up an Auth0 application
First, sign up for a free account here. Then, set up an Auth0 application with the following steps:
- Go to your Applications section of the Auth0 Dashboard and click the "Create Application" button.
- Name your new app and select "Single Page Web Applications" as the application type.
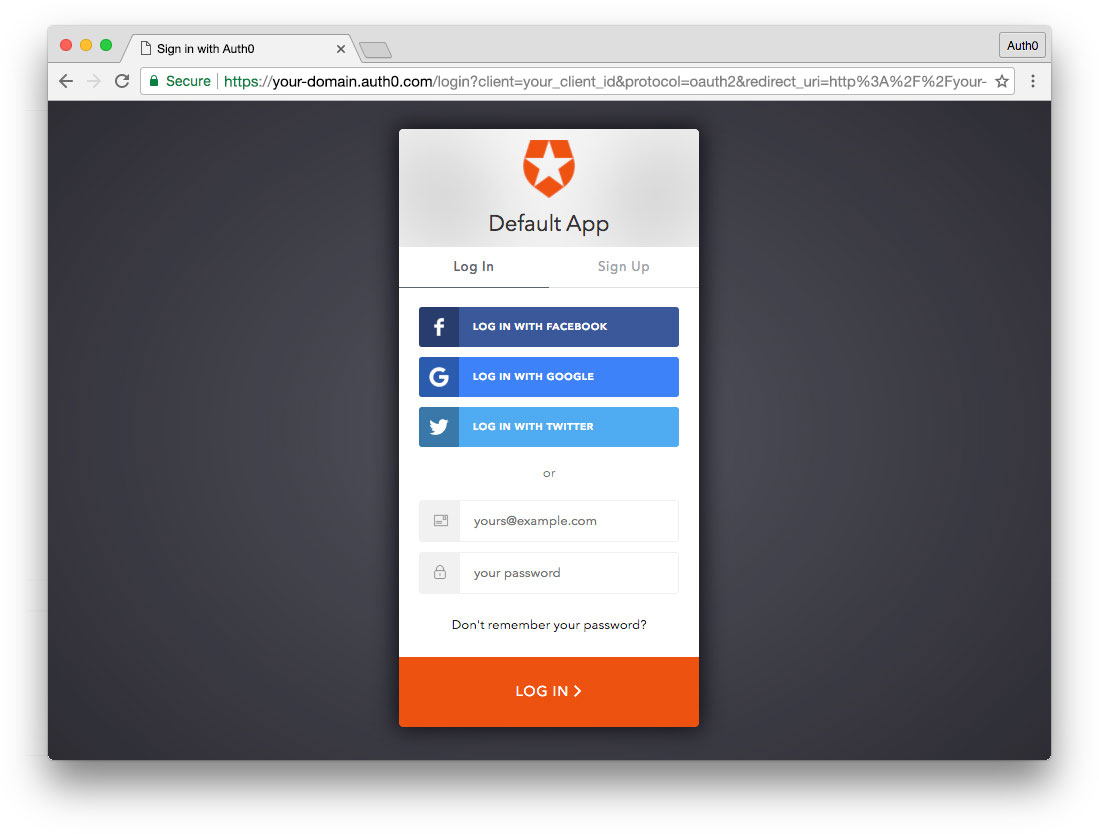
- In the Settings for your new Auth0 app, add
http://localhost:4200to the Allowed Callback URLs, Allowed Web Origins, and Allowed Logout URLs. Click the "Save Changes" button. - If you'd like, you can set up some social connections. You can then enable them for your app in the Application options under the Connections tab. The example shown in the screenshot above uses username/password database, Facebook, Google, and Twitter.
Note: Set up your own social keys and do not leave social connections set to use Auth0 dev keys, or you will encounter issues with token renewal.
Add dependencies and configure
In the root folder of your Angular project, install the auth0-spa-js library by typing the following command in a terminal window:
npm install @auth0/auth0-spa-js
Then, edit the environment.ts file in the src/environments folder and add the CLIENT_DOMAIN and CLIENT_ID keys as follows:
// src/environments/environment.ts

export const environment = {
  production: false,
  auth: {
    CLIENT_DOMAIN: 'YOUR_DOMAIN',
    CLIENT_ID: 'YOUR_CLIENT_ID',
  },
};

export const config = {};
Replace the
YOUR_DOMAINandYOUR_CLIENT_IDplaceholders with the actual values for the domain and client id you found in your Auth0 Dashboard.
Add the authentication service
Authentication logic in your Angular application is handled with an AuthService authentication service. So, use Angular CLI to generate this new service by running the following command:
ng generate service auth
Now, open the src/app/auth.service.ts file and replace its content with the following:
//src/app/auth.service.ts

import { Injectable } from '@angular/core';
import createAuth0Client from '@auth0/auth0-spa-js';
import Auth0Client from '@auth0/auth0-spa-js/dist/typings/Auth0Client';
import {
  from,
  of,
  Observable,
  BehaviorSubject,
  combineLatest,
  throwError,
} from 'rxjs';
import { tap, catchError, concatMap, shareReplay } from 'rxjs/operators';
import { Router } from '@angular/router';
import { environment } from './../environments/environment';

@Injectable({
  providedIn: 'root',
})
export class AuthService {
  // Create an observable of Auth0 instance of client
  auth0Client$ = (from(
    createAuth0Client({
      domain: environment.auth.CLIENT_DOMAIN,
      client_id: environment.auth.CLIENT_ID,
      redirect_uri: `${window.location.origin}`,
    }),
  ) as Observable<Auth0Client>).pipe(
    shareReplay(1), // Every subscription receives the same shared value
    catchError((err) => throwError(err)),
  );
  // Define observables for SDK methods that return promises by default
  // For each Auth0 SDK method, first ensure the client instance is ready
  // concatMap: Using the client instance, call SDK method; SDK returns a promise
  // from: Convert that resulting promise into an observable
  isAuthenticated$ = this.auth0Client$.pipe(
    concatMap((client: Auth0Client) => from(client.isAuthenticated())),
    tap((res) => (this.loggedIn = res)),
  );
  handleRedirectCallback$ = this.auth0Client$.pipe(
    concatMap((client: Auth0Client) => from(client.handleRedirectCallback())),
  );
  // Create subject and public observable of user profile data
  private userProfileSubject$ = new BehaviorSubject<any>(null);
  userProfile$ = this.userProfileSubject$.asObservable();
  // Create a local property for login status
  loggedIn: boolean = null;

  constructor(private router: Router) {
    // On initial load, check authentication state with authorization server
    // Set up local auth streams if user is already authenticated
    this.localAuthSetup();
    // Handle redirect from Auth0 login
    this.handleAuthCallback();
  }

  // When calling, options can be passed if desired
  // https://auth0.github.io/auth0-spa-js/classes/auth0client.html#getuser
  getUser$(options?): Observable<any> {
    return this.auth0Client$.pipe(
      concatMap((client: Auth0Client) => from(client.getUser(options))),
      tap((user) => this.userProfileSubject$.next(user)),
    );
  }

  private localAuthSetup() {
    // This should only be called on app initialization
    // Set up local authentication streams
    const checkAuth$ = this.isAuthenticated$.pipe(
      concatMap((loggedIn: boolean) => {
        if (loggedIn) {
          // If authenticated, get user and set in app
          // NOTE: you could pass options here if needed
          return this.getUser$();
        }
        // If not authenticated, return stream that emits 'false'
        return of(loggedIn);
      }),
    );
    checkAuth$.subscribe();
  }

  login(redirectPath: string = '/') {
    // A desired redirect path can be passed to login method
    // (e.g., from a route guard)
    // Ensure Auth0 client instance exists
    this.auth0Client$.subscribe((client: Auth0Client) => {
      // Call method to log in
      client.loginWithRedirect({
        redirect_uri: `${window.location.origin}`,
        appState: { target: redirectPath },
      });
    });
  }

  private handleAuthCallback() {
    // Call when app reloads after user logs in with Auth0
    const params = window.location.search;
    if (params.includes('code=') && params.includes('state=')) {
      let targetRoute: string; // Path to redirect to after login processed
      const authComplete$ = this.handleRedirectCallback$.pipe(
        // Have client, now call method to handle auth callback redirect
        tap((cbRes) => {
          // Get and set target redirect route from callback results
          targetRoute =
            cbRes.appState && cbRes.appState.target
              ? cbRes.appState.target
              : '/';
        }),
        concatMap(() => {
          // Redirect callback complete; get user and login status
          return combineLatest([this.getUser$(), this.isAuthenticated$]);
        }),
      );
      // Subscribe to authentication completion observable
      // Response will be an array of user and login status
      authComplete$.subscribe(([user, loggedIn]) => {
        // Redirect to target route after callback processing
        this.router.navigate([targetRoute]);
      });
    }
  }

  logout() {
    // Ensure Auth0 client instance exists
    this.auth0Client$.subscribe((client: Auth0Client) => {
      // Call method to log out
      client.logout({
        client_id: environment.auth.CLIENT_ID,
        returnTo: `${window.location.origin}`,
      });
    });
  }
}
This service provides the properties and methods necessary to manage authentication across your Angular application.
Add the login and logout buttons
To add a new component that allows you to authenticate with Auth0, run the following command in a terminal window:
ng generate component login-button
Open the src/app/login-button/login-button.component.ts file and replace its content with the following:
//src/app/login-button/login-button.component.ts

import { Component, OnInit } from '@angular/core';
import { AuthService } from '../auth.service';

@Component({
  selector: 'app-login-button',
  templateUrl: './login-button.component.html',
  styleUrls: ['./login-button.component.css'],
})
export class LoginButtonComponent implements OnInit {
  constructor(public auth: AuthService) {}

  ngOnInit() {}
}
Next, define the component's UI by replacing the content of the src/app/login-button/login-button.component.html with the following markup:
<!-- src/app/login-button/login-button.component.html -->
<div>
  <button (click)="auth.login()" *ngIf="!auth.loggedIn">Log In</button>
  <button (click)="auth.logout()" *ngIf="auth.loggedIn">Log Out</button>
</div>
Finally, put the <app-login-button></app-login-button> tag within the src/app/app.component.html file, wherever you want the component to appear.
Your Angular application is ready to authenticate with Auth0!
Check out the Angular Quickstart to learn more about integrating Auth0 with Angular applications.
Summary
We have learnt three methods to test Angular components. The first and fastest is testing the component in isolation: we don't compile the template, just focus on the callable methods, like with a service. If we also want to test the template, we will have to compile that component. These are shallow tests. They are slower, but test more parts. The last missing aspect is the interaction with other components. This can be tested with integration tests. The extra element here is that we need to write a wrapper component around the component under test and observe it through the wrapping component.
Either type we choose, we have to find the right balance between speed and how deeply we test the components. It is optimal if we test business through isolation tests and add some shallow and integration tests to ensure interactions and the template are valid.
To see the tests in action, check out this GitHub repository.