
Traditionally, to enable a user to manage their own account details (such as updating profile information, enrolling in Multi-Factor Authentication, or linking social accounts), developers had to rely on the Auth0 Management API. Because the Management API grants broad administrative power, its tokens must be handled on a server-side component. This often led to architectural complexity, requiring developers of Single Page Applications (SPAs) or mobile apps to build a dedicated backend proxy just to facilitate simple user self-service actions. This layer of complexity introduces challenges in terms of development time and overhead in managing API tokens. The My Account API aims to streamline these issues, providing the right tools that enable even users of your SPA or mobile application to easily manage their own profile, securely and directly. This is the essence of user self-service management.
Introducing the My Account API
The My Account API is a dedicated set of endpoints designed specifically for client-side self-service. The API operates entirely within the context of the currently logged-in user. This is enforced by scoping all API calls to the special path: /me.
Unlike the Management API, which requires high-privilege tokens, the My Account API uses access tokens issued during the standard user login process. These tokens must be requested with a specific audience and set of scopes.
This design choice is key: the API is inherently limited to the authenticated user's profile, making it safe to call directly from a public client (like a browser-based React application) without risking the entire tenant's security.
Activating the My Account API
Before using the API, you must activate it for your tenant in the Auth0 dashboard under Authentication > APIs. The banner shown below will be displayed, where you just need to click the Activate button:
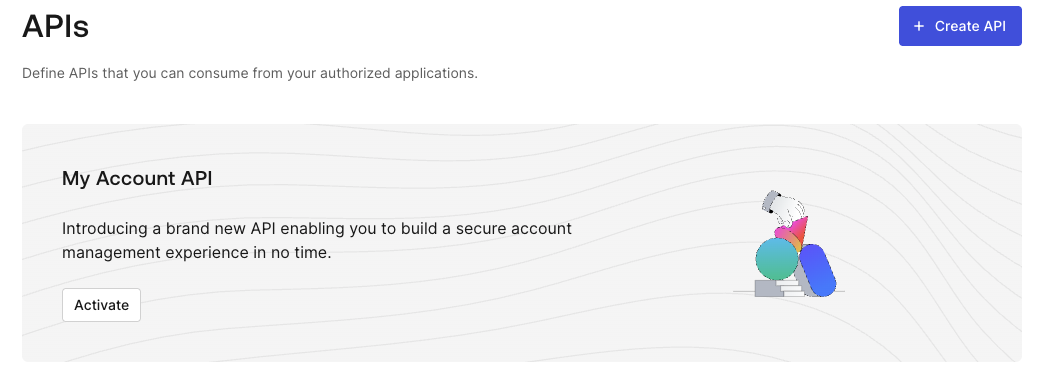
This adds the Auth0 My Account API item to the API list.
To invoke the API, you need to use the API identifier (the audience) value that is available in the Settings tab of the My Account API page. Typically, it has the form https://YOUR_AUTH0_DOMAIN/me/.
You also need to enable the scopes needed by your application. Go to the Applications tab, enable the API for your application by toggling the switch button, expand the scope section as shown below, and select the scopes you want to enable:
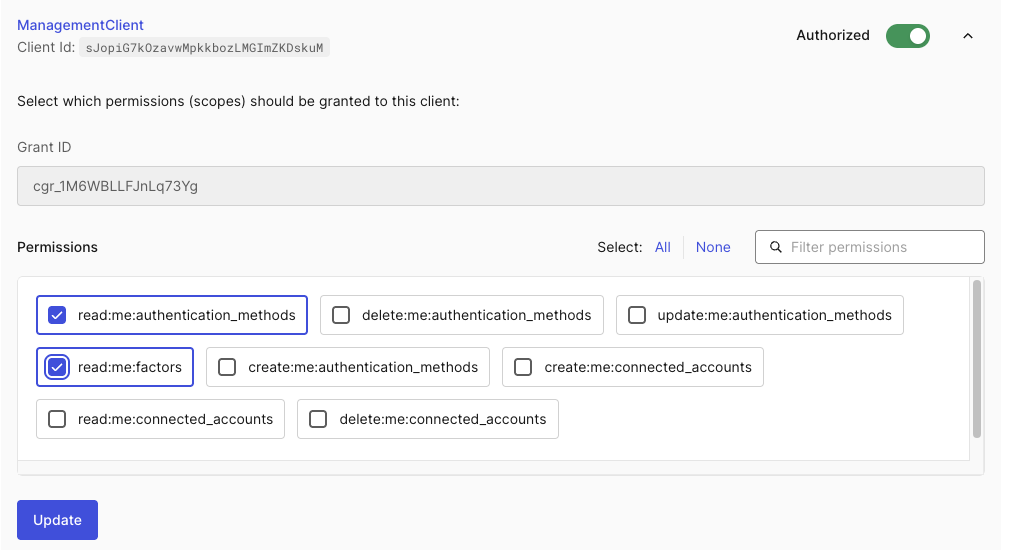
As a general rule, enable only the scopes that your application actually needs. Click the Update button to save your changes.
At the time of writing, the MyAccount API is available in Limited Early Access, so you could not have all the scopes shown above. Check out the documentation to learn more about requesting access to the Limited Early Access program.
The scopes allow your application to invoke specific endpoints and use specific HTTP verbs. For example, to allow a user to enroll a new passkey, you must request the scope create:me:authentication-methods. Other scopes include read:me:connected_accounts and delete:me:connected_accounts for managing linked social accounts and so on.
To get an access token for the My Account API, you will use the usual approach of getting access tokens at user login. You just need to specify your My Account API audience and the required scopes. The following is an example of authorization request for My Account API:
curl --request GET \
  --url 'https://YOUR_AUTH0_DOMAIN/authorize' \
  -d 'client_id=1234567890' \
  -d 'response_type=code' \
  -d 'redirect_uri=https://my-app.com/callback' \
  -d 'audience=https://YOUR_AUTH0_DOMAIN/me/' \
  -d 'scope=read:me:authentication-methods read:me:connected_accounts' \
  -d 'state=wo87trfgwcdf2' \
  -d 'nonce=dh9812hdd29' \
  -d 'code_challenge=p2g8guffhp9hf398yyhh328' \
  -d 'code_challenge_method=S256' \
Use one of the available Auth0 authentication SDKs to authenticate your application’s users and get access tokens.
Calling the API Directly
To understand the basic interaction, it is helpful to look at the raw HTTP request used to interface with the API, regardless of the programming language. All direct calls require the access token to be sent in the Authorization header.
The following cURL command demonstrates how to read the user's currently enrolled authentication methods:
curl --request GET \
  --url 'https://YOUR_AUTH0_DOMAIN/me/authentication-methods' \
  --header 'Authorization: Bearer USER_ACCESS_TOKEN' \
  --header 'Content-Type: application/json'
This example shows how to call the authentication-methods endpoint using a bearer access token in the Authorization header. The base URL must use the audience set for your My Account API and the access token must have the read:me:authentication-methods scope.
This is the basic way to implement client-side account management using the API. Any application capable of making an HTTP request can implement this pattern.
Simplifying API Calls with the SDK
For JavaScript-based applications, you can benefit from the dedicated myaccount-js SDK. The SDK abstracts the raw HTTP logic, simplifying request creation, parameter handling, and response parsing.
To install the SDK in a Node.js-based development environment, run the following command:
npm install @auth0/myaccount-js
Let’s explore the basic steps of using the SDK in two scenarios: client-side and server-side usages.
Client-side SDK usage: React example
In a client-side SPA, the SDK is perfectly suited for use after a user has logged in and the access token has been acquired. We will use React in the example, but the SDK is framework-agnostic, so you can use it regardless of your development framework.
The following code snippet shows how to easily read the user's connected accounts:
import { useState, useEffect } from 'react';
import { MyAccountClient, MyAccount } from '@auth0/myaccount-js';

function ConnectedAccountsManager({ getAccessTokenSilently, domain }) {
  const [accounts, setAccounts] = useState<MyAccount.ConnectedAccount[]>([]);
  const [loading, setLoading] = useState(true);

  useEffect(() => {
    async function fetchConnectedAccounts() {
      try {
        // 1. Get the access token with the necessary scope
        const token = await getAccessTokenSilently({
          authorizationParams: {
            audience: `https://${YOUR_AUTH0_DOMAIN}/me/`,
            scope: 'read:me:connected_accounts'
          },
        });

        // 2. Initialize the MyAccount Client
        const myAccountClient = new MyAccountClient({
          domain: domain,
          token: token
        });

        // 3. Use the SDK method to get all connected accounts
        const connectedAccounts = await myAccountClient.connectedAccounts.list();
        setAccounts(connectedAccounts.data);
      } catch (error) {
        console.error('Failed to load connected accounts:', error);
      } finally {
        setLoading(false);
      }
    }
    fetchConnectedAccounts();
  }, [getAccessTokenSilently, domain]);

  // ... (Component rendering logic)
}
The React component ConnectedAccountsManager is intended to render the list of the current user’s connected accounts.
It obtains an access token through the getAccessTokenSilently() function by specifying the audience and the required scope for this operation. Then, it initializes the myAccountClient client provided by the SDK using the domain and the acquired token. By calling the SDK's myAccountClient.connectedAccounts.list() method, it fetches the list of the user's linked accounts. Finally, the component uses the accounts state to display the connected accounts.
Server-side SDK usage: Node.js example
The myaccount-js SDK can be used in a server-side JavaScript application, such as in a Node.js environment.
The following code uses the SDK to programmatically remove a connected account, which requires the delete:me:connected_accounts scope:
const { MyAccountClient } = require('@auth0/myaccount-js');

// Replace placeholders with actual values
const DOMAIN = 'YOUR_AUTH0_DOMAIN';
const ACCESS_TOKEN = 'USER_ACCESS_TOKEN_WITH_SCOPES'; // Must have delete:me:connected_accounts scope
const ACCOUNT_ID_TO_REMOVE = 'auth0|1234567890'; // The ID of the connected account to unlink

async function unlinkConnectedAccount() {
  // 1. Initialize the MyAccount Client
  const myAccountClient = new MyAccountClient({
    domain: DOMAIN,
    token: ACCESS_TOKEN
  });

  try {
    console.log(`Attempting to unlink account ID: ${ACCOUNT_ID_TO_REMOVE}`);

    // 2. Use the SDK method to delete the account
    await myAccountClient.connectedAccounts.delete(ACCOUNT_ID_TO_REMOVE);

    console.log(`Successfully unlinked account ID: ${ACCOUNT_ID_TO_REMOVE}`);
  } catch (error) {
    console.error('Error deleting connected account:', error.message);
  }
}
This unlinkConnectedAccount() function initializes the MyAccountClient with the Auth0 domain and a user's access token (which must include the delete:me:connected_accounts scope). Then it calls the method myAccountClient.connectedAccounts.delete(), passing the ID of the account to remove. Finally, it logs a success message if the account is unlinked or logs an error if the operation fails.
Streamline Self-Service Account Management Today
The Auth0 My Account API marks a significant step forward in simplifying the development of secure, self-service user management features. By providing dedicated, user-scoped endpoints, it allows developers to confidently move key account features—like passkey enrollment and account linking—out of complex backend proxies and directly into client-side applications. This results in cleaner architecture, faster development cycles, and a more streamlined user experience.
Remember that at the time of writing the feature is available in Limited Early Access. Reach out to your Auth0 account manager to request access.
Download the myaccount-js SDK, use it in your JavaScript-based applications, and let us know what you think or ask any questions below.
About the author

Andrea Chiarelli
Principal Developer Advocate
I have over 20 years of experience as a software engineer and technical author. Throughout my career, I've used several programming languages and technologies for the projects I was involved in, ranging from C# to JavaScript, ASP.NET to Node.js, Angular to React, SOAP to REST APIs, etc.
In the last few years, I've been focusing on simplifying the developer experience with Identity and related topics, especially in the .NET ecosystem.