

TL;DR: Want to use your own domain for Auth0 authentication instead of the default Auth0 domain? This guide shows you how, from DNS setup to code updates. I'll use Python/FastAPI for examples, but the same pattern works for any Auth0 SDK. Free plan accounts get one custom domain.
Setting up custom domains in Auth0 means your users stay on your domain throughout the entire authentication flow instead of being redirected to a generic Auth0 domain. This keeps your brand consistent, builds trust, looks more professional, and can even help you with tracking the analytics through the authentication process.
Custom domains are available to all Auth0 customers, including those on the Free plan (you get one custom domain on the Free plan). As developer advocates at Auth0, we help developers set up custom domains regularly, and we've noticed the same questions come up over and over.
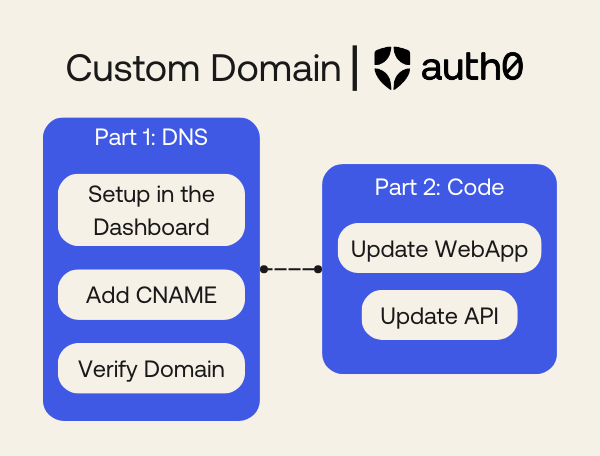
This guide combines both parts into one complete walkthrough. You'll go from zero to fully functional custom domain, covering DNS setup with your provider and all the necessary code changes in your application.
In this tutorial, you'll learn:
- How to understand and choose your domain structure
- How to set up a custom domain in your Auth0 Dashboard
- How to configure DNS records on Namecheap or Squarespace
- How to verify your domain configuration
- How to update your Auth0 SDKs to use the custom domain
- How to modify API integrations for token validation
- What to watch out for with sessions and social providers
Requirements
Before you start, here's what you'll need:
- A domain (registered with Namecheap, Squarespace, or any other DNS provider)
- An Auth0 account - Free plan works fine! (Note: Free plan accounts get one custom domain)
- A project/app (either your own or grab one from the Auth0 Developer Center)
- Access to your application's source code
For simplicity’s sake in this tutorial you'll see this stack:
- Python 3.7+ installed
- A FastAPI application (I'll use the
auth0-fastapiandauth0-fastapi-apiSDKs for examples)
Note: We are using Python/FastAPI for the examples, but these steps work with any Auth0 SDK. The pattern is always the same: update the
AUTH0_DOMAINparameter to your custom domain in the environment variables and make the adjustments to your code.
Understanding Domain Structure
Before we dive into the setup, let's break down how domains work:
A full URL looks like this: <subdomain>.<domain>.com/<path>
- Subdomain: Goes before your main domain (e.g.,
authinauth.example.com) - Domain: Your main domain acquired from your domain provider (e.g.,
example.com) - Path: Goes after your domain (e.g.,
/authinexample.com/auth)
For Auth0 custom domains, you'll need to choose an auth-related subdomain or path where your app will route users for sign-up and login. Here are some examples if your domain is coolest-startup-ever.com:
Subdomain options:
auth.coolest-startup-ever.com(we'll use this approach in this tutorial)login.coolest-startup-ever.comaccounts.coolest-startup-ever.com
Path options:
coolest-startup-ever.com/authcoolest-startup-ever.com/login
Part 1: DNS Configuration for Auth0
Setup Custom Domain in Auth0
Before configuring your DNS provider, you need to set up the custom domain in your Auth0 tenant.
Step 1: add credit card for verification
Auth0 requires a credit card on file to set up custom domains, even on the Free plan. Auth0 uses the credit card for verification purposes and you don't need to worry: you won't be charged as long as you stay within the Free plan limits (which includes one custom domain).
- Log into your Auth0 Dashboard
- Navigate to the Payment & Billing tab in your tenant settings
- Add a payment method if you haven't already
Step 2: Configure the Custom Domain
After setting up your payment method:
- Navigate to Branding > Custom Domains
- In the Custom Domains section enter your chosen subdomain (e.g.,
auth.coolest-startup-ever.com) - Under Certificate Type, select Auth0-managed certificates (recommended for most use cases)
- Then click Add Domain
After clicking "Add Domain," Auth0 will provide you with CNAME record details. Keep this page open as you'll need these values for the next step. The CNAME record will look something like:
CNAME: <your-subdomain>.<your-domain>.com
Points to: <random-string>.edge.tenants.auth0.com
As you can see in the image below:
Configuring DNS on your provider
Now that you've set up the custom domain in Auth0, you need to configure your DNS provider to point your subdomain to Auth0. We'll cover two popular providers: Namecheap and Squarespace.
Important: The DNS propagation process can take anywhere from a few minutes to 48 hours, though it's typically complete within 10-30 minutes.
Option 1: Namecheap
Namecheap is a popular domain registrar that makes DNS configuration straightforward. This example uses a subdomain approach for an existing website (like a blog hosted on GitHub Pages).
Option 2: Squarespace
Squarespace is both a website builder and domain registrar. If your domain is registered with Squarespace, follow the steps below.
Please note: The example domain used in this post (
coolest-startup-ever.com) is not a real website.
Steps for Namecheap
- Log into your Namecheap account
- Navigate to Domain List and click Manage next to your domain
- Go to the Advanced DNS tab
- Click Add New Record
Configure the CNAME record:
- Type: Select
CNAME Record - Host: Enter just the subdomain (e.g.,
loginnotlogin.coolest-startup-ever.com) - Value: Paste the CNAME value from Auth0 (e.g.,
<random-string>.edge.tenants.auth0.com) - TTL: Leave as Automatic or set to 1 min for faster propagation during setup
- Type: Select
Click the green checkmark to save
It is important to note that Namecheap does allow you to use @ as the Host value if you want to use your root domain (e.g., coolest-startup-ever.com) as your Auth0 tenant domain.
Steps for Squarespace
- Log into your Squarespace account
- Head to your Domains page
- Click on the domain you want to add to Auth0
- Navigate to DNS Settings
- For new domains: Remove any default CNAME records from the domain provider that might conflict
- Click Add Record and select CNAME
- Configure the CNAME record:
- Host: Enter just the subdomain (e.g.,
authnotauth.coolest-startup-ever.com) - Type:
CNAME - Data: Paste the CNAME value from Auth0 (e.g.,
<random-string>.edge.tenants.auth0.com)
- Host: Enter just the subdomain (e.g.,
- Save the record
Unlike Namecheap, Squarespace does not allow you to use @ as the Host for using your root domain as the Auth0 tenant domain so you must use a subdomain. Always use just the subdomain portion (for example, auth) in the Host field.
Expected wait time:
Once you've completed these steps, the verification process normally takes between 10-30 minutes. If you run into an error message like "Could not verify domain," please wait the full 30 minutes and try again. DNS propagation times vary based on your provider and TTL settings.
Verifying the domain in Auth0
After configuring your DNS records, you need to verify that everything is set up correctly.
Before returning to Auth0, you can verify that your DNS changes have propagated using these tools:
Using the dig command (Mac/Linux):
dig auth.coolest-startup-ever.com CNAME
Look for the CNAME record in the answer section. It should point to the Auth0 domain you configured.
Using MX Toolbox (Web-based):
- Go to https://mxtoolbox.com/DNSLookup.aspx
- Select "CNAME Lookup" from the dropdown
- Enter your subdomain (e.g.,
auth.coolest-startup-ever.com) - Click "CNAME Lookup"
You should see your CNAME record pointing to the Auth0 domain.
Verify in Auth0 Dashboard
After you see the propagated DNS you should return to your Auth0 Dashboard and then:
- Navigate back to Branding > Custom Domains
- Click the Verify button next to your domain
If verification succeeds, you'll see a green checkmark and your domain status will change to "Ready."
Common Errors and Troubleshooting the DNS Configuration
"Could not verify domain" error:
- Wait longer: DNS propagation can take up to 30 minutes (sometimes longer)
- Check for typos: Verify that your CNAME record matches exactly what Auth0 provided
- TTL settings: Check that your TTL isn't set too high (temporarily set it to 1 minute during setup)
- Multiple records: Ensure there are no conflicting CNAME records for the same subdomain
- Root domain limitations: Remember that Squarespace doesn't support using
@for the root domain
Still having issues?
- Clear your DNS cache:
sudo dscacheutil -flushcache; sudo killall -HUP mDNSResponder(Mac) - Try verification from a different network
- Contact your DNS provider's support to confirm the record is properly configured
Part 2: Updating Your Application
Alright! Your custom domain is verified in Auth0. But we're not done yet. Before you can use it in production, you need to update your application code.
When you switch to a custom domain, a few things change behind the scenes:
- Token Issuers: Your tokens now have your custom domain in the
issclaim instead of the Auth0 domain - SDK Configurations: Your Auth0 SDKs need to know about the new domain
- API Endpoints: Token requests must use the custom domain
- Active Sessions: All existing user sessions will be invalidated (everyone gets logged out and needs to log in again)
That last one is important: make sure your users know they'll need to log in again after you make the switch.
Let's walk through the code updates you'll need to make.
Updating Auth0 SDK setup for Custom Domains
Most developers use Auth0's SDKs to handle authentication in their applications. When you switch to a custom domain, you need to update the SDK initialization to use your new domain instead of the default Auth0 domain.
Note: While we'll use Python with FastAPI for the examples below, the pattern is similar across all Auth0 SDKs - you simply update the
domainparameter to your custom domain. Check the SDK-specific documentation for your platform.
Auth0 FastAPI SDK (web applications)
For Python web applications using FastAPI, you'll use the auth0-fastapi SDK. This SDK handles user authentication flows including login, logout, and session management.
Before: default Auth0 domain
from fastapi import FastAPI
from auth0_fastapi import Auth0

app = FastAPI()

auth = Auth0(
   domain='your-tenant.us.auth0.com',
   client_id='YOUR_CLIENT_ID',
   client_secret='YOUR_CLIENT_SECRET'
)

auth.init_app(app)

@app.get("/")
async def homepage(user=auth.require_auth()):
   return {"message": f"Hello {user.name}!"}
After: Custom Domain
from fastapi import FastAPI
from auth0_fastapi import Auth0

app = FastAPI()

auth = Auth0(
   domain='auth.coolest-startup-ever.com',  # Your custom domain
   client_id='YOUR_CLIENT_ID',
   client_secret='YOUR_CLIENT_SECRET'
)

auth.init_app(app)

@app.get("/")
async def homepage(user=auth.require_auth()):
   return {"message": f"Hello {user.name}!"}
That's it! The SDK handles everything else automatically. Your login, logout, and session management will now use your custom domain.
If you are using environment variables instead of hardcoding your domain into your code, just make sure to update the value for the corresponding AUTH0_DOMAIN variable.
Important: This same pattern applies to all Auth0 SDKs across all platforms (JavaScript, React, Angular, Vue, iOS, Android, .NET, etc.). Simply update the
domainparameter in your SDK configuration to your custom domain, and the SDK will handle the rest. The examples above use Python/FastAPI, but the concept is identical regardless of your tech stack.
Updating API integrations
When you use custom domains, the way you request and validate access tokens changes slightly. Let's break down what you need to know.
When Auth0 issues tokens (both ID tokens and access tokens), they include an iss (issuer) claim. This claim reflects the domain you used to obtain the token:
- Before custom domain:
"iss": "https://your-tenant.us.auth0.com/" - After custom domain:
"iss": "https://auth.coolest-startup-ever.com/"
This is important for token validation because your API needs to verify that tokens come from a trusted issuer.
Important: The API identifier (the
audienceclaim) does not change. Even though it's conventional to use a URI format likehttps://api.example.com, the audience is just an identifier and remains constant regardless of which domain issued the token.
Your backend API needs to validate incoming access tokens. With a custom domain, you must update the issuer configuration. For FastAPI APIs, you'll use the auth0-fastapi-api SDK.
Auth0 FastAPI API SDK
Before: Default Auth0 Domain
from fastapi import FastAPI, Security
from auth0_fastapi_api import Auth0API

app = FastAPI()

auth = Auth0API(
   domain='your-tenant.us.auth0.com',
   audience='https://api.coolest-startup-ever.com'
)

@app.get("/api/private")
async def private_endpoint(user=Security(auth.get_user)):
   return {"message": f"Hello {user.sub}! This is a protected endpoint."}
After: Custom Domain
from fastapi import FastAPI, Security
from auth0_fastapi_api import Auth0API

app = FastAPI()

auth = Auth0API(
   domain='auth.coolest-startup-ever.com',  # Updated to custom domain
   audience='https://api.coolest-startup-ever.com'  # Unchanged
)

@app.get("/api/private")
async def private_endpoint(user=Security(auth.get_user)):
   return {"message": f"Hello {user.sub}! This is a protected endpoint."}
Key changes:
- Update
domainto your custom domain - The
audience(API identifier) remains unchanged
That's it! Once you update the domain parameter, the SDK automatically:
- Fetches JWKS from your custom domain (
https://auth.coolest-startup-ever.com/.well-known/jwks.json) - Validates the token signature
- Verifies the issuer matches your custom domain
- Checks the audience claim
If you're manually validating tokens (not using an Auth0 SDK), you'll need to manually update:
- The JWKS endpoint URL to your custom domain
- The expected issuer value to your custom domain
- Keep the audience validation unchanged
Here once again if you are using environment variables instead of hardcoding your domain into your code, just make sure to update the value for the corresponding AUTH0_DOMAIN variable.
Important Considerations for Custom Domains
Session invalidation
When you enable a custom domain, all existing user sessions get invalidated. Every single one. This means:
- Everyone currently logged in will be logged out
- They'll need to authenticate again using your new custom domain
- Refresh tokens from the old domain won't work anymore
Plan ahead and communicate with your users about this change. If possible, schedule the migration during a low-traffic period to minimize disruption.
Social identity providers with development keys
If you're using social identity providers (Google, Facebook, etc.) with Auth0's development keys, these will not work with custom domains. You must configure your own application credentials with each social provider.
Auth0 provides development keys for quick testing, but they're restricted to the default Auth0 domain. To use social login with custom domains:
- Create applications with each social provider (Google, Facebook, etc.)
- Configure the OAuth credentials in your Auth0 Dashboard
- Update the callback URLs to use your custom domain
For detailed instructions, see the Auth0 documentation on configuring your own social connection keys.
CORS configuration
If you're calling Auth0 endpoints from browser-based applications, make sure your CORS settings include your custom domain:
- Go to your Auth0 Dashboard
- Navigate to Applications > Your Application > Settings
- Update Allowed Web Origins and Allowed Callback URLs to include your custom domain
Testing Your Changes After Setting Up a Custom Domain
After making these updates, test the following flows thoroughly:
Login Flow:
- Users should be redirected to your custom domain for authentication
- Check the URL in the address bar during login
Token Inspection:
- Verify that access tokens are issued with your custom domain in the
issclaim - Use jwt.io to decode and inspect tokens
- Verify that access tokens are issued with your custom domain in the
API Calls:
- Ensure your API correctly validates tokens issued by the custom domain
- Test both successful and failed authentication scenarios
Logout Flow:
- Confirm that logout redirects work properly
- Verify users are fully logged out
Token Refresh:
- Test that token refresh works with the new domain
- Check that refresh tokens are properly invalidated
Social Login (if applicable):
- Test each social provider you've configured
- Verify callback URLs work correctly
Use browser developer tools to inspect network requests and JWT tokens to verify everything is working correctly.
Recap
Setting up custom domains gives you better brand consistency and builds user trust. We covered everything from DNS configuration to code updates. Here are the key things to remember:
DNS Configuration:
- Provider differences matter: Namecheap lets you use
@for root domains, but Squarespace doesn't. Always use just the subdomain part in the Host field (likeauth, notauth.example.com). - Double-check for typos:** This is the most common issue I see. Make sure your CNAME record exactly matches what Auth0 gave you.
- **Be patient: DNS propagation takes time - usually 10-30 minutes, but sometimes up to 48 hours. Grab a coffee and wait it out.
- Use verification tools:
digand MX Toolbox are your friends for checking if DNS changes have propagated.
Application Updates:
- Update all SDKs: Change the
domainparameter in your Auth0 SDK configuration. This works the same way across all Auth0 SDKs (JavaScript, React, Angular, Vue, iOS, Android, Python, .NET, Java, you name it). Once you update the domain, the SDK handles everything else automatically. - Token issuer changes: Your tokens will have your custom domain in the
issclaim now, but theaudiencestays the same. - API validation: Using an Auth0 SDK for your API? Just update the
domainparameter. Doing manual token validation? You'll need to update the JWKS endpoint URL and expected issuer. - Session reset: Everyone gets logged out when you flip the switch. Communicate this with your users.
- Social IdPs: Auth0's development keys won't work with custom domains. You'll need to configure your own credentials.
- Test everything: Before you deploy to production, test all your authentication flows. Trust me on this one.
Need More Details?
This guide covers the most common scenarios we've helped developers with, but there are a few more edge cases depending on your setup:
- Email templates and links
- Password reset flows
- Rules and Hooks
- SAML and WS-Fed applications
- And more
If you're using any of these features, check out the Auth0 documentation on configuring features to use custom domains for the full details.
Related resources
- Auth0 Custom Domains Documentation
- Auth0 FastAPI SDK for Web Apps
- Auth0 FastAPI SDK for APIs
- Configure Features to Use Custom Domains
- Auth0 SDKs and Libraries
Quick disclaimer: Okta isn't affiliated with Namecheap or Squarespace. This guide should work with any DNS provider, though the exact UI might be slightly different. If you run into issues with your specific provider, drop a comment below and we'll help you!