

Technology Used
- Ruby / Rails
- ImageMagick for custom Image Comparison
- Amazon S3
What, Why?
Social engineering methods are increasingly being used to gain access to User Credentials. While the provider maybe as secure as can be, they are not always the source of credential leaks. Obtaining usernames and passwords by effectively 'tricking' people into handing them over is becoming more and more common.
If a miscreant is to get hold of your account login details, naturally they will be able to access sensitive data. Of course, there are already many methods available to combat this, such as mobile 2 factor auth; I wanted to take a slightly different (more fun) approach to combat the situation.
The idea behind 'Eyeball' is to offer a multi-factor authentication scenario in which we use Auth0's login page as first-line login, then upon success offer Iris recognition as second-line. This means that if a User's account details are compromised, the offender would also have to have access to the User's eyeball. (Much less likely!)
From a technical standpoint, we will be building our own Image Comparison application utilising the ImageMagick subsystem.
IMPORTANT NOTE - As this app is just a proof of concept hack, I wouldn't recommend re-using any of this code in a production environment. This article is simply to be used as an inspiration to get the gist of the technology. Using ImageMagick is fine for this article, but if you want truly accurate and secure results, I would recommend looking at the pHash algorithm & library, and the Blockhash library. I will cover these libraries in the future in detail - showing production-ready, tested data.
Getting Started
We will be using Ruby / Rails to build this app. There is already a fantastic quick-start tutorial available, alongside a sample Rails application on the Auth0 Docs. Instead of starting from scratch, we will simply download this sample app and iterate on it!
Even more handy - Auth0 allows you to download this sample Rails app configured with your Auth0 API Keys already in! Head over here to download it.
For simplicity, we are going to be making an assumption. A User can't assign their own Iris image in the first place, and this will be upto an Admin. This reflects a more realistic enterprise situation, for instance a new employee would have their Iris scanned, then an Admin would add that Iris to their User Profile. In our application specifically, we will be reflecting this by storing, and accessing a iris_image_url in Auth0's metadata. This is just a path to the User's stored Iris image, that we shall use in comparison to the temporarily uploaded Iris image upon login.
Setting up our second-line defence routes
Our sample app already has Auth0's login setup and working. The Rails app also has a Dashboard route setup to be redirected to upon successful login. We need to setup a new route to act as a go-between after successful login and before the User actually gets to see their Dashboard.
Go ahead and run:
> rails g controller Iris checkThis will create a new route at iris/check that we can redirect to after a successful Auth0 login. We now need to edit our existing Auth0Controller to reflect this. Open up app/controllers/auth0_controller.rb and update the callback method as follows:
def callback
  session[:userinfo] = request.env['omniauth.auth']

  redirect_to '/iris/check'
end
If you boot your app, and test the login you should now see we don't get to access our Dashboard, but get sent to our Iris Check page.
Building our Iris Recognition!
Now then, let's do something fun - facilitate our makeshift eyeball scanner!
While there are many API's available for Image Recognition, there are no simplistic ones available for specifically comparing two images, so we're going to roll our own. Whereas there are great arguments for choosing to use an existing API instead of building our own, it's a better learning experience in this case to do the latter.
Image processing for recognition / comparison is a very deep topic and can be expanded into Machine Learning and simply get deeper and deeper. For this article, we'll be building our Image Comparison system without the added benefit of Machine Learning. Worth noting - in real world scenarios, Iris Scanners have very advanced cameras and flashes allowing deep factoring of individual Iris'. For our proof of concept app, our mobile phone camera will suffice!
For now, we're going to use the application ImageMagick for our comparison functionality. This comes bundled with Ubuntu and is generally widely available. If you're on a Mac and don't want to download it from the net/app store - you can use Homebrew.
> brew install imagemagickImageMagick's Compare functionality takes an input of two images, and outputs both an image file with the pixel difference highlighted, and a numeric diff figure depending on which metric is used for analysis. ImageMagick compares the images by using Pixel Channels.
For the metric choices available, run the following command:
> compare -list metricAnd to find out a little about each of them, see these docs.
For our application, we're going to use the Mean Absolute Error Count MAE option. This will give us the normalized, average pixel channel error distance.
Let's take this sample image of a Medieval print, do some testing, then put it all together into our Rails app! Assuming that the ImageMagick CLI is available in our bash profile, we can experiment with the following..
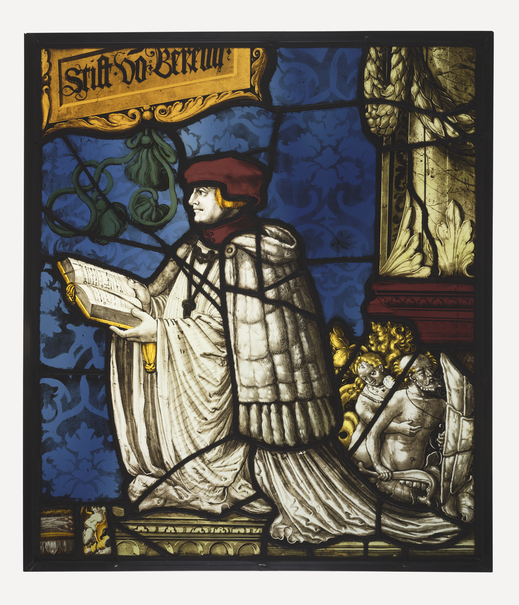
To create a secondary image of this print, which is largely the same, we will use ImageMagick's convert function to sharpen the image colours, and apply a gaussian blur. This will leave us with an image with the same dimensions, and with similar Pixel Channels. Let's run:
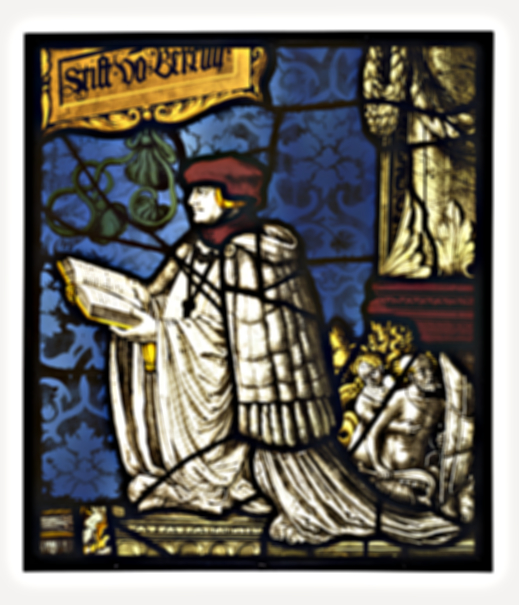
> convert 24442301.jpg -sharpen 0x9 -blur 2x2 24442301_blur.jpgWe should now have a second print image, that looks very similar, but does have subtle differences.
As mentioned above, we will use the Mean Absolute Error Count metric to get a pixel channel difference between the two images, from ImageMagick's CLI.
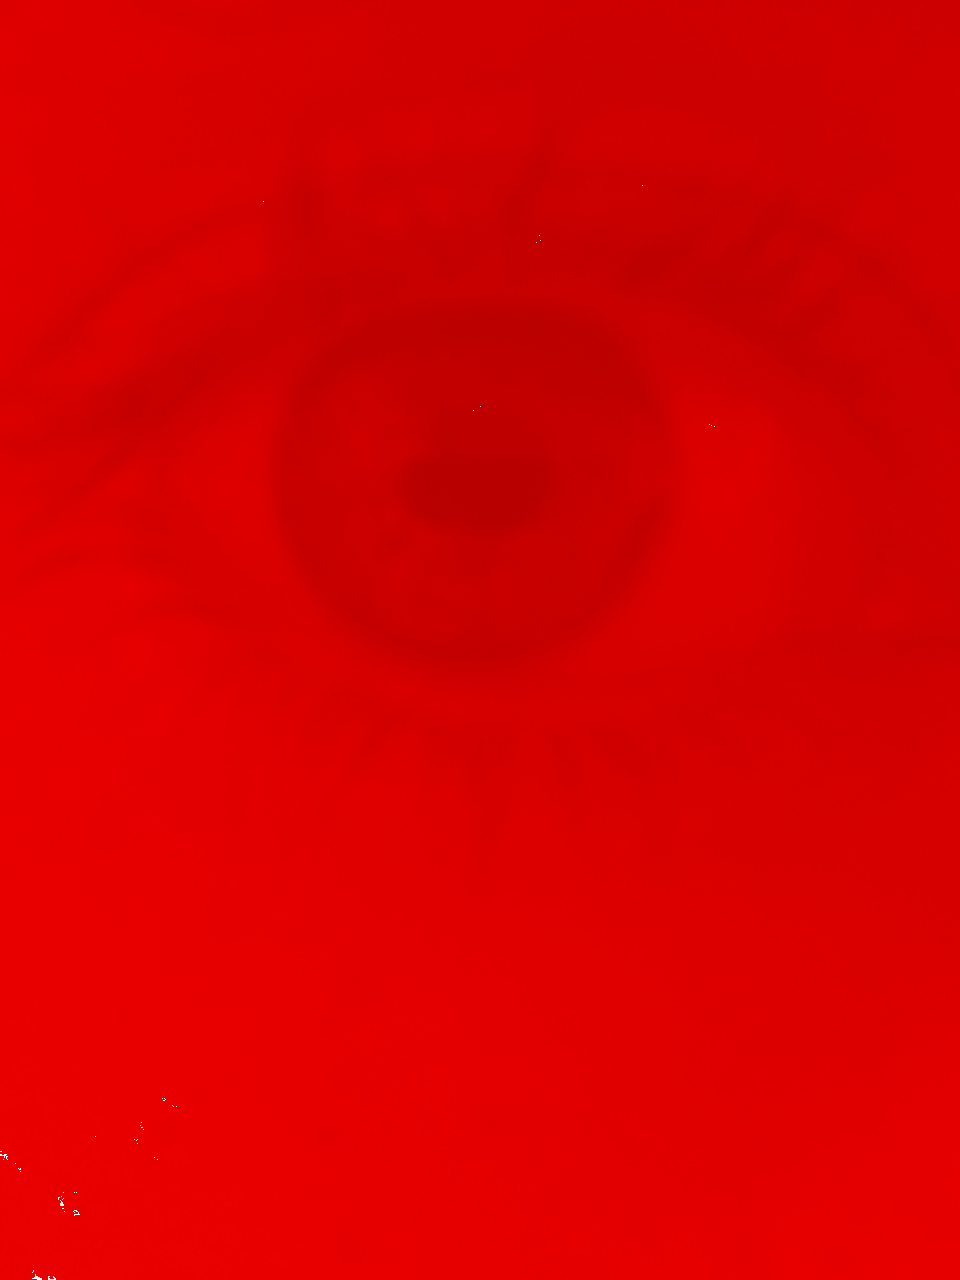
> compare -metric MAE 24442301.jpg 24442301_blur.jpg 24442301_DIFF.pngUpon running that command, we should get returned in our STDERR output the numeric Diff: 4610. There will also be a third image file in our working directory called '24442301_DIFF.png' that highlights in the red spectrum pixel channel, the differences ImageMagick picked up between the two images:
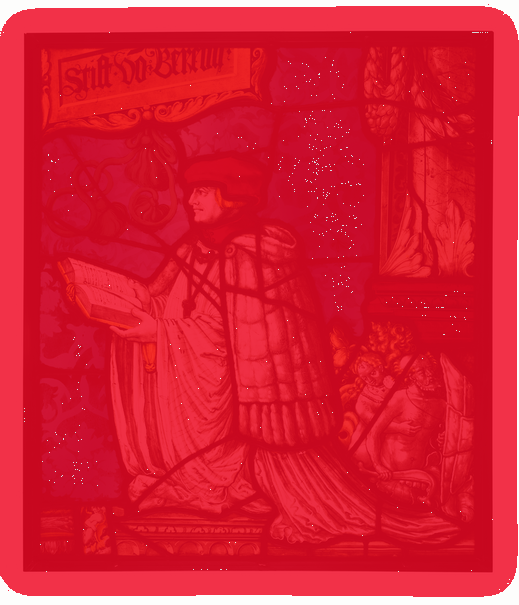
This image may look a little strange to our human eyes, but to ImageMagick, it's the only way of factoring a Diff. Whilst it's certainly an interesting image, it's pretty useless to us - we really only need the Diff figure - 4610.
The Diff figure represents the actual pixel difference between the two images. We know that there are 4610 pixels affected by our sharpen/blur action and now we need to translate this into a usable percentage difference that we can apply to any two images. For this, we're going to need to come up with an algorithm that suits our needs and that we can realiably use on an ongoing basis in our app.
We can acquire a reliable actual Diff percentage figure as long as we know a couple of variables:
* The pixel Diff figure
* The exact dimensions of the images *or **Pixel Count***
You may think this is very straight forward, but it gets a little more difficult when we factor in that our image uploader may send us something an entirely different size to the image we have stored on file. In a Real World scenario, this is a big issue and we actually couldn't use ImageMagick without doing smart image resizing on our-side first! For the sake of this article, we're going to stick with ImageMagick, and imagine in our Utopian world that all images uploaded are the same size as the Iris images stored.
So now assuming our images are going to be the same size, we can use ImageMagick again to get the Pixel Count:
> convert 24442301.jpg -format "%[fx:w*h]" info: >pixelcount.txtRunning this, we've created a txt file containing the Pixel Count figure - 313995.
So - our algorithm; we know the end figure we want is the actual Diff percentage between the two images. The equation below should give us exactly what we need:
%percentage% = 100-( (%diff%*100) / %pixelcount%)Working on the figures we already have - calculating our sum using the equation above should give us: 1.4682. So from this, we can reliably say that our two images have a 1.4682% difference in pixels. Or reversing this, we know that our images have a 98.5318% match.
As a secondary check, I also ran these images through the pHash c++ library using a much more advanced Radial Hash algorithm, and the diff match came out at 97.9%.
Now it's up to us to decide how much of a variation on this figure is acceptable and will allow a User to continue. To decide on this, I did some experimenting with two photos of my right eye taken on my iPhone.
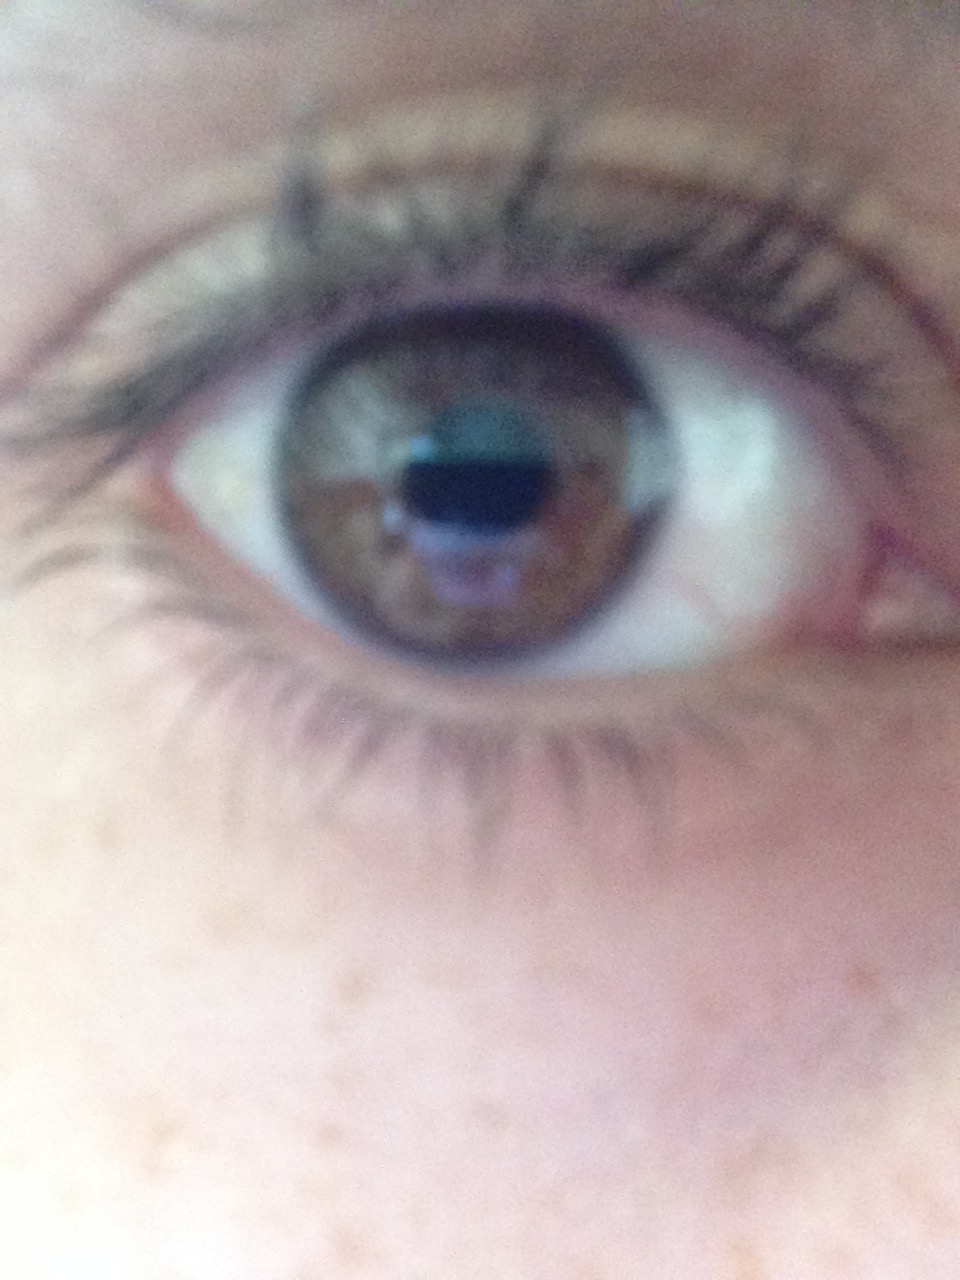
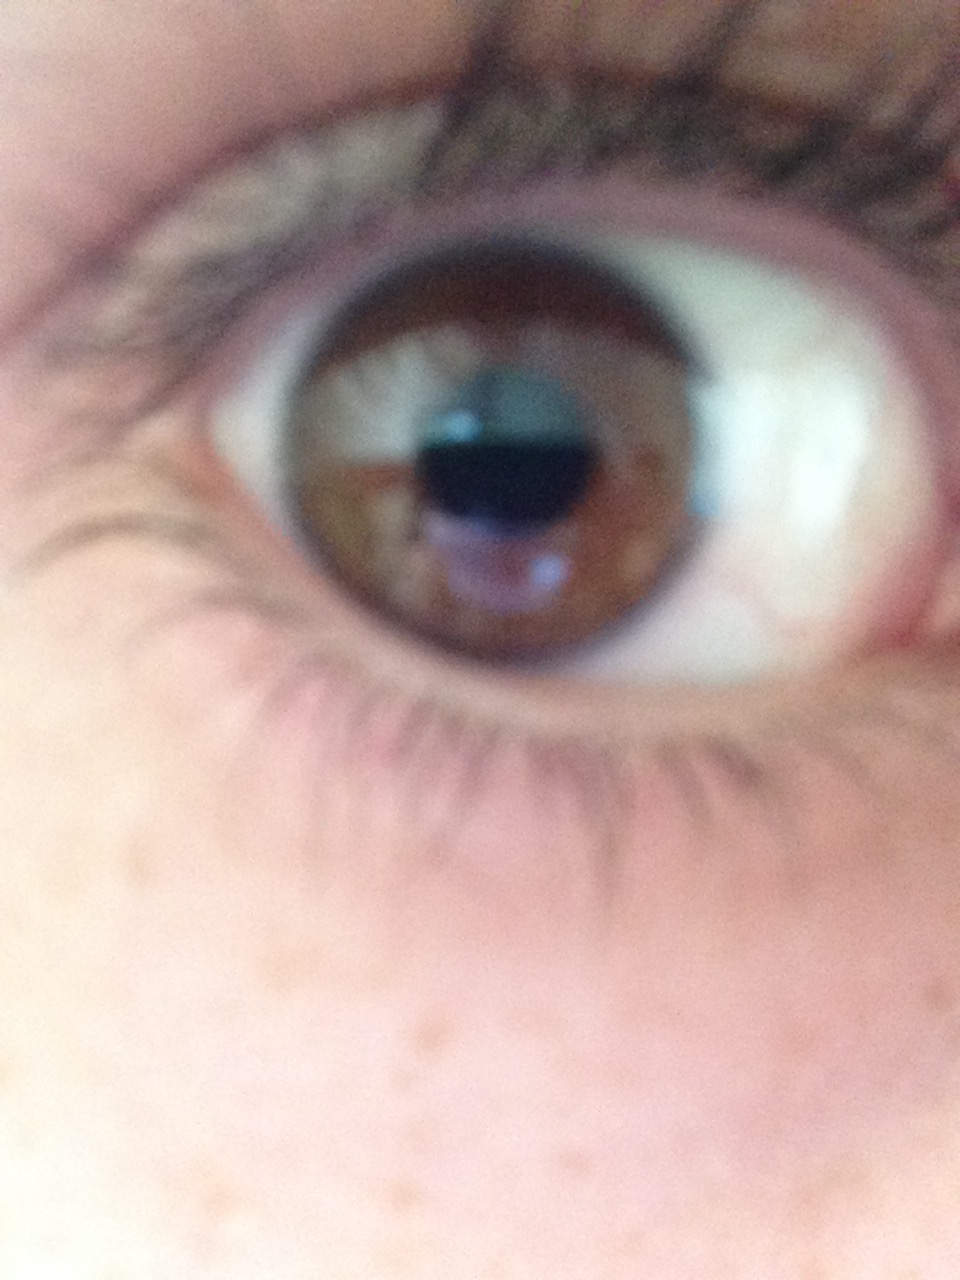
While the images don't look markedly different to me, the image processor must have seen a few things I didn't. Once again, running the script using the MAE metric, and using the -verbose option; the results came out as follows:
eye1.jpg JPEG 1280x960 1280x960+0+0 8-bit sRGB 221KB 0.020u 0:00.030
eye2.jpg JPEG 1280x960 1280x960+0+0 8-bit sRGB 210KB 0.020u 0:00.019
Image: eye1.jpg
  Channel distortion: MAE
    red: 6685.14 (0.102009)
    green: 6064.84 (0.0925435)
    blue: 5796.38 (0.0884471)
    all: 6182.12 (0.0943331)
writing raw profile: type=exif, length=8188
eye1.jpg=>eye-diff.png JPEG 1280x960 1280x960+0+0 8-bit sRGB 851KB 1.060u 0:00.980
So the match from this came out at 87.45%. From this we can safely set the minimum match level in our App at around 85%. Again, this level depends entirely on your security requirements but considering this is just a sample app and not to be used in production - ours doesn't matter all too much!
Integration into our Rails App
So now we have our image recognition working, we need to integrate it into our app. The first thing we need to do is create an Image Uploader for our Users to take a photo of their Iris and upload it to compare with the stored image. For this, I'd recommend using the CarrierWave gem to create an uploader for our user's Iris.
Go ahead and add these to your Gemfile & bundle.
gem 'omniauth', '~> 1.3.1'
gem 'omniauth-auth0', '~> 1.4.1'
gem 'carrierwave', '~> 1.0'
gem 'rmagick'
You can see how to integrate an Image uploader by following the docs here.
So once we've got our Image uploader in the frontend of our app, we can use the uploaded image from Carrierwave, to compare to our stored image. We need to call the Auth0 API to get our stored iris_image_url from the user's metadata, and compare the two with our image comparison hack.
Before that, we need to actually integrate our comparison algorithm into our Rails app.
Comparison method in Rails App
We should create a Method for our Iris comparison that we can call in our Controller. Let's change our iris_controller.rb to include the following:
def compare(iris_new, iris_stored)
    img1 = Magick::Image.read(iris_new).first

    img2 = Magick::Image.from_blob(open(iris_stored).read).first

    res = img1.compare_channel(img2, Magick::MeanAbsoluteErrorMetric, AllChannels)
    diff = res[1]
    w, h = img1.columns, img1.rows
    pixelcount = w * h
    perc = (diff * 100)
    percentage = perc/pixelcount

    return percentage
end
So now we have working image comparison functionality that we can call within our Rails Controllers. We will be using this in our controllers/iris_controller on our /check page to compare the image that's uploaded by the user, against the image stored in the Metadata in Auth0.
Storing iris image in User Metadata
As I mentioned at the beginning of this article, we have already stored an Iris image in Amazon S3, and saved the URL as metadata in Auth0. There's a fantastic guide on setting data using the various API clients here. It should be noted that there is a difference between user_metadata and app_metadata within Auth0 and I feel I should explain. We need to use app_metadata to store our iris url. This is because users have read/write access to user_metadata, and therefore could potentially change the url of the Iris image to something completely different, and entirely bypass our system!
Worth noting at this point - the iris_url should only be accessible from the backend of our application, privately. Alongside this, the S3 hosted image should not be publicly accessible, and only available to your application. The images I have used are publicly available as they are just a demo for this article.
To get access to this metadata, we need to create a rule to add the user app_metadata in the id token. Go to your Auth0's dashboard. Create a new rule and add the following code:
function (user, context, callback) {
  user.app_metadata = user.app_metadata || {};
  if(user.app_metadata.iris_url) {
    context.idToken["http://example.com/iris_url"] = user.app_metadata.iris_image_url;
  }
  callback(null, user, context);
}
Then we can simply use native Ruby and the session data returned from Auth0 and OmniAuth. We can obtain this data by using the auth hash returned from OmniAuth & Auth0. Open up your iris_controller.rb and add the following private method:
private

def get_iris_url
  @user = session[:userinfo]
  url = @user[:extra][:raw_info][:app_metadata]['http://example.com/iris_url']
  return url
end
Once we've added that, let's just ensure it's working. Open up the file: views/iris/check.html.erb, and enter the following:
Welcome, <%= @user[:info][:email] %>

Iris Stored URL is: <%= @iris_url %>
If you run your Rails app now, and go through the initial Auth0 Login Page successfully; you'll be redirected to the Iris/check page. Your app should reflect the following:
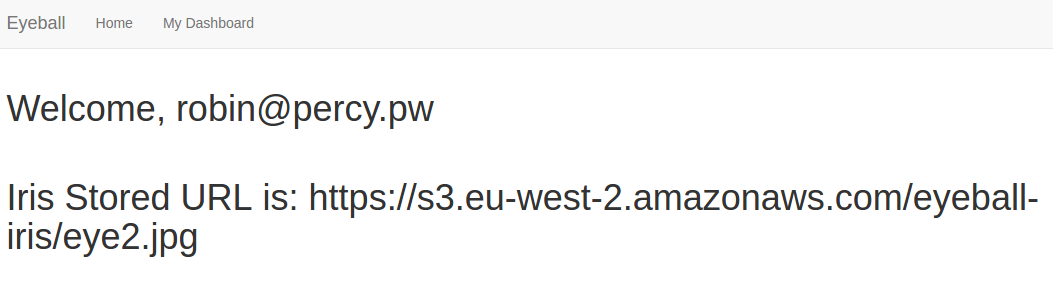
From this we know that our OmniAuth Hash is returning everything we need for our image comparison. We would not usually display the irisimageurl, but for the sake of this demo I am for now. We can access the User's details such as email address, name etc. allowing us to provide a greeting, but realistically, we only need the http://example.com/iris_url metadata, and we can move onto the final stage of our app build!
Bringing it all together
As shown above, we can call our Comparison functionality and get our user's Metadata in our Controller. Now we need bring them together, and the only thing left for you to do is set your entry percentage rule, and setup the redirect to whichever page you wish to send successful entries to!
Open up iris_controller.rb and have it reflect this:
class IrisController < ApplicationController
  require 'rmagick'
  require 'open-uri'

  include Magick
  include Secured

  def check
    @user = session[:userinfo]
    @iris_url = get_iris_url
    @upload_url = get_upload_url
    @compare = compare(@upload_url, @iris_url)
  end


  private

  def get_iris_url
    @user = session[:userinfo]
    url = @user[:extra][:raw_info]['http://example.com/iris_url']
    return url
  end

  def compare(iris_new, iris_stored)
    img1 = Magick::Image.read(iris_new).first

    img2 = Magick::Image.from_blob(open(iris_stored).read).first

    res = img1.compare_channel(img2, Magick::MeanAbsoluteErrorMetric, AllChannels)
    diff = res[1]
    w, h = img1.columns, img1.rows
    pixelcount = w * h
    perc = (diff * 100)
    percentage = perc/pixelcount

    return percentage
  end

  def get_upload_url
    dir = Dir.glob("public/uploads/iris/*").sort_by { |f| File.mtime(f) }.reverse
    return dir[0]
  end

end
Note: Using Auth0's Centralised Login Page is a more secure way of utilising Auth0's user management technology.
Aside: Using Auth0 with Rails
Auth0 issues JSON Web Tokens on every login for your users. This means that you can have a solid identity infrastructure, including single sign-on, user management, support for social identity providers (Facebook, Github, Twitter, etc.), enterprise identity providers (Active Directory, LDAP, SAML, etc.) and your own database of users with just a few lines of code.
We can easily set up authentication in our Rails apps with Auth0's Login Page. If you don't already have an Auth0 account, sign up for one now. Navigate to the Auth0 management dashboard, select Applications from the navigational menu, then select the app you want to connect with Rails.
Step 1: Install and initialize OmniAuth Auth0
Add the following dependencies to your Gemfile and run bundle install:
gem 'omniauth', '~> 1.6.1'
gem 'omniauth-auth0', '~> 2.0.0'
Create a file named auth0.rb under config/initializers and configure the OmniAuth middleware in it.
Rails.application.config.middleware.use OmniAuth::Builder do
  provider(
    :auth0,
    'YOUR_CLIENT_ID',
    'YOUR_CLIENT_SECRET',
    'YOUR_AUTH0_DOMAIN',
    callback_path: '/auth/oauth2/callback',
    authorize_params: {
      scope: 'openid profile',
    }
  )
end
Step 2: Register the callback
Head over to your Auth0 dashboard and register Allowed Callback URLs http://localhost:3000/auth/oauth2/callback and Allowed Logout URLs http://127.0.0.1:3000.
Step 3: Include Auth0's centralized login page
Add the following code to the view app/views/home/show.html.erb file:
<img src="https://images.ctfassets.net/23aumh6u8s0i/3aYRHtSBfKKKZXB9FALx4/920cb79169eadec04f7f754f39031a52/badge"/>
<h1>RoR Auth0 Sample</h1>
<p>Step 1 - Login.</p>
<a href="/auth/auth0">Login</a>
Step 4: Protect routes
Create a controller concern controllers/concerns/secured.rb to control access to routes that require the user to be authenticated:
module Secured
  extend ActiveSupport::Concern

  included do
    before_action :logged_in_using_omniauth?
  end

  def logged_in_using_omniauth?
    redirect_to '/' unless session[:userinfo].present?
  end
end
Include the concern in the dashboard controller controllers/dashboard_controller.rb to prevent unauthenticated users from accessing its routes:
class DashboardController < ApplicationController
 include Secured

 def show
 end
end
Step 5: Configure logout
Use the following command to create the controller that will handle user logout:
rails generate controller logout
To clear out all the objects stored within the session, call the resetsession method within the logout_controller/logout method. [Learn more about resetsession here](http://api.rubyonrails.org/classes/ActionController/Base.html#M000668).
# app/controllers/logout_controller.rb

class LogoutController < ApplicationController
  def logout
    reset_session
    redirect_to root_url
  end
end
Summary
So there we have it! It's important to note that this article is not meant to supply a production-ready system. I wanted to give you an idea of some of the cool things we can do easily with Auth0 Login, and how simple it is to integrate into our applications!
Building user systems from scratch takes a long time - and as Developers, we're utilising more and more API's on a daily basis. Auth0 makes it incredibly simple for us to setup a highly secure, super scalable User System in a small fraction of the time it would have taken us to build it in-house.
Iris recognition is an incredibly complex topic when used in real-world scenarios - this Article is meant to inspire you with a basic idea on how one could be integrated with Auth0, and how you can utilise it as a second-line login system alongside Auth0 Login. For a more secure and realistic image comparison, check out the aformentioned pHash and Blockhash algorithms.
I'm always more than happy to chat through ideas on improving production security, and any ideas to do with cool new tech - so if you have any questions / comments, please reach out to me!
Thanks for reading! - @rbin