
TL;DR: The photos you take on your smartphone are made up of more than just pictures. They also contain Exif metadata, which provides additional information about each photo, such as when and where it was taken, as well as other data that could be used to compromise your privacy or even incriminate you. In this article, you’ll learn about the Exif metadata format and how to use JavaScript and the Piexfjs library to find and read this data, edit it, and even erase it from your photos.
There's More Than Just Pictures in Your Photos
The mass adoption of smartphones — essentially portable, sensor-rich, location-aware, always-networked computers — has given us two major consequences whose effects on privacy and security we don’t yet completely understand:
- More people than ever have a camera that’s usually within arm’s reach.
- By default, the photos taken with these cameras can give away sensitive information, and many users are unaware that it’s happening.
In addition to picture data, photos taken with smartphones and modern digital cameras contain metadata, which is additional information about the photo. This metadata is stored in a format called Exif, which is short for Exchangeable image file format, a continually evolving standard for information added to digital image and sound recordings.
In photos, Exif can include information such as:
- The make and model of the device used to take the photo
- The date and time when the photo was taken, down to the millisecond
- Where the photo was taken, with the accuracy of GPS
- The orientation of the device when the photo was taken
- Which direction the camera was facing
- The altitude at which the photo was taken
- The speed at which the camera was moving when the photo was taken
- Various camera settings, including zoom, aperture, and flash
This metadata is useful for sorting, cataloging, and searching through photos, which is why the Exif standard was defined. However, it also introduces privacy and security concerns that many users don’t take into account.
Information security professionals tell cautionary tales about Exif metadata. The 2012 privacy incident involving antivirus company founder John McAfee is a popular one. In his DEF CON 23 presentation, Confessions of a Professional Cyber Stalker, security analyst Ken Westin talked about the privacy problems that Exif can cause.
The January 6th storming of the United States Capitol is full of examples of incriminating Exif. Many of the participants posted photos and videos to a social media site that didn’t take the precaution of “scrubbing” their Exif data during the upload process. Combined with the site’s poor security, these recordings provided law enforcement with evidence that clearly placed the people who made them at the scene of the crime.
Being the security-conscious developers that I suspect you are, you’re probably asking yourself questions like these:
- How can I programmatically detect and read the Exif metadata in photos?
- How can I alter, add, or erase Exif metadata programmatically?
This article will answer these questions with the help of JavaScript and the Piexifjs library. Along the way, you’ll use not just your programming skills, but you’ll do some detective work as well!
In the exercises below, you’ll use images containing Exif metadata. Before continuing, you should download these images from this article’s companion Github repository and put them into a directory named
images. You can find all the code here.
The Piexifjs Library
There are a number of JavaScript libraries that can access the Exif data in digital photos. This article uses Piexifjs. Unlike most other JavaScript Exif libraries, Piexif not only allows you to read Exif data, but edit and erase it as well.
Piexifjs is available as a Node.js package and can be installed by using npm as shown below:
npm install piexifjs
You can include Piexifjs directly in an HTML page by linking to piexif.js.
This article features code that make use of the Piexifjs Node.js package to read, edit, and erase Exif data from a set of sample photos. I recommend that you enter the code into your favourite JavaScript console application (such as node) or an interactive JavaScript environment (such as a Jupyter Notebook running a JavaScript kernel).
This article features code that makes use of the Piexifjs Node.js package to read, edit, and erase EXIF data from a set of sample photos. I recommend that you enter the code into your favorite JavaScript console application (such as node) or an interactive JavaScript environment (such as a Jupyter Notebook running a JavaScript kernel).
Piexifjs methods
Piexifjs object provides the following methods:
| Method | Description |
|---|---|
load(jpegBase64data) | |
dump(exifObj) | |
insert(exifBinaryData, jpegBase64data) | |
remove(jpegBase64data) |
Let’s put these methods to use!
Getting Started
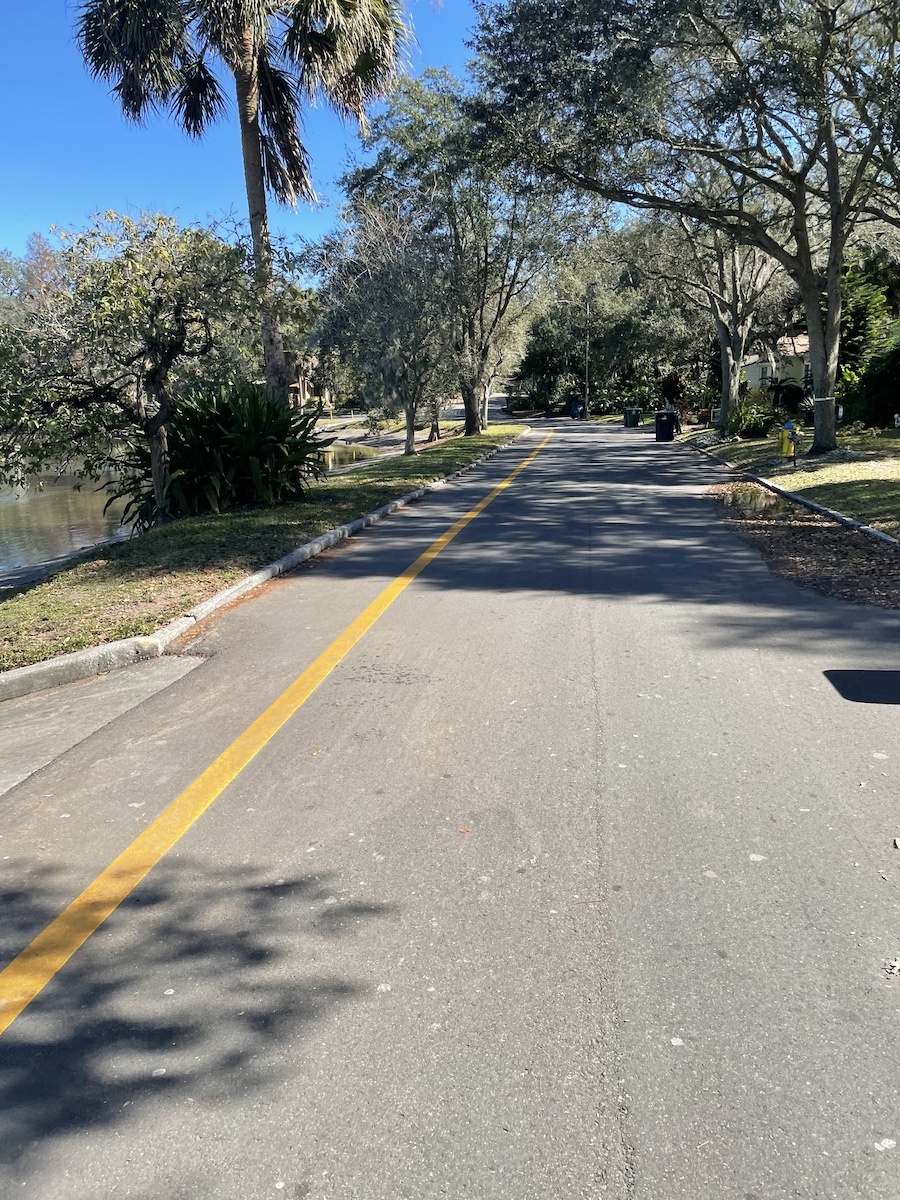
Consider the two photos below, named palm tree 1.jpg and palm tree 2.jpg, which you can download from Github:
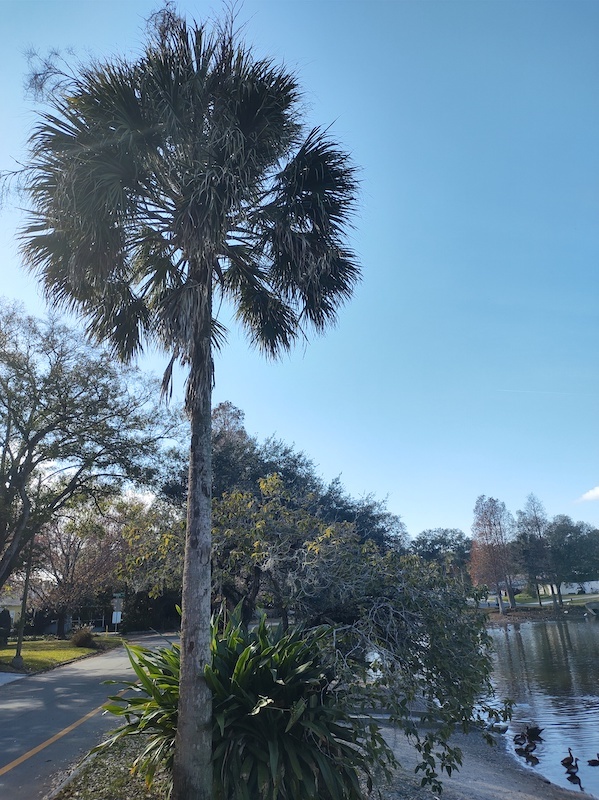
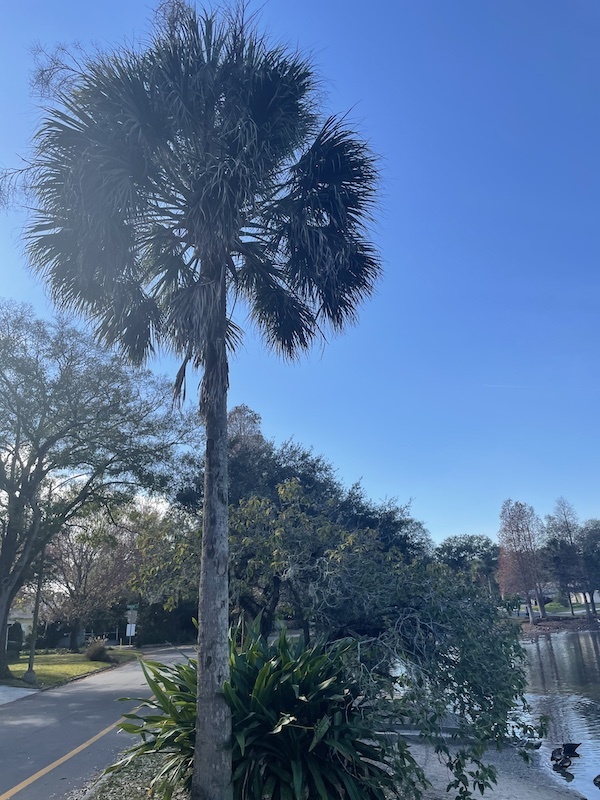
We want to answer these questions:
- Were these photos taken on the same device or two different devices?
- Which photo was taken first?
- Where were these photos taken?
Reading a Photo’s Exif Data
Open the Node.js REPL and enter the code below:
// Modules required for most of these exercises
const fs = require('fs');
const piexif = require('piexifjs');

// Handy utility functions
const getBase64DataFromJpegFile = filename => fs.readFileSync(filename).toString('binary');
const getExifFromJpegFile = filename => piexif.load(getBase64DataFromJpegFile(filename));
The code above defines two functions:
| Function | Description |
|---|---|
getBase64DataFromJpegFile(filePathname) | |
getExifFromJpegFile(filePathname) |
With these functions defined, we can start loading photos and examining their Exif metadata:
// Get the Exif data for the palm tree photos
// (Assumes that the photos “palm tree 1.jpg” and “palm tree 2.jpg”
// are in a directory named “images”)
const palm1Exif = getExifFromJpegFile("./images/palm tree 1.jpg");
const palm2Exif = getExifFromJpegFile("./images/palm tree 2.jpg");
const palmExifs = [palm1Exif, palm2Exif];
What Does Exif Data Look Like?
Let’s take a look at the Piexifjs object for the first photo. Enter palm1Exif in the node REPL. You should see the following:
{
  '0th': {
    '271': 'motorola',
    '272': 'motorola one hyper',
    '274': 1,
    '282': [ 72, 1 ],
    '283': [ 72, 1 ],
    '296': 2,
    '306': '2021:01:22 15:08:46',
    '34665': 188,
    '34853': 690
  },
  Exif: {
    '33434': [ 1, 779 ],
    '33437': [ 9, 5 ],
    '34850': 0,
    '34855': 100,
    '36864': '0220',
    '36867': '2021:01:22 15:08:46',
    '36868': '2021:01:22 15:08:46',
    '37121': '\x01\x02\x03\x00',
    '37377': [ 4803, 500 ],
    '37378': [ 169, 100 ],
    '37379': [ 0, 1 ],
    '37380': [ 0, 1 ],
    '37381': [ 169, 100 ],
    '37383': 1,
    '37384': 21,
    '37385': 24,
    '37386': [ 553, 100 ],
    '37520': '327211',
    '37521': '327211',
    '37522': '327211',
    '40960': '0100',
    '40961': 1,
    '40962': 599,
    '40963': 800,
    '41495': 0,
    '41986': 0,
    '41987': 0,
    '41988': [ 1, 1 ],
    '41989': 0,
    '41990': 0
  },
  GPS: {
    '1': 'N',
    '2': [ [Array], [Array], [Array] ],
    '3': 'W',
    '4': [ [Array], [Array], [Array] ],
    '5': 0,
    '6': [ 7189, 1000 ],
    '29': '2021:01:22'
  },
  Interop: {},
  '1st': {},
  thumbnail: null
}
The output shows that Piexifjs objects have the following properties:
0thExifGPSInterop1stthumbnail
With the exception of thumbnail, each of these properties represents an Image File Directory (IFD), which is a collection of a specific type of metadata related to the image.
📙 Click here to view details about the Piexifjs object’s properties.
| IFD Object | Description |
|---|---|
0th | |
Exif | |
GPS | |
Interop | |
1st | |
thumbnail |
When reading, editing, and writing Exif data from photos taken with smartphones, you will typically use information from just three IFDs, which are represented by Piexifjs’ 0th, Exif, and GPS properties — or more accurately, the properties of those objects.
Making Exif Data Easier to Read
Each IFD object has properties whose names are numbers in string format, which makes Piexifjs objects hard to read. Fortunately, Piexifjs provides an array called TAGS that maps these numeric keys to their names. We’ll use TAGS to create the function below, which displays the contents of a Piexifjs object in an easier-to-understand form.
Enter the following code into the node REPL:
// Given a Piexifjs object, this function displays its Exif tags
// in a human-readable format
function debugExif(exif) {
    for (const ifd in exif) {
        if (ifd == 'thumbnail') {
            const thumbnailData = exif[ifd] === null ? "null" : exif[ifd];
            console.log(`- thumbnail: ${thumbnailData}`);
        } else {
            console.log(`- ${ifd}`);
            for (const tag in exif[ifd]) {
                console.log(`    - ${piexif.TAGS[ifd][tag]['name']}: ${exif[ifd][tag]}`);
            }
        }
    }
}
Let’s use this function to look at palm1Exif. Enter debugExif(palm1Exif) into node. The following should appear:
- 0th
    - Make: motorola
    - Model: motorola one hyper
    - Orientation: 1
    - XResolution: 72,1
    - YResolution: 72,1
    - ResolutionUnit: 2
    - DateTime: 2021:01:22 15:08:46
    - ExifTag: 188
    - GPSTag: 690
- Exif
    - ExposureTime: 1,779
    - FNumber: 9,5
    - ExposureProgram: 0
    - ISOSpeedRatings: 100
    - ExifVersion: 0220
    - DateTimeOriginal: 2021:01:22 15:08:46
    - DateTimeDigitized: 2021:01:22 15:08:46
    - ComponentsConfiguration:
    - ShutterSpeedValue: 4803,500
    - ApertureValue: 169,100
    - BrightnessValue: 0,1
    - ExposureBiasValue: 0,1
    - MaxApertureValue: 169,100
    - MeteringMode: 1
    - LightSource: 21
    - Flash: 24
    - FocalLength: 553,100
    - SubSecTime: 327211
    - SubSecTimeOriginal: 327211
    - SubSecTimeDigitized: 327211
    - FlashpixVersion: 0100
    - ColorSpace: 1
    - PixelXDimension: 599
    - PixelYDimension: 800
    - SensingMethod: 0
    - ExposureMode: 0
    - WhiteBalance: 0
    - DigitalZoomRatio: 1,1
    - FocalLengthIn35mmFilm: 0
    - SceneCaptureType: 0
- GPS
    - GPSLatitudeRef: N
    - GPSLatitude: 28,1,0,1,156,100
    - GPSLongitudeRef: W
    - GPSLongitude: 82,1,26,1,5904,100
    - GPSAltitudeRef: 0
    - GPSAltitude: 7189,1000
    - GPSDateStamp: 2021:01:22
- Interop
- 1st
- thumbnail: null
With the debugExif() function, the Exif data becomes considerably easier to understand.
Enter debugExif(palm2Exif) into node. The result should be this:
- 0th
- Make: Apple
- Model: iPhone 12 Pro
- Orientation: 1
- XResolution: 72,1
- YResolution: 72,1
- ResolutionUnit: 2
- Software: 14.3
- DateTime: 2021:01:22 15:08:59
- HostComputer: iPhone 12 Pro
- TileWidth: 512
- TileLength: 512
- ExifTag: 246
- GPSTag: 2250
- Exif
- ExposureTime: 1,2618
- FNumber: 8,5
- ExposureProgram: 2
- ISOSpeedRatings: 32
- ExifVersion: 0232
- DateTimeOriginal: 2021:01:22 15:08:59
- DateTimeDigitized: 2021:01:22 15:08:59
- ComponentsConfiguration:
- ShutterSpeedValue: 114234,10061
- ApertureValue: 14447,10653
- BrightnessValue: 23749,2531
- ExposureBiasValue: 0,1
- MeteringMode: 5
- Flash: 24
- FocalLength: 21,5
- SubjectArea: 2002,1506,2213,1327
- MakerNote: Apple iOSMM) .h. ® µ
%¾
BP ä %ê!
# % & '
( +%(- .. / )0
$F .
#A58>Hj¼m`wJ"6!b¿kPT_DæaW^8) T@þÔ[$!¦
]
Ð$$K(>,4%y' y
!T5×ØÔ"
^"!!"0cW($
C$*0J^9Süm=
È.)3WkVÅg® ìû
72C}xÈ*7
#bplist00ÔUflagsUvalueYtimescaleUepochÝ
7¬;Ê
'-/8= ?.wfÀÿÿçRY@Q49830160-BAB4-4F06-8847-09CAFCEAD9E1q900n01730AB5-2562-4B21-A4F2-6906C1CE3714ùAÍ
)¾§:9D3C73DE-EC2C-46BA-90D7-916F2F0EE867Q
¡2
- SubSecTimeOriginal: 383
- SubSecTimeDigitized: 383
- FlashpixVersion: 0100
- PixelXDimension: 600
- PixelYDimension: 800
- SensingMethod: 2
- SceneType:
- ExposureMode: 0
- WhiteBalance: 0
- FocalLengthIn35mmFilm: 26
- SceneCaptureType: 0
- LensSpecification: 807365,524263,6,1,8,5,12,5
- LensMake: Apple
- LensModel: iPhone 12 Pro back triple camera 4.2mm f/1.6
- GPS
- GPSLatitudeRef: N
- GPSLatitude: 28,1,0,1,154,100
- GPSLongitudeRef: W
- GPSLongitude: 82,1,26,1,5875,100
- GPSAltitudeRef: 0
- GPSAltitude: 91475,7533
- GPSSpeedRef: K
- GPSSpeed: 0,1
- GPSImgDirectionRef: T
- GPSImgDirection: 463149,1708
- GPSDestBearingRef: T
- GPSDestBearing: 463149,1708
- GPSHPositioningError: 45166,9531
- Interop
- 1st
- thumbnail: null
Thanks to the debugExif() function, the Exif data in the photos is much easier to read. It now looks like a proper collection of properties and values, which are called tags in Exif.
Based on the information above, we can now answer at least two of our three questions about these photos:
- Were these photos taken on the same device or two different devices?
- Looking at the
MakeandModeltags (you’ll find them in the0thIFD) of both Piexifjs objects, it’s clear that these photos were taken on two different devices: a Motorola One Hyper and an iPhone 12 Pro.
- Looking at the
- Which photo was taken first?
- The
DateTimetag in the0thIFD and theDateTimeOriginaltag in theExifIFD for the first photo both have a value of2021:01:22 15:08:46. This means that it was taken on January 22, 2021 at 3:08:46 p.m.. The same tags for the second photo both have a value of2021:01:22 15:08:59, which indicates that it was taken on the same date, but 13 seconds later, at 3:08:59. Therefore, the first photo in the set was taken first.
- The
- Where were these photos taken?
- For now, let’s make do with the coordinate information provided by the
GPSLatitude,GPSLatitudeRef,GPSLongitude,GPSLongitudeReftags for each photo. We’ll soon find out how to convert these values into more recognizable coordinates.
- For now, let’s make do with the coordinate information provided by the
While it’s useful to be able to read the complete set of Exif data for a given photo, you will often want to be able to answer specific questions by access specific Exif tags. Let’s look at a few questions and how they can be answered.
What Device Took the Photo, and What OS Version Did It Use?
The Make, Model, and Software tags, which are properties of the 0th object, will tell you which device was used to take the photo, and they might tell you which OS version it used. You could access these tags by their actual property names, which are hard-to-memorize numbers, but it’s far easier to the constants provided by Piexifjs.
Here’s code that makes use of these constants to display the makes, models, and OS versions of the devices that took the palm tree photos. Enter the following into the node REPL:
// Show the make, model, and OS versions of the devices that
// took the palm tree photos
for (const [index, exif] of palmExifs.entries()) {
    console.log(`Device information - Image ${index}`);
    console.log("----------------------------");
    console.log(`Make: ${exif['0th'][piexif.ImageIFD.Make]}`);
    console.log(`Model: ${exif['0th'][piexif.ImageIFD.Model]}`);
    console.log(`OS version: ${exif['0th'][piexif.ImageIFD.Software]}\n`);
}
Here’s its output:
Device information - Image 0
----------------------------
Make: motorola
Model: motorola one hyper
OS version: undefined

Device information - Image 1
----------------------------
Make: Apple
Model: iPhone 12 Pro
OS version: 14.3
Note that while the iPhone 12 Pro photo contains data about the OS version, the Motorola One Hyper doesn’t. That’s why its Software tag contains the value undefined.
When using Piexifjs to access the Exif data in smartphone photos, you will probably use the following constants:
| Constants | Description |
|---|---|
piexif.ImageIFD.* | |
piexif.ExifIFD.* | |
piexif.GPSIFD.* |
When Was the Photo Taken?
Let’s use the constants above to access the Exif tags that specify when the photo was taken. Enter the following into node:
// Show the dates and times when the palm tree photos were taken
for (const [index, exif] of palmExifs.entries()) {
    const dateTime = exif['0th'][piexif.ImageIFD.DateTime];
    const dateTimeOriginal = exif['Exif'][piexif.ExifIFD.DateTimeOriginal];
    const subsecTimeOriginal = exif['Exif'][piexif.ExifIFD.SubSecTimeOriginal];

    console.log(`Date/time taken - Image ${index}`);
    console.log("-------------------------");
    console.log(`DateTime: ${dateTime}`);
    console.log(`DateTimeOriginal: ${dateTimeOriginal}.${subsecTimeOriginal}\n`);
}
It will output the following:
Date/time taken - Image 0
-------------------------
DateTime: 2021:01:22 15:08:46
DateTimeOriginal: 2021:01:22 15:08:46.327211

Date/time taken - Image 1
-------------------------
DateTime: 2021:01:22 15:08:59
DateTimeOriginal: 2021:01:22 15:08:59.383
The code above gets its date and time information from these tags:
DateTime, which is in the0thIFD. This is the date and time when the photo file was created.DateTimeOriginalandsubsecTimeOriginal, which are in theExifIFD. According to the Exif specification, these should denote that exact date and time when the camera shutter was actuated (i.e., the precise moment when the photo was taken).
For photos taken with a smartphone, there shouldn’t be any difference between the values in the DateTime and DateTimeOriginal tags. The subsecTimeOriginal tag is an extension of the DateTimeOriginal, providing millisecond-level precision.
Where Was the Photo Taken?
Even the most inexpensive smartphones have GPS sensors that allow them to record their current geographic coordinates with each photo they take. This information is stored in the GPS IFD, the section of Exif data specifically for storing Global Positioning System information related to the photo.
Enter the following code into the node REPL to display the coordinates for our palm tree photos:
// Show the latitudes and longitudes where the palm tree photos were taken
for (const [index, exif] of palmExifs.entries()) {
    const latitude = exif['GPS'][piexif.GPSIFD.GPSLatitude];
    const latitudeRef = exif['GPS'][piexif.GPSIFD.GPSLatitudeRef];
    const longitude = exif['GPS'][piexif.GPSIFD.GPSLongitude];
    const longitudeRef = exif['GPS'][piexif.GPSIFD.GPSLongitudeRef];

    console.log(`Coordinates - Image ${index}`);
    console.log("---------------------");
    console.log(`Latitude: ${latitude} ${latitudeRef}`);
    console.log(`Longitude: ${longitude} ${longitudeRef}\n`);
}
It will output the following:
Coordinates - Image 0
---------------------
Latitude: 28,1,0,1,156,100 N
Longitude: 82,1,26,1,5904,100 W

Coordinates - Image 1
---------------------
Latitude: 28,1,0,1,154,100 N
Longitude: 82,1,26,1,5875,100 W
The code above gets its location information from these tags:
GPSLatitude: Distance from the equator, expressed as an angle.GPSLatitudeRef:Nif the latitude is north of the equator,Sotherwise.GPSLongitude: Distance from the Prime Meridian, expressed as an angle.GPSLongitudeRef:Eif the longitude is east of the Prime Meridian,Wotherwise.
When extracted directly from Piexifjs, the values for the GPSLatitude and GPSLongitude tags are arrays of six numbers. They form the numerators and denominators for three rational values representing a coordinate in terms of degrees, minutes, and seconds:
| Array Indexes | Description |
|---|---|
0, | |
2, | |
4, |
Displaying Photo Locations on a Map
Most people don’t use geographic coordinates when talking about locations. You probably don’t know the latitude and longitude of your home, even when rounded to the nearest degree.
It’s easier to understand coordinates if you point them out on a map. Let’s use the coordinates from the palm tree photos’ Exif data to open a new Google Map for each photo.
Enter the function into the node REPL below. It relies on the open module, which you can install with the command npm install open:
// Given the latitude, latitudeRef, longitude, and longitudeRef values
// from Exif, open a Google Map page for that location
function drawMapForLocation(latitude, latitudeRef, longitude, longitudeRef) {
    const open = require('open');

    // Convert the latitude and longitude into the format that Google Maps expects
    // (decimal coordinates and +/- for north/south and east/west)
    const latitudeMultiplier = latitudeRef == 'N' ? 1 : -1;
    const decimalLatitude = latitudeMultiplier * piexif.GPSHelper.dmsRationalToDeg(latitude);
    const longitudeMultiplier = longitudeRef == 'E' ? 1 : -1;
    const decimalLongitude = longitudeMultiplier * piexif.GPSHelper.dmsRationalToDeg(longitude);

    const url = `https://www.google.com/maps?q=${decimalLatitude},${decimalLongitude}`;
    open(url);

    const latitudeDegrees = piexif.GPSHelper.dmsRationalToDeg(latitude);
    const longitudeDegrees = piexif.GPSHelper.dmsRationalToDeg(longitude);
    console.log("Original coordinates");
    console.log("--------------------");
    console.log(`Latitude: ${latitudeDegrees} ${latitudeRef}`);
    console.log(`Longitude: ${longitudeDegrees} ${longitudeRef}\n`);
}
The code above uses a function provided by Piexifjs: piexif.GPSHelper.dmsRationalToDeg(). It converts an array of 6 numbers representing degrees, minutes, and seconds in rational form into a single number representing decimal degrees. It also uses the latitudeRef and longitudeRef values to change the values for latitudes south of the equator and longitudes west of the Prime Meridian to negative numbers.
Let’s use drawMapForLocation() to show the palm tree photos’ locations on Google Maps. Enter the following into the node REPL:
// Open maps showing where the palm tree photos were taken
for (const [index, exif] of palmExifs.entries()) {
    const latitude = exif['GPS'][piexif.GPSIFD.GPSLatitude];
    const latitudeRef = exif['GPS'][piexif.GPSIFD.GPSLatitudeRef];
    const longitude = exif['GPS'][piexif.GPSIFD.GPSLongitude];
    const longitudeRef = exif['GPS'][piexif.GPSIFD.GPSLongitudeRef];
    drawMapForLocation(latitude, latitudeRef, longitude, longitudeRef);
}
When you run the code above, two new browser tabs will open. Each one will show a Google Map indicating where the corresponding photo was taken.
It will output the following on the console:
Original coordinates
--------------------
Latitude: 28.000433333333334 N
Longitude: 82.44973333333334 W

Original coordinates
--------------------
Latitude: 28.000427777777777 N
Longitude: 82.44965277777779 W
What Was the Altitude Where the Photo Was Taken?
In addition to providing location coordinates, GPS can also be used to determine altitude. Some smartphones are equipped with barometers (which detect air pressure), which they use to increase the accuracy of the altitude measurement.
Consider these two photos, altitude 1.jpg and altitude 2.jpg taken from my last pre-pandemic long-distance trip (you can download them here):

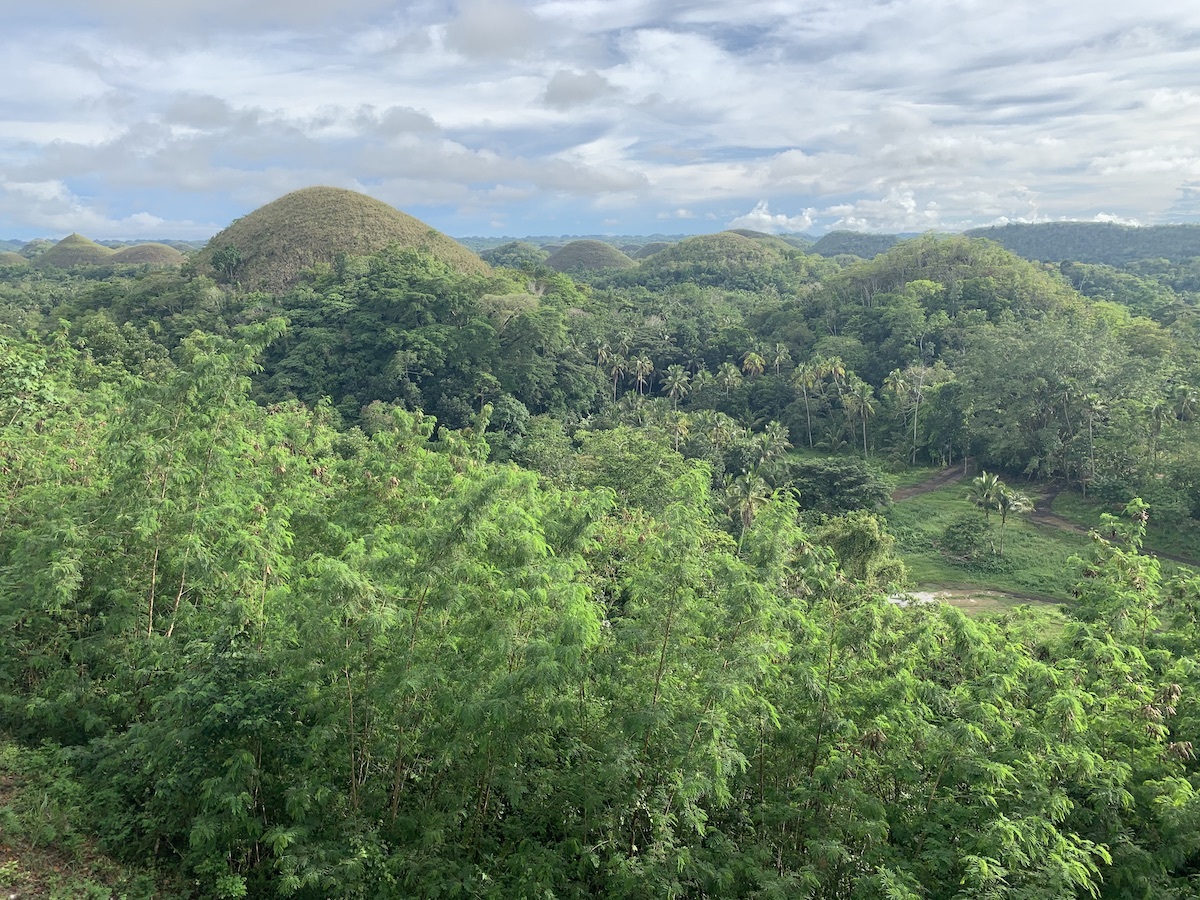
Let’s find out the altitude where they were taken. First, enter the two utility functions below:
// Given a numerator/denominator pair expressed as a 2-element array,
// return it as a single numeric value
function rationalToDecimal(rationalValue) {
    return rationalValue[0] / rationalValue[1];
}

// Given the altitude and altitudeRef values from Exif,
// return a string expressing these values in terms of
// meters above or below sea level
function formatAltitude(altitude, altitudeRef) {
    let altitudeRefText = "(above or below sea level not specified)";
    if (altitudeRef == 0) {
        altitudeRefText = "above sea level";
    } else if (altitudeRef == 1) {
        altitudeRefText = "below sea level";
    }
    return `${altitude} meters ${altitudeRefText}`;
}
Piexifjs reports altitude as a rational number in the form of a two-element array, which isn’t a format that’s easy to understand. We’ll use the rationalToDecimal() function to convert this value into a single number expressed in meters.
The formatAltitude() function formats the values from the GPSAltitude and GPSAltitudeRef tags into an easier-to-read form. The value for the GPSAltitudeRef tag is 0 if the GPSAltitude value represents meters above sea level, and 1 if that value represents meters below sea level.
Using the functions above, we can load the photos’ Exif data and display their altitudes. Enter this code into the node REPL:
// Load the altitude photos
// (Assumes that the photos “altitude 1.jpg” and “altitude 2.jpg”
// are in a directory named “images”)
let altitudeExifs = [];
for (let index = 1; index <= 2; index++) {
    const filename = `./images/altitude ${index}.jpg`;
    altitudeExifs.push(getExifFromJpegFile(filename));
}

// Show the altitudes where the photos were taken
for (const [index, exif] of altitudeExifs.entries()) {
    const altitudeRational = exif['GPS'][piexif.GPSIFD.GPSAltitude];
    const altitudeDecimal = rationalToDecimal(altitudeRational);
    const altitudeRef = exif['GPS'][piexif.GPSIFD.GPSAltitudeRef];

    console.log(`Altitude - Image ${index}`);
    console.log("------------------");
    console.log(`${formatAltitude(altitudeDecimal, altitudeRef)}\n`);
}
The code should produce this output:
Altitude - Image 0
------------------
14.025835763206075 meters above sea level

Altitude - Image 1
------------------
359.13079847908745 meters above sea level
Which Direction Was the Camera Facing?
A key sensor in smartphones is the magnetometer, which senses magnetic fields, including the giant one generated by the Earth. Its primary purpose is to be the phone’s compass and determine the direction in which the phone is pointing. Some devices, notably iPhones, write this data into Exif every time you take a picture.
Let’s determine which direction I was facing when I took each of these photos, named lake 1.jpg through lake 4.jpg (which you can download here):
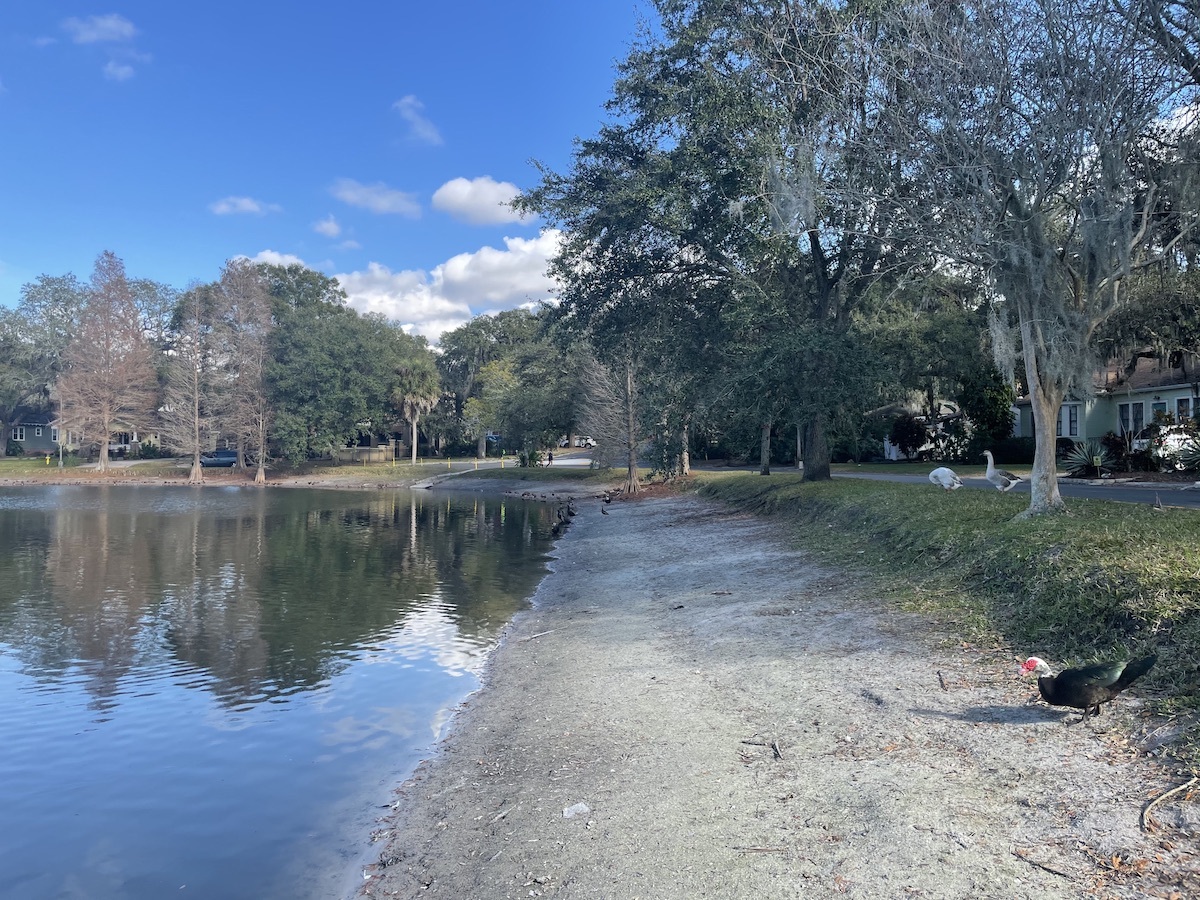
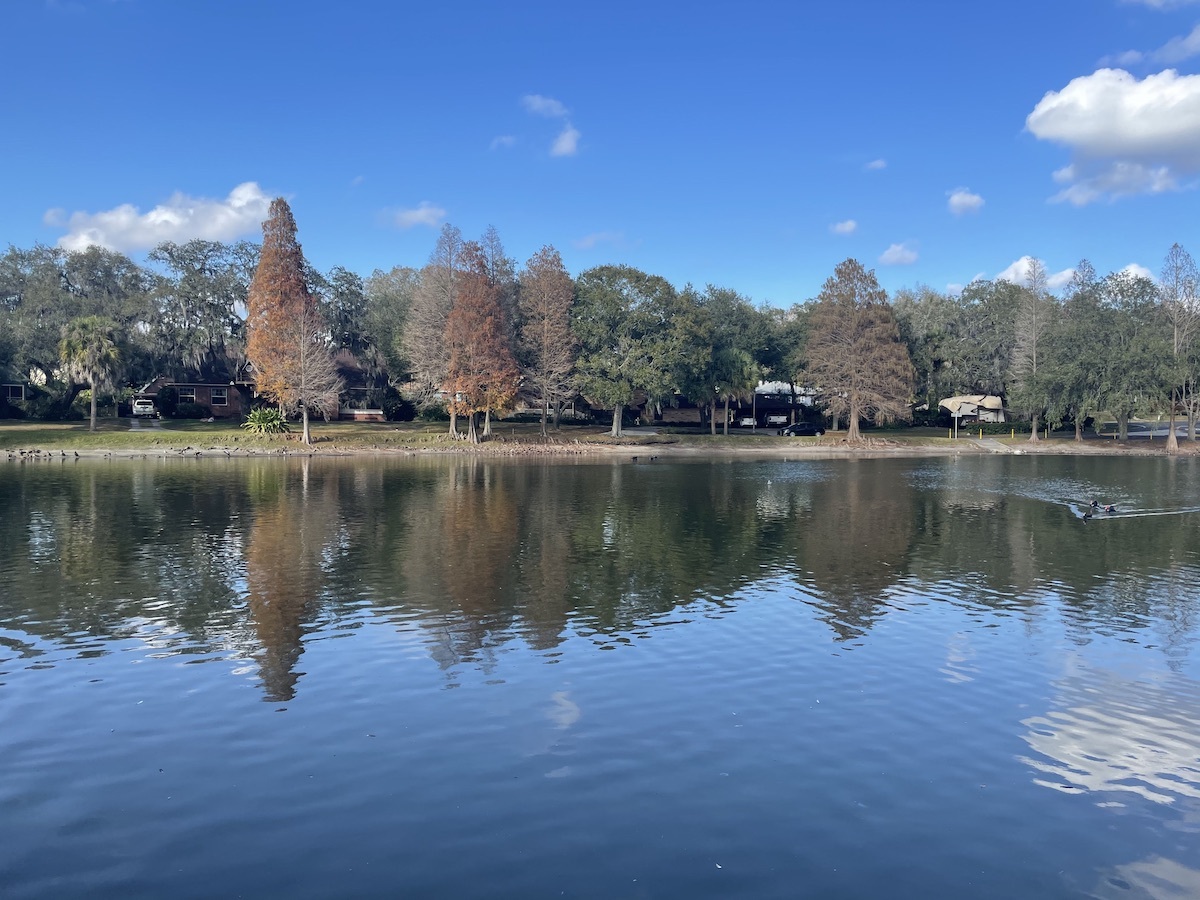
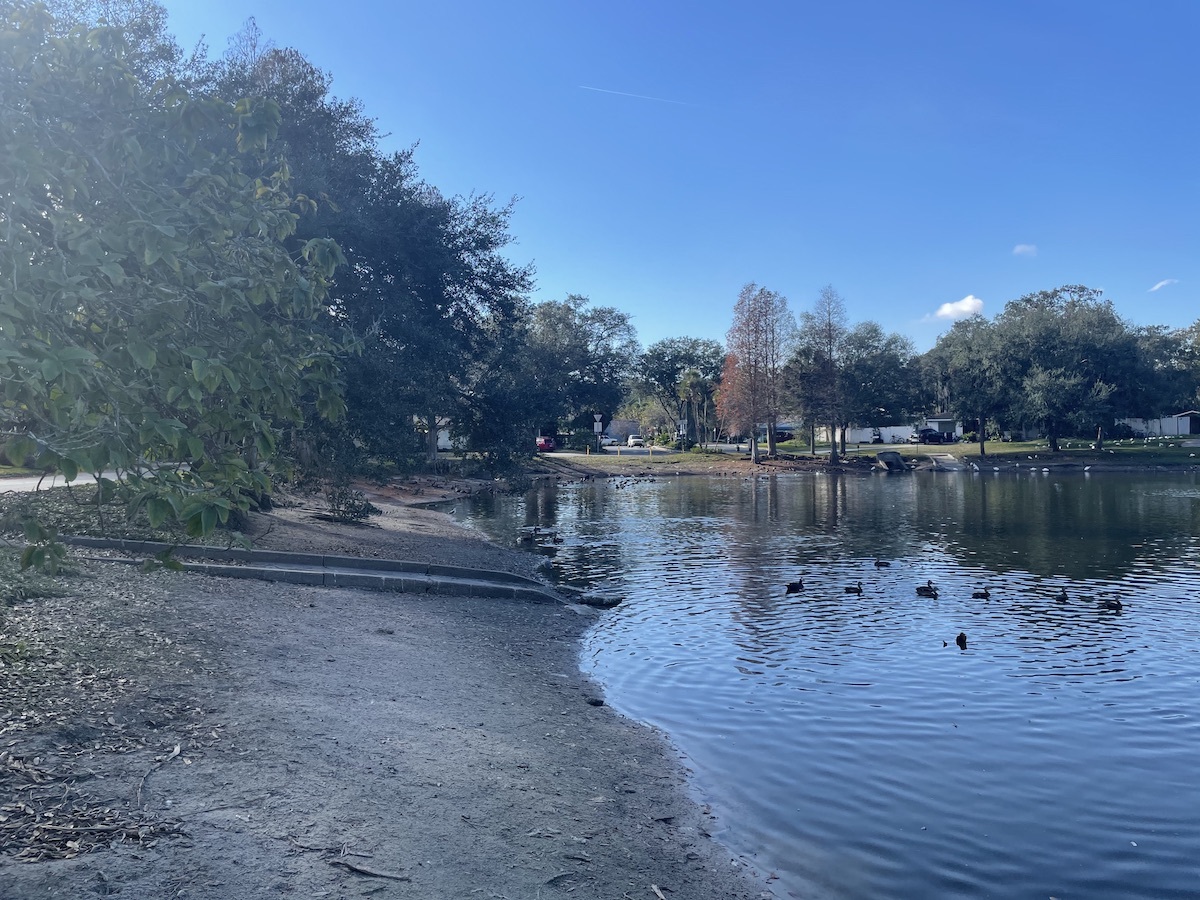
We’ll use the following Exif tags to determine the direction in which the camera was pointed:
GPSImgDirection: The compass heading (that is, direction) that the camera was facing when the picture was taken, expressed as a six-element array of degrees, minutes, and seconds in rational form.GPSImgDirectionRef: The reference point forGPSImgDirection. This can be eitherT, which means that 0° refers to true or geographic north, orM, which means that 0° refers to magnetic north. Most of the time, true north is used.
Let’s define a couple of utility functions. Enter the following into the node REPL:
// Convert a numeric compass heading to the nearest
// cardinal, ordinal, or secondary intercardinal direction
function degreesToDirection(degrees) {
    const COMPASS_DIRECTIONS = [
        "N",
        "NNE",
        "NE",
        "ENE",
        "E",
        "ESE",
        "SE",
        "SSE",
        "S",
        "SSW",
        "SW",
        "WSW",
        "W",
        "WNW",
        "NW",
        "NNW"
    ];

    const compassDirectionsCount = COMPASS_DIRECTIONS.length;
    const compassDirectionArc = 360 / compassDirectionsCount;
    return COMPASS_DIRECTIONS[Math.round(degrees / compassDirectionArc) % compassDirectionsCount];
}

// Given the directionRef value from Exif,
// return a string expressing if the direction is relative
// to true north or magnetic north
function formatDirectionRef(directionRef) {
    let directionRefText = "(true or magnetic north not specified)";
    if (directionRef == 'T') {
        directionRefText = "true north";
    } else if (directionRef == 'M') {
        directionRefText = "magnetic north";
    }
    return directionRefText;
}
Most people are more comfortable with using these directions rather than numeric compass headings:
- The cardinal directions: N, E, S, W
- The ordinal directions: NE, SE, SW, NW
- The secondary intercardinal directions: NNE, ENE, ESE, SSE, SSW, WSW, WNW, NNW
The degreesToDirection() function converts a numeric compass heading (a number representing the heading in degrees) to the closest cardinal, ordinal, or secondary intercardinal direction.
The formatDirectionRef() function converts the value of the GPSImgDirectionRef tag into a form that’s easier to understand.
Using the functions above, we can load the photos’ Exif data and display the directions that the camera was facing. Enter the following code into the node REPL:
// Load lake photos
// (Assumes that the photos “lake 1.jpg”, “lake 2.jpg”,
// “lake 3.jpg”, and “lake 4.jpg” are in a directory
// named “images”)
let lakeExifs = [];
for (let index = 1; index <= 4; index++) {
    const filename = `./images/lake ${index}.jpg`;
    lakeExifs.push(getExifFromJpegFile(filename));
}

// Show the directions the camera was facing
// when the photos were taken
for (const [index, exif] of lakeExifs.entries()) {
    const directionRational = exif['GPS'][piexif.GPSIFD.GPSImgDirection];
    const directionDecimal = directionRational[0] / directionRational[1];
    const directionRef = exif['GPS'][piexif.GPSIFD.GPSImgDirectionRef];

    console.log(`Image direction - Image ${index}`);
    console.log("-------------------------");
    console.log(`Image direction: ${degreesToDirection(directionDecimal)} (${directionDecimal}°)`);
    console.log(`Image direction ref: ${formatDirectionRef(directionRef)}\n`);
}
Running the code above produces this output:
Image direction - Image 0
-------------------------
Image direction: ENE (78.416259765625°)
Image direction ref: true north

Image direction - Image 1
-------------------------
Image direction: N (1.174224853515625°)
Image direction ref: true north

Image direction - Image 2
-------------------------
Image direction: S (178.46739196870607°)
Image direction ref: true north

Image direction - Image 3
-------------------------
Image direction: W (273.8248136315229°)
Image direction ref: true north
Was the Photographer Moving?
Smartphones use a combination of GPS locations over time and the accelerometer to determine the phone’s speed and the direction in which it’s moving. Some devices, notably iPhones, provide this information as part of the Exif metadata in photos.
Devices that add speed metadata to their photos put them in the following Exif tags:
GPSSpeed: The speed reported by the camera, expressed as a number.GPSSpeedRef: The speed units used for the value ingps_speed. This value can beKfor kilometers per hour,Mfor miles per hour, orNfor nautical miles per hour, or “knots”.
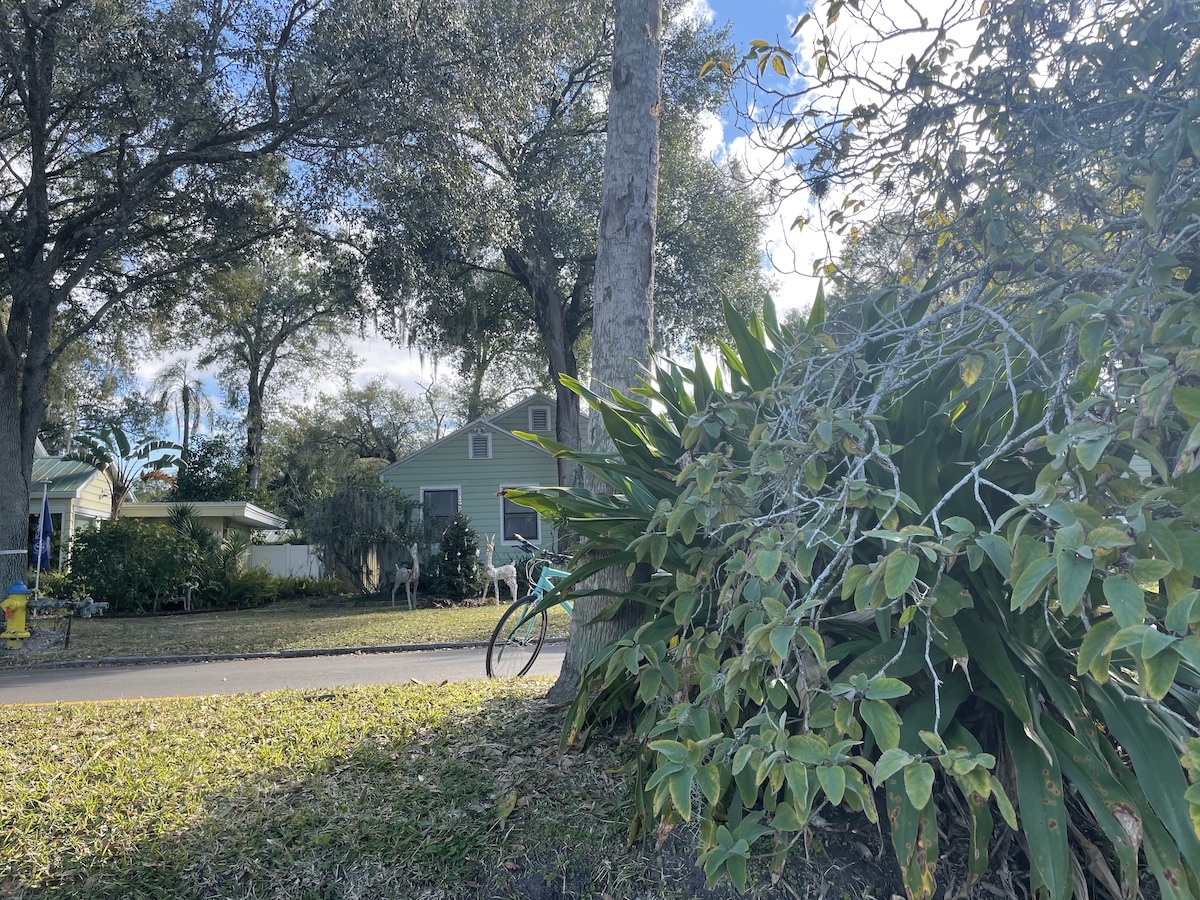
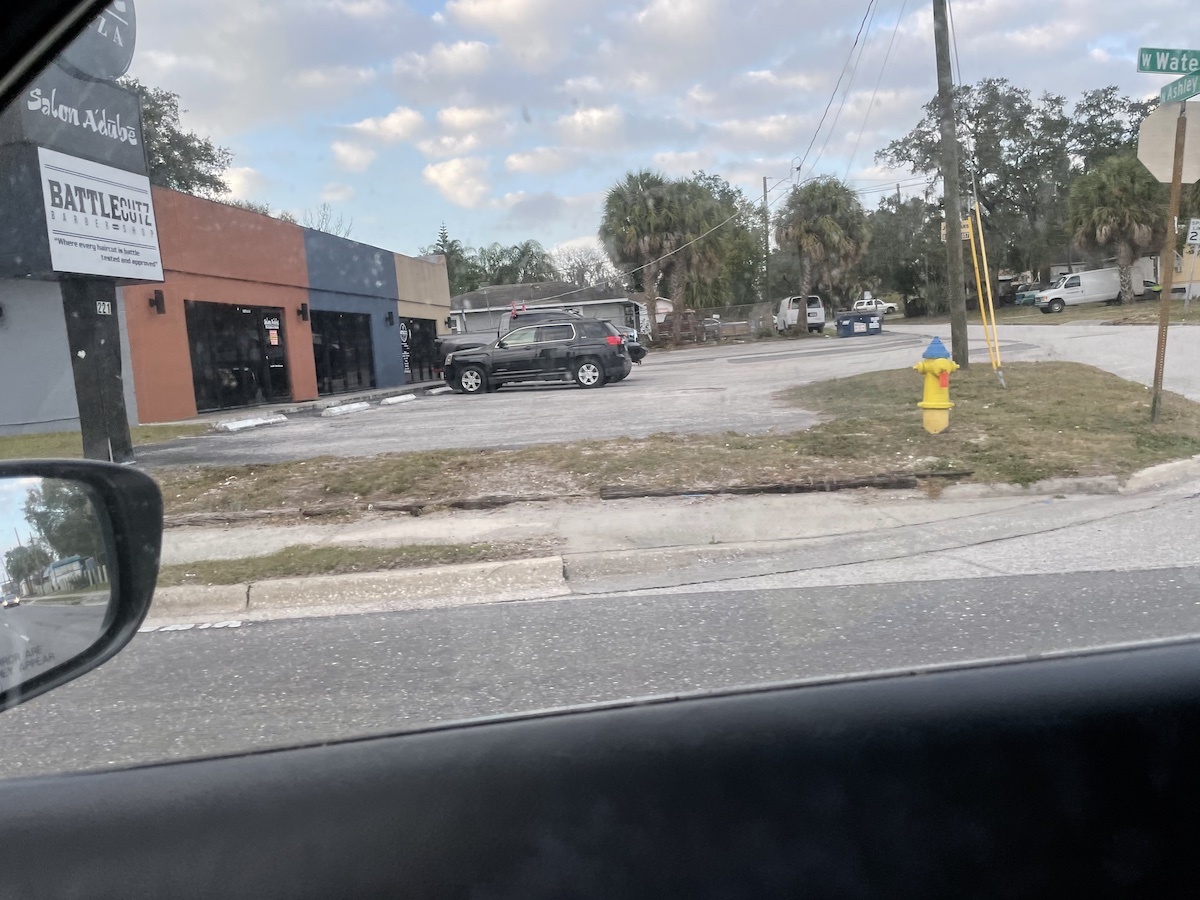
Consider the following photos, named speed 1.jpg through speed 3.jpg (you can download them here). This one was taken while standing still:

This photo was taken from the passenger seat of a car that was coming to a stop at a traffic light:
And finally, this photo was taken while riding on my bike:
Here’s code that prints out the recorded speed at the time each photo was taken. It includes a utlility function, formatSpeedRef(), which specifies the units of the reported speed. Enter the following code into the node REPL:
// Given the speedRef value from Exif,
// return a string expressing if the spped is expressed
// in kilometers per hour, miles per hour, or knots
function formatSpeedRef(speedRef) {
    let speedRefText = "(speed units not specified)";

    if (speedRef == 'K') {
        speedRefText = "km/h";
    } else if (speedRef == 'M') {
        speedRefText = "mph";
    } else if (speedRef == 'N') {
        speedRefText = "knots";
    }

    return speedRefText;
}

// Load speed photos
// (Assumes that the photos “speed 1.jpg”, “speed 2.jpg”,
// and “speed 3.jpg” are in a directory
// named “images”)
let speedExifs = [];
for (let index = 1; index <= 3; index++) {
    const filename = `./images/speed ${index}.jpg`;
    speedExifs.push(getExifFromJpegFile(filename));
}

for (const [index, exif] of speedExifs.entries()) {
    const speedRational = exif['GPS'][piexif.GPSIFD.GPSSpeed];
    const speedDecimal = rationalToDecimal(speedRational);
    const speedRef = exif['GPS'][piexif.GPSIFD.GPSSpeedRef];

    console.log(`Speed - Image ${index}`);
    console.log("---------------");
    console.log(`Speed: ${speedDecimal} ${formatSpeedRef(speedRef)}\n`);
}
Here’s its output:
Speed - Image 0
---------------
Speed: 0 km/h

Speed - Image 1
---------------
Speed: 20.19736291335287 km/h

Speed - Image 2
---------------
Speed: 5.520932607215793 km/h
Updating a Photo’s Coordinates
So far, we’ve limited ourselves to simply reading the Exif metadata from photos. Let’s take the next step: making changes to that data and then saving the results as a new photo file.
Let’s start with this photo, hotel original.jpg (download it here):

By now, you should know how to read its coordinates from Exif, use those coordinates to open a Google Map to show the location they represent and print those coordinates to the console.
Here’s the code that will do just that. It makes use of the drawMapForLocation() utility function that we defined earlier. Enter the following into the node REPL:
// Load hotel photo
// (Assumes that the photo “hotel original.jpg”
// is in a directory named “images”)
const hotelExif = getExifFromJpegFile('./images/hotel original.jpg');

// Show the hotel’s location on a map
const latitudeDMS = hotelExif['GPS'][piexif.GPSIFD.GPSLatitude];
const latitudeRef = hotelExif['GPS'][piexif.GPSIFD.GPSLatitudeRef];
const longitudeDMS = hotelExif['GPS'][piexif.GPSIFD.GPSLongitude];
const longitudeRef = hotelExif['GPS'][piexif.GPSIFD.GPSLongitudeRef];
drawMapForLocation(latitudeDMS, latitudeRef, longitudeDMS, longitudeRef);
When you run the code, you should see this on the console:
Original coordinates
--------------------
Latitude: 28.366233333333334 N
Longitude: 81.559525 W
You should also see a new browser tab showing a Google Map that displays the Swan and Dolphin hotels, which are a short walk away from Walt Disney World in Florida.
Let’s make things a little more interesting by changing the coordinates embedded in the photo’s Exif data so that it reports that it was taken at Area 51. In case you haven’t heard of this place, it’s a military installation in Nevada, where conspiracy theorists believe that the U.S. government stores the bodies of aliens and a spaceship that were captured in the 1950s. Its coordinates are 37.0° 14' 3.6" N, 115° 48' 23.99" W.
We’ll “edit” the photo’s location data by following these steps:
- Create a copy of the photo’s image data and Exif data.
- Change the location information in the Exif data copy.
- Write the image data copy and the Exif data copy to a new file.
Here’s the code for the first step — enter it into the node REPL:
// Copy the original photo’s picture and Exif data
const newImageData = getBase64DataFromJpegFile('./images/hotel original.jpg');
const newExif = {
    '0th': { ...hotelExif['0th'] },
    'Exif': { ...hotelExif['Exif'] },
    'GPS': { ...hotelExif['GPS'] },
    'Interop': { ...hotelExif['Interop'] },
    '1st': { ...hotelExif['1st'] },
    'thumbnail': null
};
The code above reads the picture data from the original file, and then uses the “spread operator” to copy the properties of the original Exif object.
Once we have a duplicate Exif object, we can make the changes to its location-related tags. This happens in the code below, which you should enter into the node REPL:
// Change the latitude to Area 51’s: 37° 14' 3.6" N
const newLatitudeDecimal = 37.0 + (14 / 60) + (3.6 / 3600);
newExif['GPS'][piexif.GPSIFD.GPSLatitude] = piexif.GPSHelper.degToDmsRational(newLatitudeDecimal);
newExif['GPS'][piexif.GPSIFD.GPSLatitudeRef] = 'N';

// Change the longitude to Area 51’s: 115° 48' 23.99" W
const newLongitudeDecimal = 115.0 + (48.0 / 60) + (23.99 / 3600);
newExif['GPS'][piexif.GPSIFD.GPSLongitude] = piexif.GPSHelper.degToDmsRational(newLongitudeDecimal);
newExif['GPS'][piexif.GPSIFD.GPSLongitudeRef] = 'W';
With the Exif object edited, we’ll convert it to binary form, embed it into the image data, then write that data to a new file. The following code, which you should enter into the node REPL, does this:
// Convert the new Exif object into binary form
const newExifBinary = piexif.dump(newExif);

// Embed the Exif data into the image data
const newPhotoData = piexif.insert(newExifBinary, newImageData);

// Save the new photo to a file
let fileBuffer = Buffer.from(newPhotoData, 'binary');
fs.writeFileSync('./images/hotel revised.jpg', fileBuffer);
Let’s see if it worked. Load the photo and use our drawMapForLocation() function to see if its Exif data says that it was taken at Area 51. Enter this code into the node REPL:
// Let’s load the file and see its Exif coordinates specify Area 51
const revisedExif = getExifFromJpegFile('./images/hotel revised.jpg');
const revisedLatitude = revisedExif['GPS'][piexif.GPSIFD.GPSLatitude];
const revisedLatitudeRef = revisedExif['GPS'][piexif.GPSIFD.GPSLatitudeRef];
const revisedLongitude = revisedExif['GPS'][piexif.GPSIFD.GPSLongitude];
const revisedLongitudeRef = revisedExif['GPS'][piexif.GPSIFD.GPSLongitudeRef];
drawMapForLocation(revisedLatitude, revisedLatitudeRef, revisedLongitude, revisedLongitudeRef);
Running the code should cause a new browser window with a map of Area 51 to appear, and the console should display a latitude of about 37.2° N and a longitude of about 115.8° W.
Deleting the Exif Data and Saving the “Scrubbed” Photo
Suppose that instead of altering the hotel photo’s location data, we want to delete its tags instead. Social media sites — well, the responsible ones, anyway — do this when you upload your photos to them.
This is what Piexifjs’ remove() method is for. It takes JPEG photo data in Base64 format as its sole parameter and returns it in the same format — but without the Exif data.
Enter the code below into the node REPL. It will create a copy of the hotel photo file, scrubbed of any Exif data:
// Create a “scrubbed” copy of the original hotel photo and save it
const hotelImageData = getBase64DataFromJpegFile('./images/hotel original.jpg');
const scrubbedHotelImageData = piexif.remove(hotelImageData);
fileBuffer = Buffer.from(scrubbedHotelImageData, 'binary');
fs.writeFileSync('./images/hotel scrubbed.jpg', fileBuffer);
Confirm that it worked by entering the following code into the node REPL:
// Let’s load the file and see its Exif data has been scrubbed
debugExif(getExifFromJpegFile('./images/hotel scrubbed.jpg'));
The code’s output confirms that the scrubbed photo contains absolutely no Exif data:
- 0th
- Exif
- GPS
- Interop
- 1st
- thumbnail: null
Practical and Technical Considerations
Reasons to Remove Exif Metadata
Exif metadata adds a whole new level of information to digital photographs, and a number of things that users, developers, and organizations must consider.
Privacy is an obvious consideration. A single photo’s GPS metadata can give away your location at a specific date and time. What’s far more valuable is the aggregate GPS from someone’s camera roll, as it contains patterns that can be analyzed to determine where they live, work, and the places they frequent on their daily routine.
This is why the more reputable social networking services strip this information when you share your photos online. Remember that this only means that your photos on your social network gallery don’t contain GPS data. There’s no guarantee that the service didn’t record the location information for advertiser data mining purposes before removing it.
Other sets of Exif metadata, such as the combination of make, model, settings, and even preferred camera orientation, can be used to associate a set of photos with a specific person.
Some photographers are more concerned about the secrets of their craft than privacy when it comes to their photos’ metadata. They don’t want to give away the camera settings they used in taking pictures.
Reasons to Retain or Add Exif Metadata
One of the original reasons why the Exif metadata format was developed was to make it easier to automate the process of cataloging, sorting, and searching through a collection of digital photographs. Exif makes it possible to search for photos taken during a certain time period, with a certain device, or at a certain location. Other tags, such as the Copyright tag, make it possible to search for photos taken by a specific photographer, as well as assert one’s copyright.
While you should generally remove Exif data from personal photos before posting them online, you’ll probably want to keep copies of the originals with the Exif data intact. You may not want the world at large to know the details behind your photos, but you might!
Although the ImageDescription tag was intended to store a description of the image, you can also use it to store other helpful text information related to the photo, such as tags to classify the image or instructions for processing and editing the photo.
If you’re posting photos online as a public record (perhaps you’re a journalist or want to document a place or event), you may want to leave its Exif metadata intact. This is a judgment call that you’ll have to make.
Exif metadata is particularly useful in mobile applications that record simultaneous combinations of visual, date/time, and location information. For example, a technician might be required to take “before” and “after” photos of repair work that they did, providing a record of where, when, and how the work was done.
Other Things to Consider
As we saw in the different tags recorded by the iPhone and Android devices used to take the photographs in this article, different cameras record different sets of Exif tags. Photo editing software often writes information to different tags or adds their own custom tags. This additional metadata can often be a hint that a photo has been edited.
There’s a concept in wildlife photography called Ethical Exif, which provides a description of the ethical standards followed when taking a photo. It includes information such as the health and stress level of the animal in the photo, how long the animal was in captivity, and if the animal was transported from its habitat for the picture.
Finally, there are the messages that camera-using mobile apps display when first used. They usually say something along the lines of “This app makes use of the camera. Is that all right with you?”, but most of them don’t make it clear that the camera adds location and other metadata to each photo it takes. If you write mobile apps that use the camera, you might want to inform the user of this.
Aside: Auth0 Authentication with JavaScript
At Auth0, we make heavy use of full-stack JavaScript to help our customers to manage user identities, including password resets, creating, provisioning, blocking, and deleting users. Therefore, it must come as no surprise that using our identity management platform on JavaScript web apps is a piece of cake.
Auth0 offers a free tier to get started with modern authentication. Check it out, or sign up for a free Auth0 account here!
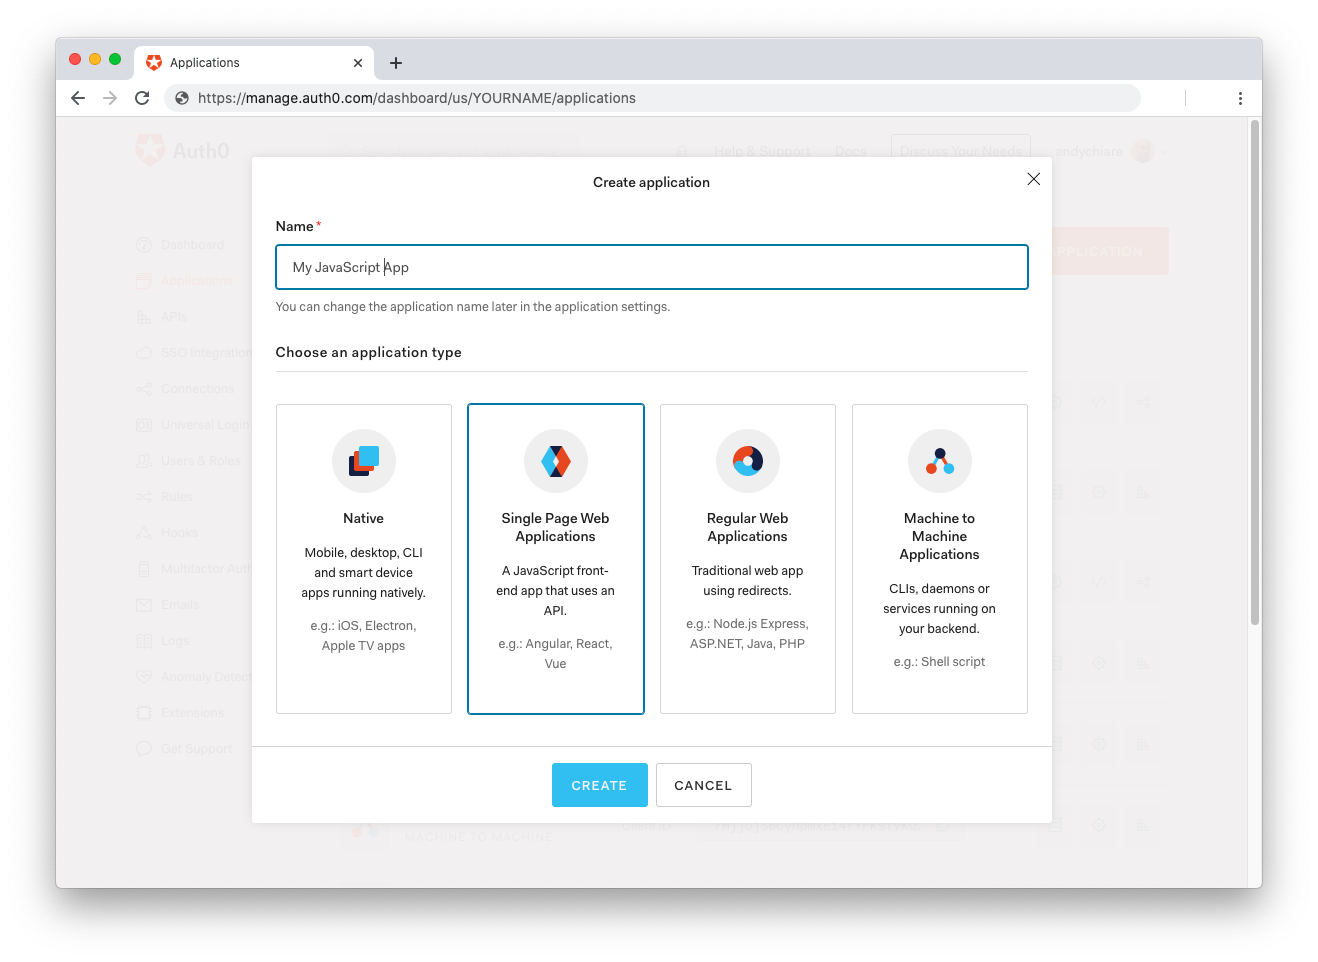
Then, go to the Applications section of the Auth0 Dashboard and click on "Create Application". On the dialog shown, set the name of your application and select Single Page Web Applications as the application type:
After the application has been created, click on "Settings" and take note of the domain and client id assigned to your application. In addition, set the Allowed Callback URLs and Allowed Logout URLs fields to the URL of the page that will handle login and logout responses from Auth0. In the current example, the URL of the page that will contain the code you are going to write (e.g. http://localhost:8080).
Now, in your JavaScript project, install the auth0-spa-js library like so:
npm install @auth0/auth0-spa-js
Then, implement the following in your JavaScript app:
import createAuth0Client from '@auth0/auth0-spa-js';

let auth0Client;

async function createClient() {
  return await createAuth0Client({
    domain: 'YOUR_DOMAIN',
    client_id: 'YOUR_CLIENT_ID',
  });
}

async function login() {
  await auth0Client.loginWithRedirect();
}

function logout() {
  auth0Client.logout();
}

async function handleRedirectCallback() {
  const isAuthenticated = await auth0Client.isAuthenticated();

  if (!isAuthenticated) {
    const query = window.location.search;
    if (query.includes('code=') && query.includes('state=')) {
      await auth0Client.handleRedirectCallback();
      window.history.replaceState({}, document.title, '/');
    }
  }

  await updateUI();
}

async function updateUI() {
  const isAuthenticated = await auth0Client.isAuthenticated();

  const btnLogin = document.getElementById('btn-login');
  const btnLogout = document.getElementById('btn-logout');

  btnLogin.addEventListener('click', login);
  btnLogout.addEventListener('click', logout);

  btnLogin.style.display = isAuthenticated ? 'none' : 'block';
  btnLogout.style.display = isAuthenticated ? 'block' : 'none';

  if (isAuthenticated) {
    const username = document.getElementById('username');
    const user = await auth0Client.getUser();

    username.innerText = user.name;
  }
}

window.addEventListener('load', async () => {
  auth0Client = await createClient();

  await handleRedirectCallback();
});
Replace the
YOUR_DOMAINandYOUR_CLIENT_IDplaceholders with the actual values for the domain and client id you found in your Auth0 Dashboard.
Then, create your UI with the following markup:
<p>Welcome <span id="username"></span></p>
<button type="submit" id="btn-login">Sign In</button>
<button type="submit" id="btn-logout" style="display:none;">Sign Out</button>
Your application is ready to authenticate with Auth0!
Check out the Auth0 SPA SDK documentation to learn more about authentication and authorization with JavaScript and Auth0.
About the author

Joey deVilla
Senior Developer Advocate (Auth0 Alumni)