
As the development of AI applications moves forward, there are new attack threats. In RAG applications, vector and embedding vulnerabilities are at the top of security risks. Securing every stage, from generating and storing to retrieving vectors and embeddings, is crucial. In this blog post, we’ll focus on securing a Ruby on Rails RAG application with Auth0 and mitigating the risk of data leakage by ensuring only the right information is retrieved for the right user using fine grained authorization with Auth0 FGA.
Understanding the RAG Application
Before we dive into the authentication and authorization, let's take a look at the code sample. The app is a Work Companion chat that uses internal documentation for the employees of a made-up company. Users have access to different documents depending on their permissions, and the app can only use those documents to answer questions they might have.
Think about a standard company knowledge base. You’ve got sensitive docs from HR, Engineering, and Legal all living in the same vector database.
In a risky RAG setup, if an Engineer asks about "salary bands," the vector search might accidentally grab a snippet from a private HR file and feed it right to the LLM. Not great for privacy.
What we want to achieve is what the diagram below shows, we want to make the retrieval step identity-aware. Before we even touch the vector database, the user must authenticate with Auth0, otherwise the app won’t even load for them. Once they are authenticated, the app asks Auth0 FGA: "Which documents is this specific user allowed to see?" We then use those allowed IDs as a filter for our search.
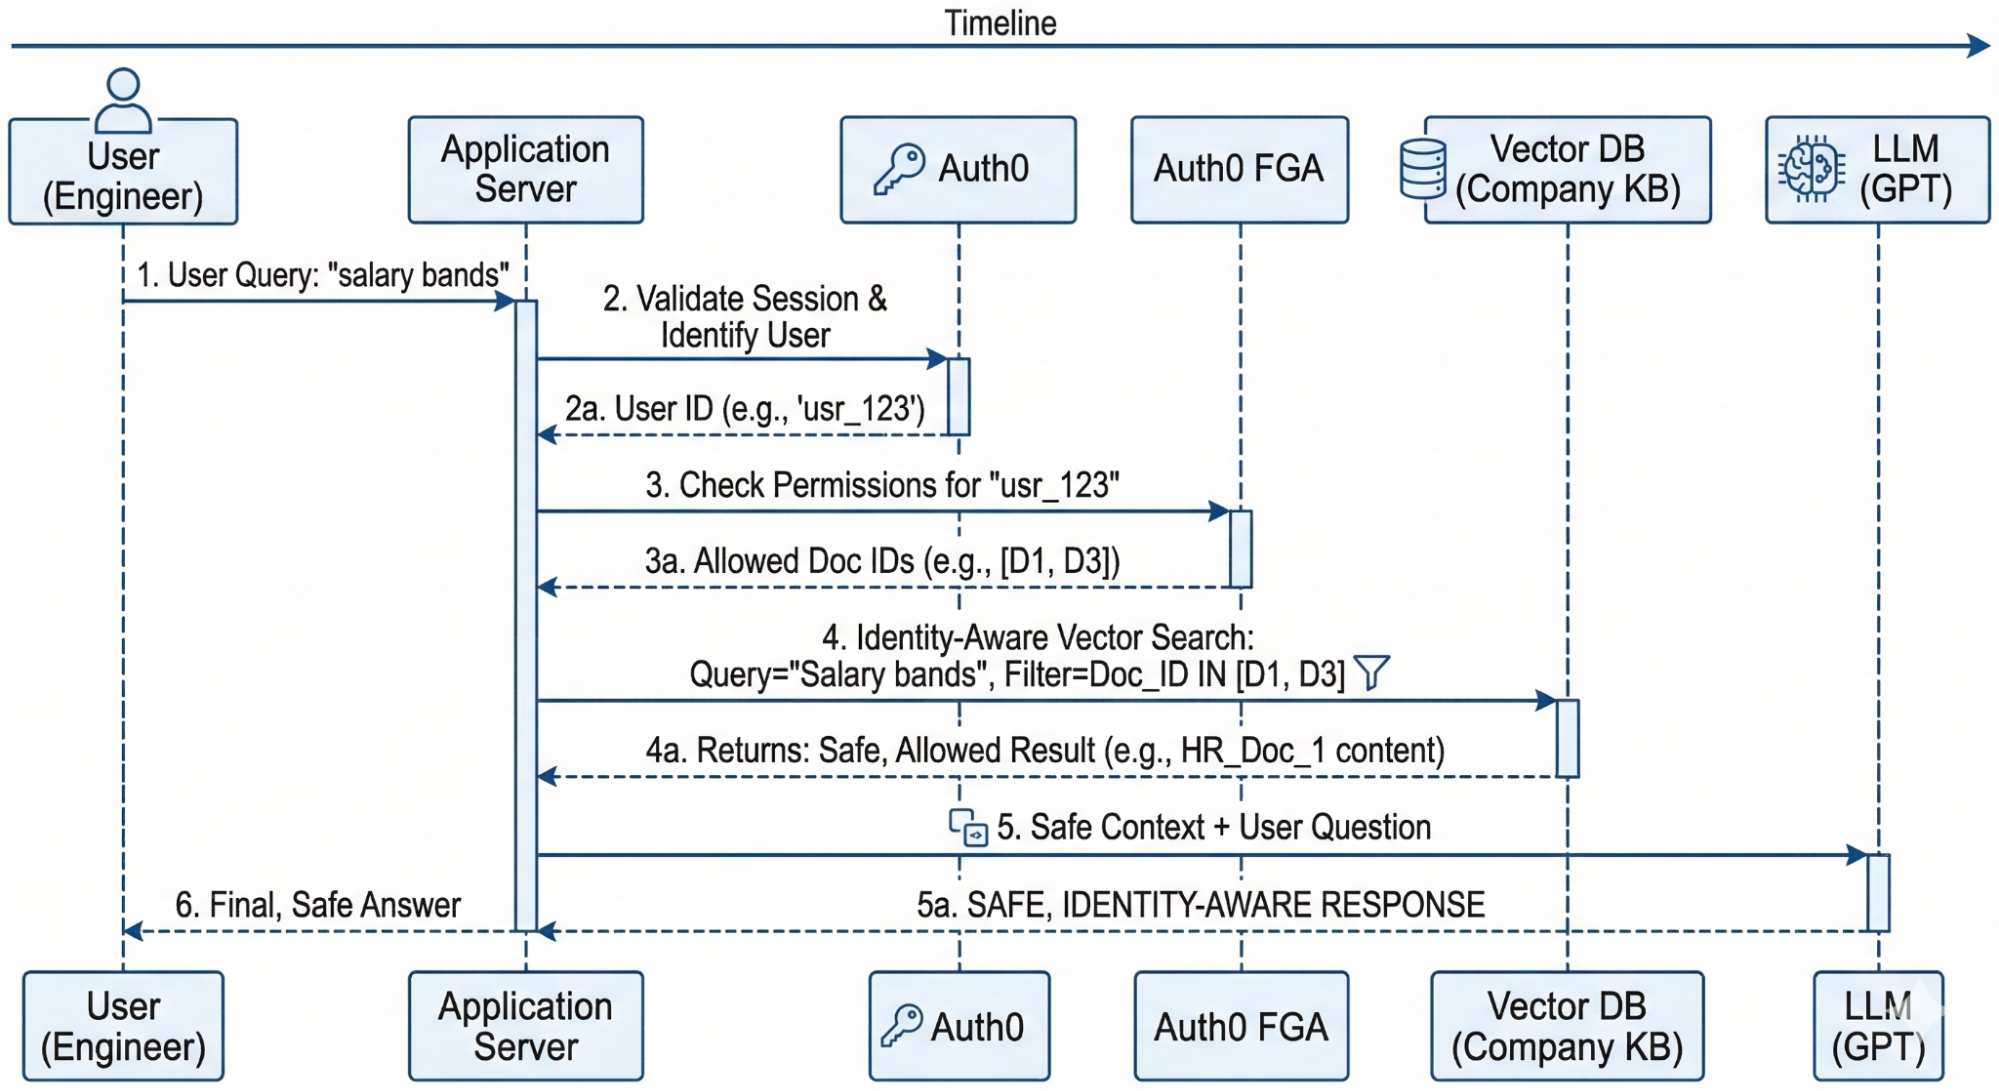
Diagram explaining the Work Companion app flow using Auth0 and Auth0 FGA for authentication and authorization.
What is RAG in this context?
If you're new to the term, Retrieval-Augmented Generation( RAG) is basically a way to give an LLM "specialized knowledge" without retraining it by adding more context. In our Work Companion:
- Retrieval: When a user asks a question, the app searches on a vector database to find the most relevant "chunks" of text from our internal docs.
- Augmentation: We take those text chunks and "augment" the user's original question by adding them as extra context.
- Generation: We send that combined package to the LLM, which generates a precise answer based only on the provided context.
The Anatomy of the Work Companion Chat App
For this code sample you’ll need the following tools:
Pre-requisites
- Ruby 4.0.1
- PostgreSQL 17 with pgvector extension
- An OpenAI API key
The app is built to keep data ingestion, retrieval, and authorization separate and clean. Here’s the breakdown:
- The Database: We have a simple schema with
users,documents, anddocument_chunks. Users are stored in the database to showcase how to handle this in a Ruby on Rails application. Thedocument_chunkstable is the star of the show, it stores thevector[1536]embeddings and uses an HNSW index to make sure our searches are fast. - The Services: We use a
RagQueryServiceto coordinate the RAG flow and anFgaServiceto talk to the Auth0 FGA API. - The Gems:
neighbor: Our go-to for handlingpgvectorinside Rails’ ActiveRecord.ruby-openai: To connect with OpenAI and turn user questions into embeddings.openfga: The Ruby SDK for OpenFGA that connects to Auth0 FGA via client credentials exchange.
Now that you know how the application works, let’s download and install it.
Running the code sample
The first thing you need to do is clone and install dependencies
git clone https://github.com/auth0-blog/ruby-rag-fga
cd ruby-rag-fga
bundle install
Then you’ll need to set up PostgreSQL with pgvector and create the database and seed it with data. I recommend you follow the steps from the repo’s README. You can run the server with rails s and navigate to http://localhost:3000 to see the chat view.
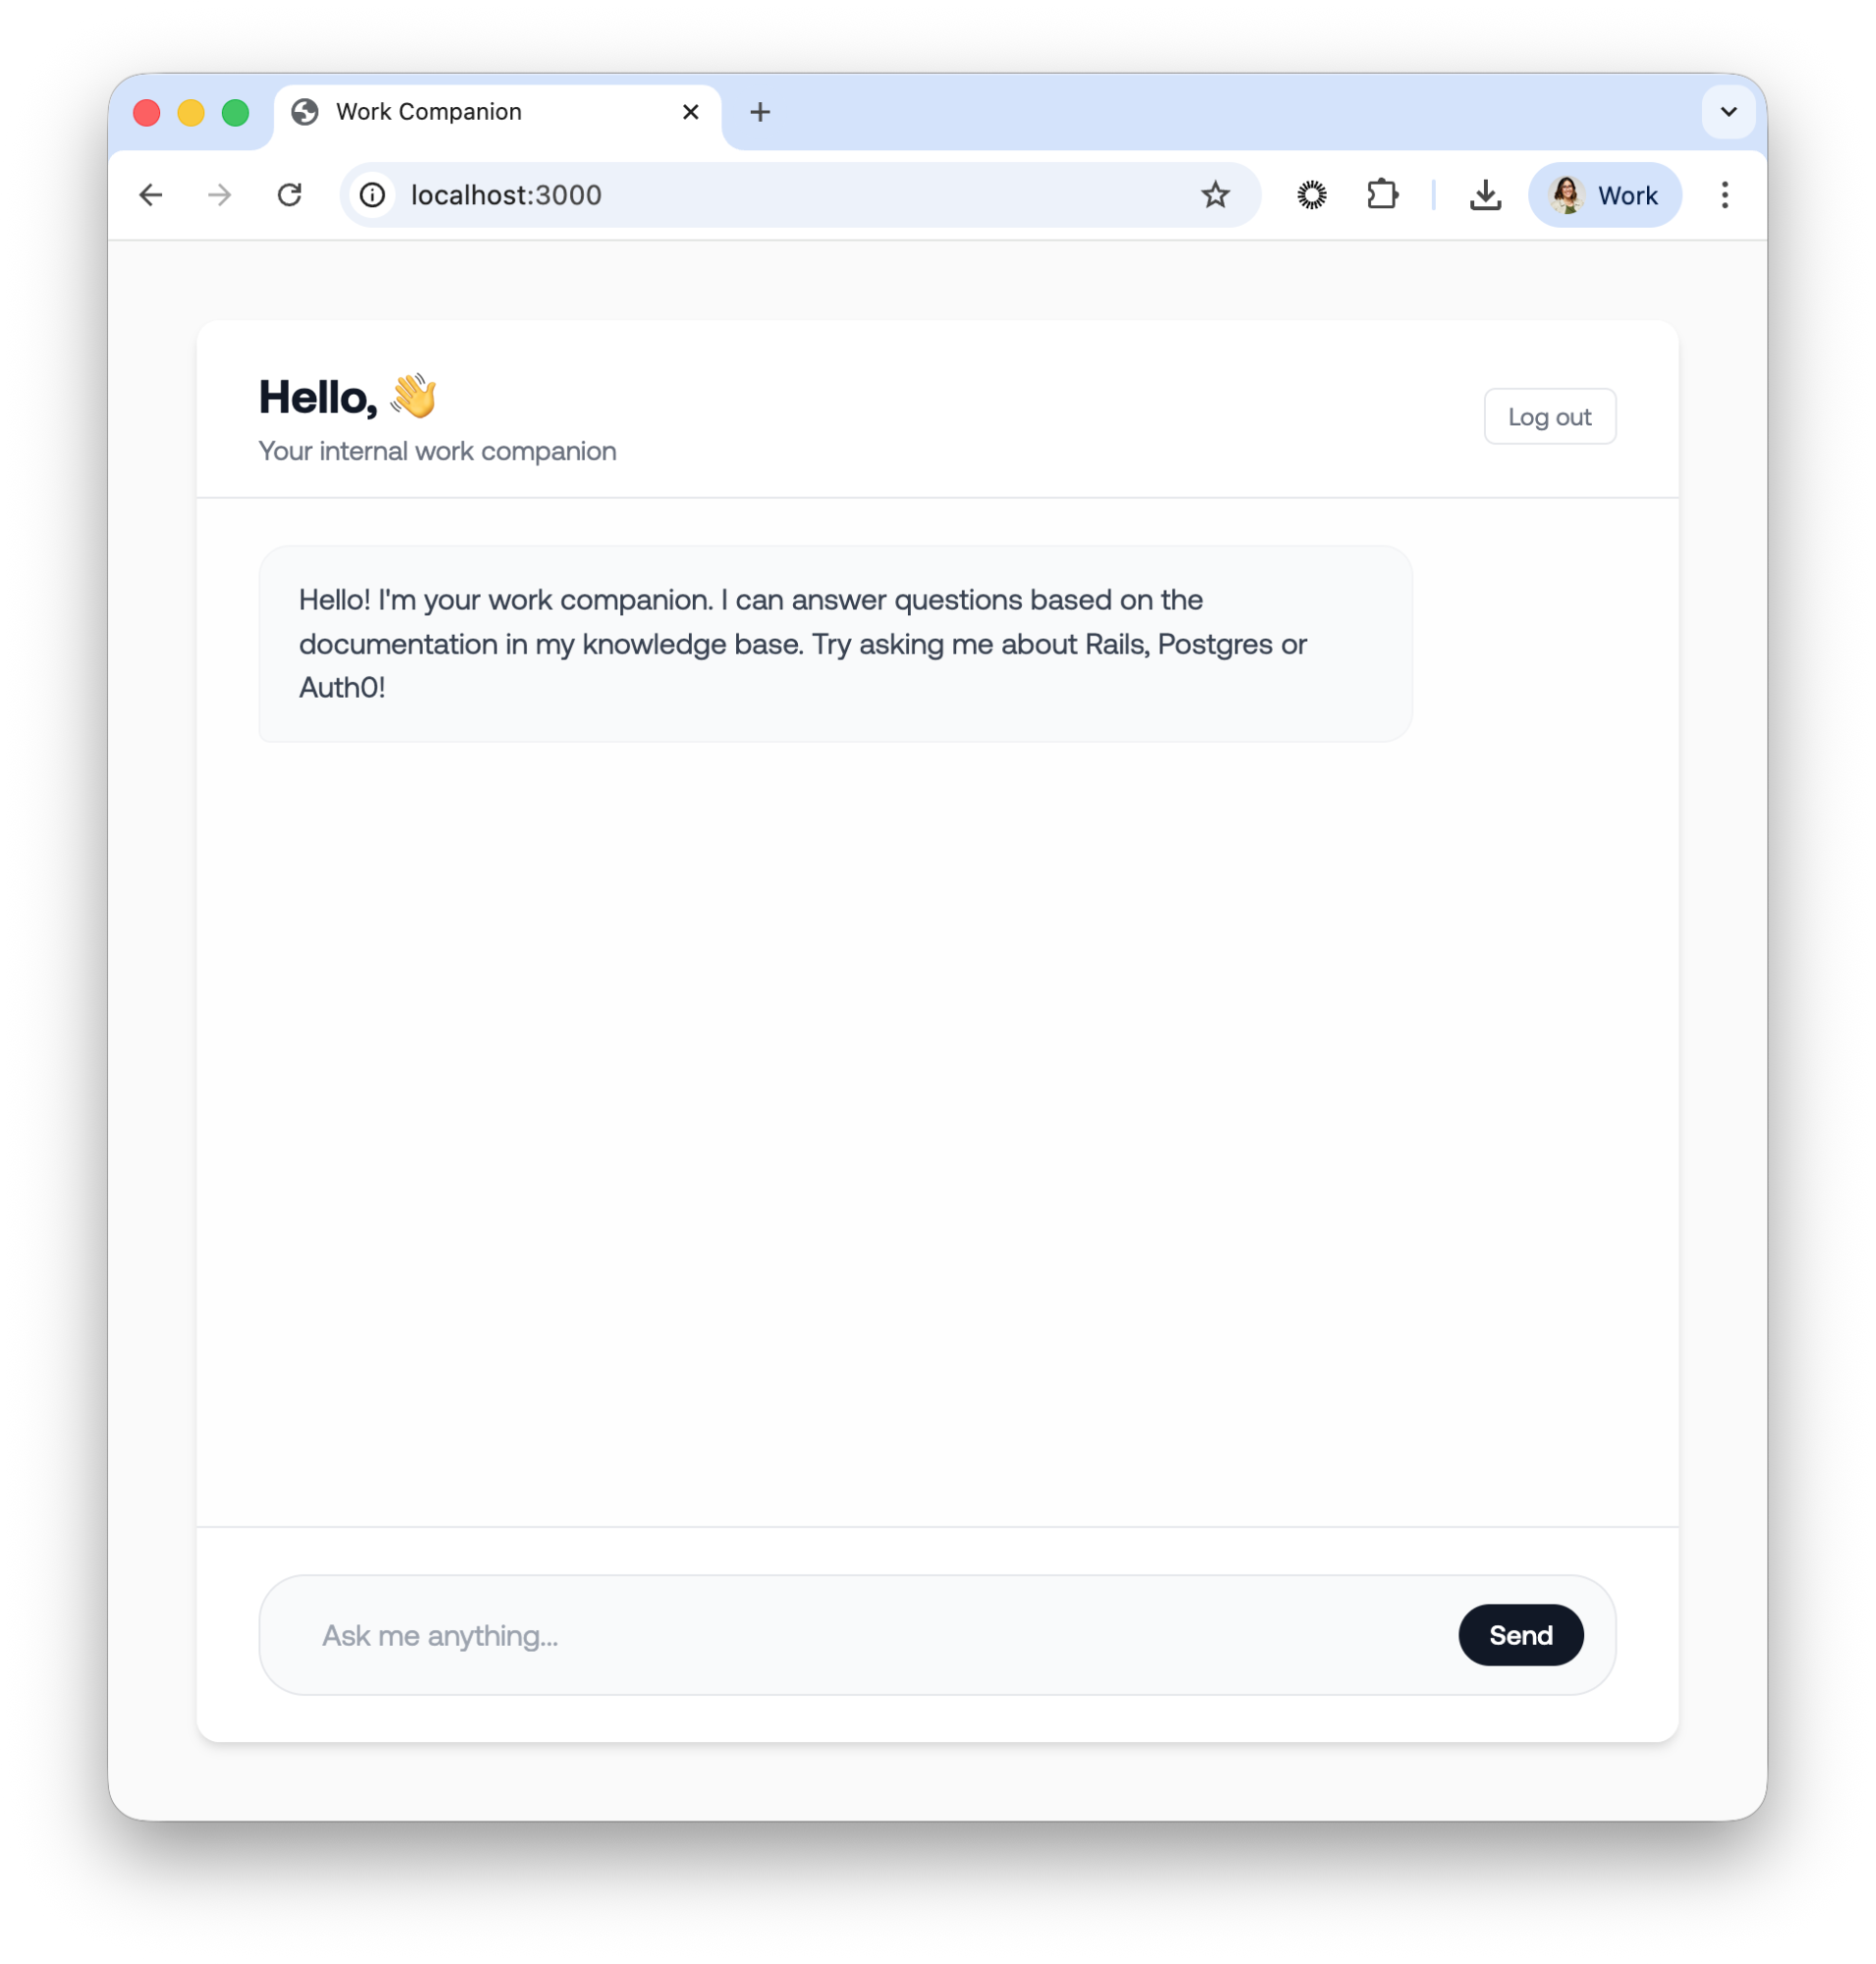
Chat view for the Work Companion app.
At this point the app doesn’t know who the user is so let’s proceed to add authentication with Auth0.
Add Authentication with Auth0
Before we can ask Auth0 FGA what a user is allowed to see, we first need to know exactly who the user is. In our Rails application, we use Auth0 to handle identity management.
Read the Rails Authentication by Example Guide to get an in depth explanation of all the details for implementing Auth0 in a Ruby on Rails application
The first step is to Create an Auth0 Application: In your Auth0 dashboard, create a new "Regular Web Application" and take note of the Domain and Client ID and Client Secret.
Install and set up the Auth0 SDK
Now you need to install the Auth0 SDK that lives in the omniauth-auth0 gem. Add the following to your Gemfile:
source "https://rubygems.org"

# ....

# New code 👇
# Auth0 Authentication
gem "omniauth-auth0", "~> 3.1"
gem "omniauth-rails_csrf_protection", "~> 1.0"

#...
Make sure to install the new gems by running bundle install in your terminal. Next, let’s add the initializer file for Auth0. Create a new file config/initializer/auth0.rb with the following content:
Rails.application.config.middleware.use OmniAuth::Builder do
  provider(
    :auth0,
    ENV.fetch("AUTH0_CLIENT_ID"),
    ENV.fetch("AUTH0_CLIENT_SECRET"),
    ENV.fetch("AUTH0_DOMAIN"),
    callback_path: "/auth/auth0/callback",
    authorize_params: {
      scope: "openid profile email"
    }
  )
end

OmniAuth.config.on_failure = Proc.new do |env|
  OmniAuth::FailureEndpoint.new(env).redirect_to_failure
end
Next you’ll need to handle the authentication flow with a rails controller. When a user successfully logs in through Auth0, they are redirected back to our application's callback action. Let’s create a new controller app/controllers/auth0_controller.rb which will handle the callback with the following content:
class Auth0Controller < ActionController::Base
  protect_from_forgery with: :exception
  skip_forgery_protection only: [:callback]

  def callback
    auth_info = request.env["omniauth.auth"]
    user = User.create_or_update_from_auth0(auth_info)
    session[:user_id] = user.id
    redirect_to "/chat"
  end

  def failure
    Rails.logger.error "Auth0 login failed: #{params[:message]}"
    render plain: "Authentication failed. Please try again.", status: :unauthorized
  end

  def logout
    session.delete(:user_id)
    reset_session

    logout_url = URI::HTTPS.build(
      host: ENV.fetch("AUTH0_DOMAIN"),
      path: "/v2/logout",
      query: {
        returnTo: root_url,
        client_id: ENV.fetch("AUTH0_CLIENT_ID")
      }.to_query
    ).to_s

    redirect_to logout_url, allow_other_host: true
  end
end
Note the method create_or_update_from_auth0 is defined in the User model and it’s not a given method from the gem.
Securing our controllers
To make sure only logged-in users can access the Work Companion, let’s implement a Rails concern Secured. This is a simple module we include in any controller that needs protection.
module Secured
  extend ActiveSupport::Concern

  included do
    before_action :logged_in_using_omniauth?
    helper_method :current_user
  end

  def current_user
    @current_user ||= User.find_by(id: session[:user_id]) if session[:user_id]
  end

  private

  def logged_in_using_omniauth?
    return if current_user

    redirect_post('/auth/auth0', params: { prompt: 'login' },
                                 options: { method: :post, authenticity_token: 'auto' })
  end
end
The logic is as follows: a before_action checks for the existence of a user ID in the session. If the session is empty, we need to send the user to the login page. Here, we are using the repost gem to allow us to perform a clean redirect-to-POST, ensuring the user hits the Auth0 login flow securely.
Next, add the new Auth0 routes in your config/routes.rb file:
# ....
scope :auth do
  get 'failure' => 'auth0#failure'
  get 'auth0/callback' => 'auth0#callback'
  get 'logout' => 'auth0#logout', as: :logout
end
Now we need to use the Secured concern where we need it: in the chat view and the chat API. Go to app/controllers/chat_controller.rb and add the following:
class ChatController < ActionController::Base
  # New code 👇
  include Secured

  def index
    # current_user is available here
  end
end
And the app/controllers/api/chat_controller.rb:
class Api::ChatController < ActionController::Base
  # New code 👇
  include Secured

  # Override Secured's redirect behavior for API — return 401 JSON instead
  def logged_in_using_omniauth?
    return if current_user

    render json: { error: "Unauthorized" }, status: :unauthorized
  end
#...
We are keeping the HTML controller separate from our API controller to maintain their single responsibilities and to make it clearer for this code sample. I’m also skipping the changes in the view. You should adjust it to your own implementation.
If you now navigate to http://localhost:3000, you’ll be redirected to login with Auth0, and once you do, you should see your name and email in the chat view as the app knows who you are.
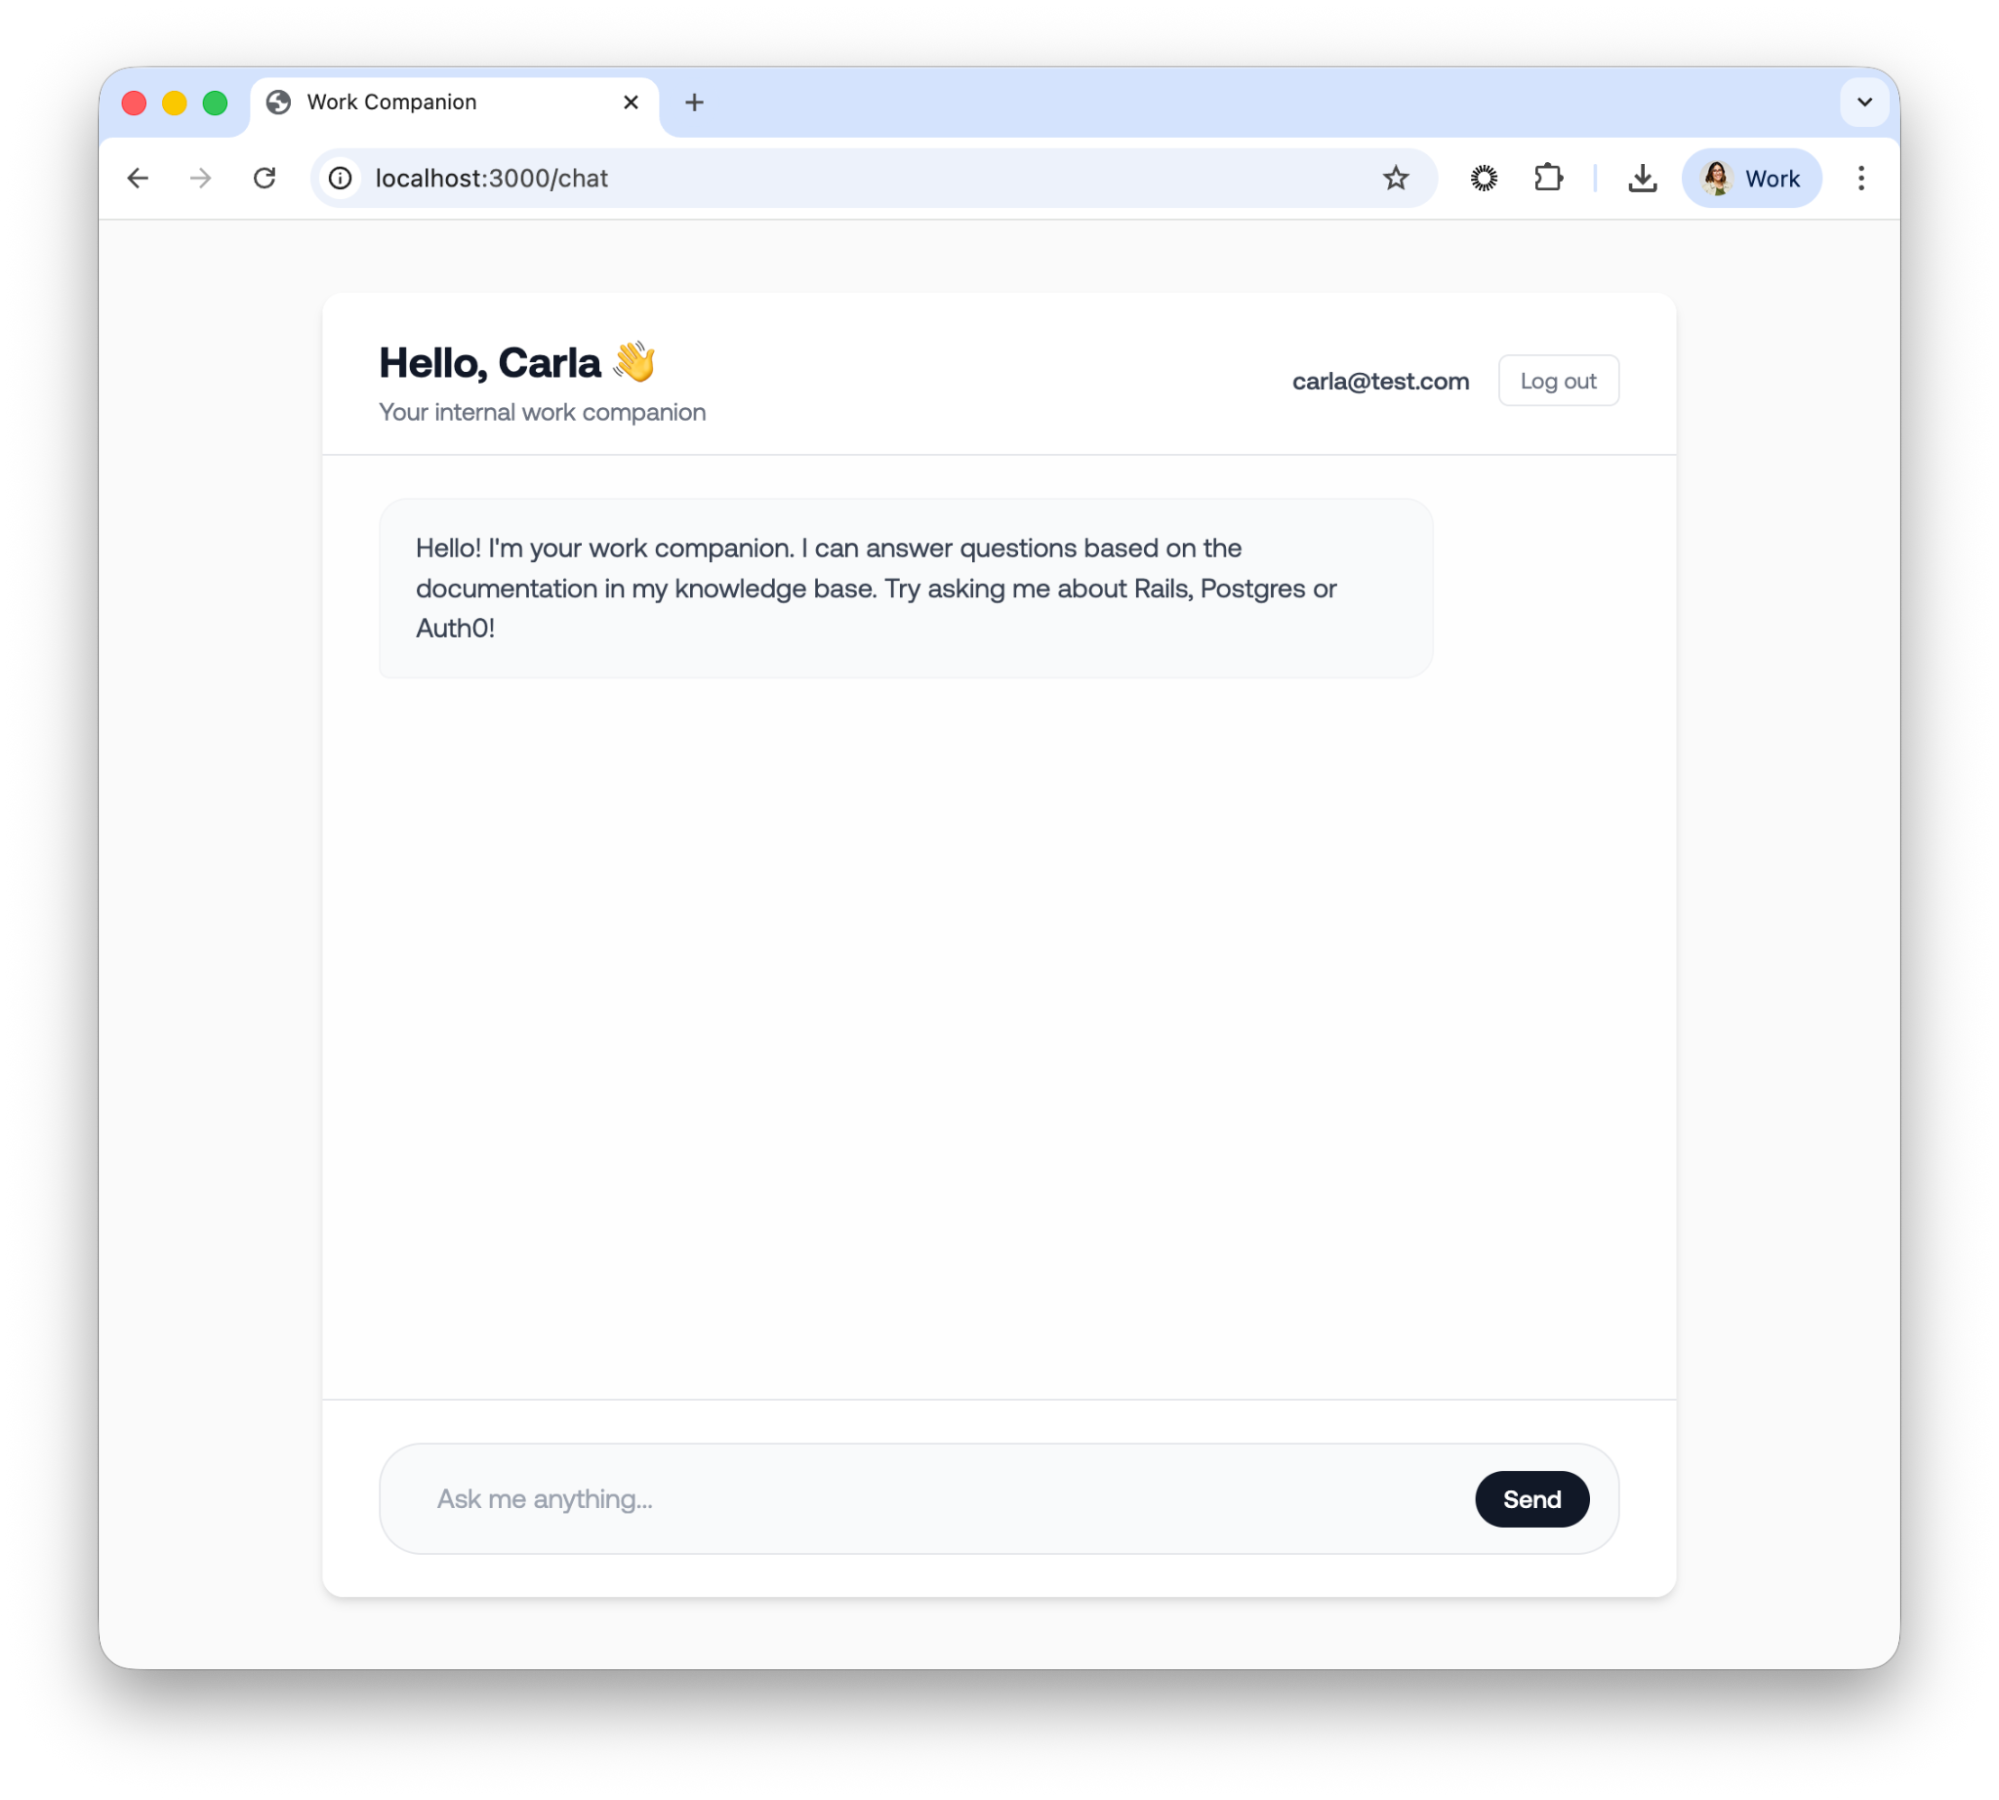
The chat view from the Work Companion with the user authenticated.
Now let’s proceed to add authorization with Auth0 FGA.
Defining permissions with Auth0 FGA
With user identity established through Auth0, the focus shifts from who the user is to what they are permitted to see. This is where Auth0 FGA (Fine-Grained Authorization) becomes essential for out Ruby RAG architecture. It provides a centralized, externalized authorization layer that prevents your Rails controllers from becoming cluttered with complex, hard-to-maintain permission logic.
Why use Auth0 FGA?
Traditional Role-Based Access Control (RBAC) is often the first tool developers reach for, but it quickly breaks down in document-heavy RAG scenarios. While you could technically create roles like rails_guide_reader or postgres_guide_reader, this "role explosion" becomes unmanageable as your document library grows from dozens to thousands.
Auth0 FGA leverages Relationship-Based Access Control (ReBAC), which is a far more natural fit for RAG applications. Instead of checking broad roles, you define direct relationships between users and specific objects, for example, "Carla is a viewer of document:rails_guide." This approach is significantly more granular, scalable, and intuitive for managing document-level security.
To learn more about Auth0 FGA and how to use it in your applications, read the Auth0 FGA documentation.
The authorization model
You can write your authorization model using the rake task provided in the repo or by going to your Auth0 FGA Dashboard. The authorization model looks like this:
model
  schema 1.1

type user

type document
  relations
    define owner: [user]
    define viewer: [user] or owner
This model represents the following:
- Users can be owners or viewers of documents
- Anyone who is an owner is automatically also a viewer
- You can also grant viewer access directly without ownership
Creating relationship tuples
Relationship tuples are the facts of your authorization model. They define what user has a relationship with what document. Because we already created five documents earlier and we know their IDs in our database, we’ll use that to identify them on Auth0 FGA, similarly we’ll use the user’s Auth0 ID to identify them. Let’s create the following tuples:
user:google-oauth2|100...5110    viewer    document    3
user:google-oauth2|100...5110    viewer    document    2
Now that we have a model and tuples, we’ll need to create an authorized client on Auth0 FGA so our application can securely talk to the API.
Go to the Auth0 FGA Dashboard and then to Store Settings. Scroll down to Authorized Clients and click on Create Client. Select the client permissions we need, which in our case are all except for Search Logs, and click on Create. Take note of all the ENV variables and add them to your .env file.
Implementing FGA in the Ruby RAG Pipeline
We are almost done with our application. We’ve added authentication but now we need to add authorization. The end to end flow of our application should end up as follows:
- User visits /chat → redirected to Auth0 Universal Login
- After authentication, user is created/updated in the database
- User sends a message in the chat interface
- FGA list_objects returns the document IDs the user can view
- Query is embedded via OpenAI
- pgvector nearest-neighbor search runs filtering authorized documents only
- Top-k chunks are assembled into context and sent to the LLM
- Response is returned with sources and processing time
We already took care of steps 1-3 but now we need to filter the documents the user has access to before we create the embeddings and send the question to OpenAI.
Install and set up the OpenFGA Ruby SDK
For this example we’ll use a community built ruby SDK: openfga. Add it to your Gemfile and then run bundle install to install it locally:
source "https://rubygems.org"

# ....

# New code 👇
gem "openfga", "~> 0.1.5"

#...
Retrieve the user’s ID
After the user signs in, we store it and use it as the current user in the session. Let’s pass the user’s ID to the RAG Pipeline by adding the following to the Api::ChatController:
class Api::ChatController < ActionController::Base
  include Secured

  #  ...

  def create
    message = params[:message]

    if message.blank?
      return render json: { error: "Message is required" }, status: :bad_request
    end

    begin
      # New code 👇 (pass user: current_user)

      response = RagQueryService.call(message, user: current_user)

      render json: {
        message: message,
        response: response[:answer],
        sources: response[:sources],
        processing_time: response[:processing_time]
      }
    rescue StandardError => e
      Rails.logger.error "Chat error: #{e.message}"
      render json: {
        error: "Sorry, I encountered an error processing your request."
      }, status: :internal_server_error
    end
  end
end
Now that we have the user’s information we can build the authorization service.
Build the authorization service
Next, let’s create an FgaService. Create a new file app/services/fga_service.rb and add the following code:
require "openfga"

class FgaService
  class << self
    def client
      @client ||= OpenFga::SdkClient.new(
        api_url: ENV.fetch("FGA_API_URL"),
        store_id: ENV.fetch("FGA_STORE_ID"),
        authorization_model_id: ENV.fetch("FGA_MODEL_ID", nil),
        credentials: {
          method: :client_credentials,
          api_token_issuer: ENV.fetch("FGA_API_TOKEN_ISSUER"),
          api_audience: ENV.fetch("FGA_API_AUDIENCE"),
          client_id: ENV.fetch("FGA_CLIENT_ID"),
          client_secret: ENV.fetch("FGA_CLIENT_SECRET")
        }
      )
    end
  end
end
We are creating a new instance of the SdkClient and connect it to our Auth0 FGA instance using Client Credentials Exchange.
Next, let’s add a method to see the list of accessible documents by the current user. In your FgaService add the following:
def list_accessible_documents(user)
  response = client.list_objects(
    user: "user:#{user.auth0_sub}",
    relation: "viewer",
    type: "document"
  )

  response.objects.map { |obj| obj.delete_prefix("document:").to_i }
rescue => e
  Rails.logger.error "FGA ListObjects error: #{e.message}"
  raise e
end
In the listaccessibledocuments method, we are using the list_objects method of the SDK to list all the objects that the user is related to via the viewer relation. This is our main document filtering mechanism for our RAG pipeline.
Filter the documents
Time has come to finally filter documents. Let’s go to the RagQueryService class and add the following code in the call method:
 def call
    start_time = Time.current

    # New code 👇
    # Step 1: Get authorized document IDs from FGA
    authorized_doc_ids = FgaService.list_accessible_documents(user)

    if authorized_doc_ids.empty?
      return {
        answer: "You don't have access to any documents. Please contact your administrator.",
        sources: [],
        context_chunks_count: 0,
        processing_time: (Time.current - start_time).round(2)
      }
    end

    # Step 2: Generate embedding for the query
    query_embedding = OpenaiService.generate_embedding(query)

    # New code👇 (user authorized_doc_ids)
    # Step 3: Find similar document chunks (filtered by authorized documents)
    similar_chunks = find_similar_chunks(query_embedding, authorized_doc_ids)

    # Step 4: Build context from chunks
    context = build_context(similar_chunks)

    # Step 5: Generate response using OpenAI
    answer = OpenaiService.generate_completion(query, context)

    processing_time = Time.current - start_time

    {
      answer: answer,
      sources: format_sources(similar_chunks),
      context_chunks_count: similar_chunks.length,
      processing_time: processing_time.round(2)
    }
  end
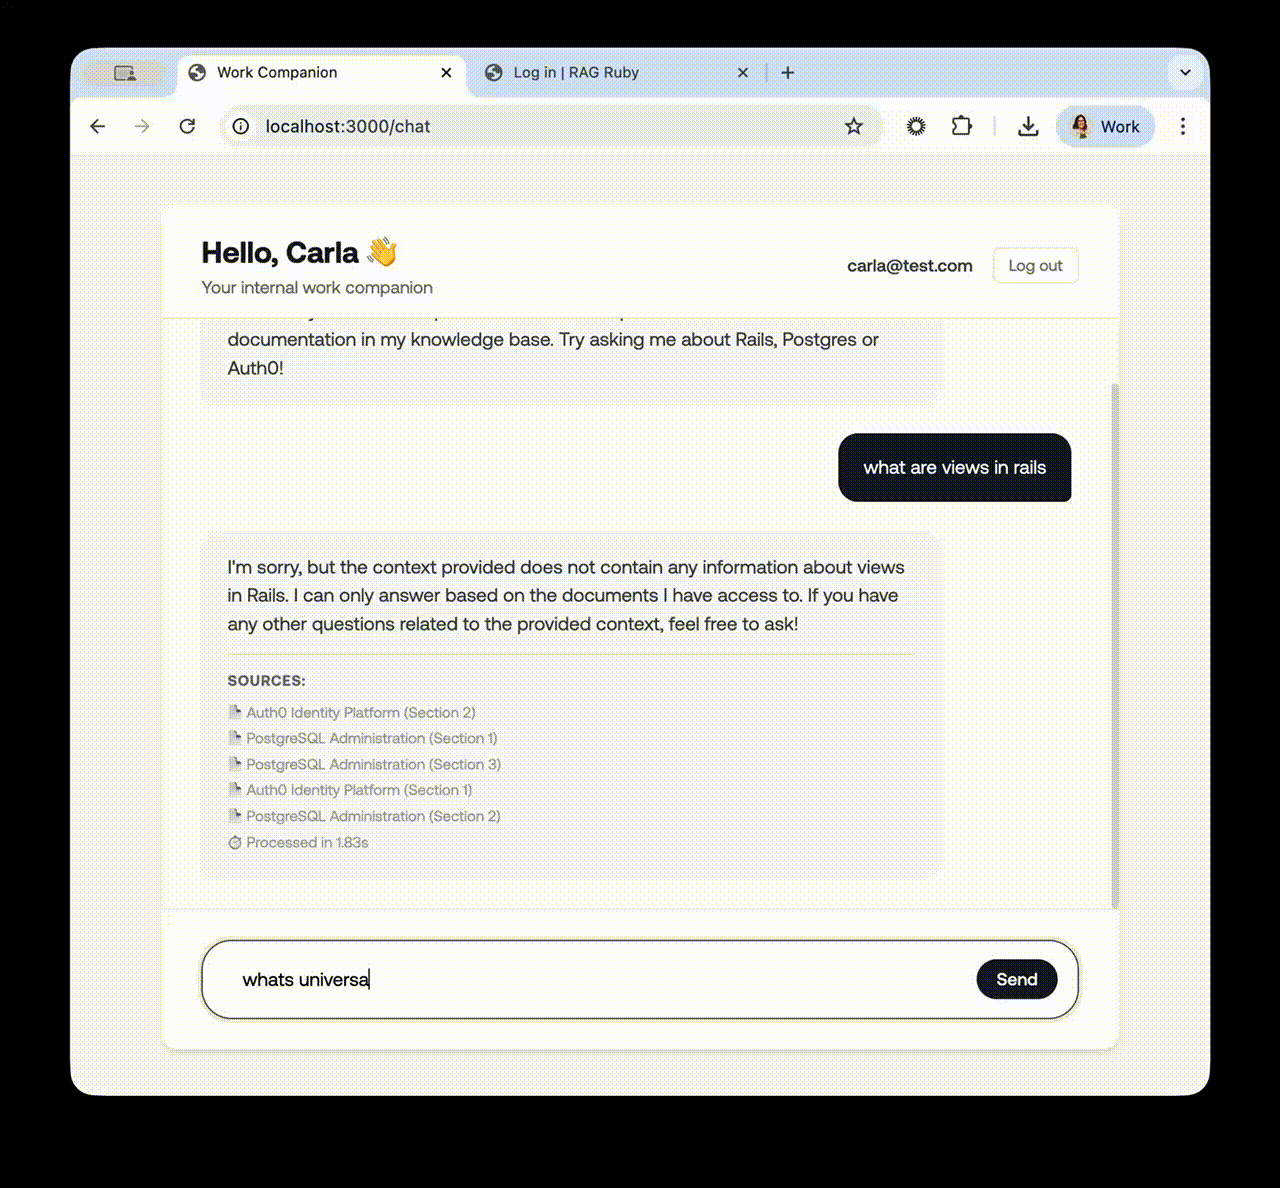
Test the work companion
With the tuples we created in Auth0 FGA, the user has access to two documents only: a Auth0 Guide and a Postgres Guide, so let’s try to ask questions NOT about those documents to see if the filtering is working:
If we now try to ask about a topic we know we have access, we’ll get the following response:
Securing Ruby on Rails RAG Apps
Building a RAG application is a major step toward making AI more useful for your organization, but it shouldn't come at the cost of data security. As we’ve seen, traditional RBAC often hits a wall when you need to manage permissions at the individual document level across complex hierarchies.
By integrating Auth0 FGA with your Ruby on Rails application, you’ve moved from a coarse approach to a precise, relationship-based authorization model. You’ve successfully:
- Identified the User: Leveraged Auth0 and OmniAuth to establish a secure identity.
- Centralized Permissions: Used a ReBAC model with Auth0 FGA to define exactly who can see what.
- Secured the Pipeline: Implemented an "identity-aware" retrieval step that filters sensitive context before it ever reaches the LLM.
This architecture doesn’t just stop at document ownership. Because Auth0 FGA is built on top of OpenFGA, it allows you to handle millions of objects and complex sharing rules, like department-wide access or temporary viewer permissions, without ever having to rewrite your core search logic.
If you’re ready to start securing your own RAG pipelines, check out the Authorization for RAG Quickstart and if you’re using Ruby check out the OpenFGA SDK
About the author

Carla Urrea Stabile
Staff Developer Advocate
I've been working as a software engineer since 2014, particularly as a backend engineer and doing system design. I consider myself a language-agnostic developer but if I had to choose, I like to work with Ruby and Python.
After realizing how fun it was to create content and share experiences with the developer community I made the switch to Developer Advocacy. I like to learn and work with new technologies.
When I'm not coding or creating content you could probably find me going on a bike ride, hiking, or just hanging out with my dog, Dasha.