
TL;DR
Using the right tools, you can create an application from scratch and release it to production very quickly. In this post, I will show you how to develop a task list application, with Angular, that consumes a serverless REST API and persists data to a MongoDB database hosted by mLab. This application will also focus on security, with Auth0, and will be deployed to GitHub Pages.
Overview
In this post I will show you that, with the right tools, it is possible to start a full stack app—task list application in this case—from scratch, and release it to production in a short time. Our full stack app will support static file hosting, a secure REST API, and a robust persistence layer. This is how we will manage all the moving parts:
- Identity management and security supported by Auth0 and JSON Web Tokens (JWT)
- Serverless REST API provided by an Express app with Webtask
- Persistence layer with a MongoDB database hosted by mLab
- Static file hosting via deployment to GitHub Pages
“Learn how create a serverless fullstack SPA with Angular, Express, Mongo GitHub Pages.”
Tweet This
Since the app that we are going to develop is quite simple in terms of features, it won't be necessary to have MongoDB running on our local environment. We will use mLab during development as well as production. The only tools that are expected to be installed are NodeJS and NPM.
Our application will have the following features:
- Sign in and sign out
- List that shows tasks from a user
- Form that allows users to add new tasks
- A button for each task, to enable users to remove these tasks
Creating a New Angular App
We are going to create our new Angular app with Angular CLI. Actually, we will be using this tool during the whole process to create components/services and build our app for production.
Here is a list of a few commands that we will have to issue to install Angular CLI and to create our app skeleton:
# install Angular CLI globally
npm install -g @angular/cli

# create skeleton
ng new task-list && cd task-list

# serve the skeleton on our dev env
ng serve
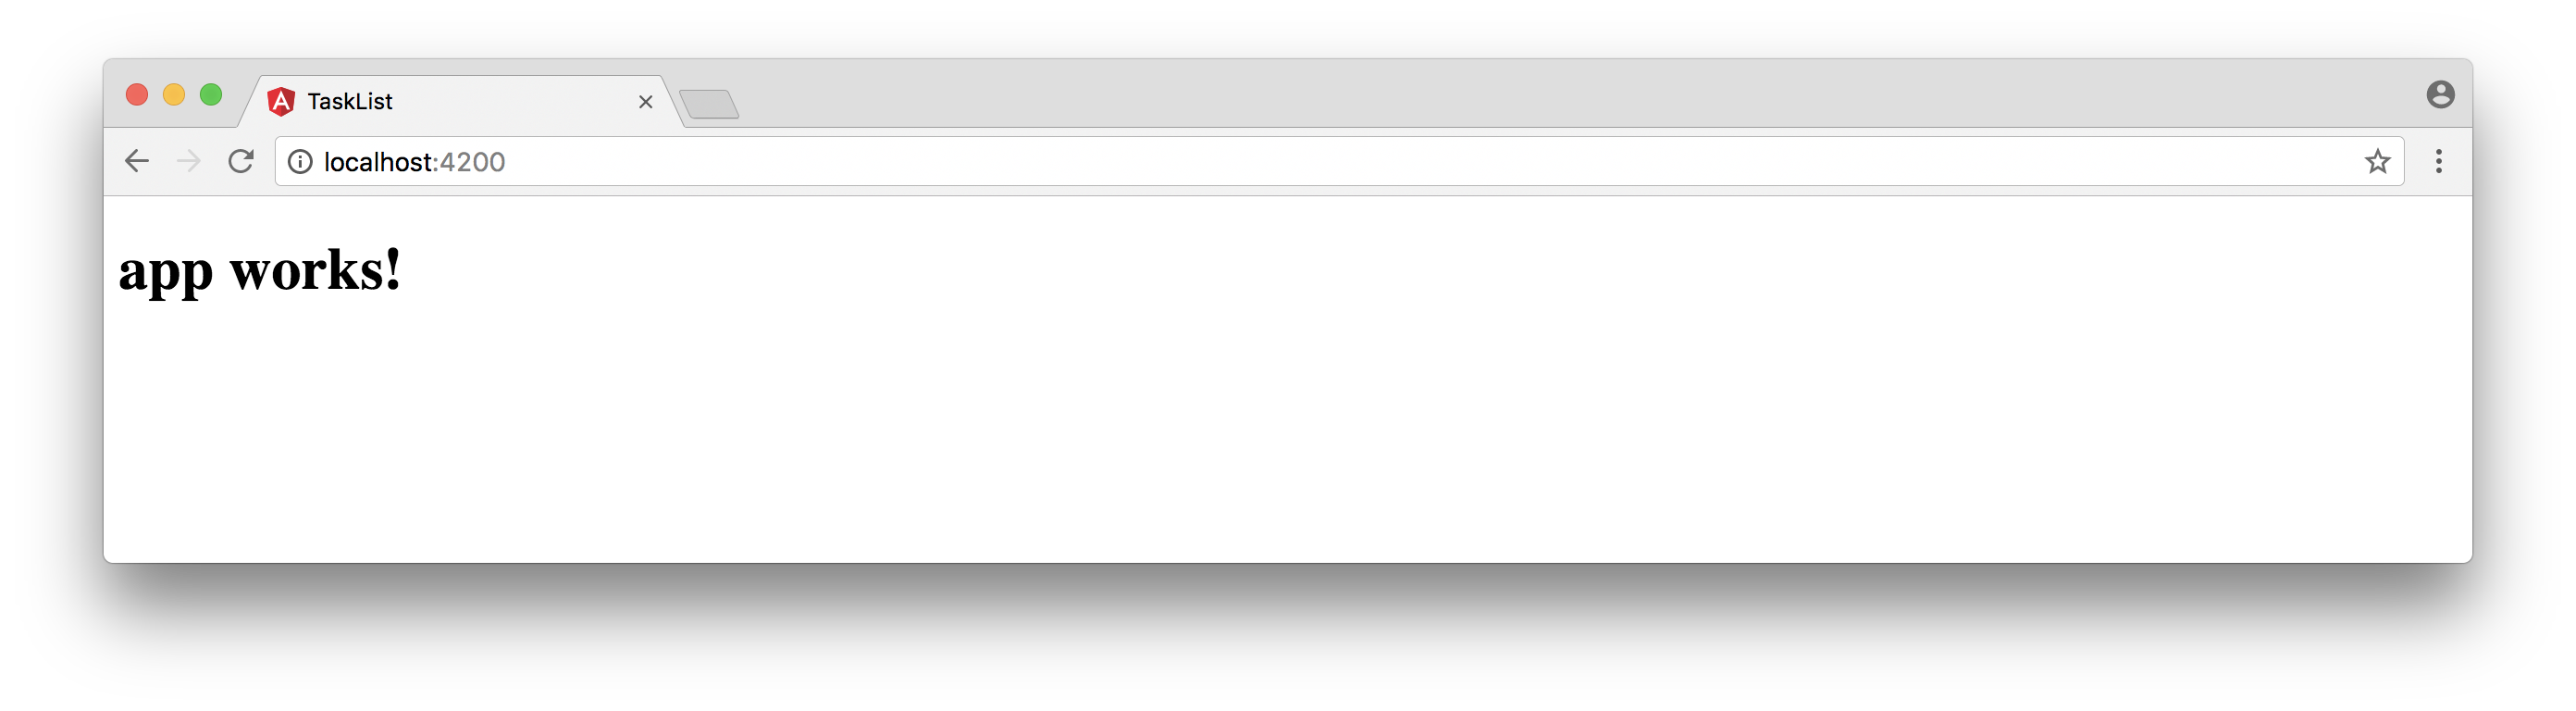
The last command is responsible for packaging our application with the development profile, and for serving it locally with Webpack Development Server. After executing all these commands, navigate to http://localhost:4200/ to see it up and running.
Securing Angular with Auth0
The first thing that we are going to take care of in our application is security. Security must be a first priority in any application that handles sensitive, third party data like the task list that we are about to develop.
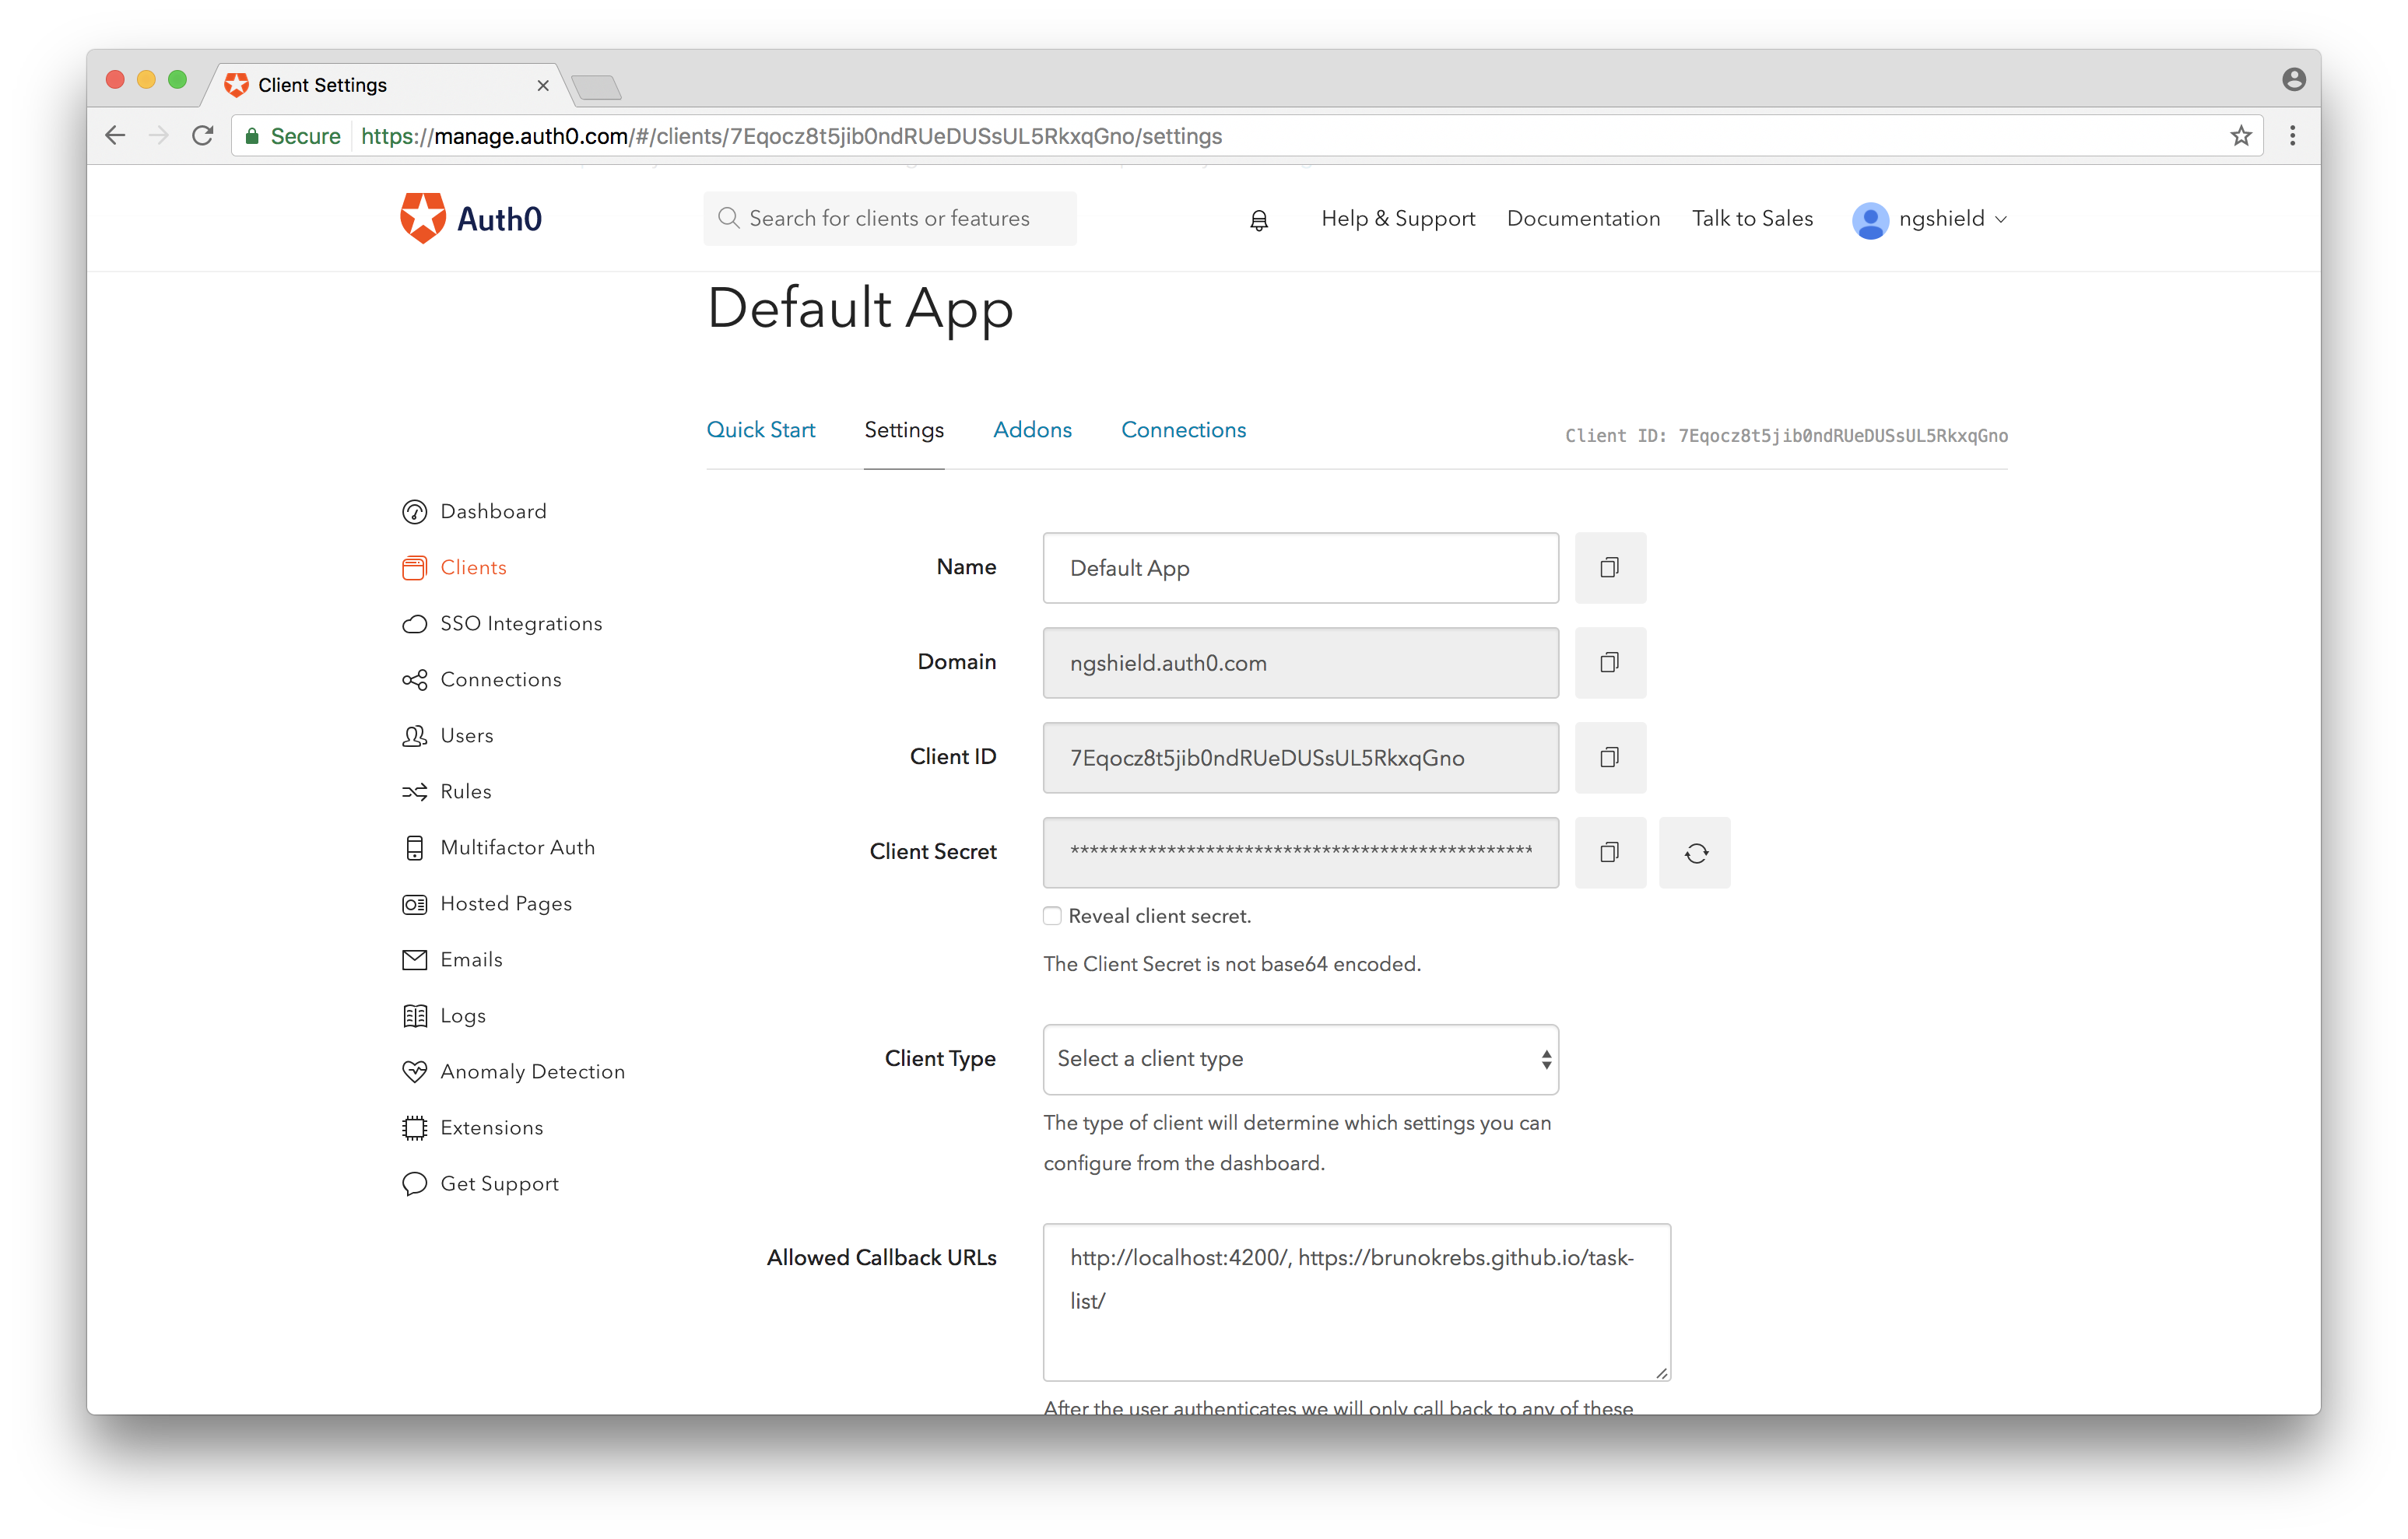
To start, sign up for a free Auth0 account and take note of Client ID and Domain. Both values are going to be used to configure Lock: an embeddable login system.
Auth0 offers a generous free tier to get started with modern authentication.
Important: Auth0 requires a list of Allowed Callback URLs. This list contains all the URLs to which Auth0 can redirect a user to after issuing a JWT. Therefore we must configure at least two URLs: http://localhost:4200/ and the URL where our app will be exposed, something like: https://brunokrebs.github.io/task-list/. This URL will be defined when we release to GitHub Pages.
To use Lock, we must install two libraries in our application: auth0-lock and angular2-jwt. Since we are using TypeScript with Angular, we will also install the @types/auth0-lock library, which provides TypeScript definitions for Lock. Also, since we want to provide our users a good looking interface, we are going to install Angular Material. These dependencies are installed with the following commands:
# Auth0 Lock and Angular 2 JWT runtime deps
npm install --save auth0-lock angular2-jwt @angular/material

# Types definitions for Auth0 Lock
npm install --save-dev @types/auth0-lock
Let's use Angular CLI to create a NavBarComponent. This component will have Sign in and Sign out buttons. We will also create a AuthService that will be responsible for sign in, sign out and to validate if the user is authenticated or not.
# generates NavBarComponent files under src/app/nav-bar
ng g component nav-bar

# generates AuthService under src/app/auth.service.ts
ng g service auth
After executing these commands, Angular CLI will have created the following file structure:
src
  |-app
    |-nav-bar
      |-nav-bar.component.ts
      |-nav-bar.component.html
      |-nav-bar.component.css]
    |-auth.service.ts
Actually two extra files were created:
src/app/auth.service.spec.tsandsrc/app/nav-bar/nav-bar.component.spec.ts. We would use these files to write tests for both the component and the service. However, for the sake of simplicity, we won't address testing in this post. You can check the following references to read about testing in Angular: Angular 2 Testing In Depth: Services; Angular Testing; Testing Components in Angular 2 with Jasmine
To integrate with Lock, let's first implement src/app/auth.service.ts with the following code:
import { Injectable } from '@angular/core';
import Auth0Lock from 'auth0-lock';
import { tokenNotExpired } from 'angular2-jwt';

// FIXME: replace these with your own Auth0 'Client ID' and 'Domain'
const AUTH0_CLIENT_ID = 'YOUR_AUTH0_CLIENT_ID';
const AUTH0_DOMAIN = 'YOUR_AUTH0_DOMAIN';

// this is the key to the JWT in the browser localStorage
const ID_TOKEN = 'id_token';

@Injectable()
export class AuthService {
  lock = new Auth0Lock(AUTH0_CLIENT_ID, AUTH0_DOMAIN, {});

  constructor() {
    // listening to 'authenticated' events
    this.lock.on('authenticated', (authResult) => {
      localStorage.setItem(ID_TOKEN, authResult.idToken);
    });
  }

  signIn() { this.lock.show(); }

  signOut() { localStorage.removeItem(ID_TOKEN); }

  authenticated() { return tokenNotExpired(); }
}
In the code above, there are three things that worth mentioning. First, we must replace AUTH0_CLIENT_ID and AUTH0_DOMAIN with the values that we noted previously. Second, the ID_TOKEN references the key were the JWT will be saved (on the user's browser localStorage). And third, the constructor of this service adds a callback listener to the authenticated event on Lock. This callback saves the token issued by Auth0 in localStorage. To sign out a user, it is just a matter of removing this token from localStorage.
Our AuthService class is good to go, but unlike components, Angular CLI does not add services to our @NgModule definition by default. To do this, open the src/app/app.module.ts file, add this service as a provider and add Angular Material in the imports array:
// ... other imports
import { AuthService } from './auth.service';
import { MaterialModule } from '@angular/material';

@NgModule({
  // ... other properties
  imports: [
      // ... other imports
      MaterialModule.forRoot(),
  ],
  providers: [ AuthService ],
  // ... other properties
})
export class AppModule { }
We can now focus on implementing our NavBarComponent. First, we will inject AuthService and add three public methods that will be used by our HTML interface. Then we will implement the interface and add some CSS rules to improve it.
Let's open the src/app/nav-bar/nav-bar.component.ts file and implement the following code:
import { Component } from '@angular/core';
import { AuthService } from '../auth.service';

@Component({
  selector: 'app-nav-bar',
  templateUrl: './nav-bar.component.html',
  styleUrls: ['./nav-bar.component.css']
})
export class NavBarComponent {
  constructor(private authService: AuthService) { }
}
This component simply gets AuthService injected and nothing else. Injecting a service like this allows the user interface to call its methods, as we will see. Now, let's open src/app/nav-bar/nav-bar.component.html and implement it as follows:
<md-toolbar color="primary">
  <span>Task List</span>
  <span class="fill-space"></span>
  <button md-button (click)="authService.signIn()" *ngIf="!authService.authenticated()">Sign In</button>
  <button md-button (click)="authService.signOut()" *ngIf="authService.authenticated()">Sign Out</button>
</md-toolbar>
Our NavBar exposes our application's title along with two buttons. At any given time, only one button is truly visible to the user. The Sign In button is going to be visible when the user is not yet authenticated and the Sign Out will be visible otherwise. To make our interface look better, we have also added a span.fill-space element. This element will be responsible to push both buttons to the right border. To accomplish this, we need to add the CSS rule that follows to the src/app/nav-bar/nav-bar.component.css file:
.fill-space {
  flex: 1 1 auto;
}
Good, we now have both the NavBarComponent and the AuthService fully implemented and integrated. But we still need to add this component to our src/app/app.component.html file, otherwise it will never get rendered. To do this, just replace the content of this file with the following line of code: <app-nav-bar></app-nav-bar>.
If we run our application now, it wouldn't look neat because most major browsers come with an 8px margin on body elements and because we haven't configured any Angular Material Theme. We will fix both issues by updating our src/styles.css file to look like:
@import '~@angular/material/core/theming/prebuilt/indigo-pink.css';

body {
  margin: 0;
}
We are now good to go, so let's start our development server, by issuing ng serve, and head to http://localhost:4200 to look how things are. You can even sign in and sign out, although there won't be much to see.

Adding a Welcome Message to Visitors
To make our application a friendly place, let's add a welcoming message. To do that, first we will add two methods and inject AuthService in the src/app/app.component.ts file, making it look like this:
import { Component } from '@angular/core';
import { AuthService } from './auth.service';

@Component({
  selector: 'app-root',
  templateUrl: './app.component.html',
  styleUrls: ['./app.component.css']
})
export class AppComponent {
  constructor(private authService: AuthService) { }
}
After that we are going to add the message, as a md-card component from Angular Material, to src/app/app.component.html:
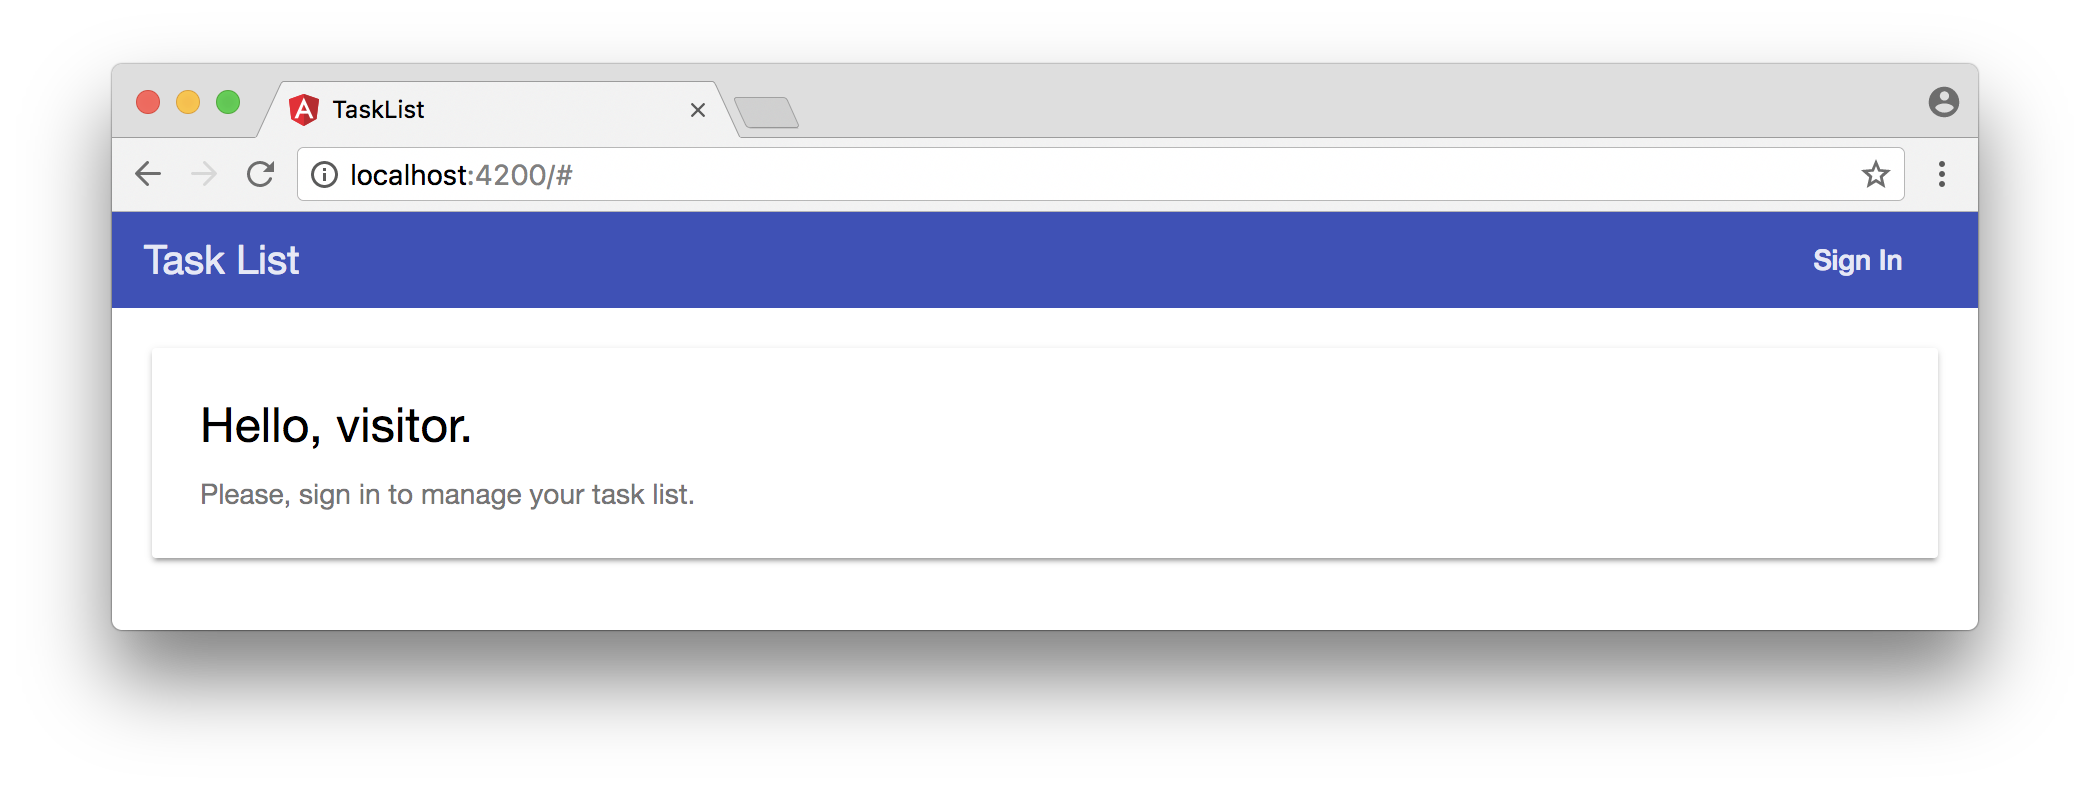
<app-nav-bar></app-nav-bar>
<div class="app-container">
  <md-card *ngIf="!authService.authenticated()">
    <md-card-title>Hello, visitor.</md-card-title>
    <md-card-subtitle>
      Please <a (click)="authService.signIn()">sign in</a> to manage your task list.
    </md-card-subtitle>
  </md-card>
</div>
And last, we are going to make a fix to the interface by adding a rule to src/app/app.component.css:
.app-container {
  padding: 20px;
}
Heading to our app, http://localhost:4200/, we can see our new welcome message (if we are not authenticated).
Implementing Serverless REST API
Now that we have our application integrated with Auth0, which allows our users to sign in and sign out, let's create our serverless REST API. This API will handle POST requests (to persist new tasks), GET requests (to retrieve tasks from a user) and DELETE requests (to remove tasks).
We will first create a file called tasks.js in a new folder called webtask, and then we will add the following code to it:
'use strict';

// imports node modules
const express = require('express');
const mongojs = require('mongojs');
const bodyParser = require('body-parser');
const jwt = require('jsonwebtoken');

// creates Express app with JSON body parser
const app = new express();
app.use(bodyParser.json());

// defines REST API (HTTP methods)
app.get('/', getTasks);
app.post('/', addTask);
app.delete('/', deleteTask);

// exports REST API
module.exports = app;

function addTask(req, res) {
  let userCollection = loadUserCollection(req.webtaskContext);

  // save new task to user collection
  userCollection.save({
    createdAt: new Date(),
    description: req.body.description
  }, () => res.end())
}

function getTasks(req, res) {
  let userCollection = loadUserCollection(req.webtaskContext);

  // retrieves all tasks sorting by descending creation date
  userCollection.find().sort({ createdAt: -1 }, (err, data) => {
    res.status(err ? 500 : 200).send(err || data);
  });
}

function deleteTask(req, res) {
  let userCollection = loadUserCollection(req.webtaskContext);

  // removes a task based on its id
  userCollection.remove({ _id: mongojs.ObjectId(req.query.id) }, () => res.end());
}

function loadUserCollection(webtaskContext) {
  // this secrets are configured when creating the Webtask
  const AUTH0_SECRET = webtaskContext.secrets.AUTH0_SECRET;
  const MONGO_USER = webtaskContext.secrets.MONGO_USER;
  const MONGO_PASSWORD = webtaskContext.secrets.MONGO_PASSWORD;
  const MONGO_URL = webtaskContext.secrets.MONGO_URL;

  // removes the 'Bearer ' prefix that comes in the authorization header,
  let authorizationHeader = webtaskContext.headers.authorization;
  authorizationHeader = authorizationHeader.replace('Bearer ', '');

  // verifies token authenticity
  let token = jwt.verify(authorizationHeader, AUTH0_SECRET);

  // connects to MongoDB and returns the user collection
  let mongodb = mongojs(`${MONGO_USER}:${MONGO_PASSWORD}@${MONGO_URL}`);
  return mongodb.collection(token.sub);
}
The code is quite simple and easy to understand, but an overall explanation might come in handy. The main purpose of this file is to export an Express app that handles three HTTP methods for a single route, the main / route. These three methods, as explained before, allow users to create, retrieve and delete tasks from collections on a MongoDB database.
Every user will have their own collection—not the best approach, since MongoDB can handle a maximum of 24,000 collections, but good enough to start. This collection is based on the sub claim, which identifies user, present in the JWT issued by Auth0.
The last function definition in the tasks.js file, loadUserCollection, is actually responsible for two things: security and MongoDB connection. When a user issues any request to our API, the function verifies if the authorization header sent was actually signed by Auth0. If none is sent, a non-user-friendly error is generated. This is done through the jwt.verify function with the help if AUTH0_SECRET key. The second responsibility, connecting to MongoDB, is handled by the mongojs module and depends on three configuration variables: MONGO_USER, MONGO_PASSWORD, MONGO_URL.
All these configuration variables—three to connect to MongoDB and one to verify Auth0 tokens—are passed to Webtask when creating the serverless function. We will see how this is done soon.
This is the whole REST API implementation, with this code we are ready to handle users requests that will be sent by the components that we are about to create on our Angular app. But there are a few more steps that we need to perform.
Creating a MongoDB Database
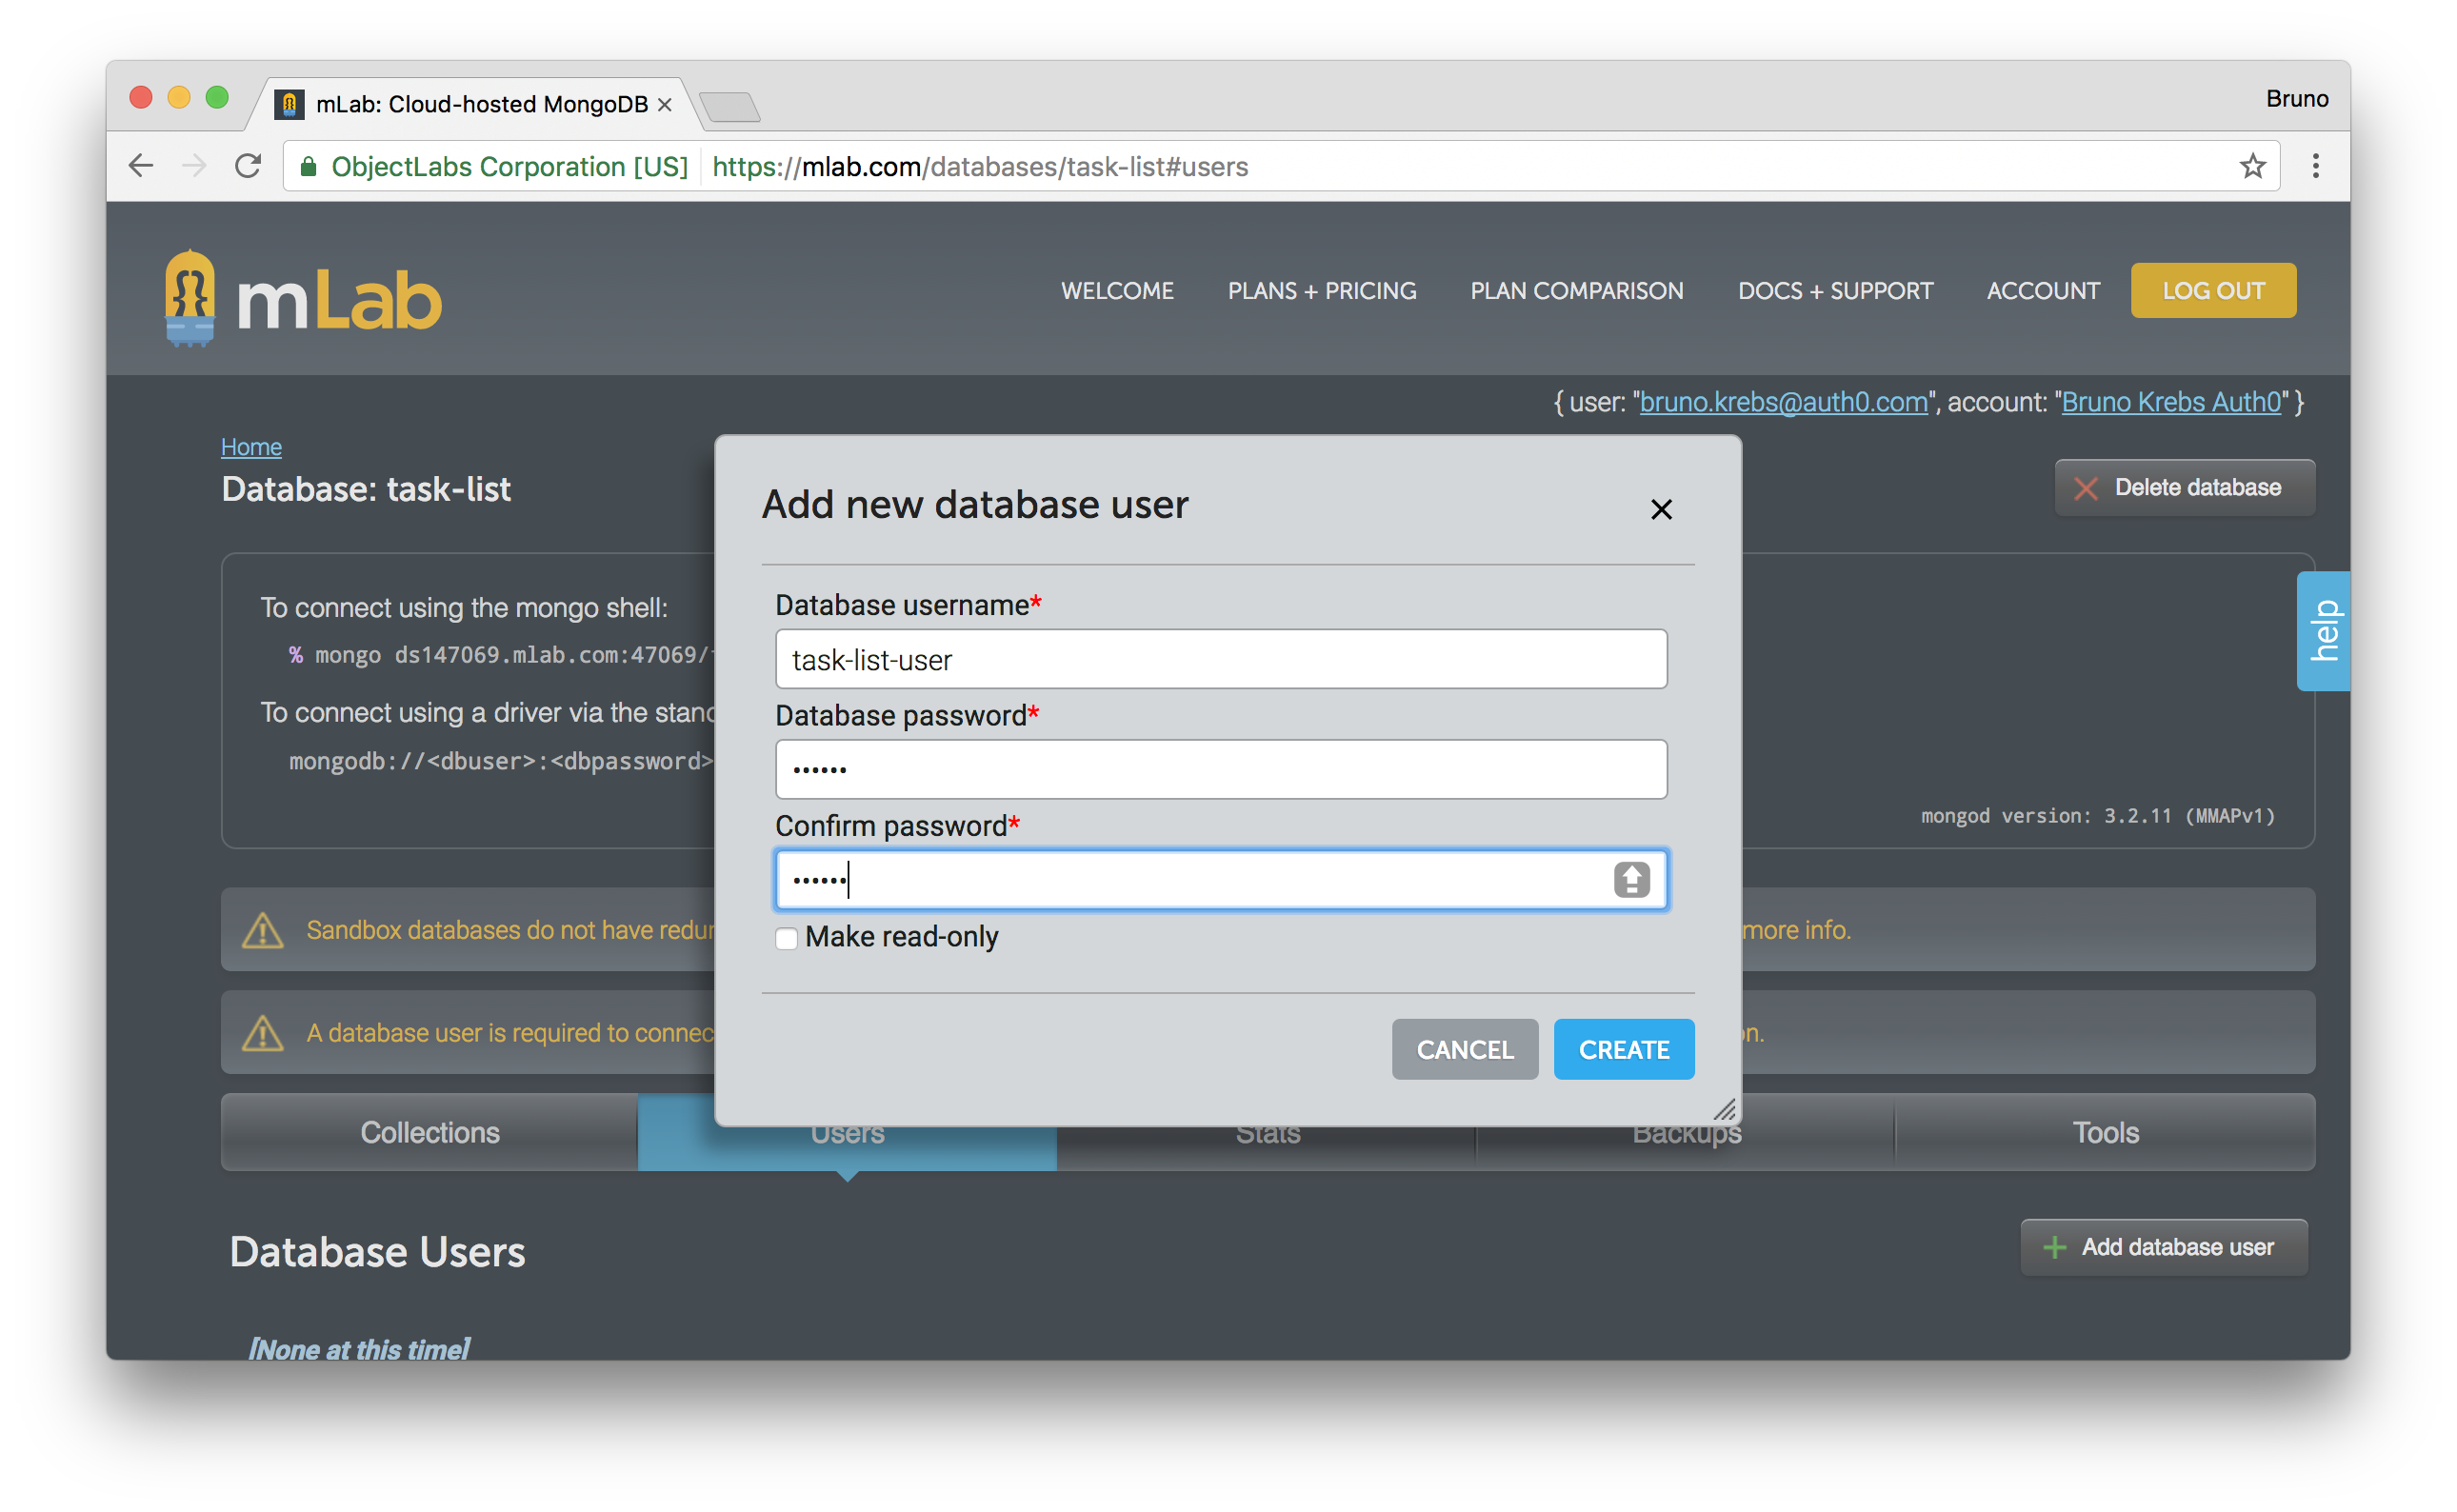
To make our lives easier and to avoid heaving to install and support MongoDB by ourselves, we are going to use mLab, a cloud-hosted MongoDB. The first thing that we have to do is to head to their website and sign up for a free account. After verifying our email address, we have to create a new deployment. Since we are just starting our app and we won't get too much traffic, let's choose the Single Node plan and the Sandbox type, which provides us 500 MB of DB storage for free. You will also need to type a database name, choose something like task-list.
The last thing that we will have to do is to create a user to connect to this database. If you choose task-list as the name of your database, this is the link to create users.
Configuring Webtask Account
We will also need to create a Webtask account, but this as easy as it can be. Webtask, being a product of Auth0, relies on Lock and enables us to create an account with one of the following identity providers (IdP): Facebook, GitHub, Google or Microsoft. It is just a matter of hitting a button to create an account.
After choosing an IdP, we are presented with a succinct, three-step process demonstrating how to create a Hello World serverless function. We already have a Webtask to deploy, so let's follow only the first two steps in order to configure the CLI tool in our computer:
# install Webtask CLI tool
npm install wt-cli -g

# initialize it with our email address
wt init me@somewhere.com
You will be asked to enter the verification code that was sent to your email address. This is the final step in the Webtask account configuration.
Recently, we have released a product called Auth0 Extend (which is backed by the Webtask engine). This product enables companies to provide an easy extension point where customers can run arbitrary JavaScript code. With Auth0 Extend, customers can create custom business rules, scheduled jobs, or connect to the ecosystem by integrating with other SaaS systems, like Marketo, Salesforce, and Concur. All using plain JavaScript and NPM modules.
Deploying Our Serverless REST API
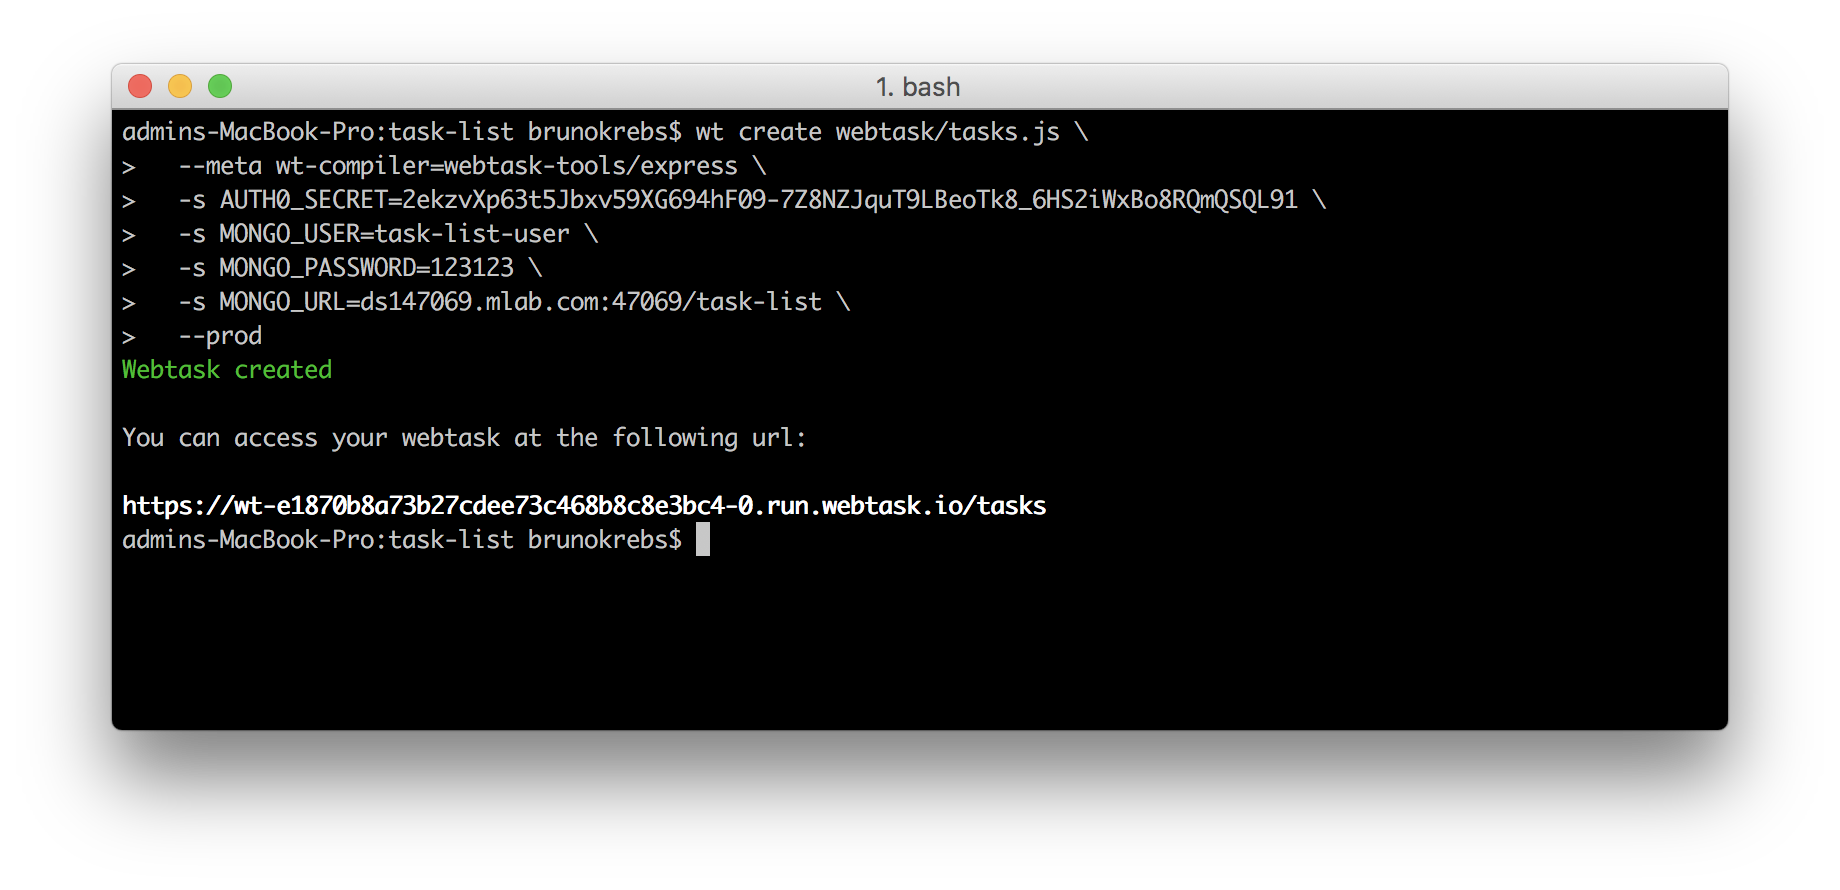
With mLab and Webtask accounts created and having Webtask CLI tool correctly configured, we can now deploy our serverless REST API to production. This is done with the following code:
wt create webtask/tasks.js \
  --meta wt-compiler=webtask-tools/express \
  -s AUTH0_SECRET=secret-from-auth0.com \
  -s MONGO_USER=task-list-user \
  -s MONGO_PASSWORD=111222 \
  -s MONGO_URL=ds147069.mlab.com:47069/task-list \
  --prod
The first option passed to the wt tool specifies that we want to create a Webtask based on our webtask/tasks.js file. The second parameter identifies our code as being an Express app, which needs to be pre-compiled by Webtask with the help of webtask-tools/express tool. The following four parameters are the secrets that we use in our Webtask (-s prefix denotes them as secrets). The last parameter creates our Webtask in production mode, which makes it faster.
Be aware that the values above have to be replaced with values that come from our Auth0 account and from our mLab account. AUTH0_SECRET value can be found at the same place of Client ID and Domain. And the last three values, related to MongoDB, can be found at mLab's dashboard.
Having successfully issued the Webtask creation command, we can now focus on working on the main feature of our Angular application, the task list component.
Building our Angular Interface
There are two components that we will need to create to allow users to interact with their task lists. We will create a TaskListComponent, to expose the task list, and a TaskFormComponent, that will allow the user to create new tasks. Besides these components, we will create a TaskListService that will handle all AJAX requests. We will use Angular CLI to create them to us:
# creates the main component that lists tasks
ng g component task-list

# creates a component to hold a form to add tasks
ng g component task-list/task-form

# creates a service to handle all interaction with our REST API
ng g service task-list/task-list
Integrating Angular with Serverless REST API
Both TaskListComponent and TaskFormComponent will depend on TaskListService to communicate with our serverless REST API, so let's handle the service implementation first.
Open the recently created service file, src/app/task-list/task-list.service.ts, and insert the following code:
import { Injectable } from '@angular/core';
import { Observable } from 'rxjs';
import { AuthHttp } from 'angular2-jwt';

@Injectable()
export class TaskListService {
  private static TASKS_ENDPOINT =
    'https://wt-e1870b8a73b27cdee73c468b8c8e3bc4-0.run.webtask.io/tasks';

  constructor(private authHttp: AuthHttp) { }

  loadTasks$(): Observable<any> {
    return this.authHttp.get(TaskListService.TASKS_ENDPOINT);
  }

  addTask$(task) : Observable<any> {
    return this.authHttp.post(TaskListService.TASKS_ENDPOINT,
      { description: task });
  }

  deleteTask$(task): Observable<any> {
    return this.authHttp.delete(TaskListService.TASKS_ENDPOINT +
      '?id=' + task._id);
  }
}
There are three important things to note in this code. First, the TASKS_ENDPOINT constant. This constant must reference the URL returned by the wt create command above.
Second, this class is not using Http from @angular/http. It is using AuthHttp, which is provided by angular2-jwt and which integrates gracefully with auth0-lock. Instances of this class automatically send an authorization header with whatever content it finds on id_token key on the user browser localStorage. As you may have noted, this is the same place where we stored tokens when configuring AuthService.
Third, all methods in TaskListService return Observables, leaving the caller to decide what to do with the response sent by our serverless REST API.
To inject TaskListService in our components, we need to make a few changes in our main @NgModule, located in src/app/app.module.ts:
// ... other imports
import { Http, RequestOptions } from '@angular/http';
import { AuthHttp, AuthConfig } from 'angular2-jwt';
import { TaskListService } from './task-list/task-list.service';

// creates a factory to AuthHttp
export function authHttpFactory(http: Http, options: RequestOptions) {
  return new AuthHttp(new AuthConfig(), http, options);
}

@NgModule({
    // ... other properties
    providers: [
      AuthService,
      TaskListService, // adds new service
      {
        provide: AuthHttp,
        useFactory: authHttpFactory, // defines how to provide AuthHttp
        deps: [ Http, RequestOptions ]
      }
    ],
    bootstrap: [AppComponent]
})
The first change that we made to our module was to add TaskListService as a provider, just like we did before with AuthService. The second change also added a provider, but in a more complex form.
The AuthHttp provider needed help from a factory - declared as authHttpFactory - to be created. This factory has Http and RequestOptions as dependencies, so we needed to define the provider as a literal object, passing this dependencies explicitly.
Listing Tasks with Angular
Our TaskListComponent can now be implemented. We will now open the src/app/task-list/task-list.component.ts file and apply the code below:
import { Component, OnInit } from '@angular/core';
import { TaskListService } from './task-list.service';

@Component({
  selector: 'app-task-list',
  templateUrl: './task-list.component.html',
  styleUrls: [ './task-list.component.css' ]
})
export class TaskListComponent implements OnInit {
  private tasks: String[];

  constructor(private taskListService: TaskListService) { }

  ngOnInit() { this.loadTasks(); }

  private loadTasks() {
    this.taskListService.loadTasks$().subscribe(
      response => this.tasks = response.json(),
      error => console.log(error)
    );
  }

  taskAddedHandler(task) {
    this.taskListService.addTask$(task).subscribe(
      response => this.loadTasks(),
      error => console.log()
    );
  }

  deleteTask(task) {
    this.taskListService.deleteTask$(task).subscribe(
      response => this.loadTasks(),
      error => console.log()
    );
  }
}
This class gets TaskListService injected and add a few callback methods to the Observables responses. Both taskAdded$ and deleteTask$ triggers a call to loadTasks method when the Observables respond without errors. console.log is triggered by these methods to handle cases where errors are issued by the serverless REST API.
The loadTasks method calls taskListService.loadTasks$ to assign the result to tasks property.
With the three exposed methods and the task property filled, we can now implement the TaskListComponent interface, which resides in the src/app/task-list/task-list.component.html file.
This is what this file should look like:
<md-card>
  <md-card-title>Task List</md-card-title>
  <md-card-subtitle>All your tasks in one place.</md-card-subtitle>
  <md-list>
    <div class="task-item" *ngFor="let task of tasks; trackBy: $index">
      <p><small><strong>{{ task.createdAt | date: 'short' }}</strong></small></p>
      <p>{{ task.description }}</p>
      <button class="delete" md-button md-raised-button
        color="accent" (click)="deleteTask(task)">Delete</button>
    </div>
    <div class="task-item" *ngIf="tasks?.length == 0">
      <p>You have no pending tasks.</p>
    </div>
  </md-list>
</md-card>
Here we added a md-list component, provided by Angular Material, that iterates through the tasks, showing their creation date and their description. Also, each task got a button that enables users to delete them.
To make our interface better, let's add two CSS rules to the src/app/task-list/task-list.component.css file:
.task-item {
  padding: 10px;
  margin-bottom: 10px;
  background-color: #eee;
}

button.delete {
  float: right;
  top: -60px;
}
This will make different tasks distinguishable with a gray background color, and push the delete button to the right, aligning it vertically to the task.
Now our interface is ready to list tasks, so we need to make it visible by adding it to the src/app/app.component.html file. Open it and the TaskListComponent as follows:
<app-nav-bar></app-nav-bar>
<div class="app-container">
  <!-- ... card with welcome message -->
  <app-task-list *ngIf="authService.authenticated()"></app-task-list>
</div>
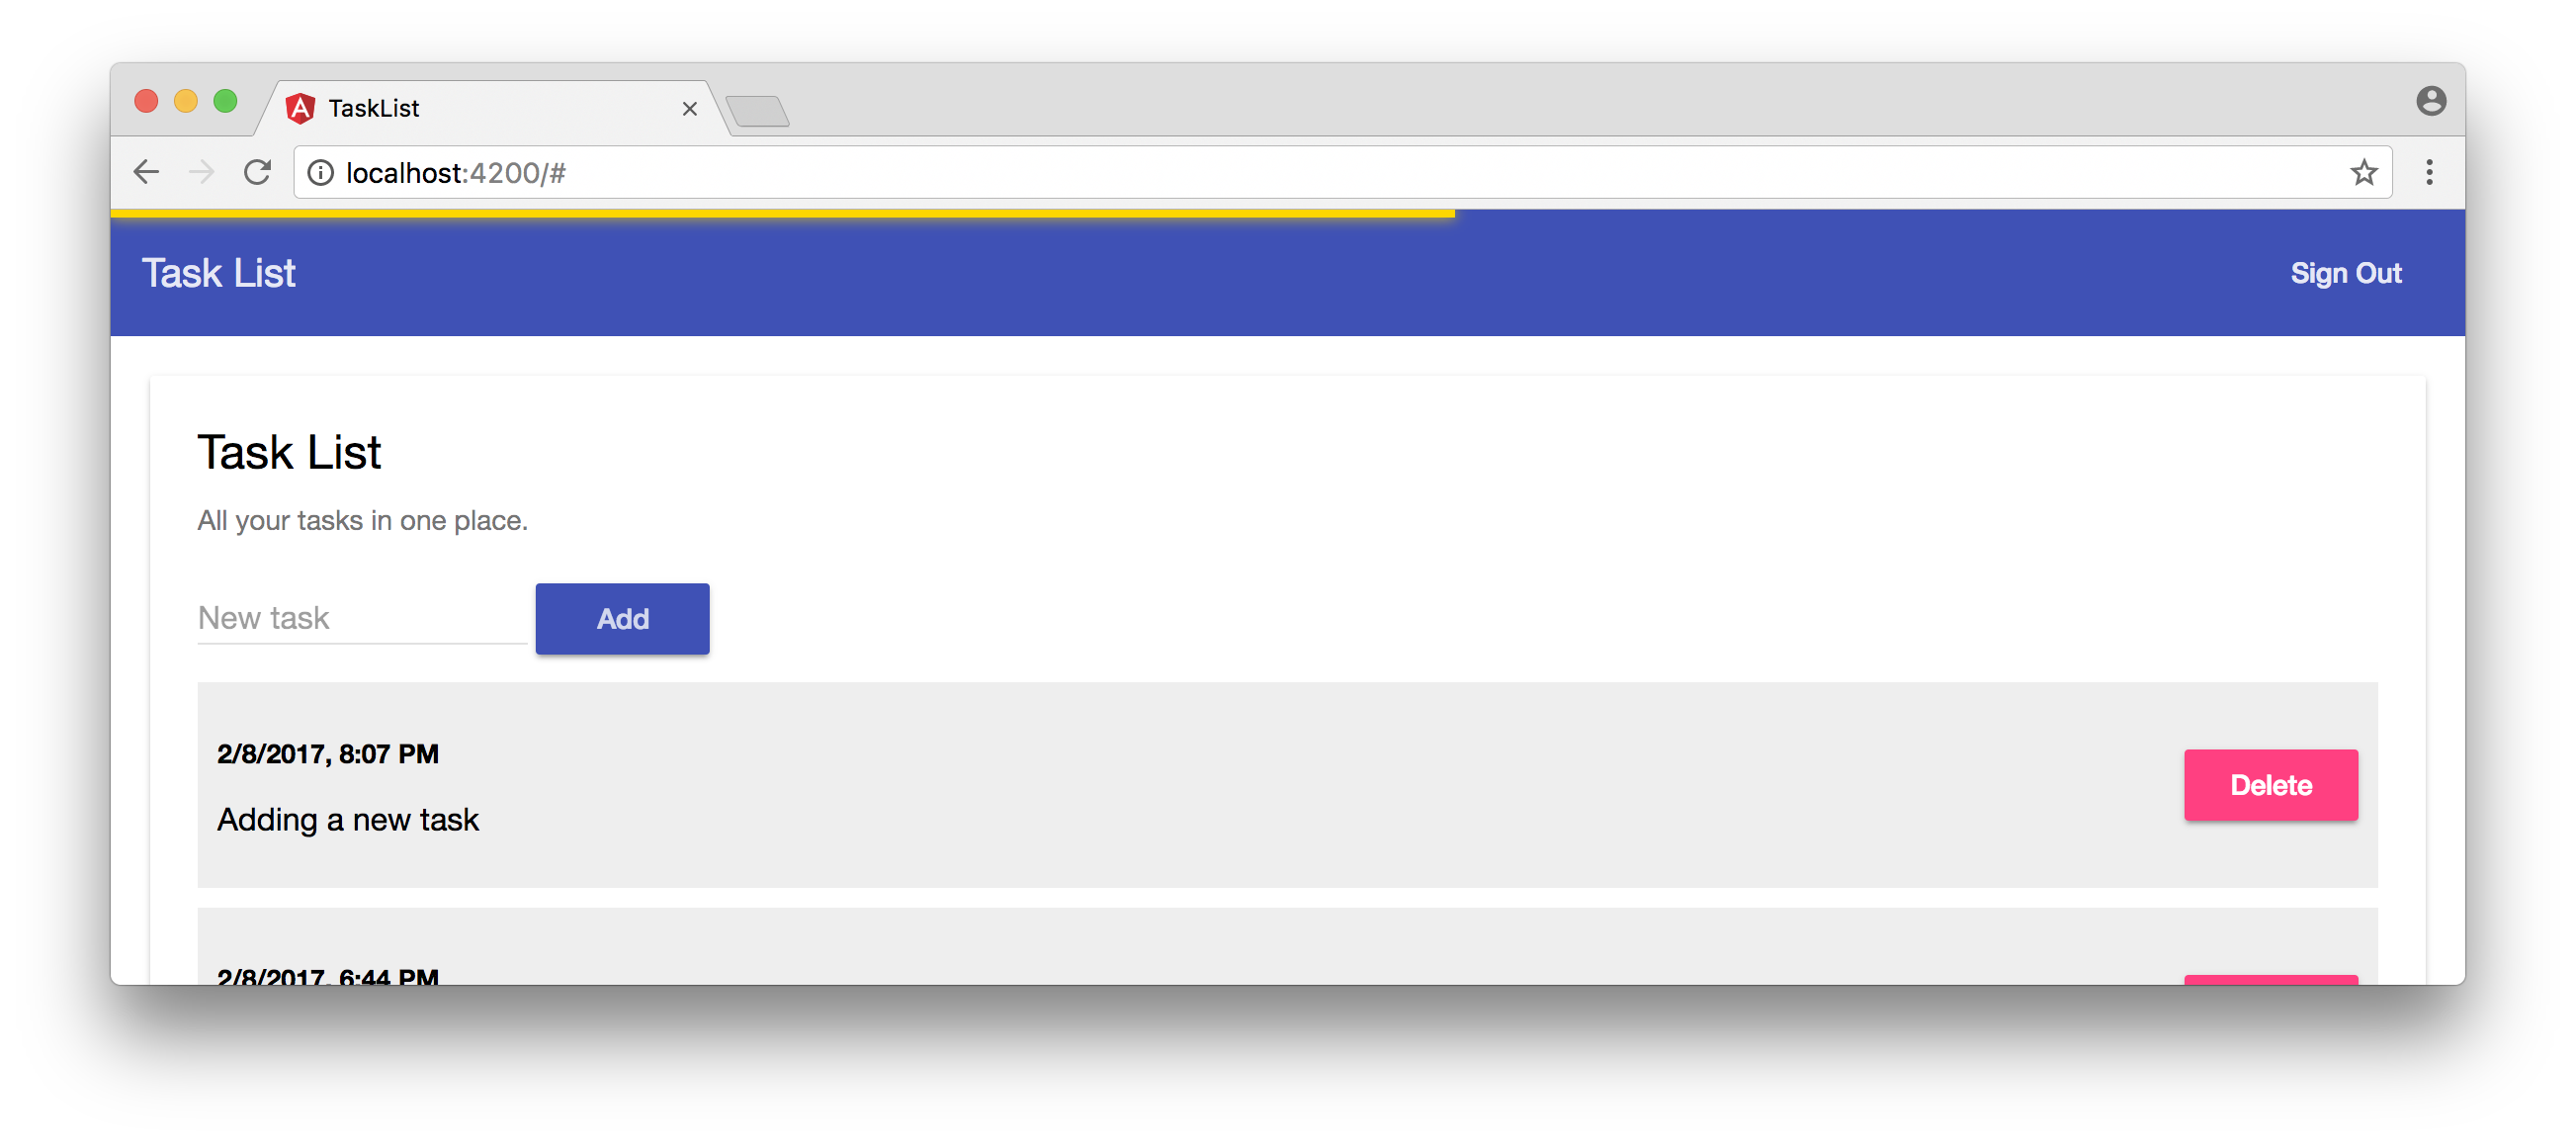
If we open our application in a browser, by accessing http://localhost:4200, we would see the following screen.

Our app's completion now depends on implementing the last component, TaskFormComponent, to allow users to add tasks to their lists.
Adding Tasks with Angular
To enable a user to add tasks, we need to open the src/app/task-list/task-form/task-form.component.ts file and implement it as follows:
import { Component, EventEmitter, Output } from '@angular/core';

@Component({
  selector: 'app-task-form',
  templateUrl: './task-form.component.html',
  styleUrls: ['./task-form.component.css']
})
export class TaskFormComponent {

  @Output()
  taskAdded = new EventEmitter();

  public task: String = null;

  addTask() {
    this.taskAdded.emit(this.task);
    this.task = null;
  }
}
This component accepts a user's task input and emits a taskAdded event with the data. This component's HTML, located in the src/app/task-list/task-form/task-form.component.html file, is also really simple:
<div class="task-form">
  <md-input-container>
    <input mdInput [(ngModel)]="task" placeholder="New task">
  </md-input-container>
  <button md-button md-raised-button color="primary" (click)="addTask()">Add</button>
</div>
When clicked, the Add button triggers the addTask method in the component. This method then triggers the taskAdded event emitter. TaskListComponent is the component that will listen to these events. We already implemented a method, called taskAdded, that can handle such events. We just need to update this component's HTML to add TaskFormComponent and register the event handler.
To do that, let's open src/app/task-list/task-list.component.html and add the app-task-form tag just before our list, as follows:
<md-card>
  <!-- ... card title and subtitle -->
  <app-task-form (taskAdded)="taskAddedHandler($event)"></app-task-form>
  <!-- ... md-list -->
</md-card>
And here we go. Our app is now fully implemented and ready to go to production.

Or is it? If we play a little with the application we will see that under some conditions the user experience is not that good. The app takes a while to update the task list when a new task is added or an existing one gets deleted. So there is room for improvement.
Adding an AJAX Loading Indicator
To solve this issue let's use a small module called Angular 2 Slim Loading Bar. To install it run npm install --save ng2-slim-loading-bar and then open the src/app/app.module.ts file to import it:
// ... other module imports
import { SlimLoadingBarModule } from 'ng2-slim-loading-bar';

@NgModule({
  // ... declarations
  imports: [
    // ... other imports
    SlimLoadingBarModule.forRoot()
  ],
  // ... providers and bootstrap
})
export class AppModule { }
We will also import its CSS rules by adding the following line to the top of our src/styles.css file:
@import '~ng2-slim-loading-bar/bundles/style.css';

/* ... everything else ... */
After that we need to make our AppComponent use SlimLoadingBarService. To do that let's open src/app/app.component.ts and edit as follows:
// ... other imports
import { SlimLoadingBarService } from 'ng2-slim-loading-bar';

// ... component definition
export class AppComponent {
  constructor(private authService: AuthService, private slimLoading: SlimLoadingBarService) { }

  // ... method definitions
}
SlimLoadingBarService contains two methods that we will use: start, which starts the loading bar; and complete, which ends the loading indicator. These methods will be registered as event listeners on TaskListComponent. We still didn't create event emitters in this component, but we can configure the listeners in advance. Let's open src/app/app.component.html and edit like this:
<app-nav-bar></app-nav-bar>
<div class="app-container">
  <!-- ... welcome message ... -->
  <app-task-list *ngIf="authService.authenticated()"
    (startAjaxRequest)="slimLoading.start()"
    (completeAjaxRequest)="slimLoading.complete()">
  </app-task-list>
</div>
<!-- adds the slim loading bar to our app -->
<ng2-slim-loading-bar [color]="'gold'" [height]="'4px'"></ng2-slim-loading-bar>
The last thing we will have to do is edit the src/app/task-list/task-list.component.ts file to create and use both startAjaxRequest and completeAjaxRequest event emitters on TaskListComponent:
// ... other imports
import { EventEmitter, Output } from '@angular/core';

// ... component definition
export class TaskListComponent implements OnInit {
  @Output()
  startAjaxRequest = new EventEmitter<void>();

  @Output()
  completeAjaxRequest = new EventEmitter<void>();

  // ... properties, constructor and ngOnInit definitions

  private loadTasks() {
    this.startAjaxRequest.emit();
    this.taskListService.loadTasks$().subscribe(
      response => this.tasks = response.json(),
      error => console.log(error),
      () => this.completeAjaxRequest.emit()
    );
  }

  taskAddedHandler(task) {
    this.startAjaxRequest.emit();
    this.taskListService.addTask$(task).subscribe(
      response => this.loadTasks(),
      error => console.log()
    );
  }

  deleteTask(task) {
    this.startAjaxRequest.emit();
    this.taskListService.deleteTask$(task).subscribe(
      response => this.loadTasks(),
      error => console.log()
    );
  }
}
Here we have create both event emitters and have added them to the three methods that depend on AJAX request. Whenever one of these methods gets called we emit an event, through this.startAjaxRequest.emit(), to make the Slim Loading Bar start running the loading bar indicator. After getting a response back from the AJAX requests sent by the loadTasks method, that updates the task list, we tell Slim Loading Bar to complete its progress through this.completeAjaxRequest.emit().
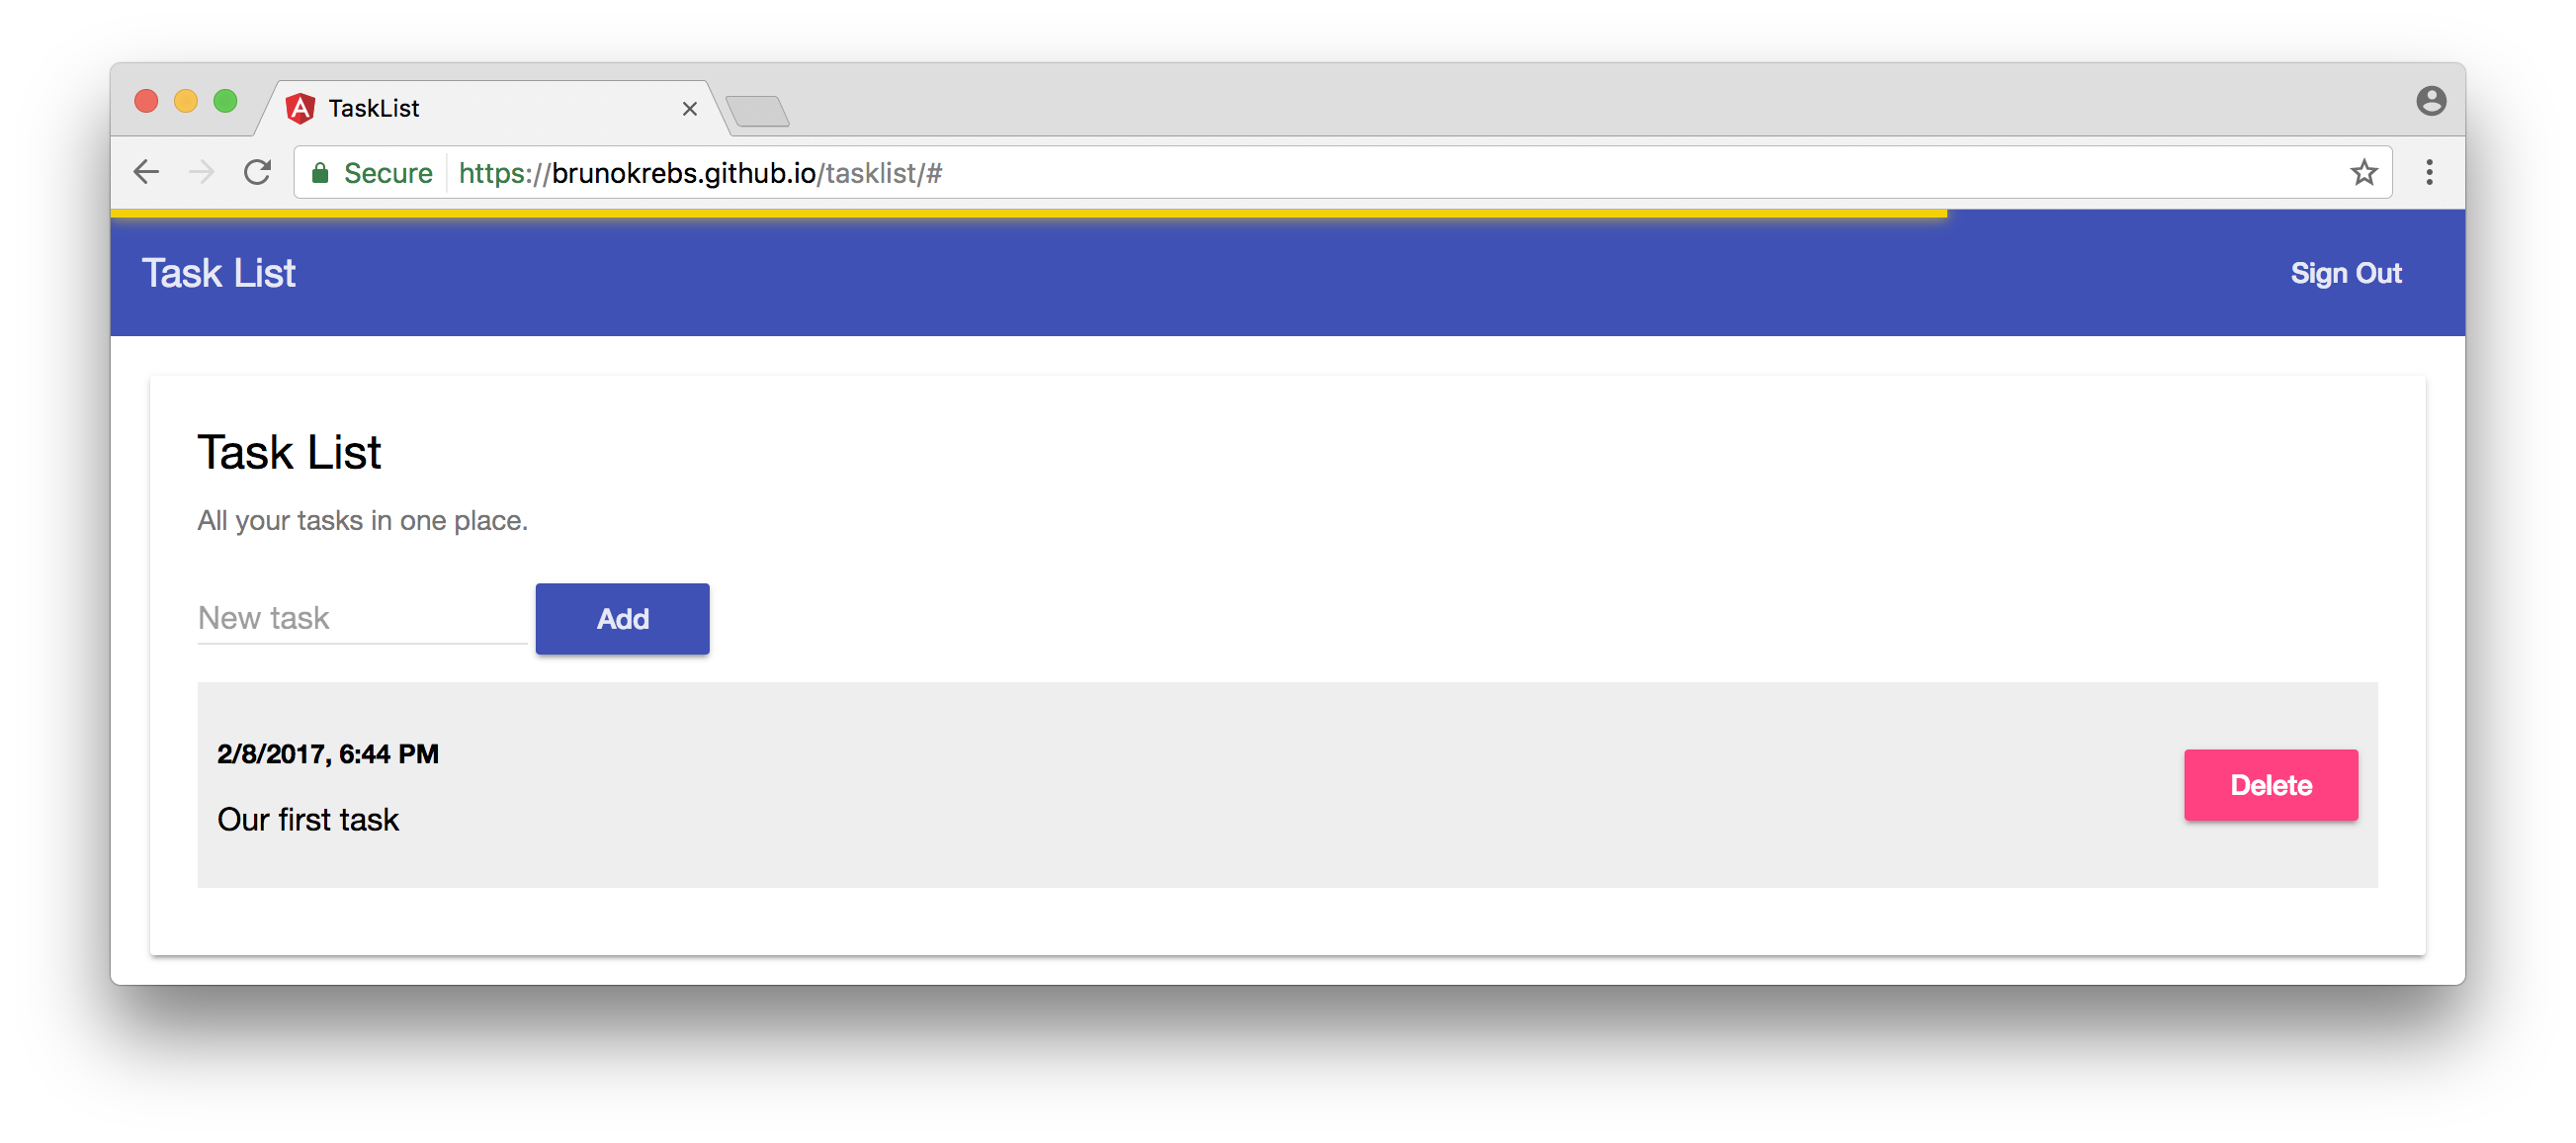
If we run our development server by issuing ng serve and heading to http://localhost:4200/, we will see our application with a better user experience:
Going Live with GitHub Pages
Our application is ready to be deployed to production. We have a persistence layer that saves all users' tasks. We have a serverless REST API that accepts GET, POST and DELETE requests to manipulate tasks. We have security, provided by Auth0. And we have a good looking Angular single page application interface. The only thing that is missing is a place to host our static (HTML, CSS and JavaScript) files.
That is exactly what GitHub Pages provides. To use it is simple. We just need to create a repository and push our work to a branch called gh-pages. This branch should contain only our production bundles.
To create a GitHub repository go to GitHub, sign in (or sign up if you don't have an account) and choose the Create a New Repository option. Create your new repository naming it as task-list. Note that if you choose another name, you will have to adjust the base-href parament of the ng build command that we will run later.

Now we have to add this repository as a remote to our application. When we created our project with Angular CLI, it already came with Git. We just have to add this remote, commit all our changes and push to its master:
# adds new repo as a remote
git remote add origin git@github.com:YOUR-USERNAME/YOUR-REPO.git

# commits our code
git add .
git commit -m "Task List Angular app with a secure serverless REST API."

# push work to new repo
git push origin master
Having our code safe, we can now work on the going live task. Two steps are needed here. The first one is to prepare our code for production and package it. Again Angular CLI comes in handy. To do that we just have to issue ng build --prod --base-href=/task-list/. Note that we have to set base-href to the exact same name of our GitHub repository, otherwise our application won't be able to load all the resources and it won't work.
The second step used to be handled by Angular CLI, but this command has been removed in the latest release, so we will need a third party tool to help us here. Fortunately, there is one that is very easy to use called angular-cli-ghpages. To install it issue npm install -g angular-cli-ghpages. After that we just have to execute angular-cli-ghpages (yep, without any parameters) and voilà. Our app is up and running on GitHub Pages.
Important: do not forget to update the Allowed Callback URLs on your Auth0 account. The list of allowed URLs must have the URL where our app was exposed. This should be something like https://brunokrebs.github.io/task-list/.
“GitHub pages is a great place to host your SPAs.”
Tweet This
Conclusion
As we could see, when we choose the right tools, it gets easy to achieve great accomplishments. We started with nothing, just an idea to develop a task list application, and managed to create and release it to the internet with not that much effort.
We didn't even have to worry about building, supporting and securing servers to host our web application or our database. If we had to manage these tasks by ourselves, we would take much more time and wouldn't be as confident about our app's security, fault tolerance and scalability.
And this is just the beginning. Freeing ourselves from all these issues enables us to focus 100% on our ideas and on what makes our applications unique.
Auth0 provides the simplest and easiest to use User interface tools to help administrators manage user identities including password resets, creating and provisioning, blocking and deleting users.
About the author

Bruno Krebs
R&D Content Architect (Auth0 Alumni)