
Learn how to use Spring Boot, Java, and Auth0 to secure a feature-complete API by implementing authorization in Spring Boot with Auth0.
This tutorial was created with the following tools and services:
Authentication and Authorization on the Web
Authentication is the process of proving a user's identity, proving they are who they claim to be. Authorization is the process of giving someone the ability to access a resource.
In computer systems, authentication and authorization are part of a discipline called Identity and Access Management (IAM). OAuth 2.0 is a standard designed to authorize a website or application to access resources hosted by third-party services on behalf of a user. For web and mobile applications, an identity protocol was born in 2014, OpenID Connect 1.0 (OIDC), a simple identity layer on top of OAuth 2.0, now widely adopted as part of the IAM strategy of many identity providers and identity clients on the internet.
To authorize access to a protected resource, OAuth 2.0 uses Access Tokens. An access token is a piece of data representing an authorization issued to the client. It may also include scopes and durations of the access. The token is validated at the resource server. Briefly, the standard defines the roles of the resource owner, resource server, client, and authorization server, as well as a protocol flow for the client requesting access through an authorization server to resources controlled by the resource owner and hosted by the resource server.
OpenID Connect provides authentication built on top of OAuth 2.0, and information about the authentication performed is returned in an ID Token with JWT format (JSON Web Token). In the abstract, the protocol defines a client role or Relying Party that sends a request to the OpenID Provider, which in turn authenticates the end-user and obtains authorization, returning an ID Token and Access Token to the Relying Party.
Authorization in a Spring Boot API
After the year 2020, in Buenos Aires, many bars and restaurants implemented a digital menu with a QR code that translates to a public document for having an updated price list. Prices change so often due to inflation, and updating a physical menu seems tedious and costly. Still, restaurant tables are managed with a software application, which includes a menu management module.
For learning purposes, let's assume you have built a Spring Boot menu API that must be secured so only authorized users can make requests to its endpoints. Now, you are going to implement authorization for the API with OAuth 2.0 and Auth0. Start by doing a checkout of the API repository, which already implements basic request handling:
git clone https://github.com/oktadev/spring-menu-api.git
The repository contains two project folders, start and demo. The bare bones menu API is a Gradle project in the start folder, open it with your favorite IDE. If you would rather skip the step-by-step security configuration and just run the final demo project, follow the instructions in the README.
Sign up at Auth0 and install the Auth0 CLI. Then, in the command line, run:
auth0 login
The command output will display a device confirmation code and open a browser session to activate the device.
You need to create a client application for your API if you are using opaque tokens. Since this tutorial does not use opaque tokens, you only need to register the API within your tenant. You can do it using Auth0 CLI:
auth0 apis create \
  --name "Menu API" \
  --identifier https://menu-api.okta.com \
  --scopes "create:items,update:items,delete:items" \
  --offline-access=false
The scopes create:items, update:items, delete:items will be required ahead in the tutorial.
Next, add the okta-spring-boot-starter dependency:
// build.gradle
dependencies {
    ...
    implementation 'com.okta.spring:okta-spring-boot-starter:3.0.6'
    ...
}
As the menu-api must be configured as an OAuth2 resource server, add the following properties to the application.properties file:
# application.properties
okta.oauth2.issuer=https://<your-auth0-domain>/
okta.oauth2.audience=https://menu-api.okta.com
You can find your Auth0 domain with the following Auth0 CLI command:
auth0 tenants list
Run the API with:
./gradlew bootRun
Test the API authorization with curl:
curl -i localhost:8080/api/menu/items
You will get HTTP response code 401 because the request requires bearer authentication. Using Auth0 CLI, get an access token:
auth0 test token -a https://<your-auth0-domain>/api/v2/ -s openid
Select any available client when prompted. You also will be prompted to open a browser window and log in with a user credential. You can sign up as a new user using an email and password or using the Google social login.
With curl, send a request to the API server using a bearer access token:
ACCESS_TOKEN=<auth0-access-token>
curl -i --header "Authorization: Bearer $ACCESS_TOKEN" localhost:8080/api/menu/items
The request will not be authorized yet; you will see the error message This aud claim is not equal to the configured audience. The error means that the audience contained in the aud claim of the access token does not match the expected audience configured in the server properties. When requesting a token with theauth0 test token command, the default audience value is https://<your-auth0-domain>/api/v2, which is the Auth0 Provider management API audience.
NOTE: The Okta Spring Boot Starter autoconfigures the issuer and audience validation from the resource server properties for JWT authorization.
Request a test token again, this time with the expected audience:
auth0 test token -a https://<your-auth0-domain>/api/v2/ -s openid -a https://menu-api.okta.com
Try the API request again, and you should get a JSON response listing the menu items:
[
    {
        "description": "Tasty",
        "id": 1,
        "imageUrl": "https://cdn.auth0.com/blog/whatabyte/burger-sm.png",
        "name": "Burger",
        "price": 599.0
    },
    {
        "description": "Cheesy",
        "id": 2,
        "imageUrl": "https://cdn.auth0.com/blog/whatabyte/pizza-sm.png",
        "name": "Pizza",
        "price": 299.0
    },
    {
        "description": "Informative",
        "id": 3,
        "imageUrl": "https://cdn.auth0.com/blog/whatabyte/tea-sm.png",
        "name": "Tea",
        "price": 199.0
    }
]
Authentication from a Single-Page Application (SPA)
It would be so much fun testing the API with a client application. Good fortune is on your side because you can use the WHATABYTE client, a live demo application where you can configure Auth0 authentication and send requests to your local API server.
For the Auth0 authentication, you need to register the live client as a Single-Page Application to Auth0. You can do it with the Auth0 CLI:
auth0 apps create \
  --name "WHATABYTE client" \
  --description "Single-Page Application for menu items CRUD" \
  --type spa \
  --callbacks https://dashboard.whatabyte.app/home \
  --logout-urls https://dashboard.whatabyte.app/home \
  --origins https://dashboard.whatabyte.app \
  --web-origins https://dashboard.whatabyte.app
Go to the WHATABYTE client, and set API Server Base URL to http://localhost:8080. Toggle on Enable Authentication Features and set the following values:
- Auth0 Domain: <your-auth0-domain>
- Auth0 Client ID: <client-id>
- Auth0 Callback URL: https://dashboard.whatabyte.app/home
- Auth0 API Audience: https://menu-api.okta.com
Click Save.
For the API server to accept requests from the WHATABYTE client, you must tweak the CORS configuration, enabling the WHATABYTE client URL as an allowed origin for requests.
In the API project under the start folder, add a SecurityConfig class at the root package:
// src/main/java/com/example/menu/SecurityConfig.java
package com.example.menu;

@Configuration
public class SecurityConfig {

    @Bean
    public SecurityFilterChain configure(HttpSecurity http) throws Exception {
        return http
                .oauth2ResourceServer(oauth2ResourceServer -> oauth2ResourceServer.jwt(withDefaults()))
                .build();
    }

}
Modify ItemController by adding the @CrossOrigin annotation:
// src/main/java/com/example/menu/web/ItemController.java
...

@RestController
@RequestMapping("/api/menu/items")
@CrossOrigin(origins = "https://dashboard.whatabyte.app")
public class ItemController {

...
Restart the API server. Before the sign in, you can create some test users with the Auth0 CLI. This step is optional; you can sign up later from the Auth0 Universal Login form or choose Google social login.
auth0 users create
Complete the required information; you will see an output like the lines below:
Connection Name: Username-Password-Authentication
 Name: Thomas
 Email: thomas@email.com
 Password: ********

=== dev-avup2laz.us.auth0.com user created

  ID          auth0|643ec0e1e671c7c9c5916ed6
  EMAIL       thomas@email.com
  CONNECTION  Username-Password-Authentication
Save the ID for later.
In the WHATABYTE client, click the Sign in button. The client will redirect you to the Auth0 Universal Login page. Sign in with the user you just created. In the left menu, choose Menu, and the menu items will display.

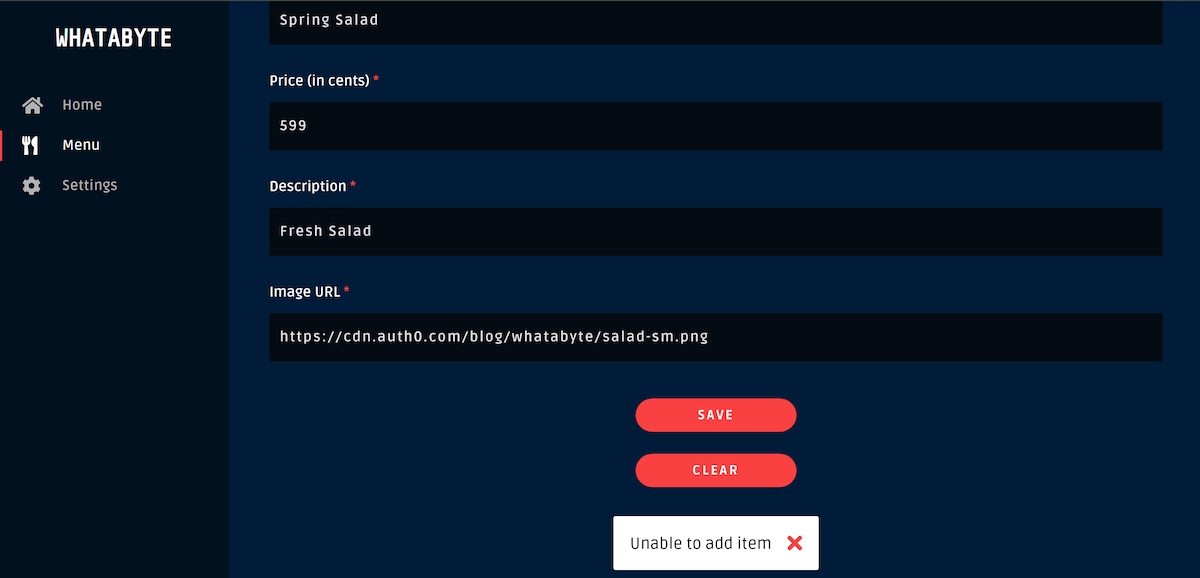
On the top right corner, click Add Item, and a pre-populated form will display. Click on Save and verify that the user request is authorized in the server.
Role-Based Access Control (RBAC)
If you disable the authentication features in the WHATABYTE client, it will allow you to attempt CRUD operations from the UI, but your API server will reject item modifications as an unauthenticated user.
Besides requiring a user to be authenticated, it is a standard practice to create roles for authorizing write operations.
Create and assign roles
In the WHATABYTE client settings, re-enable the authentication features and also enable RBAC. Set menu-admin in the User Role text box. Click on Save.
Now, if you sign in with the user you created, the UI will not display the links to perform write operations, as the role has not yet been assigned.
First, the menu-admin role must be defined in the Auth0 tenant as well. You can use the following Auth0 CLI command:
auth0 roles create
Assign the role to the user you created:
auth0 users roles assign
NOTE: You can find the user id with
auth0 users search --query email:<email>
Follow the steps, you will see the output below:
=== dev-avup2laz.us.auth0.com user roles (1)

  ID                    NAME           DESCRIPTION
  rol_Nf2xmon4GzTbLU9T  menu-admin     Admin role for menu item write operations
Mapping the roles to token claims
The role menu-admin and its permissions must be mapped to a claim in the access token, to make them available in the API for authorization. With Auth0 Actions you can customize the Login flow to map the user roles to a custom claim.
First configure your preferred editor to use with the Auth0 CLI:
# for example
export EDITOR=nano
Then, create the Login Action:
auth0 actions create
Set the name Add Roles, and select post-login for the Trigger. When the editor opens, set the following implementation for the onExecutePostLogin function.
exports.onExecutePostLogin = async (event, api) => {
  const namespace = 'https://menu-api.okta.com';
  if (event.authorization) {
    api.idToken.setCustomClaim('preferred_username', event.user.email);
    api.idToken.setCustomClaim(`${namespace}/roles`, event.authorization.roles);
    api.accessToken.setCustomClaim(`${namespace}/roles`, event.authorization.roles);
  }
}
Save the file. You will see a detailed output once the action is created.
You can list the available actions with the following command:
auth0 actions list
The output will show the deployment status of each action:
=== dev-avup2laz.us.auth0.com actions

  ID                                    NAME       TYPE        STATUS  DEPLOYED
  da49ae42-b5e4-496a-8305-4fff437f813b  Add Roles  post-login  built   ✗
Note the DEPLOYED status is x. Go ahead and deploy it using the action ID:
auth0 actions deploy <ACTION_ID>
Once the action is deployed, you must attach it to the login flow. You can do this with Auth0 Management API for Actions:
auth0 api patch "actions/triggers/post-login/bindings" \
  --data '{"bindings":[{"ref":{"type":"action_id","value":"<ACTION_ID>"},"display_name":"Add Roles"}]}'
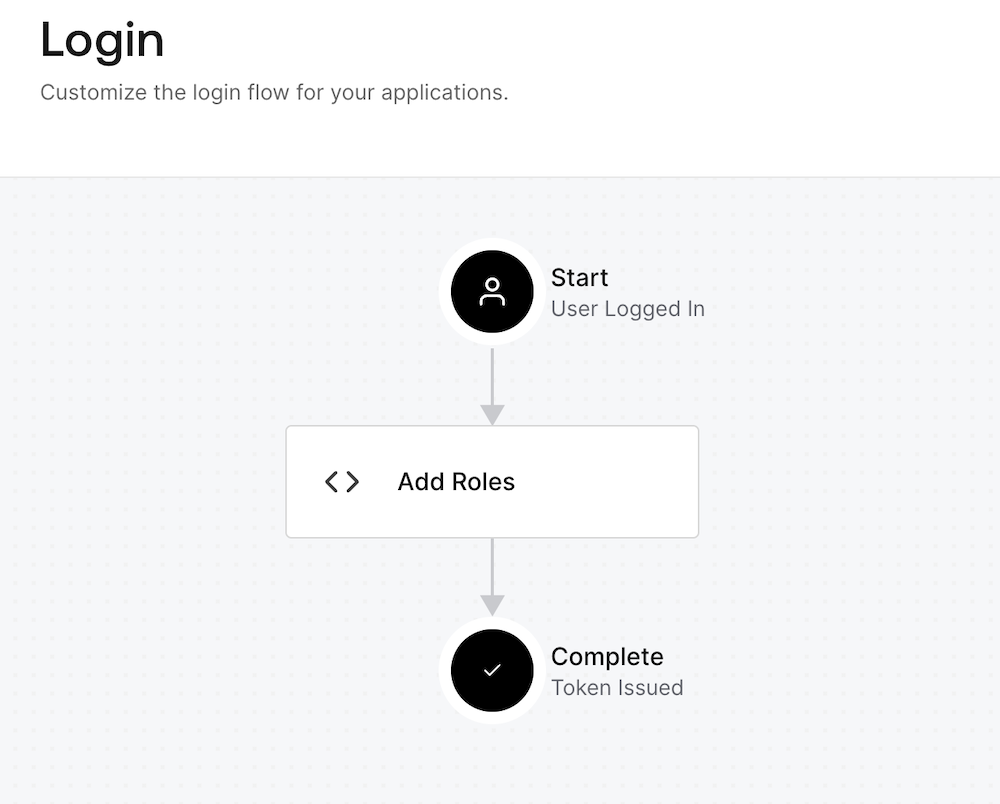
You can visualize the flow in the Auth0 dashboard. Sign in, and on the left menu, you choose Actions, then in the Flows screen, choose Login.
Now, the role has been assigned and mapped to the ID and access tokens, and the UI will display the links to perform write operations. Still, the API server is not yet enforcing RBAC.
Enable RBAC in Auth0
The next step is to enable RBAC for the API in Auth0. You can do it with the following Auth0 CLI commands:
auth0 apis list
Copy the Menu API ID and use it for the next command:
auth0 api patch "resource-servers/<API_ID>" \
  --data '{ "enforce_policies": true, "token_dialect": "access_token_authz" }'
The token_dialect value access_token_authz enables the permissions to be included in the access token in a custom permissions claim.
Assign the Menu API permissions to the menu-admin role:
auth0 roles permissions add
Follow the instructions, and make sure to select all the API permissions:
create:itemsdelete:itemsupdate:items
 Want to take your Authorization to the next level? → fga.dev
Implement RBAC in the Spring Boot API
The Okta Starter provides a simple way to specify the claim from which authorities must be extracted. In the application.properties file, add the following property:
okta.oauth2.groupsClaim=permissions
With the @PreAuthorize annotation, you define the required permission to perform the endpoint operation. The final controller implementation should look like this:
// src/main/java/com/example/menu/web/ItemController.java
package com.example.menu.web;

@RestController
@RequestMapping("/api/menu/items")
@CrossOrigin(origins = "https://dashboard.whatabyte.app")
public class ItemController {

    private ItemRepository itemRepository;

    public ItemController(ItemRepository itemRepository) {
        this.itemRepository = itemRepository;
    }

    @GetMapping
    public Collection<Item> items(){
        List<Item> list = new ArrayList<>();
        this.itemRepository.findAll().forEach(list::add);
        return list;
    }

    @GetMapping("/{id}")
    public ResponseEntity<Item> item(@PathVariable Long id){
        return this.itemRepository.findById(id)
                .map(item -> ResponseEntity.ok().body(item))
                .orElse(ResponseEntity.notFound().build());
    }

    @PutMapping("/{id}")
    @PreAuthorize("hasAuthority('update:items')")
    public ResponseEntity<Item> updateItem(@Valid @RequestBody Item items, @PathVariable Long id){
        return this.itemRepository.findById(id)
                .map(item -> {
                    item.setName(items.getName());
                    item.setPrice(items.getPrice());
                    item.setDescription(items.getDescription());
                    item.setImage(items.getImage());
                    Item result = this.itemRepository.save(item);
                    return ResponseEntity.ok().body(result);
                }).orElse(ResponseEntity.notFound().build());
    }

    @PostMapping
    @PreAuthorize("hasAuthority('create:items')")
    public ResponseEntity<Item> createItem(@Valid @RequestBody Item item) throws URISyntaxException {
        Item result = this.itemRepository.save(item);
        return ResponseEntity.created(new URI("/api/menu/items/" + result.getId())).body(result);

    }

    @DeleteMapping("/{id}")
    @PreAuthorize("hasAuthority('delete:items')")
    public ResponseEntity<?> deleteItem(@PathVariable Long id){
        this.itemRepository.deleteById(id);
        return ResponseEntity.ok().build();
    }


}
For the @PreAuthorize rules to take effect, you must add the annotation @EnableGlobalMethodSecurity to the security configuration, the final code must look like this:
// src/main/java/com/example/menu/SecurityConfig.java
package com.example.menu;

@Configuration
@EnableGlobalMethodSecurity(prePostEnabled = true)
public class SecurityConfig {

    @Bean
    public SecurityFilterChain configure(HttpSecurity http) throws Exception {
        return http.oauth2ResourceServer(oauth2ResourceServer -> oauth2ResourceServer.jwt(withDefaults())).build();
    }

}
Restart the API and your user should now have the required permissions to request write operations to the Menu API.
If you remove the permissions from the menu-admin role, the UI will display links for item modifications, but the API server will reject the operations as the required permissions will not be present in the access token.
Learn More about Spring Boot Authentication and Authorization
I hope you enjoyed this tutorial on how to secure a Spring Boot API with OAuth2 and Auth0. You learned how to configure a resource server with okta-spring-boot-starter and how to implement RBAC.
You can find all the code shown in this tutorial on GitHub in the spring-menu-api repository.
If you liked this post, you might enjoy these related posts:
- Deploy Secure Spring Boot Microservices on Amazon EKS Using Terraform and Kubernetes
- Get started with Spring Boot and Auth0
- Build a Beautiful CRUD App with Spring Boot and Angular
- Get Started with Jetty, Java, and OAuth
Check out the Spring Boot Security labs in our Developer Center:
- Authorization in Spring Boot
- Authentication in Spring Boot
- Role Based Access Control in Spring Boot
- Build and Secure Spring Boot Microservices
Please follow us on Twitter @oktadev and subscribe to our YouTube channel for more Spring Boot and microservices knowledge.
You can also sign up for our developer newsletter to stay updated on everything about identity and security.
About the author

Jimena Garbarino
Spring Cloud Developer