
TL;DR: Node.js is a JavaScript runtime built on Chrome's V8 JavaScript engine. It has gained massive adoption by developers and organizations around the world because of it's efficient, event-driven and non-blocking I/O model. Node.js makes it possible for developers to code the most popular language (JavaScript) in the world on the backend. Furthermore, Node.js's package manager,npm, houses the largest distribution of open source libraries in the world. Node.js and npm just had new major releases. In this article, we'll highlight 7 notable additions to Node.js and dabble into the new monster, npm@5.
Node.js 8.0.0 was announced to the world on May 31, 2017. The previous Node.js version was v7.10.0. The v was dropped in order to avoid confusion with the V8 JavaScript engine. This major release brings a lot of new features, deprecations and changes. By October, 2017, Node.js 8 will become a Long Term Support (LTS) release. Next, notable additions!
1. Node.js API (N-API)
Currently, this is an experimental feature behind a flag. 30 percent of JavaScript modules rely indirectly on native modules.
Existing native modules are written in C/C++ and directly depend on V8 or Native Abstractions for Node.js (NAN) APIs. This dependency requires native modules to be recompiled and updated for every major Node.js release. This is a burden for native modules maintainers. Furthermore, companies and products depending on these modules find it difficult to upgrade their Node.js versions in production because of potential massive code breakage.
Now, the N-API is here to eliminate breakage of dependencies that happens between release lines with native modules. The full N-API functions can be found in the documentation.
“N-API is here to eliminate breakage of dependencies that happens between release lines with native modules.”
Tweet This
Note: These 5 modules, node-sass, canvas , leveldown , nanomsg, and iotivity have successfully been ported to use N-API.
Native modules builders and users can start experimenting with this feature. More details can be found here.
2. Better Support for Promises
This release includes a new util.promisify() API that allows developers to wrap standard callback-style APIs in a function that returns a Promise. Check out this sample code:
const fs = require('fs');
const util = require('util');

const readfile = util.promisify(fs.readFile);

readfile('/some/file')
  .then((data) => { /** ... **/ })
  .catch((err) => { /** ... **/ });
3. Buffer Improvements
The Node.js Buffer API witnessed a lot of changes. Most notable amongst these changes is:
- Zero-filling new instances of Buffer(num) by default will have a negative significant impact on performance. The positive side of zero-filling Buffer is that it helps to prevent information leaks.
You want Buffer instances with uninitialized memory? No problem! Use the Buffer.allocUnsafe(num) API.
// Zero-filled Buffers
const safeBuffer1 = Buffer.alloc(20);
const safeBuffer2 = new Buffer(20);

// Uninitialized Buffer
const unsafeBuffer = Buffer.allocUnsafe(20);
Note: Developers should be very careful when using the
Buffer.allocUnsafe. Only use it when you are aware of the risks and how to avoid it.
4. Stable WHATWG URL Parser
This release makes the WHATWG URL parser fully supported. No more hiding behind the experimental flag. It's a URL API implementation that matches the URL implementation in modern web browsers like Firefox, Edge, Chrome, and Safari allowing code using URLs to be shared across environments. The URL implementation will be handled equally on these modern browsers.
const myURL = new URL('/foo', 'https://example.org/');

// result
https://example.org/foo

const myURL = new URL('https://example.org/foo#bar');
console.log(myURL.hash);
// returns #bar

console.log(myURL.href);
// returns https://example.org/foo#baz
5. async_hooks
The experimental async_hooks module otherwise known as async_wrap has received a major bump in Node.js 8.
This API gives developers the ability to register callbacks tracking the lifetime of asynchronous resources created inside a Node.js application. An asynchronous resource represents an object with an associated callback. Some of the API methods can be found below:
const async_hooks = require('async_hooks');

const cid = async_hooks.currentId();
// returns the ID of the current execution context.

const tid = async_hooks.triggerId();
// returns the ID of the handle responsible for triggering the callback of the current execution scope to call.

// Create a new AsyncHook instance. All of these callbacks are optional.
const asyncHook = async_hooks.createHook({ init, before, after, destroy });
Look at this example below:
const fs = require('fs');
const async_hooks = require('async_hooks');

async_hooks.createHook({
  init(asyncId, type, triggerId) {
    const cId = async_hooks.currentId();
    fs.writeSync(1, `${type}(${asyncId}): trigger: ${triggerId} scope: ${cId}\n`);
    }
  }).enable();

require('net').createServer((conn) => {}).listen(8080);
Output when hitting the server with nc localhost 8080:
TCPWRAP(2): trigger: 1 scope: 1
TCPWRAP(4): trigger: 2 scope: 0
The first TCPWRAP is the server which receives the connections. The second TCPWRAP is the new connection from the client. When a new connection is made the TCPWrap instance is immediately constructed. This happens outside of any JavaScript stack (side note: a currentId() of 0
means it's being executed from C++, with no JavaScript stack above it). With only that information it would be impossible to link resources together in terms of what caused them to be created, so triggerId is given the task of propagating what resource is responsible for the new resource's existence.
The full documentation can be found here.
6. Stream API Improvements
This release adds new ways for destroying and finalizing Stream instances. Every Stream instance will now inherit a destroy() method, the implementation of which can be customized and extended by providing a custom implementation of the _destroy() method.
myStream._destroy = function (cb) {
  closeResources(function (err) {
    cb(err)
  })
}

myStream.destroy();
The _destroy() method can take in two arguments, the err and callback function. The callback function takes an optional error argument which is invoked when the stream is destroyed.
From the code above, there is a custom implementation of the _destroy() method. So calling the destroy() method destroys the stream, and emits the passed error.
7. Inspector JavaScript API
Developers have a new way of debugging their Node.js applications via the experimental inspector JavaScript API. This API leverages the debug protocol to inspect various Node.js processes.
The inspector module provides an API for interacting with the V8 inspector.
const inspector = require('inspector');

const session = new inspector.Session();
session.connect();

// Listen for inspector events
session.on('inspectorNotification', (message) => {
  // Do whatever
});

// Send messages to the inspector
session.post(message);

session.disconnect();
There are other events such as the Debugger.paused and Debugger.resumed events that you can listen to with this module.
Check out how to inspect your node.js scripts and also use Chrome DevTools to debug your Node.js apps
If you are curious about other changes and additions in Node.js 8.0.0 release, you can check out the full list of changes here.
Note: Node.js 8.0.0 ships with npm 5.
Let's highlight major changes in npm 5.
npm@5
npm's latest version is npm@5. What's new in npm@5?
1. Wicked Fast Install
I bumped my npm version to npm 5 using npm install npm@latest -g and the first thing I discovered was that my module installs were insanely fast!
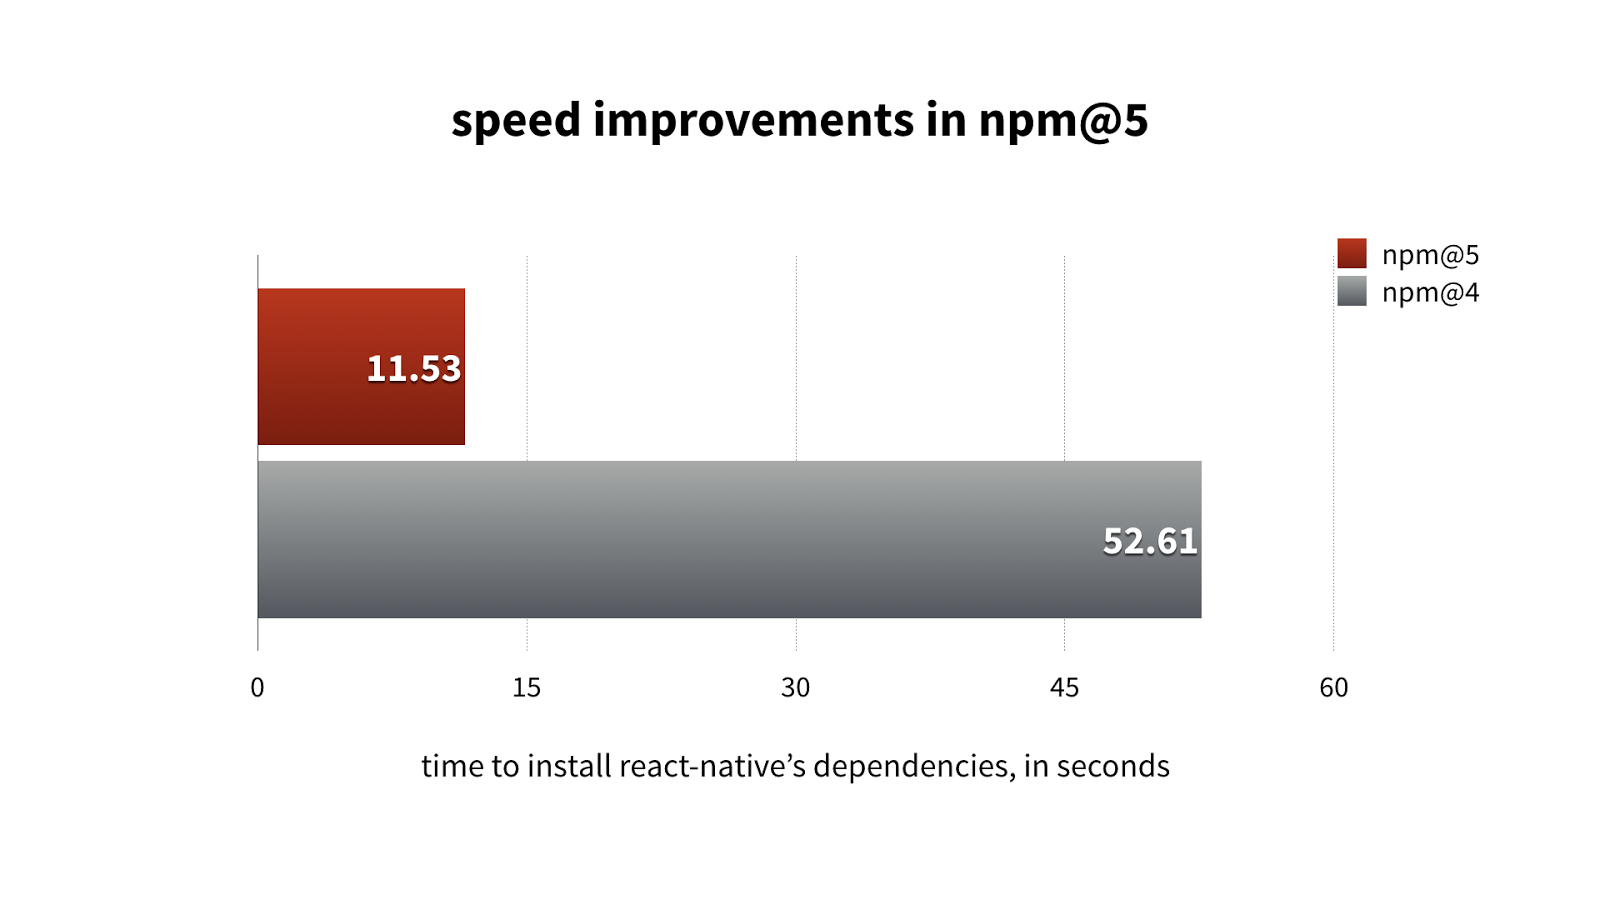
With #npm5 about to come out, I thought I'd update those benchmarks.
Here's the npm5 code I'm working on, vs npm@4.6.1 on a popular repo pic.twitter.com/KWPfbpE46p
— ✨11x gayer Kat✨ (@maybekatz) May 19, 2017
One of the benefits of Yarn over npm was faster package install, but with npm@5, you don't need to brew coffee anymore during waiting time! Your modules install before you say Jack! Well, literally not at that speed, but it takes lesser time to install node modules. Significant performance improvements of 20 to 100 percent!
“With npm@5, you don't need to brew coffee anymore during waiting time!”
Tweet This

Installed in 12.557s

Installed in 98.99s
Oh yeah! npm is now faster than Yarn!
Check out 5 things you can do with Yarn
2. Lockfiles
With npm@5, lockfiles are the default (package-lock.json). This simply means that whatever files you get when you install a package will be the same every time you install that package after initial install. This eliminates the challenges developers had with having different files on different developer environments after installing the same package.

3. SHA-512 Hash
The npm CLI will use sha512 for tarballs from registries that sends a sha512 checksum as the tarball hash. npm@5 publishes with SHA-512 hashes. This is to protect a developer against malicious attacks by checking downloaded packages and ensuring that code downloaded from the registry is safe and unwavering!
4. Saves by default
All installs save by default with npm@5. Adding the --save flag is no longer necessary. If you don't want to save the installed package, add the --no-save flag.
5. Install Report Summary
npm@5 doesn't show the whole installed tree on your screen anymore. Instead, you'll see a summary report of the install on your screen like so:

Added 2 packages in 0.599s
6. Automatic Fallback to Offline mode
npm@5 will use your cache if you are offline to install packages that have been installed before but are no longer available maybe due to accidental node_modules folder deletion. Check this out:
this is fun. pic.twitter.com/gVakQFVfax
— ✨11x gayer Kat✨ (@maybekatz) April 18, 2017
npm@5 shipped with a lot of changes that I might not be able to mention in this article. However, do well to check the full list of changes from the GitHub repo.
Aside: Using Auth0 with npm@5
Auth0 issues JSON Web Tokens on every login for your users. This means that you can have a solid identity infrastructure, including single sign-on, user management, support for social identity providers (Facebook, GitHub, Twitter, etc.), enterprise identity providers (Active Directory, LDAP, SAML, etc.) and your own database of users with just a few lines of code.
Auth0 provides the simplest and easiest to use user interface tools to help administrators manage user identities including password resets, creating and provisioning, blocking and deleting users. A generous free tier is offered so you can get started with modern authentication.
We can easily set up authentication in our JavaScript apps by using Auth0's Centralized Login Page.
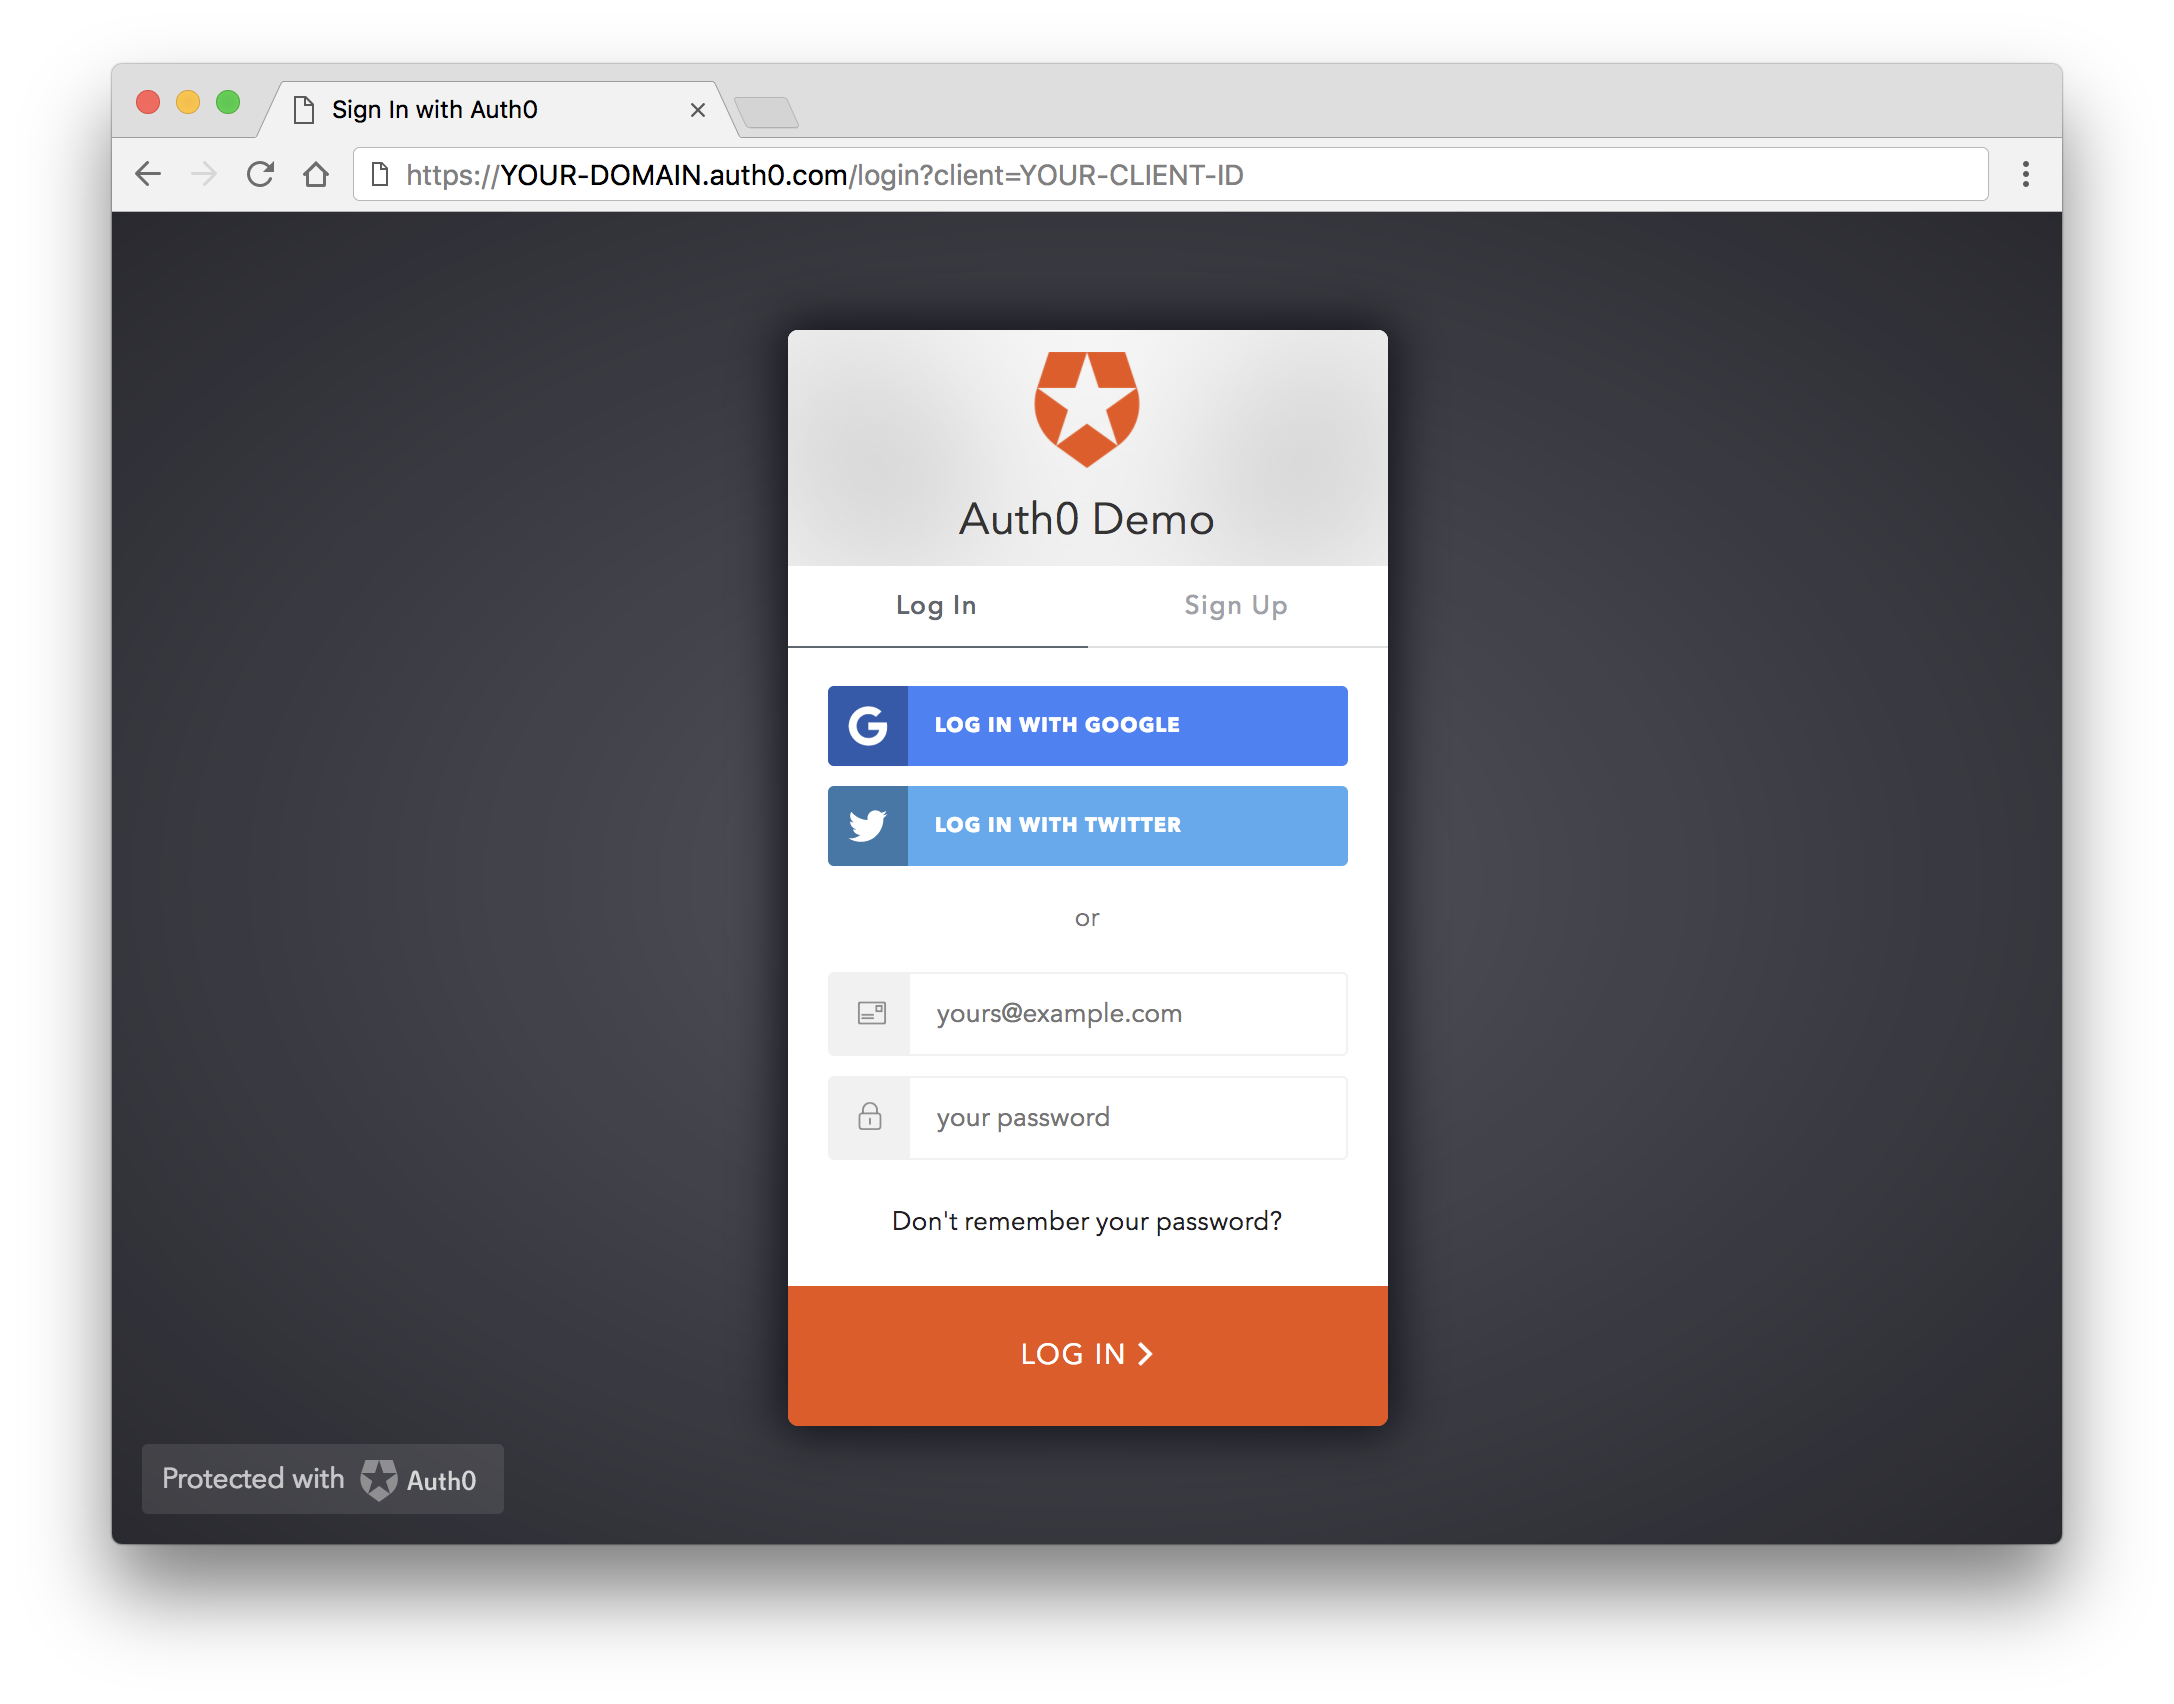
It's as easy as installing the auth0-js and jwt-decode node modules like so:
npm install auth0-js jwt-decode --save
And using them like so:
import auth0 from 'auth0-js';

const auth0 = new auth0.WebAuth({
    clientID: "YOUR-AUTH0-CLIENT-ID",
    domain: "YOUR-AUTH0-DOMAIN",
    scope: "openid email profile YOUR-ADDITIONAL-SCOPES",
    audience: "YOUR-API-AUDIENCES", // See https://auth0.com/docs/api-auth
    responseType: "token id_token",
    redirectUri: "http://localhost:9000" //YOUR-REDIRECT-URL
});

function logout() {
    localStorage.removeItem('id_token');
    localStorage.removeItem('access_token');
    window.location.href = "/";
}

function showProfileInfo(profile) {
    var btnLogin = document.getElementById('btn-login');
    var btnLogout = document.getElementById('btn-logout');
    var avatar = document.getElementById('avatar');
    document.getElementById('nickname').textContent = profile.nickname;
    btnLogin.style.display = "none";
    avatar.src = profile.picture;
    avatar.style.display = "block";
    btnLogout.style.display = "block";
}

function retrieveProfile() {
    var idToken = localStorage.getItem('id_token');
    if (idToken) {
        try {
            const profile = jwt_decode(idToken);
            showProfileInfo(profile);
        } catch (err) {
            alert('There was an error getting the profile: ' + err.message);
        }
    }
}

auth0.parseHash(window.location.hash, (err, result) => {
    if(err || !result) {
        // Handle error
        return;
    }

    // You can use the ID token to get user information in the frontend.
    localStorage.setItem('id_token', result.idToken);
    // You can use this token to interact with server-side APIs.
    localStorage.setItem('access_token', result.accessToken);
    retrieveProfile();
});

function afterLoad() {
    // buttons
    var btnLogin = document.getElementById('btn-login');
    var btnLogout = document.getElementById('btn-logout');

    btnLogin.addEventListener('click', function () {
        auth0.authorize();
    });

    btnLogout.addEventListener('click', function () {
        logout();
    });

    retrieveProfile();
}

window.addEventListener('load', afterLoad);
It installs the auth0-js library within seconds and locks down the exact files with package-lock.json file. If you don't already have an Auth0 account, sign up for one now. Navigate to the Auth0 management dashboard, select Applications from the navigational menu, then select the app you want to connect with the JavaScript framework of your choice. Now head over to the Quickstart docs, select the type of app you want to build and follow the steps highlighted there.
Conclusion
Node.js 8 and npm5 came loaded with lots of new features and significant improvements. I couldn't be more proud of the JavaScript and Open source community right now. Is Yarn going to release something super amazing soon? Maybe a faster install experience? I'll be on the look out!
Have you switched to Node.js 8 and npm@5 yet? What are your thoughts? Let me know in the comments section! 😊
About the author

Prosper Otemuyiwa
Former Auth0 Employee (Auth0 Alumni)