

Prerequisites
-
Register your Application with Auth0.
- Select an appropriate Application Type.
- Add an Allowed Callback URL of
{https://yourApp/callback}. - Make sure your Application’s Grant Types include the appropriate flows.
Steps
To connect your application to an OIDC , you must:- Set up your app in the OpenID Connect Identity Provider
- Create an enterprise connection in Auth0
- Enable the enterprise connection for your Auth0 Application
- Test the connection
Set up your app in the OpenID Connect Identity Provider
To allow users to log in using an OIDC Identity Provider, you must register your application with the IdP. The process of doing this varies depending on the OIDC Identity Provider, so you will need to follow your IdP’s documentation to complete this task. Generally, you will want to make sure that at some point you enter your callback URL:https://{YOUR_AUTH0_DOMAIN}/login/callback.
Find your Auth0 domain name for redirects
If your Auth0 domain name is not shown above and you are not using our custom domains feature, your domain name is a concatenation of your tenant name, your regional subdomain, and
auth0.com, separated by the dot (.) symbol.For example, if your tenant name is exampleco-enterprises, and your tenant is in the US region, your Auth0 domain name would be exampleco-enterprises.us.auth0.com and your Redirect URI would be https://exampleco-enterprises.us.auth0.com/login/callback.However, if your tenant is in the US region and was created before June 2020, then your Auth0 domain name would be exampleco-enterprises.auth0.com and your Redirect URI would be https://exampleco-enterprises.auth0.com/login/callback.If you are using custom domains, your Redirect URI would be https://<YOUR CUSTOM DOMAIN>/login/callback.Create an enterprise connection in Auth0
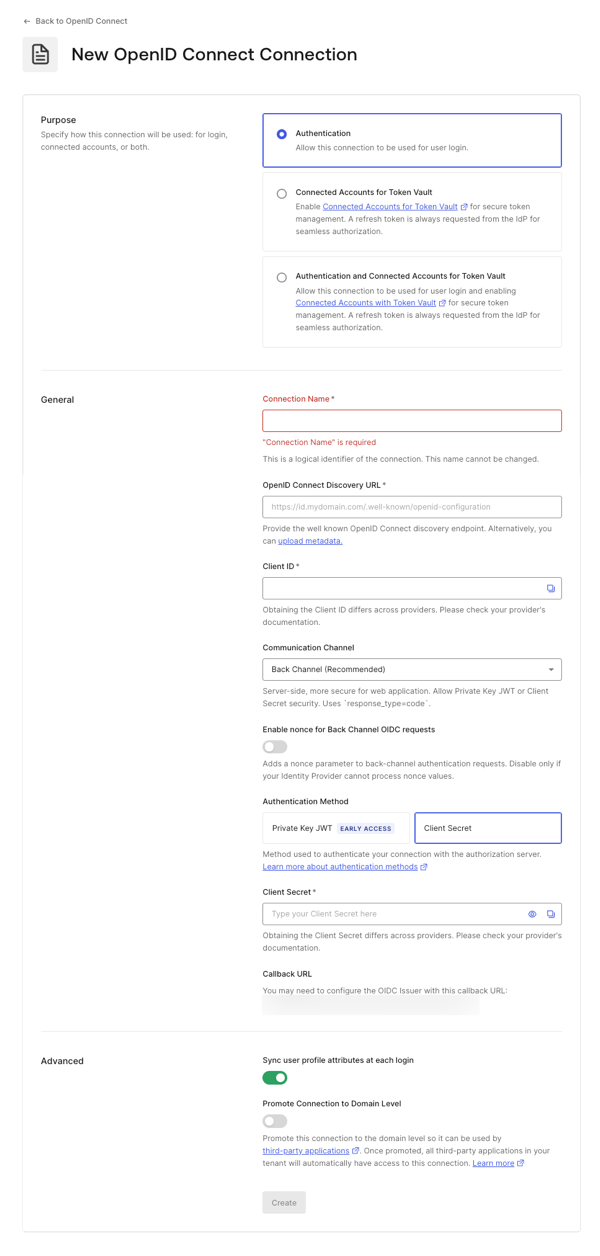
Before you configure a OIDC Enterprise Connection in Auth0, ensure you have the Application (Client) ID and the generated when you set up your app in the OIDC provider.Create an enterprise connection using the Auth0 Dashboard
-
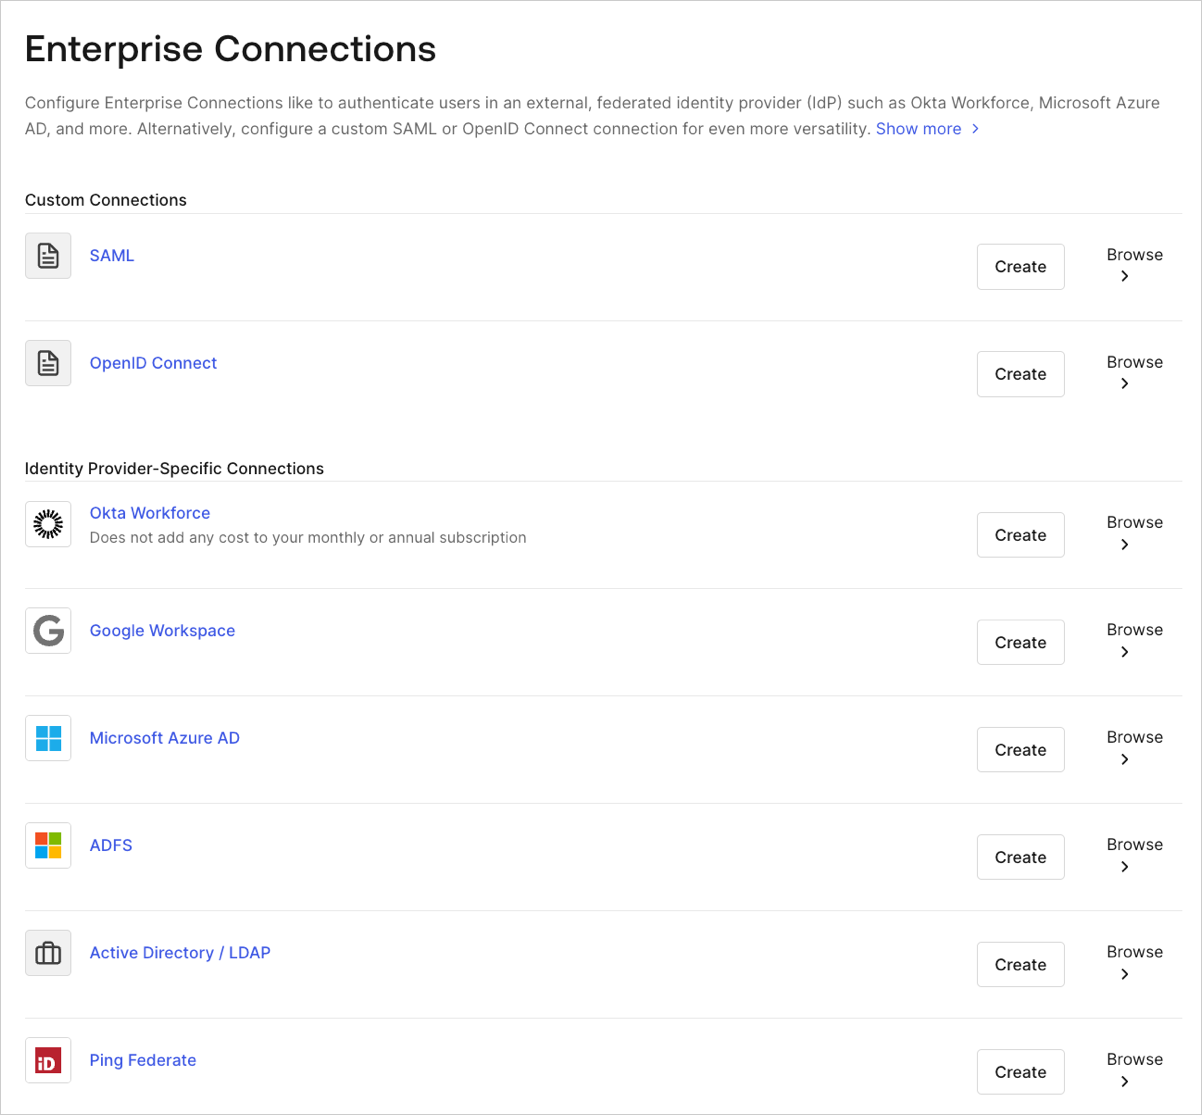
Navigate to Auth0 Dashboard > Authentication > Enterprise, locate Open ID Connect, and select Create.
- Enter details for your connection, and select Create:
- In the Settings view, make additional configuration adjustments, if necessary.
- In the Provisioning view, configure how user profiles get created and updated in Auth0.
- In the Login Experience view, configure how users log in with this connection.
Optional fields are available with Universal Login only. Customers using Classic Login will not see the Add button, Button display name, or Button logo URL.
- Select Save Changes.
Create an enterprise connection using the Management API
These examples will show you the variety of ways you can create the connection using Auth0’s . You can configure the connection by either providing a metadata URI or by setting the OIDC URLs explicitly. For OIDC connections, Auth0 enforces a size limit of 128 KB on metadata discovery document with the errorDiscovery document exceeds the maximum allowed size of 128 KB when this limit is exceeded.
For more information, read Identity Providers.
Use front-channel with discovery endpoint
Using the Auth0 CLI? If you haven’t already, set up and authenticate your CLI session before running this command.
Use back-channel with discovery endpoint
Use back-channel specifying issuer settings
Use front-channel specifying issuer settings
Configure PKCE and claims mapping
This Enterprise connection can support Proof Key for Code Exchange (PKCE), as well as attribute and token mapping. To learn more, review Configure PKCE and Claim Mapping for OIDC Connections.Enable the enterprise connection for your Auth0 application
To use your new enterprise connection, you must first enable the connection for your Auth0 Applications.Test the connection
Now you’re ready to test your connection.Manually configure Issuer metadata
If you click Show Issuer Details on the Issuer URL endpoint, you can see the data and adjust it if you need to.Federate with Auth0
The Connect enterprise connection is useful when federating to another Auth0 tenant. Enter your Auth0 tenant URL (for example,https://<tenant>.us.auth0.com) in the Issuer field, and enter the Client ID for any application in the tenant to which you want to federate in the Client ID field.
New tenants will have
us as part of the URL. Tenants created before the regional domain addition will continue to work. For example, https://{YOUR ACCOUNT}.auth0.com.